

While holiday seasons often call for elaborate pies and cakes, there’s a unique charm in offering delightful, handheld treats that are both easy to make and perfect for any festive gathering. These Peppermint Oreo Balls truly embody the spirit of no-bake simplicity and vibrant holiday cheer, making them an ideal addition to your seasonal repertoire.
Crafted with just a handful of straightforward ingredients, these charming peppermint truffles elevate any dessert table with their undeniable beauty and festive flair. Their brilliant white coating, artfully speckled with crushed red and white peppermint candy pieces, instantly evokes the joyful essence of the holidays, inviting everyone to indulge in a sweet moment.
SAVE THIS RECIPE FOR LATER!
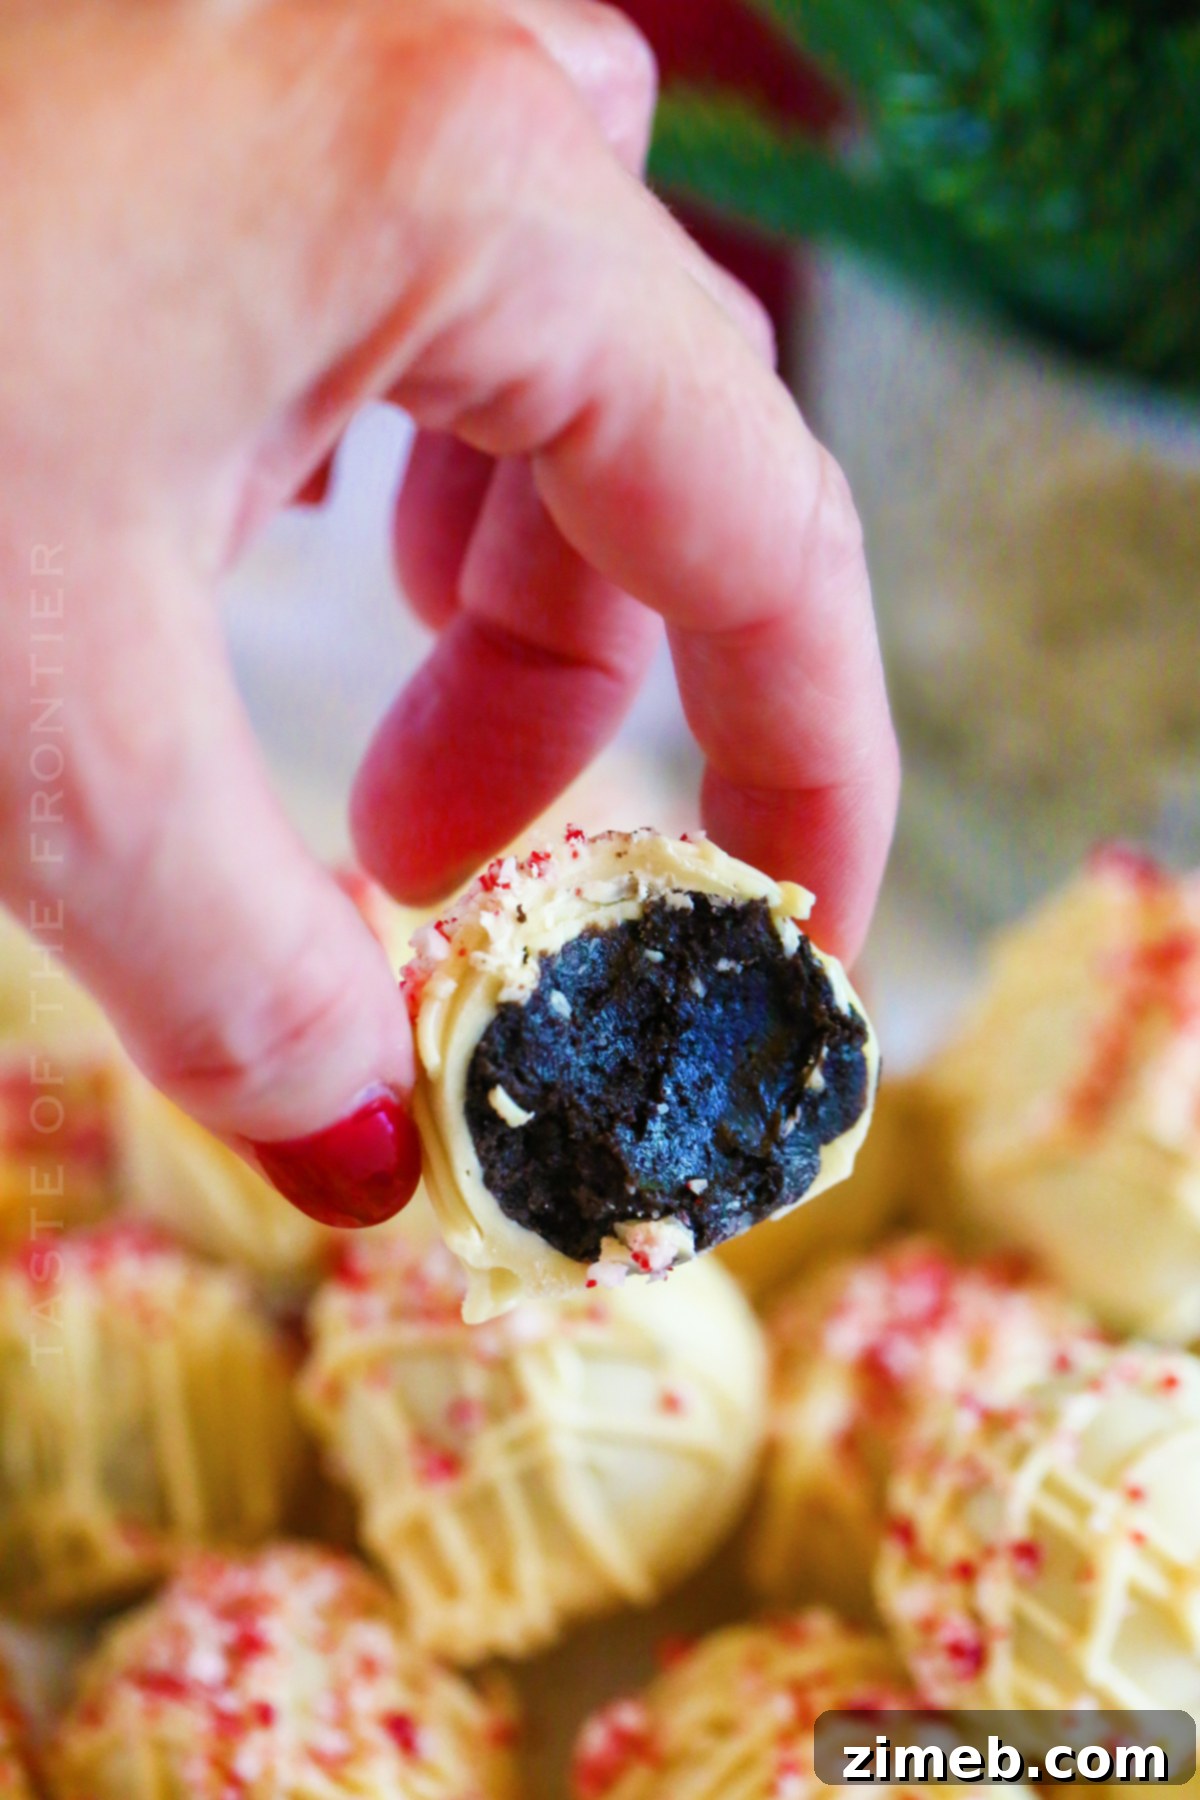
Beyond their captivating exterior, the interior of these sweet morsels delivers a symphony of textures and flavors. Each bite offers a creamy, luscious filling beautifully contrasted by the subtle crunch of finely crushed Oreo cookie crumbles. The harmonious blend of cool peppermint and rich chocolate creates an unforgettable taste experience that is both refreshing and deeply satisfying.
If your busy holiday schedule demands a dessert that comes together quickly without the need for an oven, look no further. These easy no-bake Oreo cookie balls are specifically designed for convenience, allowing you to spend less time in the kitchen and more time enjoying the festivities with loved ones.

The Irresistible Allure of Peppermint Oreo Balls
Peppermint Oreo Balls are more than just a dessert; they are a festive statement, embodying the joy and flavors of the holiday season in every bite. Their simple preparation, stunning appearance, and delightful taste make them a standout treat. This section delves into what makes these truffles an absolute must-make for your next celebration.
Why These No-Bake Treats Will Be Your New Holiday Favorite
- Effortless No-Bake Preparation: Forget the oven! This recipe eliminates baking entirely, making it perfect for novice bakers and seasoned pros alike. It’s a fantastic option for freeing up oven space during busy holiday cooking.
- Minimal Ingredients, Maximum Flavor: You only need a few staple ingredients to create these impressive treats. The magic lies in the combination of crunchy Oreos, creamy cream cheese, and refreshing peppermint, all enveloped in a smooth candy coating.
- Visually Stunning for Any Occasion: With their vibrant white coating and cheerful red and white peppermint speckles, these truffles are a feast for the eyes. They add a sophisticated yet playful touch to any holiday dessert platter or buffet.
- Perfectly Portable for Parties: Compact and easy to transport, Peppermint Oreo Balls are ideal for potlucks, office parties, or as a thoughtful homemade gift. They hold their shape well and are a joy to share.
- Kid-Friendly Fun: The no-bake nature of this recipe makes it an excellent activity for involving children in the kitchen. They’ll love crushing Oreos, rolling the balls, and decorating with candy.
Common Questions About Crafting Peppermint Oreo Balls
As with any delicious recipe, a few questions often arise. We’re here to clarify some common queries to ensure your Peppermint Oreo Balls turn out perfectly every time.
Are White Candy Melts the Same as White Chocolate?
While often used interchangeably in recipes like this, white candy melts and white chocolate are not exactly the same. White candy melts are primarily made from sugar, milk solids, and vegetable oils, designed to melt smoothly and harden quickly for easy dipping and coating. White chocolate, on the other hand, contains cocoa butter, which gives it a richer flavor and different melting properties. Both can be used for these truffles, but candy melts generally offer a more consistent and easier-to-work-with coating.
Is White Chocolate Actually Chocolate?
Technically, white chocolate is not considered “true” chocolate by some purists because it does not contain cocoa solids, which are present in milk and dark chocolate. It’s made from cocoa butter (the fat from the cocoa bean), sugar, and milk products. However, its creamy texture and sweet flavor make it a beloved confectionery ingredient. For this recipe, while white chocolate isn’t specifically called for, it can be a delightful substitute for white candy melts if you prefer its distinct taste.

What Can I Use if I Don’t Have Peppermint Extract?
Peppermint extract is key to the distinctive flavor of these truffles, but if you don’t have it on hand, don’t worry! You can achieve a similar minty freshness with a few substitutions. A common alternative is to use about ¼ teaspoon of edible peppermint oil (which is more concentrated than extract) combined with 1 tablespoon of peppermint schnapps for a delightful kick. Another option is to finely crush extra peppermint candies and incorporate them directly into the truffle mixture for a burst of minty flavor.
Can I Use Different Oreo Flavors for This Recipe?
Absolutely! While classic Oreos provide a versatile base, feel free to experiment with other flavors to create unique variations. Peppermint Oreos (if available seasonally) would amplify the minty flavor. Golden Oreos could offer a vanilla-based truffle, or even a chocolate cream Oreo could provide a deeper cocoa note. Just ensure the cookie-to-cream cheese ratio remains balanced, as different Oreo varieties might have slightly different filling amounts.
Making Peppermint Oreo Balls Ahead of Time
One of the many advantages of this no-bake recipe is its flexibility for make-ahead preparation, a true lifesaver during the bustling holiday season. If you plan to prepare these delectable treats in advance, the optimal approach is to prepare the cream cheese truffle mixture and form the balls first. These un-coated balls can then be refrigerated or frozen, allowing you to tackle the dipping and decorating steps closer to your event. Be sure to allocate sufficient time for the melted candy coating to fully harden before serving for the best presentation and texture.
Storage for Peak Freshness and Flavor
To ensure your Peppermint Oreo Balls remain in perfect condition for serving, proper storage is crucial. Since they contain dairy, refrigeration is a must.
- Refrigerator: Store the truffles in an airtight container or a sealed ziplock bag in the refrigerator for up to one week. This not only maintains their freshness but also helps prevent unattractive “fat blooms” from appearing on the chocolate coating, which can occur if they remain unrefrigerated for extended periods.
- Freezing: For longer storage, Peppermint Oreo Balls freeze beautifully. Place the finished truffles in a single layer on a baking sheet to freeze solid, then transfer them to an airtight freezer-safe container or bag. They can be stored in the freezer for up to three months. Thaw them in the refrigerator before serving.
Expert Tips for Crafting the Best Peppermint Oreo Balls
Achieving perfectly smooth, flavorful, and visually appealing Peppermint Oreo Balls is easy with these insider tips:
- For Smooth Balls, Grease Your Hands: To prevent the creamy mixture from sticking and to ensure each truffle is perfectly spherical and smooth, lightly grease your hands with a tiny bit of butter or cooking spray before rolling. This simple trick makes a huge difference in presentation.
- Use Full-Fat Cream Cheese: Opt for full-fat cream cheese. Its richness and creaminess are essential for achieving the luxurious texture and deep flavor that these Oreo balls are known for. Low-fat alternatives may result in a less satisfying consistency.
- Crush Peppermint Candies Super Fine: For the prettiest presentation and to ensure every bite delivers a balanced combination of flavors and textures, crush your peppermint candies into a very fine, uniform sprinkle. A food processor works best, or you can place them in a sealed bag and gently crush with a rolling pin.
- Room Temperature Ingredients Are Key: Ensure your cream cheese is completely softened to room temperature before mixing. This allows it to blend seamlessly with the crushed Oreos, creating a smooth and pliable truffle dough without lumps.
- Melt Candy Melts Carefully: When melting your white candy melts, do so slowly and at a lower power setting (like 50% in the microwave) to prevent scorching or seizing. Stir frequently between short intervals until just melted and smooth. This will give you the perfect consistency for dipping.
- Chill Thoroughly: Don’t rush the chilling process. Well-chilled truffle balls are much easier to dip, as they hold their shape better and allow the warm candy coating to set more quickly.
Ingredients for Your Festive Peppermint Oreo Balls
Gathering your ingredients is the first step to creating these delightful holiday treats. Here’s what you’ll need:
- Oreo Cookies: The foundational ingredient, providing a rich chocolate base and satisfying crunch.
- Softened Cream Cheese: The binding agent that gives these truffles their signature creamy, melt-in-your-mouth texture. Ensure it’s at room temperature for easy blending.
- Peppermint Extract: Delivers that essential cool, festive minty flavor.
- White Candy Melts or Almond Bark: For the beautiful, crisp white coating. Candy melts are designed for easy melting and hardening.
- Crushed Peppermint Candy Canes or Peppermint Candies: The perfect topping for a vibrant, festive look and an extra burst of minty crunch.
*Important Note: If you are using double-stuffed Oreos, remember to reduce the amount of cream cheese by half to maintain the perfect truffle consistency.
Kitchen Supplies You’ll Need
To make the process smooth and enjoyable, ensure you have these essential kitchen tools on hand:
- Microwave: For melting the candy melts efficiently.
- Food Processor: Indispensable for quickly crushing Oreos into fine crumbs and mixing the truffle base.
- Fork or Skewer: Perfect for dipping the truffle balls into the melted candy coating, ensuring an even layer without making a mess.
- Baking Sheets lined with Parchment Paper: For chilling the truffle balls and allowing the coated truffles to harden without sticking.
- Airtight Container: For storing your finished Peppermint Oreo Balls.
What Other Truffle Recipes Do You Suggest?
If you’re a fan of these easy, no-bake truffles, you’ll love exploring other delightful variations. Truffles are incredibly versatile and can be adapted to suit any flavor preference or holiday theme. Here are some fantastic recipes to inspire your next sweet creation:
- Classic Oreo Balls/Oreo Truffles
- Vibrant Rainbow Truffles Recipe
- Decadent Chocolate Chip Cookie Truffles
- Autumnal Pumpkin Spice Truffles
- Sweet Sugar Cookie Truffles
- Rich Dark Chocolate Pistachio Truffles
- Patriotic 4th of July Truffles
- Simply Easy Chocolate Truffles
- Romantic Valentine Oreo Truffles
- Colorful Rainbow Mint Oreo Truffles
- Spooky Halloween Oreo Balls
- Holiday Sprinkled Chocolate Truffles
- Delightful Holiday Nutella Bites
- Classic Buckeyes (Peanut Butter Balls)
- Whimsical Grinch Truffles
- Festive Christmas Truffles
Step-by-Step Guide: How to Make Peppermint Oreo Balls
Follow these detailed instructions to create your own batch of irresistible Peppermint Oreo Balls. Precision and patience are key to their perfect texture and stunning finish.
Crafting the Truffle Base
- First, prepare a baking sheet by lining it with parchment paper. This will be essential for chilling and hardening your truffles. Set it aside for later.
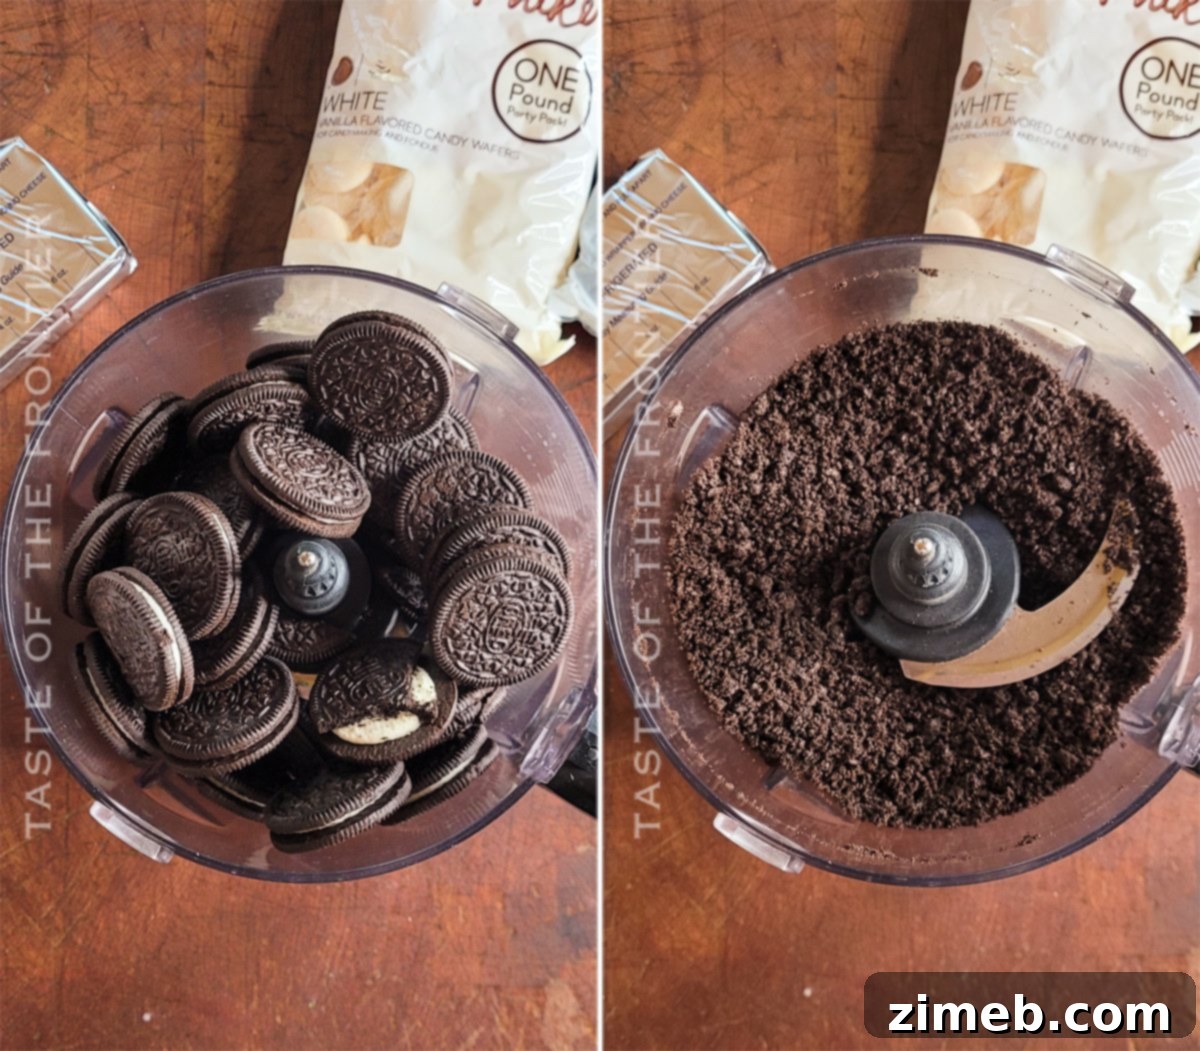
- Begin by crushing the Oreo cookies into extremely fine crumbs. This can be achieved efficiently using a food processor; pulse until no large pieces remain. If you don’t have a food processor, place the cookies in a large, resealable plastic bag, seal it, and use a rolling pin or meat mallet to crush them until they resemble fine sand.
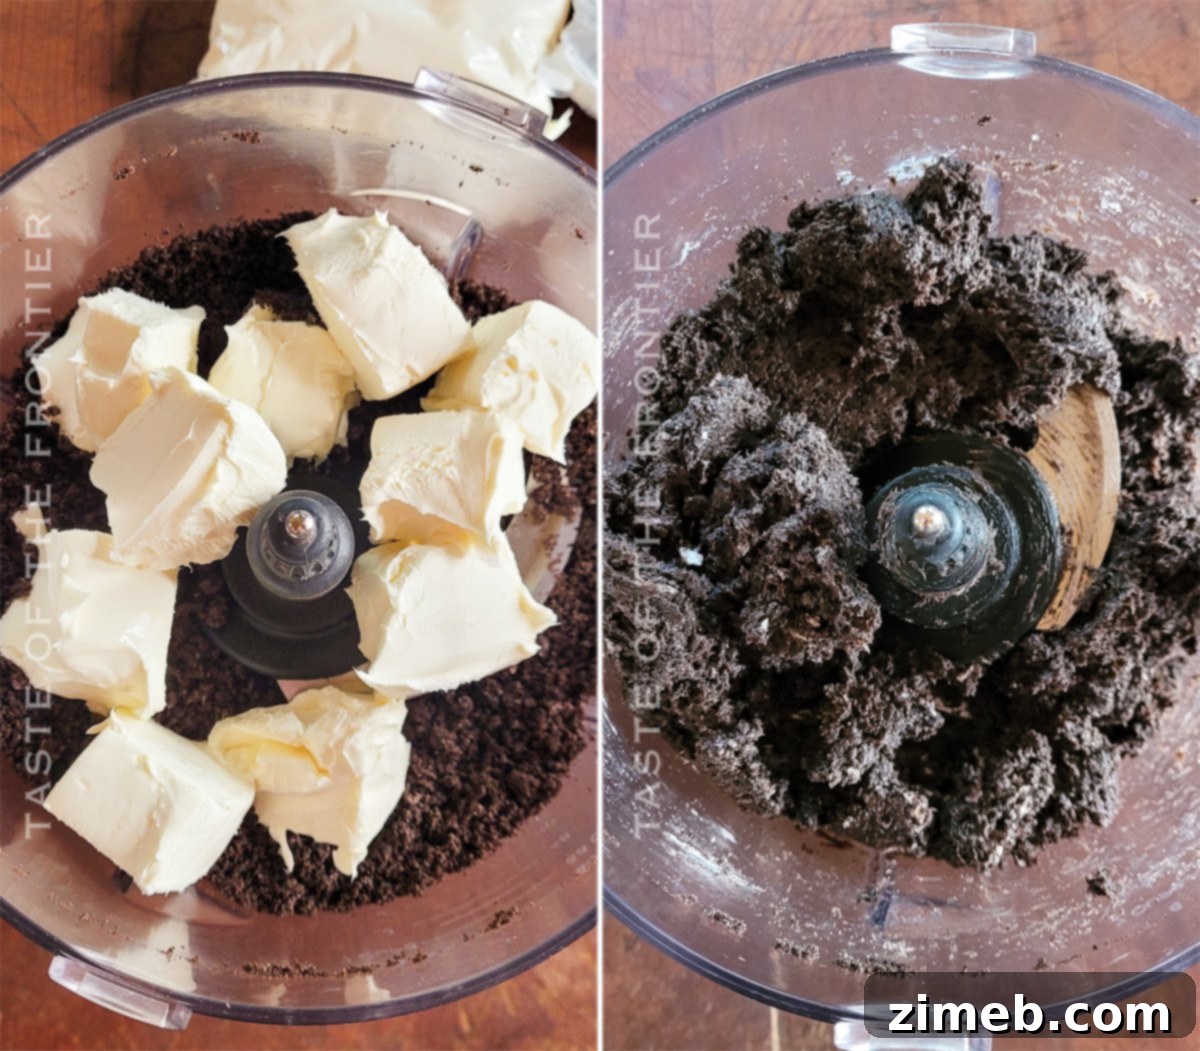
- Once the cookies are finely crushed, add the softened cream cheese and peppermint extract to the food processor (or to a large mixing bowl with the crumbs if you hand-crushed the cookies). Pulse the blades (or mix thoroughly) until all the ingredients are uniformly combined, forming a thick, pliable dough. Ensure there are no streaks of cream cheese remaining.
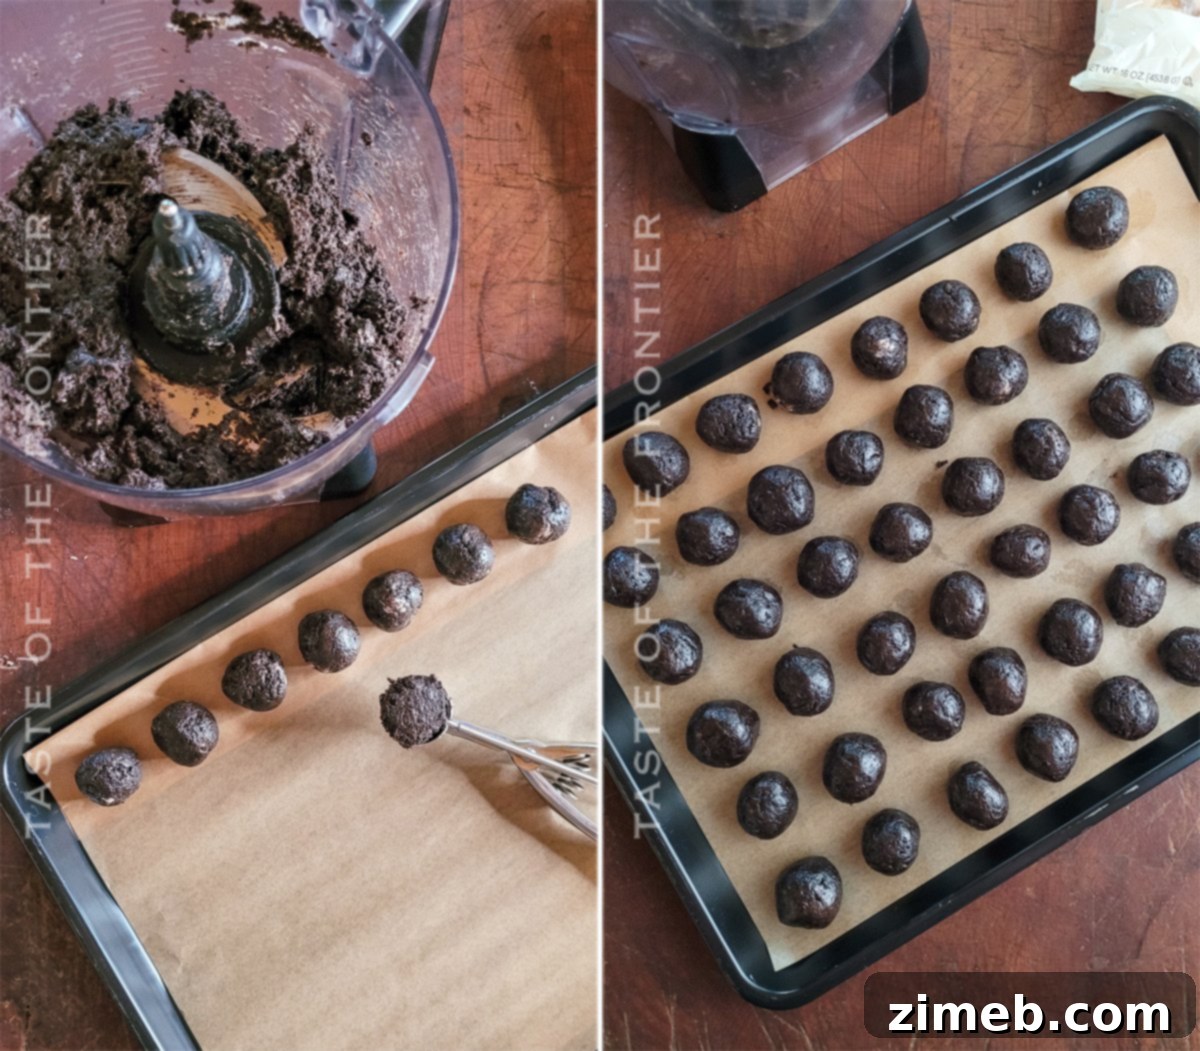
- Using a small ice cream scooper, melon baller, or simply your hands, separate the dough into approximately 48 equal portions. This consistency will ensure uniform truffles.
- Take each portion and roll it between your palms to form a smooth, round sphere. Lightly greasing your hands can prevent sticking and ensure a perfectly smooth finish.
- Once all the balls are rolled, place them on the prepared baking sheet.
- Allow the truffle balls to chill in the refrigerator for at least 30 minutes. For best results and easier coating, you can chill them for up to 24 hours, or even pop them into the freezer for a quicker firm-up.
Coating and Decorating Your Festive Truffles
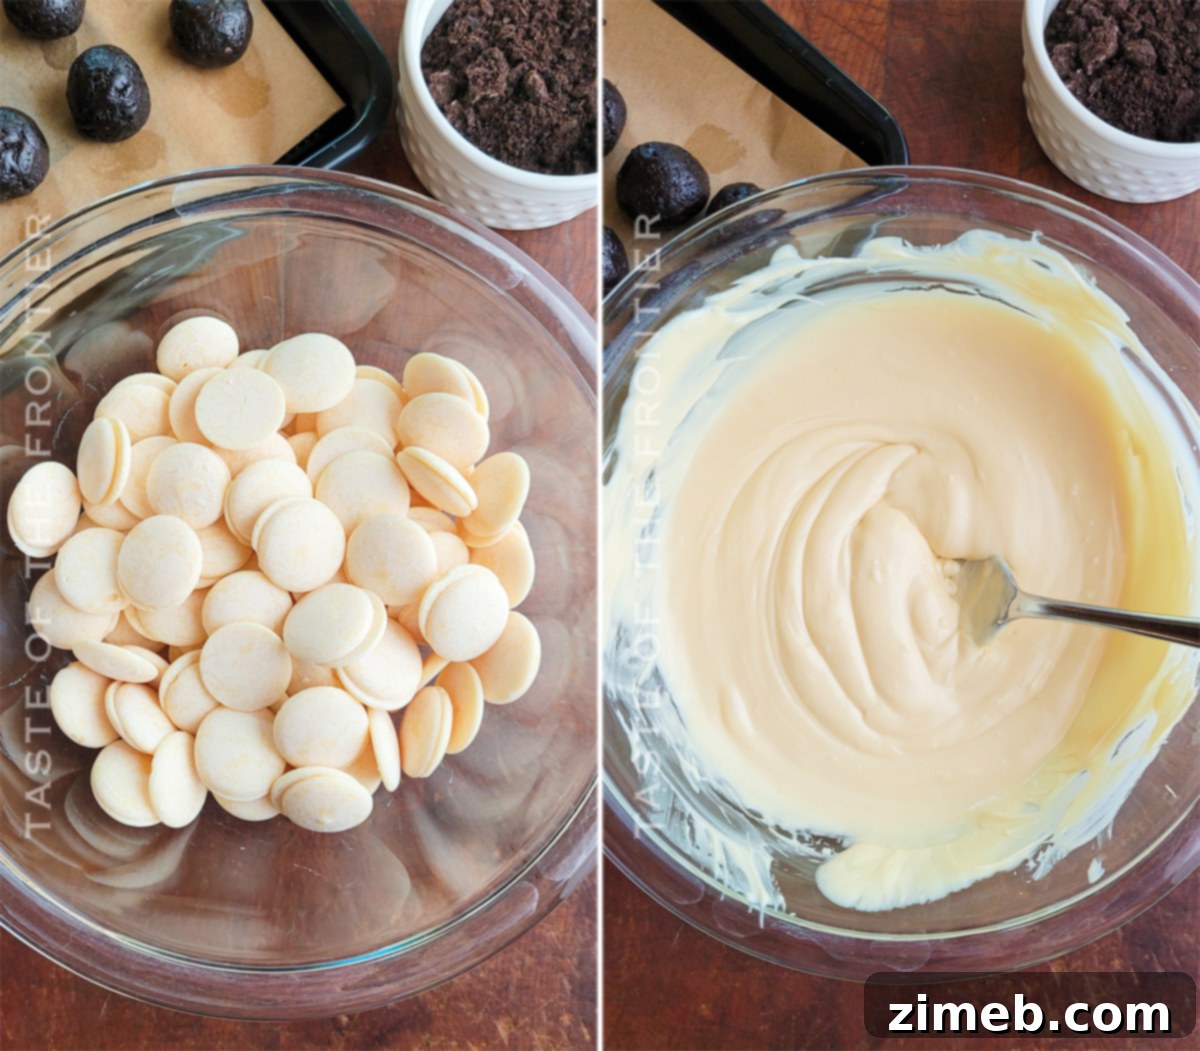
- Pour the white candy melts into a microwave-safe bowl. A wider, shallower bowl often works best for easy dipping.
- Heat the candy melts in the microwave at 50% power in 30-second intervals, stirring thoroughly after each interval. Continue this process until the melts are mostly smooth with a few small lumps remaining. Remove from the microwave and stir until completely melted and smooth. Alternatively, use a double boiler method for a more controlled melt.
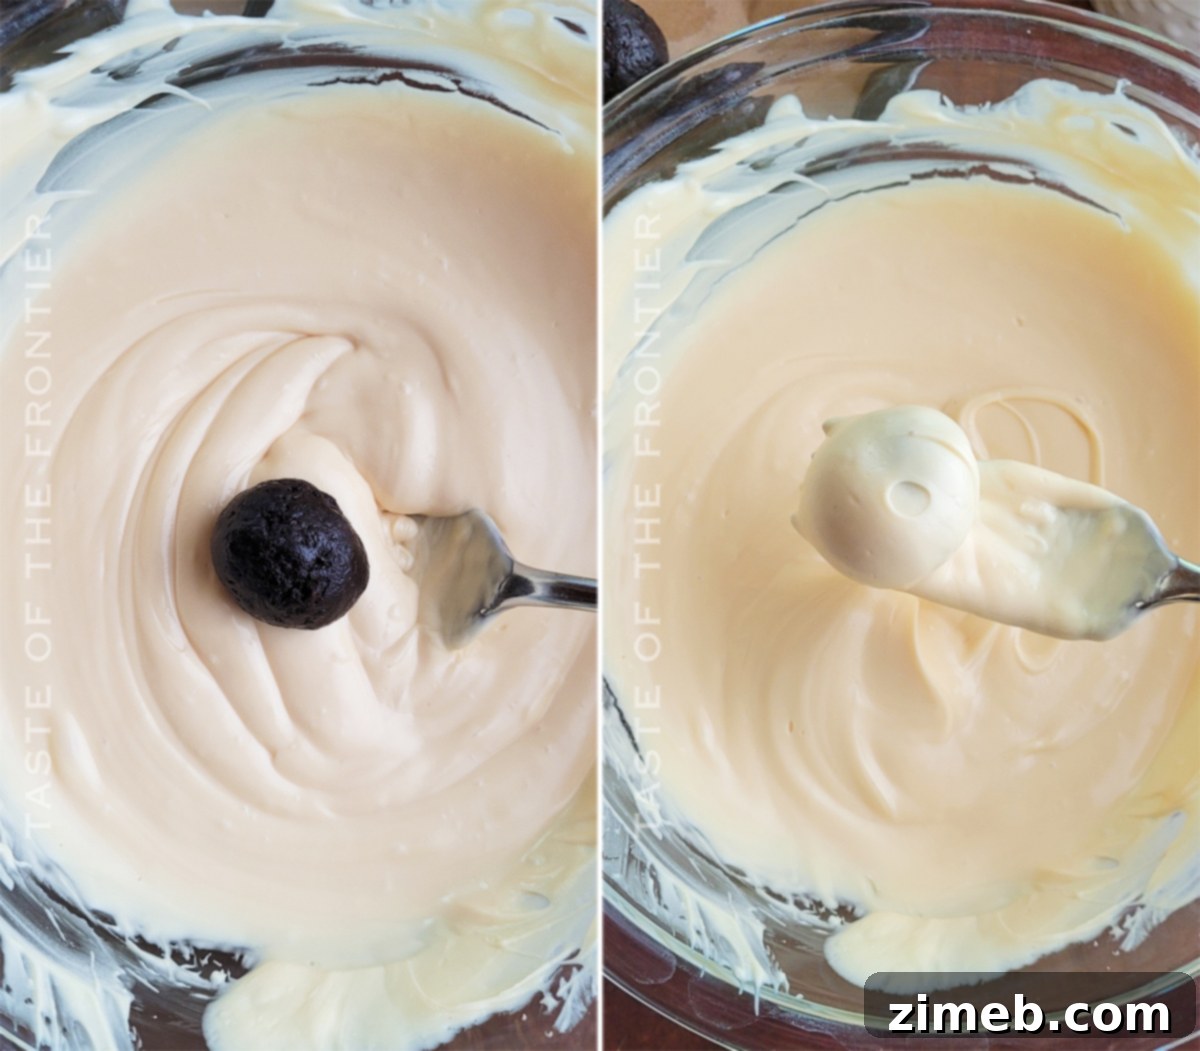
- Carefully pierce a chilled truffle ball with a fork or skewer. Dip the ball entirely into the bowl of melted candy, ensuring it is fully coated.
- Gently tap off any excess coating back into the bowl. A clean, even coating is key for a professional look.
- Immediately after dipping and while the coating is still wet, sprinkle generously with the crushed peppermint candies. The candies will adhere best to the warm, unset coating.
- Place the coated and decorated truffle back onto the parchment-lined baking sheet.
- Repeat the dipping and decorating process with the remaining truffle balls.
- Allow the coated truffles to harden completely at room temperature or by placing them back in the refrigerator for 10-15 minutes.
- If desired, for an extra thick coating or a smoother finish, you can dip the truffles a second time after the first layer has hardened. Then, sprinkle with more crushed candy canes or candy pieces.
- Once all truffles are coated and decorated, ensure the chocolate coating is fully set before serving.
- Serve cold directly from the refrigerator or at room temperature, depending on your preference.
What to Serve With Your Festive Peppermint Oreo Truffles
These peppermint Oreo truffles are undeniably a sweet treat that can shine brightly on their own. However, pairing them with the right beverage or companion dessert can elevate the entire experience. Here are a few creative ideas to complement their refreshing mint and rich chocolate flavors:
- Classic Hot Chocolate: Is there any dessert that isn’t made better with a warm, comforting mug of hot chocolate? The creamy richness of the cocoa perfectly balances the crisp peppermint and the slightly tangy, sweet cream cheese flavor of the Oreo balls. A match made in holiday heaven!
- Freshly Brewed Coffee: The robust, slightly bitter notes of coffee provide an excellent contrast to the sweetness of the truffles. Whether it’s a regular pot of freshly percolated coffee or a homemade latte or cappuccino, coffee is a timeless companion to almost any dessert.
- Elegant Cocktails or Liqueurs: For an adult gathering, consider serving these truffles alongside a festive cocktail. A drizzle of Frangelico or Bailey’s Irish Cream into a coffee, or a decadent espresso or chocolate martini, would create a sophisticated pairing that enhances the dessert’s flavors.
- Vanilla Ice Cream or Milkshakes: Turn these truffles into an indulgent garnish! Crumble them over your favorite scoop of vanilla bean ice cream or blend them into a creamy peppermint milkshake for an extra layer of flavor and texture.
- A Simple Fruit Platter: To cut through the richness, a platter of fresh, seasonal fruits like berries or citrus segments can offer a refreshing palate cleanser between bites of the decadent truffles.
Creative Variations and Delightful Add-ins for Your Peppermint Truffles
While these tasty peppermint truffles are perfectly delicious as they are, one of the joys of cooking is the ability to customize and experiment. Here are some simple additions and substitutions to inspire your creativity and tailor these treats to your liking:
- Colorful Candy Coating: Instead of sticking to just red and white peppermint pieces, consider crushing multicolored peppermint candies for a more vibrant, playful look. You could also use different colored candy melts, such as green or red, to make them even more festive.
- Peppermint Oreos Power-Up: If you’re fortunate enough to find seasonal peppermint Oreos at your local grocery store, use them instead of the regular Oreos. This will intensify the minty flavor throughout the truffle, creating an even more immersive peppermint experience.
- Flavorful Extract Swaps: The peppermint extract is essential for this recipe, but you can swap out some or all of it for other complementary flavors. Almond extract could create a delightful nutty undertone, or a touch of vanilla extract could enhance the sweetness. For a subtle citrus twist, a tiny amount of orange extract could be surprising.
- Chocolate Indulgence: Replace the white candy melts with various types of chocolate for a different flavor profile. Dark chocolate offers a sophisticated, intense cocoa flavor, milk chocolate provides a sweeter, creamier coating, and even butterscotch or peanut butter chips could be melted for unique flavor combinations.
- Mini Chocolate Chips for Texture: Stir a handful of mini chocolate chips into the cream cheese mixture before rolling the balls. This adds an extra layer of chocolatey flavor and a delightful texture to the creamy interior of the truffle.
- Nutty Crunch: For an added layer of flavor and crunch, sprinkle the coated truffles with very finely chopped or crushed nuts like pecans, walnuts, or almonds. You could also mix a small amount of finely ground nuts directly into the cream cheese mixture for a more integrated nutty taste.
- Drizzles and Sprinkles: After the main coating has set, drizzle contrasting melted chocolate (like dark chocolate over white coating) in a decorative pattern. Beyond peppermint, consider other festive sprinkles, edible glitter, or even a dusting of cocoa powder for an elegant finish.
If you love this easy Oreo ball recipe, you’re going to adore these other festive, no-bake goodies too. Click each link below to discover the simple, printable recipes!
Check out this recipe
Check out this recipe

Check out this recipe

Check out this recipe

Check out this recipe

Check out this recipe
Other Handheld Holiday Desserts You Must Try
If you’re anything like us, the convenience and charm of handheld desserts during the holidays are simply unmatched. They are perfect for party platters, easy snacking, and sharing with friends and family. Explore these other fantastic recipes that promise both ease and festive flavors:
- **Holiday Shortbread Elf Bites:** Tiny, buttery shortbread cookies that melt in your mouth, perfect for a whimsical touch to your holiday spread.
- **Creamy White Chocolate Holiday Fudge:** A rich, smooth fudge recipe bursting with seasonal flavors and a beautiful white hue.
- **Frosted Holiday Mint M&M Brownies:** Indulgent brownies topped with a vibrant mint frosting and festive M&Ms, offering a delightful chocolate-mint combo.
- **Simple Holiday Oreo Fudge:** Another no-bake wonder, combining the beloved Oreo cookie with a luscious fudge base, ideal for quick preparation.
Discover More Easy No-Bake Treats
For those who love the simplicity and speed of no-bake desserts, there’s a treasure trove of recipes waiting to be explored. These quick and easy treats are perfect for last-minute gatherings, kid-friendly kitchen projects, or simply satisfying your sweet tooth without turning on the oven.
- Sweet Christmas Coal Candies
- Silky Easy No-Cook Fudge
- Festive Peppermint Bark Cookies
- Classic Divinity Candy
- Holiday Christmas Puppy Chow
- Addictive Christmas Crack (Saltine Toffee)
DON’T MISS MY HOLIDAY E-BOOK!

If you loved creating and enjoying this easy Peppermint Oreo Balls recipe as much as I do, please take a moment to leave a five-star review. Your feedback is invaluable! And don’t forget to help me share the holiday cheer by sharing this recipe on Facebook and Pinterest! Happy holidays and happy baking (or rather, no-baking)!

CONNECT WITH YUMMI HAUS!
Be sure to follow me on my social media, so you never miss a post!
Substack, Facebook, Pinterest, Instagram, Email Subscription


Print Recipe |
Pin Recipe
Peppermint Oreo Balls
These peppermint Oreo balls are a no-bake dessert that makes any dessert table pretty and festive for the holidays.
Course: Dessert
Servings: 48 truffles
Prep Time: 25 mins | Chill Time: 30 mins | Total Time: 55 mins
Ingredients
- 38 Oreo cookies
- 8 ounces cream cheese – softened
- 1 tsp peppermint extract
- 1 pound white candy melts or almond bark
- 2 tbsp crushed peppermint candies – for topping
Instructions
Truffles
- Line a baking sheet with parchment paper. Set aside.
- Using a food processor or large resealable bag and a rolling pin, crush the cookies into fine crumbs.
- Add the cream cheese and peppermint extract to the food processor with the crumbs and pulse several times until well combined.
- Using a small cookie dough scoop, separate out into 48 portions and then form each into a ball.
- Roll the ball between your hands until it’s smooth.
- Place them on the prepared baking sheet.
- Chill in the refrigerator for at least 30 minutes; longer is fine. You can also pop them in the freezer if you have space.
Coating
- Place the candy melts in a microwave-safe bowl.
- Start heating it in the microwave for 30 seconds to 1 minute on 50% power, then stir the chocolate.
- Continue to heat in 30-second intervals – still at 50% power, stirring after each time. Stop when there are a few bits of chocolate left, then stir until completely melted and smooth.
- Using a fork, dip a chilled Oreo ball into the melted chocolate and tap off the excess.
- Place the chocolate-coated truffle on the prepared baking sheet.
- Sprinkle generously with the crushed peppermint candies while the coating is still wet.
- Let harden for about 10-15 minutes.
- Repeat with another layer of melted chocolate if necessary or desired before decorating with additional candy pieces.
- Let harden completely before serving.
- Store in an airtight container in the refrigerator until ready to serve.
Equipment
- Microwave
- Food Processor
Nutrition
Serving: 1g | Calories: 72kcal | Carbohydrates: 9g | Protein: 1g | Fat: 4g | Saturated Fat: 1g | Cholesterol: 5mg | Sodium: 54mg | Potassium: 29mg | Fiber: 0.3g | Sugar: 6g | Calcium: 7mg | Iron: 1mg | Net Carbohydrates: 7g
Nutritional information for the recipe is provided as a courtesy and is approximate. Please double-check with your own dietary calculator for the best accuracy. We at Yummi Haus cannot guarantee the accuracy of the nutritional information given for any recipe on this site.
Love this recipe? Follow @KleinworthCo for even more tasty recipes!