
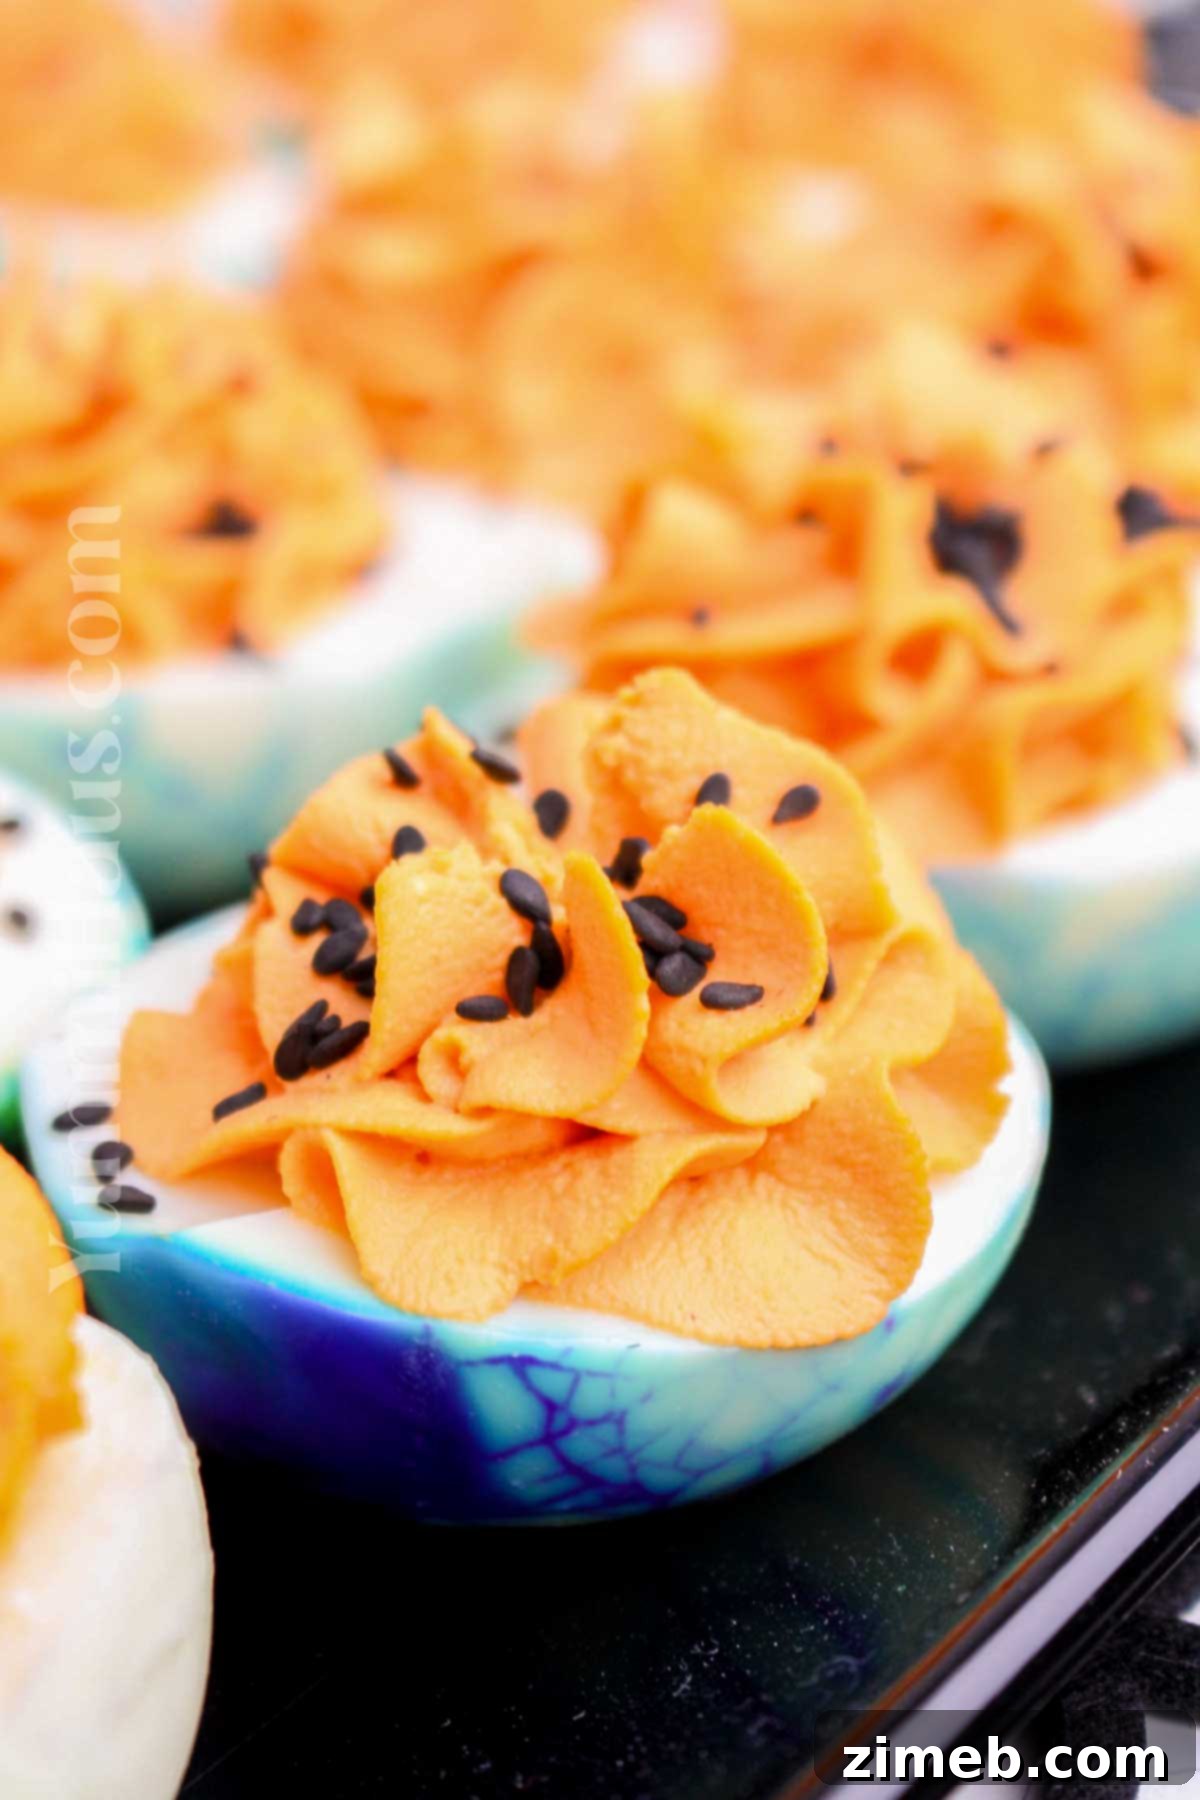
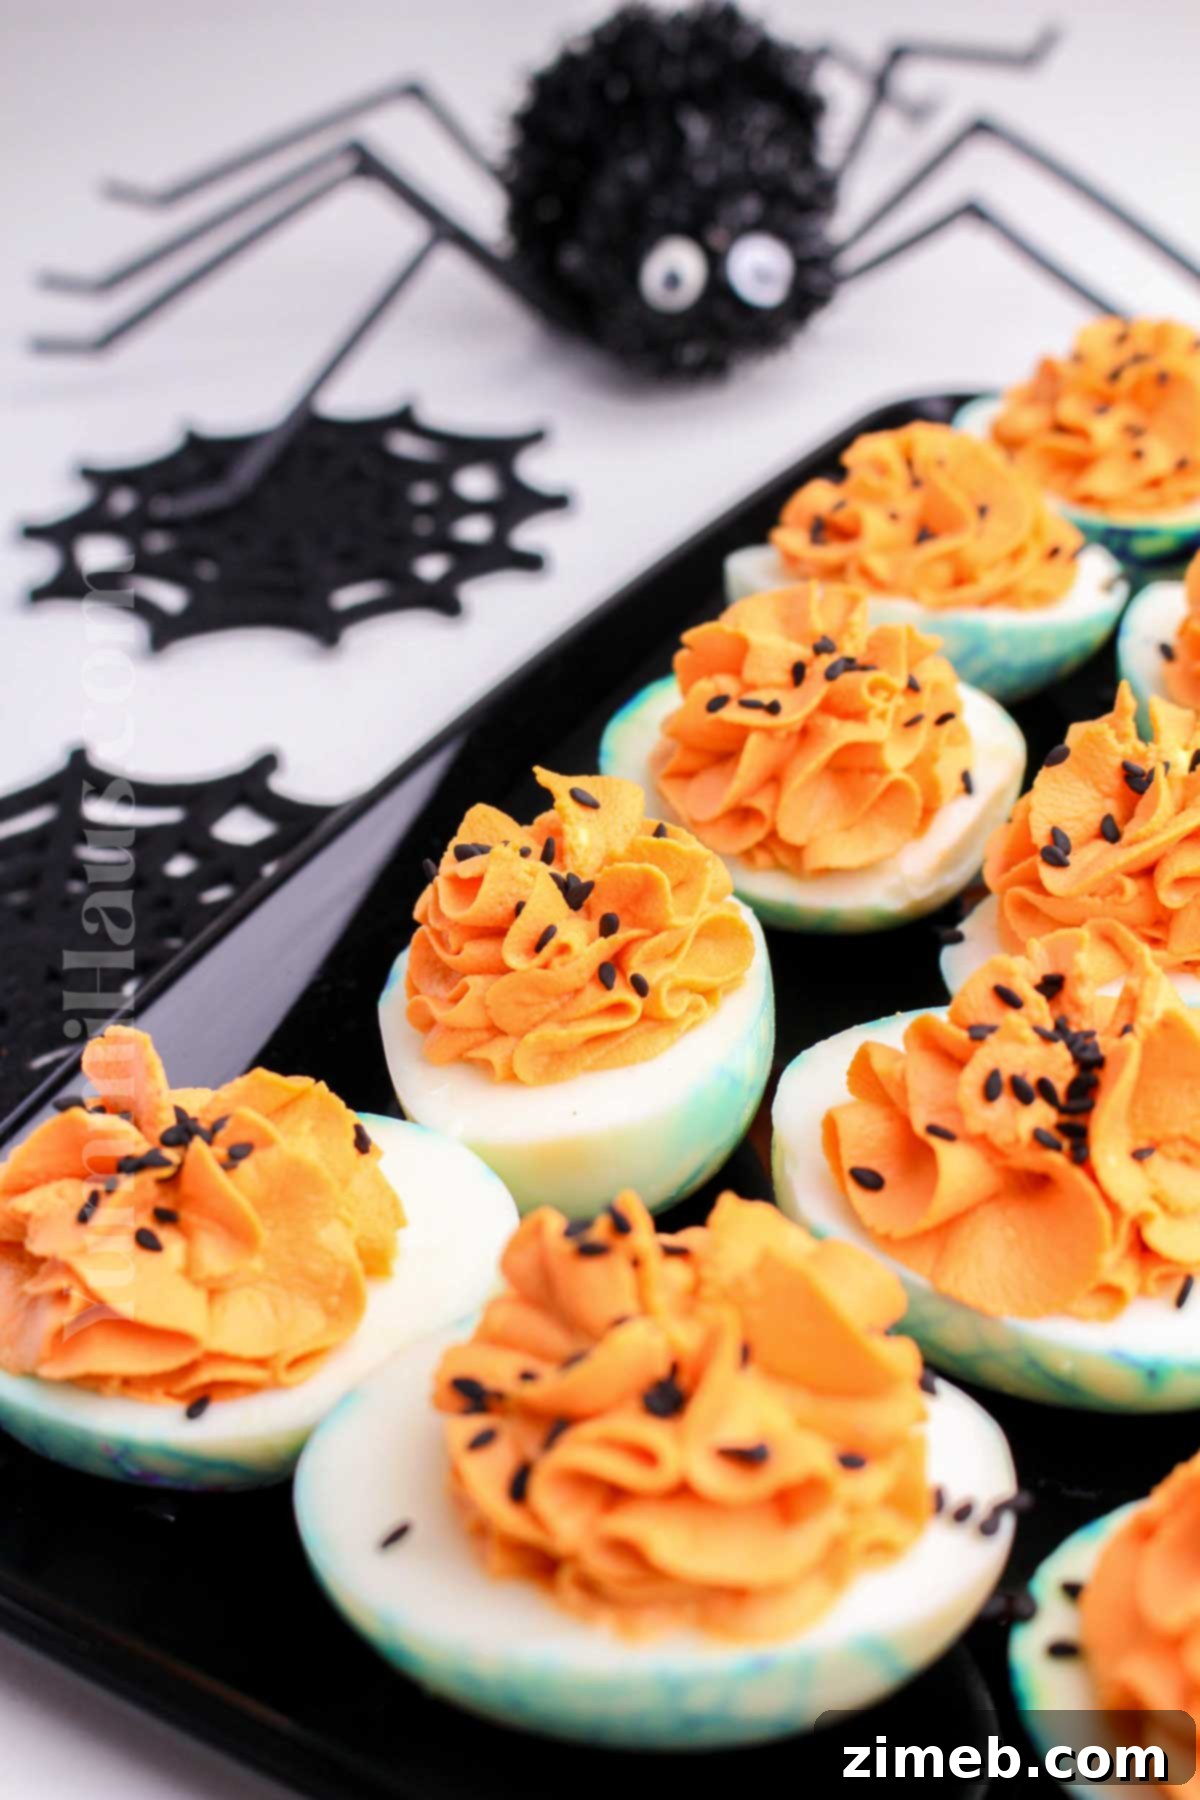
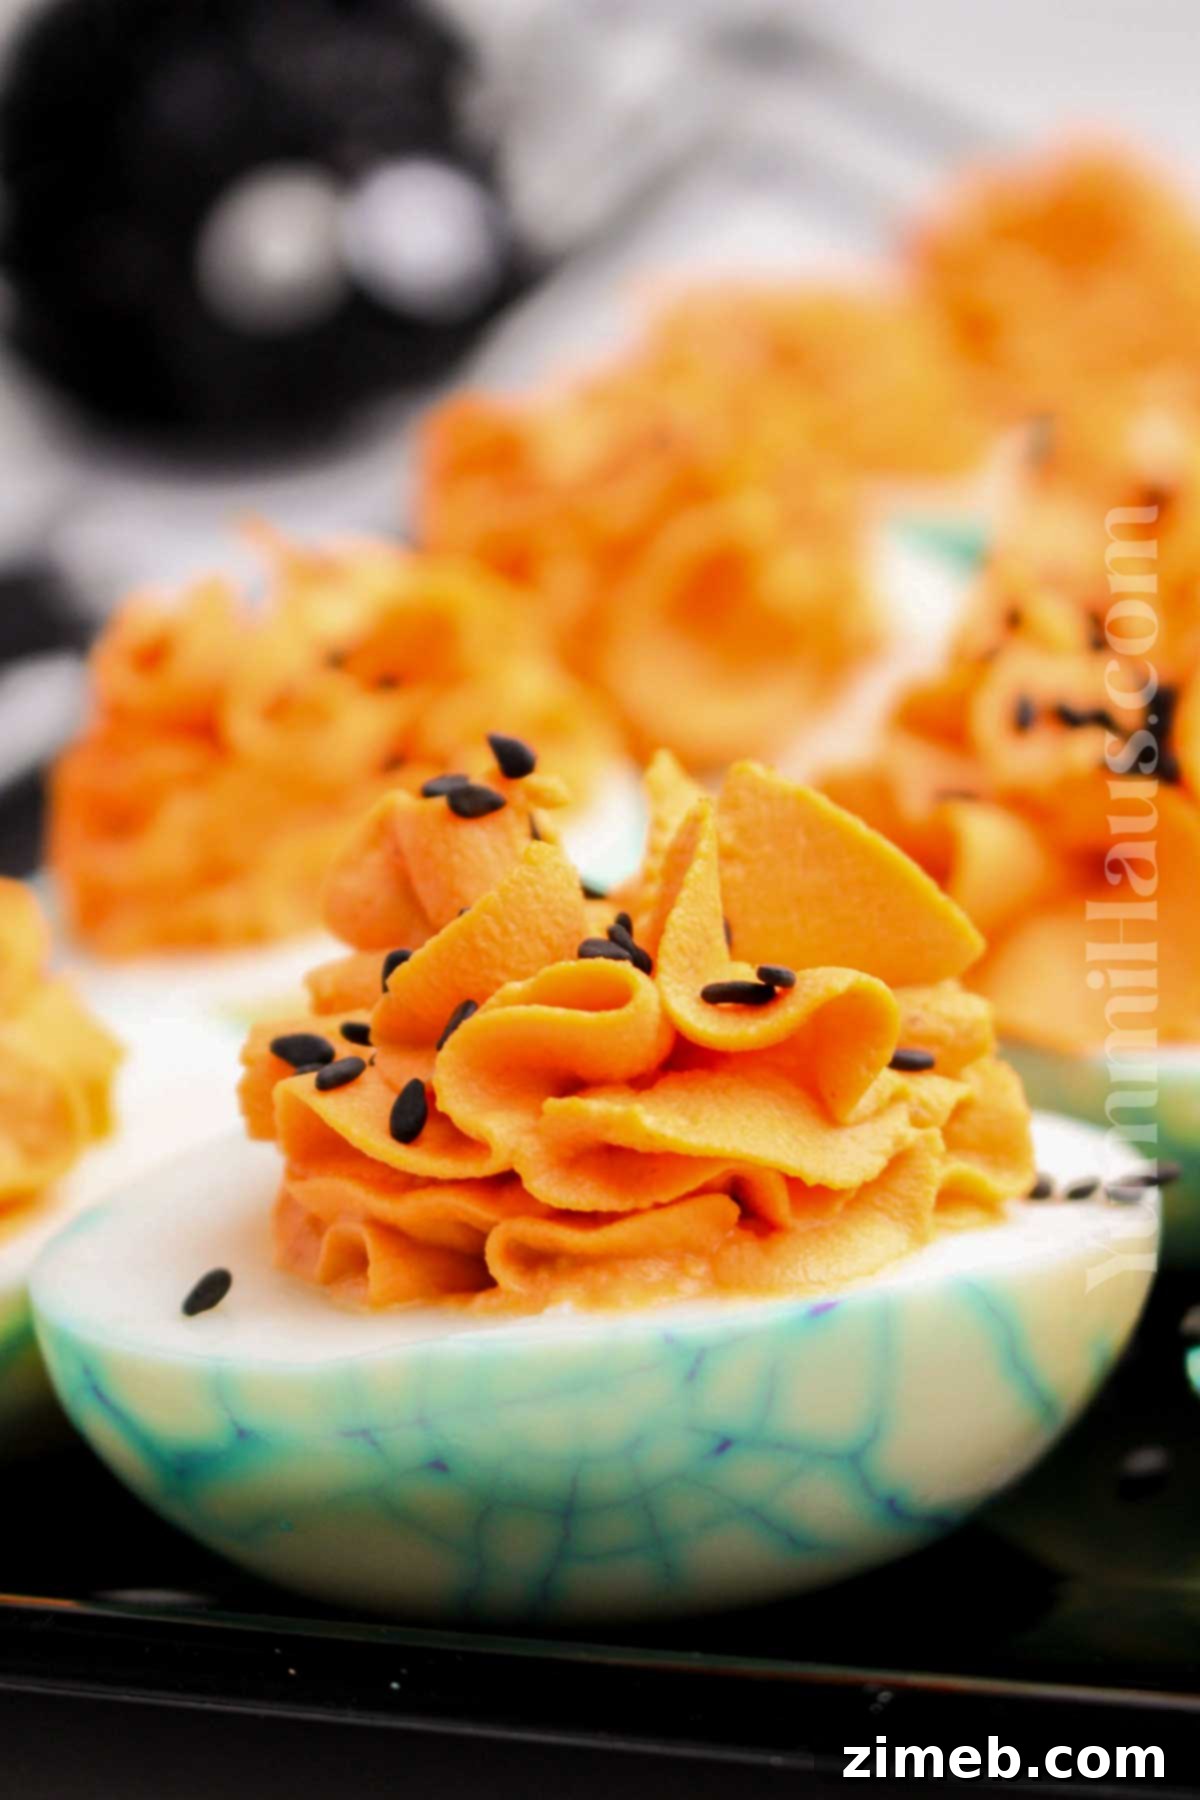
As the air grows crisp and shadows lengthen, it’s time to infuse some enchanting spirit into your kitchen! Forget the ordinary and embrace the extraordinary with these **Halloween Deviled Eggs**. They’re not just an appetizer; they’re a conversation starter, a ghoulish delight that transforms a classic into a spooky masterpiece. Imagine the captivating sight of intricate spiderweb patterns adorning the egg whites, cradling a vibrant, pumpkin-orange yolk filling. This recipe proves that you don’t need elaborate spells or complicated techniques to conjure up a truly impressive Halloween treat. They’re so irresistibly delicious, you might find yourself sneaking a second one before the party even begins! Join us as we unveil the secrets to crafting these charmingly eerie and incredibly easy deviled eggs, perfect for adding a touch of spooky elegance to your festive spread.
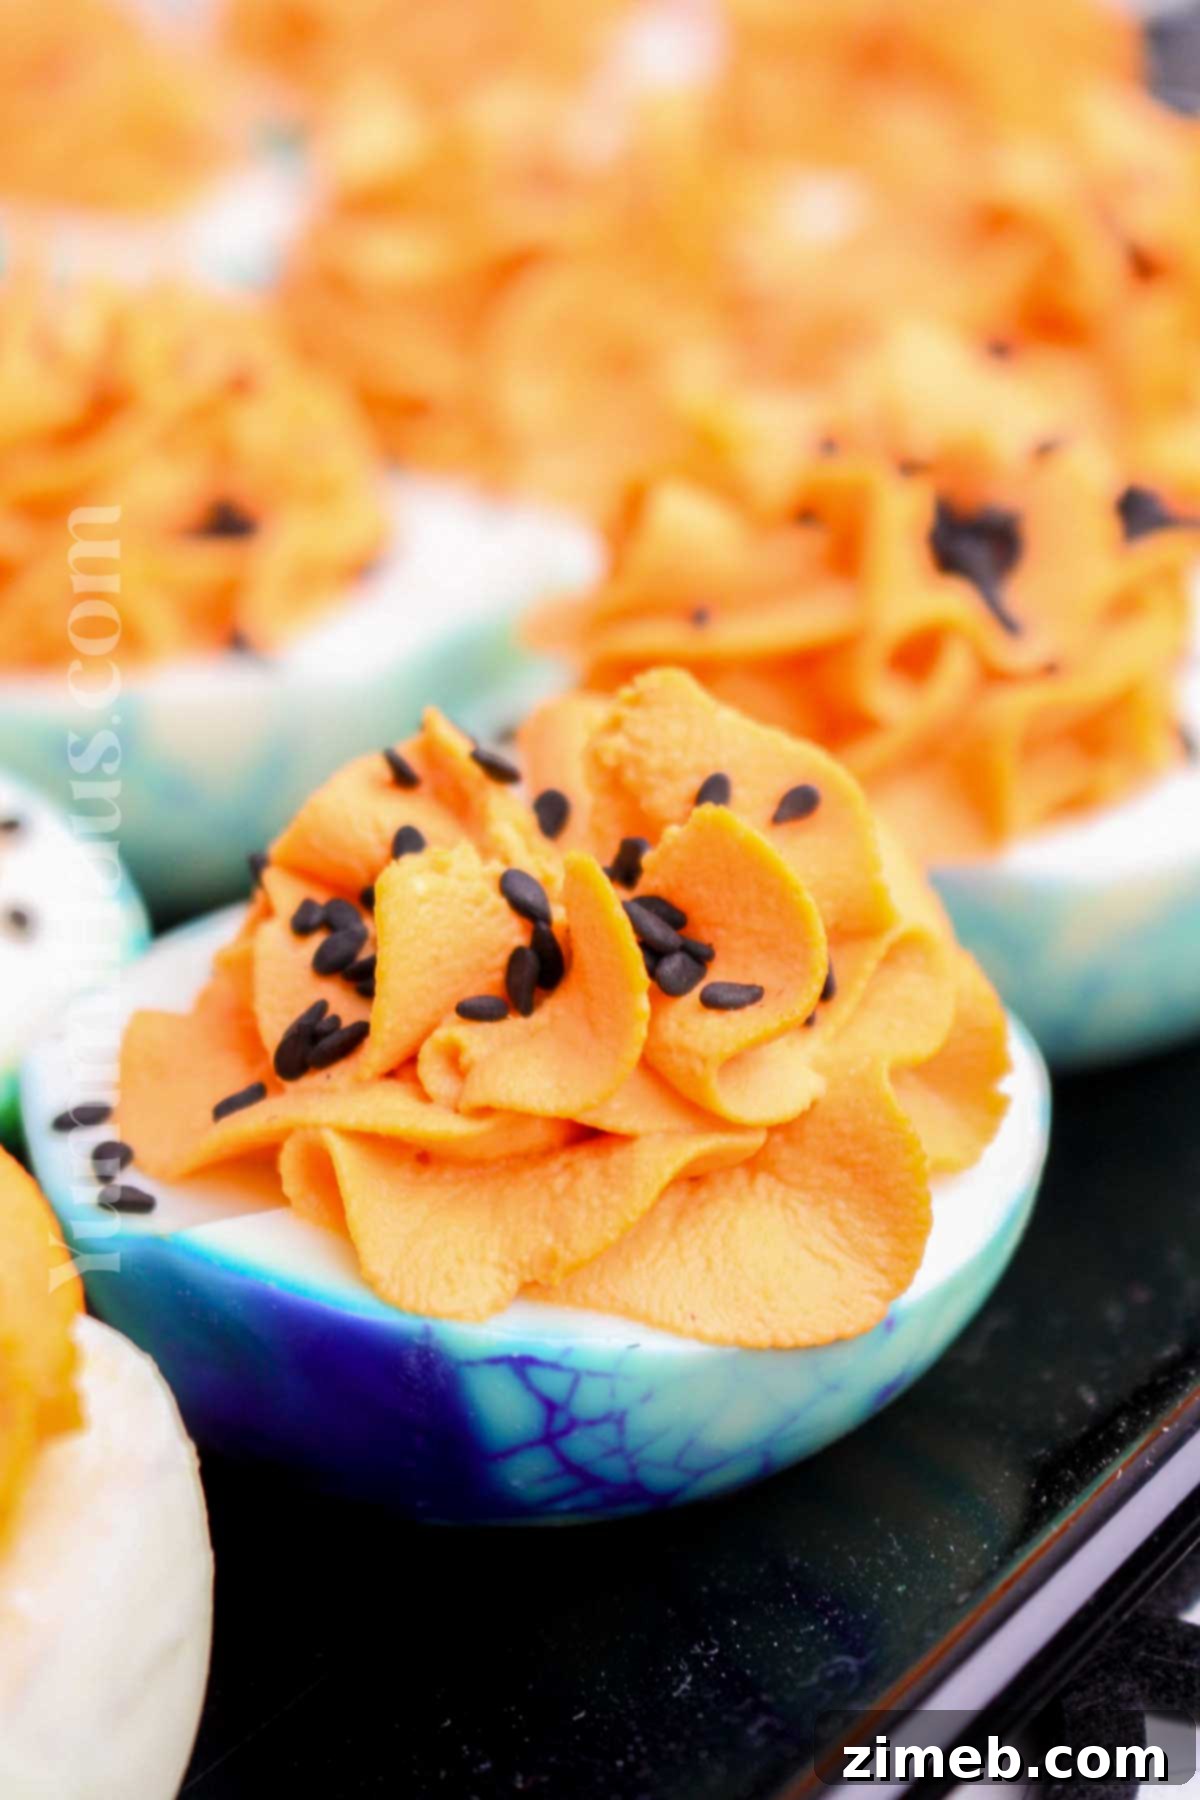
Gina’s Recipe Rundown: The Ultimate Halloween Appetizer Experience
Texture: Prepare for a delightful sensory experience. The filling of these Halloween deviled eggs boasts an incredibly smooth, velvety, and rich texture that melts in your mouth. This creamy core is beautifully contrasted by a slightly firm yet tender egg white base, creating a perfect bite that is both satisfying and luxurious. It’s a delightful balance of soft and substantial that will leave your guests craving more.
Taste: Each bite is a harmonious blend of creamy, tangy, and savory flavors, elevated by a subtle, perfectly balanced hint of spice. These deviled eggs are a truly flavorful explosion that is both festive and undeniably delicious. The classic deviled egg profile is present, but with an added depth that makes it stand out from typical appetizers, all while perfectly complementing the spooky theme.
Ease: Don’t let their impressive appearance fool you; these Halloween deviled eggs are remarkably quick and simple to prepare. They come together in minutes, making them an ideal choice for last-minute party planning, spontaneous festive gatherings, or simply a fun, spooky snack. Minimal fuss, maximum impact—that’s the mantra of this recipe.
Why I Love It: I adore these Halloween deviled eggs because they embody everything a holiday treat should be: fun, festive, and incredibly easy to execute. Beyond their charmingly spooky aesthetic, their creamy, flavorful profile consistently earns rave reviews from everyone who tries them. They bring a smile to every face and a touch of magic to any Halloween table!
Why These Spooky Deviled Eggs Will Be Your Go-To Halloween Appetizer
Searching for the perfect appetizer to bewitch your Halloween guests? Look no further! Our Halloween Deviled Eggs offer a blend of familiarity and fright that makes them an absolute must-have for any festive gathering. Here’s why you’ll be utterly enchanted by this recipe:
A Beloved Classic, Reimagined with a Spooky Twist: Deviled eggs are a timeless party favorite, cherished for their creamy texture and savory flavor. This recipe takes that beloved staple and infuses it with a playful, festive Halloween spin. The unique spiderweb effect and vibrant orange filling transform ordinary eggs into captivating, eerie delights. It’s a small, creative touch that elevates your food display, making it memorable without being overly complicated or pretentious. Guests will appreciate the nod to tradition with an exciting seasonal upgrade.
Impressive Results, Effortless Preparation: You don’t need to possess supernatural culinary powers to create these show-stopping appetizers. With just a handful of straightforward ingredients and a touch of creative flair, you can turn humble hard-boiled eggs into eye-catching “eyeballs” or charming “pumpkin” bites. The spiderweb technique, while looking incredibly intricate, is surprisingly simple to achieve, guaranteeing gasps of delight and compliments from all your guests. You’ll appear like a kitchen wizard, but your secret is safe with us!
Delightful for All Ages – Kids and Adults Alike: These spooky bites are universally appealing, making them a perfect addition to any Halloween celebration, whether it’s a family-friendly gathering or an adult costume party. The filling is mild, creamy, and palatable enough for even the pickiest eaters, while offering just the right amount of tang and savory goodness to keep adults coming back for more. Plus, in a sea of sugary Halloween treats, these deviled eggs offer a welcome boost of protein, making them a smart and delicious snack to fuel your little monsters (and big ones!) between candy raids.
Highly Customizable for Your Spooky Vision: Beyond the core recipe, these deviled eggs are incredibly versatile. Want to add more heat? A dash of hot sauce. Prefer a vegetarian kick? Finely chopped roasted red peppers. The base recipe is a canvas for your Halloween creativity, allowing you to tailor them to your guests’ preferences and dietary needs, making every batch uniquely yours. From creepy crawlers to monstrous eyeballs, the possibilities are endless.
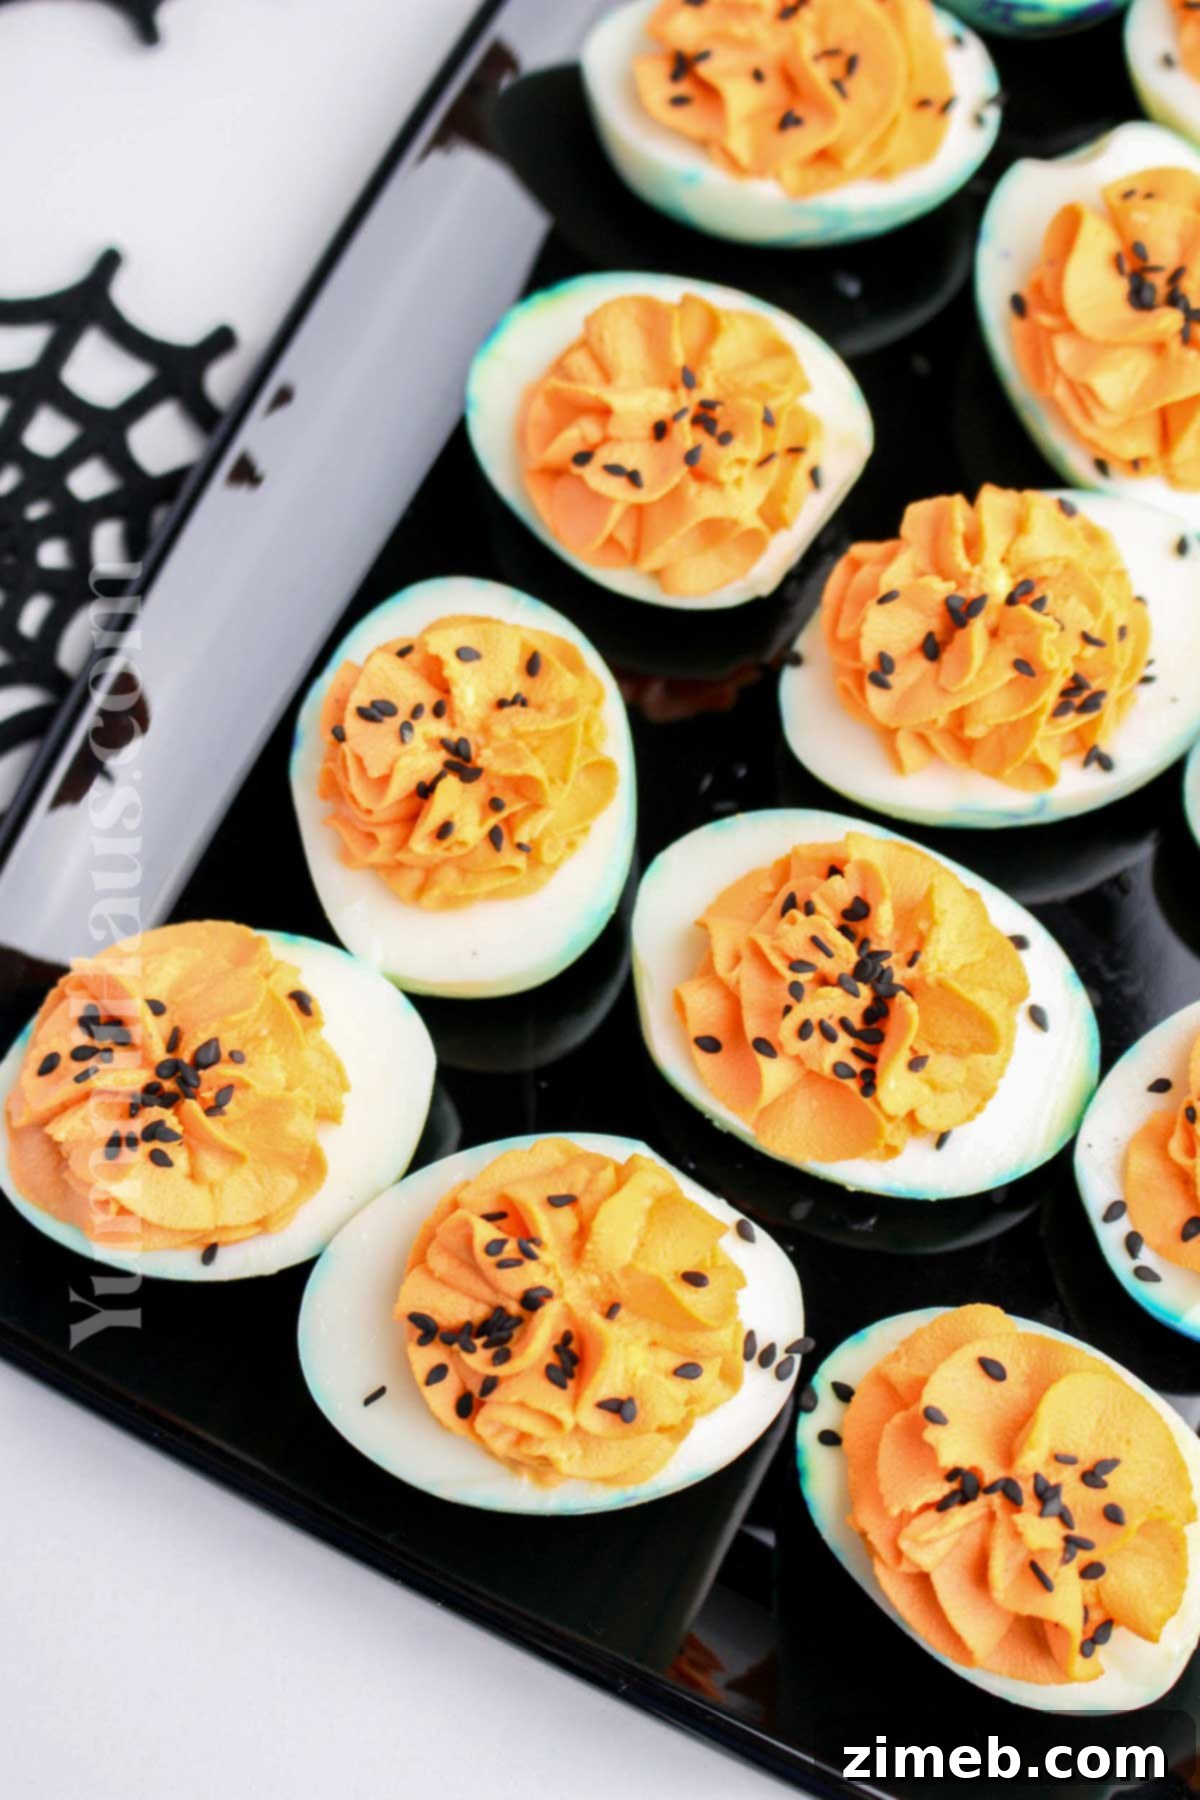
Essential Ingredients for Your Halloween Deviled Eggs (and Creative Swaps!)
Crafting the perfect batch of Halloween Deviled Eggs begins with understanding the role each ingredient plays and knowing when you can get creative with substitutions. Here’s a closer look at what you’ll need:
- Large Eggs: The foundation of this hauntingly good appetizer! Hard-boiled eggs are essential here. For the best results and easiest peeling, opt for eggs that are at least a week old, as fresher eggs tend to cling to their shells more stubbornly. While large eggs are standard, smaller quail eggs can create adorable, bite-sized alternatives, though they will require more delicate handling and peeling.
- Mayonnaise: This is the creamy heart of your deviled egg filling, providing that classic rich and smooth texture. For a slight variation, you can swap in full-fat Greek yogurt for a tangier, lighter option with added probiotics, or even a blend of both for a balanced flavor profile. If you’re looking for an extra rich and tangy kick, a good quality homemade mayonnaise works wonders.
- Dijon Mustard: Dijon mustard is crucial for adding a delightful zing that cuts through the richness of the egg yolks and mayonnaise, preventing the filling from being overly heavy. Its subtle spice and complexity elevate the flavor. While Dijon is preferred for its balanced taste, yellow mustard or even spicy brown mustard can be used for a different flavor profile. Adjust the amount to your taste; some prefer a bolder mustard presence.
- Lemon Juice: A squeeze of fresh lemon juice brightens the entire filling, adding a necessary acidic balance and a fresh, zesty note. Don’t skip this! It truly enhances the overall flavor.
- Whipped Cream Cheese (Softened): This secret ingredient adds an extra layer of creaminess and stability to the filling, making it exceptionally smooth and pipeable. Ensure it’s softened to room temperature for effortless blending.
- Sea Salt and Ground Black Pepper: These pantry staples are essential for seasoning the yolk mixture to perfection. Start with the recommended amounts and adjust to your personal preference, tasting as you go.
- Black Gel Food Coloring: Your magic potion for creating the iconic spiderweb effect on the egg whites. Gel food coloring provides a more concentrated color and won’t thin out your liquid as much as liquid food coloring. For an even more dramatic effect, consider trying natural food colorings if you prefer.
- Orange Gel Food Coloring: This is what transforms your creamy yolk filling into a vibrant, festive “pumpkin” hue. Again, gel coloring is best for intensity.
- Black Sesame Seeds: The perfect finishing touch! These tiny seeds add a subtle crunch and visual contrast, resembling tiny spider eyes or scattered spooky dust. For alternative spooky garnishes, consider small pieces of black olives, capers, or even finely chopped chives for a different look.
Essential Kitchen Tools for Spooky Success
Having the right tools on hand will make preparing your Halloween Deviled Eggs a breeze. Most of these are likely already in your kitchen, ensuring a smooth and enjoyable cooking experience:
- Large Mixing Bowl: You’ll need a spacious bowl for comfortably mixing your creamy yolk filling. A good size prevents spills and allows for thorough blending.
- Instant Pot or Electric Pressure Cooker / Saucepan or Large Pot: For perfectly hard-boiling your eggs. An Instant Pot offers a hands-off, consistent method, while a traditional saucepan on the stovetop works just as well. Choose your preferred method for flawless results.
- Piping Bag or Ziploc Bag: Essential for neatly filling your egg whites with the yolk mixture. A piping bag with a star tip will give a professional, decorative swirl, but a Ziploc bag with a corner snipped off works perfectly for a clean, simple presentation.
- Sharp Knife: For cleanly slicing the hard-boiled eggs in half. A sharp knife ensures a smooth cut and prevents tearing the delicate whites.
- Small Spoon: Ideal for carefully scooping out the egg yolks without damaging the whites.
- Cutting Board: A stable surface for slicing eggs and any garnishes.
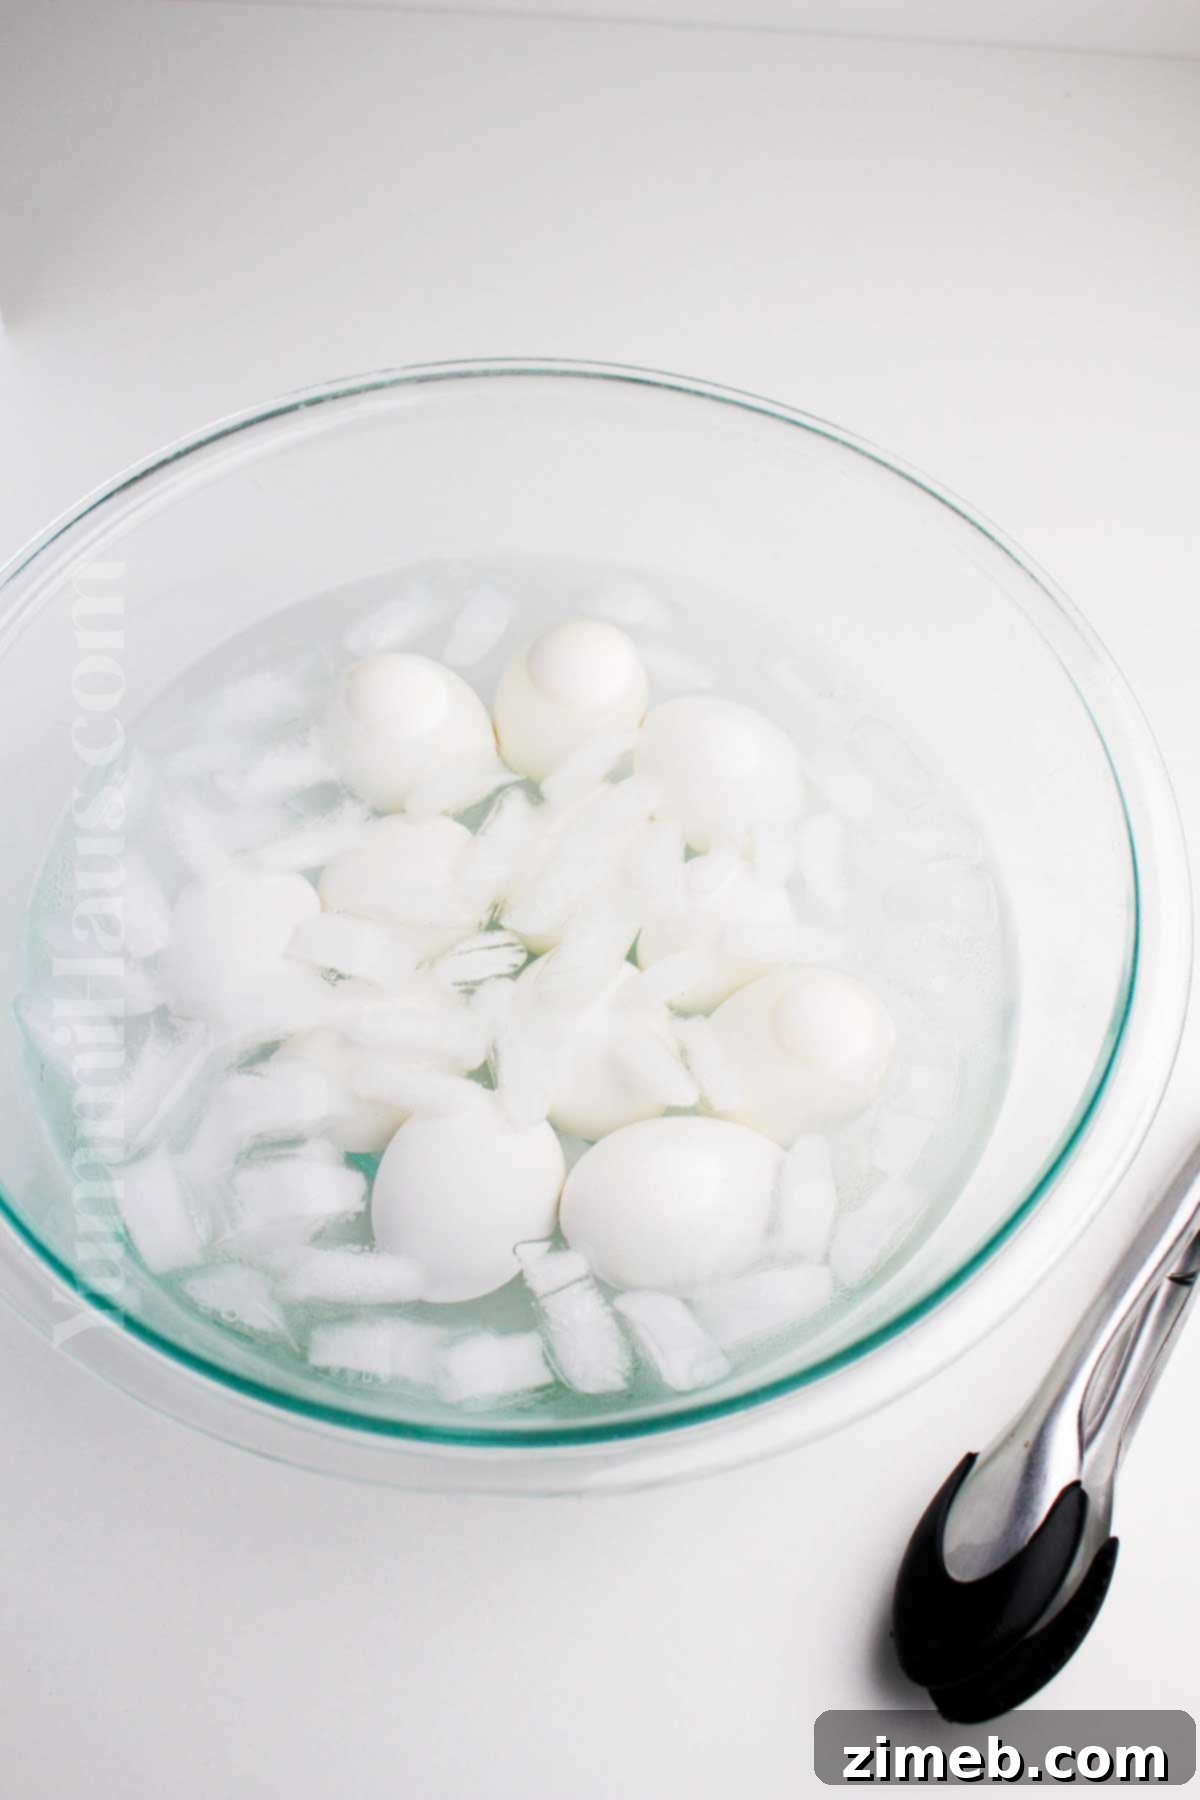
- Ice Bath: While not a piece of equipment to purchase, a bowl filled with ice water is crucial for rapidly cooling your hard-boiled eggs, stopping the cooking process and making them easier to peel.
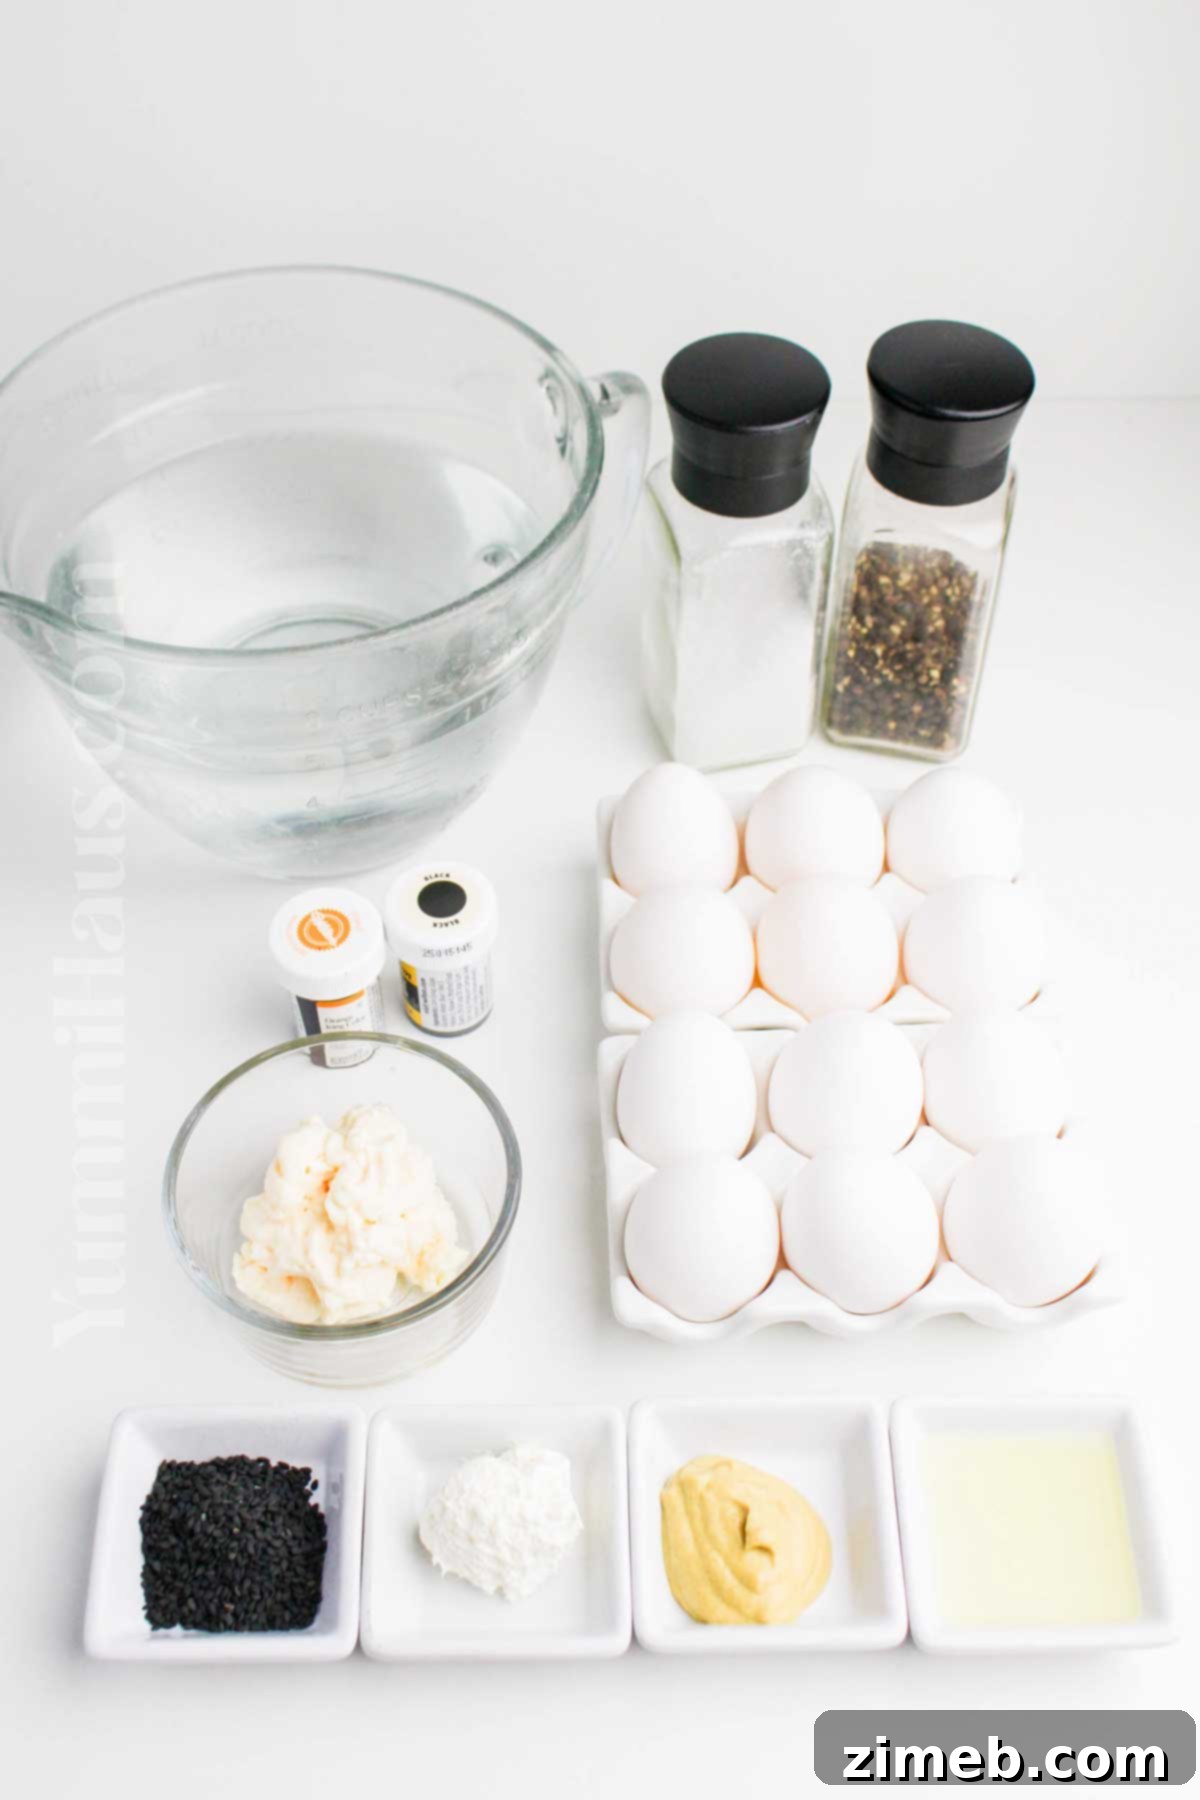
Crafting Your Spooky Halloween Deviled Eggs: A Step-by-Step Guide
Ready to transform ordinary eggs into an extraordinary Halloween treat? Follow these simple steps to create deviled eggs that are as delicious as they are visually striking:
- Prepare Your Hard-Boiled Eggs: Begin by hard-boiling your eggs using your preferred method—whether it’s on the stovetop, steaming, or using a pressure cooker. The key is to achieve perfectly cooked yolks and easily peelable whites. Immediately after cooking, transfer the eggs to an ice bath and let them cool completely. This rapid cooling halts the cooking process and helps the shells detach more easily. (For detailed instructions, don’t miss my guide on Perfect Hard-Boiled Eggs Every Time!)
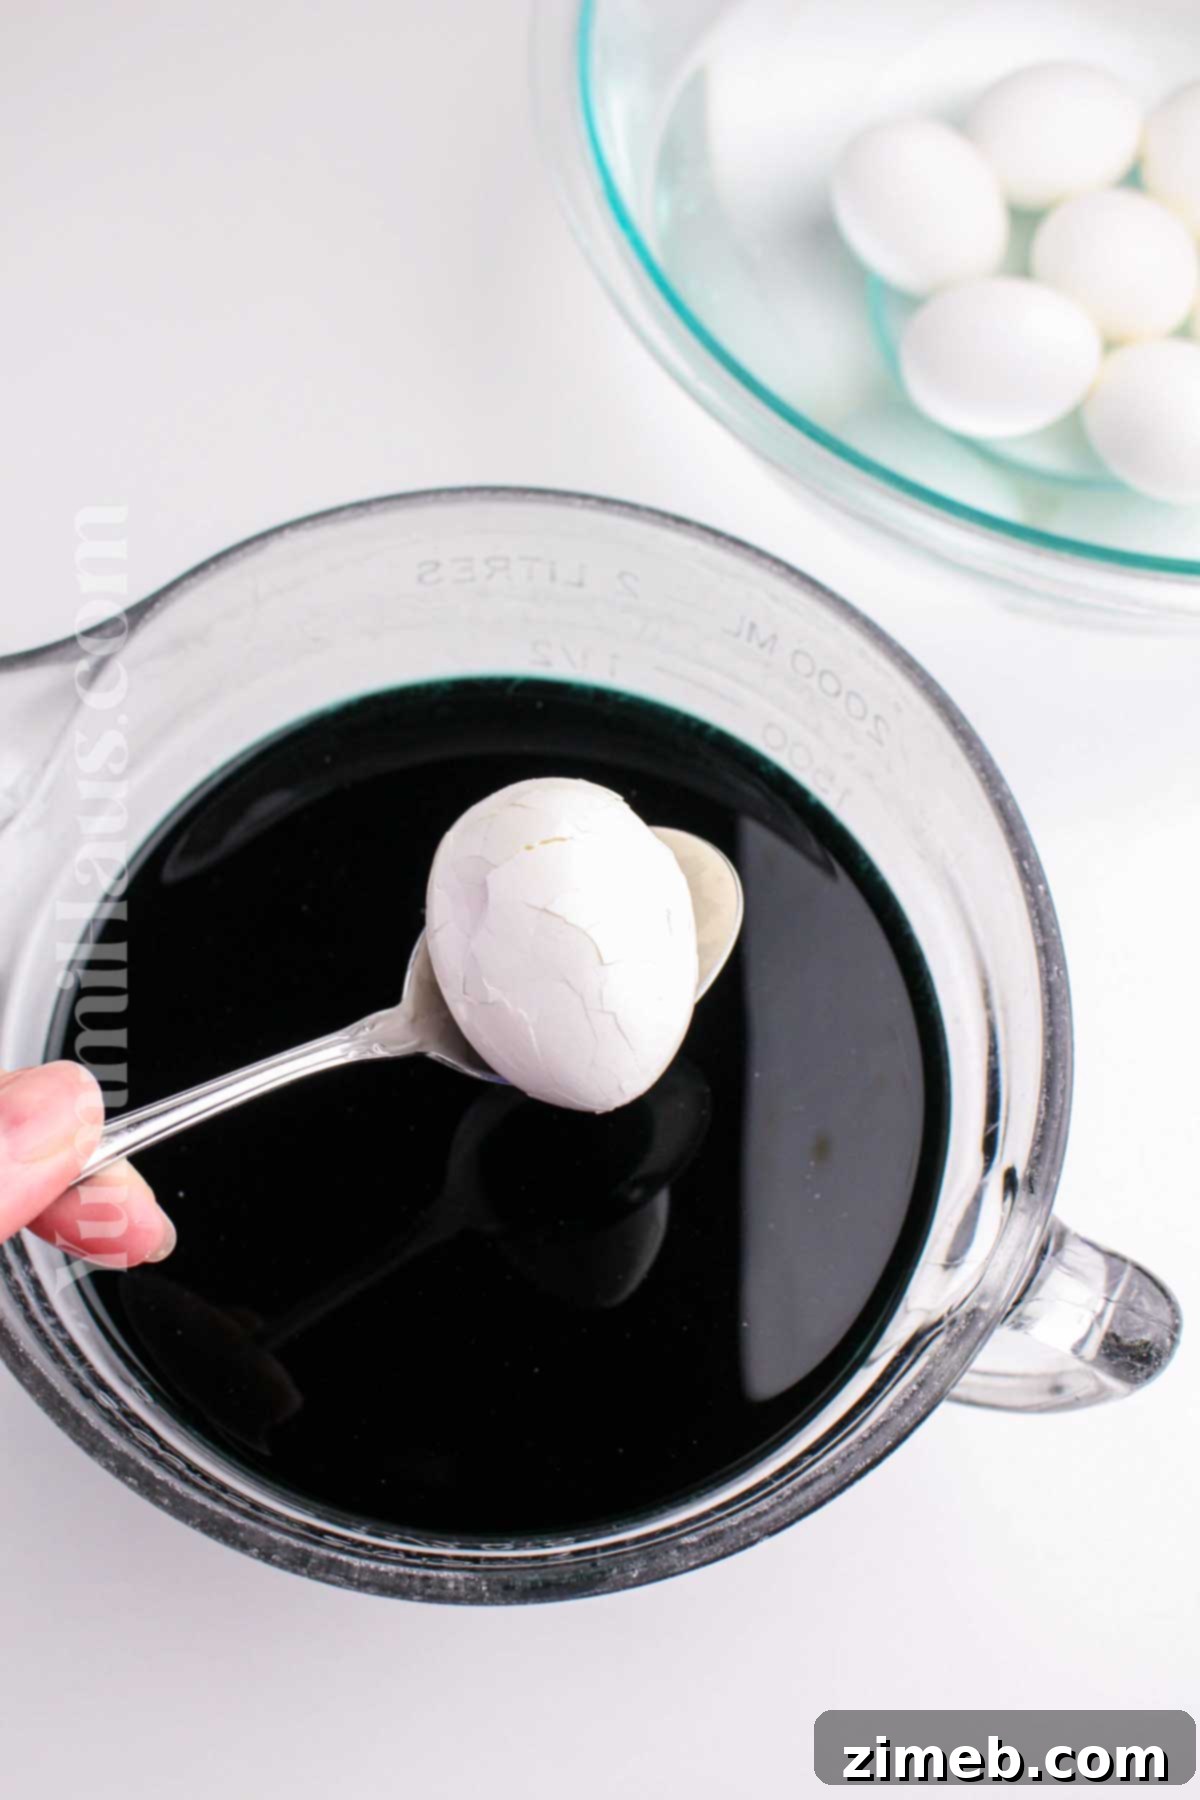
- Create the Spooky Dye Bath: In a medium-sized bowl, combine the water with the black gel food coloring. Stir well until the color is consistent and richly black. This will be your magical potion for achieving the spiderweb effect.
- Crack and Dye the Eggs: Gently tap each hard-boiled egg with the back of a spoon, creating small cracks all over the shell. It’s important to keep the shell mostly intact; you’re aiming for a fractured surface, not shattered pieces. Carefully place these cracked eggs into the black water bath, ensuring they are fully submerged.
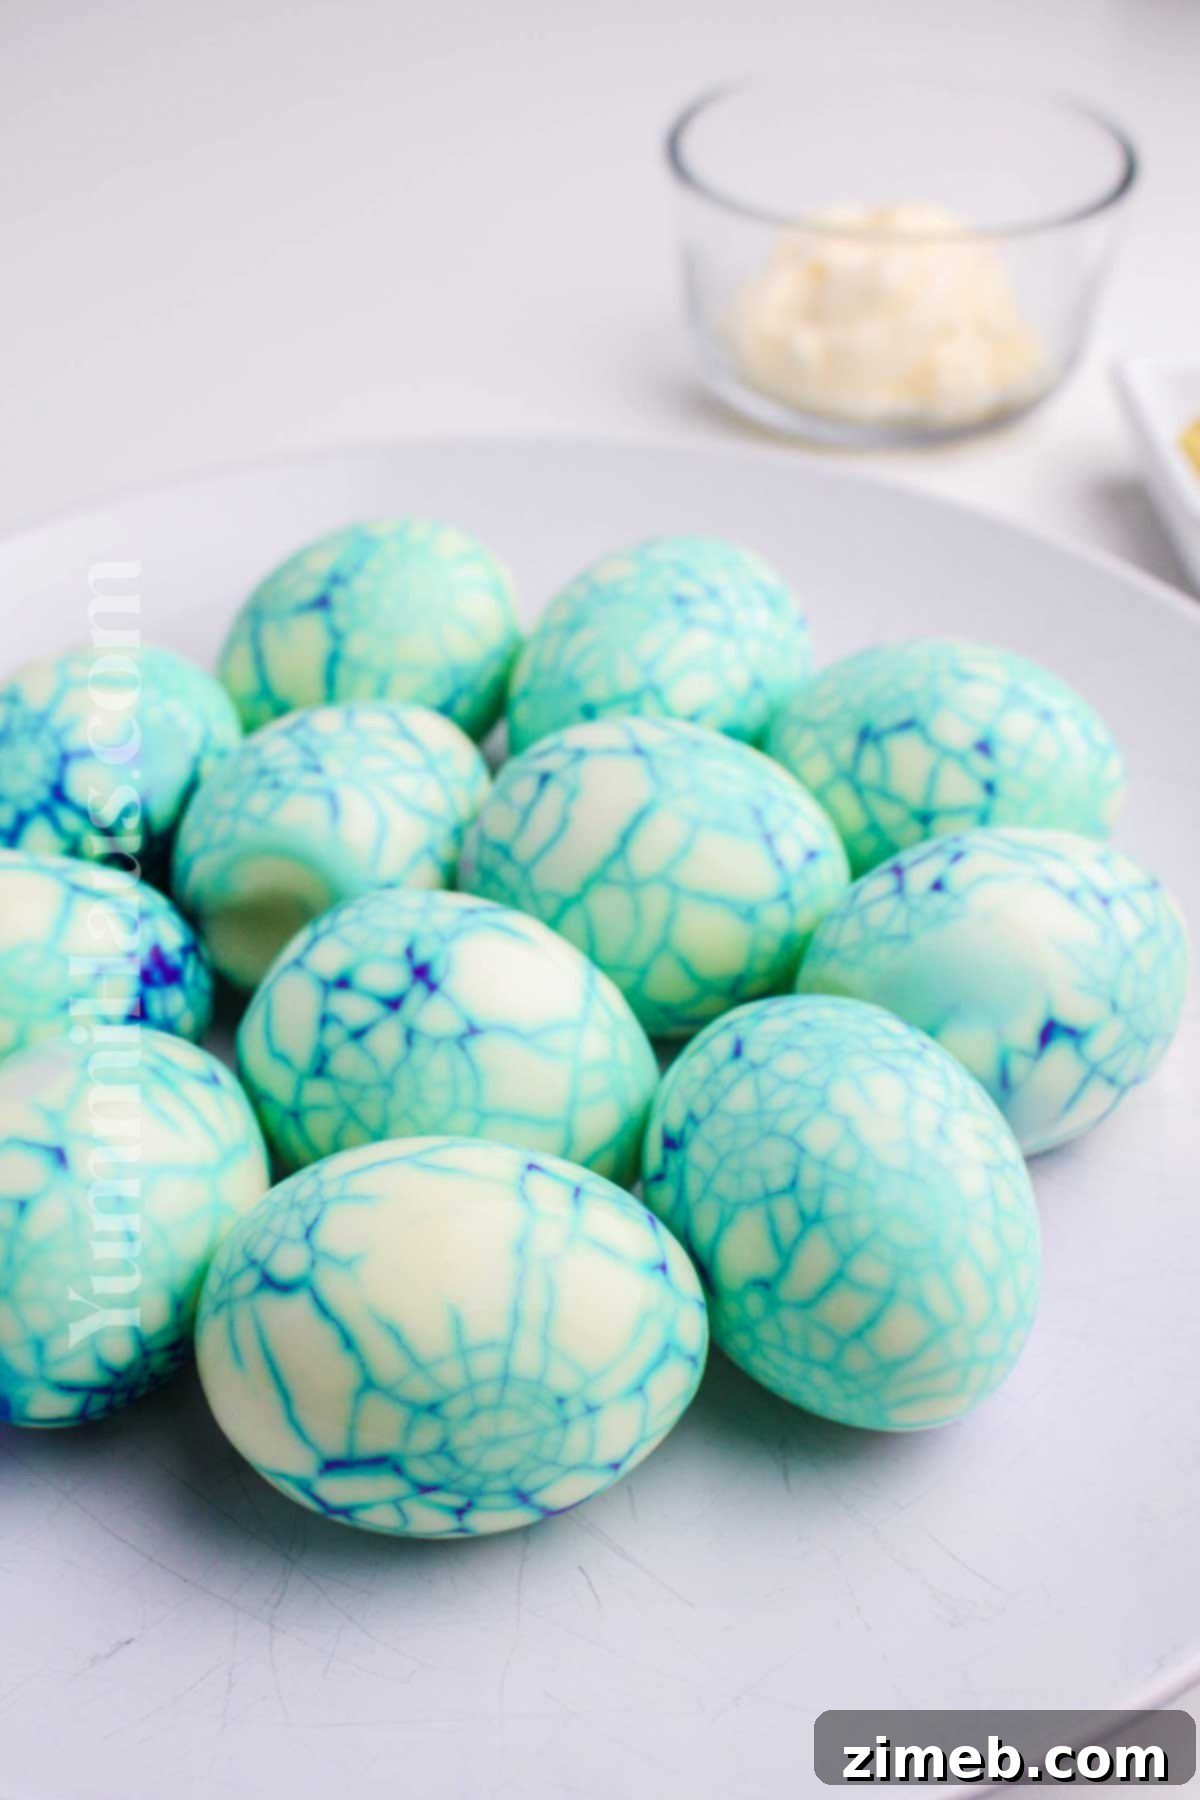
- Chill for the Spiderweb Effect: Cover the bowl and refrigerate for at least 2 hours. This chilling period allows the black food coloring to seep into the cracks, creating those eerie, beautiful black veins that mimic a spiderweb pattern on the egg whites. For a more intense pattern, you can leave them to chill longer, up to overnight.
- Peel and Slice: Once the eggs have chilled sufficiently, remove them from the dye bath and carefully peel off the shells. You’ll reveal the striking black-veined egg whites beneath. With a sharp knife, slice each egg in half lengthwise, showcasing the spooky pattern.
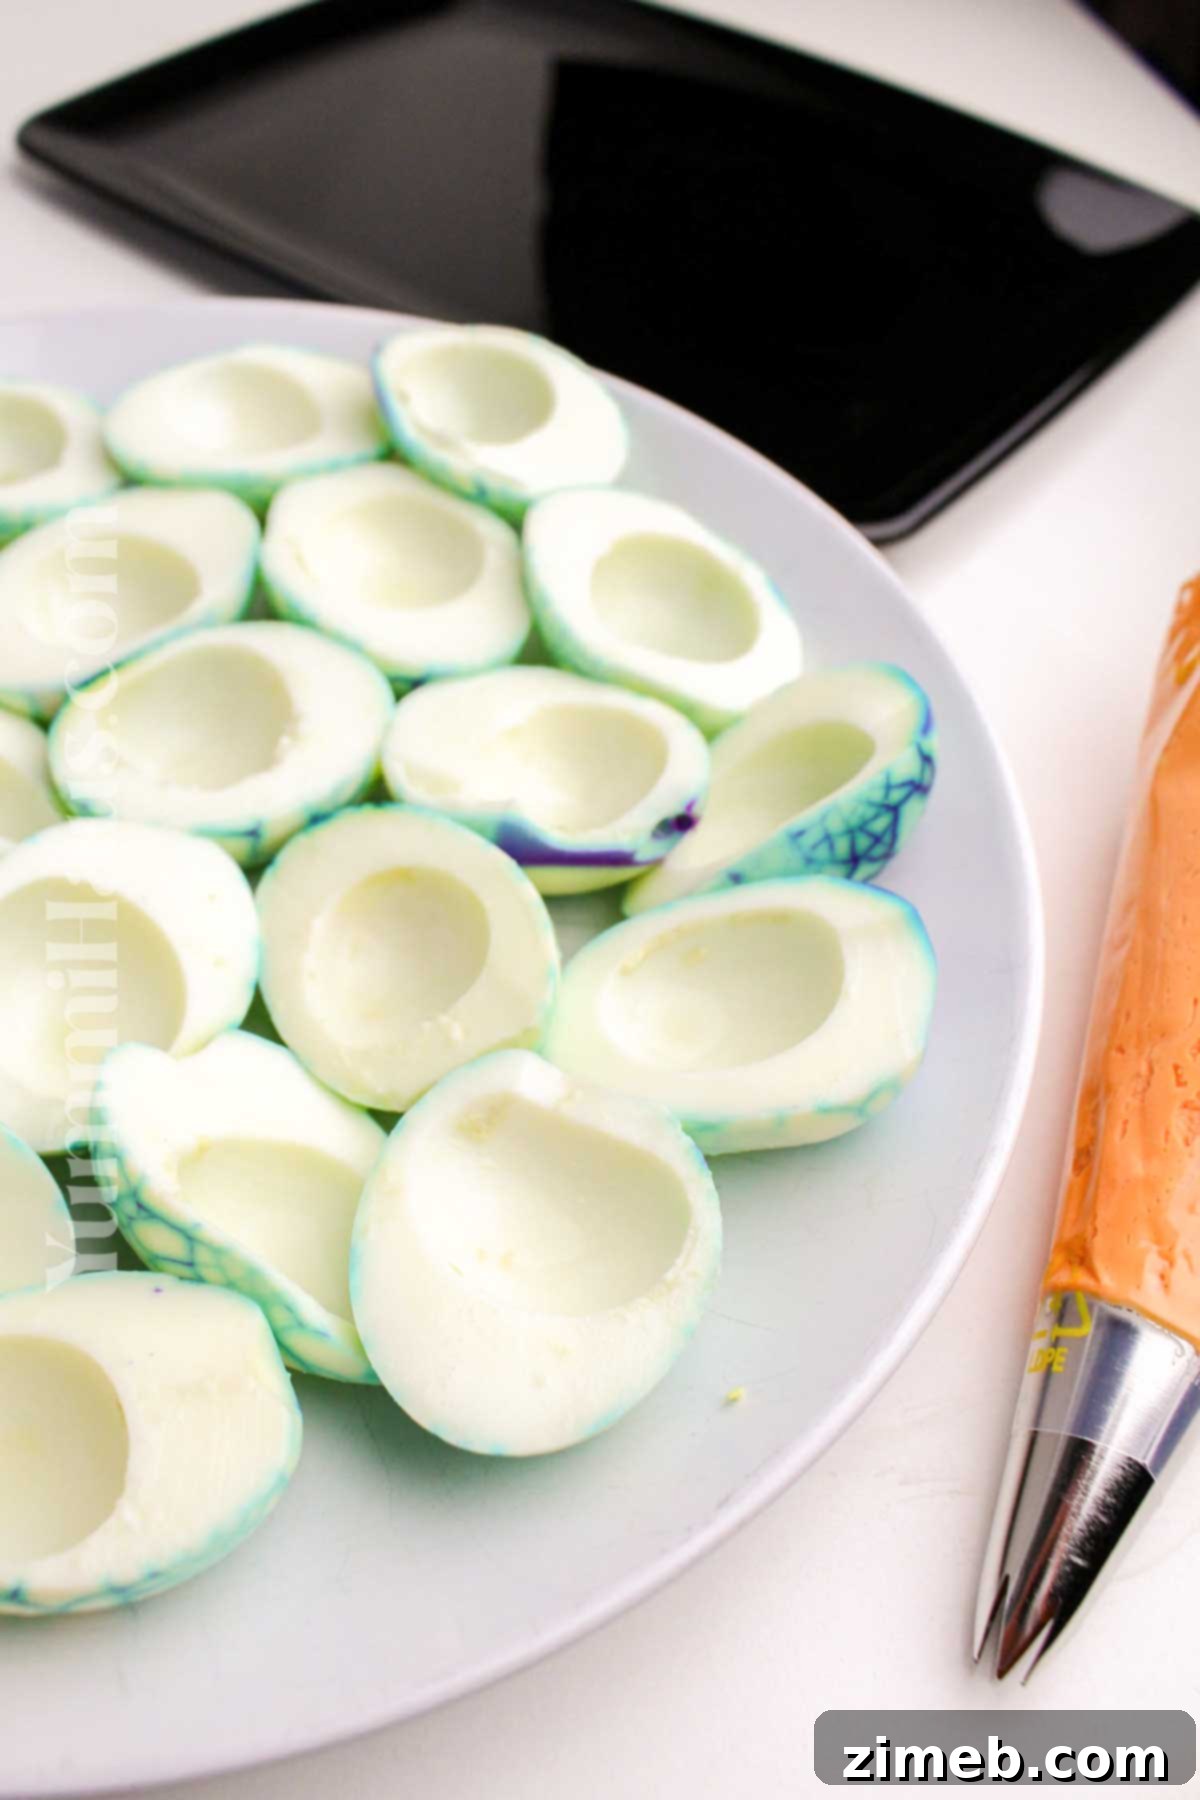
- Prepare the Yolk Filling: Gently scoop out the vibrant yellow yolks from the egg white halves and transfer them to a separate bowl. To this bowl, add the mayonnaise, Dijon mustard, fresh lemon juice, softened whipped cream cheese, sea salt, and ground black pepper.
- Mash and Smooth: Using a fork, mash the yolks thoroughly with the added ingredients until the mixture is completely smooth and creamy. Ensure there are no lumps for the best texture.
- Add Halloween Color: Stir in the orange gel food coloring a few drops at a time until the yolk mixture achieves a bright, uniform pumpkin-orange hue. This contrasting color makes the “spiderweb” whites even more dramatic.
- Fill the Egg Whites: Transfer the creamy orange yolk mixture into a piping bag fitted with a star tip (or a Ziploc bag with a corner snipped off). Pipe the filling neatly back into the hollowed egg white halves, creating elegant swirls or simple mounds.
- Garnish and Serve: For a final spooky flourish, sprinkle a few black sesame seeds over the top of each filled deviled egg. These resemble tiny spider eggs or simply add an extra touch of dark contrast.
- Keep Chilled: Arrange your hauntingly delicious Halloween Deviled Eggs on a serving platter and keep them refrigerated until it’s time to unleash them upon your unsuspecting guests!
Creative Variations & Spooky Substitutions for Your Deviled Eggs
One of the best things about deviled eggs is their versatility! These Halloween Deviled Eggs are no exception. Feel free to get creative and customize them to fit your specific taste preferences or spooky theme:
- Spooky Spider Deviled Eggs: Elevate the creepy factor! After filling, take thin strips of black olives and arrange them around the egg yolk, creating eight delicate “spider legs” for a truly chilling critter effect. You can even place a whole black olive in the center for the body.
- Avocado Green Slime Twist: For a naturally green and creamy filling, swap out a portion or all of the mayonnaise for mashed ripe avocado. This not only adds a fresh, earthy flavor but also boosts the nutritional value with healthy fats and creates a vibrant, almost “slime-like” green hue (which you can enhance with a drop of green food coloring if desired).
- Fiery Buffalo Bites: Craving a kick? Mix in a dash of your favorite hot sauce (like Frank’s RedHot or Tabasco) to the yolk mixture for a spicy buffalo-style deviled egg. Adjust the amount of hot sauce to achieve your desired level of heat. A sprinkle of blue cheese crumbles on top would complete this savory variation.
- Sweet and Savory Pumpkin Spice: For a unique autumn twist, add a tiny hint of maple syrup or a drizzle of honey to the filling. This subtle sweetness creates a fantastic contrast with the savory flavors, evoking seasonal pumpkin spice notes without being overtly dessert-like. A pinch of nutmeg could also work.
- Vegetarian Delight with Roasted Peppers: Introduce a fresh, garden-inspired flavor by finely chopping roasted red peppers or sun-dried tomatoes and folding them into the yolk mixture. This adds a beautiful red fleck and a lovely savory depth, enhancing both texture and taste.
- Eyeball Extravaganza: Get truly ghoulish by transforming these into realistic eyeballs. Use small black olive slices for the pupil, and for “bloodshot” veins, use tiny thin strips of red bell pepper or a touch of red food coloring gel piped on carefully.
- Wicked Witch Green Eggs: Instead of orange, use green food coloring for the yolk mixture to create “Wicked Witch” or “Frankenstein” themed eggs. Garnish with a tiny “witch hat” made from a black olive.
- Mummy Madness: After piping the filling, use thin strips of cheese or strategically placed white icing (made from cream cheese) to create “mummy wraps” over the filling. Add two candy eyes for a playful touch.
- Smoky Flavor Boost: A tiny pinch of smoked paprika or a drop of liquid smoke can add a delicious, savory depth to your deviled egg filling, making them even more irresistible.
Storing Your Spooky Deviled Egg Creations
Proper storage is key to keeping your Halloween Deviled Eggs fresh, delicious, and safe for consumption. Here’s how to ensure they maintain their creamy texture and vibrant flavors:
Refrigeration: For optimal freshness, store your assembled deviled eggs in an airtight container in the refrigerator for up to 2 days. It’s crucial to keep them well-chilled until just before serving. A container designed specifically for deviled eggs, with individual compartments, can prevent them from sliding around and getting damaged.
Freezing (Not Recommended for Assembled Eggs): Generally, deviled eggs are not a good candidate for freezing once assembled. The texture of the egg whites can become rubbery or watery upon thawing, and the creamy yolk filling may separate, leading to a less-than-appetizing consistency. The mayonnaise and other creamy components tend to break down, compromising the smooth texture you worked so hard to achieve.
Freezing Components Separately (If You Must): If you absolutely must freeze parts of the recipe, it’s best to store the cooked egg whites and the yolk filling separately. Thaw both components slowly in the refrigerator overnight before re-assembling. However, for the best quality, we strongly recommend making these fresh or preparing them no more than two days in advance.
Make Ahead Tips: To save time, you can hard-boil your eggs and prepare the black dye bath a day or two in advance. You can also mix the yolk filling (without the food coloring) and store it in an airtight container. When you’re ready to serve, simply dye the eggs, peel, slice, color the yolk mixture, and pipe – this will ensure the freshest taste and appearance.
Chef’s Secrets for Perfect Halloween Deviled Eggs
Achieving deviled egg perfection, especially with a spooky twist, comes down to a few key techniques. These expert tips will help you create flawlessly creamy, beautifully presented, and utterly delicious Halloween Deviled Eggs every time:
- Master the Hard-Boil: The foundation of any great deviled egg is a perfectly cooked hard-boiled egg. Place your eggs in a pot, cover them with cold water, and bring them to a full, rolling boil. Immediately turn off the heat, cover the pot, and let them sit for precisely 10-12 minutes. This method prevents green rings around the yolk. Then, plunge the eggs into an ice bath for at least 5-10 minutes. This sudden temperature change not only stops the cooking but also causes the egg to contract, making the shell significantly easier to peel without damaging the delicate whites. (For a more in-depth guide, check out my recipe for Perfect Hard-Boiled Eggs.)
- Embrace the Piping Bag: While a spoon works, a piping bag with a star tip (or even a plain round tip) is your secret weapon for a professional, elegant, and spooky presentation. It allows you to create beautiful swirls or neat mounds of filling, giving your deviled eggs a refined finish that’s sure to impress. It also keeps your serving platter cleaner and minimizes mess.
- Strategic Prep-Ahead: Don’t wait until the last minute! Hard-boil and dye your eggs a day or two in advance. You can also prepare the yolk filling (without the orange food coloring) and store it separately in an airtight container in the fridge. Assemble the deviled eggs just a few hours before serving. This allows the flavors to meld beautifully and gives you more time to focus on other spooky party preparations.
- The Art of the Filling: Avoid overdoing the mayonnaise. Too much can result in a runny, unstable filling that’s difficult to pipe and doesn’t hold its shape. You want a consistency that’s light, fluffy, and slightly firm – perfect for mimicking “pumpkin guts” or “eyeball goo.” If your filling seems too thin, you can add a bit more mashed yolk from an extra egg, or a small amount of powdered sugar (for sweetness) or cornstarch (for neutral thickening, used sparingly).
- Elevate Eyeball Details: If you’re going for the full eyeball effect, don’t stop at just black olive rings for pupils. Get creative! Try adding tiny red pepper slivers for eerie bloodshot veins, or a small piece of green olive for an alien-like iris. You can also use a dot of red food gel to paint on finer details. The more attention to detail, the more hauntingly realistic they’ll be!
- Food Safety First: Since deviled eggs contain mayonnaise and are served chilled, always prioritize food safety. Keep them refrigerated until about 15-20 minutes before serving. Avoid leaving them out at room temperature for more than two hours, especially in warmer conditions.
- Quick Egg Salad Sandwiches: The most classic use! Simply chop up any remaining deviled egg halves (both whites and filling) and mix them with a touch more mayonnaise, a dash of mustard, and perhaps some finely diced celery or red onion. Serve on toasted bread, croissants, or in lettuce cups for a delicious and easy lunch.
- Nutritious Stuffed Avocados: For a fresh and satisfying meal, scoop out the pit from avocado halves. Fill the cavity with the chopped deviled egg mixture. This makes a creamy, nutrient-packed bite that’s perfect for a light lunch or snack.
- Protein-Packed Salad Topping: Dice the leftover deviled eggs and sprinkle them over a fresh green salad. They add a wonderful creamy texture and a boost of protein, transforming a simple salad into a more substantial and flavorful meal.
- Gourmet Breakfast Toast: Elevate your morning toast! Spread any remaining deviled egg filling generously on toasted bread. Top with fresh cherry tomato slices, microgreens, a sprinkle of paprika, or even a dash of hot sauce for an easy yet elegant breakfast or brunch option. This is a fantastic way to enjoy a savory start to your day.
- Pita Pocket Lunch: Turn your leftovers into a convenient and tasty lunch. Stuff pita bread with the deviled egg filling, adding some crisp lettuce, sliced cucumbers, or shredded carrots for extra crunch and freshness. It’s a delightful alternative to a traditional sandwich.
- Crostini Topping: Spread the creamy filling onto toasted baguette slices or crackers for a quick and impressive appetizer. Garnish with chives or a tiny piece of smoked salmon.
- Egg Yolks Too Dry: If your yolk filling turns out crumbly or overly dry, don’t fret! The simplest fix is to gradually incorporate a bit more mayonnaise, a splash of milk, or even a teaspoon of pickle juice (for added tang) until you reach your desired creamy consistency. Stir gently to avoid overworking the mixture, aiming for smooth richness rather than a runny mess.
- Eggs Are Difficult to Peel: This is a common frustration! The key often lies in the age of your eggs. Older eggs (about a week or more past their purchase date) tend to peel much more easily than very fresh ones. Additionally, ensure your eggs are plunged into an ice bath immediately after cooking; this rapid cooling helps the membrane separate from the egg white. For particularly stubborn shells, try peeling the egg under a stream of cold running water, or crack the shell all over and gently roll it on the counter before peeling.
- Filling Too Runny: A runny filling can be tricky to pipe and might make your deviled eggs look less appealing. This usually happens from adding too much liquid (mayonnaise, mustard, or food coloring) too quickly. To remedy this, try adding more mashed egg yolk (if you have an extra hard-boiled egg on hand) or a small amount of plain, unflavored breadcrumbs or finely crushed crackers to absorb excess moisture. Alternatively, chilling the filling for at least 30 minutes in the refrigerator can help it firm up before you attempt to pipe it. Remember, too much liquid food coloring can also thin out your mixture, so opt for gel food coloring when possible.
- Color Bleeding (from the spiderweb effect): While a little bleed can add to the “spooky” effect, excessive bleeding might look messy. To minimize this, ensure you pat your dyed egg whites completely dry before slicing and filling. Also, be careful not to handle the dyed whites excessively, as the warmth from your hands can encourage color transfer. If using very dark colors for the yolk filling, ensure it’s completely mixed and stable before piping.
- Lumpy Yolk Filling: For that signature smooth, creamy texture, make sure you mash the yolks thoroughly. If using an electric mixer, be careful not to overmix, which can incorporate too much air or make the texture too light. If mashing by hand, press the yolks against the side of the bowl with a fork until all lumps are gone before adding other ingredients.
- 12 large eggs hard-boiled and cooled
- 5 cups water
- 8 drops black gel food coloring
- 3 tablespoons mayonnaise
- 1 tablespoon Dijon mustard
- 1 tablespoon lemon juice freshly squeezed
- 1 tablespoon whipped cream cheese softened to room temperature
- ½ teaspoon sea salt
- ½ teaspoon ground black pepper
- 10 drops orange gel food coloring or more, to achieve desired color
- 1 teaspoon black sesame seeds for garnish
-
Hard-boil the eggs using your preferred method (boil, steam, or pressure cook), then cool them completely in an ice bath. (For a full guide, refer to my Perfect Hard-Boiled Eggs post linked above!)
-
In a medium bowl, thoroughly mix 5 cups of water with 8 drops of black gel food coloring to create your “spooky dye bath.”
-
Gently tap each hard-boiled egg with the back of a spoon to crack the shell all over, ensuring the shell remains mostly intact. Place the cracked eggs (shells on) into the black tinted water, making sure they are fully submerged.
-
Cover the bowl and chill in the refrigerator for at least 2 hours to allow the black dye to seep into the cracks, creating the spiderweb effect. For a more intense pattern, you can chill them longer.
-
Once chilled, remove the eggs, carefully peel off the shells, and slice each egg in half lengthwise to reveal the eerie black-veined whites.
-
Carefully scoop out the yolks into a separate mixing bowl. Add the mayonnaise, Dijon mustard, fresh lemon juice, softened whipped cream cheese, sea salt, and ground black pepper to the yolks.
-
Mash the yolk mixture with a fork until it is completely smooth and creamy, ensuring no lumps remain.
-
Stir in 10 drops (or more, as needed) of orange gel food coloring until the mixture is evenly colored and a vibrant pumpkin-orange.
-
Transfer the creamy orange filling to a piping bag fitted with a star tip (or a Ziploc bag with a corner snipped off). Pipe the filling artfully back into the hollowed egg white halves, creating eerie, creamy centers.
-
Sprinkle each filled egg with a few black sesame seeds for a finishing spooky touch and added texture.
-
Arrange your Halloween Deviled Eggs on a serving platter and keep them refrigerated until you are ready to serve these hauntingly delicious treats!
Creative Ways to Enjoy Leftover Halloween Deviled Eggs (If There Are Any!)
While these spooky deviled eggs are usually devoured quickly, sometimes you might find yourself with a few leftover halves. Don’t let them go to waste! Here are some delicious and creative ways to repurpose your Halloween Deviled Eggs:
Troubleshooting Common Deviled Egg Dilemmas
Even the most seasoned home cooks can encounter small hiccups when making deviled eggs. Don’t let these minor issues scare you away from creating your spooky treats! Here are some common problems and their easy solutions:
Perfect Eggs Every Time: Learn How to Hard-Boil Eggs with My Foolproof Recipe
Achieving consistently perfect hard-boiled eggs is the first step to deviled egg success. If you often struggle with peeling or getting the yolk just right, my detailed guide will walk you through the process for flawless results, every single time. It’s an essential skill for any deviled egg enthusiast!
Frequently Asked Questions About Halloween Deviled Eggs
How far in advance can I prep these Halloween Deviled Eggs?
You can hard-boil and dye your eggs up to 2-3 days in advance and store them unpeeled in the refrigerator. The yolk filling can also be prepared a day or two ahead and stored in an airtight container. For the best taste, texture, and visual appeal, it’s best to assemble and pipe the deviled eggs on the same day you plan to serve them, ideally a few hours before your party.
Can I add cheese to the filling for extra flavor?
Absolutely! A little shredded sharp cheddar, smoked gouda, or even a tablespoon of cream cheese (as already included in this recipe for texture) can add wonderful richness and a savory twist to the yolk mixture. Experiment with small amounts to find your favorite cheesy combination.
Can I make these vegan?
While this specific recipe uses eggs, you can find excellent vegan deviled egg recipes that typically use potatoes or chickpeas as the “yolk” base and vegan mayonnaise. You could adapt the spiderweb dyeing technique to vegan egg whites if you use a plant-based alternative that holds its shape well.
What kind of food coloring is best for the spiderweb effect?
Gel food coloring is highly recommended. It’s concentrated, so you need less of it, and it won’t dilute your dye bath as much as liquid food coloring. Black is used here for the spooky web effect, but you could experiment with dark purple or deep blue for a different eerie vibe.
DON’T MISS THESE HOLIDAY E-BOOKS! Unlock More Festive Recipes!


If you love this spooky recipe, you’re going to love these other favorite Halloween recipes, too. Please click each link below to find the easy, printable recipe!
Check out this recipe

Check out this recipe
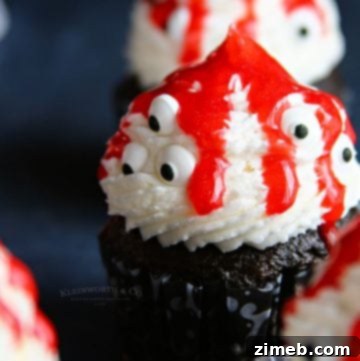
Check out this recipe

Check out this recipe

Check out this recipe
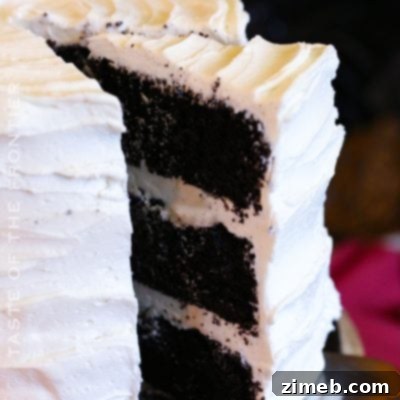
More Easy Halloween Appetizers and Snacks to Die For
Complete your hauntingly delicious Halloween spread with these other fantastic, easy-to-make appetizers and snacks. Perfect for parties, trick-or-treaters, or just a fun family night!
Mummy Dogs: Adorable and savory, these hot dogs wrapped in crescent roll strips and baked to golden perfection resemble spooky mummies. A guaranteed hit with kids!
Mummy Candy Apples: A sweet and spooky take on a classic fall treat, these candy apples are decorated to look like wrapped mummies, adding a ghostly touch to your dessert table.
Halloween Snack Mix: A festive and customizable mix of sweet and salty treats, perfect for munching on during a Halloween movie night or serving in a big bowl at your party.
Purple Hooter Shot Recipe: For the adults, this vibrant purple shot is both delicious and visually striking, adding a fun, mysterious element to your grown-up Halloween festivities.
CONNECT WITH YUMMI HAUS!
Be sure to follow me on my social media, so you never miss a post!
Substack, FB, Pinterest, IG, Email Subscription

Rate this Recipe
Halloween Deviled Eggs
Ingredients
Instructions
Nutrition
Nutritional information for the recipe is provided as a courtesy and is approximate. Please double-check with your own dietary calculator for the best accuracy. We at Yummi Haus cannot guarantee the accuracy of the nutritional information given for any recipe on this site.