
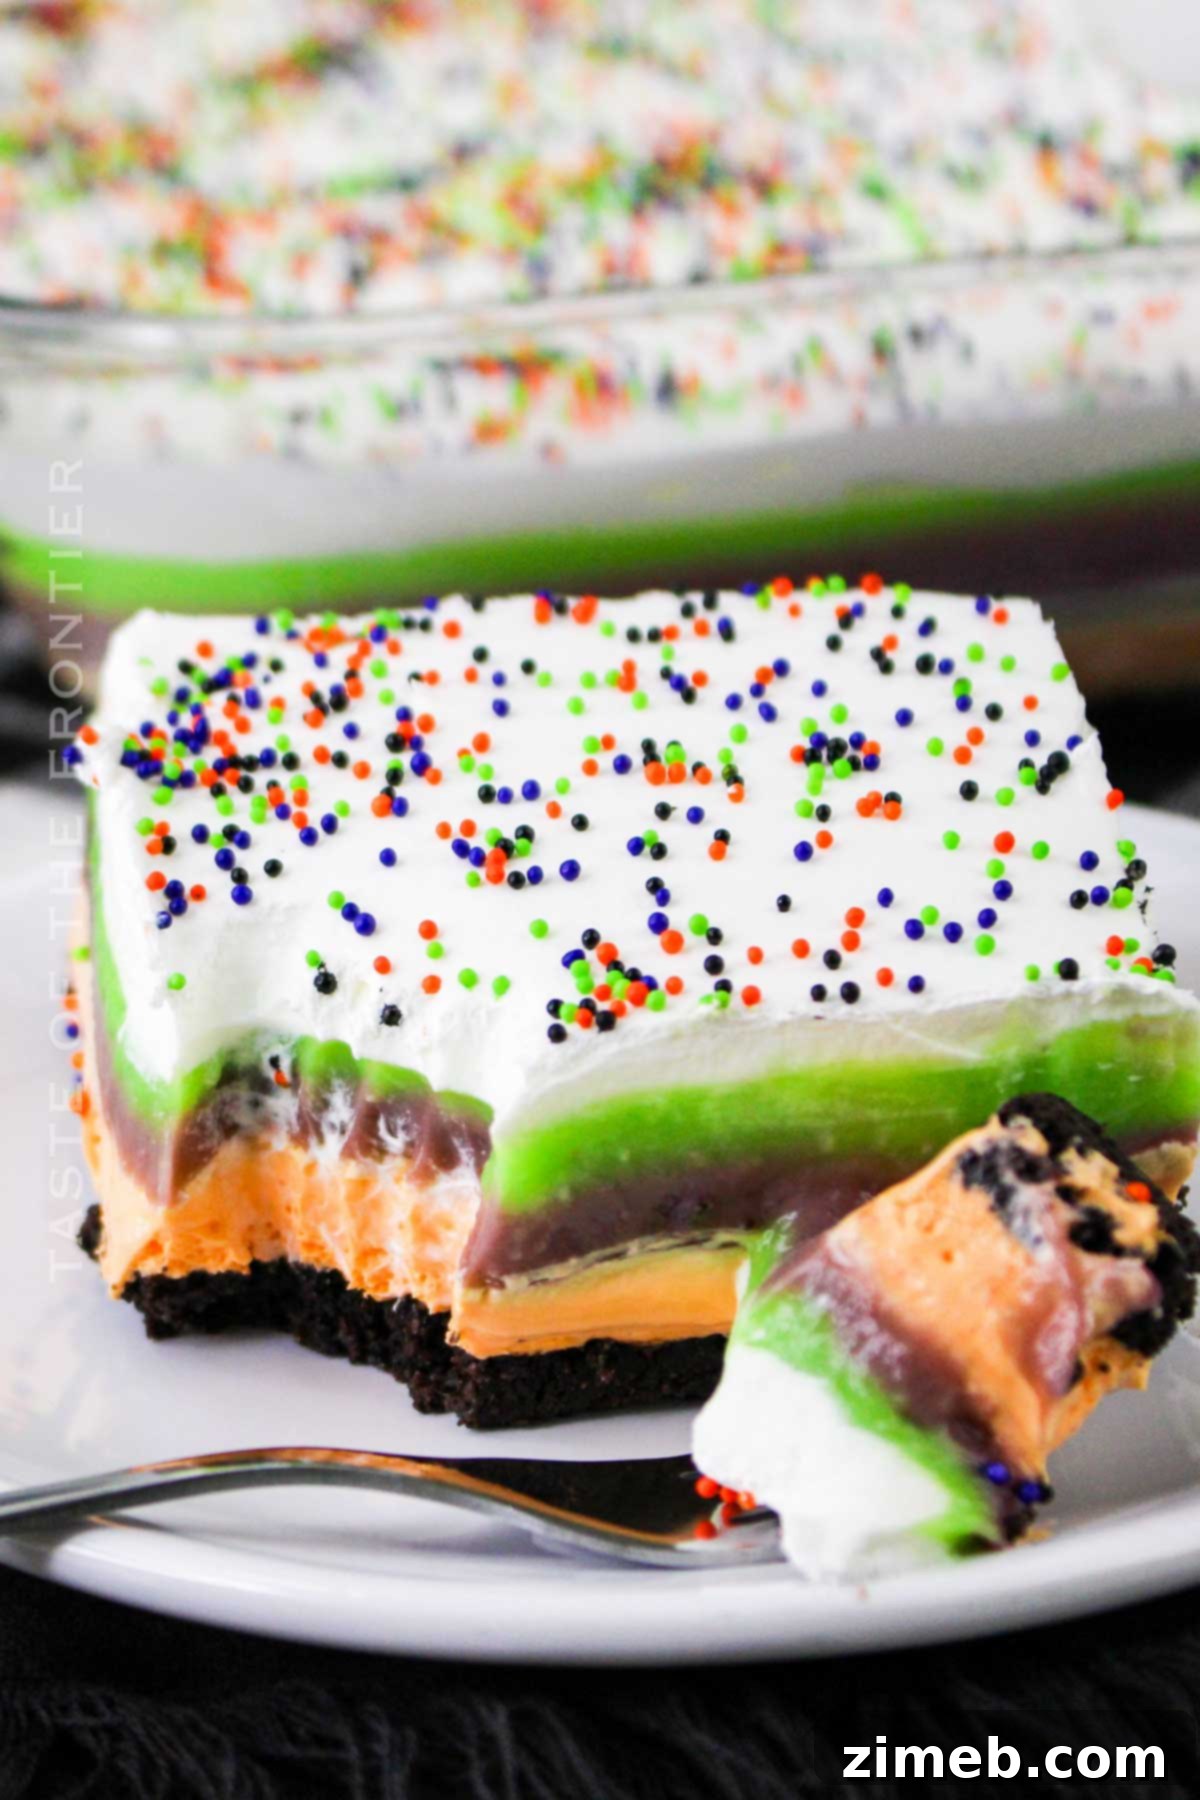
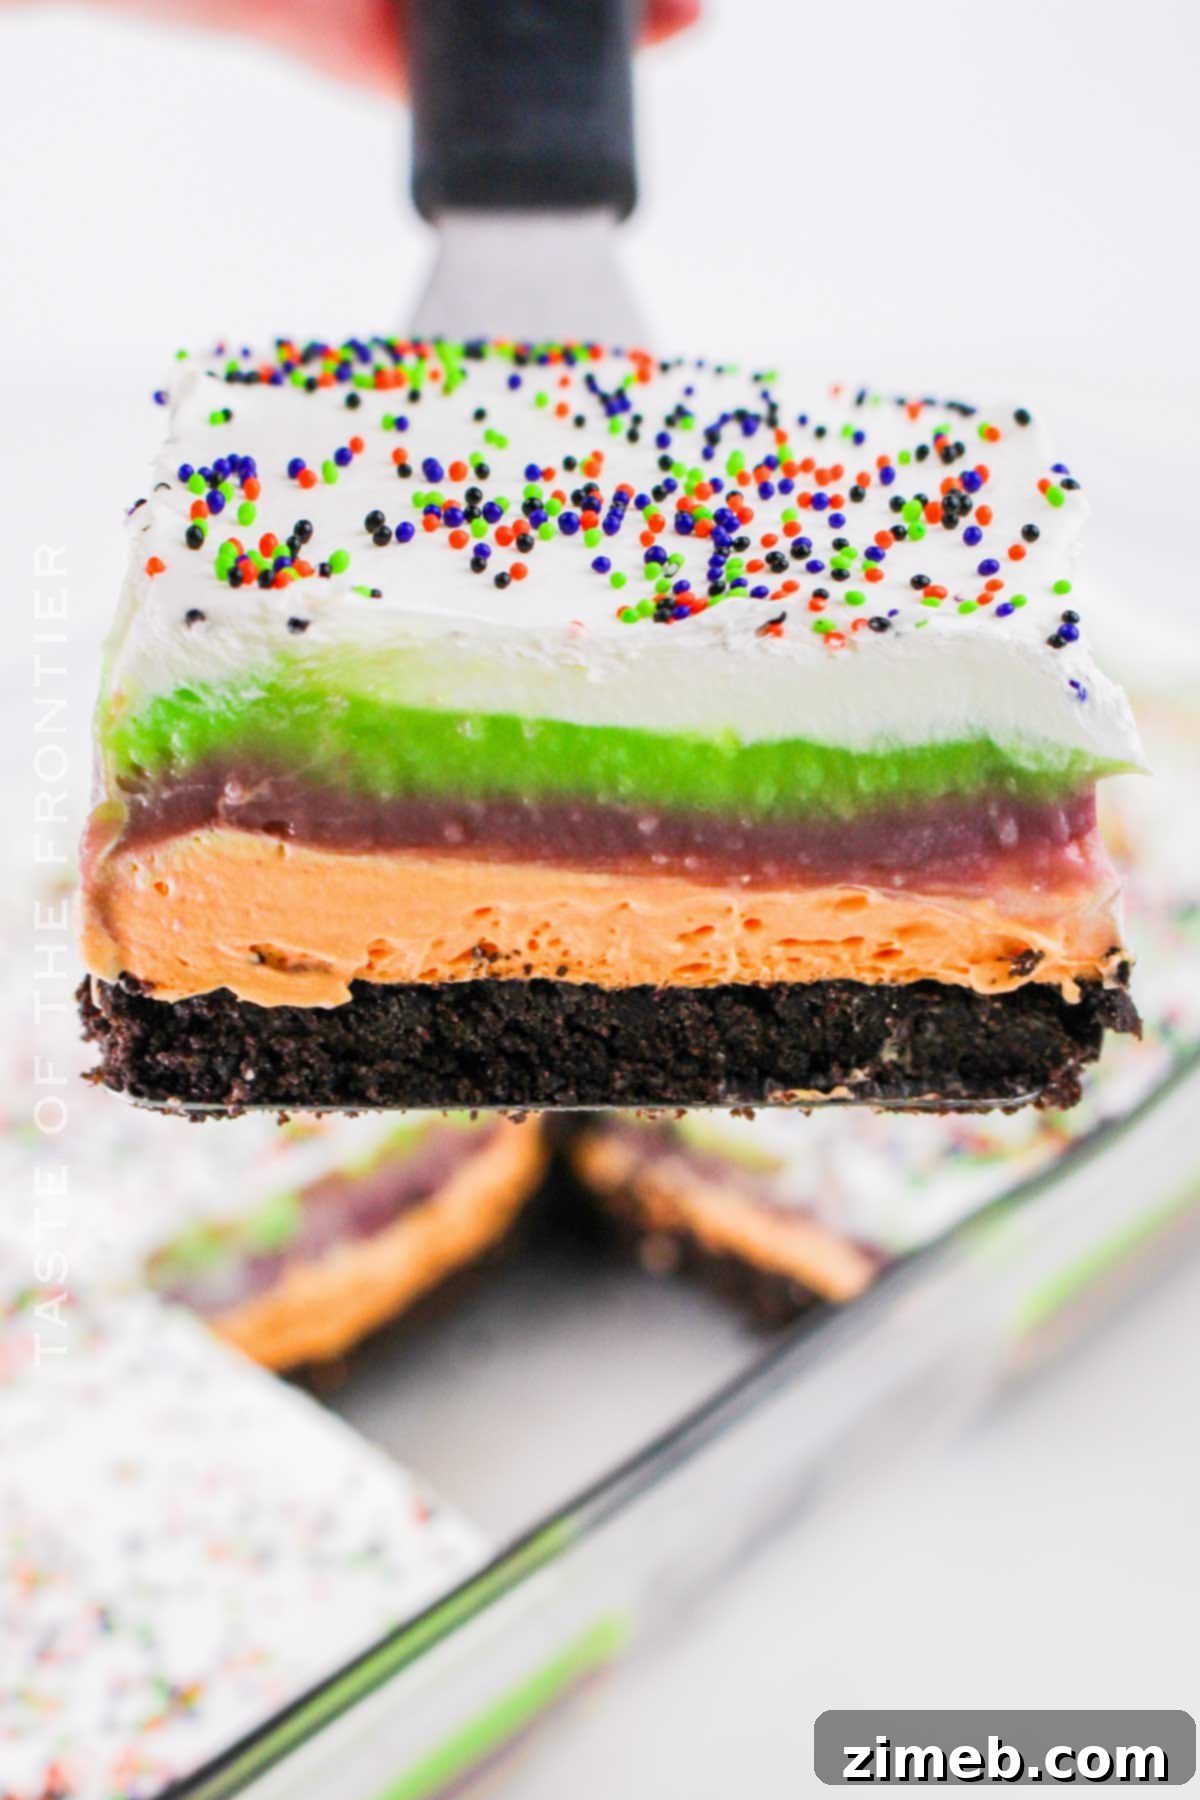
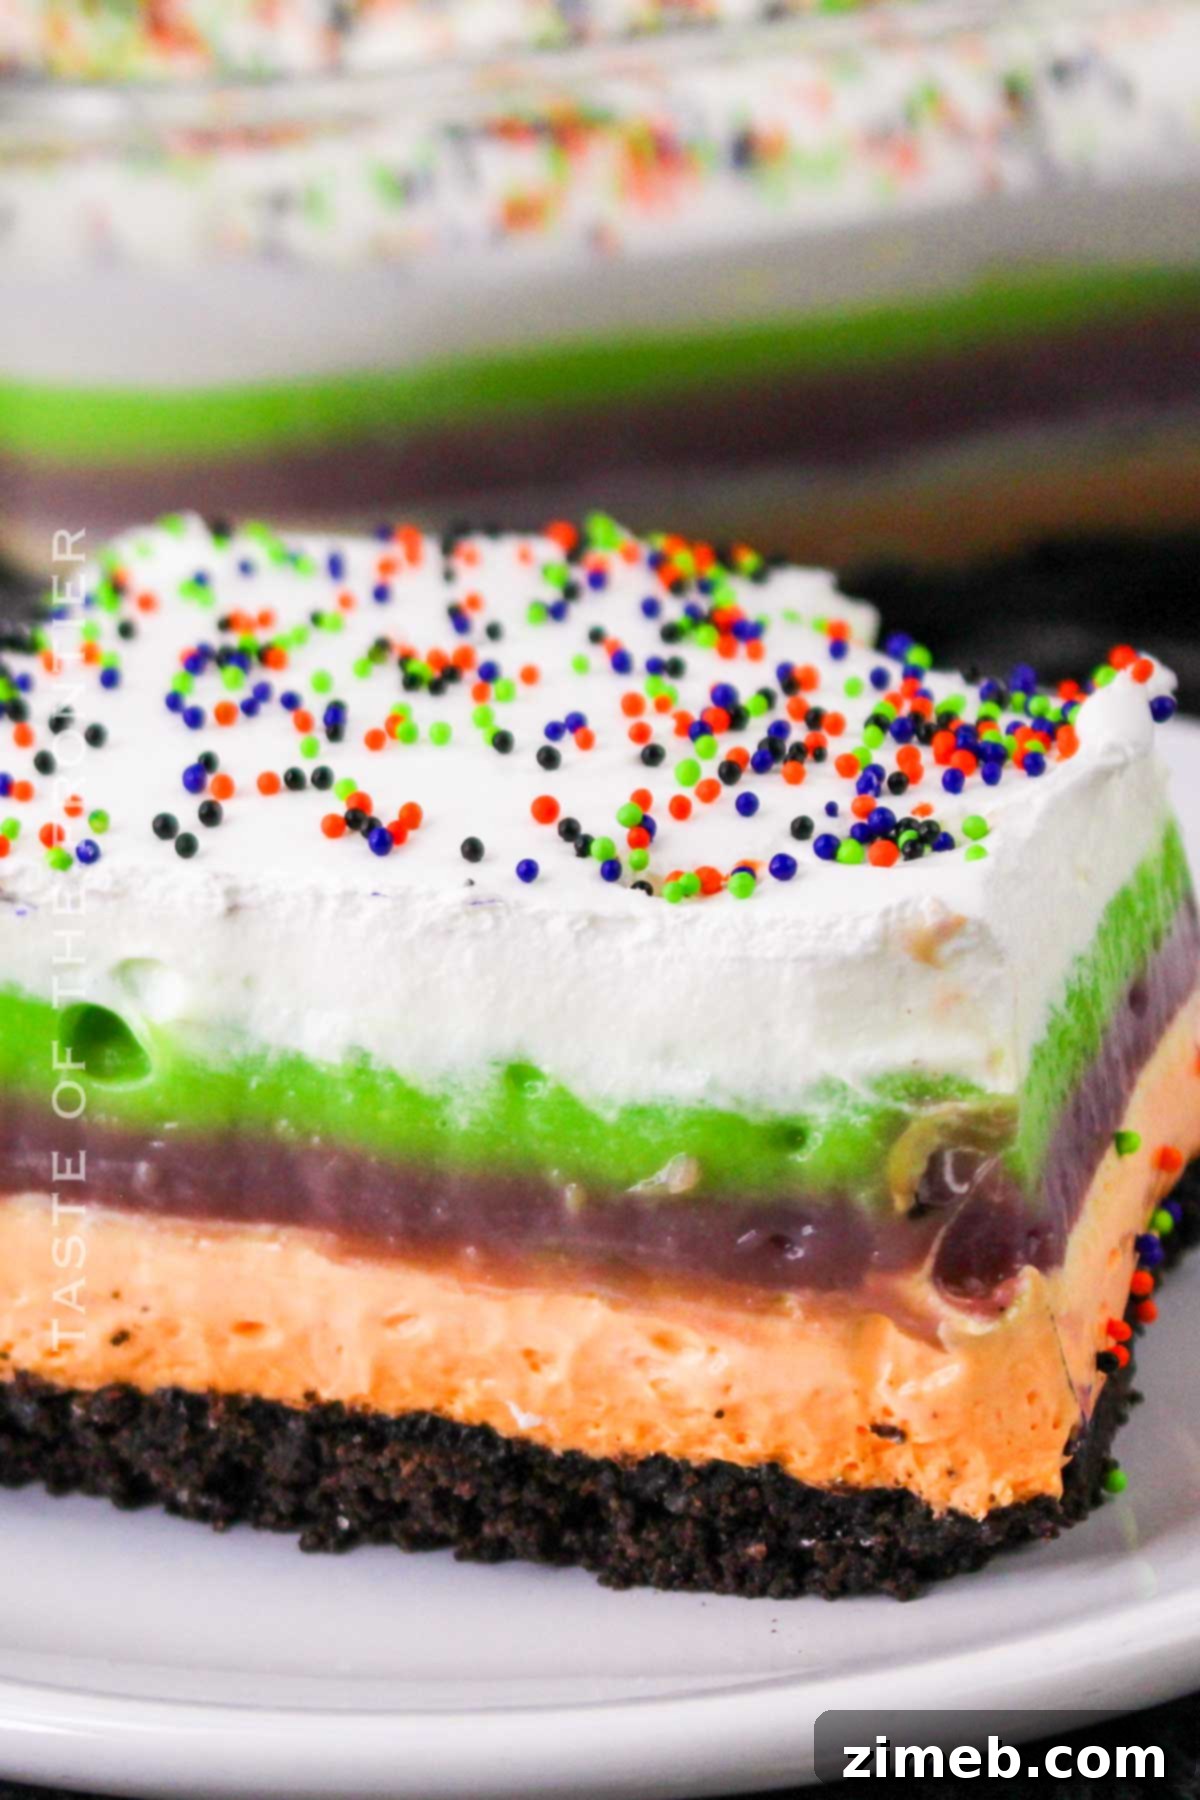
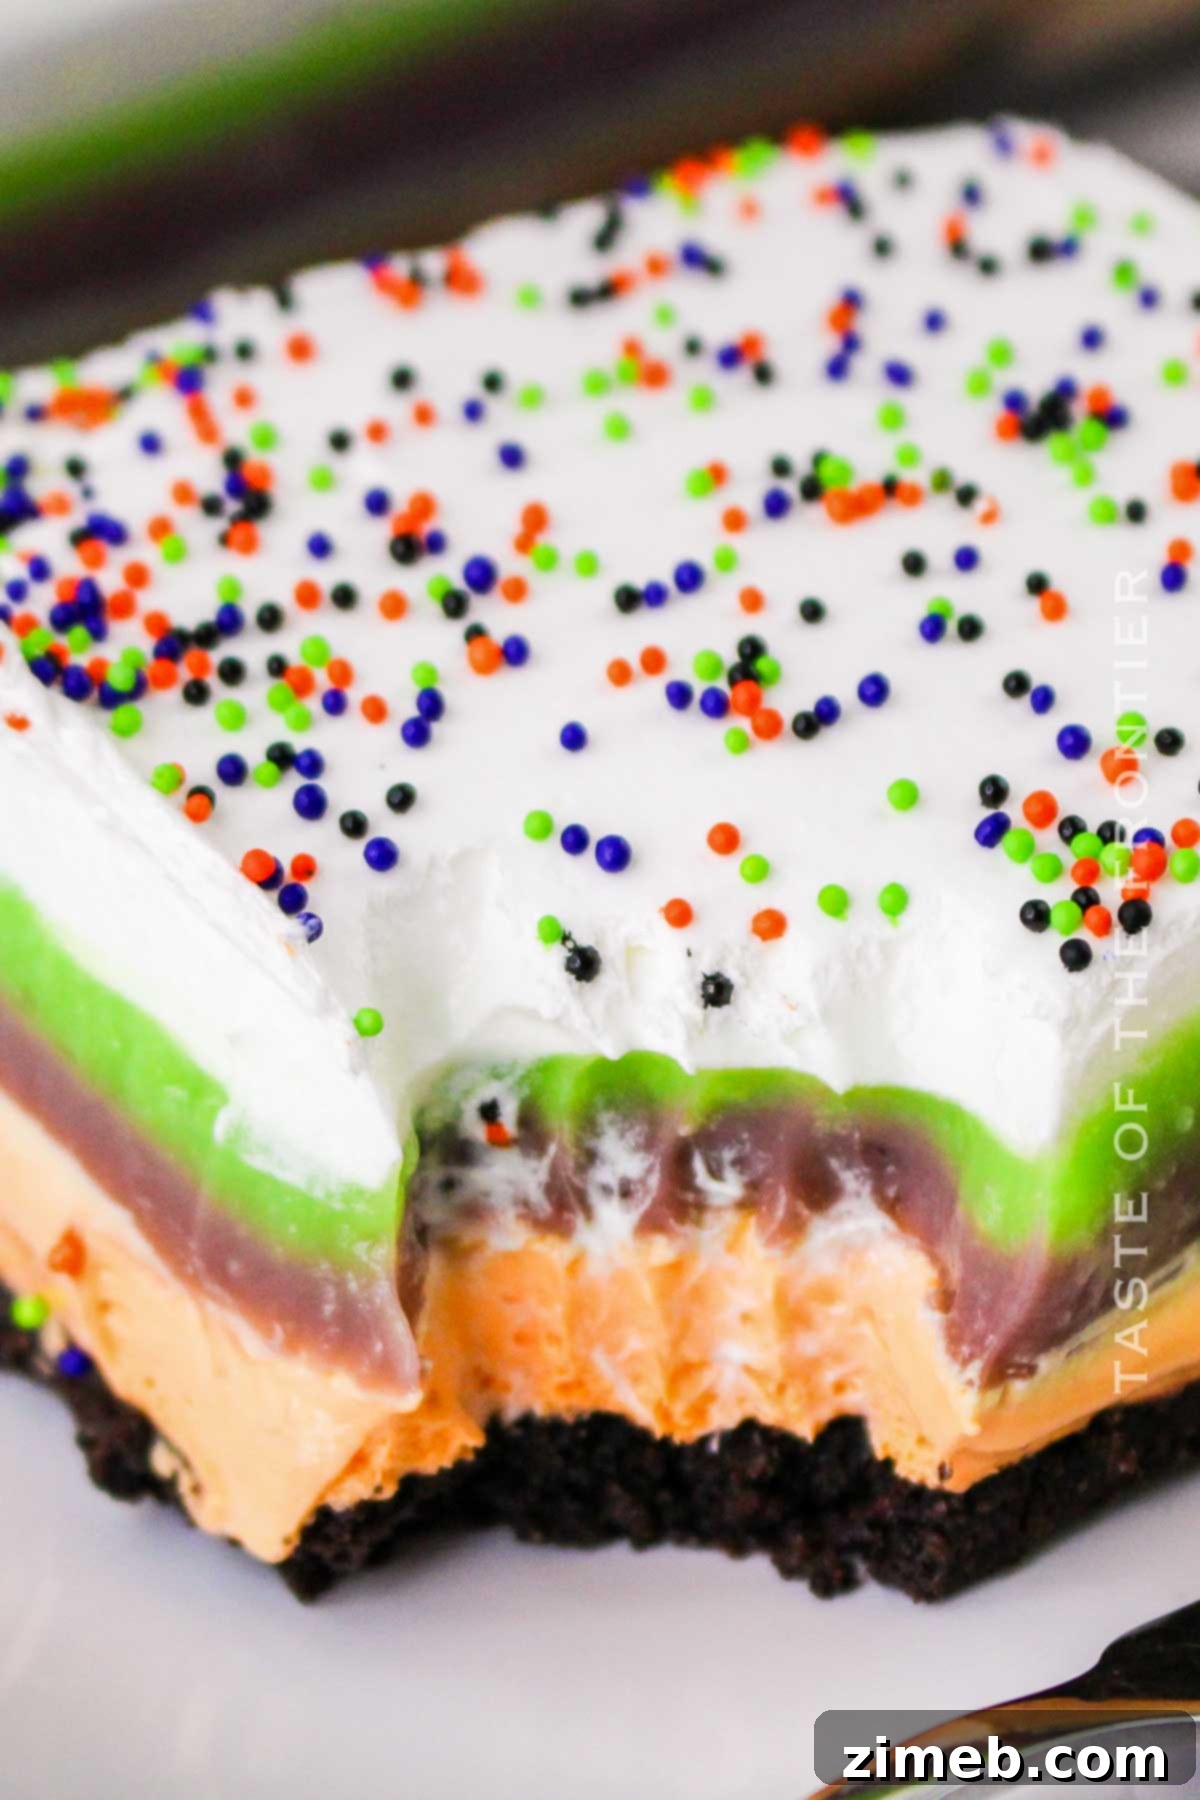
Get ready to enchant your taste buds and impress your Halloween party guests with this mesmerizing **Halloween Lush**! This no-bake dessert is a vibrant spectacle of orange, purple, and green layers, making it the ultimate festive centerpiece for any spooky celebration. Crafted with a rich, homemade cookie crust, a luscious creamy cheesecake layer, and delightful fruity pudding layers, it’s an effortless yet incredibly tasty treat that promises to be a crowd-pleaser.
Forget the oven and the stress of complex baking. This easy, colorful dessert comes together with minimal effort, allowing you more time to enjoy the Halloween fun. Each spoonful offers a harmonious blend of textures and flavors, from the crunchy chocolate crust to the silky smooth, vividly colored fillings, all crowned with a fluffy whipped topping and festive sprinkles. It’s not just a dessert; it’s an experience!
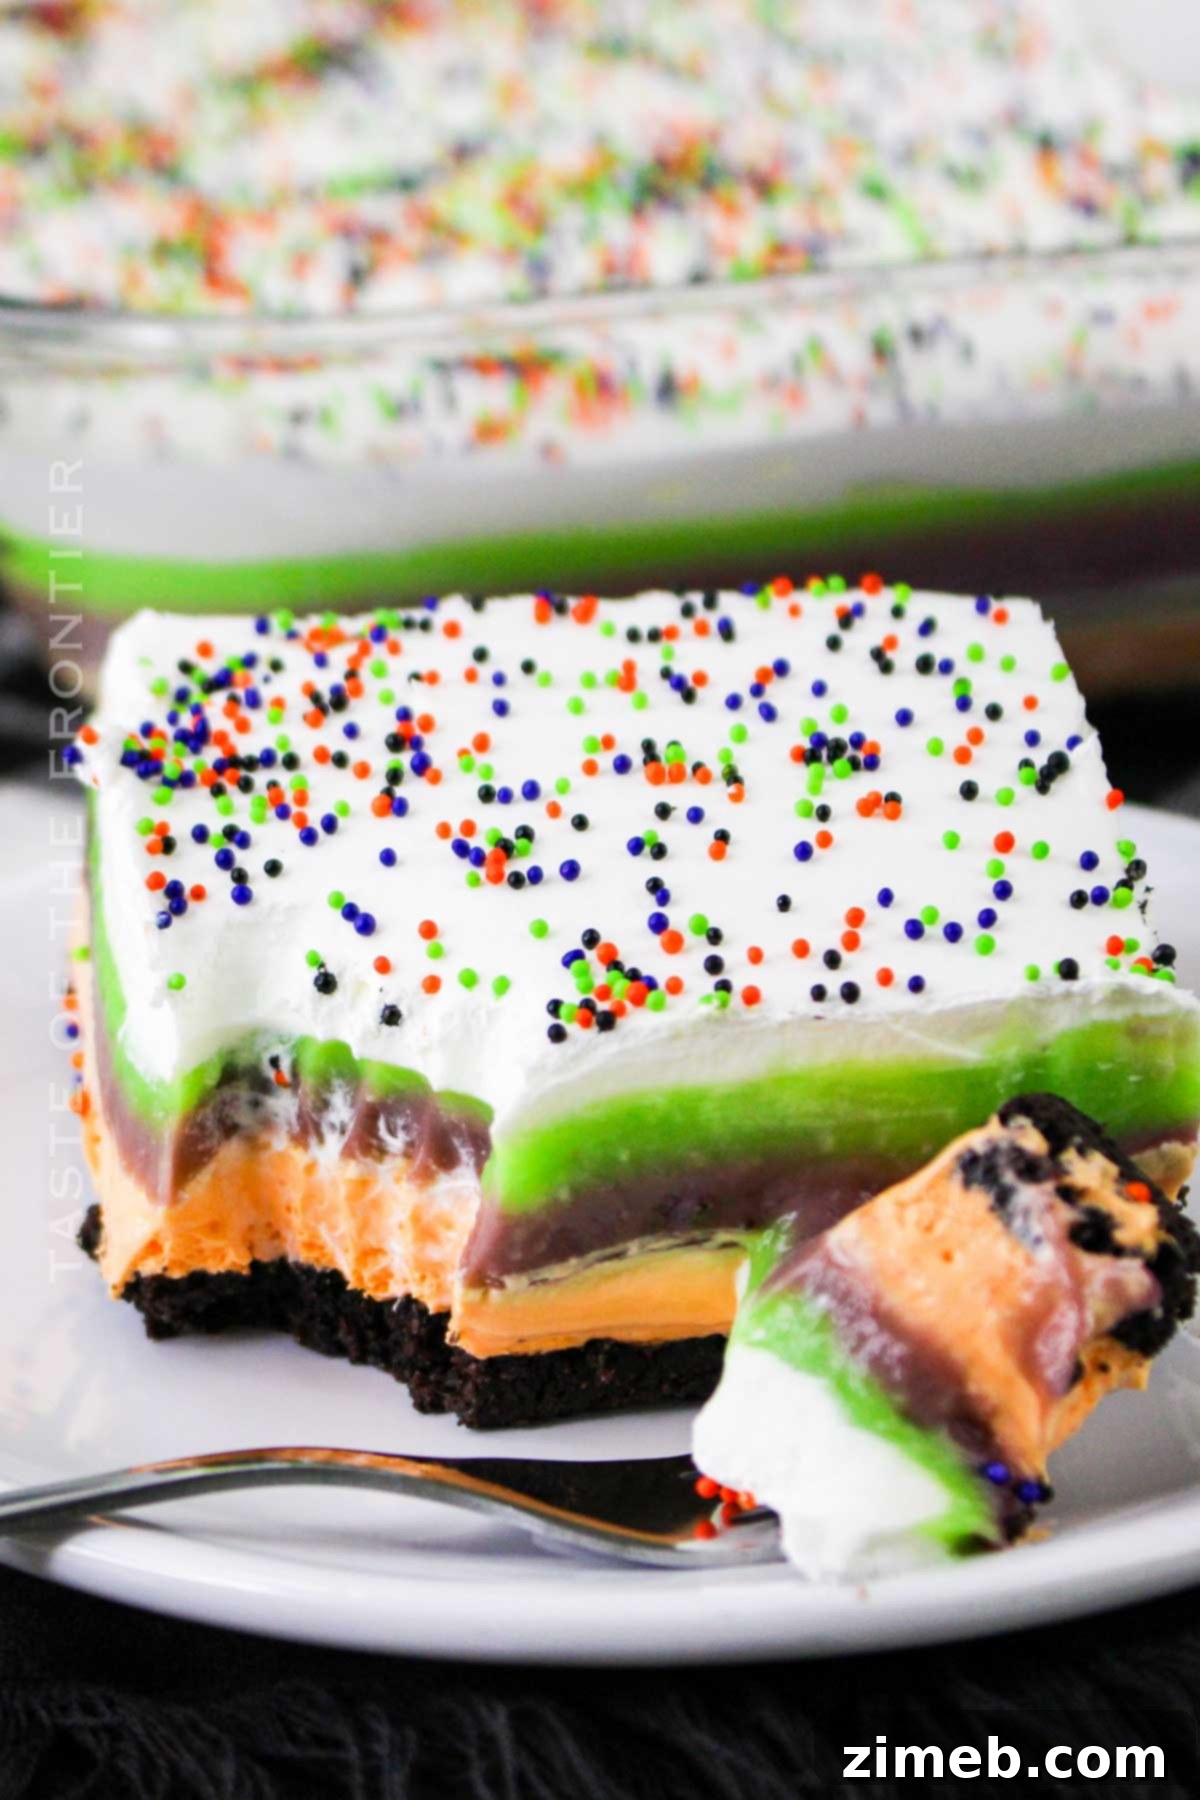
Halloween festivities are synonymous with sharing joy, dressing up in imaginative costumes, and indulging in delightful treats. This spectacular Halloween Lush perfectly embodies that spirit. It’s “dressed up” in eye-catching, spooky colors that artfully conceal layers of vanilla, pistachio, and chocolate-inspired flavors. Each vibrant layer contributes to a dessert that’s as fun to look at as it is to eat.
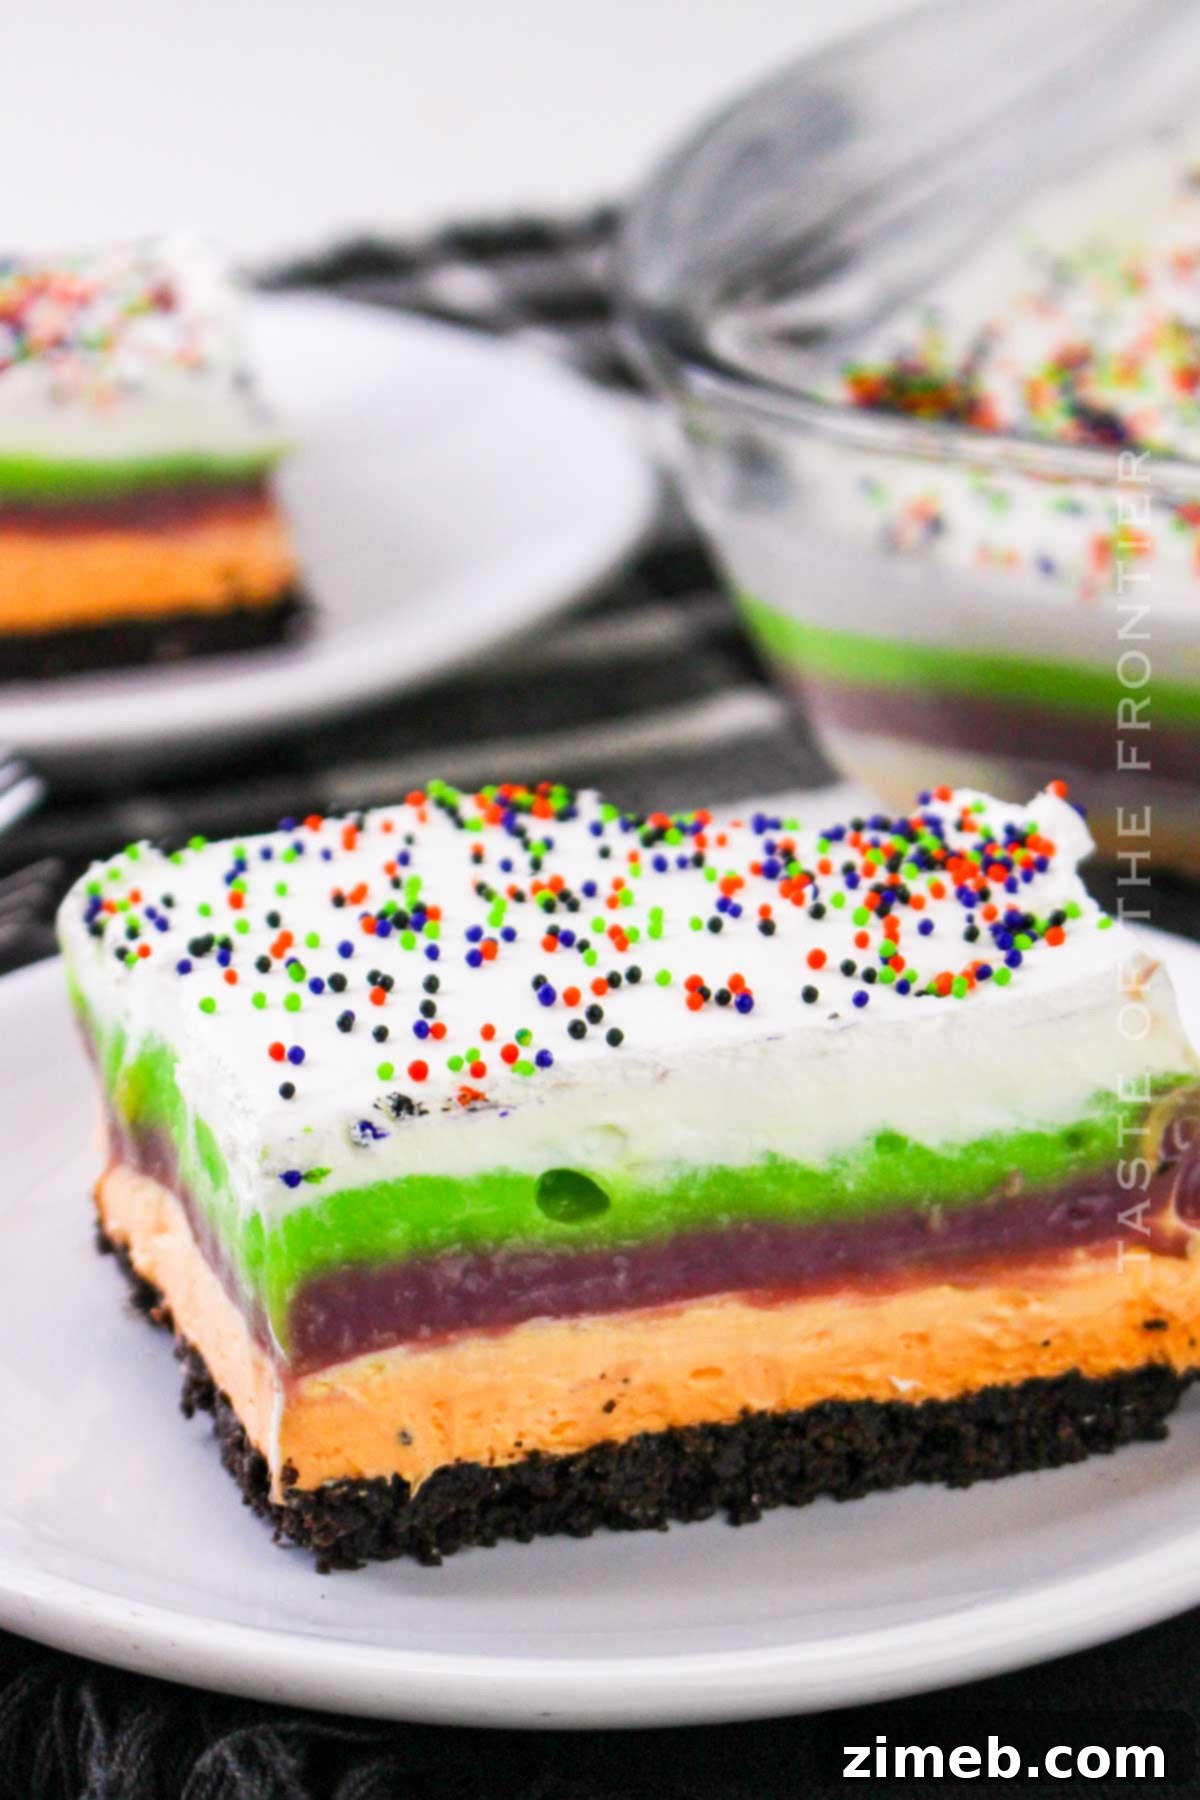
Why This No-Bake Halloween Lush is a Must-Make This Season
Looking for the perfect dessert to elevate your Halloween celebrations? This Halloween Lush offers a multitude of compelling reasons to earn a spot on your holiday menu:
- Effortless No-Bake Perfection: This is the ultimate no-bake dessert for any Halloween party, potluck, or family gathering. With a mere 30 minutes of active prep time, it’s a dream come true for busy home chefs. Plus, it can be entirely made ahead, freeing up your time on the day of the event. Designed to generously serve 12 people, it’s an ideal solution for feeding a crowd without the fuss.
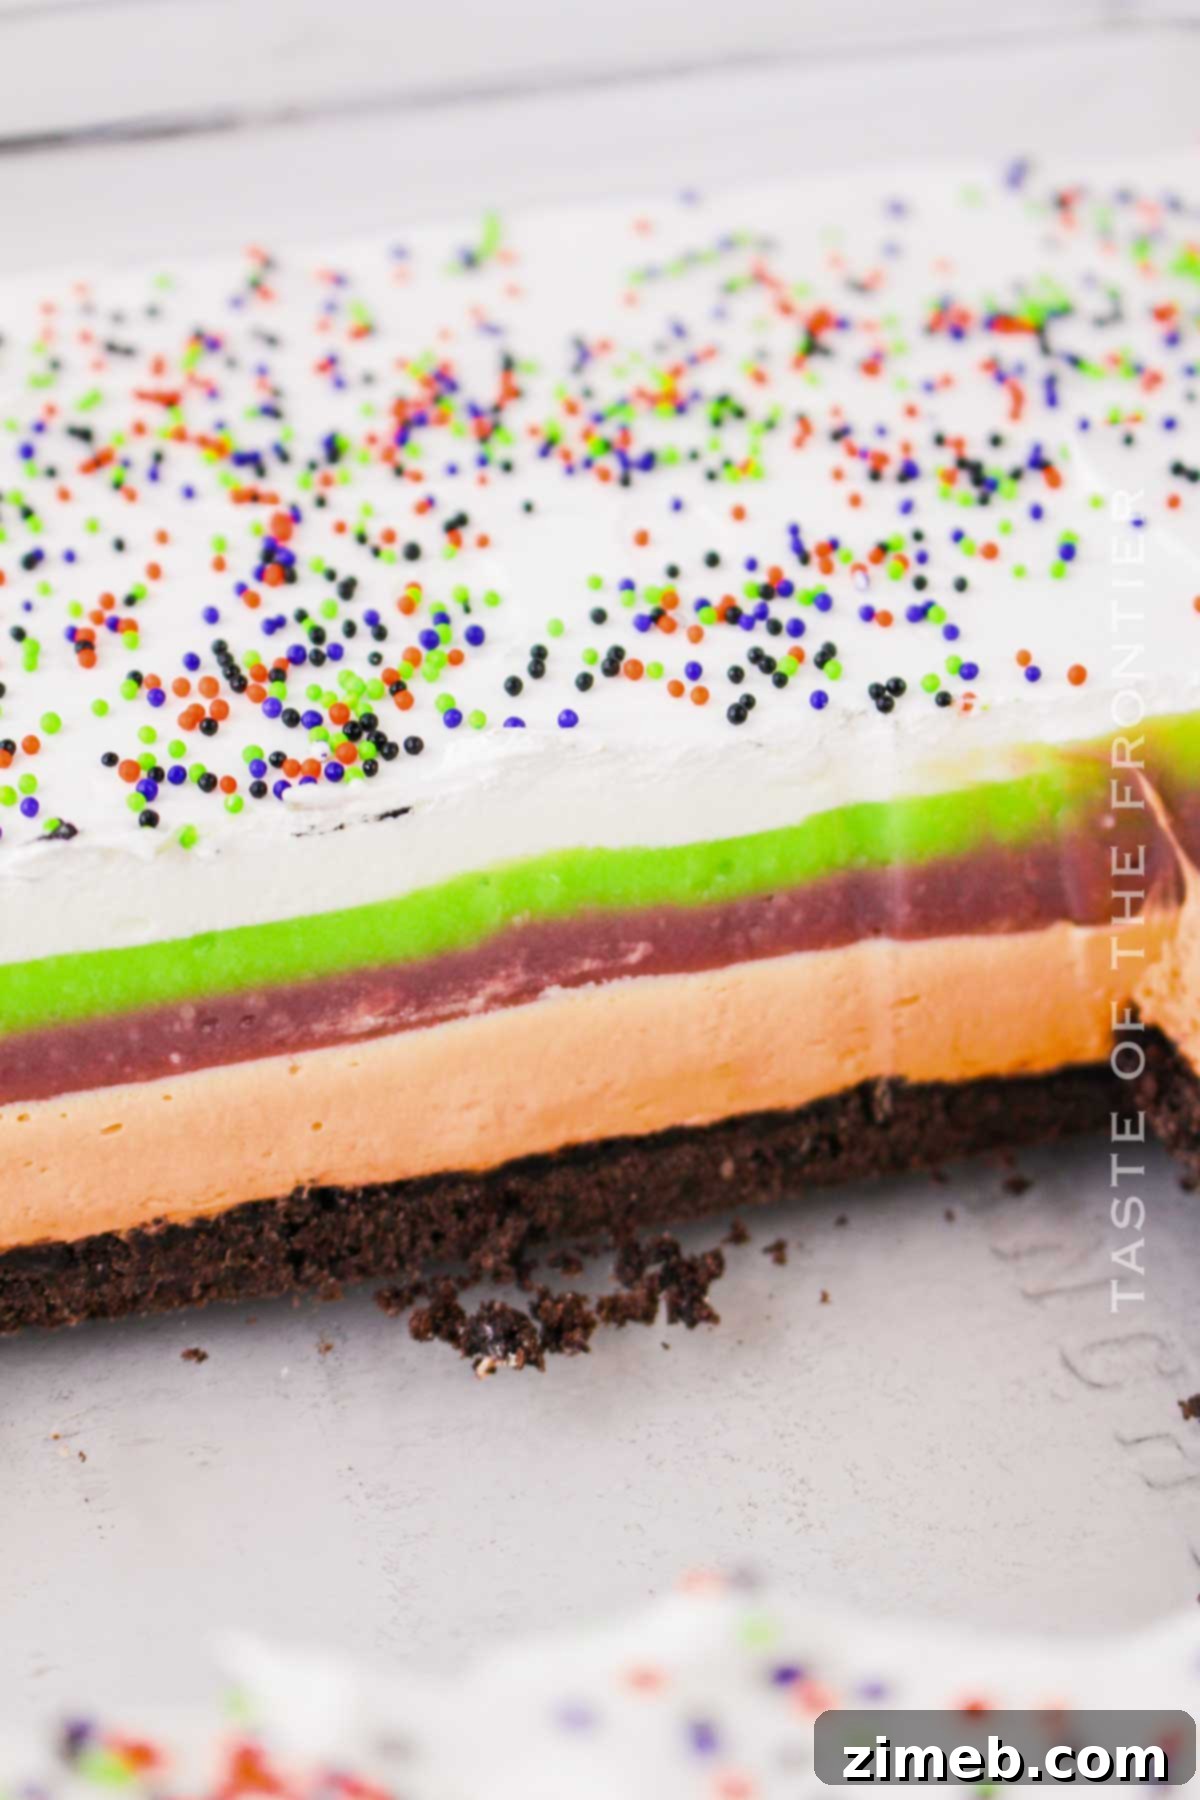
- Visually Stunning and Playfully Colorful: If you adore vibrant colors, whimsical sprinkles, and captivating layered desserts, then this recipe is tailor-made for you. The distinct orange, purple, and green layers create a visually striking effect that will capture everyone’s attention and perfectly complement your Halloween décor. It’s a truly festive and joyful dessert!
- Gelatin-Free Simplicity: Many layered desserts rely on gelatin, which can sometimes be tricky to work with. This recipe bypasses gelatin entirely, utilizing readily available boxed dry pudding mixes to create each creamy, flavorful layer. This simplifies the process and ensures a consistent, delightful texture every time.
- Generous Layers and Extra Whipped Topping: We believe in making desserts extra special. Unlike many standard lush recipes, this version features more distinct layers, providing a richer, more complex taste and texture profile. We also don’t skimp on the whipped topping, ensuring every slice is generously crowned with light, airy sweetness.
Understanding the Delightful “Lush” Dessert
Originating in American culinary traditions, a “Lush” dessert is a classic no-bake treat renowned for its distinctive layered structure. Imagine a sweet, layered lasagna, but instead of pasta and savory fillings, you have a delightful base of crumbly crust, creamy pudding layers, and a generous topping of whipped cream. It’s a dessert that has stood the test of time, remaining incredibly easy to prepare and consistently delicious, making it a beloved staple for generations.
While the word “Lush” might conjure images of fragrant bath products for some – and indeed, the Lush Halloween collection is wonderfully spooky, aromatic, and fantastic for skin care, with its bubble baths, essential oils, shower gels, and lip scrubs – in the world of cooking and baking, “Lush” refers exclusively to this delectable food category. For us, especially during this time of year, it’s all about indulging in yummy Halloween treats, and this dessert certainly fits the bill!
Essential Ingredients for Your Spooky Lush
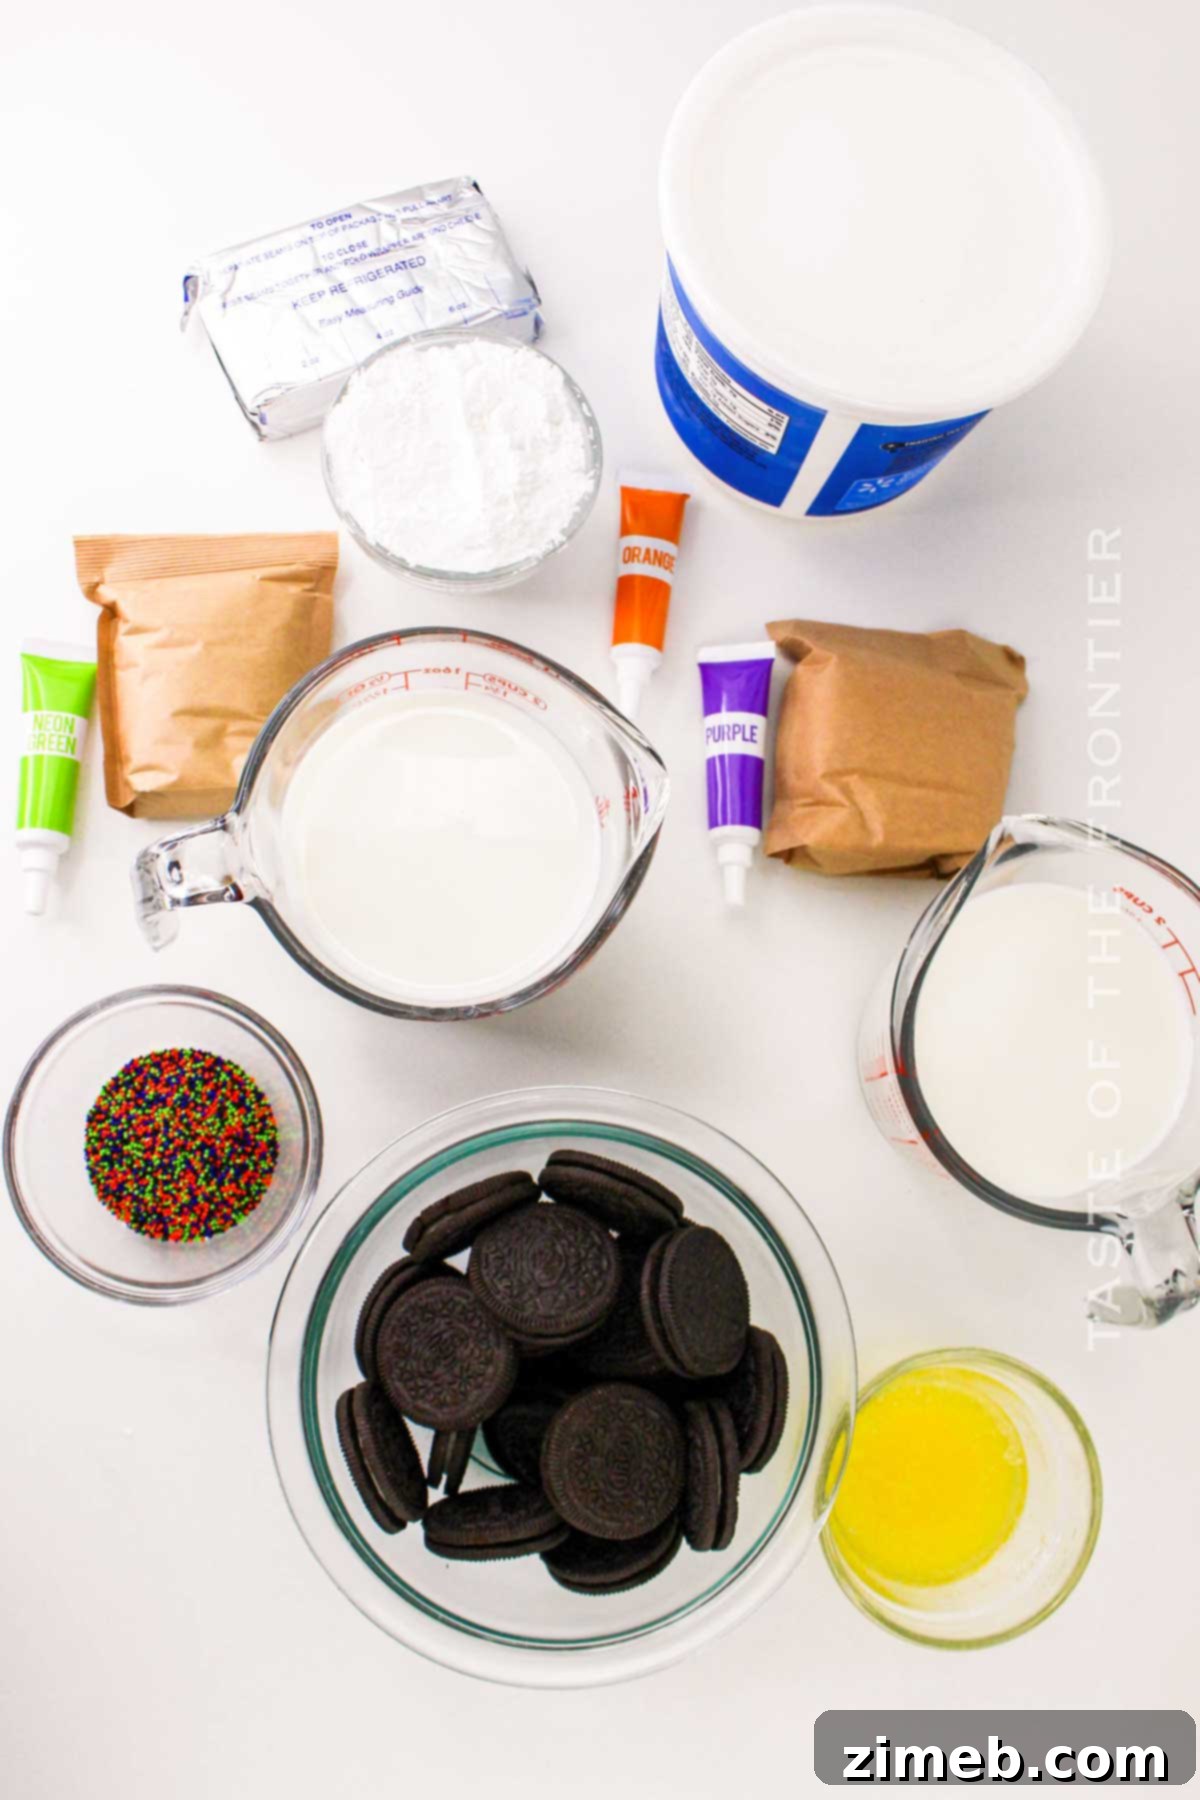
Crafting this vibrant Halloween Lush requires a selection of readily available ingredients, divided into three main components: the irresistible cookie crust, the colorful pudding and cream cheese layers, and the festive topping.
For the Perfect Cookie Crust
- Chocolate Cookie Crumbs: The foundation of this lush dessert starts with a rich, chocolatey crust. Any chocolate sandwich cookies will work wonderfully, such as classic Oreo cookies. You can also opt for graham crackers or similar crisp cookies if you prefer a different base flavor. Ensure they are finely crushed into crumbs.
- Melted Butter: This essential ingredient acts as the binder, bringing the cookie crumbs together to form a firm, flavorful crust that holds its shape beautifully.
For the Eye-Catching Halloween Colored Layers
- Softened Cream Cheese: The star of our creamy orange cheesecake layer. Using softened cream cheese ensures a smooth, lump-free consistency that melts in your mouth.
- Confectioner’s Sugar (Powdered Sugar): This fine sugar sweetens the cream cheese layer and contributes to its silky texture.
- Whipped Topping: We’ll use a generous amount of whipped topping for both the creamy layers and the final flourish. Be sure to have at least 2 cups ready. Frozen whipped topping (like Cool Whip) or homemade whipped cream will both work.
- Instant Vanilla Pudding Mix: This is key for creating the vibrant purple cream layer without needing to cook custard from scratch. It saves precious time while delivering excellent flavor.
- Instant Pistachio Pudding Mix: Chosen for its natural green hue and delightful nutty flavor, the pistachio pudding forms our green layer, harmonizing color and taste perfectly.
- Cold Whole Milk: Always opt for whole milk when preparing instant puddings for baking. Its higher fat content results in a richer, creamier, and softer texture for your pudding layers.
- Food Coloring: Orange, green, and purple food colorings are crucial for achieving the signature Halloween aesthetic of this dessert. A few drops are usually enough to create vibrant, opaque colors.
For the Festive Topping
- Additional Whipped Topping: To crown this magnificent dessert, you’ll need another cup of whipped topping, whether it’s store-bought Cool Whip or freshly whipped cream.
- Halloween-Themed Sprinkles: These are a must for decorating and adding that extra festive touch. Look for sprinkles in traditional Halloween colors like black, green, purple, and orange to complete the spooky vibe.
Essential Kitchen Equipment
Having the right tools makes preparing this Halloween Lush a breeze:
- Food Processor or Ziploc Bag with Rolling Pin: For efficiently crushing your cookies into fine crumbs. A food processor is the quickest method, but a Ziploc bag and a rolling pin work equally well for an old-school approach.
- 9×13-inch Baking Dish: This standard size is perfect for creating enough servings for a party. Opt for a dish with a lid if possible, as it makes storing leftovers incredibly convenient.
- Electric Mixer: Essential for combining ingredients smoothly, especially for beating the cream cheese to a light, airy consistency for the orange layer.
- Large Mixing Bowls: You’ll need a few to prepare the different layers separately.
- Rubber Spatula: Ideal for folding in whipped topping and gently spreading layers without disturbing the ones beneath.
Step-by-Step Guide: How to Make Halloween Lush Dessert
Follow these simple steps to create your stunning layered Halloween dessert:
1 – Prepare the Cookie Crust
- Start by crushing your chocolate cookies into fine crumbs. The most efficient way is to use a food processor. If you don’t have one, simply place the cookies in a sturdy Ziploc bag and crush them thoroughly with a rolling pin until uniformly fine.
- In a medium-sized mixing bowl, combine the crushed cookie crumbs with the melted butter. Stir well with an electric mixer or spoon until all the cookie crumbs are evenly moistened.
- Press this mixture firmly and evenly into the bottom of your 9×13-inch baking dish. You can use your hands, the back of a spoon, or the flat bottom of a glass to achieve a compact crust.
- Place the dish in the refrigerator to chill while you prepare the remaining layers. This helps the crust set properly.
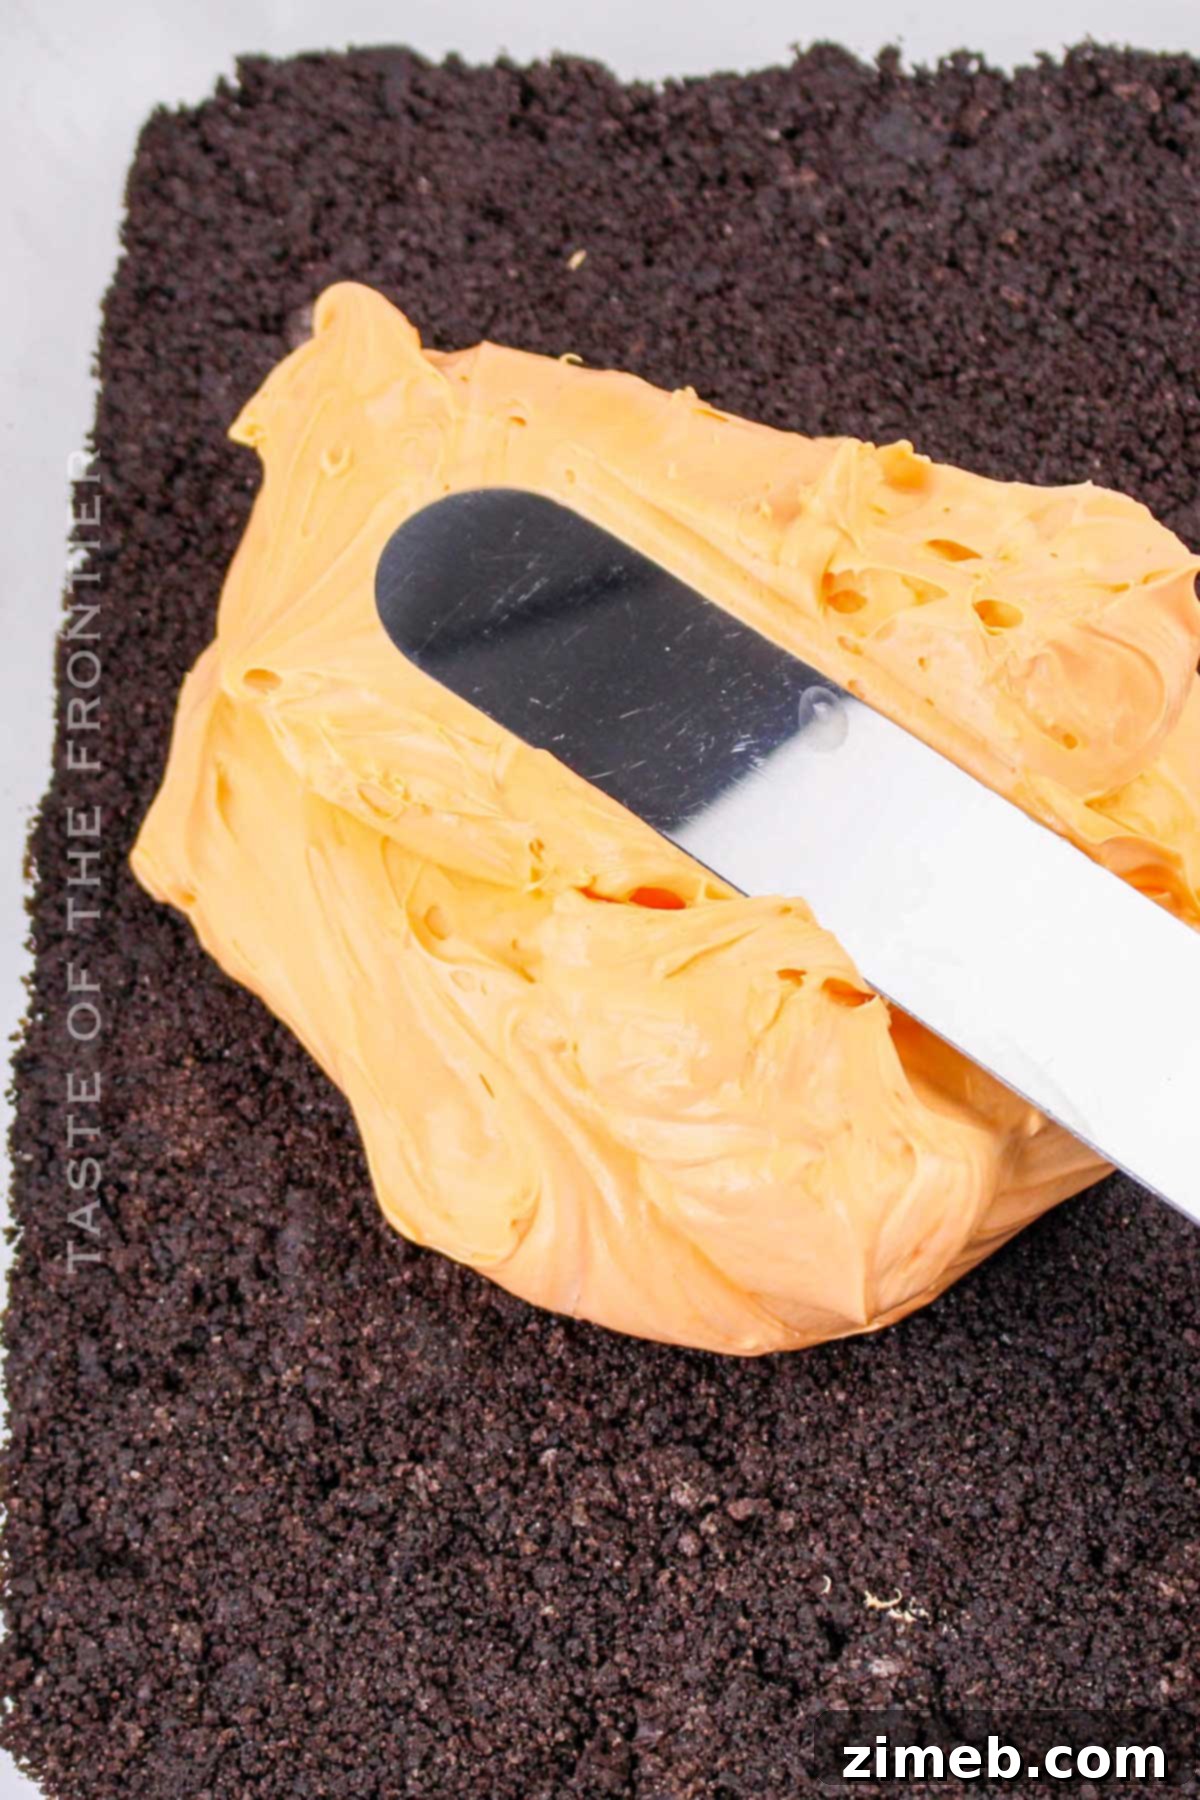
2 – Create the Orange Cheesecake Layer
- In a large bowl, beat the softened cream cheese and confectioner’s sugar with an electric mixer until the mixture is completely smooth and free of lumps.
- Gently fold in 1 cup of whipped topping until just combined, maintaining its light and airy texture.
- Add a few drops of orange food coloring and mix until the color is vibrant and evenly distributed throughout the cream cheese mixture.
- Carefully spread this orange layer over your chilled cookie crust in the baking dish.
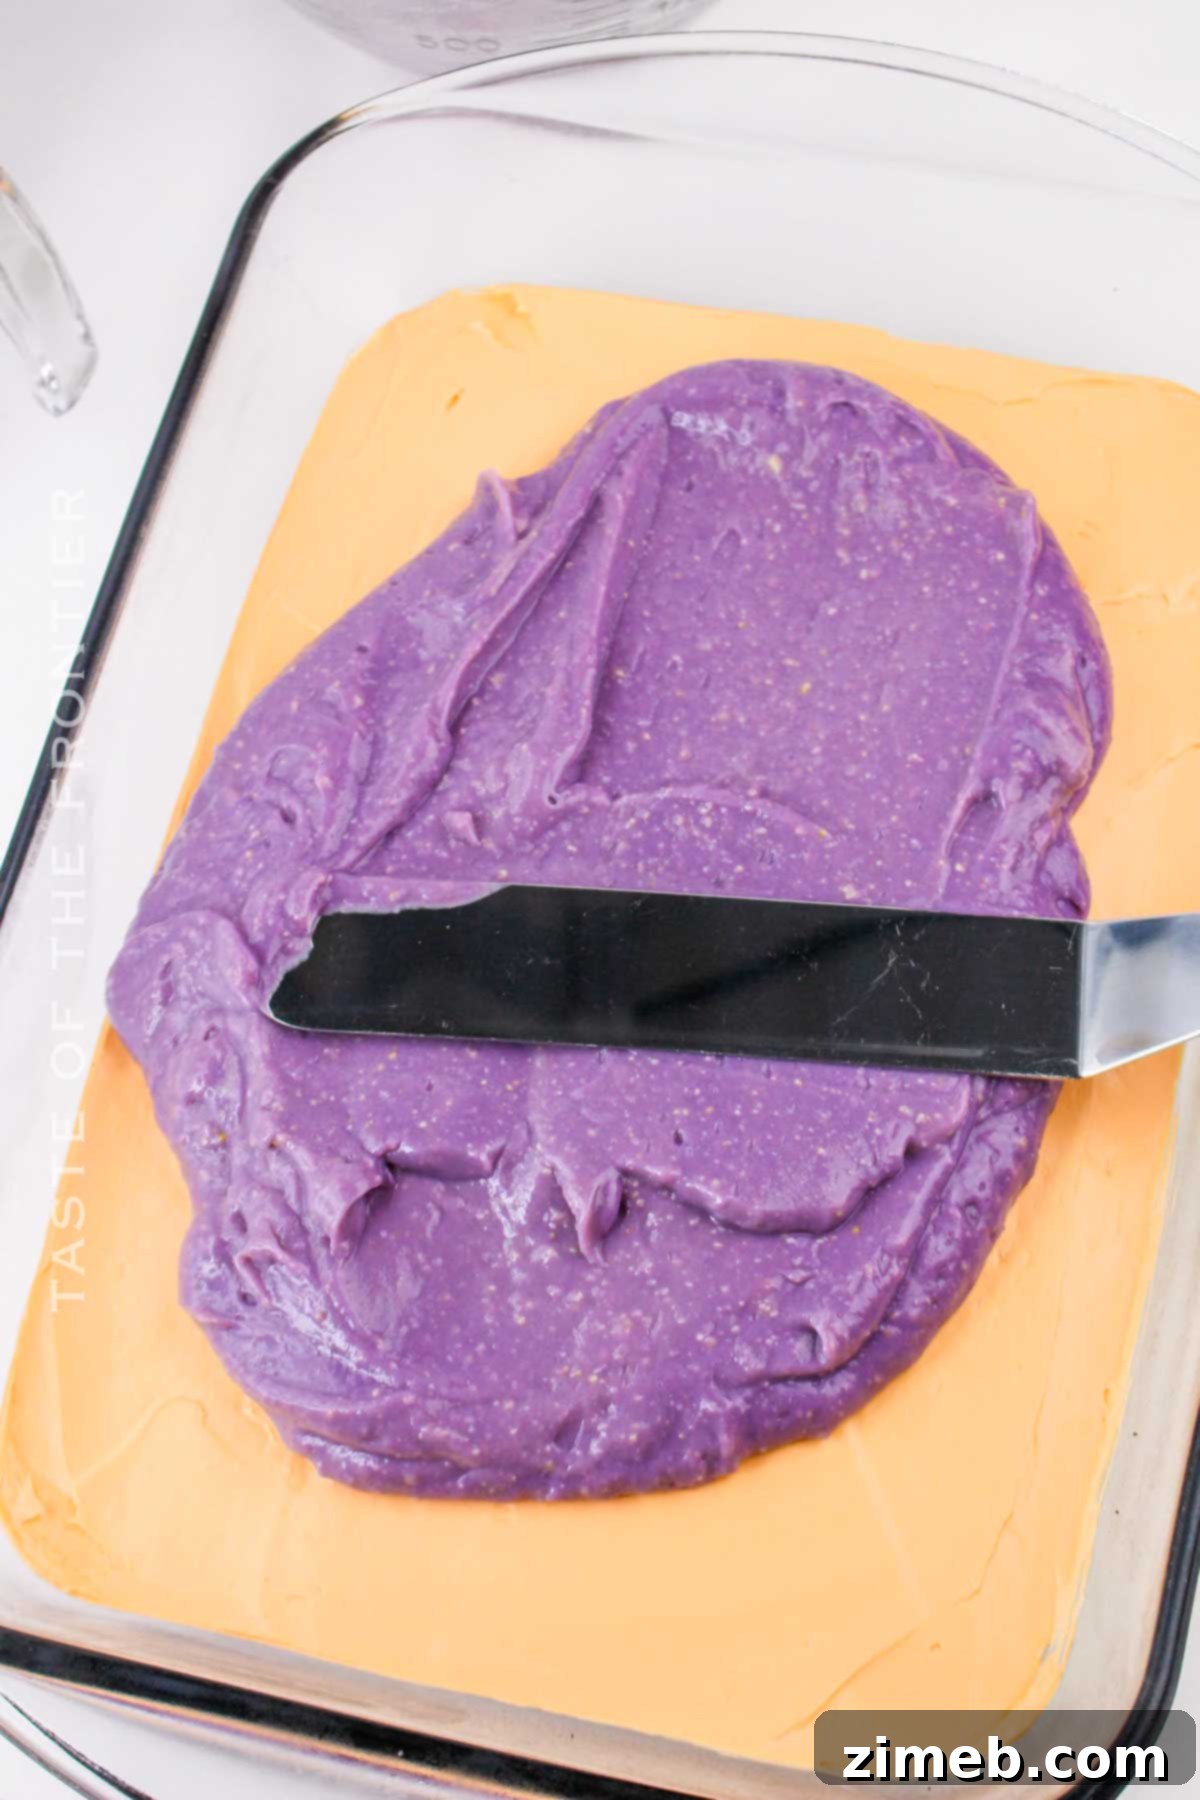
3 – Form the Purple Pudding Layer
- In a separate mixing bowl, whisk together the instant vanilla pudding mix and cold milk until the mixture begins to thicken. Continue whisking for about 2 minutes to ensure it’s well combined and starting to set.
- Add purple food coloring, a few drops at a time, mixing until you achieve your desired shade of purple and the color is uniformly distributed. Allow the pudding to partially set for a few minutes.
- Carefully spread this purple pudding layer over the orange cream cheese layer in your baking dish.
4 – Add the Green Pudding Layer
- In another mixing bowl, whisk the instant pistachio pudding mix and cold milk until it thickens, following the same process as the vanilla pudding.
- Add a few drops of green food coloring and mix until the color is fully combined and evenly distributed throughout the pistachio pudding. Let it partially set.
- Gently spread this green pudding layer over the purple layer, creating a striking contrast.
5 – Final Touches and Topping
- Spread the remaining whipped topping evenly over the green pudding layer, covering the entire surface.
- Refrigerate the dessert for a minimum of 2-4 hours before serving. This crucial chilling time allows all the layers to set properly, ensuring a firm, sliceable dessert.
- Just before serving, generously decorate the top with your favorite Halloween-themed sprinkles for a festive finish.
- Slice the Halloween Lush into squares and serve chilled for the best experience.
Storage Solutions for Your Halloween Lush
One of the many advantages of this Halloween Lush is its excellent make-ahead and storage capabilities. Whether you’re preparing for a party or simply want to enjoy leftovers, here’s how to store it:
- Refrigeration: You can easily prepare this dessert a day in advance and store it in the refrigerator overnight. Once cut into servings, any leftovers should be covered tightly with plastic wrap or transferred to an airtight container. If you used a baking dish with a lid, that provides perfect protection. The dessert will remain fresh and delicious in the refrigerator for up to 4 days.
- Freezing: Lush desserts are exceptionally freezer-friendly, making them perfect for long-term storage. To freeze, ensure the dessert is well-covered with plastic wrap and then aluminum foil to prevent freezer burn. It can be stored in the freezer for up to 3 months.
- Thawing: When you’re ready to enjoy a frozen Halloween Lush, transfer it from the freezer to the refrigerator and allow it to thaw for approximately 1 hour. Be aware that the texture may be slightly softer after thawing, but it will still be wonderfully delicious.
Creative Variations and Smart Substitutes
This Halloween Lush recipe is wonderfully versatile, allowing for numerous creative twists and substitutions to suit your preferences or what you have on hand:
- Pudding Alternatives: While we use instant pudding for ease, you can certainly replace it with Jello for a different texture. If opting for Jello, remember that it contains gelatin and requires boiling water for mixing. Many traditional lush recipes feature an orange gelatin layer, but feel free to customize your Halloween Lush your own way!
- Extra Creamy Cheesecake Layer: For an even smoother and richer orange cheesecake layer, consider adding an extra cup of heavy whipped cream to the mixture. The addition of more whipping cream results in an exceptionally decadent texture.
- Seasonal Flavor Infusion: To introduce more traditional fall and Halloween flavors, you can replace the orange cream cheese layer with a pumpkin filling made from pumpkin puree. This adds a delightful seasonal twist.
- Natural Food Coloring: For those who prefer natural ingredients, you can experiment with natural food colorants. Matcha powder provides a subtle green hue, turmeric can create a dense orange-brown color, and purple sweet potato powder can achieve a beautiful purple layer. I haven’t extensively experimented with these myself, but the possibilities are intriguing!
- Minty Green Layer: Instead of pistachio, the green layer can be infused with a refreshing mint flavor. Consider using a mint-flavored pudding mix or adding a few drops of food-grade mint extract for a cool twist.
- Decorating Extravaganza: Beyond traditional Halloween sprinkles, let your imagination run wild! Add edible glitter, chocolate drizzles, or adorable edible googly eyes for a whimsical touch. You can even prepare a mix of various decorations in a small bowl to sprinkle over the entire dessert, or individually adorn each slice with jelly spiders or gummy worms for an extra spooky surprise.
- Color Customization: While we’ve chosen orange, purple, and green from bottom to top, the order and colors are entirely up to you! You could make a purple cream cheese layer, or explore a monochromatic theme with shades of orange, yellow, and white.
- Crust Innovations: If chocolate is not your preference, substitute the chocolate cookie crumbs with a graham cracker crust, gingersnap cookies, classic shortbread cookies, or even chocolate wafers. All these alternatives create a fantastic base for your lush.
- Colored Whipped Topping: Don’t stop at the layers! Tint your final whipped topping with food coloring too. A green topping could create a cute Frankenstein effect, orange for a pumpkin patch, or purple for a witch’s hat. Then, adjust your decorations to match your chosen theme for a truly customizable and fun dessert!
- Whipped Topping Options: You can use either store-bought frozen whipped topping (like Cool Whip) or make your own fresh whipped cream for the layers and topping.
- Crushed Cookie Topping: For an alternative to whipped topping, consider sprinkling more crushed cookies on top. You can then use cookie tombstones or spooky skeleton figures as decorations to create a “graveyard at witching hour” theme.
Pro Tips for Crafting the Ultimate Halloween Lush
Achieving a picture-perfect and delicious Halloween Lush is easy with these helpful tips:
- Judicious Use of Food Coloring: A little goes a long way! Usually, just a few drops of food coloring are sufficient to create a beautiful, opaque color in each layer. I’ve rarely needed more than 10 drops per layer to achieve the desired vibrancy.
- Patience is Key for Chilling: Allowing ample chilling time is absolutely mandatory for this dessert. If you’re short on time or feeling impatient, prepare the dessert the night before and let it chill in the refrigerator overnight. It will be perfectly set and ready to serve while you sleep.
- Pre-Chill the Crust: Always chill the pressed cookie crust in the refrigerator before adding the subsequent layers. This helps the crust firm up and prevents it from crumbling when you spread the creamy fillings on top, ensuring a stable foundation for your lush.
- Mastering the Slice: For the cleanest cuts, ensure your lush dessert is very cold. You can even pop it into the freezer for 15 minutes just before slicing. For ultra-clean edges, dip your knife in hot water, wipe it dry, and then make each cut, repeating the process as needed.
- Room Temperature Cream Cheese: For the smoothest possible cheesecake layer, make sure your cream cheese is at room temperature before you begin beating it. This ensures it creams beautifully with the confectioner’s sugar, resulting in a velvety texture.
- Chill Between Layers: To make spreading each layer easier and more even, briefly place the dessert in the refrigerator for about 10-15 minutes after applying each layer. This slight chill helps the previous layer firm up, preventing the colors from bleeding and making it simpler to spread the next one without disruption.
- Portion Control: Given its multiple rich layers, diverse textures, and satisfying flavors, this Halloween Lush is a very filling dessert. Consider making small to mid-size portions to ensure everyone can enjoy a slice without feeling overwhelmed.
If you’re as passionate about easy, no-bake desserts as we are, you’ll absolutely adore these other fantastic treats. Click each link below to discover more simple and delicious recipes to add to your repertoire!
Halloween Pretzels
These spooky Halloween Pretzels are a fun and easy treat to make with the kids. They’re the perfect festive addition to any Halloween party spread, offering a delightful balance of sweet and salty.
Discover Recipe

Halloween Oreo Balls / Halloween Cake Pops
Searching for enjoyable and simple Halloween treats to create with your children? These Halloween Oreo Balls are an excellent choice! They’re incredibly easy to prepare and taste absolutely delicious. Perfect for any Halloween gathering this year, give them a try!
Discover Recipe
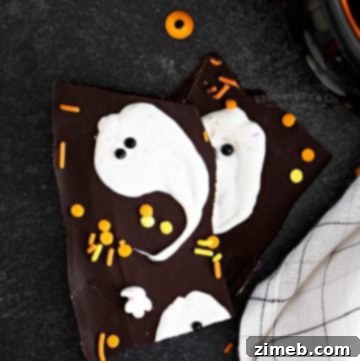
Halloween Bark
Calling all candy lovers! This delightfully spooky Halloween Bark Recipe combines white and dark chocolate with an assortment of candies and more, making it perfect for all your ghoulish celebrations. It’s quick, customizable, and utterly addictive.
Discover Recipe
Halloween Dessert Dip
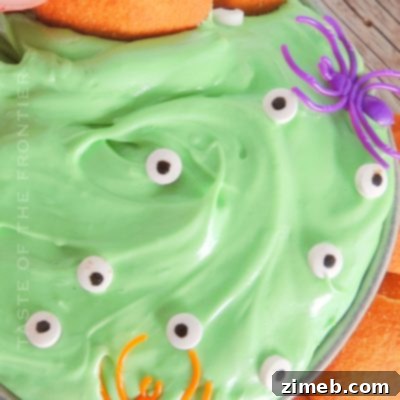
This Halloween Dessert Dip is the ideal spooky treat for kids this autumn. It’s fantastic for parties, classroom events, or simply as a fun after-school snack. Easy to make and irresistibly delicious, it’s sure to be a hit!
Discover Recipe
Mummy Rice Krispie Treats
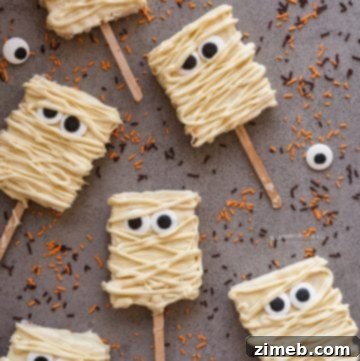
Mummy Rice Krispie Treats are a wonderfully easy and quick Halloween recipe. They are perfect for kids’ parties, school events, or simply for satisfying the inner child in all of us! A classic treat with a spooky twist.
Discover Recipe
Explore More Great No-Bake Treats
- No Bake Oreo Cheesecake
- Caramel Truffles
- Microwave Peanut Butter Fudge
- Halloween Eyeball Truffles
DON’T MISS THESE HOLIDAY E-BOOKS!



CONNECT WITH YUMMI HAUS!
Be sure to follow me on my social media, so you never miss a post!
Substack, FB, Pinterest, IG, Email Subscription
Rate this Recipe
Halloween Lush
Course: Dessert
Servings: 12 servings
Halloween Lush is a tasty dessert with layers of orange, purple, and green, perfect for adding a festive touch to your spooky celebrations.
Pin
Save
Prep Time
30 mins
Chill Time
2 hrs
Total Time
2 hrs 30 mins
Ingredients
Crust
- 1½ cups chocolate cookie crumbs
- ¼ cup butter – melted
Orange Layer
- 8 oz cream cheese – softened
- 1 cup confectioner’s sugar
- 1 cup whipped topping
- Orange food coloring
Purple Layer
- 3.4 oz instant vanilla pudding mix – 1 box
- 1¾ cups milk – cold
- Purple food coloring
Green Layer
- 3.4 oz instant pistachio pudding mix – 1 box
- 1¾ cups milk – cold
- Green food coloring
Topping
- 1 cup whipped topping
- Halloween-themed sprinkles
Instructions
Crust
- Combine chocolate cookie crumbs and melted butter in a mixing bowl. Stir to moisten the cookie crumbs.
- Press the mixture into the bottom of a 9×13-inch baking dish.
- Chill in the refrigerator while preparing the other layers.
Orange Layer
- Beat the softened cream cheese and confectioner’s sugar in a mixing bowl until smooth.
- Fold in the whipped topping.
- Add orange food coloring and mix until the color is evenly distributed.
- Spread the orange layer over the chilled crust.
Purple Layer
- Whisk the vanilla pudding mix and cold milk in a mixing bowl until it thickens.
- Add purple food coloring and mix until the color is evenly distributed.
- Spread the purple layer over the orange layer.
Green Layer
- Whisk the pistachio pudding mix and cold milk in a mixing bowl until it thickens.
- Add green food coloring and mix until the color is evenly distributed.
- Spread the green layer over the purple layer.
Topping
- Spread the remaining whipped topping over the green layer.
- Refrigerate for at least 2 hours before serving to allow the layers to set.
- Just before serving, decorate the top with Halloween-themed sprinkles.
- Cut into squares and serve chilled.
Nutrition
Serving: 1 serving |
Calories: 284 kcal |
Carbohydrates: 34g |
Protein: 4g |
Fat: 15g |
Saturated Fat: 7g |
Cholesterol: 38mg |
Sodium: 301mg |
Potassium: 148mg |
Fiber: 0.05g |
Sugar: 32g |
Calcium: 116mg |
Iron: 0.04mg |
Net Carbohydrates: 22g
Nutritional information for the recipe is provided as a courtesy and is approximate. Please double-check with your own dietary calculator for the best accuracy. We at Yummi Haus cannot guarantee the accuracy of the nutritional information given for any recipe on this site.
Love this recipe?
Follow @KleinworthCo for even more tasty recipes!