
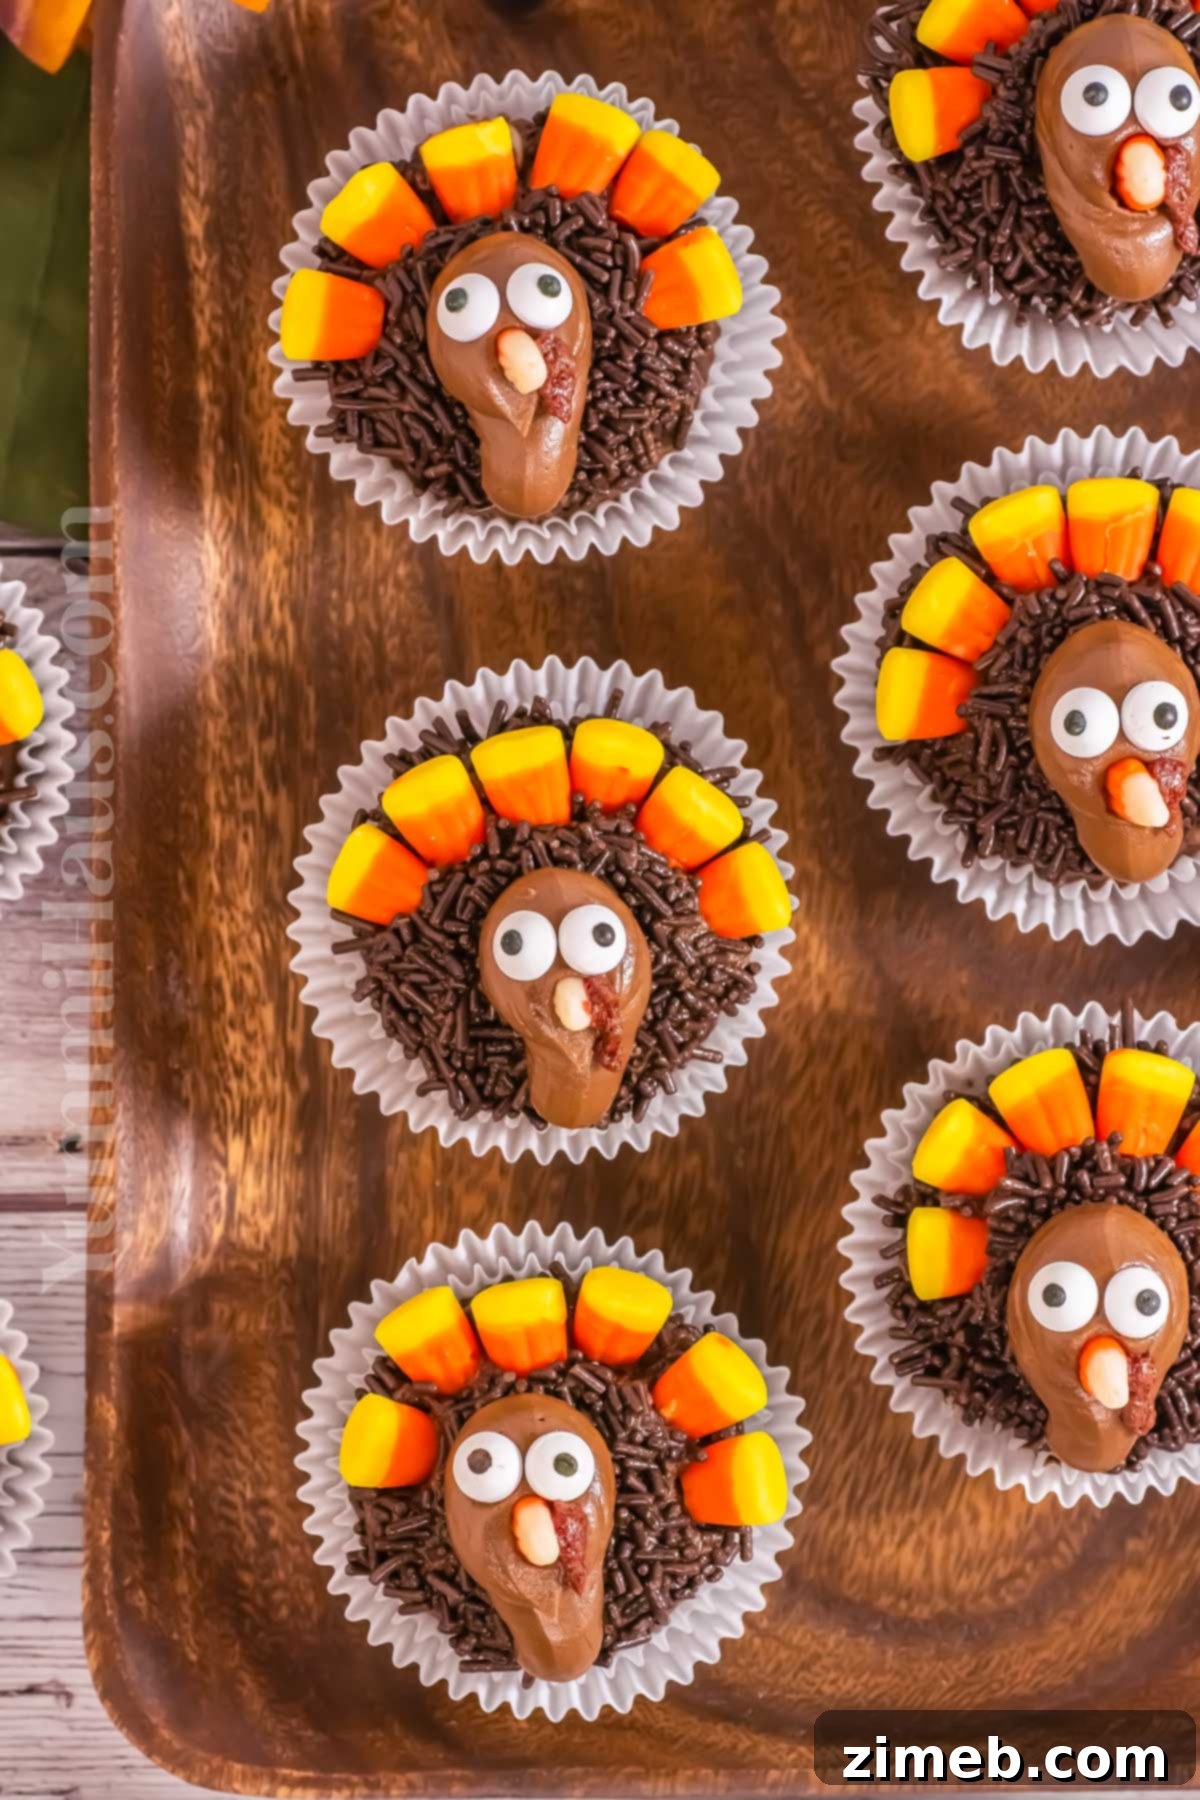
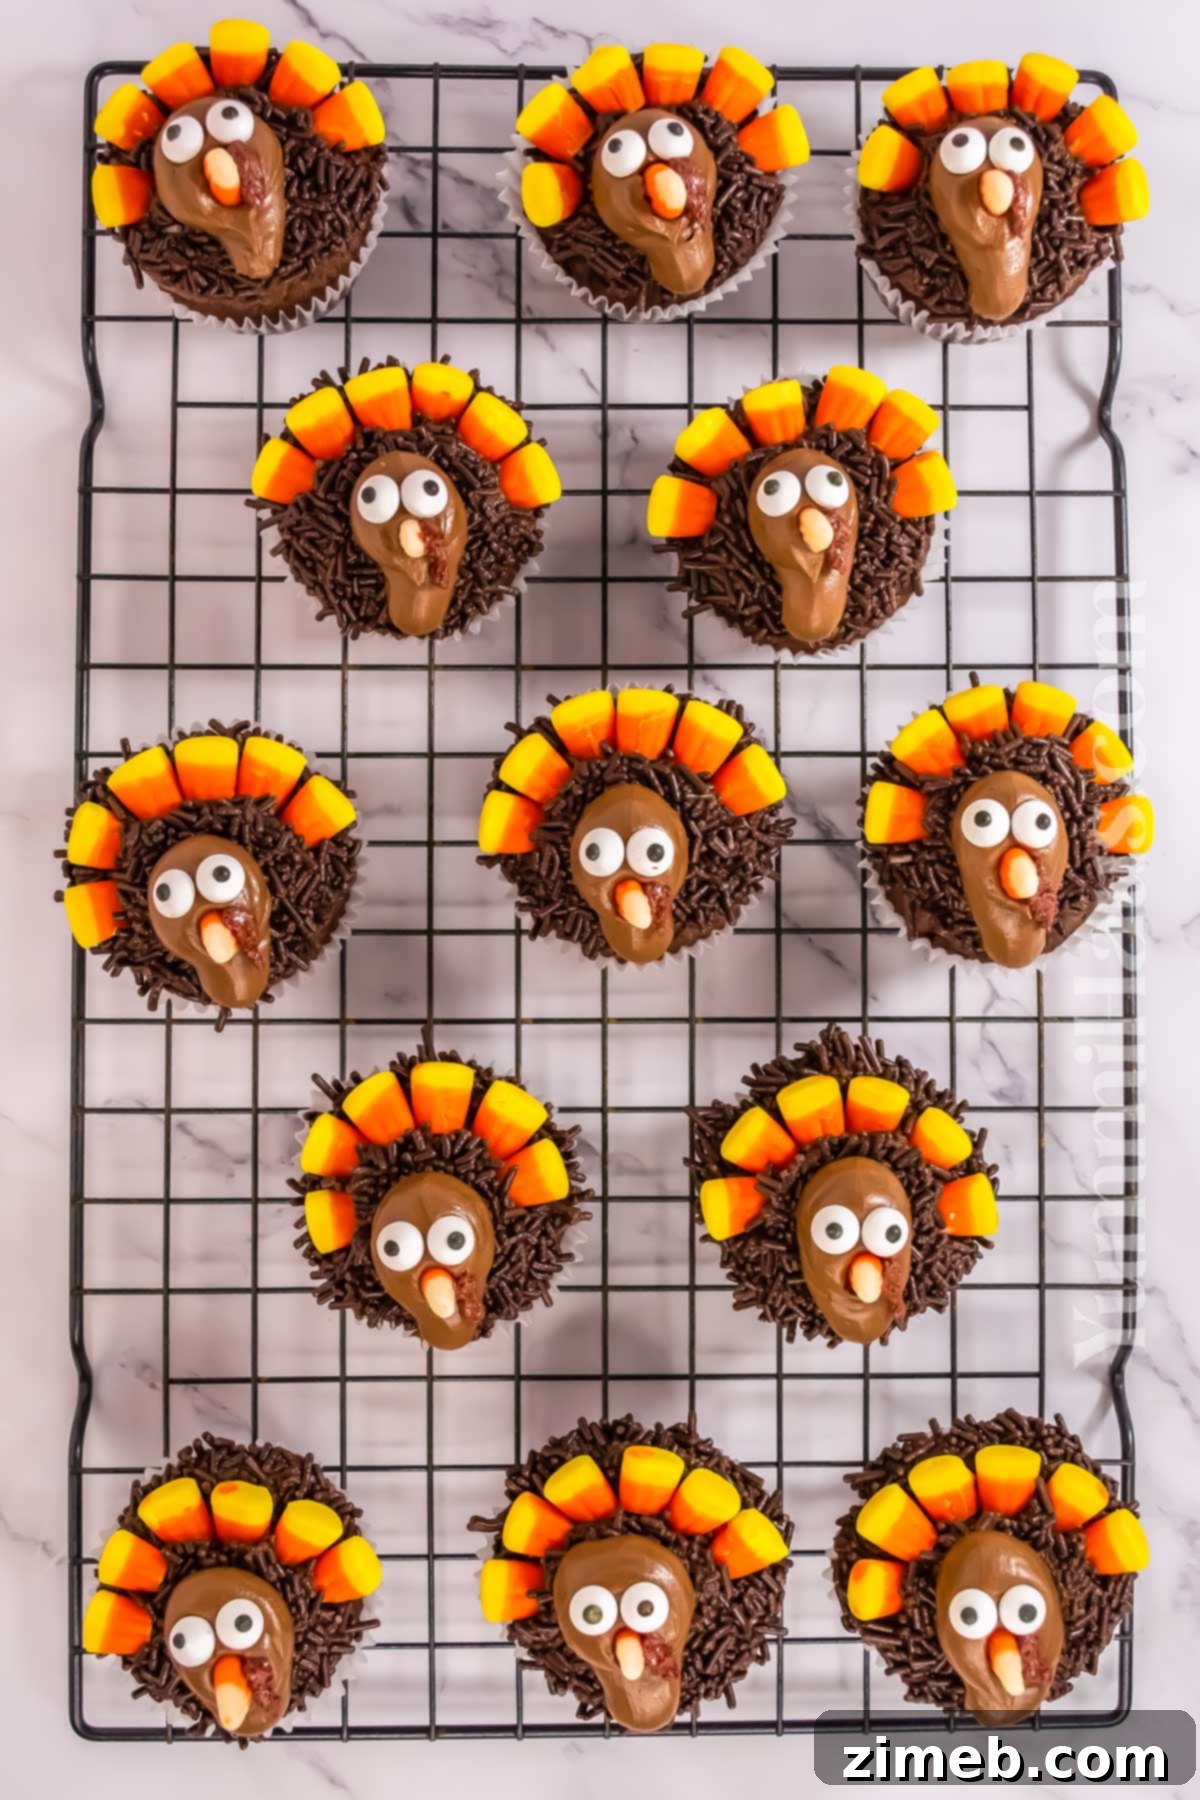
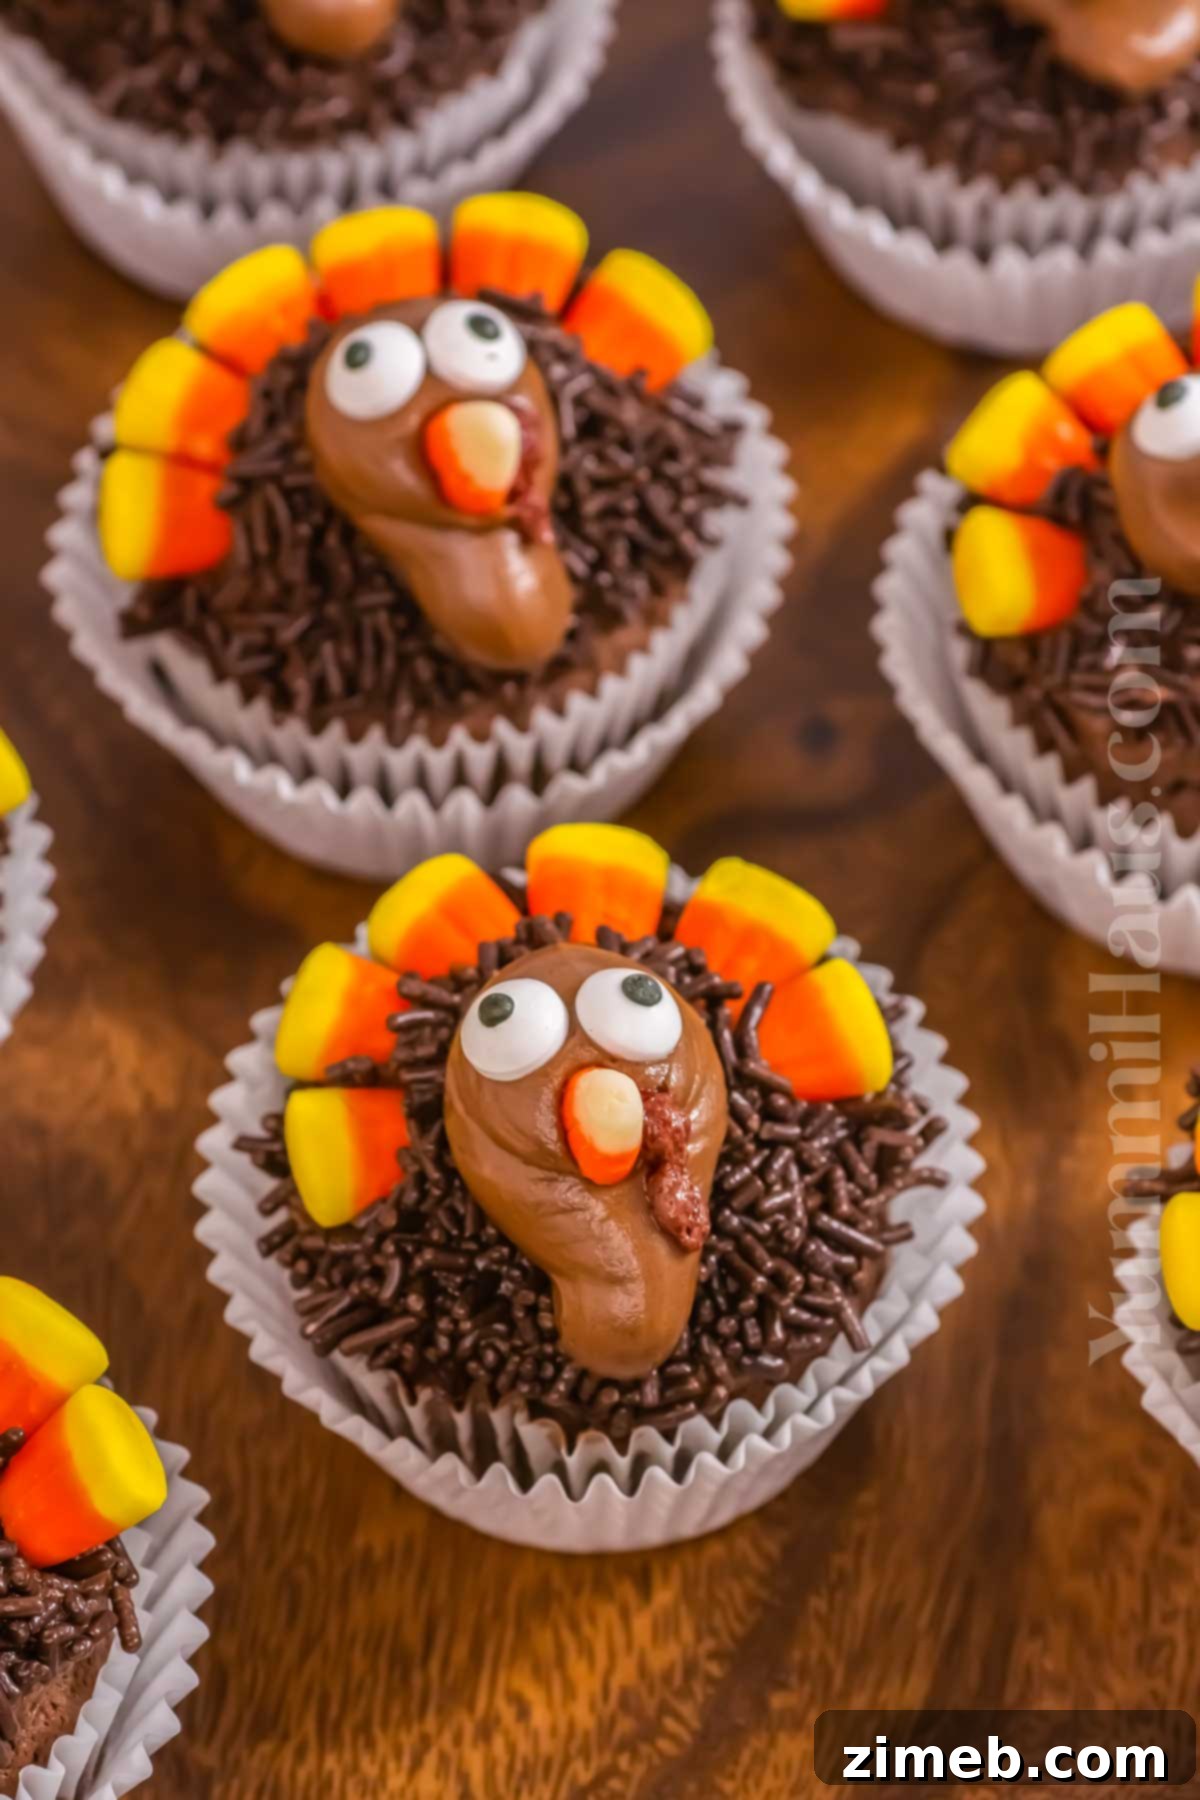
Welcome to your next favorite holiday baking project: these delightful Thanksgiving Turkey Cupcakes! Perfect for bringing a smile to everyone’s face, these charming treats are not just incredibly adorable but also bursting with rich chocolate flavor. They make an ideal sweet party snack or a fun dessert centerpiece for your festive gathering. Imagine the joy of transforming classic chocolate cupcakes into cute, edible turkeys – it’s an easy twist that will impress all your Thanksgiving guests!
If you’re looking for a memorable activity to share with your children this holiday season, this recipe offers a fantastic family project. In approximately 45 minutes from start to finish, you and your loved ones can create a batch of these irresistibly cute turkey cupcakes. It’s a wonderful opportunity to bond, get creative, and make sweet memories together.
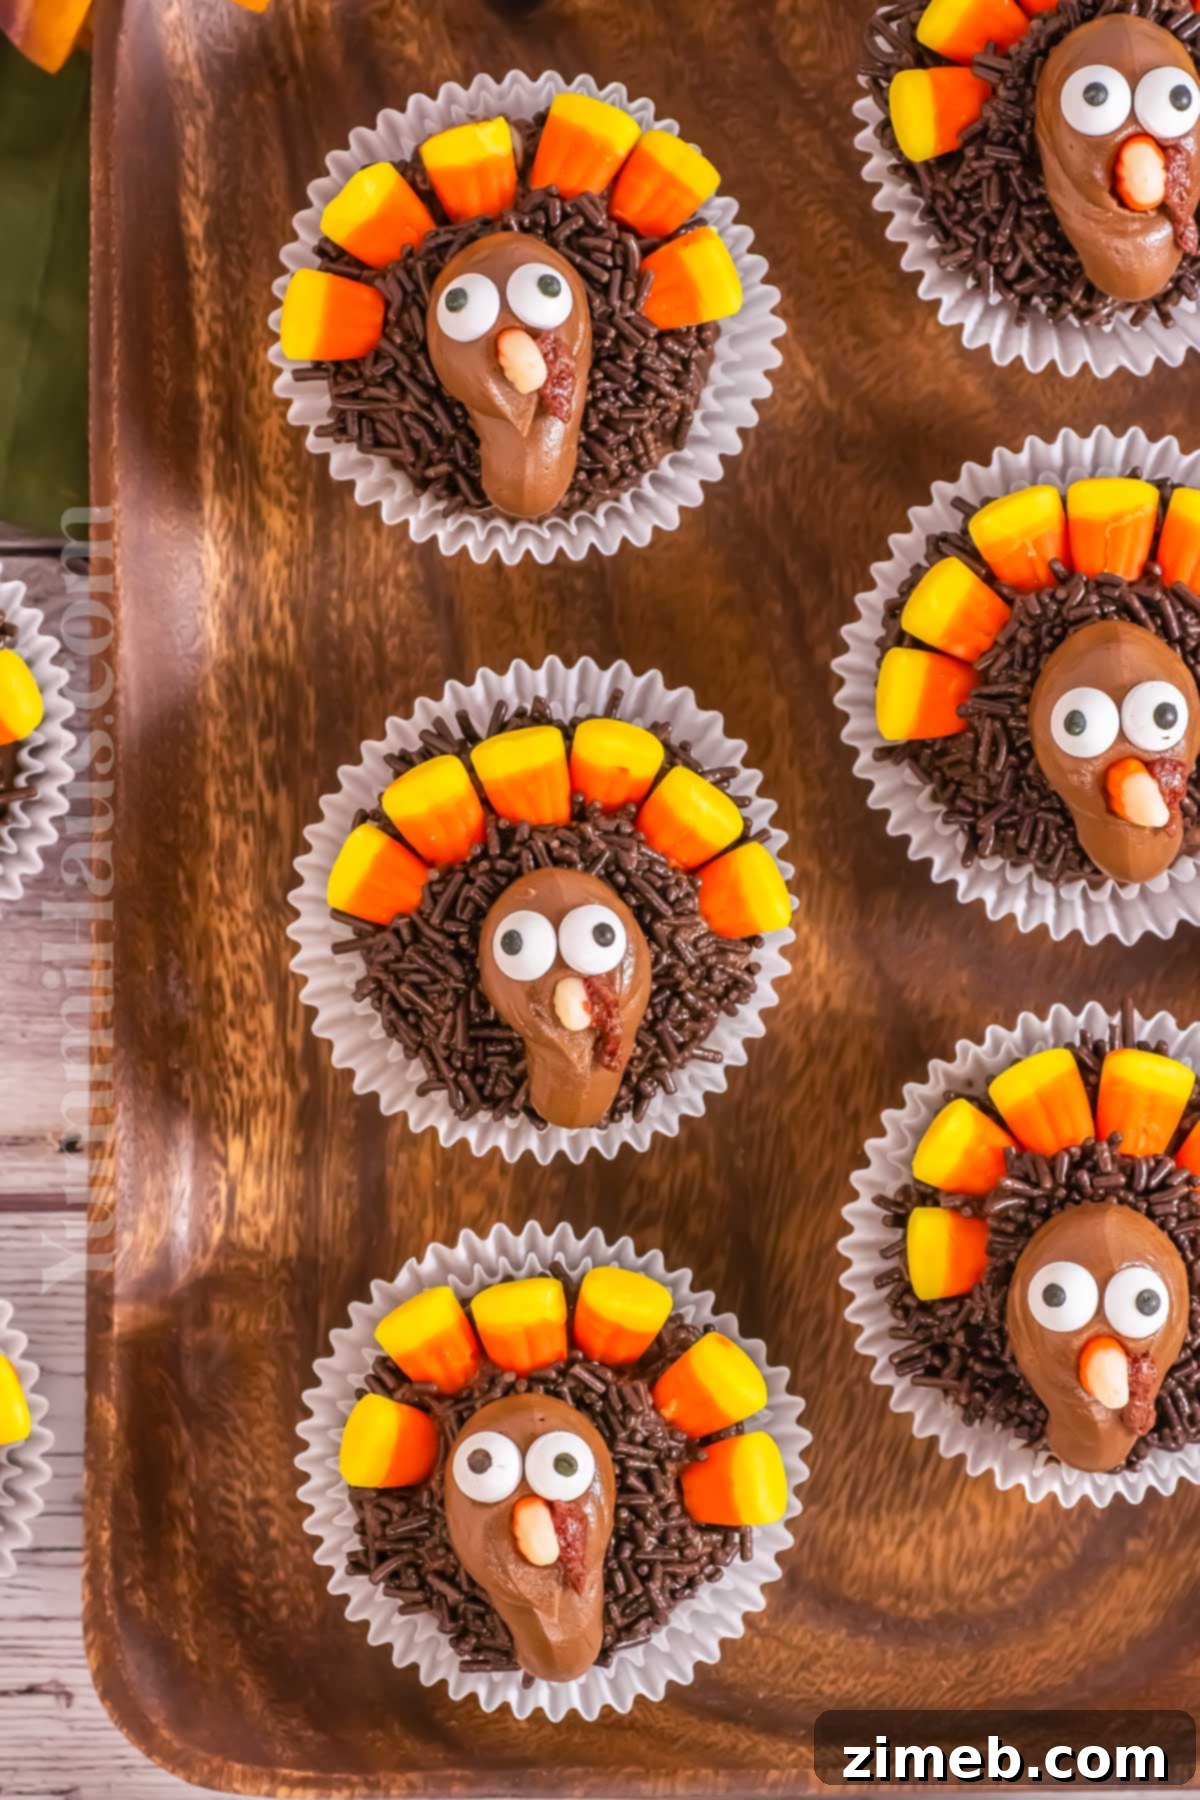
This Thanksgiving, why not venture beyond the traditional pumpkin pie and try something wonderfully unique? These turkey-shaped cupcakes are not only delicious but almost too charming to eat (but we promise, they’re worth every bite!). They offer a delightful visual appeal that perfectly complements the festive spirit of Thanksgiving, making them a standout addition to your dessert table.
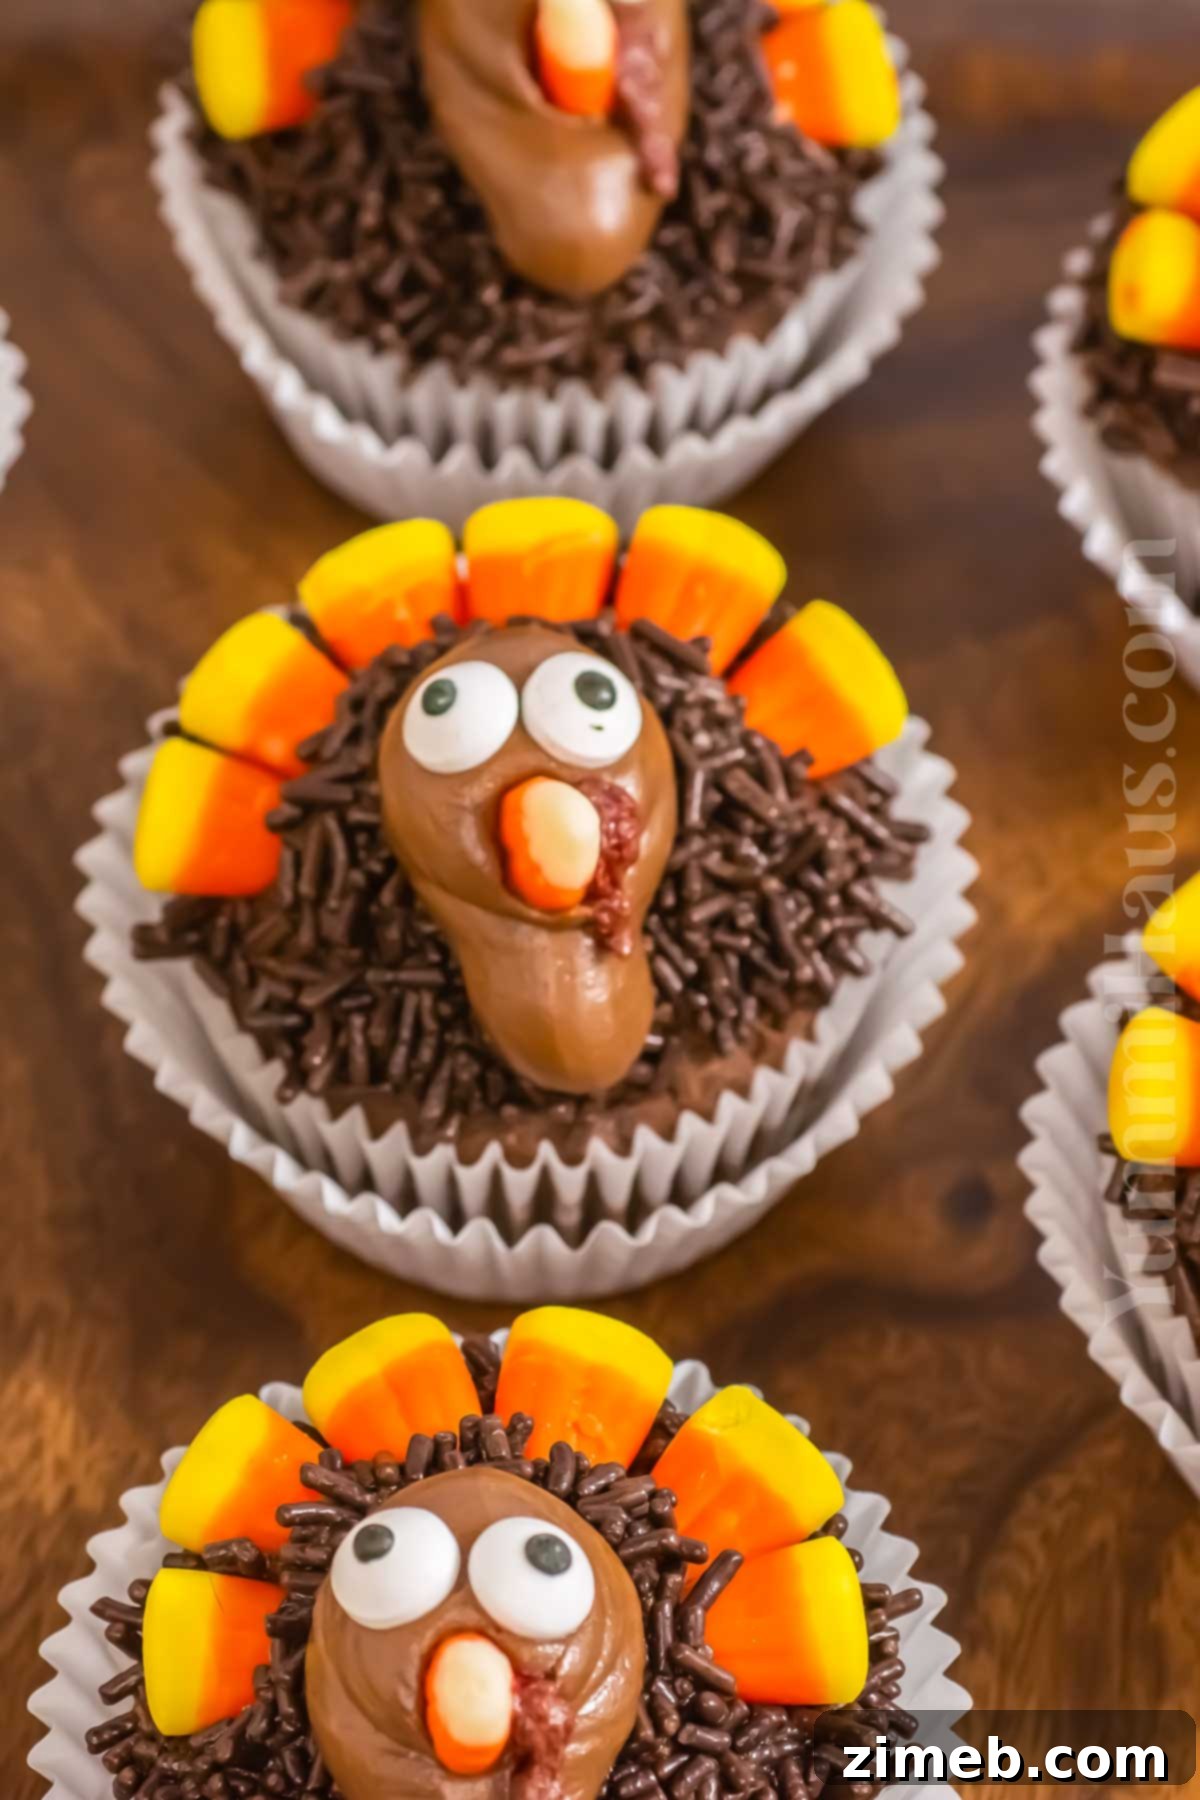
Why These Festive Turkey Cupcakes Will Be Your New Favorite Holiday Dessert
Our easy recipe for Turkey Cupcakes is designed for success and maximum enjoyment, making it a brilliant choice for your Thanksgiving festivities. Here’s why this recipe stands out:
- Unleash Your Creativity: This recipe encourages personalization! Whether you follow our detailed decoration ideas or invent your own unique turkey designs, the process is flexible and fun. You have the freedom to make your turkeys as whimsical or as classic as you wish, making each cupcake a small work of art. This adaptability is truly the beauty of this creative dessert.
- Effortlessly Foolproof: Don’t have much time for baking? No problem! This recipe is incredibly forgiving. For the ultimate shortcut, you can easily use pre-made chocolate cupcakes and a tub of your favorite frosting from the grocery store. This allows you to focus all your energy and creativity entirely on the delightful decorating process, saving time without sacrificing charm.
- A Sweet Tooth’s Dream: These aren’t just pretty cupcakes; they are loaded with rich chocolate flavor and an assortment of candies. Each bite delivers a decadent experience, making them an absolute favorite for anyone who loves a sweet treat. The combination of moist chocolate cake, creamy frosting, and fun candy decorations creates an irresistible dessert.
- Engaging Family Fun: Making these adorable turkey cupcakes is an excellent activity for children. It offers a hands-on experience that stimulates creativity, fine motor skills, and provides a wonderful opportunity for family bonding. Spend quality time together in the kitchen, creating edible masterpieces that everyone will be proud to display and devour!
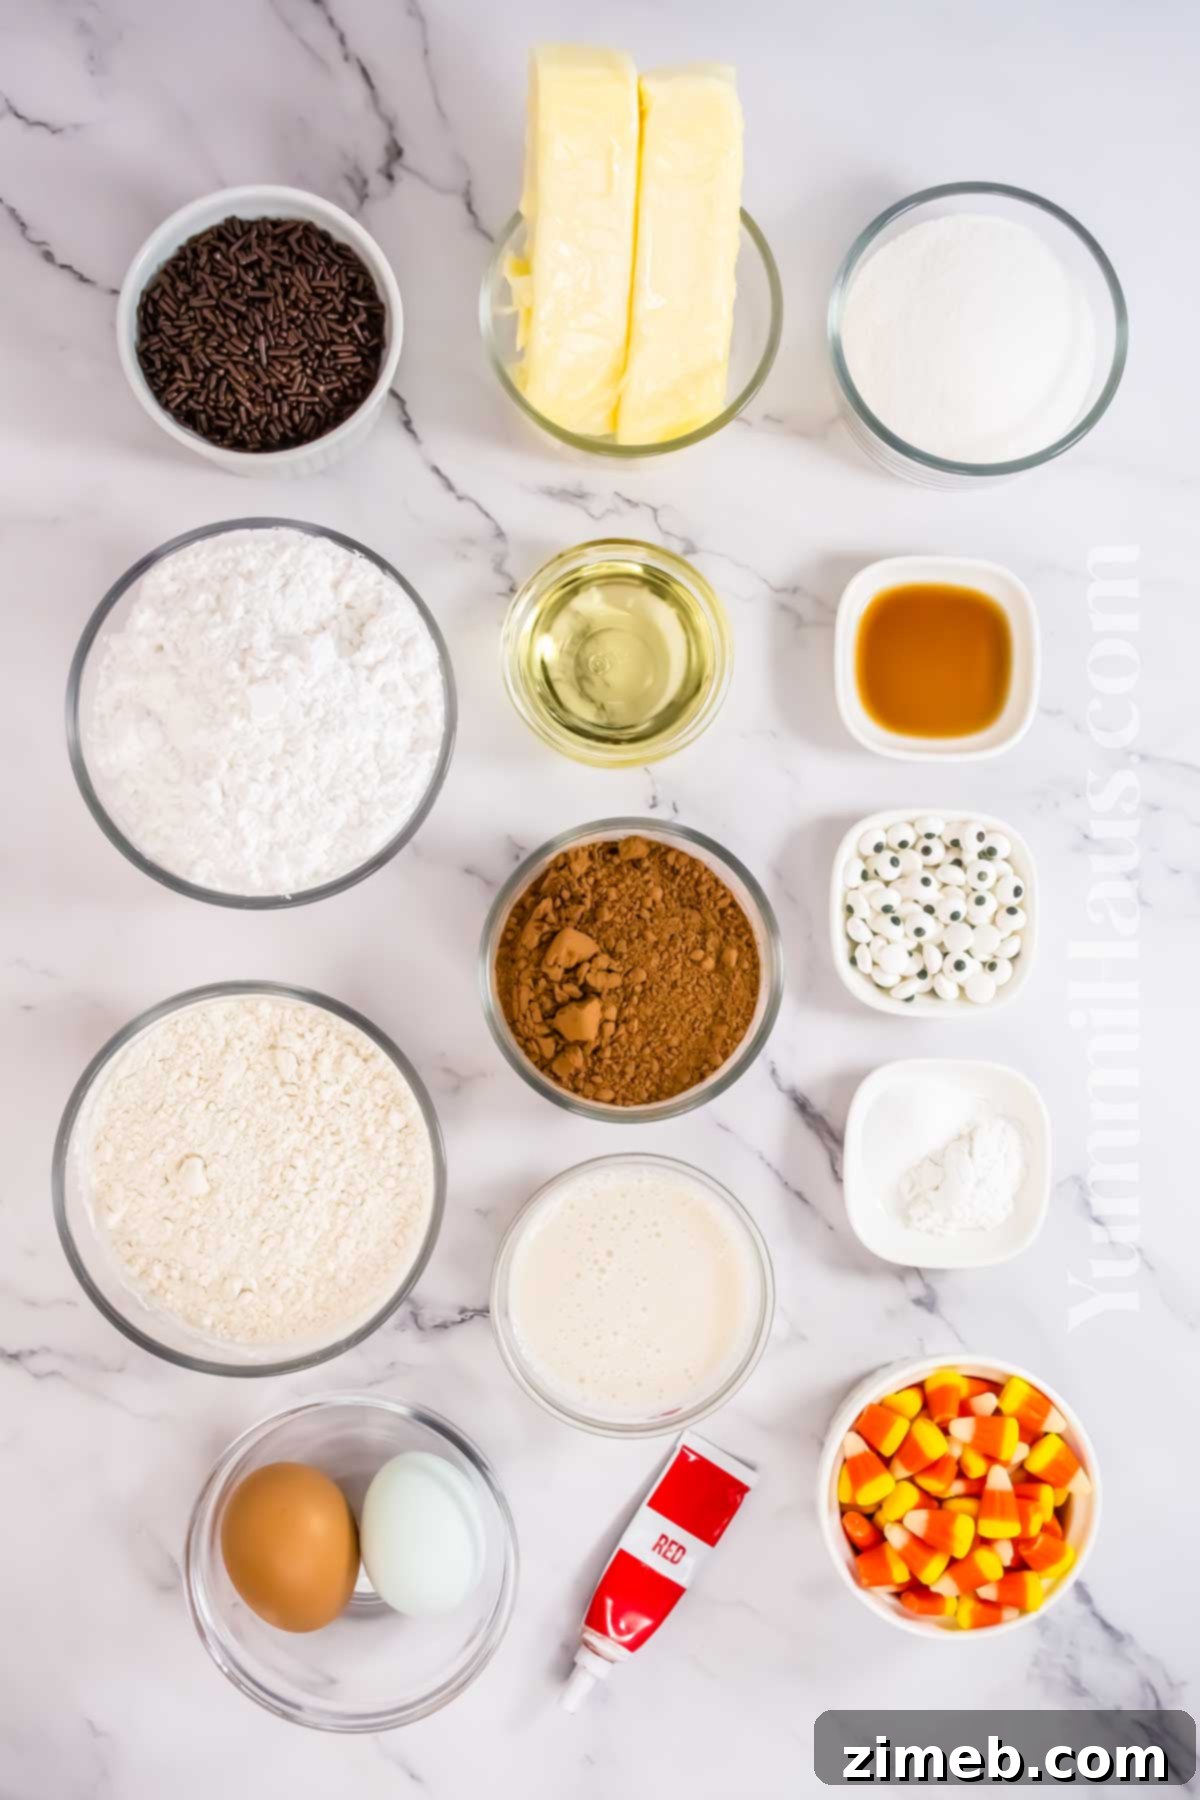
Essential Ingredients for Your Adorable Turkey Cupcakes
This recipe guides you through making delectable chocolate cupcake batter from scratch, ensuring a rich and moist base for your festive turkeys. While we often opt for classic vanilla cupcakes for our Thanksgiving table, the chocolate version truly elevates the holiday spirit. Rest assured, all the ingredients are readily available and affordable at your local grocery store, making this a stress-free baking adventure.
For the Irresistible Chocolate Cupcakes:
- Granulated Sugar: Provides the essential sweetness and contributes to the cupcakes’ tender texture.
- Unsalted Butter: Softened at room temperature, butter adds rich flavor and moisture, helping to create a tender crumb. Using unsalted butter allows you to control the total salt content in the recipe.
- Milk: Whole milk is highly recommended as it contributes to the richness and moistness of the batter, resulting in perfectly tender cupcakes. Ensure it’s at room temperature for optimal blending.
- Flavorless Vegetable Oil: Such as canola oil, oil adds an extra layer of moisture to the cupcakes, keeping them soft and fresh for longer.
- Eggs: Crucial for binding the ingredients, adding moisture, and contributing to the structure and richness of the cupcakes. Like butter and milk, eggs should be at room temperature to ensure they emulsify properly with other ingredients, creating a uniform and smooth batter.
- Vanilla Extract: A touch of pure vanilla extract enhances the overall flavor profile, complementing the chocolate beautifully.
- All-Purpose Flour: Our go-to for consistent baking results. We combine it with baking powder to create a self-rising effect, but if you have self-rising flour on hand, you can certainly use that instead.
- Cocoa Powder: The star of these classic Thanksgiving dessert cupcakes! Dutch-processed cocoa powder is highly recommended for its rich, deep chocolate color and intense flavor, perfect for a decadent treat. Of course, you can easily adapt this to vanilla or any other flavor you prefer.
- Baking Powder: The leavening agent that helps your cupcakes rise beautifully and become wonderfully fluffy. Remember to skip it if you’re using self-raising flour.
- Salt: A pinch of salt is vital for balancing the sweetness and enhancing all the other flavors without being noticeable itself.
Short on time? Don’t let that stop you! Feel free to use a box cake mix for a quick batch of cupcakes or, for an even faster solution, purchase a box of pre-made, unfrosted cupcakes from your local bakery or grocery store. This allows you to jump straight to the fun part: decorating!
For the Creamy Chocolate Frosting:
- Unsalted Butter: Softened to room temperature, it’s the base for a smooth, rich buttercream.
- Confectioner’s Sugar: Also known as powdered sugar, this fine sugar blends seamlessly to create a silky-smooth frosting.
- Cocoa Powder: Adds the deep, delightful chocolate flavor to your buttercream.
For the Adorable Turkey Decorations:
- Red Food Coloring: Or a small tube of red frosting, essential for creating the turkey’s characteristic snood. Alternatively, get creative with cookie icing in various colors to add more personalized details.
- Candy Corn Pieces: These are an absolute must-have! Their distinct shape and colors make them perfect for crafting realistic turkey tails and tiny beaks.
- Candy Eyeballs: Add instant personality and charm to your turkeys. You might even have some leftover Halloween candy that can be put to good use!
- Chocolate Jimmies Sprinkles: These classic rod-shaped sprinkles are fantastic for adding a wonderful textural element and creating the “body” of the turkey on your cupcakes.
Essential Tools for Baking and Decorating
To ensure a smooth baking and decorating process, gather these essential kitchen tools:
- Two standard cupcake pans: Lined with paper cupcake liners for easy baking and cleanup.
- Stand mixer: Highly recommended for efficiently creaming butter and sugar, and mixing batter and frosting to perfection. A hand mixer can also work.
- Piping bag: Essential for applying frosting neatly and creating the turkey’s head and snood.
- Optional, ice cream scoop: A small ice cream scoop or a 1/4 cup measuring cup makes dividing batter into muffin cups much easier and ensures uniform cupcake sizes.
Simple Steps to Craft Adorable Thanksgiving Turkey Cupcakes
Creating your own batch of Thanksgiving turkey cupcakes is surprisingly simple and incredibly rewarding. The process involves three main stages: baking moist chocolate cupcakes, generously topping them with rich chocolate frosting, and then transforming them into the cutest little turkeys using an array of candies. This turkey cupcake recipe is 100% beginner-friendly and a fantastic project for the whole family to enjoy together, guaranteeing smiles and delicious results!
Step 1: Prepare Your Chocolate Cupcake Batter
- Begin by preheating your oven to 350 degrees F (175 degrees C). Prepare two standard cupcake pans by lining them with paper cupcake liners. Set these aside.
- In a large mixing bowl or the bowl of a stand mixer fitted with the paddle attachment, combine the granulated sugar and softened unsalted butter. Cream these ingredients together on medium speed until the mixture is light, fluffy, and smooth, typically for 2-3 minutes.
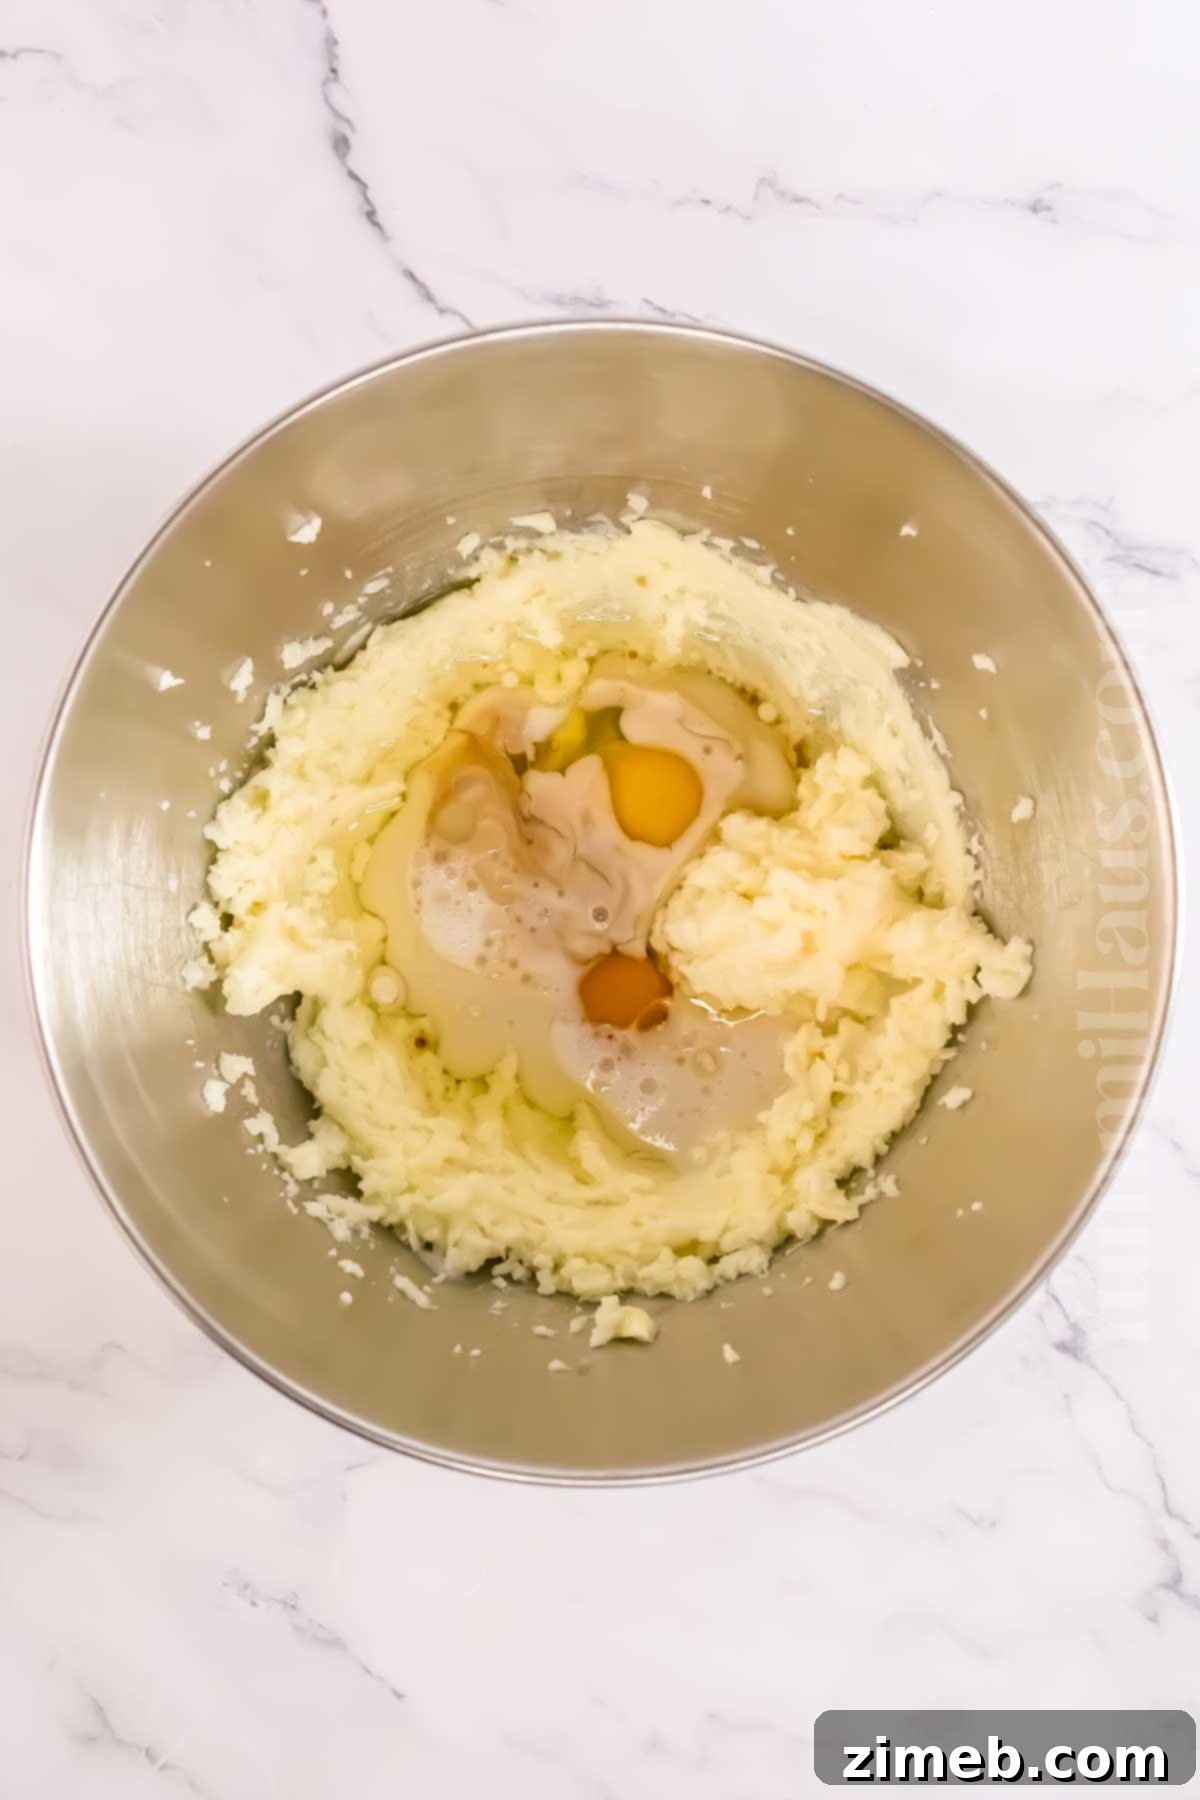
- Next, add the milk, flavorless oil, room temperature eggs, and vanilla extract to the creamed mixture. Mix on low speed until just combined. The batter might appear slightly lumpy at this stage, which is perfectly normal.
- Gradually incorporate the dry ingredients: all-purpose flour, rich cocoa powder, baking powder, and salt. Start mixing on low speed to prevent flour from flying out of the bowl, then increase to medium speed and mix for an additional minute until the batter is well combined and smooth. Be careful not to overmix, as this can lead to tough cupcakes. Remember to scrape down the sides of the bowl with a spatula to ensure all ingredients are thoroughly incorporated.
Step 2: Bake Your Moist Chocolate Cupcakes
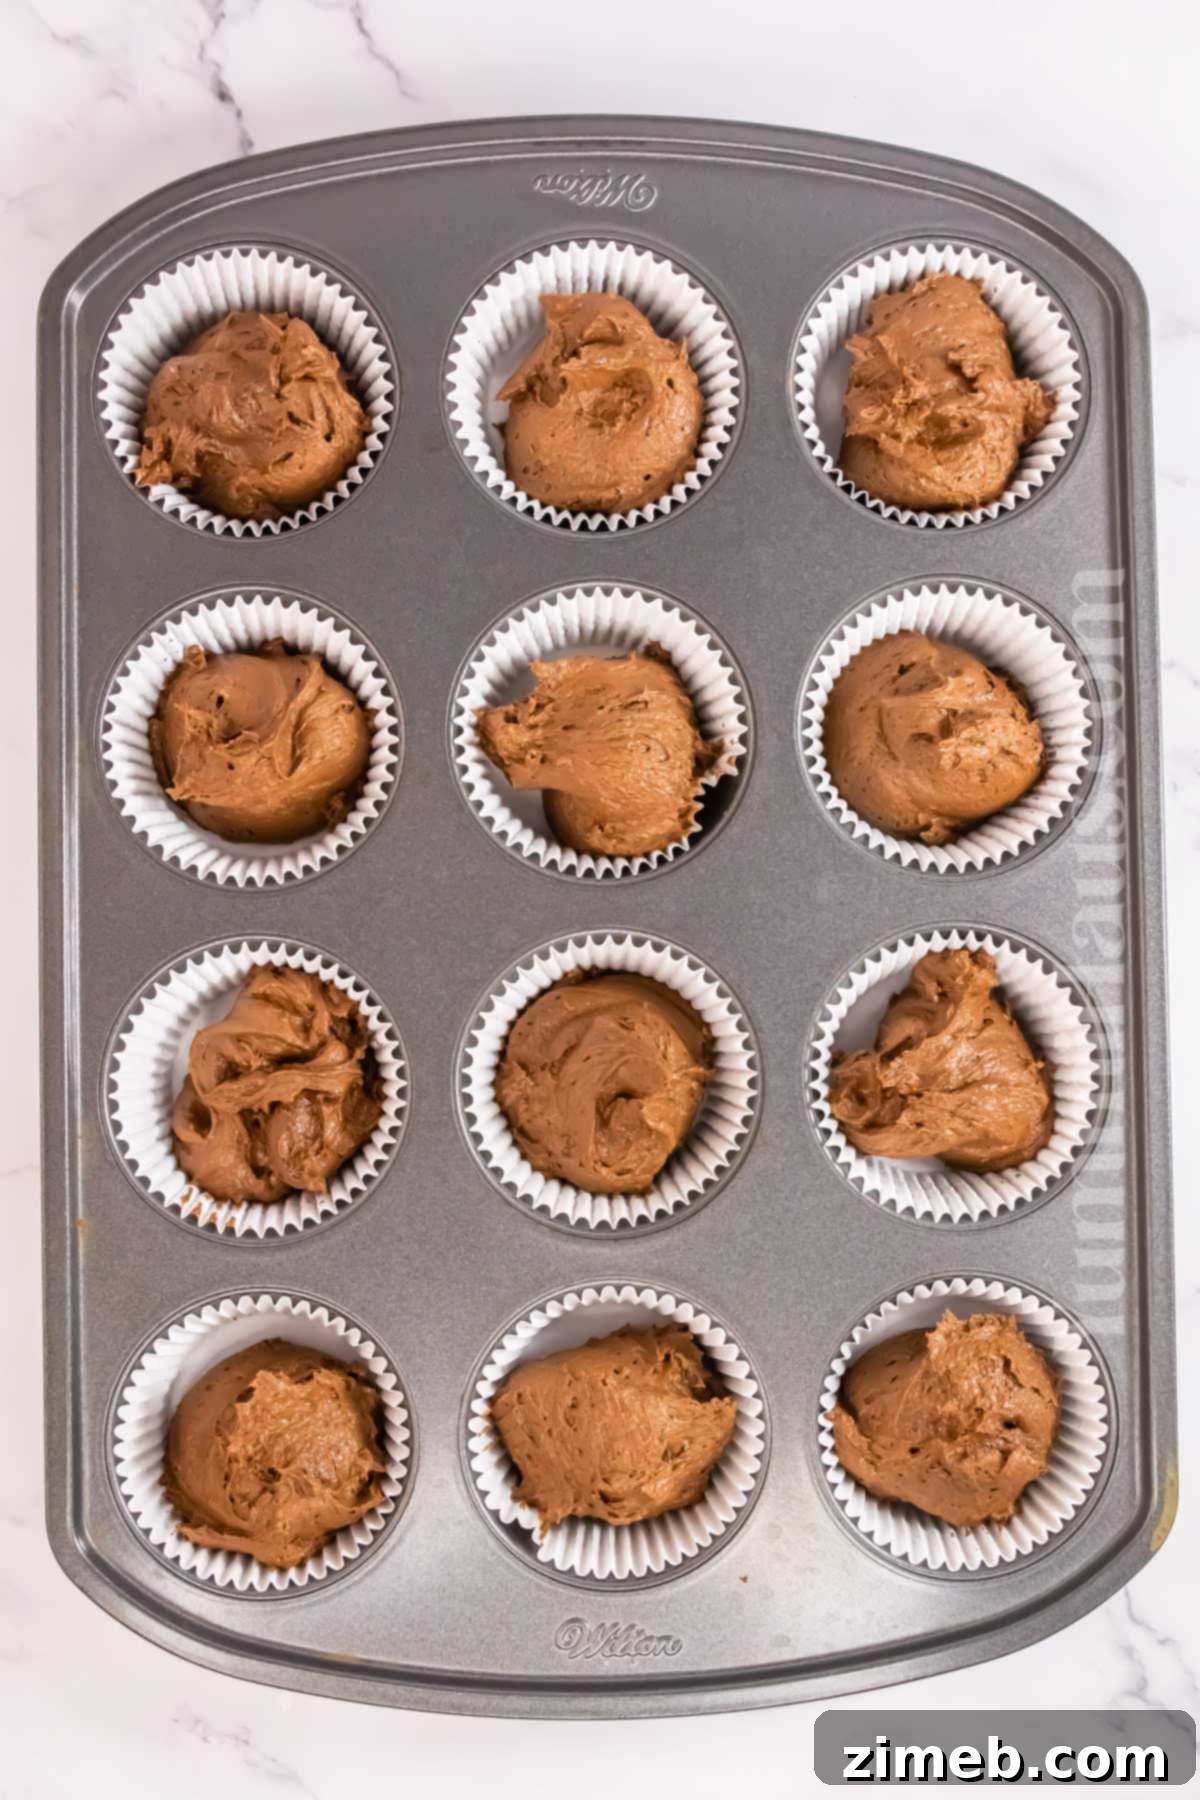
- Using a small ice cream scoop or a 1/4 cup measuring cup, evenly divide the prepared cupcake batter into the lined cupcake pans. Fill each liner about two-thirds full to allow for proper rising.
- Bake the cupcakes for 14-16 minutes, or until a toothpick inserted into the center of a cupcake comes out clean, and the center springs back gently when lightly pressed.
- Once baked, remove the cupcake pans from the oven and let the cupcakes cool in the pans for a few minutes before transferring them to a wire rack to cool completely. This step is absolutely crucial! Attempting to frost or decorate warm cupcakes will cause your beautiful frosting and candy decorations to melt, resulting in a less-than-charming turkey. Patience will pay off for perfectly adorable results.
Step 3: Prepare and Frost Cupcakes with Decadent Chocolate Buttercream
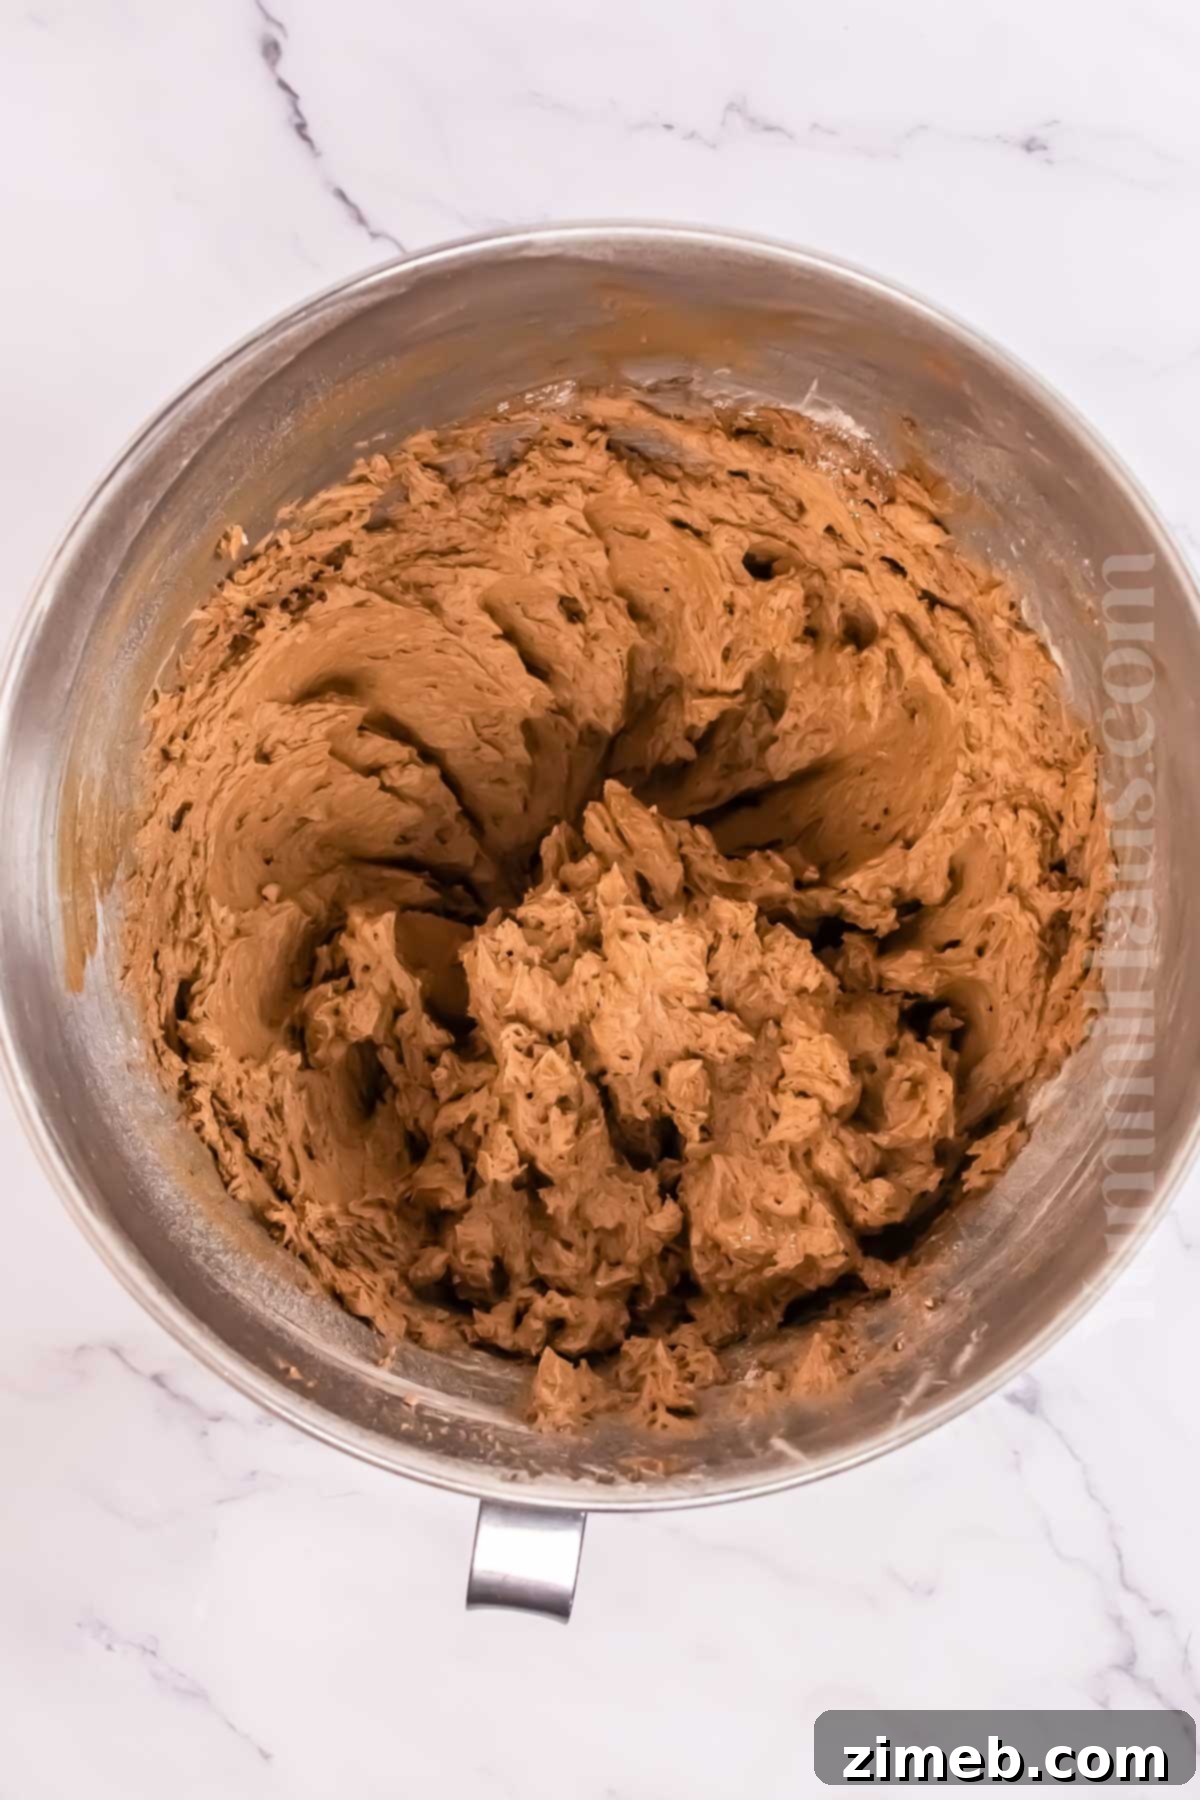
- In the bowl of a stand mixer, combine the confectioner’s sugar, cocoa powder, and softened unsalted butter. Begin mixing on low speed until the ingredients are just combined. Then, increase the speed to medium and continue mixing for an additional minute until the frosting becomes wonderfully smooth, light, and fluffy. If your frosting seems a bit too dry or stiff, gradually add a small splash of water or milk, one teaspoon at a time, until it reaches your desired smooth and spreadable consistency.
- Once the chocolate frosting is ready, scoop out about 1/4 cup of it into a separate small bowl. Tint this portion with red food coloring to create a deep burgundy shade, perfect for the turkey’s snood. Transfer this colored frosting to a small piping bag and set it aside.
- Transfer the remaining majority of the chocolate frosting to a larger piping bag fitted with a large round tip. For easier filling, you can place the piping bag in a tall mug before scooping in the frosting. Set this aside until your cupcakes are completely cooled and ready for assembly.
Step 4: Decorate Your Festive Turkey Cupcakes
Now for the most exciting part – bringing your turkey cupcakes to life! This is where the fun truly begins, especially if you have little helpers.
- First, pipe a generous swirl of the main chocolate frosting on top of each cooled cupcake. Aim for a thick, domed layer of frosting, as this will form the turkey’s body and provide a sturdy base for decorations.
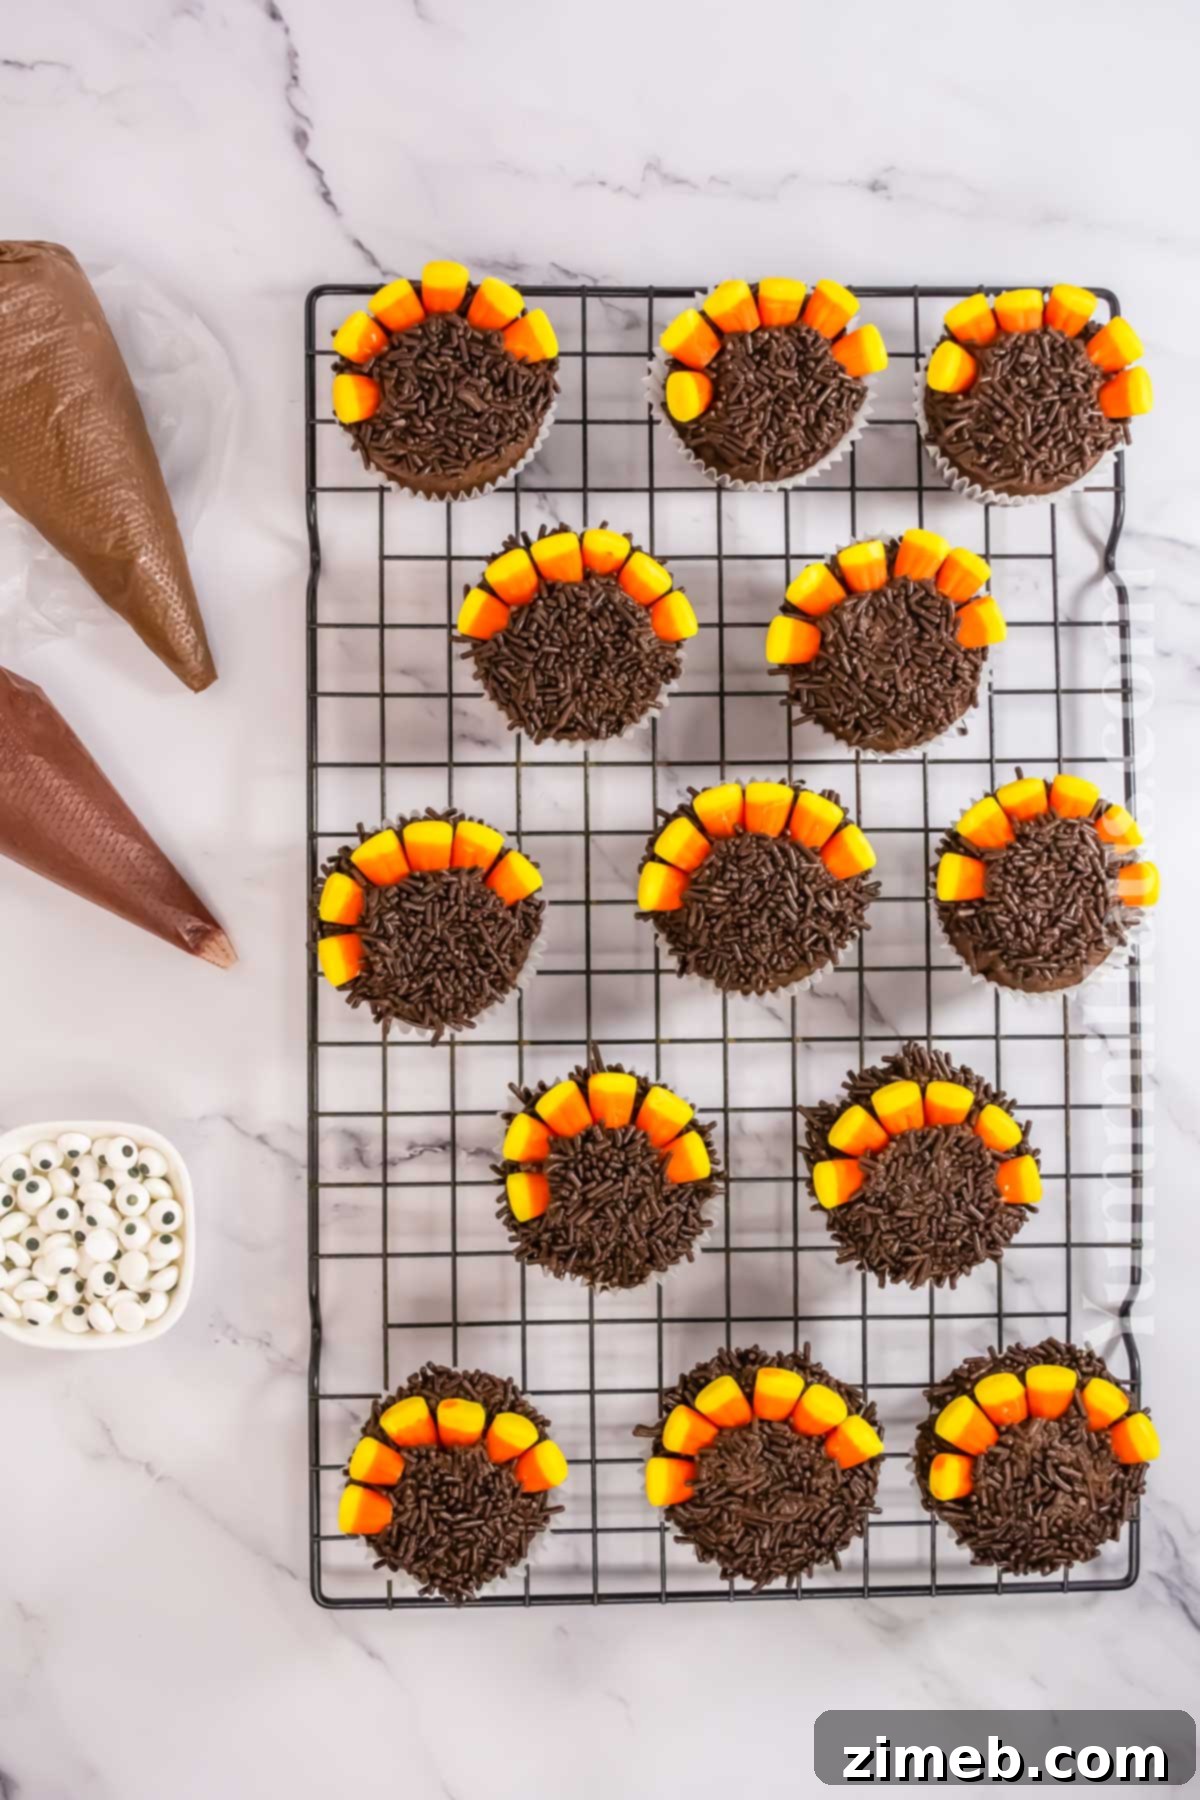
- To create the turkey’s textured body, pour your chocolate jimmies sprinkles into a small, shallow bowl. Gently dip the frosted top of each cupcake into the sprinkles, pressing lightly to ensure they adhere well. This gives the turkey a lovely, feathered appearance.
Now, let’s assemble the individual turkey features:
- Turkey Feathers (Tail): Take six candy corn pieces. Insert the pointed end of each piece along the top edge of the frosted cupcake, arranging them to fan out like a turkey’s tail feathers. Press them gently into the frosting to secure them. Candy corns are truly the ideal candy for this task! For an alternative or additional touch, brown M&M’s can also be used to create small “wings” on either side of the turkey’s body.
- Turkey’s Head: Using your piping bag with the main chocolate frosting (or a small dollop from the larger piping bag), pipe a small, inverted teardrop shape on the front center of each cupcake. This will form the turkey’s head.
- Eyes: Carefully place two candy eyeballs onto the upper portion of the turkey’s piped head, giving your turkey a charming, curious gaze.
- Turkey’s Beak: For the beak, insert another candy corn piece into the center of the turkey’s head, ensuring the tip points upwards. This creates a distinctive, pointy beak.
- Snood: Finally, using the piping bag with the burgundy-tinted frosting, pipe a small dollop or a wavy line along the side of the candy corn beak. This will create the iconic red snood, completing your adorable turkey’s face.
Storing Your Delicious Turkey Cupcakes
Proper storage is key to keeping your festive turkey cupcakes fresh and delicious for your Thanksgiving celebration.
Decorated and frosted cupcakes can safely be left out at room temperature for 1-2 days, provided they are covered properly with plastic wrap or stored in an airtight container. This helps prevent them from drying out. However, for optimal freshness, especially in warmer environments or if your home is quite warm, it is generally better to store them in the refrigerator. This helps keep the frosting firm and prevents any candy decorations from melting or becoming sticky.
When stored in an airtight container in the refrigerator, your turkey cupcakes will remain fresh and delicious for up to 3 days. Always ensure they are in a sealed container to protect them from absorbing any odors from other foods in the fridge.
Freezing: Freezing decorated cupcakes is generally not recommended, as the frosting and candy decorations may not hold up well during thawing, potentially becoming soggy or discolored. However, you can successfully freeze baked, unfrosted cupcakes! Simply allow them to cool completely, then place them in an airtight container or wrap them tightly in plastic wrap and then foil. They can be frozen for up to 3 months. When ready to use, thaw them at room temperature before frosting and decorating.
Creative Substitutions & Fun Variations
Feel free to get creative with your turkey cupcakes! This recipe is incredibly versatile, allowing for many delicious substitutions and fun variations to suit your taste and convenience.
- The Ultimate Shortcut: For the quickest and easiest turkey cupcakes, a chocolate cake mix and store-bought frosting are your best friends! Simply follow the package directions for the boxed cake mix, bake your cupcakes, and then proceed directly to the exciting decoration phase with your pre-made frosting. This is perfect for busy holiday schedules.
- Gummy Worm Gobblers: Add a playful touch by using gummy worms! Place one gummy worm on each turkey cupcake to create a whimsical, squiggly accent. Red gummy worms can even be cut in half to form a fun, floppy snood, offering another easy decoration option.
- Flavor Boost with Espresso Powder: For an extra depth of flavor in your chocolate cupcakes, consider adding a teaspoon of espresso powder to the dry ingredients. This little secret ingredient doesn’t make the cupcakes taste like coffee; instead, it magically enhances and intensifies the rich chocolate flavor, making it even more decadent.
- Alternative Frosting Flavors: While chocolate frosting is classic, feel free to experiment with other flavors like vanilla buttercream, cream cheese frosting, or even peanut butter frosting for a different twist. Just make sure the color works with your turkey theme or consider adding food coloring.
Creative Candy Ideas for Turkey Head & Body Decorations
Unleash your inner decorator with these fantastic ideas for crafting the perfect turkey heads and bodies for your festive cupcakes:
- Nutter Butters for Heads: Nutter Butter cookies are incredibly versatile and make a fantastic, ready-made turkey head! Their distinctive peanut shape is perfect for this purpose.
- Oreo or Chocolate Ball Bodies/Heads: Double-stuffed Oreo cookies can serve as a great turkey’s face or body directly on top of the cupcake. For a truly impressive effect, you can even place an Oreo vertically into the frosting to imitate a round body, then stick candy corn into the cream filling to create a fanned tail. For a more luxurious head option, consider using chocolate balls like Lindt truffles or Whoppers. Mini Reese’s peanut butter cups or Hershey’s Kiss candies also make excellent, bite-sized turkey faces.
- Colorful Tail Feathers: Beyond candy corn, you can get creative with other candies to mimic vibrant tail feathers. Break up Kit Kat bars, use pretzel sticks for a rustic look, or arrange Reese’s Pieces and M&M’s in an arch to create a colorful, fanned tail.
- Distinctive Snood Options: For the turkey’s distinctive red snood, consider using small red M&M’s, strips of red licorice, small pieces of red Swedish Fish candy, or even Strawberry Twizzlers cut to size. These alternatives add both color and a chewy texture.
- Easy All-Frosting Decoration: For a simpler and potentially more budget-friendly approach, you can color more of your chocolate frosting with various food colorings. Then, pipe every element of the turkey’s body or head – including wavy tail feathers, a round body shape, and the snood – directly onto the cupcake. Finish by placing the candy eyes. This method saves you money on buying a wide assortment of individual decorations.
Expert Tips for Crafting the Perfect Turkey Cupcakes
Achieving bakery-quality turkey cupcakes is easier than you think with these expert tips:
- Embrace the Shortcut: Don’t have time to bake from scratch? No worries! Many recipes simplify the process by suggesting the use of a good quality chocolate cake mix and store-bought frosting. You can also simply buy regular, unfrosted cupcakes from a local bakery and turn them into your charming turkey creations. This allows you to focus all your energy on the fun part – decorating!
- Smooth Frosting Application: For a perfectly smooth and even layer of frosting, an offset spatula or even a regular butter knife are your best tools. These allow you to spread the frosting with precision and ease, creating a great base for your decorations.
- Achieve Extra Moist Cupcakes: To ensure your cupcakes are exceptionally moist and rich, many bakers incorporate ingredients like milk, yogurt, or sour cream into the batter. These dairy products add tenderness and depth of flavor, making your cupcakes truly irresistible.
- Bake in Batches: If your oven tends to have hot spots or if you’re making a large batch, it’s often best to bake one tray of cupcakes at a time. Keep the remaining batter in the fridge until you’re ready to bake the next batch. This helps ensure even baking and consistent results across all your cupcakes.
- Do Not Overfill Liners: To prevent your cupcakes from overflowing and creating messy tops, ensure you fill each paper liner no more than two-thirds full. This allows ample space for the cupcakes to rise beautifully without spilling over.
- Sift Dry Ingredients: For the lightest and fluffiest cupcakes, consider sifting your dry ingredients (flour, cocoa powder, baking powder, salt) together before adding them to the wet mixture. This helps eliminate lumps and ensures they are evenly distributed, contributing to a smooth batter and tender crumb.
We hope you thoroughly enjoy making these fun and festive Thanksgiving Turkey Cupcakes! They are truly a delightful way to add cheer to your holiday celebrations. If you enjoyed this particular cupcake recipe, we’re confident you’ll adore some of our other fantastic cupcake creations. Discover more easy, printable recipes by clicking each link below!
Check out this recipe
Check out this recipe
Check out this recipe
Check out this recipe

Check out this recipe
More Delightful Thanksgiving Desserts
Round out your holiday feast with these other irresistible Thanksgiving dessert options, perfect for any palate:
Caramel Pecan Pie
Pumpkin Pie Ice Cream
Lace Cookies
Caramel Truffles
CONNECT WITH YUMMI HAUS!
Be sure to follow me on my social media, so you never miss a post!
Substack, FB, Pinterest, IG, Email Subscription
Rate this Recipe
Thanksgiving Turkey Cupcakes
Ingredients
For the Chocolate Cupcakes
- ¾ cup granulated sugar
- ½ cup unsalted butter softened to room temperature
- ¾ cup whole milk
- ½ cup flavorless vegetable oil such as canola oil
- 2 large eggs at room temperature
- 1 tsp vanilla extract
- 1 ¼ cups all-purpose flour
- ½ cup Dutch-processed cocoa powder
- 1 ½ tsp baking powder
- ½ tsp salt
For the Chocolate Frosting
- 1 cup unsalted butter softened to room temperature
- 3 cups confectioner’s sugar
- 1 cup cocoa powder
- red food coloring for the snood
For Decoration
- ½ cup candy corn pieces for tail feathers and beak
- 2 tbsp candy eyeballs
- ½ cup chocolate jimmies sprinkles for the turkey body
Instructions
Chocolate Cupcakes
-
Preheat your oven to 350°F (175°C).
-
Line 2 standard cupcake pans with paper liners. Set them aside for later.
-
In a large mixing bowl or the bowl of a stand mixer, combine the granulated sugar and softened butter. Cream them together on medium speed until the mixture is smooth and fluffy.
-
Add in the milk, oil, eggs, and vanilla extract. Mix on low speed until all ingredients are just combined; the mixture may appear slightly lumpy.
-
Gradually stir in the remaining dry ingredients: flour, cocoa powder, baking powder, and salt. Start mixing on low speed until combined, then increase to medium speed for another minute. Scrape down the sides of the bowl and mix briefly again to ensure everything is incorporated.
-
Using a small ice cream scoop or a ¼ cup measuring cup, divide the batter evenly into the lined cupcake pans, filling each liner about two-thirds full.
-
Bake for 14-16 minutes, or until the center springs back when gently pressed, or a toothpick inserted comes out clean.
-
Allow the cupcakes to cool completely on a wire rack before attempting to decorate them. This step is essential to prevent frosting from melting.
Chocolate Frosting
-
Combine the confectioner’s sugar, cocoa powder, and softened butter in the bowl of a stand mixer. Mix on low speed until combined, then increase to medium speed and mix for an additional minute until the frosting is smooth and appears fluffy. If the frosting seems too dry, add a splash of water or milk, just a teaspoon at a time, until it reaches a perfect consistency.
-
Scoop out ¼ cup of the prepared frosting and tint it with red food coloring to create a burgundy shade. Transfer this colored frosting to a small piping bag and set it aside for the turkey’s snood.
-
Transfer the remaining chocolate frosting to a larger piping bag fitted with a large round tip. You can place the piping bag in a mug to make it easier to fill. Set it aside until you are ready to assemble your cupcakes.
Decorate Your Turkeys
-
Pipe a generous, thick swirl of chocolate frosting on top of each cooled cupcake. This forms the turkey’s body.
-
Pour the chocolate jimmies sprinkles into a small bowl. Gently dip the frosted top of each cupcake into the sprinkles to coat the frosting, creating a textured “feathered” body.
-
To create the turkey’s tail feathers, insert the pointed end of six candy corn pieces along the top edge of each cupcake, gently pressing them into the frosting to secure.
-
Pipe a small, inverted teardrop shape on the front center of each cupcake using the chocolate frosting to form the turkey’s head.
-
Place two candy eyeballs onto the upper portion of each turkey head, giving them character.
-
Insert another candy corn piece into the center of the turkey’s head, with the tip pointing upwards, to create the beak.
-
Finally, pipe a small dollop of the burgundy-tinted frosting along the side of the candy corn beak to create the distinctive snood of the turkey.
Notes
These delightful turkey cupcakes can be stored in an airtight container in the refrigerator for up to 3 days, maintaining their freshness and festive appearance.
Freezing is generally not recommended once the cupcakes have been frosted and decorated, as it can affect the texture of the frosting and the integrity of the candy decorations.
However, you can successfully freeze the baked, unfrosted cupcakes in an airtight container for up to 3 months. Simply thaw them at room temperature before frosting and decorating as desired.
Nutrition
Nutritional information for the recipe is provided as a courtesy and is approximate. Please double-check with your own dietary calculator for the best accuracy. We at Yummi Haus cannot guarantee the accuracy of the nutritional information given for any recipe on this site.