
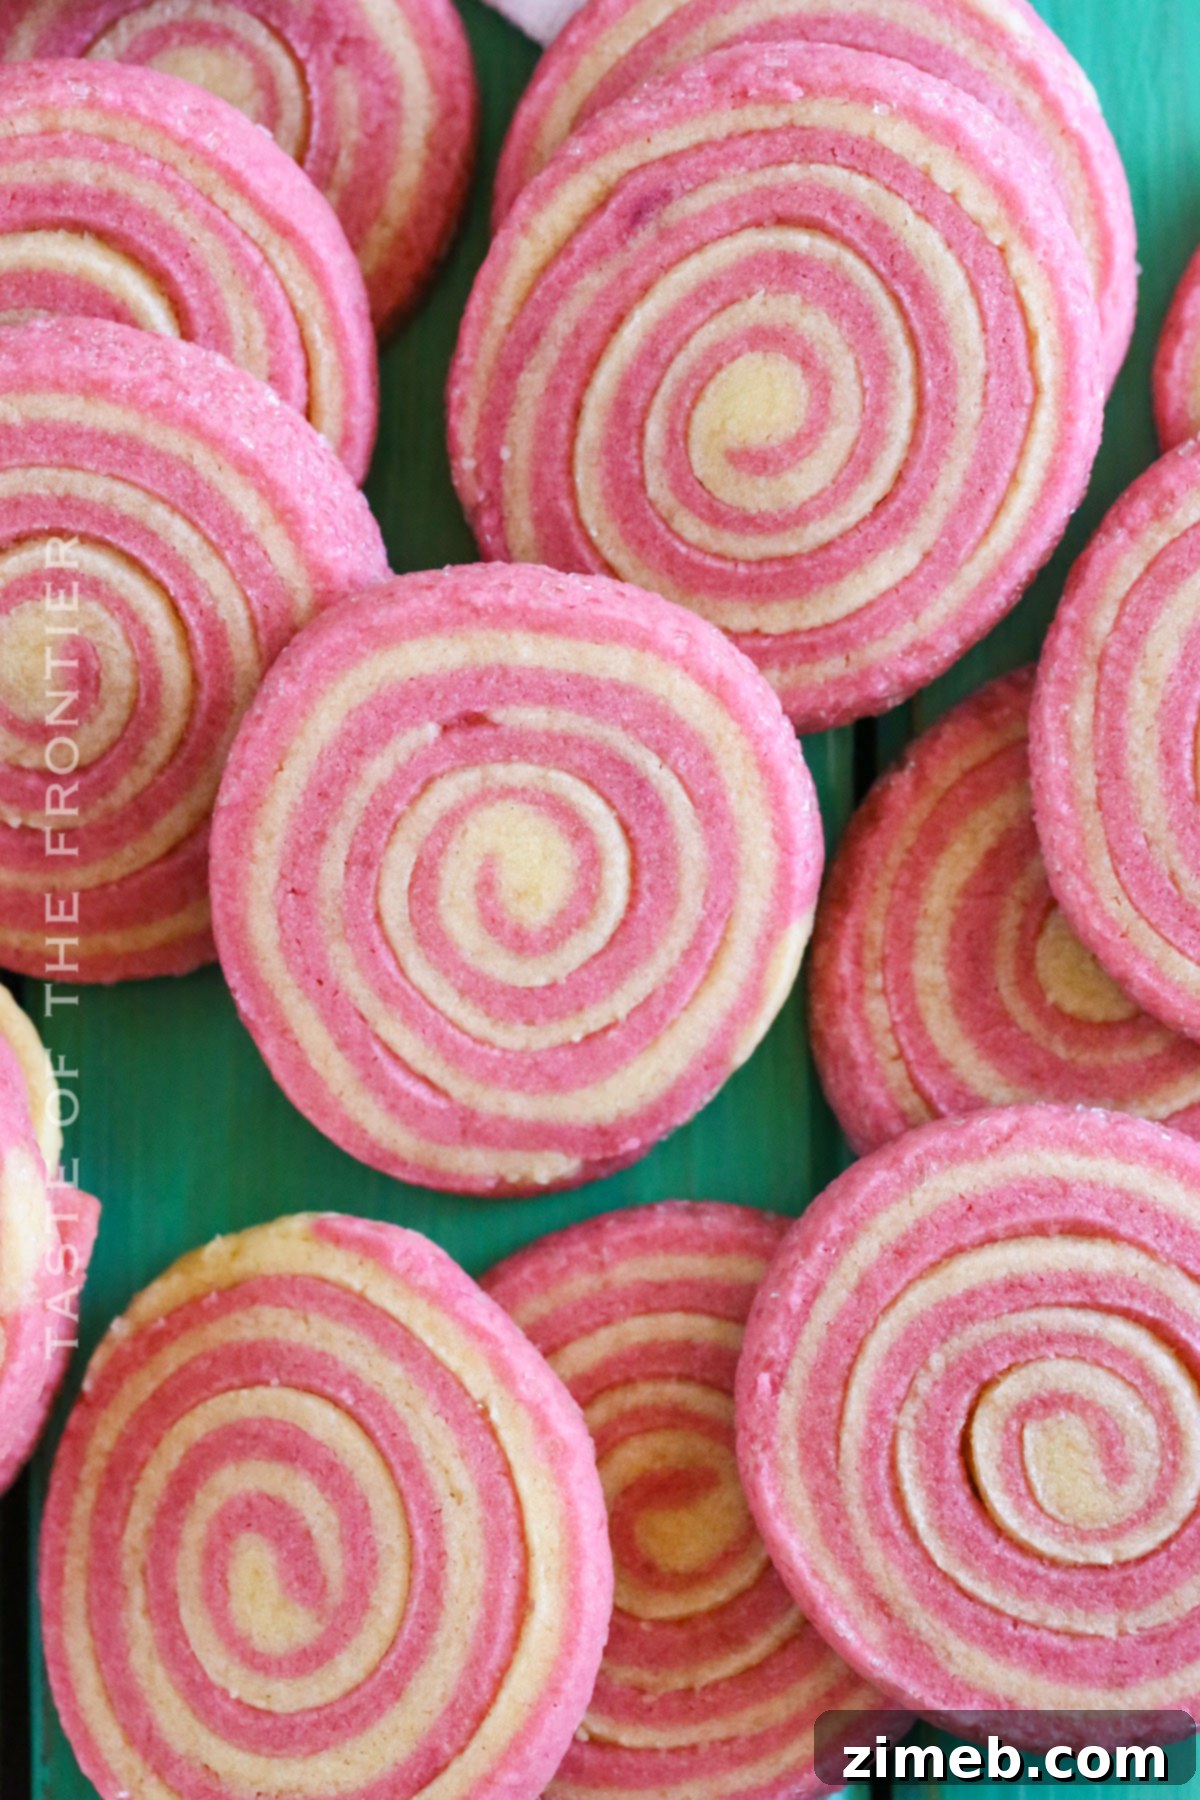
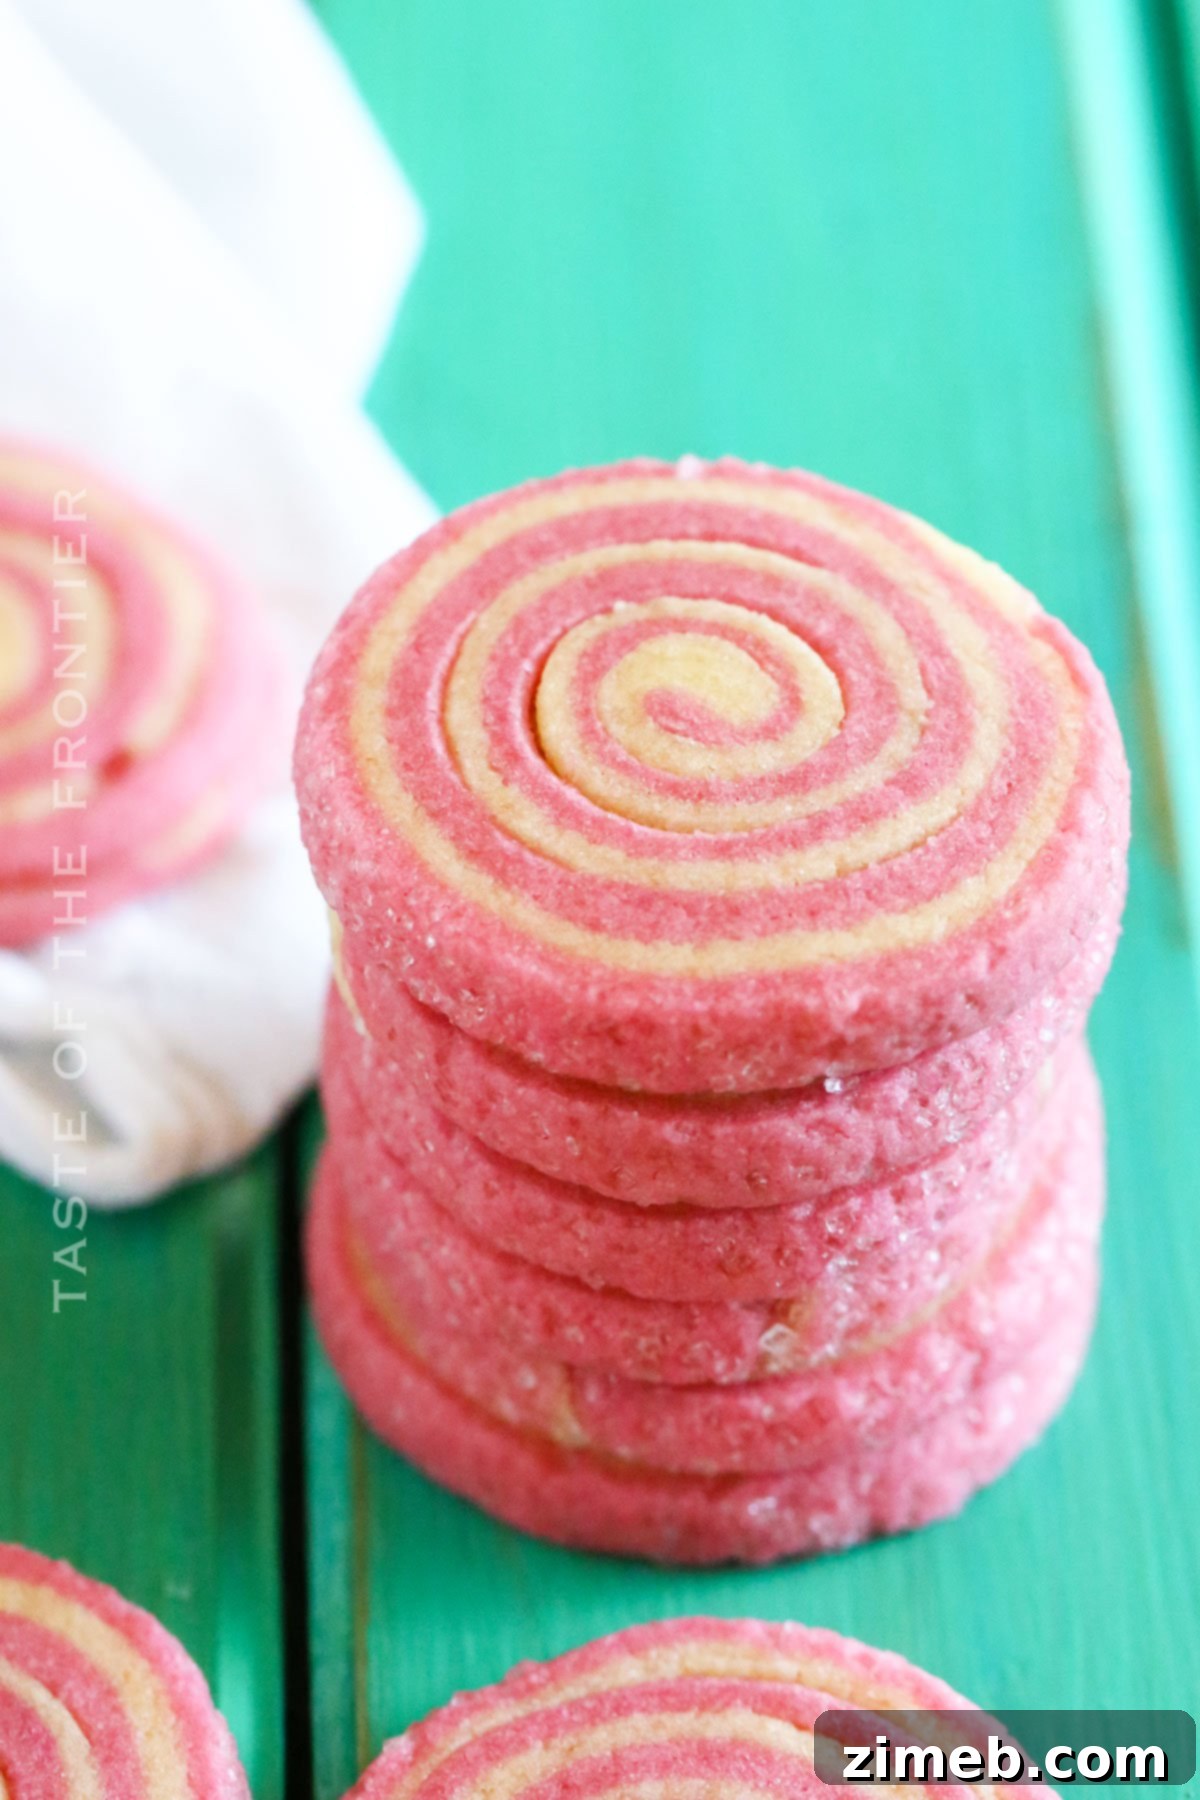
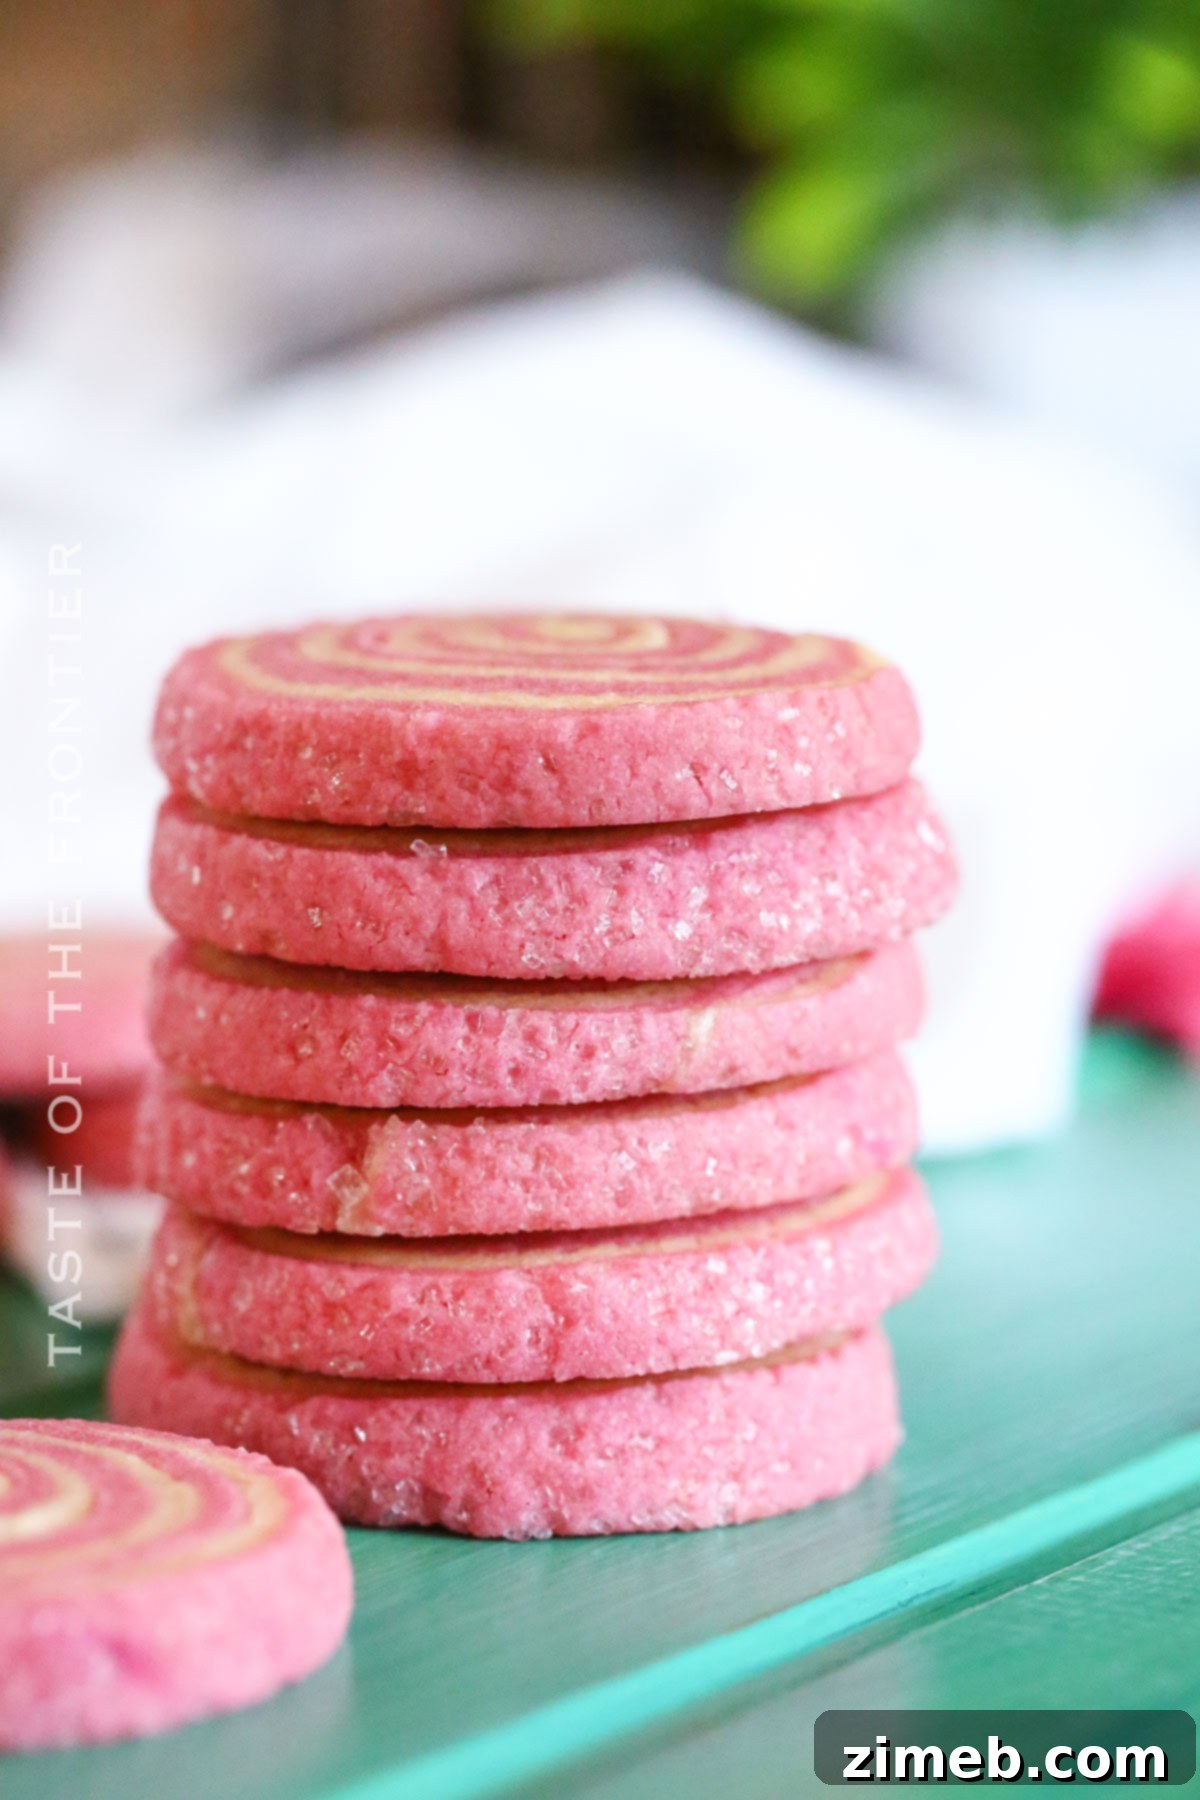
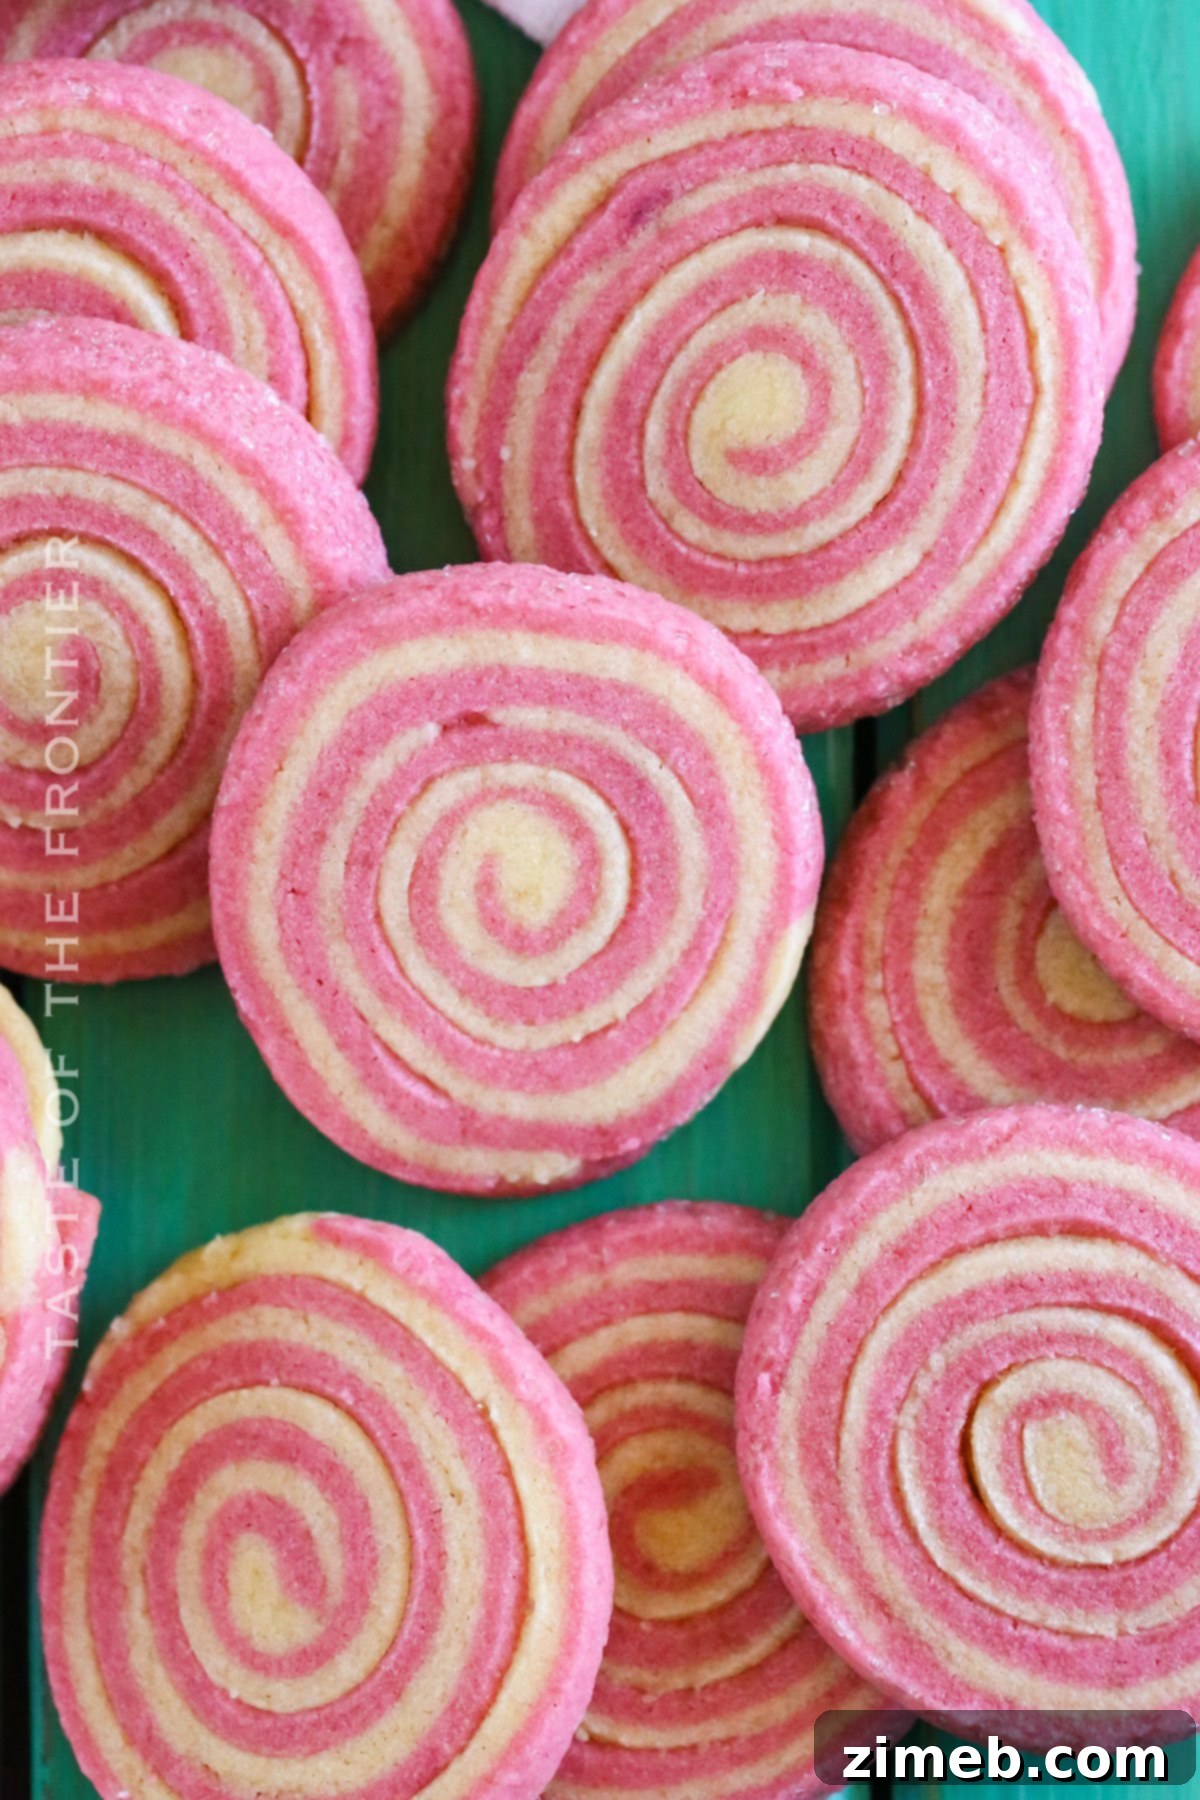
As Easter approaches, the desire to create memorable and beautiful desserts for family and friends grows. This year, delight your guests with an extraordinary treat: these stunning Easter sugar cookies, crafted into eye-catching pinwheel shapes. More than just a dessert, these vibrant, colorful cookies are a true centerpiece, transforming any Easter dinner dessert spread into a festive spectacle. Their intricate appearance might suggest a complicated baking process, but surprisingly, this recipe is remarkably simple and accessible for bakers of all skill levels.
You don’t need exotic ingredients or advanced techniques. With just a few standard pantry staples, straightforward mixing, and a bit of essential refrigeration between steps, you’ll be able to produce the most exquisite and delicious cookies. Imagine the smiles when these tender, perfectly sweet pinwheels are presented, making your Easter celebration even more special and flavorful. This guide will walk you through every step to achieve these gorgeous, bakery-quality cookies right in your own kitchen.
Gina’s Recipe Rundown: Pinwheel Easter Sugar Cookies
Texture: These Pinwheel Easter Sugar Cookies offer a truly delightful texture. They are wonderfully tender, soft, and buttery, with just the right amount of crispness around the edges. The distinctive swirl of colorful dough layers doesn’t just look beautiful; it contributes to a cookie that remains thick and satisfyingly chewy after baking, providing a pleasant contrast with the slightly crisp exterior. Each bite is a harmonious blend of melt-in-your-mouth softness and a subtle chew that keeps you coming back for more.
Taste: Prepare your taste buds for a classic, comforting flavor experience. Our Easter Sugar Cookies are rich in buttery notes, perfectly sweet, and infused with a delicate hint of vanilla. This timeless combination creates a cookie that is irresistible, making it an instant favorite for both children and adults. The sweetness is balanced, never overpowering, allowing the pure vanilla essence and rich butter flavor to shine through.
Ease: Don’t let their elegant appearance intimidate you! These Easter Sugar Cookies are surprisingly easy to master. While they look fancy and impressive, the steps involved are straightforward and beginner-friendly. With clear instructions and a little patience for chilling the dough, you’ll find the process enjoyable and the results incredibly rewarding.
Why I Love This Recipe: There’s so much to adore about these cookies! The soft, buttery texture and the hint of vanilla sweetness create a melt-in-your-mouth sensation that is simply irresistible. Beyond their delectable taste, these cookies boast impressive longevity, staying wonderfully soft for up to a week when stored correctly. This makes them perfect for preparing ahead of time for your Easter celebrations or simply enjoying over several days. They are a delightful blend of simplicity, beauty, and unforgettable flavor, guaranteed to bring joy to any occasion.
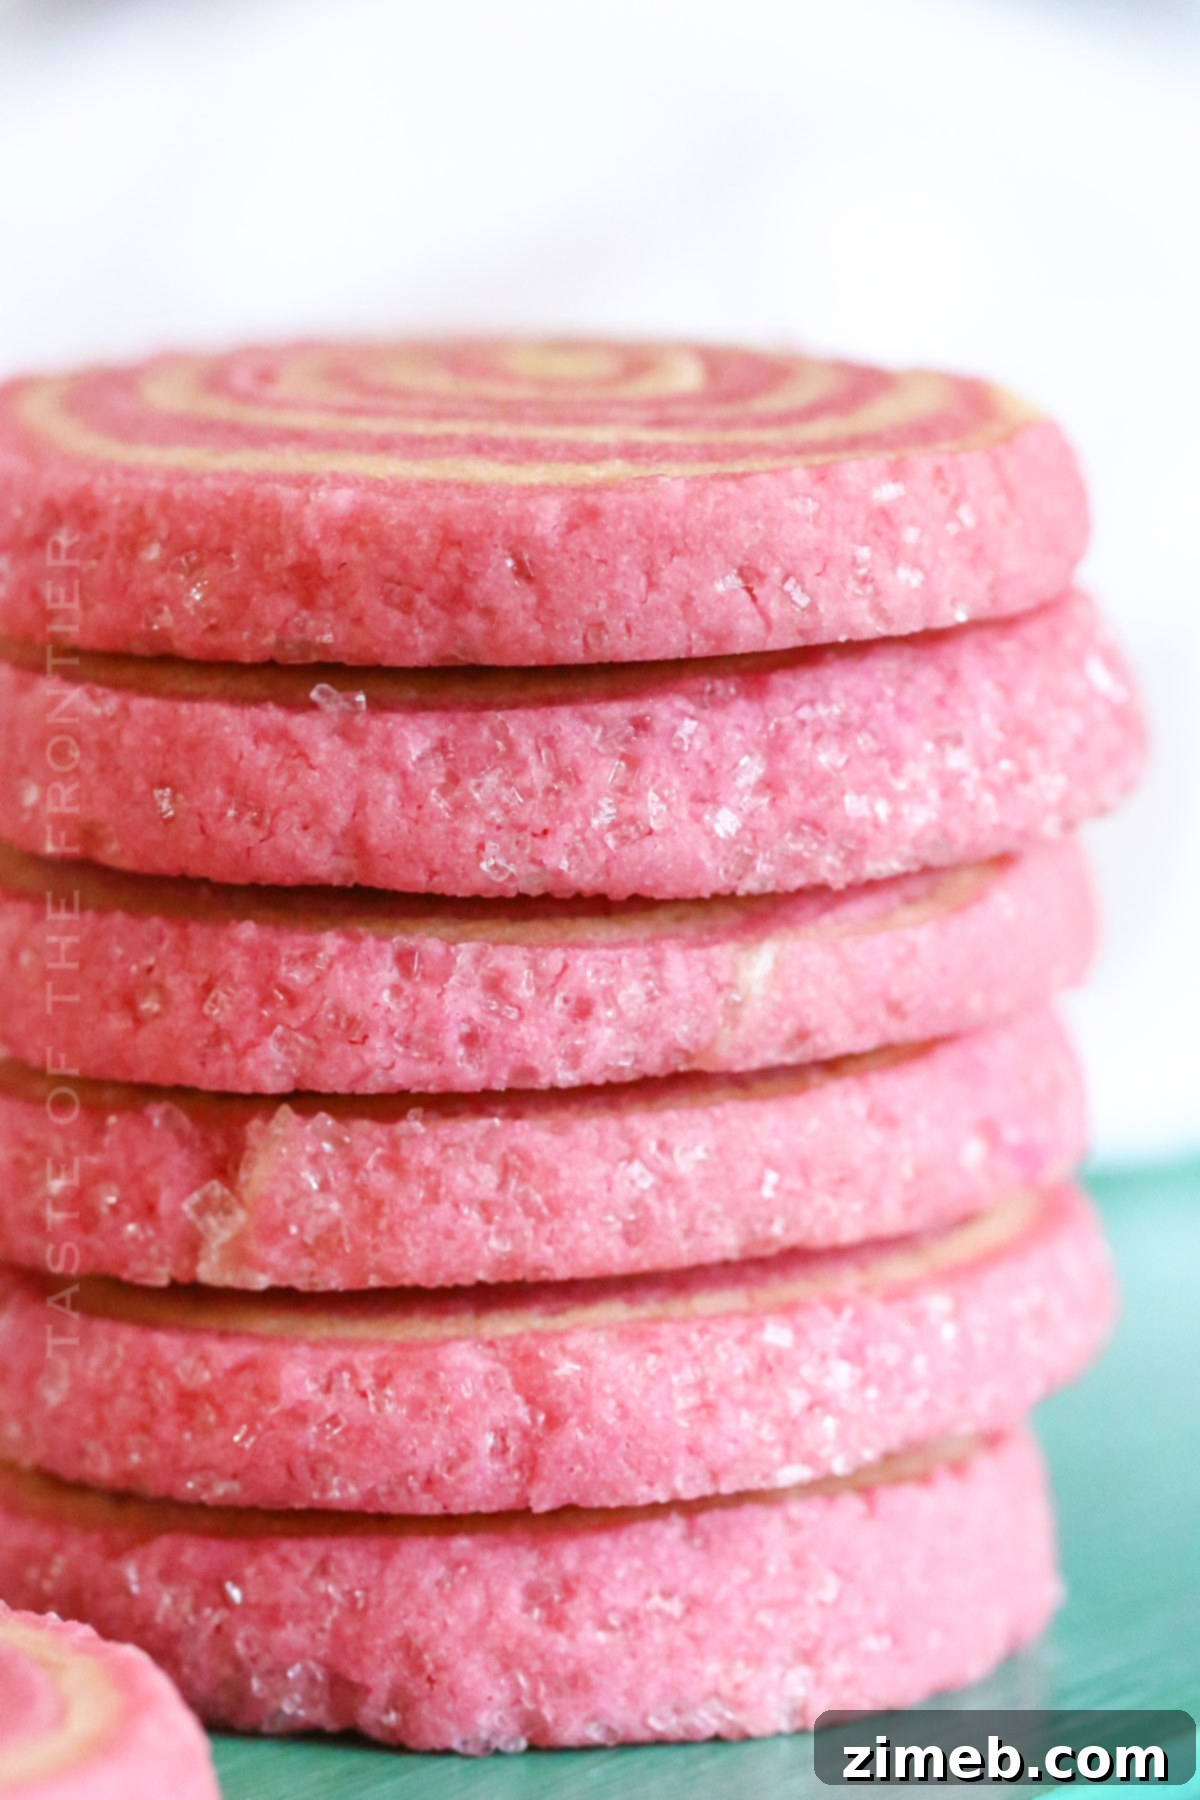
If you’re on the hunt for impressive sugar cookie recipes that will truly wow your guests this Easter, or for any special occasion that calls for a touch of whimsy and elegance, this pinwheel sugar cookie recipe is your ultimate go-to. Its unique visual appeal combined with a delightful taste makes it a standout choice for holiday gatherings, spring parties, or simply as a joyous homemade treat.
- Gina’s Recipe Rundown: Pinwheel Easter Sugar Cookies
- Common Questions about Easter Sugar Cookies
- Do you put sugar crystals on cookies before baking?
- Do you decorate cookies hot or cold?
- Making Sugar Cookies for Easter Ahead of Time
- Storage: Best Practices for Sugar Cookies
- Tips For The Best Easter Sugar Cookies
- Essential Ingredients for Your Easter Sugar Cookies
- Kitchen Supplies You’ll Need
- How to Make Easter Sugar Cookies: Step-by-Step
- What to Serve With Sugar Cookies for Easter
- Why You Should Make This Recipe Today
- Creative Variations and Add-ins for Your Pinwheel Cookies
- Other Delicious Cookie Recipes to Try
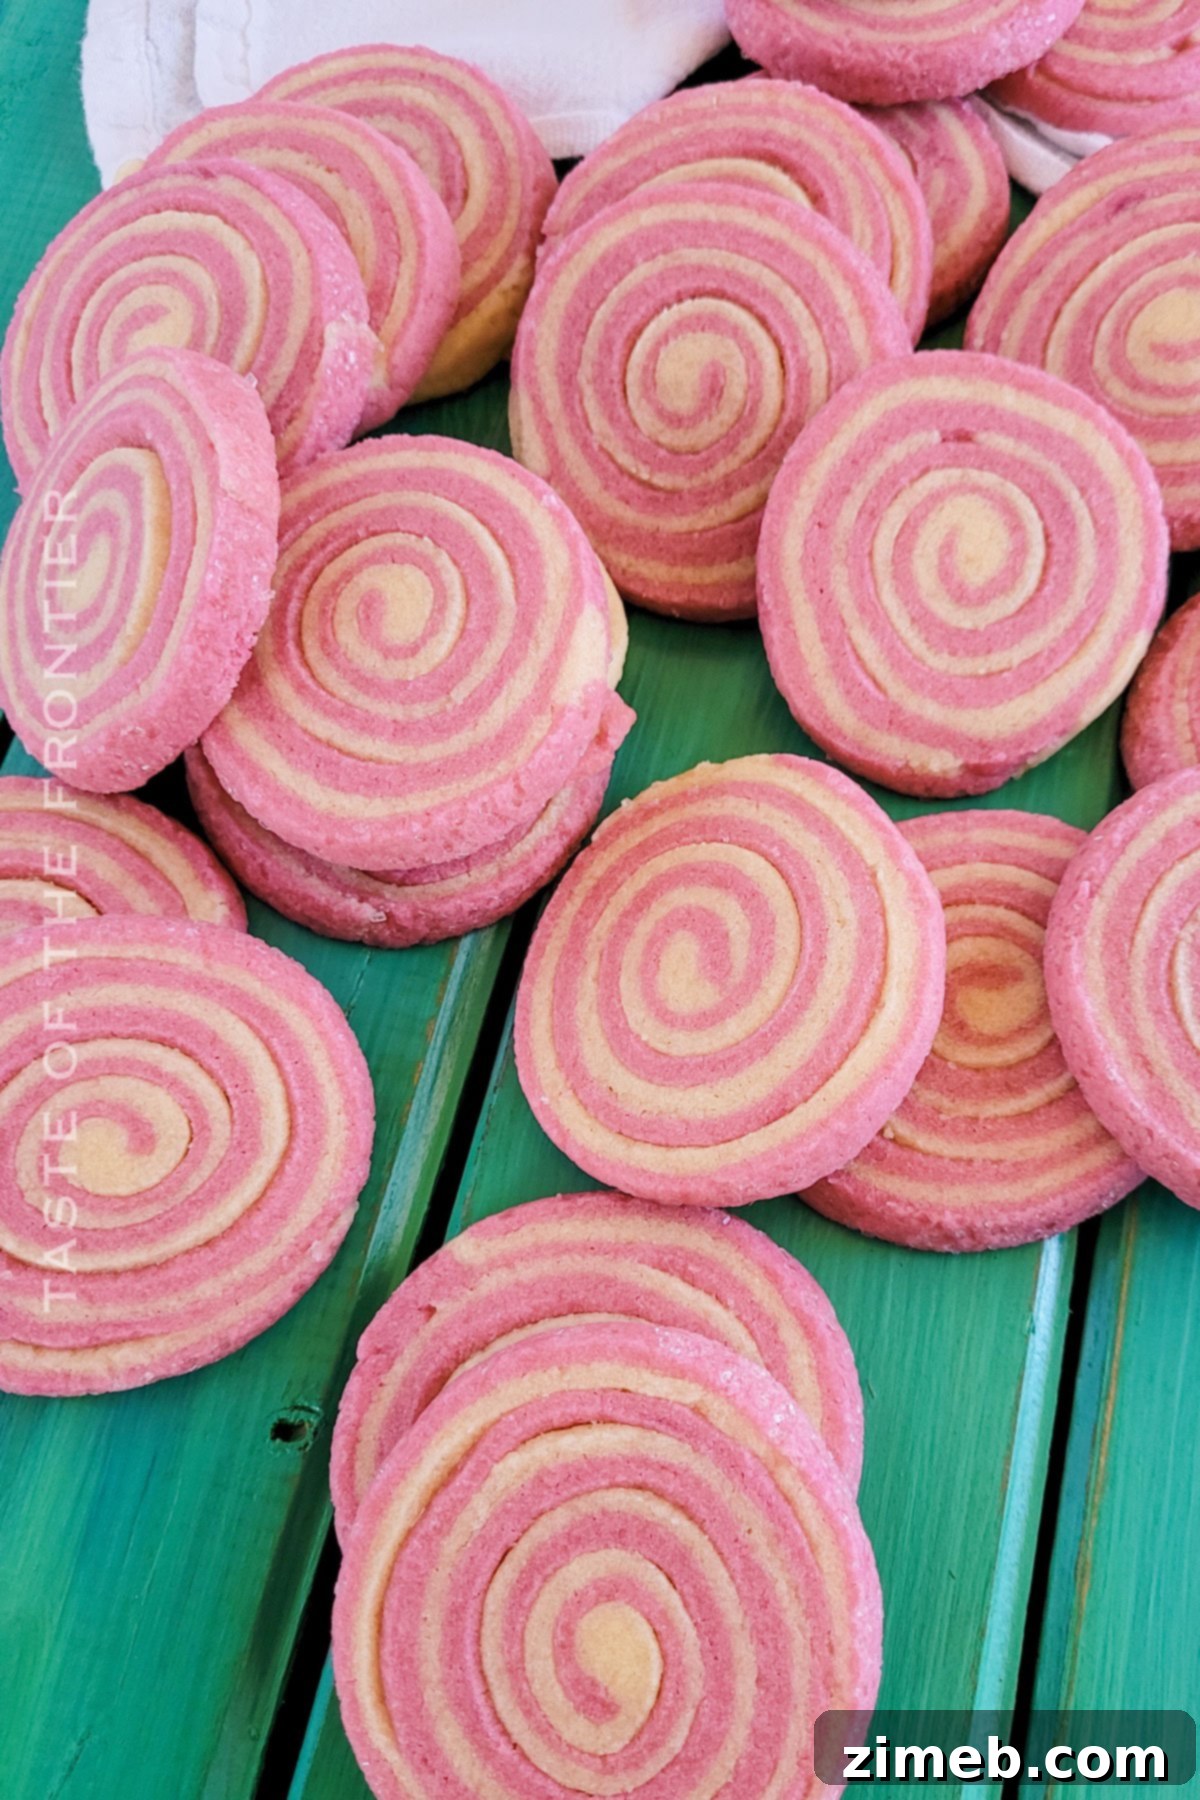
Common Questions about Easter Sugar Cookies
Delving into a new recipe often brings questions, especially when aiming for perfection for a special occasion like Easter. Here, we address some of the most common queries about making these delightful pinwheel sugar cookies, ensuring your baking experience is as smooth and successful as possible.
Do you put sugar crystals on cookies before baking?
Absolutely! While our core recipe doesn’t explicitly require sugar crystals, they are a fantastic optional addition to enhance both the visual appeal and texture of your pinwheel cookies. If you decide to add decorative elements like sugar crystals, sanding sugar, or sprinkles, it’s best to apply them *before* baking. This allows the heat of the oven to help them adhere securely to the dough, preventing them from falling off once the cookies are cooled. For these pinwheel cookies, pressing sprinkles or sanding sugar into the rolled log of dough before its final chill is an excellent way to incorporate them, ensuring a beautiful, sparkling finish on your baked treats.
Do you decorate cookies hot or cold?
When it comes to decorating, especially with frostings, glazes, or intricate details, patience is key. For best results, always wait until your cookies are completely cooled to room temperature before attempting any decoration. Hot or even warm cookies will cause frosting to melt, slide, or become messy, ruining your beautiful designs. While our pinwheel cookies are designed to be stunning on their own with their colorful swirls, if you choose to add extra flair like a simple drizzle or dusting of powdered sugar, ensure they are thoroughly cooled first to maintain their pristine appearance and prevent any unwanted mishaps.
Making Sugar Cookies for Easter Ahead of Time
One of the fantastic advantages of this Easter sugar cookie recipe is its flexibility, allowing you to prepare components in advance. You can make the cookie dough and store it wrapped tightly in plastic wrap in the refrigerator for up to 24 hours. This makes holiday baking significantly less stressful, as you can tackle the dough preparation a day before you plan to bake and decorate. When you’re ready to bake, simply remove the dough from the fridge, allow it to soften slightly for easier rolling (about 10-15 minutes at room temperature), and then proceed with rolling, slicing, and baking as instructed. This method ensures fresh, delicious cookies with minimal last-minute fuss, perfect for a busy Easter weekend.
Storage: Best Practices for Sugar Cookies
To maintain the delightful softness and freshness of your baked pinwheel cookies, proper storage is crucial. Once completely cooled, store your cookies in an airtight container or a reliable Ziploc bag at room temperature. When stored this way, these soft sugar cookies will retain their tender texture and delicious flavor for up to a week. It’s generally not recommended to refrigerate baked sugar cookies, as the cold temperature can cause them to dry out and become hard. Freezing is also typically advised against for already baked sugar cookies as it can affect their delicate texture, making them crumbly or less enjoyable upon thawing. However, if you need to store the dough for longer periods, consider freezing the unbaked dough log (well-wrapped) for up to 3 months, then thawing in the refrigerator before slicing and baking.
Tips For The Best Easter Sugar Cookies
Achieving perfectly soft, chewy, and visually appealing Easter sugar cookies is simple with these expert tips:
- Chill the Dough Thoroughly: This is arguably the most crucial step for pinwheel cookies. Chilling the dough serves multiple purposes: it allows the ingredients to meld together, enhancing the flavor, and more importantly, it firms up the dough. Firm dough is easier to handle, roll, and slice, ensuring your pinwheel shapes hold beautifully and prevent the cookies from spreading excessively during baking. Don’t rush this step!
- Ensure Butter is at Room Temperature: Softened butter creams much more easily with sugar, creating a light and airy base for your cookie dough. If your butter is too cold, it won’t incorporate properly, leading to a dense cookie. If it’s too warm or melted, the dough can become greasy and difficult to manage. Aim for butter that is soft enough to indent with a finger but still holds its shape.
- Don’t Overmix the Dough: Once you add the flour, mix until just combined. Overmixing develops the gluten in the flour, which can lead to tough, rather than tender, cookies. Mix on low speed until no dry streaks of flour remain.
- Use Parchment Paper: Always line your baking sheets with parchment paper. This prevents sticking, ensures even baking, and makes cleanup a breeze. It also helps in achieving that slight crispness around the edges without overbrowning the bottom.
- Avoid Overbaking: Sugar cookies bake relatively quickly. Keep a close eye on them, especially during the last few minutes. Cookies are done when the edges are lightly golden and the centers are just set and no longer appear shiny. They will continue to cook slightly from residual heat on the baking sheet after being removed from the oven, so slightly underbaked is often better than overbaked for a soft texture.
- Consistent Thickness for Even Baking: When rolling out your dough, strive for an even thickness (⅛ to ¼ inch). This ensures all your cookies bake uniformly, preventing some from being undercooked while others are overdone. A rolling pin with thickness guides can be incredibly helpful here.
Essential Ingredients for Your Easter Sugar Cookies
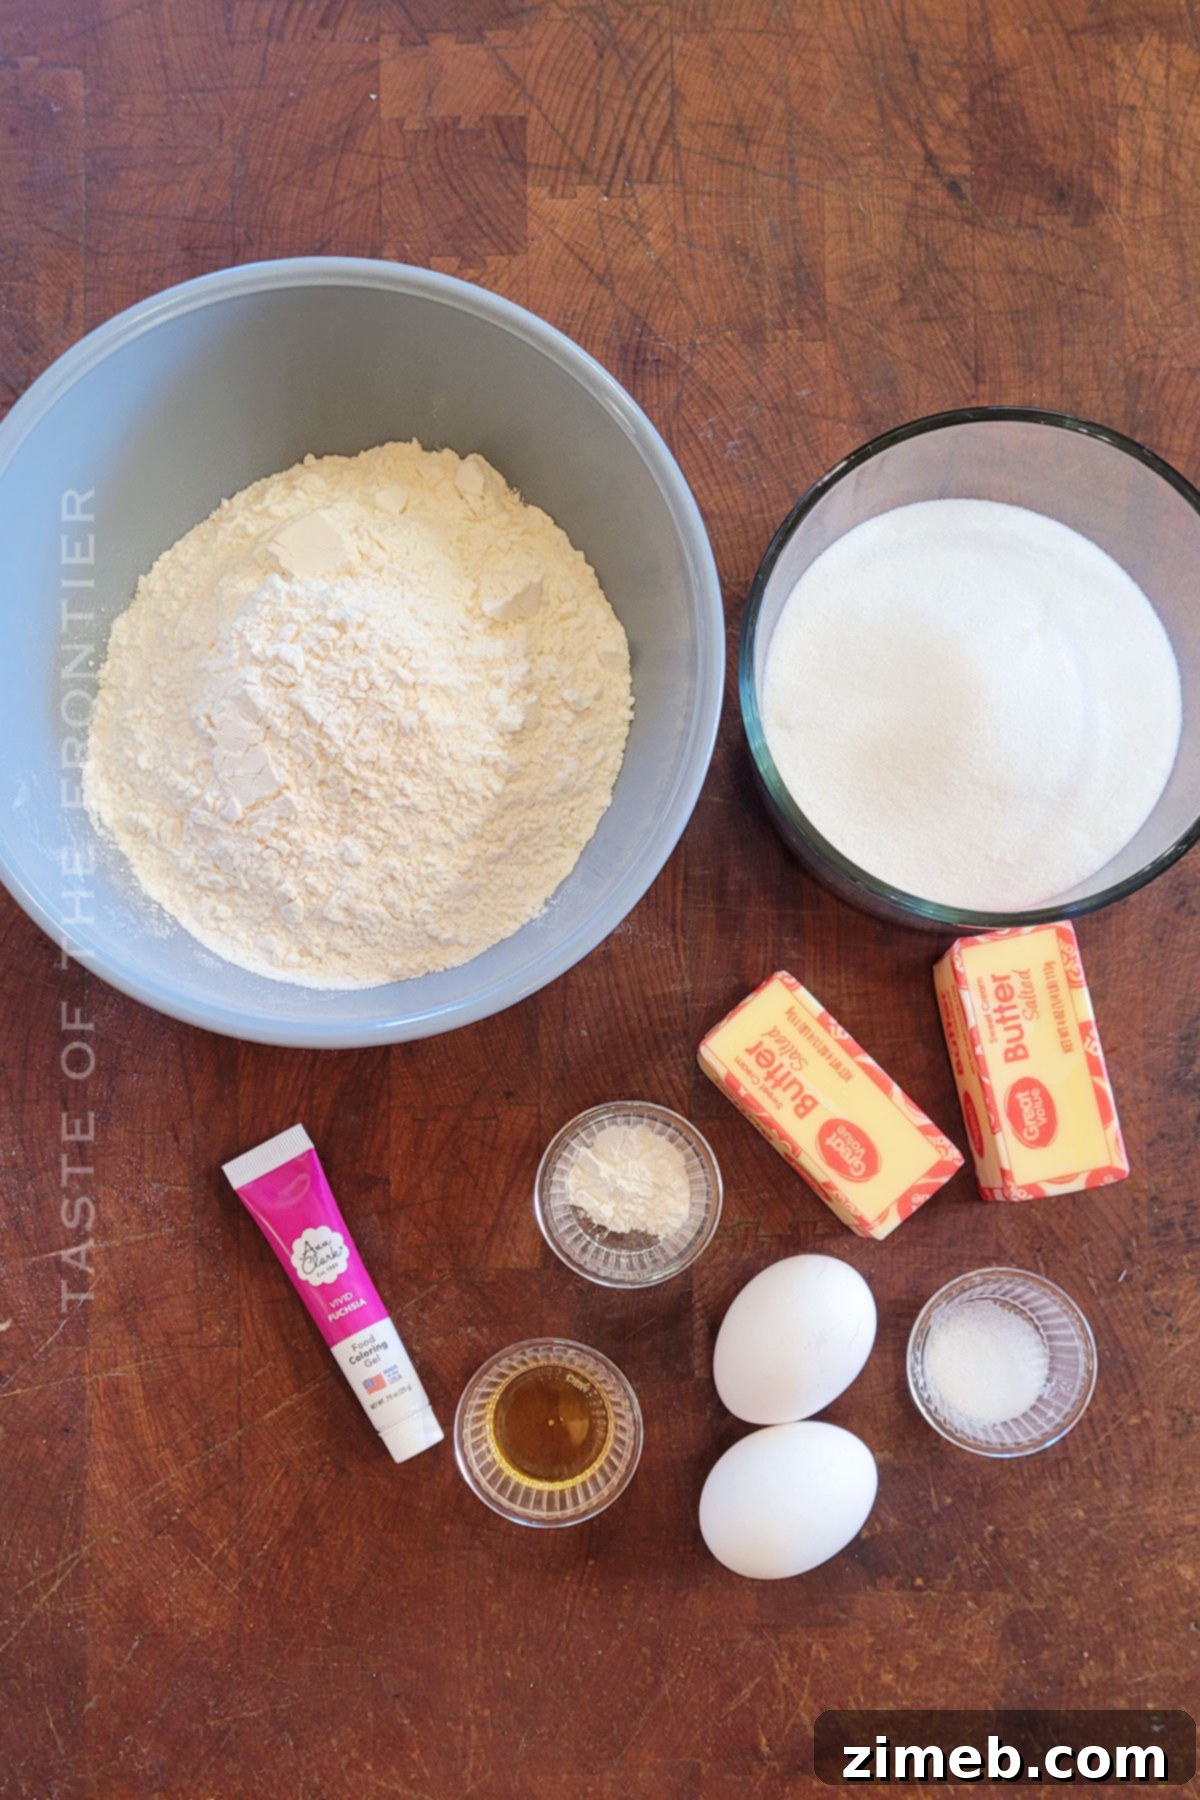
Crafting these beautiful pinwheel sugar cookies is delightfully simple, requiring a handful of basic ingredients that you likely already have in your pantry. The magic happens when these humble components come together to create a truly spectacular treat. Besides the vibrant food coloring and optional sprinkles, here’s what you’ll need:
- All-Purpose Flour: The foundation of our cookies, providing structure and body.
- Baking Powder: A leavening agent that gives these cookies a delicate lift, contributing to their soft and tender texture.
- Salt: Essential for balancing the sweetness and enhancing all the other flavors in the cookie. Don’t skip it!
- Butter (Room Temperature): The star ingredient for richness and flavor. Using softened butter is key for proper creaming and a smooth dough.
- Granulated Sugar: Provides sweetness and helps create that wonderful crisp-tender texture.
- Eggs: Act as a binder, adding moisture and richness to the dough, contributing to its chewy quality.
- Vanilla Extract: A classic flavor enhancer that adds warmth and depth to the sweet profile of the cookies. Pure vanilla extract is always recommended for the best flavor.
- Pink Gel Food Coloring: We used a vibrant fuchsia gel for a striking color, but you can choose any gel food coloring to match your desired Easter palette. Gel colors are preferred over liquid as they don’t add extra moisture to the dough.
- White Sanding Sugar or Sprinkles (Optional): For an extra festive touch and a bit of sparkle on the exterior of your pinwheel cookies.
Kitchen Supplies You’ll Need
To whip up these easy and gorgeous sugar cookies, you’ll only need a few essential kitchen tools. Most of these are likely already staples in your baking arsenal, making this recipe even more convenient.
- Mixing Bowls: You’ll need at least two – one for dry ingredients and one for wet ingredients – to ensure proper mixing and incorporation.
- Stand Mixer with a Paddle Attachment or Hand Mixer: A mixer is invaluable for creaming butter and sugar, as well as thoroughly combining the dough. The paddle attachment is ideal for cookie dough.
- Pizza Cutter or Pastry Cutter: Perfect for trimming the edges of your rolled dough to create neat rectangles, which is essential for uniform pinwheel swirls.
- Pastry Brush: Useful for applying a light coat of water to the dough if you’re adding sprinkles, helping them adhere better.
- Baking Sheets: You’ll need one or more baking sheets, preferably lined with parchment paper, to bake your cookies evenly.
- Wire Rack: Crucial for cooling the cookies completely after baking, allowing air circulation to prevent them from becoming soggy.
- Rolling Pin: Essential for rolling out your dough to the desired uniform thickness before forming the pinwheels.
How to Make Easter Sugar Cookies: Step-by-Step
This easy Easter sugar cookie recipe comes together with surprisingly little effort, despite the stunning results. Follow these steps carefully for beautiful, delicious pinwheel cookies:
- Combine Dry Ingredients: In a large bowl, whisk together the all-purpose flour, salt, and baking powder. Sifting these ingredients together ensures they are well combined and evenly dispersed throughout the dough. Set this aside.
- Cream Butter and Sugar: In a separate, larger mixing bowl, use a stand mixer with a paddle attachment or a hand mixer to cream together the softened butter and granulated sugar until the mixture is light, fluffy, and pale in color. This process incorporates air, contributing to the cookies’ tender texture.
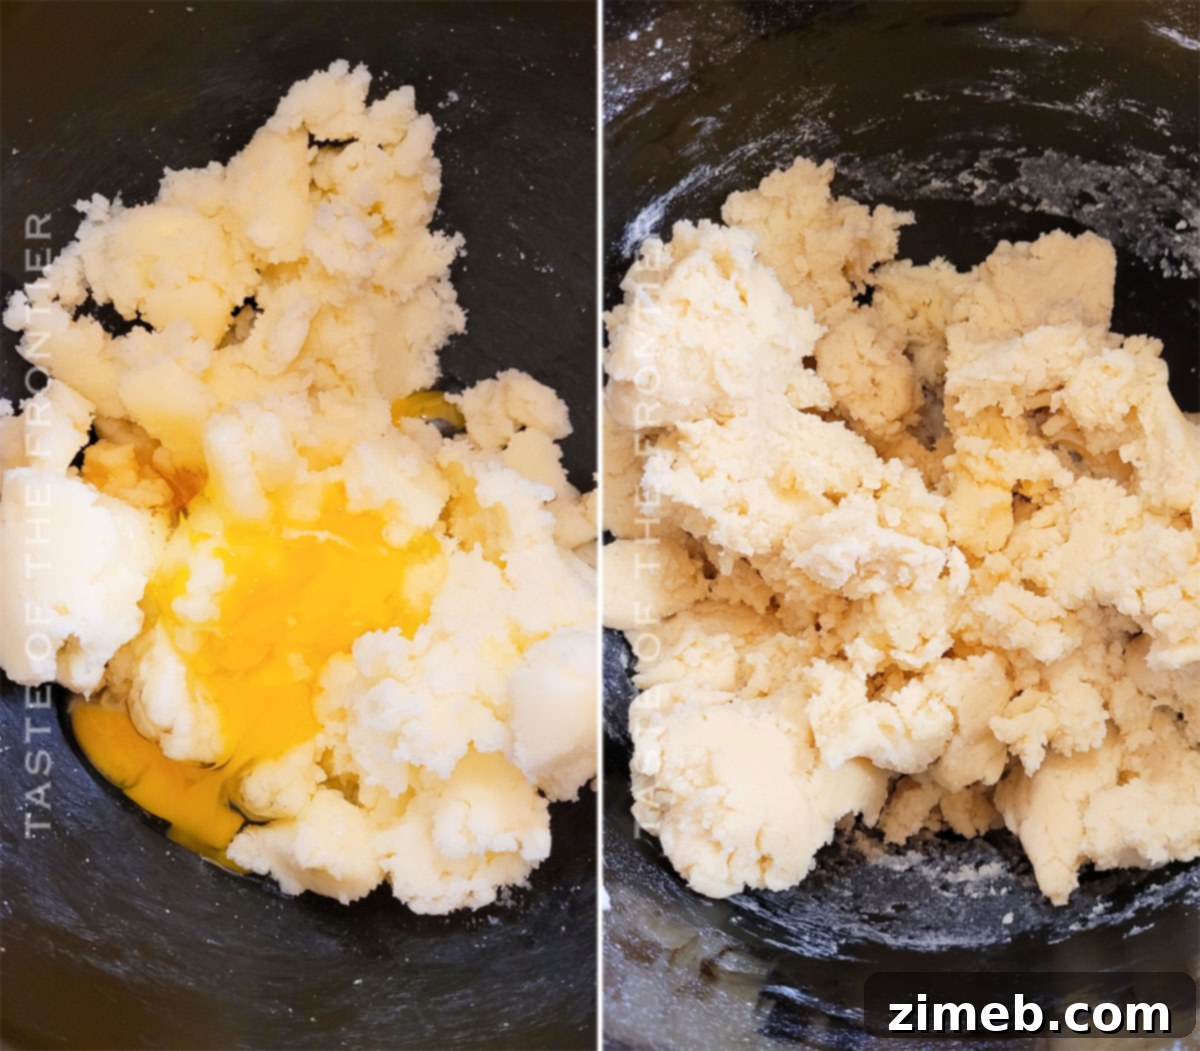
- Add Wet Ingredients: Once the butter and sugar are creamed, beat in the eggs one at a time, followed by the vanilla extract. Continue to beat until everything is thoroughly combined, making sure to scrape down the sides of the bowl with a spatula to ensure all ingredients are fully incorporated.
- Gradually Add Dry to Wet: Slowly add the dry flour mixture to the butter and egg mixture in intervals. Mix on low speed until all ingredients are just equally dispersed and the dough comes together. Be careful not to overmix, as this can make your cookies tough.
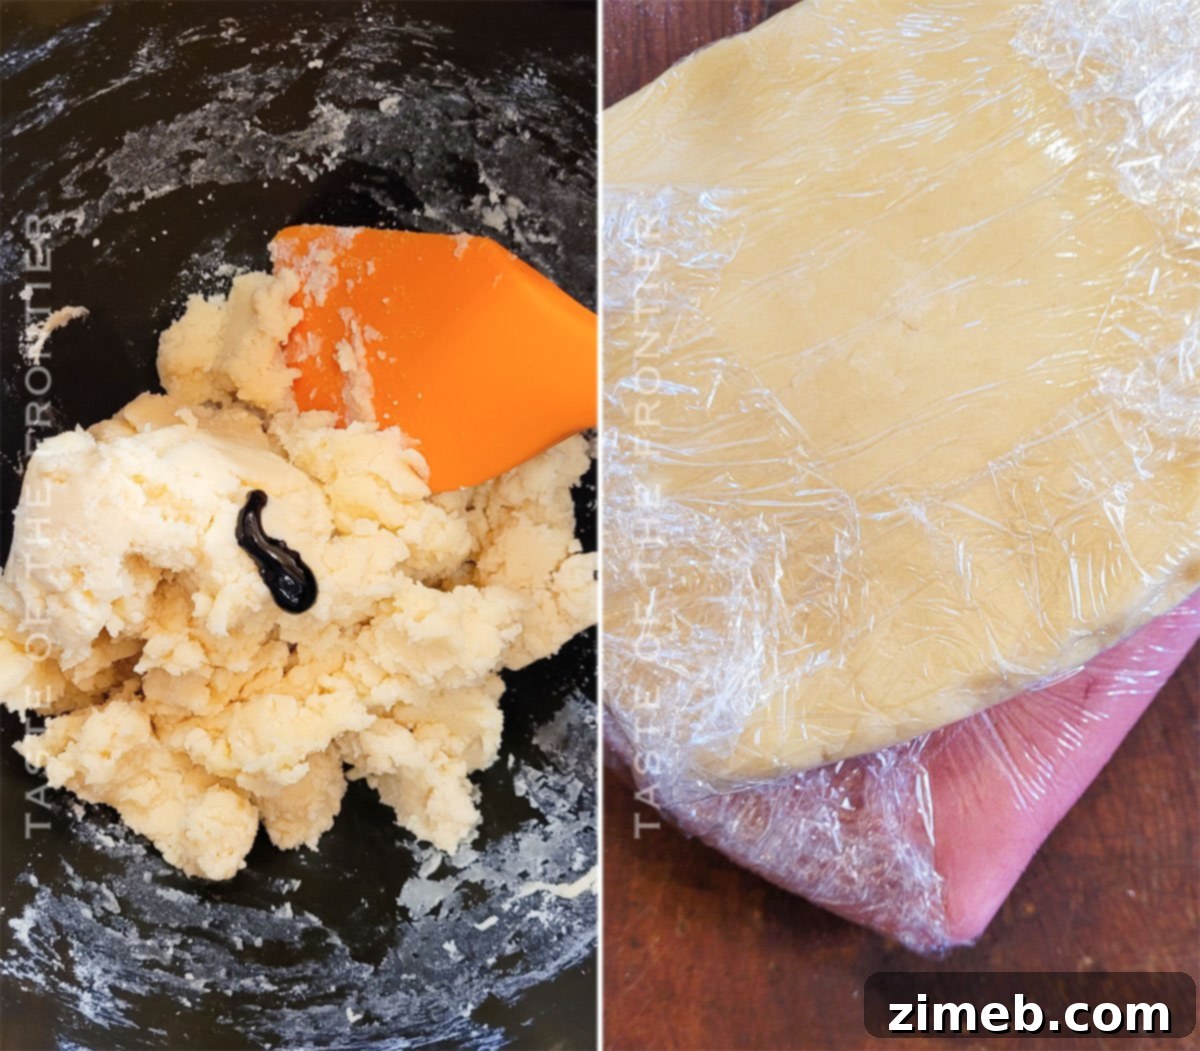
- Divide and Color Dough: Divide the cookie dough into two equal halves. Take one portion and add your chosen gel food coloring (like pink fuchsia). Use your stand or electric mixer to thoroughly mix the color into the dough until a uniform and desired shade is achieved. Leave the other portion of dough uncolored, or color it with a different shade for a more multi-layered pinwheel.
- Form and Chill Dough Rectangles: On a lightly floured surface, gently form each half of the sugar cookie dough into a ball, then flatten it into a thick patty. Carefully reshape the edges to form a neat rectangle. Wrap each dough rectangle tightly in plastic wrap and refrigerate for 1-2 hours. This chilling step is crucial for the dough to firm up and for the colors to set, making it easier to work with.
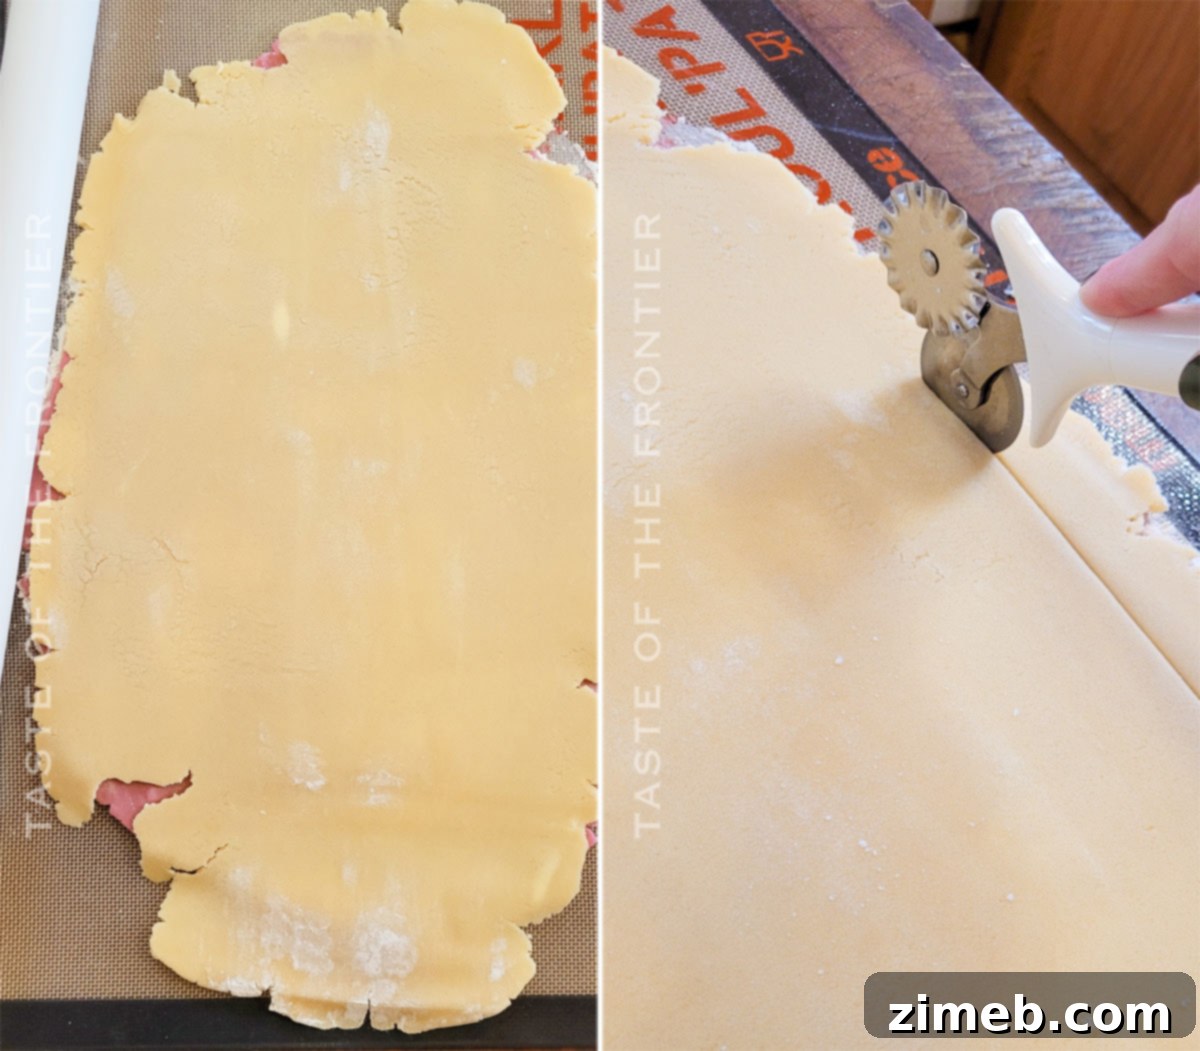
- Roll and Stack Dough: After chilling, remove the dough rectangles from the refrigerator. On a lightly floured surface, roll out each dough rectangle to an even thickness of approximately ⅛ to ¼ inch. Carefully place one rolled dough rectangle directly on top of the other (e.g., colored dough on the bottom, uncolored dough on top).
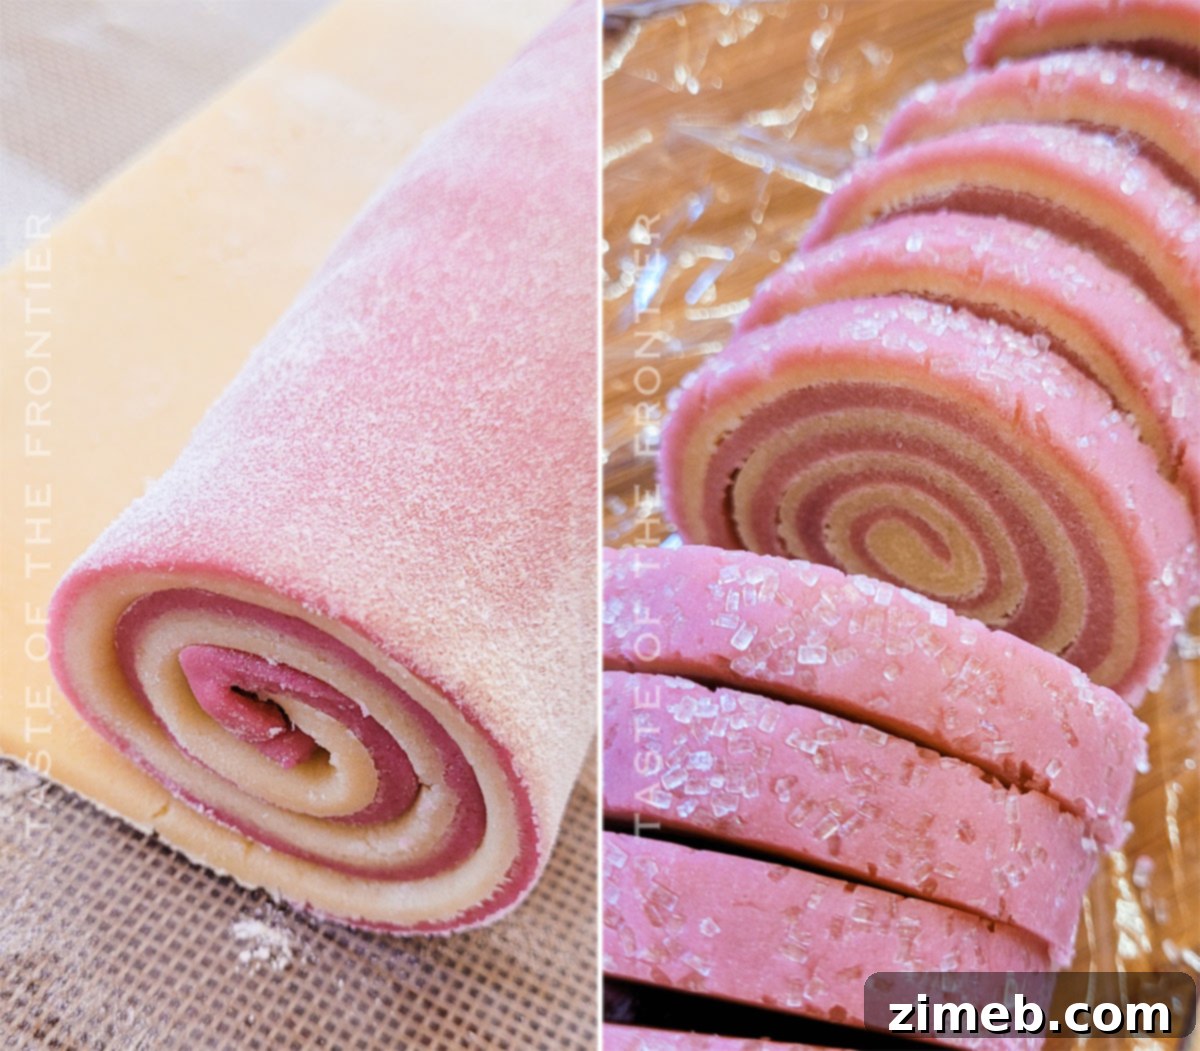
- Trim and Roll into a Log: Using a pizza cutter or pastry cutter, carefully trim the edges of your stacked dough to create clean, straight lines, forming a perfect rectangle. Starting from one long end, gently but firmly roll the stacked dough into a tight log. This creates the signature pinwheel effect.
- Add Sprinkles (Optional) & Chill Again: If desired, lightly brush the outside of the dough log with a little water using a pastry brush, then gently roll it in white sanding sugar or sprinkles, pressing them lightly to adhere. Wrap the dough log tightly in plastic wrap and refrigerate again for at least 1 hour. This second chill is vital for the log to firm up, making it easier to slice without distorting the pinwheel shape.
- Preheat Oven & Slice Cookies: Preheat your oven to 350°F (175°C). Remove the chilled dough log from the refrigerator. Using a sharp, thin-bladed knife (a thicker blade can squish the dough), slice the log into cookies approximately ¼ to ½ inch thick.
- Bake: Arrange the sliced cookie rounds on a prepared baking sheet lined with parchment paper, spacing them about 2 inches apart. Bake for 10-12 minutes, or until the edges are lightly golden and the tops are no longer shiny. Be careful not to overbake to maintain their soft texture.
- Cool: Allow the cookies to cool on the baking sheet for a few minutes before carefully transferring them to a wire rack to cool completely to room temperature.
What to Serve With Sugar Cookies for Easter
These exquisite sugar cookies, with their vibrant pinwheel patterns, are certainly capable of standing alone as a star dessert. However, their versatility makes them a wonderful accompaniment to a variety of beverages and other sweet treats. Here are some delightful ideas to complement your Easter sugar cookies and elevate your dessert experience:
- Warm Drinks: Nothing pairs quite as perfectly with a sweet cookie as a comforting warm beverage. Offer a selection of freshly brewed coffee, soothing herbal or black tea, or rich hot chocolate. The warmth of the drink provides a lovely contrast to the cookie’s buttery sweetness, creating a cozy and inviting experience.
- Whipped Cream: A dollop of freshly made whipped cream can transform these cookies into an even more decadent treat. Serve it alongside for guests to smear on their cookies or use as a light, airy dip. The creaminess and subtle sweetness of the whipped cream beautifully complement the sugar cookie’s texture and flavor.
- Ice Cream: For a truly indulgent dessert, pair your Easter sugar cookies with a scoop of your favorite ice cream. Vanilla bean, strawberry, or even a complementary fruit sorbet would be heavenly. You can place a cookie on top of the ice cream, crumble it over, or serve the cookies on the side for a delightful scoop-and-bite experience.
- Marshmallow Fluff: Similar to whipped cream, marshmallow fluff offers a unique texture and a sweet, dreamy flavor that pairs wonderfully with sugar cookies. Its sticky, airy consistency makes it an excellent option for spreading or dipping, adding an extra layer of sweetness and fun to your dessert table.
- Fresh Fruit Platter: For a refreshing balance to the sweetness, consider serving your cookies alongside a vibrant platter of fresh spring fruits like strawberries, blueberries, raspberries, or sliced kiwi. The natural tartness and juiciness of the fruit provide a lovely palate cleanser and a burst of freshness.
Why You Should Make This Recipe Today
These pinwheel Easter cookies are more than just a treat; they’re an experience waiting to happen. There are countless compelling reasons to make these fantastic cookies for your upcoming Easter celebration or simply to brighten any spring day:
- Effortlessly Easy: Sugar cookies are a classic for a reason – they are fundamentally simple and universally beloved. While these pinwheel cookies involve a few distinct steps, each individual step is incredibly straightforward. The hands-on prep time is surprisingly minimal, making it an ideal baking project even for those new to the kitchen or for involving kids in a fun, colorful activity. The beautiful results belie the ease of preparation.
- Wonderfully Festive: These cookies are designed to celebrate! Their vibrant colors and whimsical pinwheel shape make them an elevated and perfectly festive addition to any Easter brunch, dinner, or gathering. They instantly add a touch of joy and spring cheer to your dessert spread, making them unforgettable. Plus, with customizable colors, you can easily adapt them for other holidays or themes throughout the year.
- Budget-Friendly Baking: You don’t need to splurge to create a gorgeous and delicious dessert. This recipe calls for very few basic, affordable ingredients that are common in most pantries. Making these cookies from scratch is a cost-effective way to produce an impressive quantity of treats compared to buying them from a bakery, allowing you to enjoy gourmet-quality desserts without breaking the bank.
- Crowd-Pleasing Flavor: Beyond their beauty, these cookies deliver on taste. Their soft, buttery, and subtly sweet vanilla flavor is a universal crowd-pleaser, appealing to all ages. They are the kind of cookies that disappear quickly from any plate.
- Perfect for Gifting: Baked with love and decorated with cheerful colors, these pinwheel sugar cookies make a thoughtful and delicious homemade gift for neighbors, teachers, or hosts during the Easter season.
Creative Variations and Add-ins for Your Pinwheel Cookies
While these Easter sugar cookies are fantastic as is, there are endless ways to customize them and make them truly your own signature holiday treat. Don’t be afraid to experiment and get creative with these delicious variations and add-ins:
- Alternative Flours: If you’re catering to dietary needs or simply want to experiment, you can try using alternative flours. A 1:1 gluten-free baking flour blend often works well as a direct substitute. Always check the specific recommendations for your chosen flour, as some may require slight adjustments to liquid or baking time.
- Different Extracts for Flavor: While vanilla extract is a timeless choice, feel free to switch it up! Almond extract offers a delightful nutty note, lemon extract can provide a bright, zesty twist, or even a touch of coconut extract for a tropical flair. Start with a small amount and adjust to taste, as some extracts are more potent than others.
- Vibrant Colors Beyond Pink: The beauty of pinwheel cookies lies in their customizable colors! Use any gel food coloring you like to create different holiday themes or simply your favorite color combinations. Think pastel blues, greens, and yellows for a classic Easter look, or bolder hues for a modern twist.
- Decorating Options: While the pinwheels are decorative on their own, you can certainly add more embellishments:
- Buttercream Frosting: Once cooled, frost these cookies with your favorite buttercream. Use a piping bag with a decorative tip for a professional touch.
- Powdered Sugar Dusting: For a simple yet elegant finish, dust cooled cookies with powdered sugar.
- Glaze Icing: A thin drizzle of glaze icing (powdered sugar mixed with a little milk or lemon juice) can add a lovely sheen and extra sweetness.
- Add Chocolate: For the chocolate lovers, fold mini chocolate chips or finely shaved chocolate into one or both portions of the dough before chilling. This adds pockets of rich chocolatey goodness to your otherwise sweet vanilla cookies.
- Citrus Zest for Brightness: Elevate the flavor profile by adding a splash of fresh lemon juice or lemon extract to the batter, along with some finely grated lemon zest. This transforms them into bright and zesty lemon cookies, perfect for spring. Orange or lime zest would also work beautifully.
- Fun with Cookie Cutters: Instead of slicing the log into rounds, you can roll out the chilled dough log into a thin sheet and use cookie cutters to create different shapes. An egg-shaped cookie cutter works especially well for Easter, showcasing the pinwheel design in a festive outline. Just ensure the dough is very cold for clean cuts.
If you adored this easy Easter pinwheel cookies recipe, you’re sure to fall in love with these other delightful sugar cookie variations too. Click each link below to discover the simple, printable recipe and expand your baking repertoire!
Check out this recipe

Check out this recipe
Check out this recipe

Check out this recipe
Check out this recipe
Other Delicious Cookie Recipes to Try
If you’ve enjoyed making these delightful pinwheel Easter cookies and are looking for more fun and festive cookie ideas, explore these other fantastic recipes. Pinwheel cookies are versatile and can be adapted for any season or celebration!
- Rainbow Pinwheel Cookies
- Christmas Pinwheel Cookies
- Patriotic Pinwheel Cookies
- Jack Frost Pinwheel Cookies
- Halloween Sugar Cookies
- Cadbury Egg Cookies
If you love this recipe for Pinwheel Easter Cookies as much as I do, please take a moment to write a five-star review below, and be sure to help me share this delightful recipe on Facebook and Pinterest! Your support helps others discover these wonderful treats.
CONNECT WITH YUMMI HAUS!
Be sure to follow me on my social media, so you never miss a post!
Substack, FB, Pinterest, IG, Email Subscription
Rate this Recipe
Easter Sugar Cookies
Ingredients
- 3 cups all-purpose flour
- 1 tsp baking powder
- ½ tsp salt
- 1 cup butter at room temperature
- 1½ cups granulated sugar
- 2 large eggs
- 2 tsp vanilla extract
- 1 tsp pink gel food coloring – I used fuchsia
Optional Toppings: white sanding sugar or sprinkles
Instructions
-
Combine the flour, salt, and baking powder in a bowl, mix thoroughly and set aside.
-
In another large mixer bowl, cream together the softened butter and granulated sugar until light and fluffy.
-
Once smooth, add the eggs and vanilla extract and beat well, scraping down the sides of the bowl as needed.
-
Gradually add the flour mixture to the butter mixture, a little at a time. Mix on low speed until the dough is smooth and the flour is fully incorporated without overmixing.
-
Separate the dough into two equal parts.
-
Color one portion of the dough pink (or your desired color) using the gel food coloring, mixing it in with the stand or electric mixer until the color is even. If using multiple colors, rinse the bowl and beater between colors to prevent mixing.
-
Once tinted to the desired color, form each dough portion into a ball, then flatten it into a patty, and then reshape the edges to form a rectangle.
-
Wrap each flattened rectangle tightly in plastic wrap, and allow the dough to firm up in the refrigerator for about one to two hours.
-
Roll out each ball of dough to an even thickness of about ⅛ – ¼” thick. Stack the two rolled dough rectangles on top of each other (for example, pink dough on the bottom, then the untinted dough on top).
-
Trim the edges of the stacked dough with a pizza or pastry cutter to ensure neat, straight edges, forming a clean rectangle.
-
Starting from one long side, carefully roll the dough into a tight log. Wrap the log in plastic wrap and chill in the refrigerator for at least 1 hour to firm up completely.
-
Optional step: If desired, pour some sprinkles into your hand. Brush the outside of the dough log with a bit of water using a pastry brush, then press the sprinkles firmly into the outside of the dough log before chilling.
-
Preheat your oven to 350°F (175°C).
-
Remove the chilled dough log from the refrigerator. Using a very sharp, thin blade (like a chef’s knife or even unflavored dental floss for clean cuts), slice the log into ¼ – ½” thick cookies. Place the rounds on a parchment-lined baking sheet, approximately 2 inches apart.
-
Bake for 10-12 minutes, or until the edges are lightly golden and the tops are no longer shiny.
-
Allow cookies to cool on the baking sheet for a few minutes before transferring them to a wire rack to cool completely. Store cooled cookies in an airtight container at room temperature for up to 1 week.
Equipment
-
Rolling Pin
-
Mixer (Stand or Hand)
Nutrition
Nutritional information for the recipe is provided as a courtesy and is approximate. Please double-check with your own dietary calculator for the best accuracy. We at Yummi Haus cannot guarantee the accuracy of the nutritional information given for any recipe on this site.