
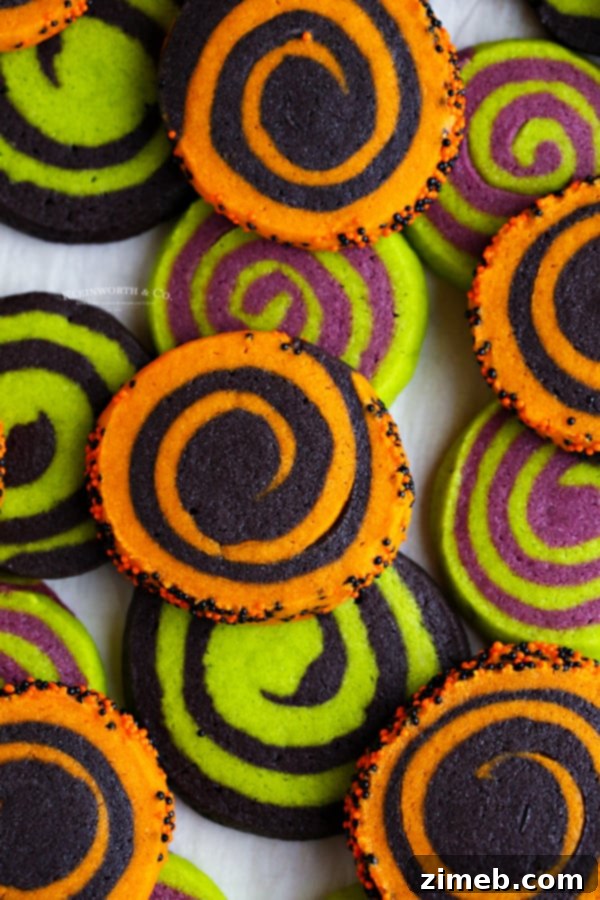
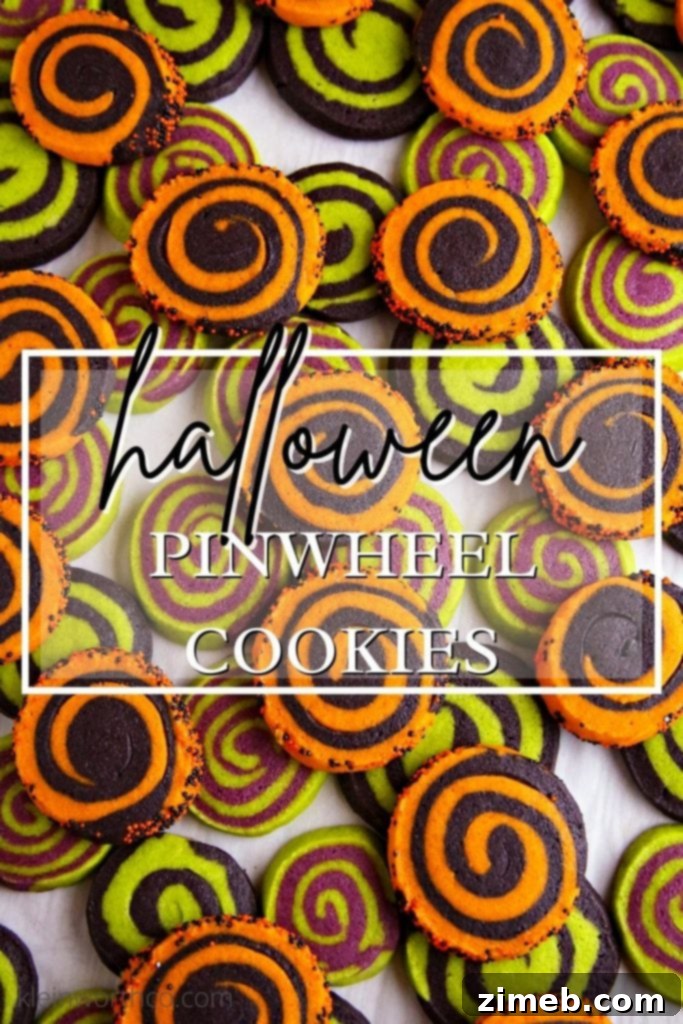
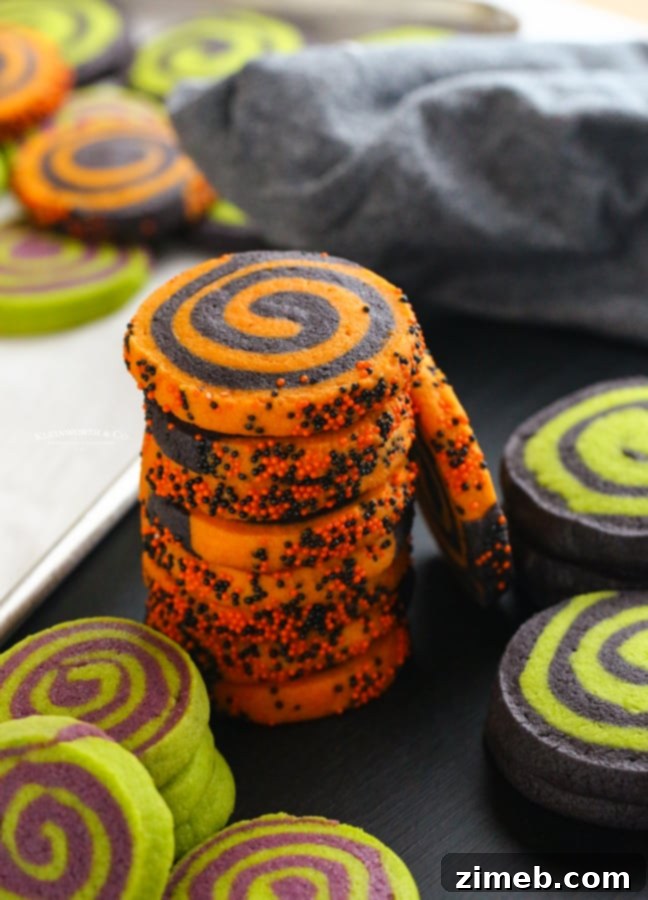
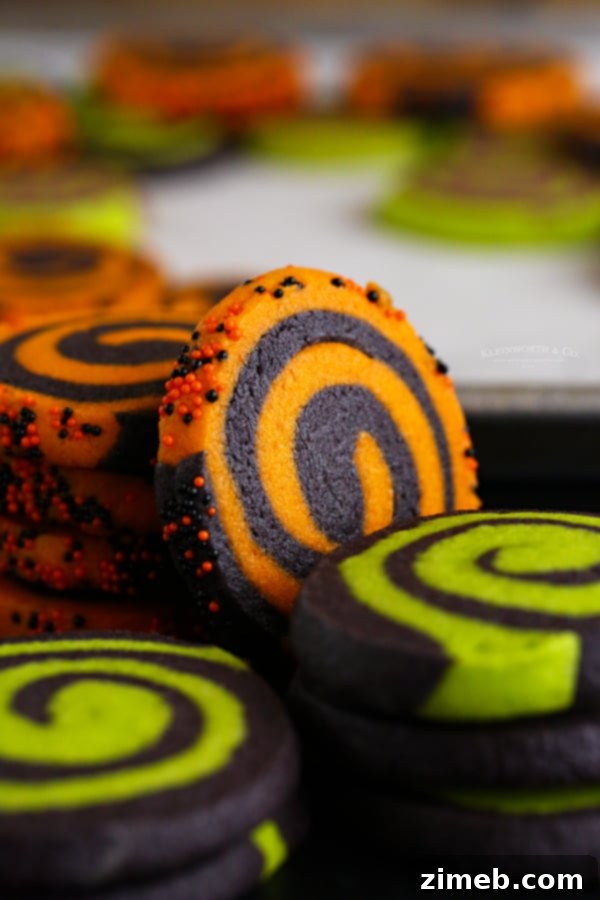
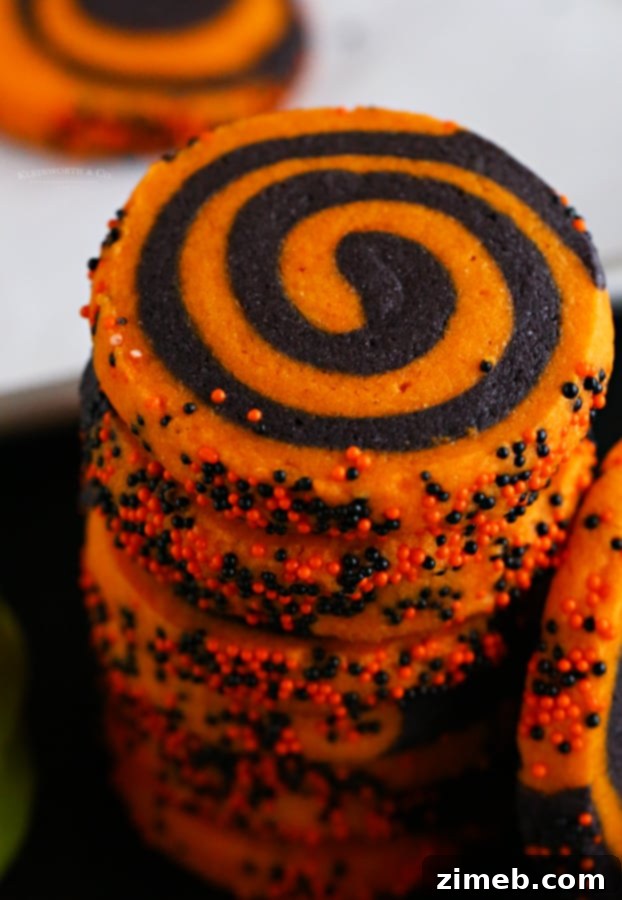
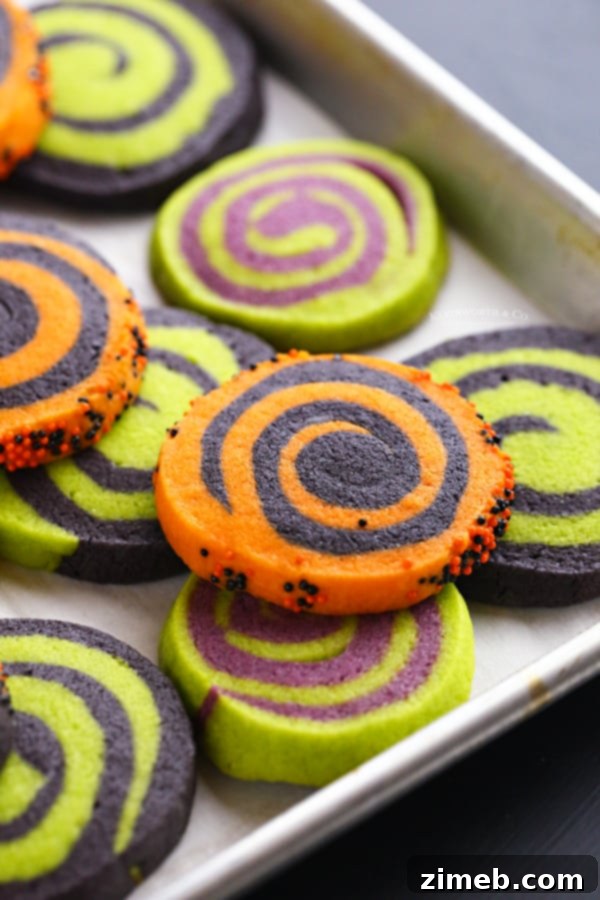
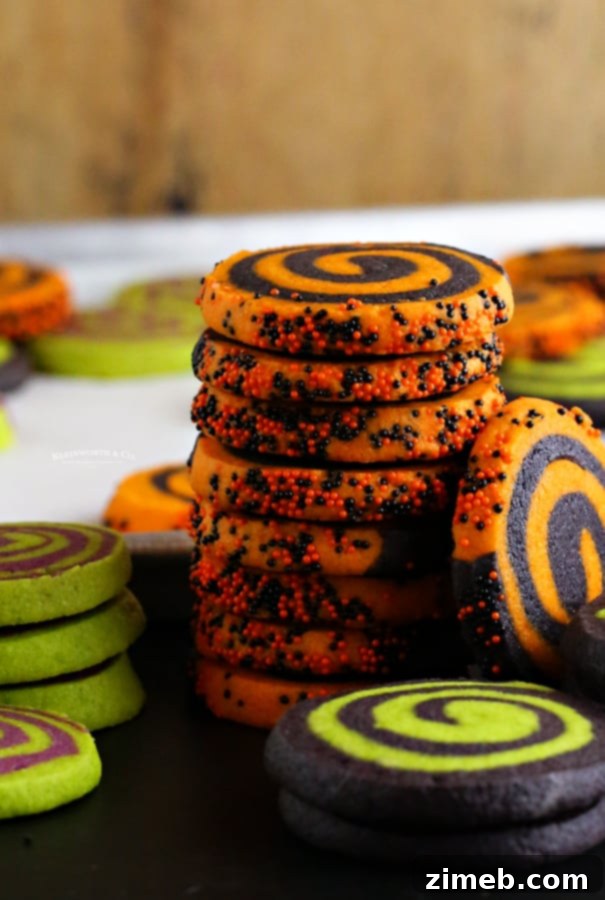
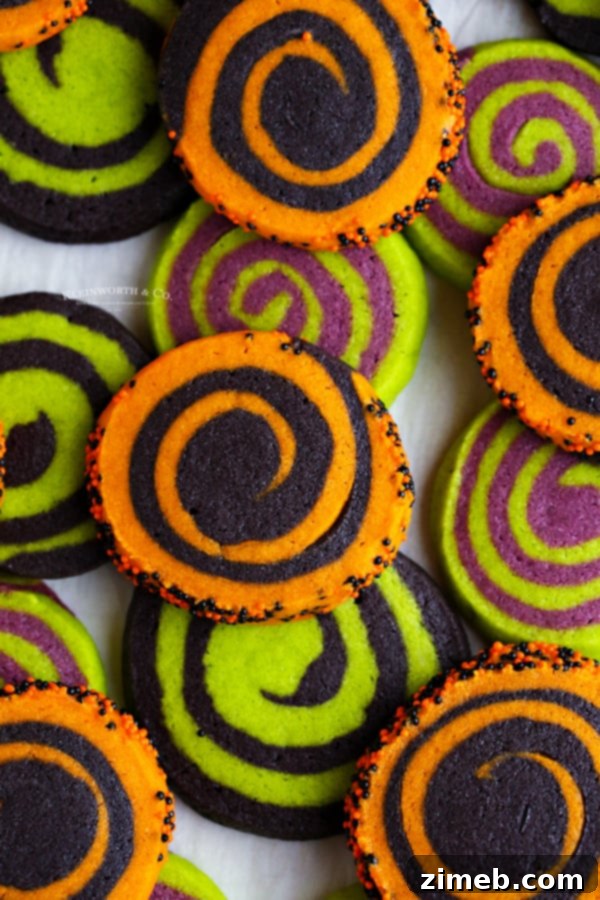
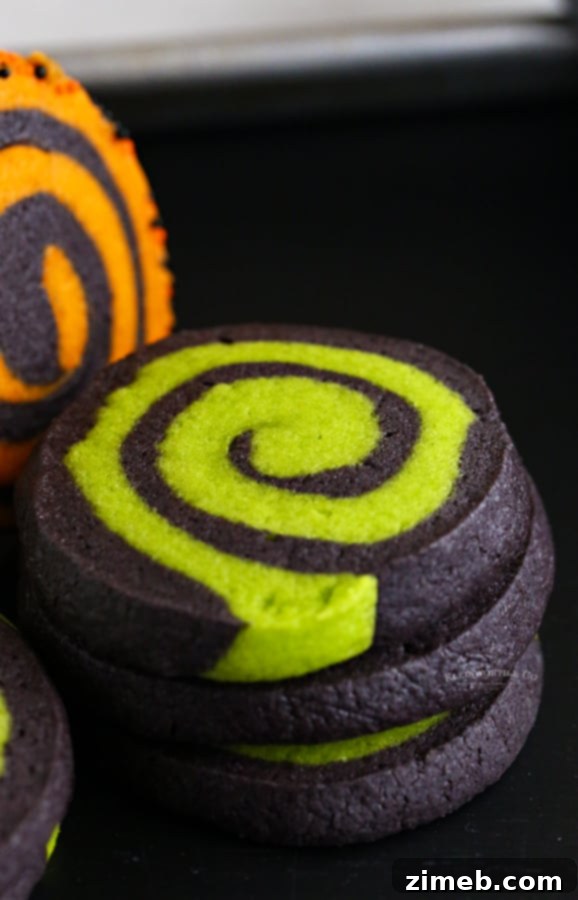
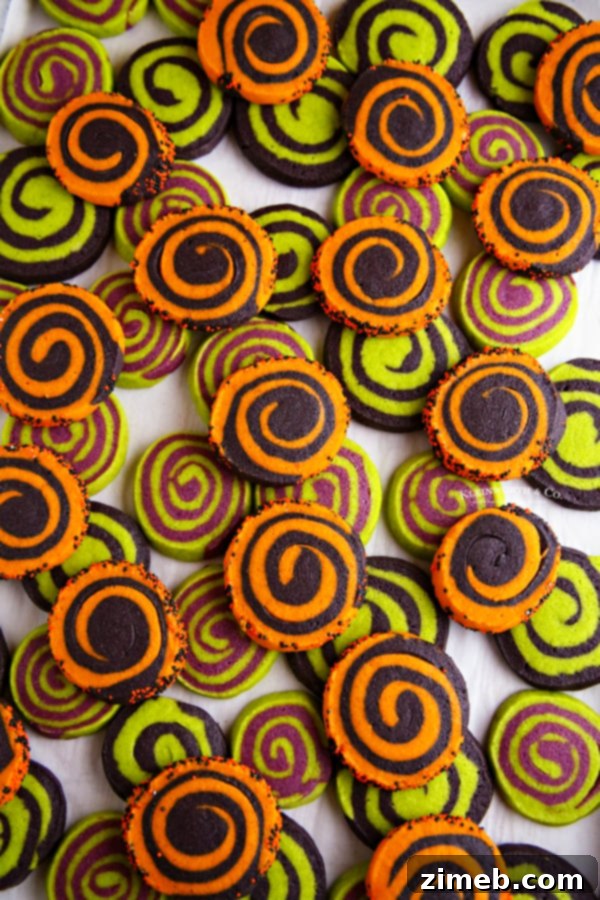
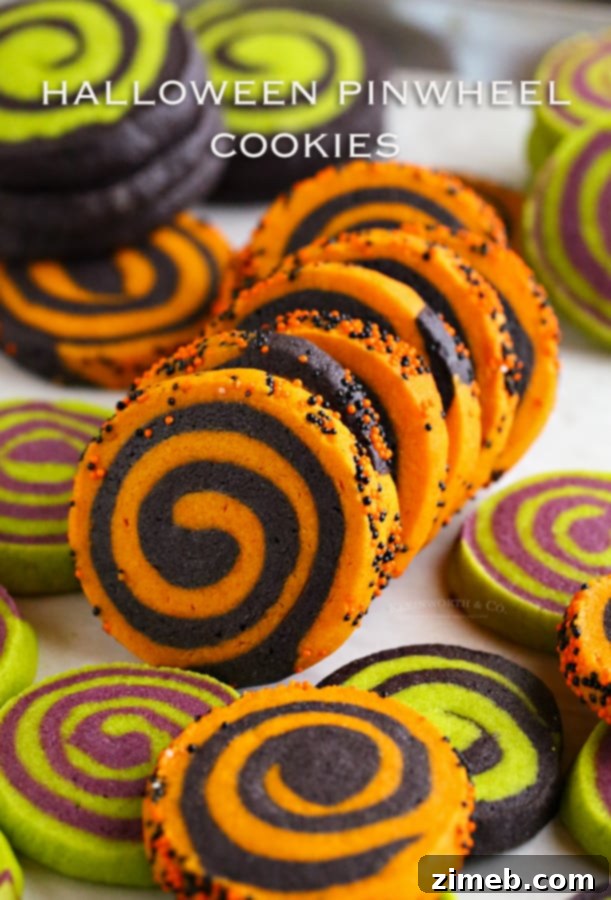
Welcome to the spooktacular world of Halloween baking! These Easy Halloween Sugar Cookies are designed to be soft, delightfully chewy, and infused with the vibrant, festive spirit of the season. Featuring a whimsical pinwheel design, these cookies come alive with classic Halloween colors like green, orange, purple, and black, making them the perfect treat for your holiday gatherings and celebrations.
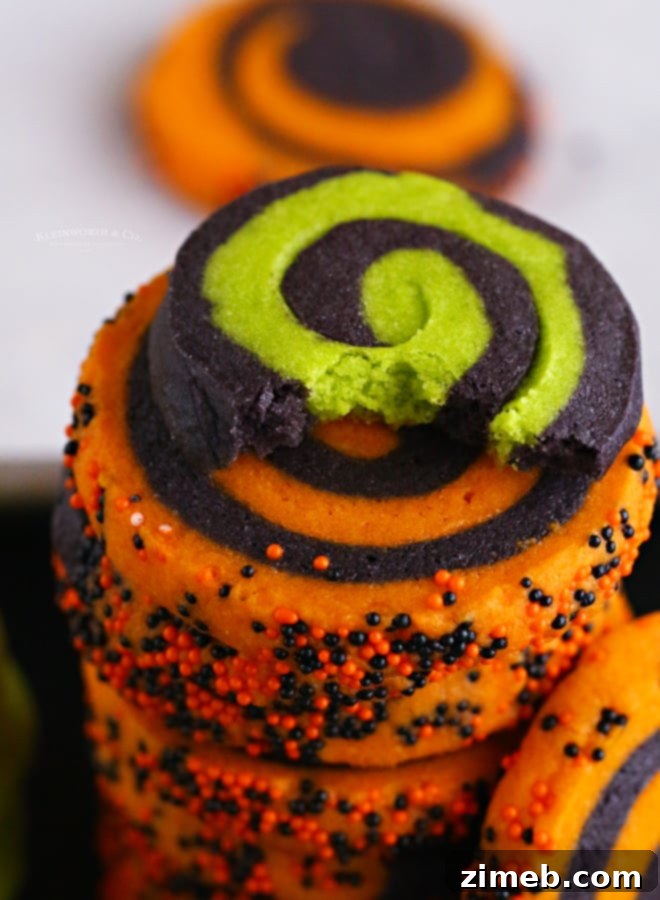
There’s something truly special about pinwheel cookies. Beyond their charming appearance, they boast an incredibly soft and tender texture that simply melts in your mouth. One of their most beloved qualities is their ability to remain wonderfully soft and fresh for several days after baking. Unlike many cookies that tend to dry out quickly, these pinwheel sugar cookies maintain their delicious chewiness on the second, third, and even fourth day, ensuring lasting enjoyment for you and your guests.
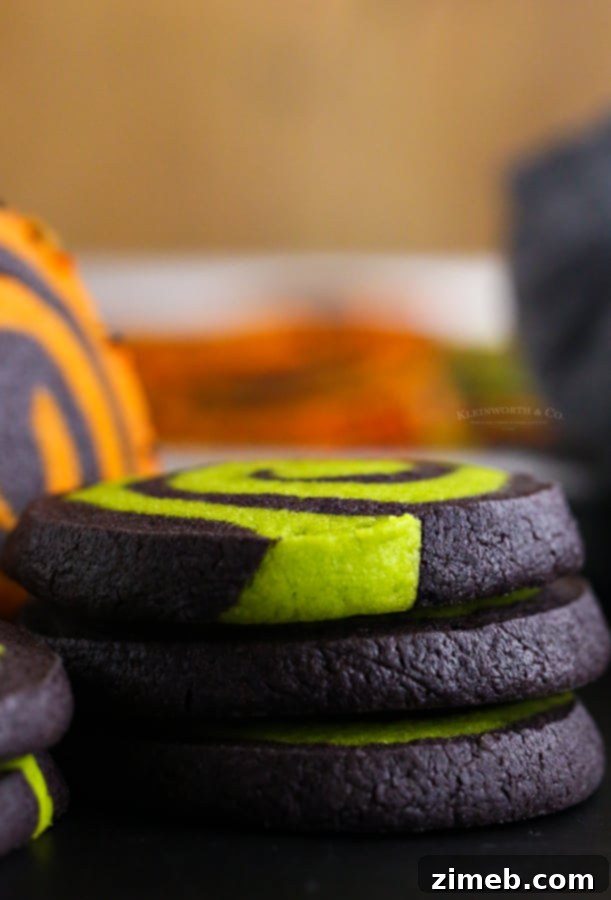
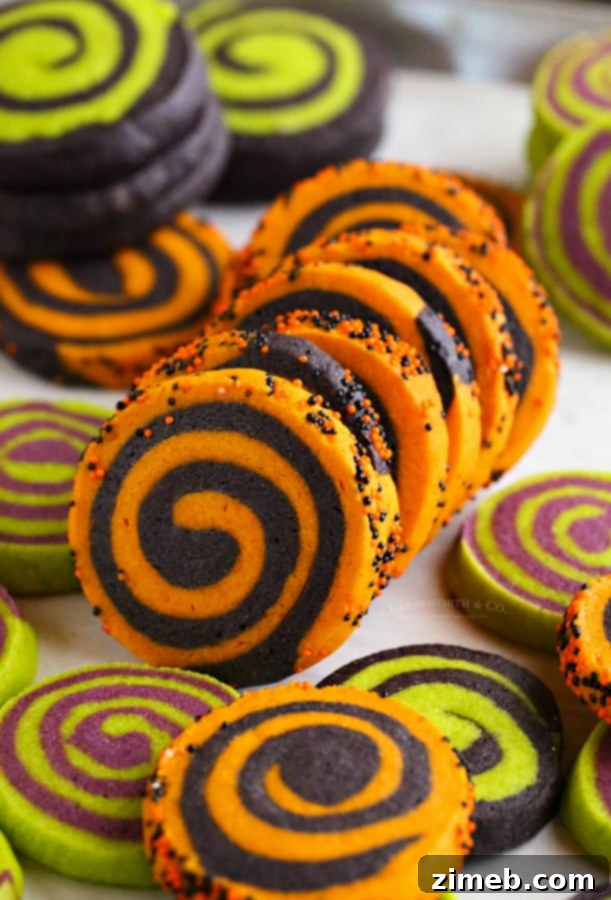
The beauty of this recipe lies in its endless creative possibilities, particularly when it comes to color combinations. While the traditional orange and black hues are a timeless favorite for Halloween, don’t hesitate to explore other captivating pairings. For instance, a blend of eerie green and mystical purple offers a wonderfully vibrant and unique twist. Or perhaps a bold green and classic black combination catches your eye? The choice is yours, and each variation promises a stunning display that will impress everyone at your Halloween party.
Crafting the Perfect Halloween Pinwheel Cookies
Creating these festive pinwheel sugar cookies is a fun and rewarding process that adds a personal touch to your Halloween festivities. The vibrant swirls make them stand out on any dessert table, inviting everyone to enjoy a bite of homemade goodness. From mixing the dough to rolling and baking, each step is straightforward, leading to a spectacular result that’s both delicious and visually appealing.
Frequently Asked Questions About Pinwheel Sugar Cookies
To help you achieve the best possible results, let’s address some common questions about baking these delightful Halloween pinwheel cookies. Understanding the nuances of ingredients and techniques can make all the difference in your baking journey.
Should I use salted or unsalted butter for this recipe?
The choice between salted and unsalted butter often comes down to personal preference and what you have on hand. If you appreciate a subtle contrast to the sweetness in your cookies, salted butter can be a fantastic option. The touch of salt helps to enhance other flavors and prevent the cookies from tasting overly sweet. Many bakers find that salted butter adds a wonderful depth to sugar cookie recipes. However, if you prefer to control the exact amount of salt in your baking, unsalted butter gives you that precision. In today’s world, sometimes availability dictates our choices, so feel free to use whichever butter you can find. Rest assured, either will yield delicious results in these Halloween sugar cookies.
How do I accurately measure flour for baking?
Accurate flour measurement is crucial for preventing dry or crumbly cookies. The most reliable method is the “spoon and level” technique: gently spoon the flour into your measuring cup until it’s overflowing, then use a straight edge (like the back of a knife) to level off the excess without packing it down. This ensures you’re adding the correct amount of flour, preventing your dough from becoming too stiff. Alternatively, you can fluff the flour in its container with a spoon before gently scooping it into the measuring cup, still avoiding any packing. Both methods help maintain the ideal moisture content for soft, tender sugar cookies.
Don’t miss our Halloween Cookie Dough too!
Getting Started: Ingredients for Swirl Sugar Cookies
Before diving into the fun of mixing and coloring, gather all your ingredients. Using fresh, high-quality ingredients is the first step to achieving wonderfully delicious and visually appealing swirl sugar cookies for your Halloween celebrations. Having everything prepped and ready will make the baking process smoother and more enjoyable.
Can I prepare these cookies in advance?
Absolutely! This recipe is perfect for making ahead, which is a huge advantage when planning for Halloween parties or busy schedules. The prepared cookie dough can be stored in the refrigerator for up to 4 days before baking. When you’re ready to bake, simply take the dough out of the fridge and let it sit at room temperature for about 10-15 minutes to soften slightly before slicing and baking. This makes entertaining effortless and ensures you always have fresh, delicious cookies ready to go.
What does “soft butter” mean for this recipe?
“Soft butter” or “room temperature butter” refers to butter that has been allowed to sit out of the refrigerator long enough to become pliable but not melted or greasy. Typically, this takes about an hour, depending on your kitchen’s temperature. The butter should be soft enough to easily indent with your finger but still hold its shape. This consistency is vital for creaming with sugar, as it creates tiny air pockets that contribute to the cookies’ light and fluffy texture.
Baking Delightful Pinwheel Sugar Cookies
Once your dough is perfectly chilled and ready, the magic truly begins. Slicing and baking these pinwheel sugar cookies is a simple process that quickly transforms them into stunning, edible works of art. The anticipation as they bake, filling your kitchen with a sweet aroma, is part of the joy of homemade treats, especially for festive occasions like Halloween.
Step-by-Step: How to Make Easy Halloween Sugar Cookies
Follow these detailed steps to create your own batch of soft, colorful, and utterly delicious Halloween pinwheel sugar cookies. The process is divided into two main parts: preparing and coloring the dough, and then chilling, slicing, and baking the cookies to perfection.
- Combine all-purpose flour, baking powder, and salt in a medium bowl. Whisk these dry ingredients together thoroughly, then set the bowl aside.
- In a large mixer bowl, add the softened butter and granulated sugar. Cream them together using an electric mixer on medium speed until the mixture is light, fluffy, and well combined, scraping down the sides of the bowl as needed.
- Once the butter and sugar mixture is smooth, beat in the large eggs one at a time, then add the vanilla extract. Continue beating until all ingredients are fully incorporated and the mixture is uniform.
- Gradually add the prepared flour mixture to the wet ingredients, a little at a time. Mix on low speed until the dough is smooth and no traces of dry flour remain. Be careful not to overmix, as this can lead to tough cookies.
- Divide the cookie dough into two equal portions.
- Take one portion of dough and add your desired food coloring, such as orange gel food coloring. Repeat with the second portion of dough, adding another color, like black gel food coloring. Use your mixer to thoroughly beat the color into each dough portion until you achieve a vibrant, uniform shade. Remember to rinse the mixer bowl and beaters thoroughly between colors to avoid accidental blending.
- Once each dough portion is tinted to your desired color, form each into a ball, then flatten it into a patty. Gently reshape the edges of each patty to form a rectangle, approximately 8×10 inches.
- Wrap each flattened dough rectangle tightly in plastic wrap. Place both wrapped dough rectangles in the refrigerator to chill and firm up for at least one to two hours. This chilling step is essential for easy handling and to prevent the cookies from spreading too much during baking.
After Chilling: The Final Steps to Pinwheel Perfection
Once your dough has had ample time to chill, it’s ready for its transformation into beautiful pinwheel cookies. These steps are where the characteristic swirl comes to life, leading to a batch of stunning Halloween treats.
- On a lightly floured surface or between two sheets of parchment paper, roll out each chilled dough rectangle to an even thickness of about ⅛ to ¼ inch. Carefully stack one colored dough on top of the other (for example, orange on the bottom, then black).
- Using a sharp pizza cutter or a large knife, trim the edges of the stacked dough rectangles to create neat, straight lines, ensuring your pinwheels have a clean finish.
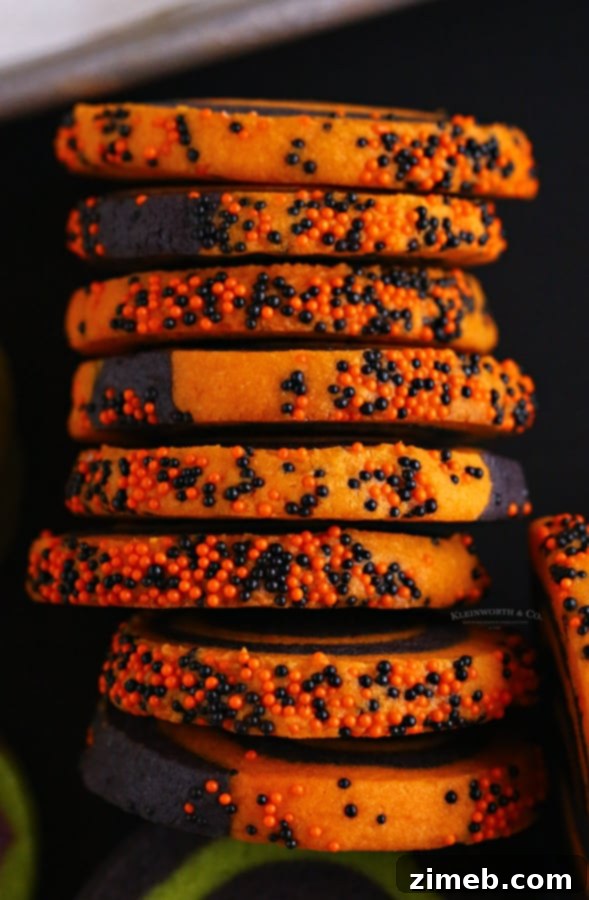
- If you wish to add sprinkles, lightly brush the top surface of the stacked dough with a tiny bit of water. Pour Halloween sprinkles into your hand and gently press them onto the moistened edge of the dough log, ensuring they adhere well.
- Carefully roll the stacked dough into a tight log, starting from one of the longer edges. Wrap this dough log tightly in plastic wrap and return it to the refrigerator for at least another hour. This second chill is crucial for the cookies to hold their distinct pinwheel shape during slicing and baking.
- Preheat your oven to 350 degrees Fahrenheit (175 degrees Celsius). Line a baking sheet with parchment paper.
- Remove the chilled dough log from the refrigerator. Using a very sharp knife or thin-bladed cutter, slice the log into ¼ to ½ inch thick cookie rounds. Place these rounds on the prepared baking sheet, ensuring they are approximately 2 inches apart to allow for slight spreading. A thinner blade is preferable for slicing, as a thick blade can squish the dough, distorting the pinwheel shape.
- Bake the cookies for 10-12 minutes, or until the edges are lightly golden and the tops are no longer shiny. They should still be soft in the center when removed from the oven.
Detailed Ingredients for Your Halloween Sugar Cookies
Here’s a complete list of what you’ll need to create these fantastic Halloween pinwheel sugar cookies. Make sure to choose quality ingredients for the best flavor and texture.
- All-purpose flour: Provides the structure for your cookies.
- Baking powder: The leavening agent that helps your cookies rise slightly and become tender.
- Salt: Balances the sweetness and enhances all the flavors.
- Butter at room temperature: Essential for a soft, rich cookie texture and for creaming with sugar.
- Granulated sugar: Sweetens the cookies and contributes to their crisp-chewy texture.
- Large eggs: Act as a binder and add richness to the dough.
- Vanilla extract: Provides a warm, classic flavor that complements the sugar.
- Orange gel food coloring: For vibrant orange swirls. (Recommended: electric orange) *See notes for other color combinations.
- Black gel food coloring: For striking black swirls. (Recommended: super black) *See notes for other color combinations.
- Halloween sprinkles: Optional, but highly recommended for an extra festive touch!
Alternative Color Combinations
Unleash your creativity with these alternative spooky color pairings for your pinwheel cookies:
Black and Green Duo
- Black gel food coloring (e.g., super black)
- Green gel food coloring (e.g., electric green)
Mystical Purple and Green
- Purple gel food coloring (e.g., electric purple)
- Green gel food coloring (e.g., electric green)
Expert Tips for Softening Butter to Room Temperature
Achieving perfectly softened butter is a common challenge for bakers, but it’s crucial for the texture of these pinwheel cookies. Here are a few reliable methods to get your butter to that ideal room temperature stage without melting it:
Method One: The Patient Countertop Approach
The simplest method is to plan ahead. Take your butter (and any other ingredients requiring room temperature, like eggs) out of the refrigerator about 30 minutes to an hour before you plan to start baking. The exact time will depend on your kitchen’s ambient temperature. The butter should be pliable, allowing you to easily make an indentation with your finger, but not so soft that it’s greasy or melted. Starting with all room-temperature ingredients ensures everything blends smoothly and evenly.
Method Two: The Quick Microwave Trick (Use Caution!)
If you’re short on time, the microwave can be your friend, but it requires careful attention. Place the butter, still in its paper wrapping (never foil!), in the microwave. Heat for 2-second intervals, flipping the stick each time. Continue this process, usually for 6-10 seconds total, until the butter feels soft enough. Stop immediately if it starts to look shiny or melted. Overly softened or melted butter from the microwave will negatively impact the cookie’s texture, making it greasy and causing excessive spreading.
Method Three: The Warm Water Bath
For a gentle and effective softening method, place the wrapped butter sticks into a zip-top bag (if not already sealed) to prevent water from getting in. Submerge the bag in a bowl of warm (not hot!) water. This method works beautifully for eggs too. Within 5-10 minutes, your butter should reach the perfect room-temperature consistency, making it ready for creaming.
Delightful Sugar Cookies for Halloween Festivities
These Halloween sugar cookies are more than just a treat; they’re a centerpiece for your holiday celebrations. Their festive colors and irresistible taste make them a favorite among both kids and adults. Imagine the smiles they’ll bring to trick-or-treaters and party guests alike.
Why are room temperature ingredients important for baking?
Using room temperature ingredients is a fundamental principle in baking, especially for cookies. When butter, eggs, and other dairy are at room temperature, they emulsify much more effectively with other ingredients. This creates a smooth, uniform batter free of unblended pockets. This emulsion is crucial because it traps air, which then expands during baking, resulting in a lighter, fluffier, and more tender baked good. Cold ingredients, on the other hand, can cause the batter to seize, leading to a denser, less desirable texture.
Explore Other Delicious Pinwheel & Holiday Cookies
If you love the fun and flavor of these pinwheel sugar cookies, you’ll definitely want to explore these other fantastic recipes:
- Rainbow Pinwheel Cookies
- Christmas Pinwheel Cookies
- Patriotic Pinwheel Cookies
- Jack Frost Pinwheel Cookies
- Easter Sugar Cookies
Tips for Storing Your Halloween Sugar Cookies
Proper storage is key to keeping your Halloween sugar cookies fresh and delicious. Once the cookies have completely cooled to room temperature, place them in an airtight container or a reliable zip-top bag. Stored this way, they should remain wonderfully soft and enjoyable for several days. It’s generally not recommended to refrigerate baked sugar cookies, as the cold can cause them to dry out and become stiff.
Choosing the Best Sprinkles for Your Dough
Not all “sprinkles” are created equal, especially when baking with dough. It’s important to differentiate between actual sprinkles (like nonpareils or jimmies) and colored sanding sugar. While sanding sugar can look vibrant, it tends to bleed its color when exposed to moisture, especially when mixed into a moist dough or chilled in the refrigerator. For these pinwheel cookies, opt for genuine sprinkles designed to hold their color and shape, ensuring your beautiful festive swirls remain distinct and vibrant.
Essential Steps: The Halloween Sugar Cookie Recipe
This recipe provides all the details you need for perfect Halloween sugar cookies, from preparation to baking. Follow it closely for the best results, ensuring a festive and delicious treat for everyone.
Is chilling the cookie dough really necessary?
Yes, absolutely! Chilling the dough is a critical step that should not be skipped, for several important reasons. Firstly, as the dough chills, the ingredients have time to fully hydrate and meld together, deepening the overall flavor profile of your cookies. This resting period allows the flavors to develop and intensify, resulting in a richer, more complex taste.
Secondly, and perhaps even more crucially for pinwheel cookies, chilling the dough solidifies the butter. This firm butter prevents the cookies from spreading excessively in the oven, helping them maintain their distinct pinwheel shape and thickness. Without proper chilling, the dough would be too sticky to handle, making it difficult to roll and slice, and the cookies would likely spread too much during baking, resulting in thin, flat, and less visually appealing treats. So, for both flavor and structure, embrace the chilling process!
NOTE: This recipe is designed to yield one of the featured color combinations. If you plan to create multiple vibrant combinations, such as orange/black, green/purple, and green/black, you will need to prepare separate batches for each pairing. The dough from a single recipe is not sufficient to be divided into more than two colored portions effectively.
Can this recipe be cut in half?
While the thought of halving a recipe for a smaller batch is understandable, it can be quite challenging with this pinwheel cookie dough. Working with a very small amount of dough makes it difficult to divide, roll, and form into neat logs for slicing. For the best results, we recommend making the recipe as written. If you find yourself with extra dough, you can easily freeze half of it for later, ensuring you get perfect pinwheels every time without the hassle of working with tiny portions.
Can I double this recipe?
Yes, absolutely! Doubling this recipe is a great idea, especially if you’re baking for a larger crowd or simply want to stock up on these delicious cookies. Many bakers, myself included, often find it easier to work with a larger quantity of dough. Just be sure you have a larger stand mixer or a spacious mixing bowl to accommodate the increased volume of ingredients. Doubling ensures you have plenty of Halloween pinwheel cookies to share, freeze, or enjoy over an extended period.
DISCOVER MORE HOLIDAY E-BOOKS!


Recommended Products for Making Halloween Sugar Cookies…
This pinwheel cookie recipe is incredibly easy and yields delicious results. Whether you’re a seasoned baker or new to making pinwheel cookies, you’ll find these tools indispensable for a smooth and enjoyable baking experience. These are the items I personally rely on to ensure perfect cookies every time.
- Electric Orange Food Color
- Electric Purple Food Color
- Super Black Food Color
- Electric Green Food Color
- Halloween Sprinkles
- Baking Sheet
- Parchment Paper
- Mixer
If you adore this Easy Halloween Sugar Cookies recipe, you’ll be thrilled with these other festive Halloween treats as well. Each link below leads to an easy, printable recipe for your holiday baking adventures!
- Mummy French Macarons with Maple Cinnamon Filling – These adorable and delicious macarons are packed with fall flavors, perfect for Halloween.
- Monster Cupcakes – Funny eyes and colorful frosting make these easy desserts a delight for all ghouls and goblins at your Halloween party.
- Halloween Bark – A spooky and sweet treat made with white & dark chocolate, candy, and more – perfect for all your ghoulish celebrations.
- Ghoulish Monster Halloween Cupcakes – Super cute and fun, these cupcakes will bring giggles and spooky delight to your Halloween gathering.
- Mummy Shortbread Cookies – Perfectly decorated Halloween cookies with vanilla, cinnamon, and nutmeg flavors. So cute and easy to create!
- Monster Brownies – A chewy, chocolatey delight decorated to be perfectly spooky for Halloween.
- Monster Bark – This adorable Monster Bark takes just a couple of ingredients and minutes to make, and kids absolutely love it!
- Pumpkin Shaped Chocolate Stuffed Shortbread Cookies – Buttery shortbread cookie sandwiches filled with creamy chocolate, making them ideal for Halloween.
- Sugar Skull Cookie Dough – A quick and easy, egg-free Halloween treat with green and purple dough loaded with sugar skull sprinkles – perfect for Day of the Dead.
- Bloodshot Eyeball Red Velvet Crinkle Cookies – Just like your favorite soft & chewy crinkle cookies, but made spooky for Halloween!
If you genuinely love this recipe for Easy Halloween Sugar Cookies as much as I do, please take a moment to leave a five-star review. Your feedback is greatly appreciated, and don’t forget to help share the festive joy on Facebook and Pinterest!
CONNECT WITH YUMMI HAUS!
Be sure to follow me on my social media channels so you never miss a post!
Substack, Facebook, Pinterest, Instagram, Email Subscription
Rate this Recipe
Halloween Sugar Cookies
Ingredients
- 3 cups all-purpose flour
- 1 tsp baking powder
- ½ tsp salt
- 1 cup butter at room temperature
- 1½ cups granulated sugar
- 2 large eggs
- 2 tsp vanilla extract
- 1 tsp orange gel food coloring – I used electric orange *see notes for other color combos
- 1 tsp black gel food coloring – I used super black *see notes for other color combos
- Halloween sprinkles if desired
NOTE- This recipe will make 1 of the color combinations shown. If you want all of the color combinations – you will need to make 3 batches as there isn’t enough dough in the one recipe to divide it that many times.
Instructions
-
Combine flour, salt & baking powder in a bowl, mix and set aside.
-
In another large mixer bowl, cream together the softened butter & sugar.
-
Once smooth, add the eggs & vanilla and beat well.
-
Add the flour mixture to the butter mixture a little at a time. Mix until the dough is smooth and flour is fully incorporated.
-
Separate your dough into two equal parts.
-
Color one of the portions of dough orange, and one black. Use the mixer to beat the color into the dough until you have reached the desired shade of each color. Be sure to rinse out the bowl and the beater inbetween the colors so that you don’t cross the colors and end up with something other than the desired color.
-
Once the dough is tinted to the desired color – form it into a ball, then flatten it into a patty and then reshape the edges to form a rectangle.
-
Wrap each flattened rectangle in plastic, and allow the dough to firm up in the refrigerator for about an hour or two.
-
Roll out each ball of dough to about ⅛ – ¼” thick, and stack them on top of the other (I did orange on the bottom, then black).
-
Trim the edges with a pizza cutter so you have nice, straight edges.
-
If desired – Pour some sprinkles into your hand & brush the outside of the dough with a bit of water and then press the sprinkles into the outside of the dough log.
-
Roll the dough into a log, wrap in plastic wrap and chill in the refrigerator for at least 1 hour.
-
Preheat the oven to 350 degrees.
-
Cut the log of dough into ¼ – ½” thick cookies and place the rounds on a parchment lined baking sheet – approx 2 inches apart. The thinner the blade used to slice them, the better. A thick blade will tend to squish the dough.
-
Bake at 350 for 10-12 minutes, or until no longer shiny on top.
Notes
Black/Green
- 1 tsp black gel food coloring – I used super black
- 1 tsp green gel food coloring – I used electric green
Purple/Green
- 3 tsp purple gel food coloring – I used electric purple
- 1 tsp green gel food coloring – I used electric green
Nutritional information for the recipe is provided as a courtesy and is approximate. Please double-check with your own dietary calculator for the best accuracy. We at Yummi Haus cannot guarantee the accuracy of the nutritional information given for any recipe on this site.