
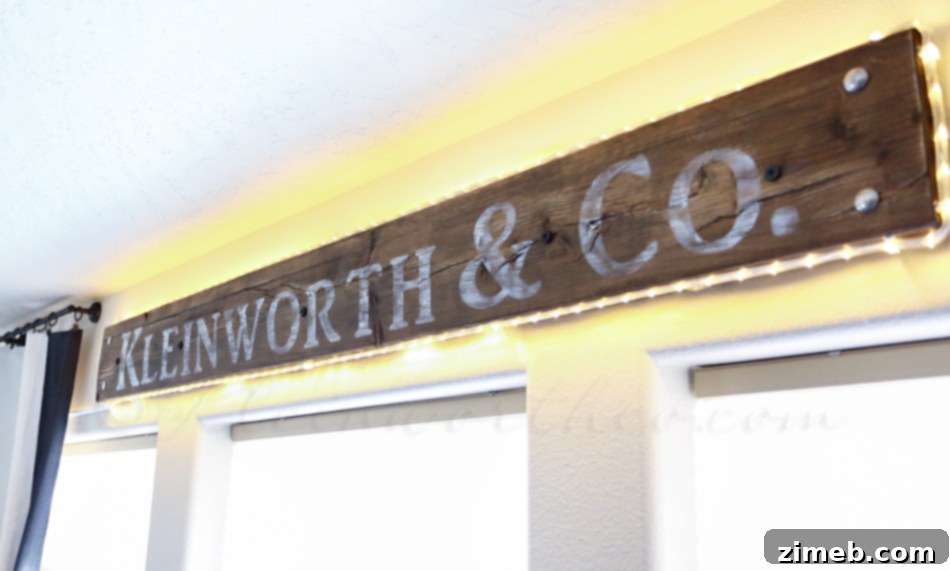
This post is part of a social shopper marketing insight campaign withPollinate Media Group® and Glad, but all my opinions are my own. #pmedia #pressnsealhacks
Are you dreaming of a personalized, vintage-inspired sign to add character to your space but lack a fancy cutting machine? Look no further! This comprehensive guide will show you how to craft a stunning Vintage Lighted Shop Sign with ease, using an unexpected hero: Glad Press’n Seal. Forget complicated tools and expensive equipment; this project is as simple as press, cut, paint, and sand, transforming a plain piece of wood into a bespoke piece of illuminated art. Get ready to add a significant “wow factor” to your home studio, workshop, or any room craving a touch of retro charm.
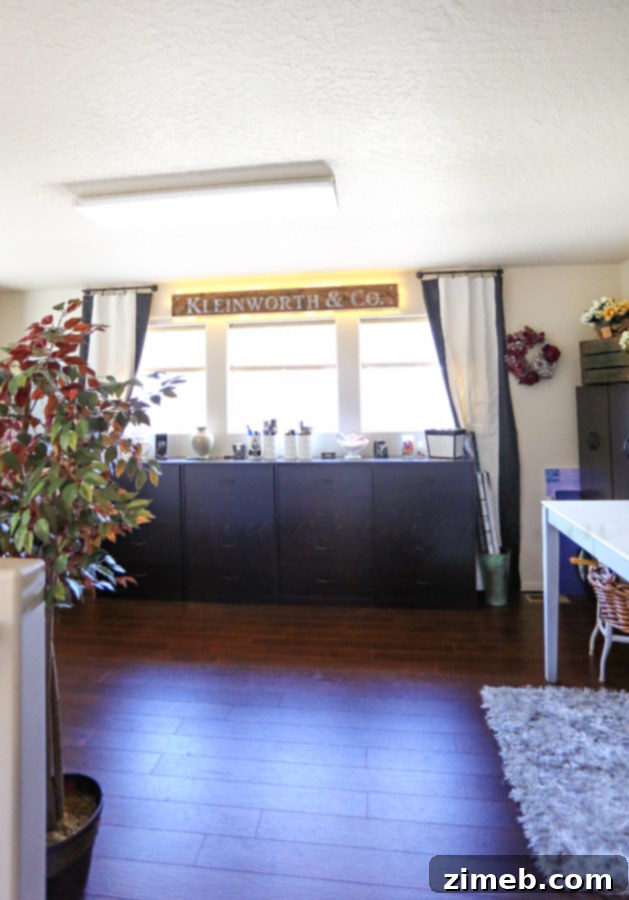
Unlock Your Creativity: The Story Behind My Studio Sign
Remember that super fun project I teased on Instagram last week? Well, the wait is over! Today, I’m thrilled to share the full tutorial for this incredible lighted sign. For months after we moved into our house last summer, I envisioned a distinctive “shop” style sign for my creative studio. The idea was clear: something custom, something with an antique feel, and ideally, something that glowed. The only roadblock was the common challenge many DIY enthusiasts face – not owning a vinyl cutting machine. For a long time, this dream project remained on hold, relegated to a Pinterest board of aspirations.
Then, inspiration struck! I started noticing various tutorials online that ingeniously utilized Glad Press’n Seal for creating custom stencils without specialized machinery. Intrigued by the simplicity and accessibility, I decided to put this hack to the test. The results? Absolutely blew me away! This isn’t just a sign; it’s a testament to how creative solutions can overcome perceived limitations, allowing anyone to achieve professional-looking results with basic tools. Scroll down to discover how incredibly easy it was to bring this vision to life and why Glad Press’n Seal is now my go-to for many crafting adventures.
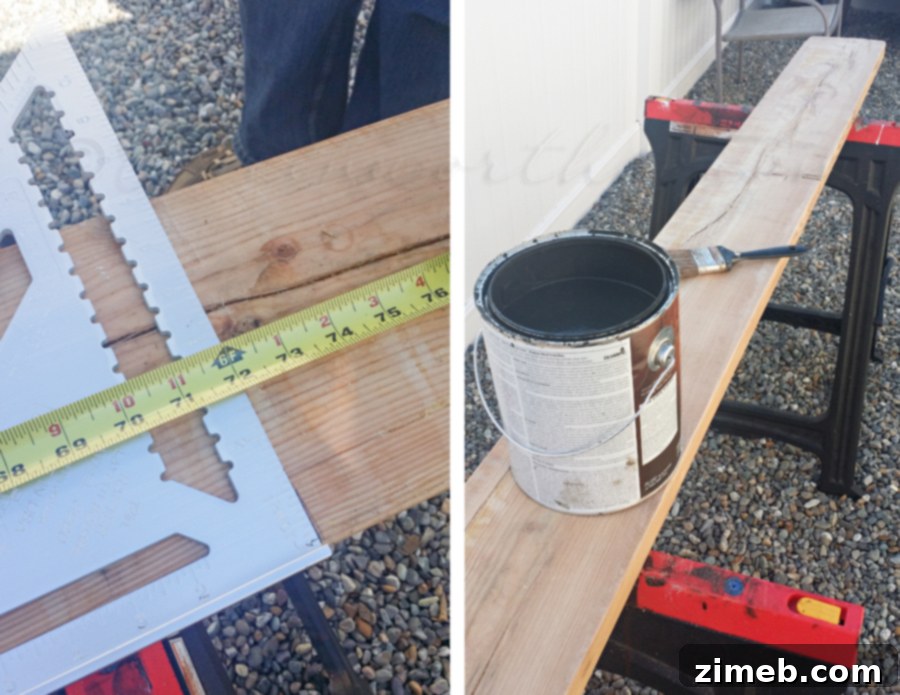
Gather Your Tools: Materials for Your Lighted Shop Sign
Before we dive into the creative process, let’s make sure you have everything you need. One of the best aspects of this project is that it requires minimal specialized tools, making it perfect for beginners and seasoned DIYers alike. Most items can be found around your home or at your local hardware store and craft shop. The star of the show, of course, is the versatile Glad Press’n Seal, which transforms into the perfect temporary stencil. Here’s a quick checklist:
- Wood Board: Salvaged scrap wood works perfectly for an authentic vintage feel. Choose a size appropriate for your desired sign.
- Deck Stain: A dark, rich color is ideal for achieving a weathered look with a single coat.
- Sandpaper: Various grits (e.g., 120-grit for initial smoothing, 220-grit for distressing).
- Glad Press’n Seal: The secret weapon for creating your stencil.
- Printer & Paper: To print your chosen letters.
- Masking Tape: To secure your printed letters.
- X-Acto Knife or Craft Blade: For precise cutting of the stencil.
- Plastic Card (e.g., credit card): For adhering the Press’n Seal smoothly.
- Acrylic or Chalk Paint: Your preferred color for the letters.
- Stippling Brush: Essential for applying paint evenly and achieving a distressed look.
- Drill with Pilot Bit: For creating holes for bolts and mounting.
- Decorative Bolts (Optional): For an industrial, riveted aesthetic.
- Flat LED Rope Lights: To illuminate your sign.
- Large Screws: For securely mounting the sign to the wall.
- Cord Keeper (Optional): For neat cable management.
Step-by-Step Guide: Crafting Your Vintage Lighted Shop Sign
1. Preparing Your Wood Base
The foundation of any great sign is the wood itself. I began by rummaging through my beloved scrap wood collection in the shed – a treasure trove of potential. Opting for a piece with natural character, I measured and cut it to the perfect length for my studio space. Next, a thorough sanding was in order to ensure a smooth, splinter-free surface. Don’t underestimate this step; proper sanding not only prepares the wood for staining but also enhances the final appearance. After sanding, I applied a generous coat of deck stain. You might wonder, “Why deck stain?” My particular choice of deck stain was deliberate: it beautifully highlights the natural grain of the wood, and its deep, rich color instantly imparts that desired weathered, aged look with just one application. It’s a fantastic shortcut to achieving an authentic vintage aesthetic, setting the perfect backdrop for our custom lettering.
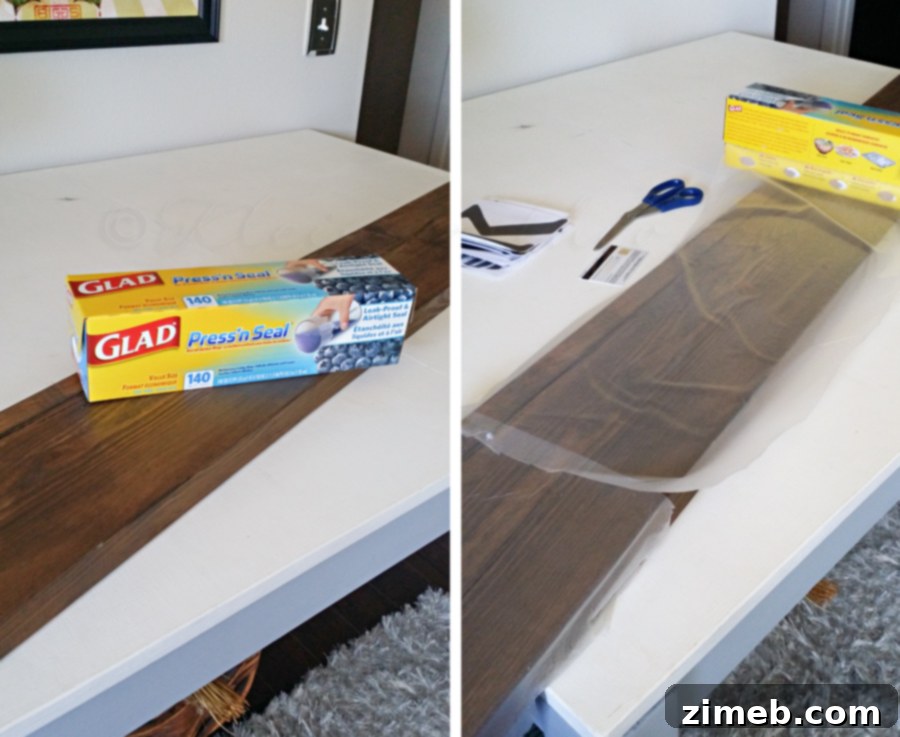
2. The Glad Press’n Seal Stencil Magic
Once the stained wood was completely dry, I brought it into my studio, ready for the truly fun part – creating the stencil. This is where Glad Press’n Seal truly shines. I carefully laid a piece of Press’n Seal over the entire board, ensuring it covered the surface evenly. The key here is to apply it smoothly, avoiding air bubbles. Using a plastic card (like a credit card or a loyalty card), I scraped firmly over the top of the Press’n Seal, pressing down to adhere it securely to the wood. This creates a strong, temporary bond that will prevent paint from bleeding under your stencil, ensuring crisp, clean lines for your letters. Take your time during this step; a well-adhered stencil is crucial for a professional finish.
3. Cutting Your Custom Letters
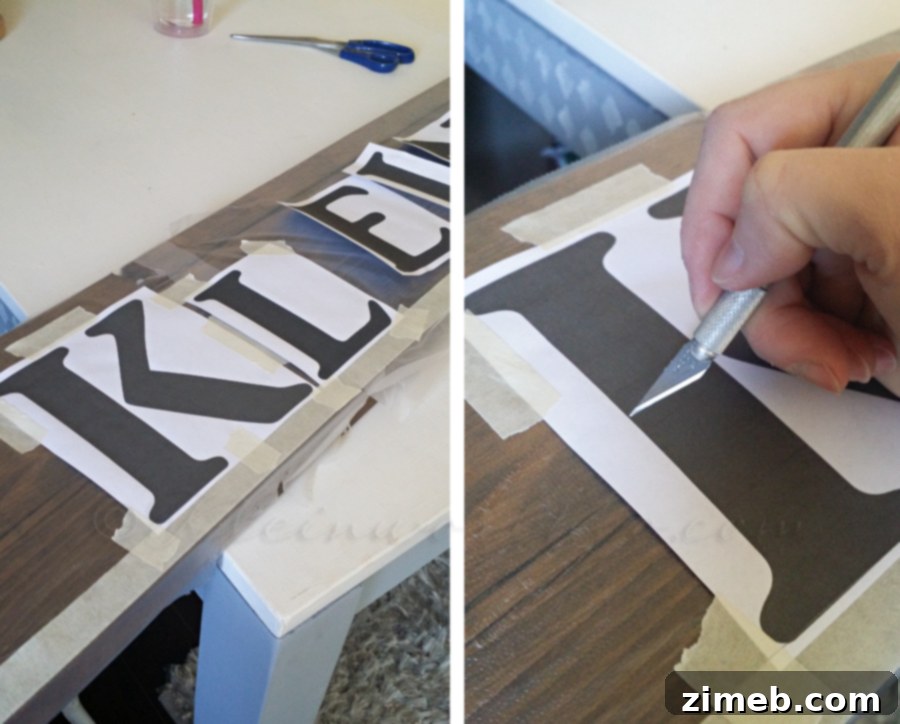
With the Press’n Seal firmly in place, it was time to bring my chosen text to life. I had already printed out my letters in a classic, vintage-appropriate font, ensuring they were sized correctly for my sign. I meticulously taped these printed letters down on top of the Press’n Seal, taking extra care to ensure they were perfectly straight and evenly spaced across the board. Precision here pays off! Next, with an X-Acto knife, I carefully began cutting out each letter. The trick is to press hard enough to cut through both the paper template and the layer of Press’n Seal underneath. Go slowly, following the contours of each letter precisely. Once all the letters were cut, I carefully removed the paper templates and the Press’n Seal from inside the letter outlines, leaving behind a perfectly formed stencil adhered to the wood. This method offers an incredible level of customization without needing any expensive machinery.
4. Painting for That Worn Look
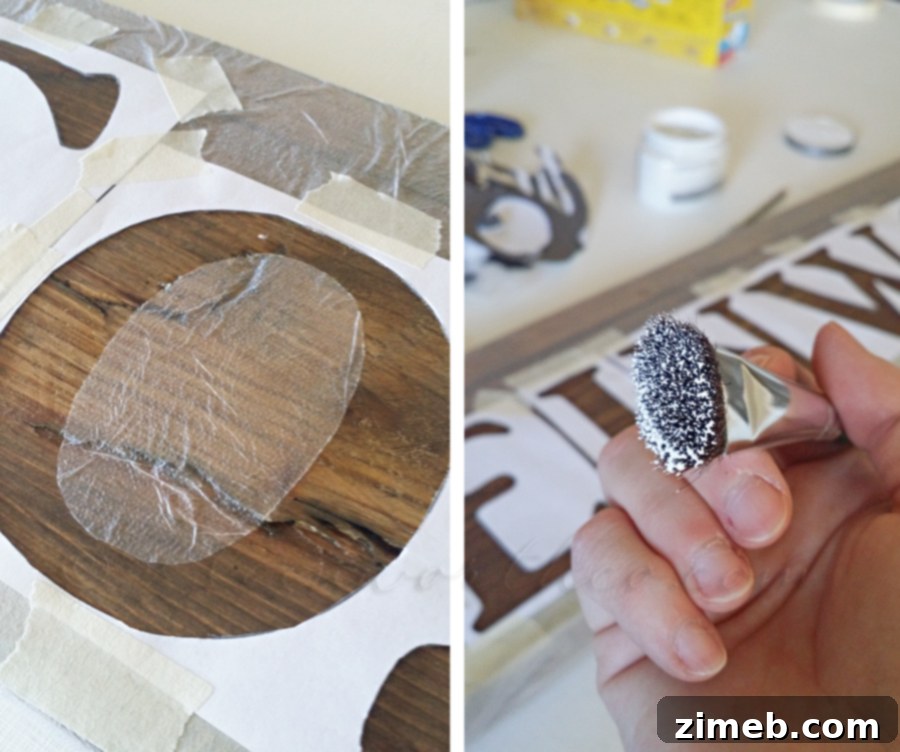
Now, with our custom stencil ready, it’s time to paint! You can see in the image that the stencil is perfectly left on the board, exposing the areas where the paint will go. I opted for a stippling brush and applied very little paint at a time. The stippling technique involves a gentle “pouncing” motion with the brush, rather than traditional brushing strokes. This method is fantastic for two reasons: it helps prevent paint bleed under the stencil and, crucially, it creates an uneven, textured finish on the letters. You’ll notice some areas will be lighter and others darker, naturally mimicking the worn appearance of an old sign. This intentional inconsistency is exactly what we want, as it makes the subsequent distressing step much easier and more authentic.
5. Distressing for Authentic Vintage Charm
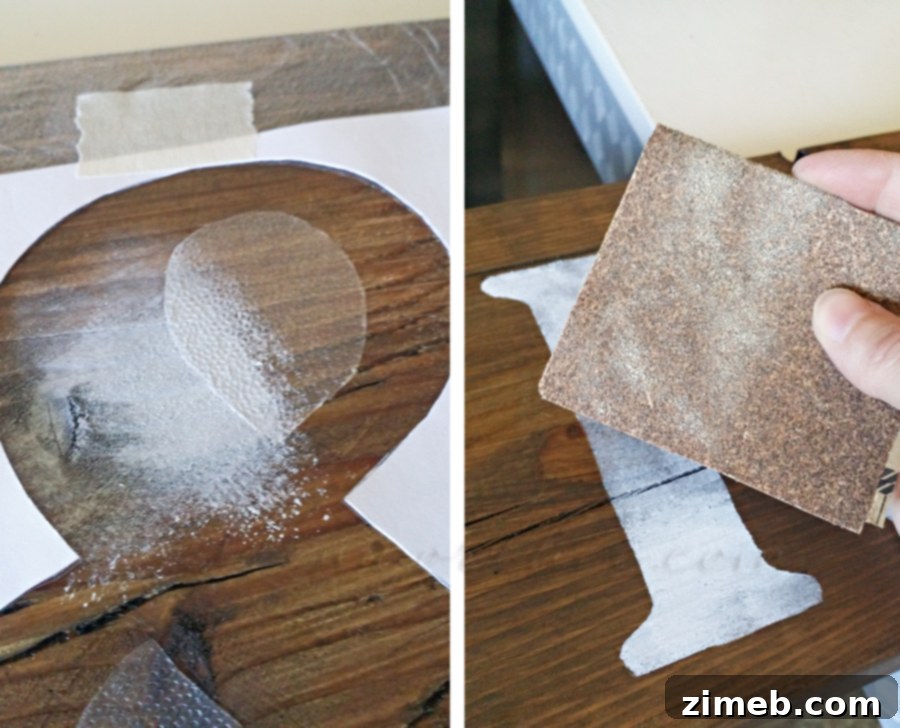
As you can see from the previous step, stippling the paint already creates a beautifully varied texture, with lighter and darker areas that instantly lend a worn-off look. This is a crucial foundation for achieving a truly authentic vintage appearance. But we want it to look even more lovingly aged, as if it has endured years of use and exposure. Once the paint was completely dry – and this is important for preventing smudges – I took a piece of fine-grit sandpaper and gently rubbed it over the painted letters. Focus on the edges and high points, mimicking natural wear and tear. This quick rub further enhances the distressed effect, blending the painted letters seamlessly into the stained wood backdrop. The combination of stippled paint and light sanding creates a depth and character that truly elevates the sign, making it appear genuinely old and full of history.
6. Adding the “Wow Factor”: Lights and Industrial Accents
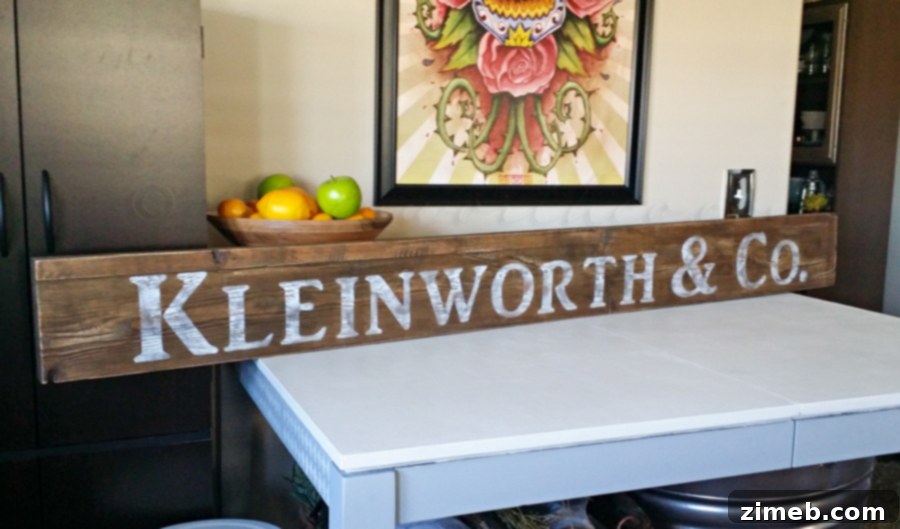
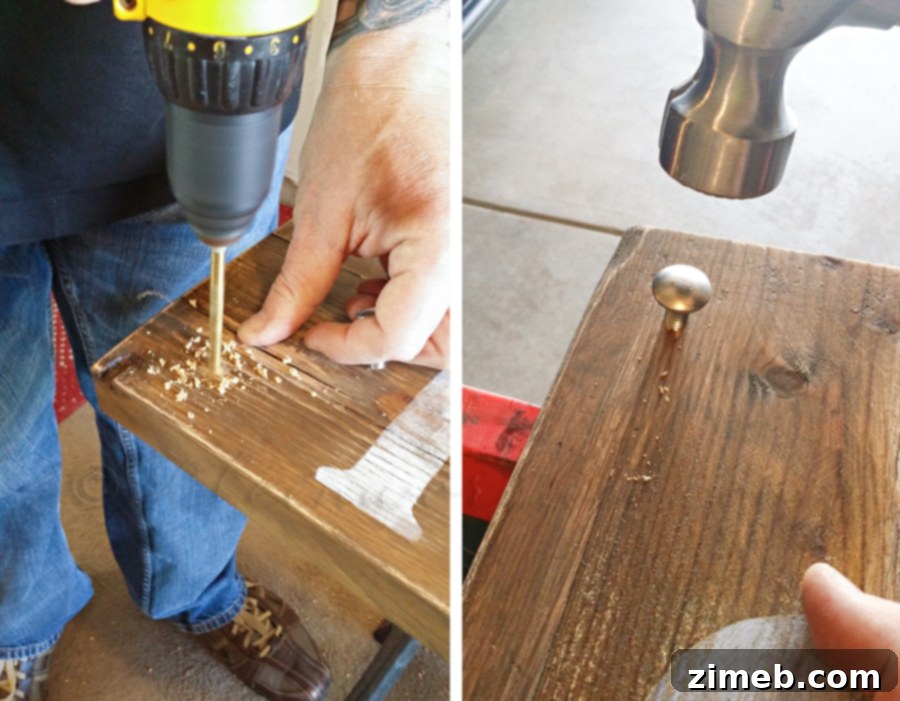
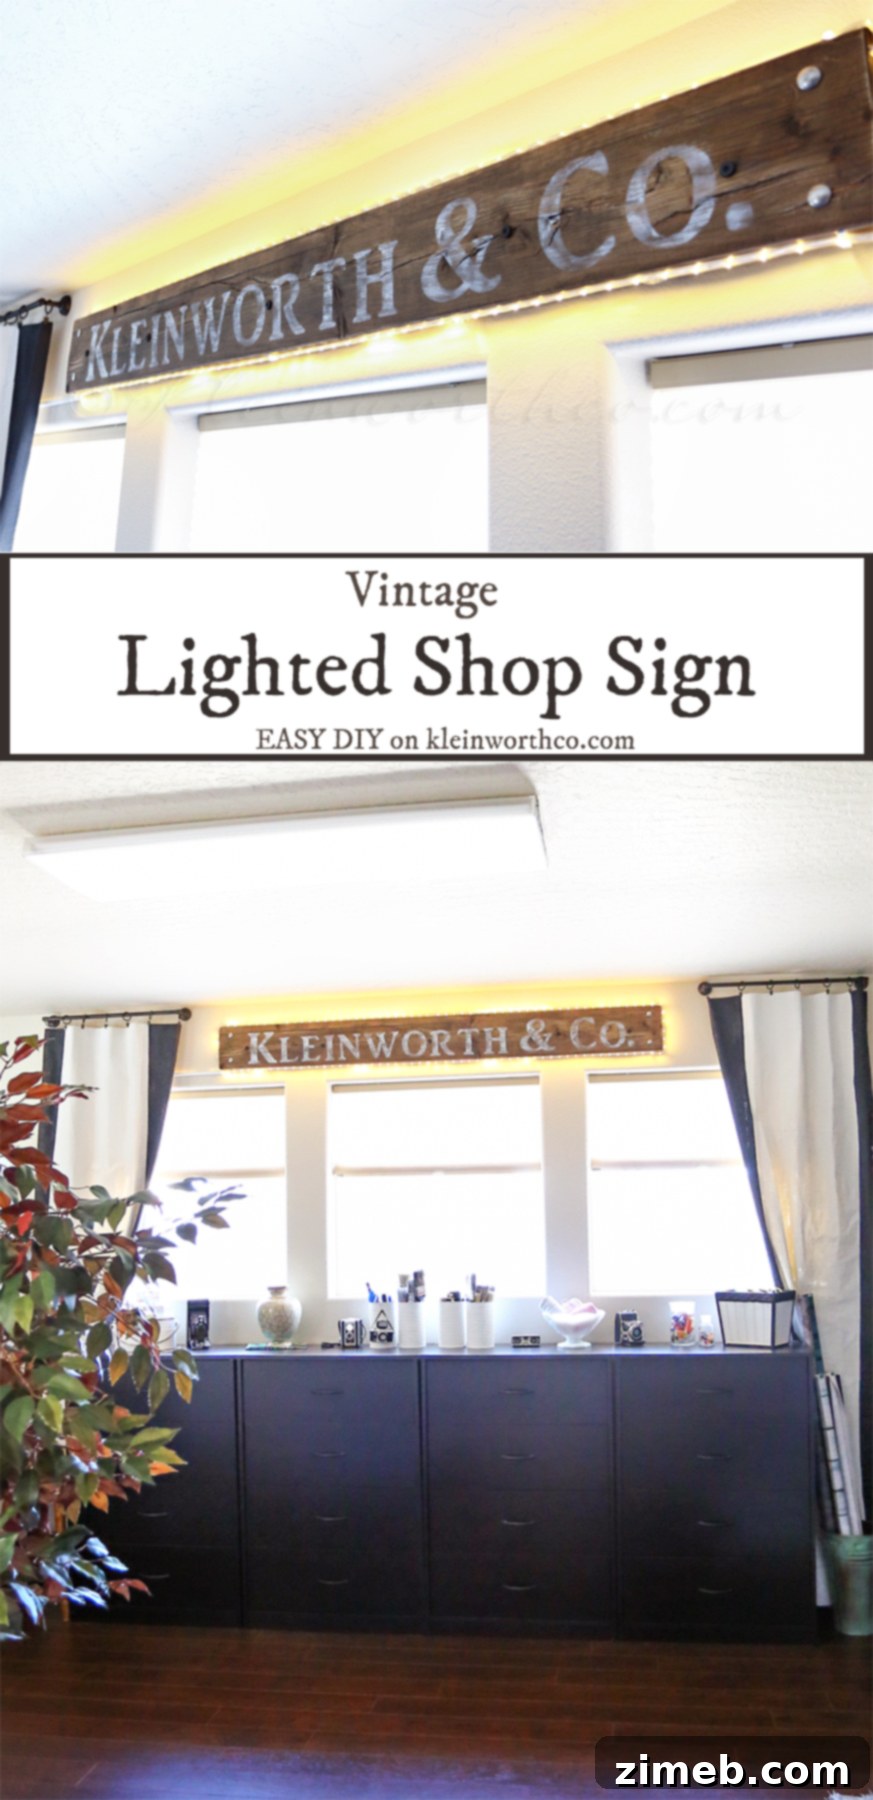
Here’s what the sign looked like after painting and distressing, before it returned to the garage for its final touches. I honestly loved it just as it was – a charming, rustic sign with undeniable character. However, my vision for this piece always included that extra special element, a little more “wow factor” to make it truly stand out. I wanted it to emulate the robust, riveted aesthetic of old industrial signs, giving it a sturdy, permanent feel on the wall. To achieve this, we drilled some pilot holes in each corner of the board and then carefully pounded in some decorative bolts. These bolts aren’t just for show; they add significant visual weight and an authentic, rugged charm that really complements the vintage theme.
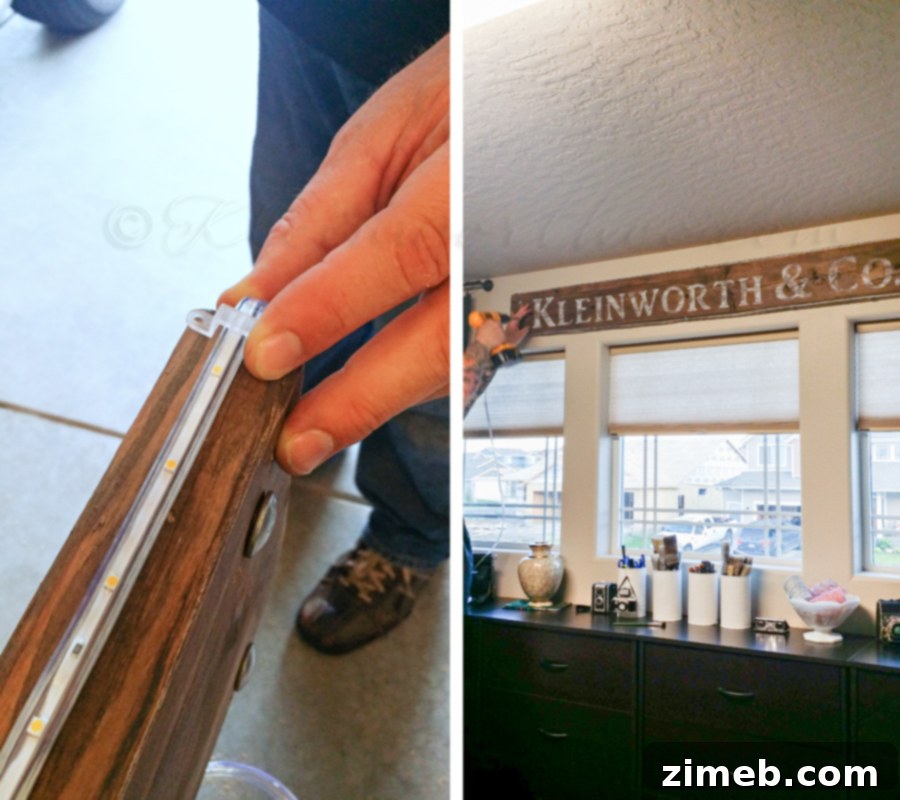
The ultimate “wow factor” came with the illumination. While picking up the Glad Press’n Seal at Walmart, we also grabbed a strip of flat LED rope lights. These lights are perfect because they’re flexible and emit a soft, even glow. We carefully attached the LED strip to the back edge of the board, positioning it so the light would cast a beautiful halo effect around the sign when mounted. Finally, using some very large, sturdy screws, we attached the entire sign to the wall in my studio, strategically placing it between the curtains for maximum impact. To keep the power cord tidy and discreet, we used a cord keeper to guide it neatly down the wall to the nearest outlet. And just like that, the transformation was complete!
The Grand Reveal: My Beloved Lighted Shop Sign
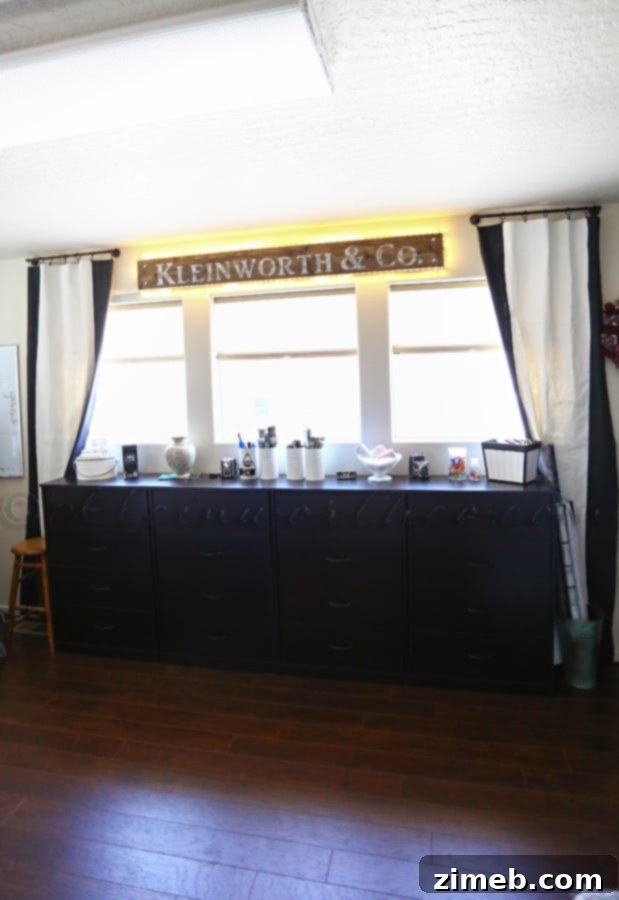
And here it is! Adorning the largest wall in my studio, this Vintage Lighted Shop Sign is everything I envisioned and more. It’s absolutely what that space needed, injecting personality, warmth, and a unique focal point. The soft glow of the LED lights highlights the distressed letters beautifully, creating an inviting ambiance that perfectly complements my creative sanctuary. Every time I look at it, I can’t help but smile, knowing I crafted it myself with a little ingenuity and a lot of Press’n Seal magic.
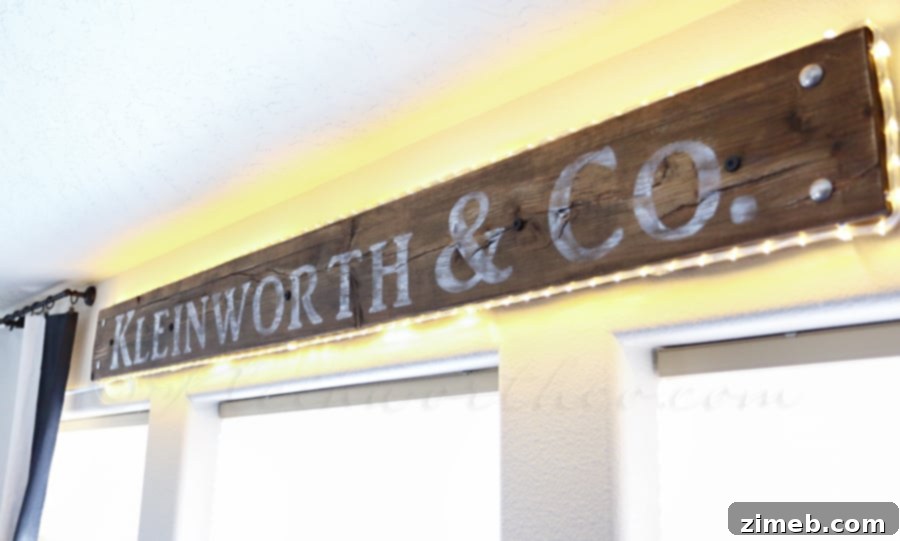
The design, with its worn paint, rich stain, and industrial bolts, truly reminds me of the old, weathered signs we used to see in rustic bars and general stores in the tiny mining towns when we lived outside of Tahoe. It evokes a sense of history and handcrafted authenticity that mass-produced items simply can’t replicate. This project proves that you don’t need a professional workshop or expensive machines to create something truly special and personal for your home. All it takes is a bit of inspiration, some basic supplies, and the clever application of tools like Glad Press’n Seal.
What Would You Create with Glad Press’n Seal?
Now that you’ve seen how simple and effective Glad Press’n Seal can be for DIY stenciling, what project ideas are sparking your imagination? The possibilities are truly endless, from custom wall art and furniture makeovers to personalized gifts and home decor accents. Its unique ability to adhere securely yet remove cleanly makes it an invaluable tool for any crafter. Share your brilliant ideas in the comments below – I’d love to hear them!
For even more project inspiration and ingenious uses for Glad Press’n Seal, be sure to visit their Official Website or explore their extensive collection on Pinterest. You’ll be amazed at the versatility of this everyday household item!
Discover More Inspiring Home Projects
If you enjoyed crafting this vintage sign, you might be interested in tackling other rewarding home improvement and decor projects. Here are a few more ideas to ignite your DIY spirit and transform your living spaces:
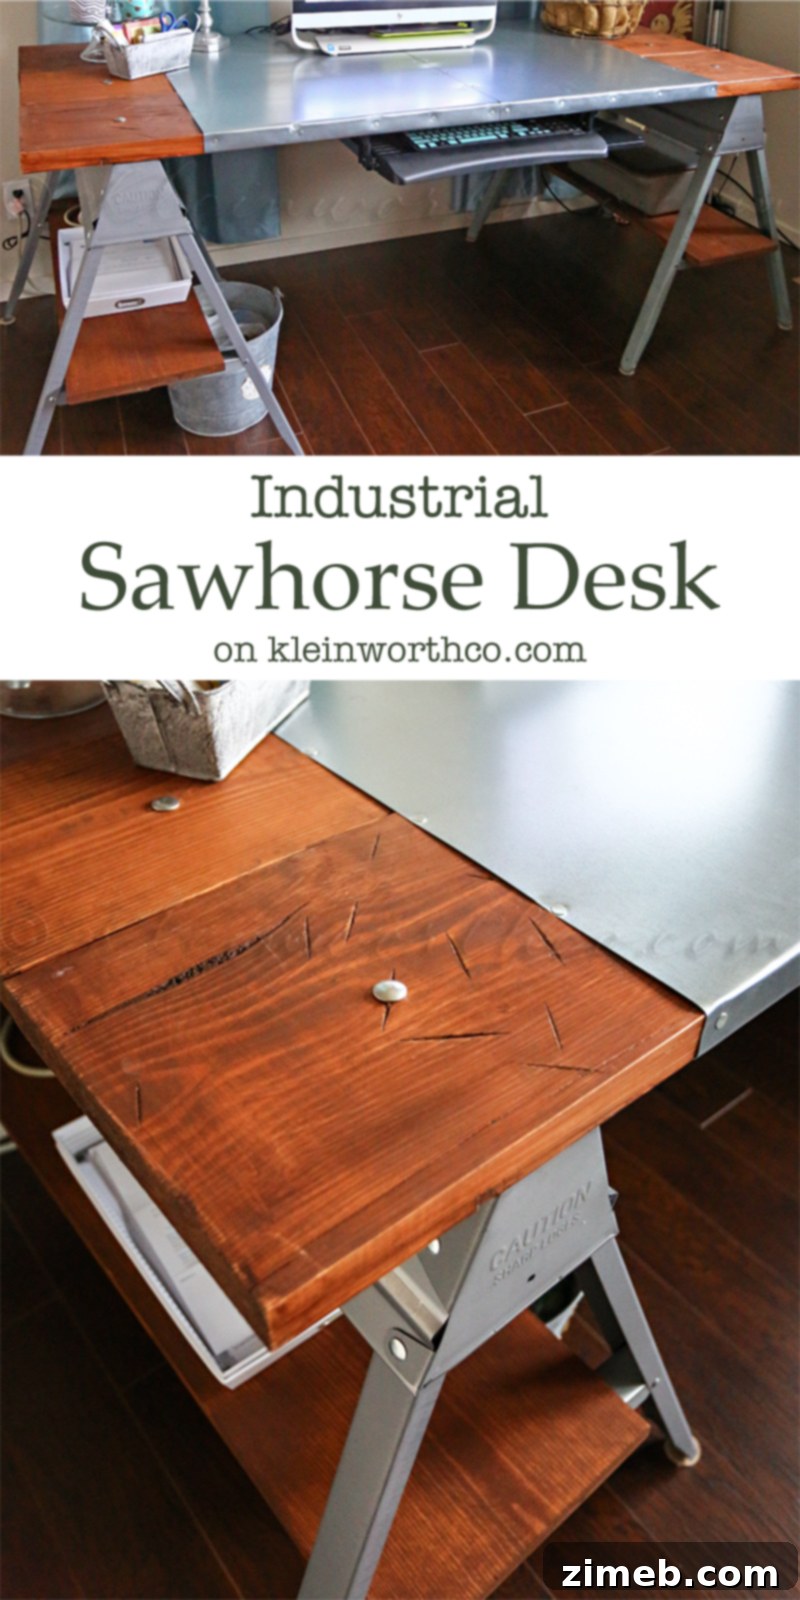
Build Your Own Industrial Sawhorse Desk

One Desk, Three Great Uses: Maximizing Your Space
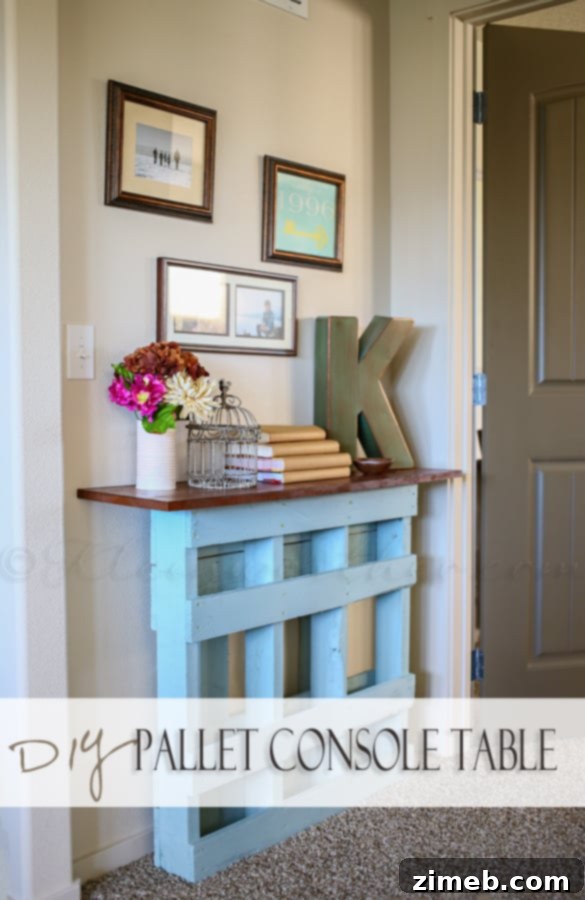
Craft a Rustic DIY Pallet Console Table
To see where I am linking today- visit HERE