
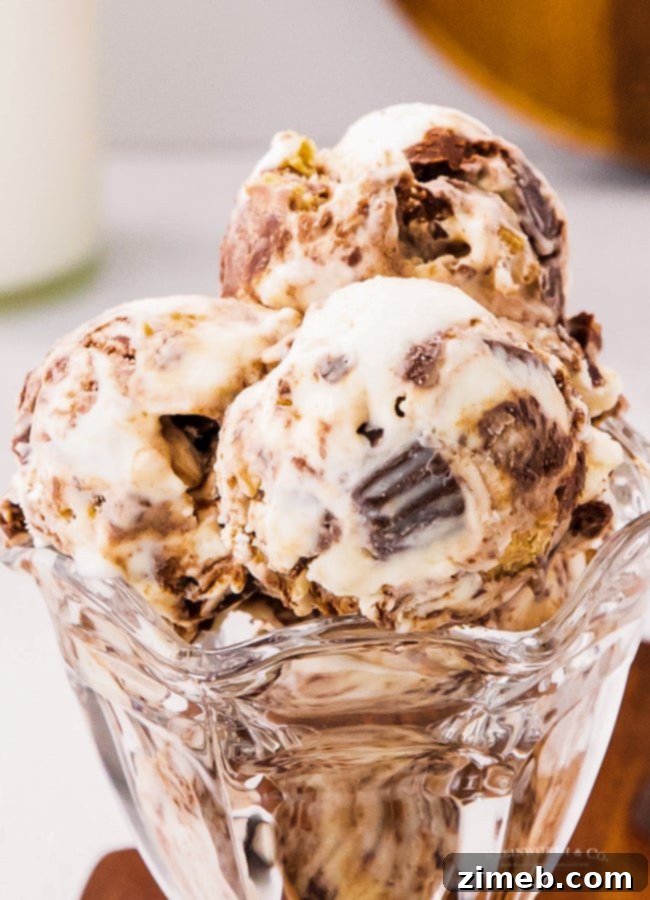
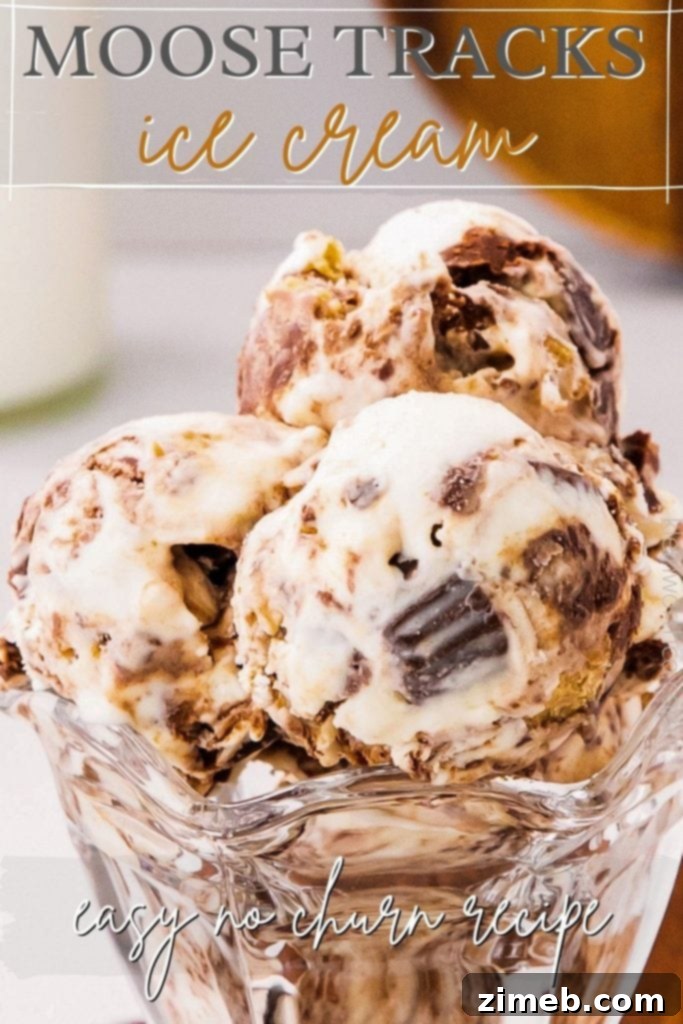
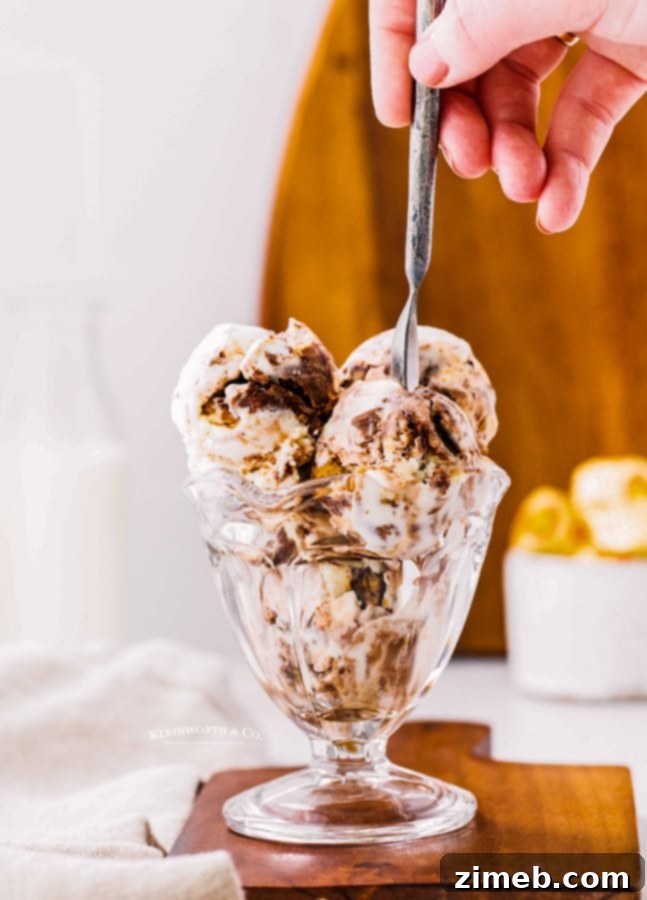
Super easy, no-churn Moose Tracks Ice Cream is a dream come true for dessert lovers, generously loaded with creamy peanut butter cups and decadent ribbons of chocolate fudge. The best part? No ice cream maker is required, making this a truly accessible homemade delight!
If you’re a fan of the classic peanut butter and chocolate combination, then you’re intimately familiar with the irresistible allure of Moose Tracks ice cream. This beloved flavor frequently graces our freezer, a testament to its widespread appeal and comforting deliciousness. The unique blend of textures and tastes makes it a perennial favorite for families everywhere.
Recently, with a special occasion on the horizon, we found ourselves wanting a celebratory treat but faced the usual challenge of making an impromptu trip to the store. That’s when inspiration struck: why not create our very own homemade Moose Tracks ice cream? The result was nothing short of spectacular, far surpassing any store-bought version we’ve ever enjoyed. The richness, the freshness, and the sheer satisfaction of crafting it yourself make this recipe an absolute must-try. We’re confident you’ll find it utterly delightful and perhaps even your new go-to frozen dessert!
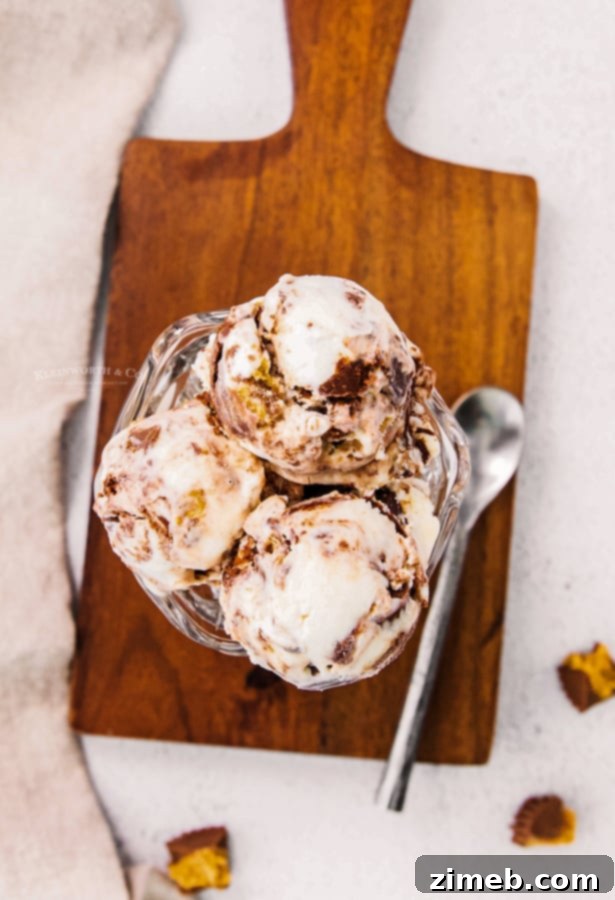
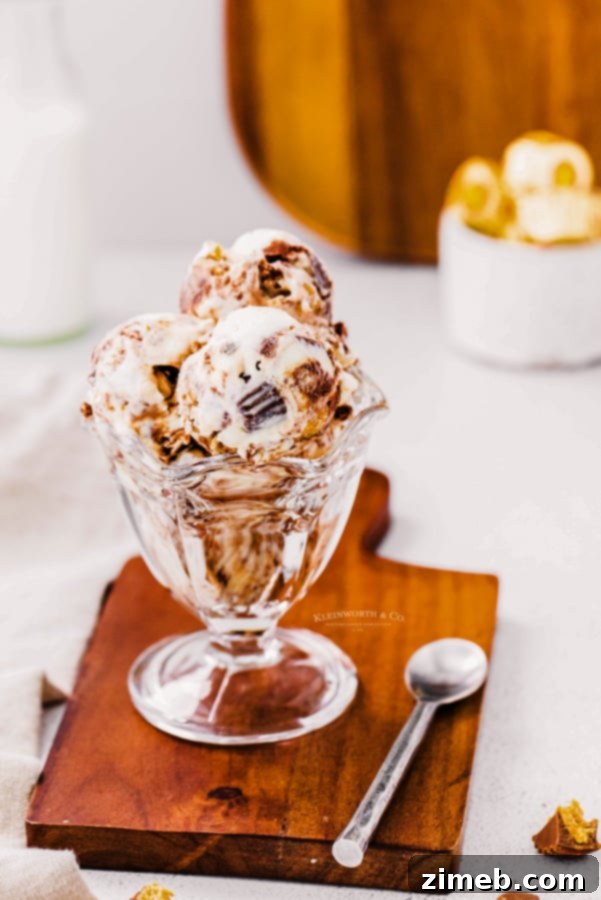
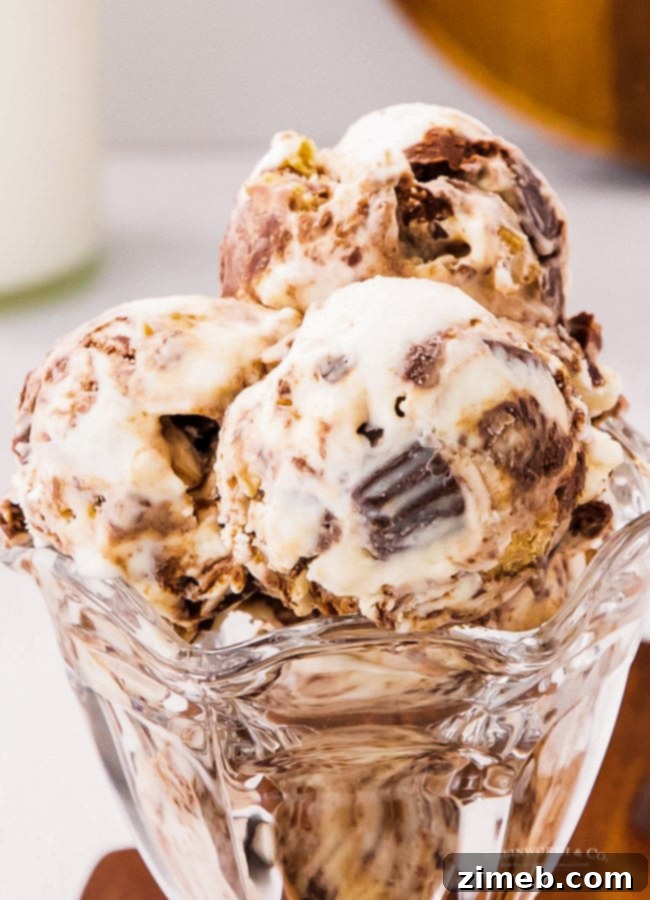
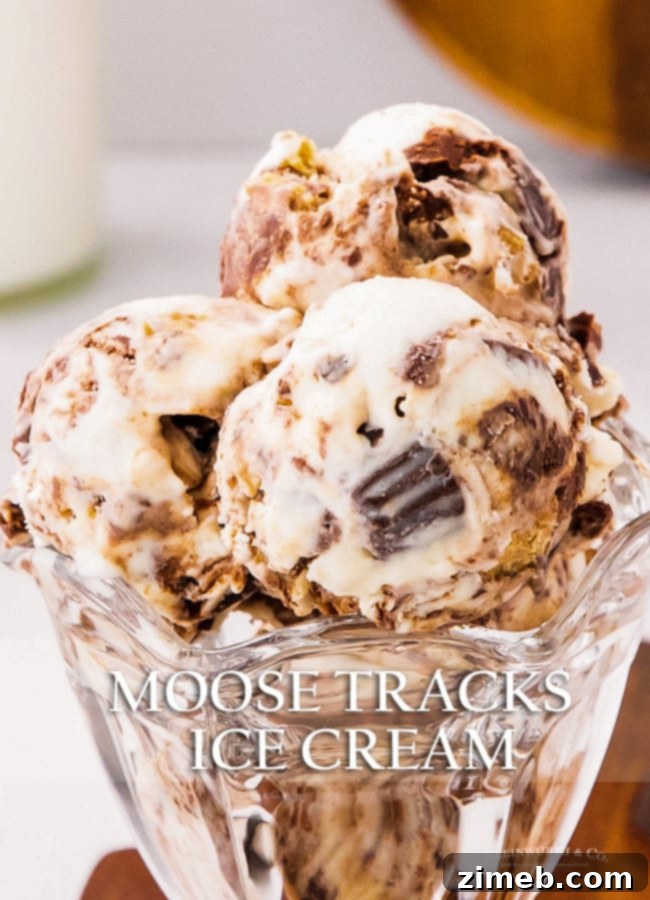
Just one look at that mesmerizing fudge ripple swirling through the creamy base, perfectly complemented by chunks of peanut butter cups, confirms its divine status. Each spoonful offers a symphony of smooth, sweet, and slightly salty notes that dance on the palate. Without exaggeration, this recipe has earned unanimous praise in our home, quickly becoming everyone’s absolute favorite treat. It’s the kind of dessert that creates lasting memories and always leaves you craving just one more bite.
One of the many reasons I adore this recipe is its remarkable simplicity and the accessibility of its ingredients. It’s incredibly satisfying to whip up such a fantastic dessert using staples I almost always have on hand. The only item I occasionally need to specifically plan for is heavy whipping cream, as it’s the foundation for the creamy no-churn base. Beyond that, the sweetened condensed milk, vanilla extract, chocolate, and peanut butter cups are pantry mainstays, making spontaneous ice cream making sessions a delightful reality. This convenience means you can enjoy this heavenly treat whenever the craving strikes, without a last-minute dash to the grocery store.
Unveiling the Magic of Moose Tracks Ice Cream
Moose Tracks ice cream isn’t just a flavor; it’s an experience. Originating from the Michigan-based Denali Flavors, the original Moose Tracks features a vanilla ice cream base swirled with peanut butter fudge and mini peanut butter cups. Our homemade no-churn version captures that iconic profile perfectly, delivering the same beloved combination of textures and flavors. The contrast between the silky smooth ice cream, the rich, slightly chewy fudge, and the delightful crunch of the peanut butter cups is what makes this dessert so uniquely appealing. It’s a symphony of indulgence that satisfies every chocolate and peanut butter craving simultaneously. This recipe elevates the classic by offering a fresher, more personal touch, making it an ideal choice for any occasion, from a simple family night to a celebratory gathering.
Frequently Asked Questions About No-Churn Ice Cream
What exactly is no-churn ice cream?
Traditionally, making ice cream involves an ice cream maker. This specialized appliance continuously churns the mixture as it freezes, which is crucial for preventing large ice crystals from forming and ensuring a smooth, creamy texture. The churning process incorporates air, resulting in that delightful scoopable consistency we all love.
However, no-churn recipes like this one revolutionize the process by eliminating the need for an ice cream maker entirely. The secret lies in the specific combination of ingredients, primarily heavy whipping cream and sweetened condensed milk. When whipped together, the heavy cream incorporates air, creating a light, fluffy base. The high fat content of the cream, combined with the sugar and thickness of the condensed milk, naturally inhibits ice crystal formation, resulting in an incredibly rich and creamy ice cream texture that rivals its churned counterparts. This not only saves you time and the hassle of specialized equipment but also delivers a positively delicious result that’s surprisingly simple to achieve.
Homemade Moose Tracks Ice Cream: A Sweet Escape
Crafting homemade Moose Tracks ice cream is more than just making a dessert; it’s an act of culinary creativity and a guarantee of pure satisfaction. The joy of combining simple ingredients to produce something so profoundly delicious and personal is unparalleled. Each batch offers the flexibility to adjust the intensity of the fudge swirls, the density of the peanut butter cup pieces, and even the subtle notes of vanilla, allowing you to tailor it perfectly to your taste preferences. This hands-on approach ensures a freshness and vibrant flavor that store-bought options simply can’t match, turning a simple sweet craving into an extraordinary indulgence. Experience the delight of creating this frozen masterpiece in your own kitchen.

How can I make the ice cream base chocolate?
While the classic Moose Tracks flavor features a vanilla base, a chocolate base offers an equally irresistible twist for serious chocolate enthusiasts. Transforming the base into a rich chocolate flavor is incredibly straightforward. Simply incorporate 1/2 cup of unsweetened cocoa powder (ensure it’s not Dutch-processed, as Dutch-processed cocoa reacts differently with leavening agents and might alter the final texture and flavor balance) into the sweetened condensed milk before gently folding it into the whipped cream mixture. For an even deeper, more complex chocolate profile, you can also experiment with using chocolate malt milk powder, which adds a nostalgic, malty undertone. This simple adjustment opens up a whole new dimension of flavor, allowing you to customize your homemade Moose Tracks to perfectly suit your chocolate cravings.
Mastering the Moose Tracks Ice Cream Recipe at Home
Embarking on the journey of making Moose Tracks ice cream at home is a rewarding experience that promises a dessert far superior to any store-bought equivalent. This comprehensive guide and recipe are designed to empower you with the knowledge and confidence to create an undeniably delicious frozen treat. From understanding the crucial role of each ingredient to mastering the simple steps of preparation, you’ll find that achieving that perfect balance of creamy texture, rich fudge ribbons, and delightful peanut butter cup chunks is entirely within reach. Get ready to impress your family and friends with a homemade dessert that truly shines.

Can this recipe be doubled for a bigger batch?
Absolutely! If you’re hosting a gathering, have a larger family, or simply anticipate a high demand for this undeniably delicious dessert, doubling the recipe is a fantastic idea. Moose Tracks ice cream tends to disappear quickly, especially among peanut butter and chocolate lovers. However, there’s a practical consideration: ensure your mixer (whether a stand mixer or a powerful hand mixer) can comfortably accommodate the increased volume of ingredients, particularly when whipping the heavy cream. You’ll need a sufficiently large mixing bowl to prevent overflow and ensure the cream can achieve those essential stiff peaks. If your equipment can handle it, then I wholeheartedly recommend doubling this recipe. You’ll be glad you have the extra supply of this beloved frozen treat!
The Quest for the Best Moose Tracks Ice Cream
When it comes to frozen desserts, “best” is a subjective term, but this homemade no-churn Moose Tracks ice cream consistently earns that title in our household. What sets it apart is the perfect harmony of its components: the unparalleled creaminess of the no-churn base, the intense richness of the homemade chocolate fudge sauce, and the satisfying texture of generously distributed peanut butter cups. Unlike many store-bought options that might skimp on mix-ins or use artificial flavors, this recipe ensures a vibrant, authentic taste and texture in every spoonful. It’s a testament to how simple, quality ingredients, combined with a touch of homemade care, can elevate a classic dessert to extraordinary heights. Prepare for an ice cream experience that truly stands out.
This recipe calls for a stand mixer. Can I also make this recipe by hand?
While a stand mixer is ideal for its efficiency and consistent power, ensuring the heavy cream reaches stiff peaks quickly and effortlessly, it is certainly possible to make this recipe without one. However, attempting to whip heavy cream to stiff peaks using only a whisk by hand would be an extremely strenuous and time-consuming endeavor, likely resulting in arm fatigue before achieving the desired consistency. The good news is that a powerful hand mixer will work beautifully. It will require a bit more time and attention compared to a stand mixer, but it is perfectly capable of whipping the cream to the necessary stiffness. The key is patience and a steady hand, and you’ll still achieve that wonderfully creamy no-churn base.
The Art of No-Churn Moose Tracks Ice Cream: A Detailed Guide
Creating no-churn Moose Tracks ice cream is an accessible culinary adventure that yields incredibly satisfying results. This method is celebrated for its simplicity and the luxurious texture it produces, all without the need for an expensive ice cream machine. By understanding the core principles and carefully following each step, you can achieve a homemade dessert that is not only packed with flavor but also boasts that coveted creamy consistency. We’ll delve into each component and process to ensure your success, guaranteeing a batch of Moose Tracks ice cream that will impress everyone.
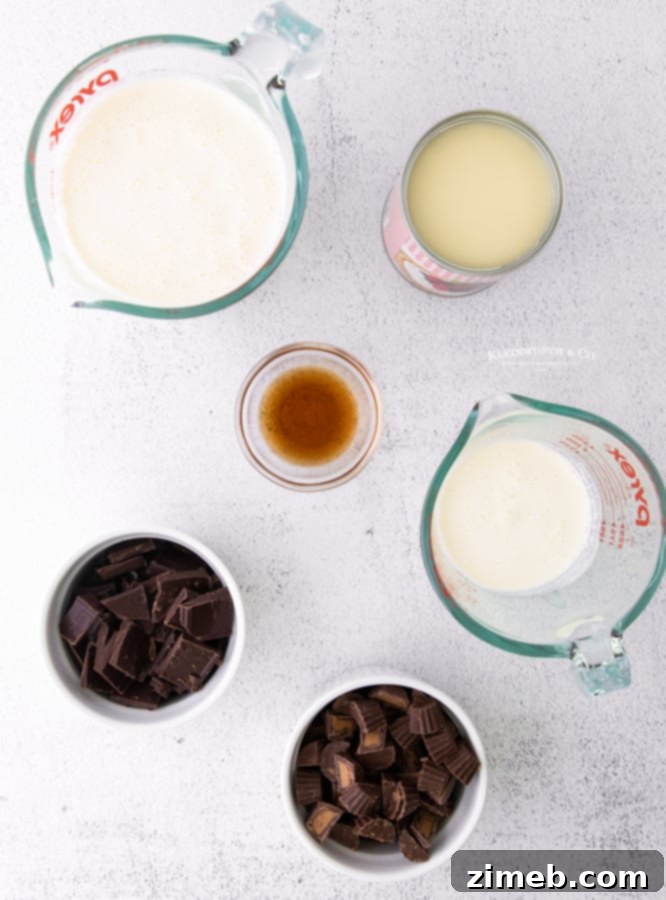
What are the essential ingredients for Moose Tracks Ice Cream?
The magic of Moose Tracks ice cream, particularly the no-churn variety, comes from a concise list of high-quality ingredients that work together to create an extraordinary flavor and texture profile. Each component plays a vital role in achieving that creamy, rich, and utterly irresistible result:
For the Decadent Fudge Sauce:
- Chocolate, chopped: Opt for a good quality semi-sweet or dark chocolate. The better the chocolate, the richer and more luscious your fudge ripple will be. Chopping it finely ensures it melts smoothly and quickly into the cream.
- Heavy cream: This is the base for your fudge, providing the necessary fat to create a smooth, emulsified sauce that will set beautifully within the ice cream.
For the Creamy No-Churn Ice Cream Base:
- Heavy whipping cream: The star of the no-churn method. When whipped, it incorporates air, creating the light and fluffy texture that forms the bulk of the ice cream, negating the need for churning.
- Sweetened condensed milk: This ingredient is a true powerhouse. It sweetens the ice cream, adds body and richness, and its high sugar content helps prevent the formation of large ice crystals, resulting in that wonderfully smooth consistency.
- Vanilla extract: A crucial flavor enhancer. Good quality vanilla extract elevates the overall taste of the ice cream base, providing a warm, aromatic foundation for the chocolate and peanut butter flavors.
- Reese’s cups, chopped: The iconic mix-in for Moose Tracks! Chopping them ensures an even distribution and allows you to enjoy pieces of varying sizes, from small crumbles to larger chunks, in every bite.
- Fudge sauce: The homemade fudge sauce prepared earlier is essential for creating those signature beautiful ribbons and bursts of chocolate throughout the ice cream.
With these key ingredients, you’re all set to create a batch of homemade Moose Tracks ice cream that’s bursting with flavor and boasts a delightfully creamy texture, proving that simple ingredients can yield truly spectacular results.
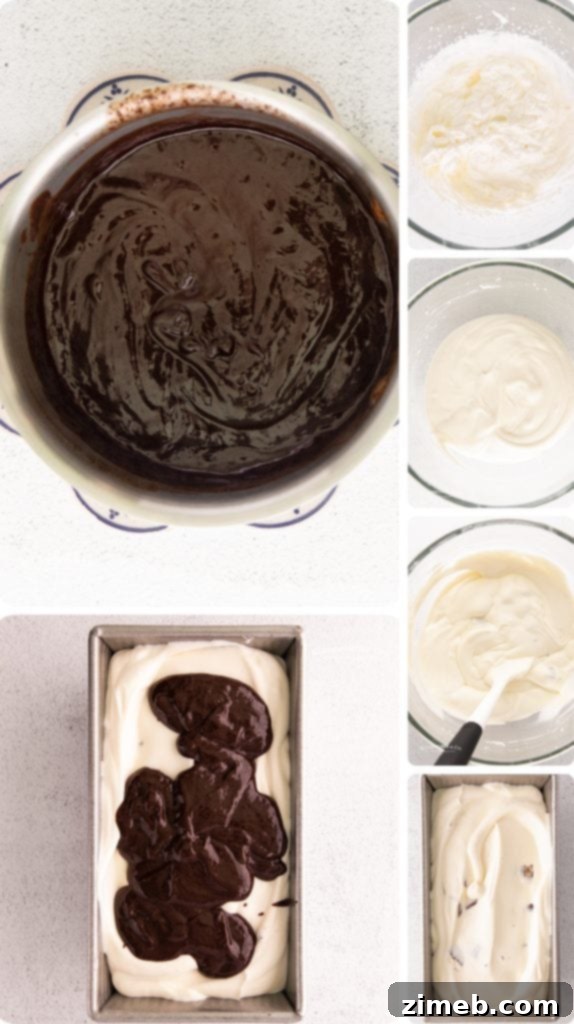
Simplified Steps: How to Make Moose Tracks Ice Cream
Creating this irresistible no-churn Moose Tracks ice cream is a straightforward process, broken down into two main parts: preparing the luscious fudge sauce and then assembling the creamy ice cream base. Follow these simple steps for a truly divine homemade treat:
Fudge Sauce Preparation:
- Heat the heavy cream: In a small saucepan, gently heat the heavy cream over medium heat. Watch it carefully; you want it to just begin bubbling around the edges, which typically takes about 5 minutes. Avoid a rolling boil, as this can affect the texture of your fudge.
- Melt the chocolate: Remove the saucepan from the heat immediately. Add your finely chopped chocolate to the hot cream and stir continuously until the chocolate is completely melted and the mixture is smooth, glossy, and uniform. This creates a rich, indulgent ganache-like sauce. Set this aside to cool to room temperature. It’s crucial for the fudge to be cool so it doesn’t melt the ice cream base when swirled in.
Ice Cream Assembly:
- Whip the heavy whipping cream: In a large mixing bowl (preferably chilled for best results), whip the cold heavy whipping cream on high speed using a stand mixer or a hand mixer. Continue whipping until stiff peaks form. This means when you lift the beaters, the cream should hold its shape firmly and stand upright. This step typically takes about 3 minutes, but it can vary based on your mixer’s power.
- Fold in condensed milk and vanilla: Gently fold in the sweetened condensed milk and vanilla extract into the whipped cream. Use a spatula and a gentle hand, lifting from the bottom of the bowl and folding over, to maintain as much of the air incorporated into the cream as possible.
- Add chopped Reese’s cups: Incorporate the chopped Reese’s cups into the mixture. Again, fold gently to combine them evenly throughout the base without deflating the cream.
- Layer and swirl: Transfer about half of your ice cream mixture to a plastic ice cream tub or a standard loaf pan. Drizzle a generous amount of the cooled fudge sauce over it. Add the remaining ice cream mixture, then drizzle with the rest of the fudge sauce. Use a butter knife or a skewer to gently swirl the fudge into the ice cream. Be careful not to over-mix; you want distinct ribbons of fudge, not a fully incorporated chocolate ice cream.
- Freeze overnight: Cover the container tightly with plastic wrap or a lid. Place it in the coldest part of your freezer and freeze overnight, or for at least 8-12 hours, until it is completely firm. This extended freezing time ensures the perfect scoopable consistency.
Once frozen, your homemade no-churn Moose Tracks ice cream is ready to be enjoyed! Prepare for a truly delightful dessert experience.
Expert Tips for the Best Moose Tracks Ice Cream Every Time
- Optimal Freezer Placement: For the best results in preventing freezer burn and maintaining a consistent temperature, always store your ice cream at the very back of your freezer. Avoid storing it in the freezer door, as this area experiences the most temperature fluctuations whenever the door is opened.
- Stick to Full-Fat Ingredients: This recipe relies heavily on the fat content of its ingredients for its signature creamy texture and rich flavor. Absolutely no substitutions should be made with low-fat, reduced-fat, or sugar-free versions. Using these alternatives will compromise both the delicious flavor and the desired ultra-creamy consistency, potentially resulting in an icy or bland dessert.
- Accelerate Freezing with Metal: If you’re eager to enjoy your homemade treat sooner, consider freezing it in a metal container. Metal conducts cold more efficiently than plastic, which can significantly speed up the freezing process, ensuring your ice cream sets faster.
- Shallow Container Advantage: Similarly, using a wider, more shallow container instead of a deep, narrow one will also help the ice cream freeze more quickly and evenly. A larger surface area allows for more rapid cooling throughout the mixture.
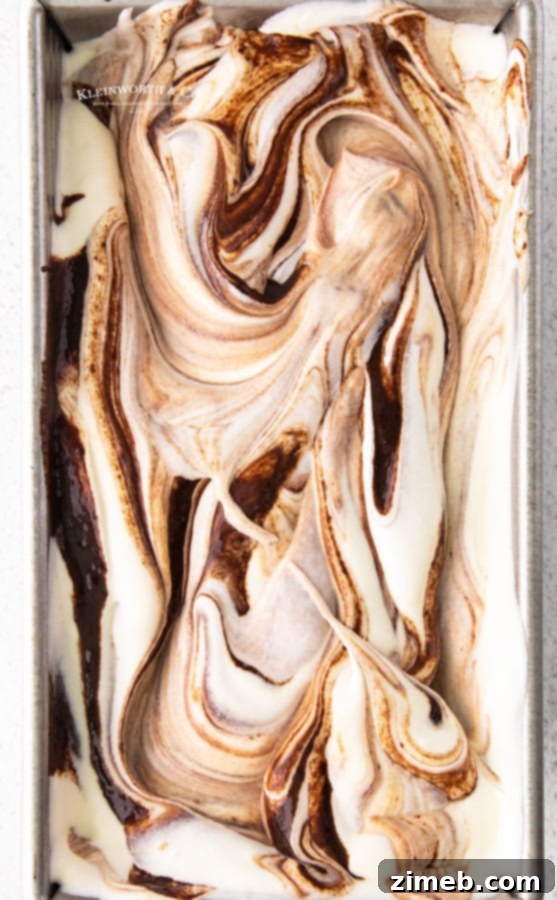
- Master the Swirl: When incorporating the fudge sauce, exercise caution and restraint. Do not over-mix! The goal is to create beautiful, distinct ribbons of chocolate fudge flowing through the creamy base, not to uniformly color the entire ice cream. Over-mixing will result in a solid chocolate ice cream, losing the iconic Moose Tracks aesthetic and flavor contrast.
- Proper Storage for Longevity: With proper storage, your homemade Moose Tracks ice cream can last for up to 6 months in the freezer. Ensure it is always kept in an airtight container to prevent freezer burn and absorb odors from other foods. Avoid letting it sit out at room temperature for prolonged periods, as repeated thawing and refreezing can degrade its quality and texture.
- The Perfect Scoop: For the smoothest, cleanest scoops, a little trick makes all the difference: run your ice cream scooper under hot water between each scoop. This warms the metal, allowing it to glide effortlessly through the frozen dessert, making serving a breeze and ensuring perfectly rounded portions.
Essential Moose Tracks Ice Cream Ingredients: A Closer Look
Understanding the role of each ingredient is key to appreciating the simplicity and genius behind this no-churn Moose Tracks recipe. From the creamy base to the delightful mix-ins, every component contributes to the overall success and irresistible appeal of this homemade dessert. By selecting quality ingredients, you’re setting yourself up for a truly exceptional treat that rivals any gourmet ice cream parlor.
Explore More Frozen Delights: Our Favorite Recipes
If your love for frozen treats extends beyond the delectable Moose Tracks ice cream, you’re in for a treat! We’ve curated a collection of our absolute favorite chilly desserts, each promising a unique and delightful experience. From classic comforts to refreshing surprises, there’s something here to satisfy every palate. Dive into these easy-to-make recipes and expand your frozen dessert repertoire:
- Classic Root Beer Float: A timeless beverage and dessert rolled into one, featuring fizzy root beer and creamy vanilla ice cream.
- Tangy Sour Watermelon Pops: A refreshing and vibrant treat with a delightful sweet and sour kick, perfect for hot summer days.
- Celebratory Cake Batter Gelato: Indulge in the whimsical flavors of cake batter in a smooth, rich gelato form, no celebration required!
- Simple Frozen Bananas: A healthy and naturally sweet treat, perfect for a quick snack or light dessert.
- Invigorating Homemade Slurpee: Recreate your favorite convenience store slushy with a homemade cherry version that’s bursting with fruity flavor.
- Delicious Banana Cream Pie Frozen Yogurt: All the beloved flavors of banana cream pie transformed into a lighter, tangy frozen yogurt.
- Nostalgic Frozen Brown Cow: A delightful blend of chocolate and root beer, offering a unique and comforting frozen drink experience.
Each recipe is designed for ease and maximum flavor, ensuring you can whip up impressive frozen treats with minimal effort. Happy chilling!
Moose Ice Cream: A Homage to a Classic
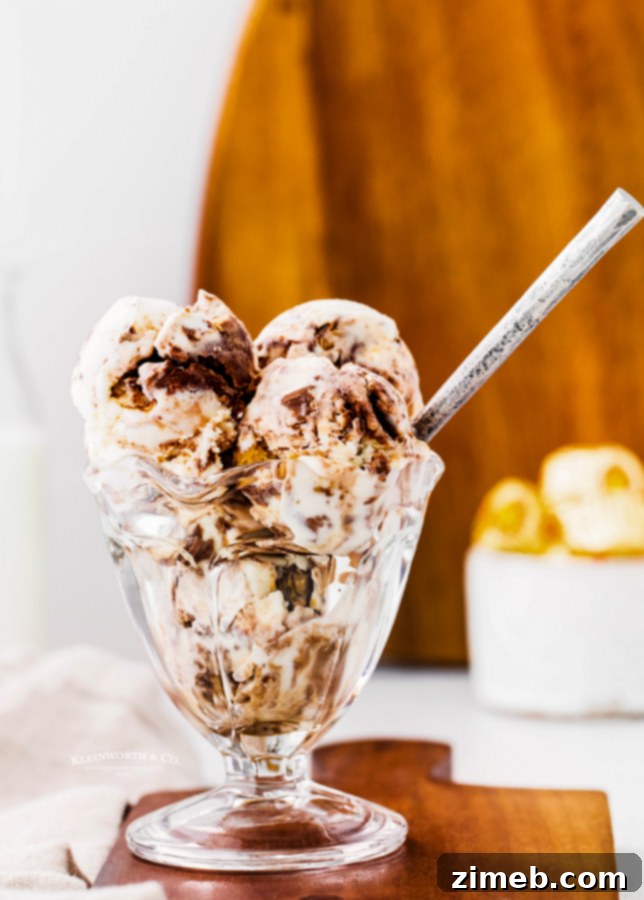
When we talk about “Moose Ice Cream,” we’re really talking about the iconic Moose Tracks, a flavor profile that has captivated taste buds for decades. This homemade version pays a beautiful homage to that classic, elevating it with the freshness and quality that only a kitchen-made dessert can provide. Imagine a creamy, velvety base—either the traditional vanilla or a rich chocolate—intertwined with generous ripples of gooey chocolate fudge and abundant pieces of peanut butter cups. It’s more than just a dessert; it’s a celebration of beloved flavors and textures, meticulously crafted to bring joy with every scoop. This no-churn method makes it effortlessly achievable, allowing you to bring this legendary flavor to your table with pride and ease.
Tools and Products I Love When Making Moose Tracks Ice Cream
This ice cream recipe is not only SUPER EASY and incredibly delicious, but it also becomes even more enjoyable with the right tools. If you’re like me, you might already have some of these items on hand. Or perhaps you’re new to the world of homemade ice cream and feel a little nervous – rest assured, you’re going to love the process and the delicious outcome! To help you achieve the best results with this frozen treat recipe, I’ve compiled a list of the absolute essentials that I can’t imagine making this dessert without. These items ensure a smooth, efficient, and enjoyable ice cream-making experience every single time.
- Quality Chocolate: Essential for a rich, smooth fudge sauce.
- Heavy Cream: The base for both the fudge and the creamy ice cream.
- Sweetened Condensed Milk: The secret to no-churn creaminess and sweetness.
- Pure Vanilla Extract: Enhances all the flavors beautifully.
- Reese’s Cups: The star mix-in for that classic Moose Tracks flavor.
- Stand or Hand Mixer: Crucial for whipping the heavy cream to stiff peaks.
- Freezer-Safe Container: For freezing your delicious creation.
- Ice Cream Scoop: For serving those perfect, easy portions.
If you love this easy ice cream recipe and are always on the lookout for delectable frozen treats, you’re going to adore these other fantastic dessert ideas too. Each link below leads to an easy-to-follow, printable recipe, ensuring your sweet cravings are always satisfied!
Check out this recipe
Check out this recipe
Check out this recipe
Check out this recipe
Check out this recipe
Check out this recipe
Check out this recipe
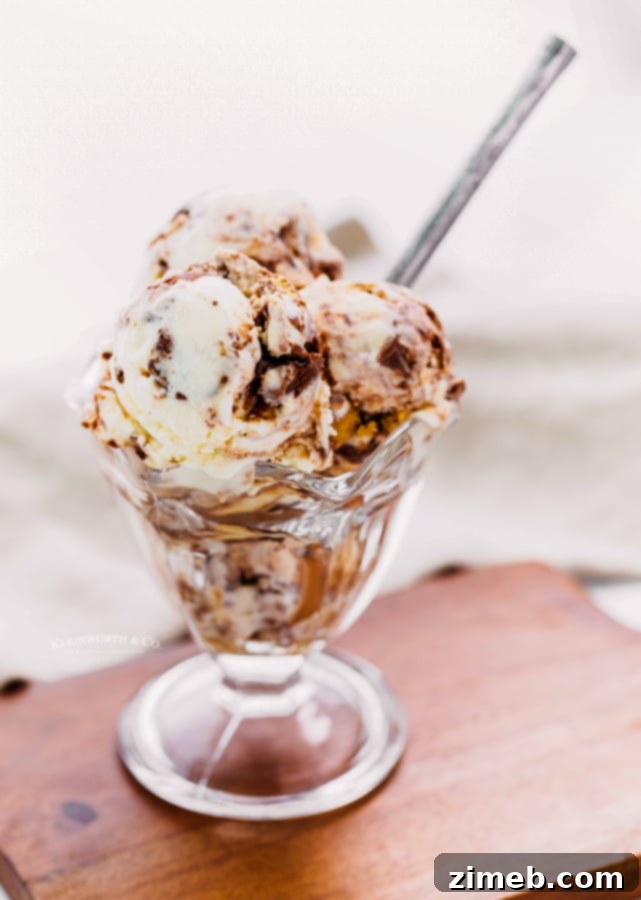
If you’ve thoroughly enjoyed creating this recipe for Homemade Moose Tracks Ice Cream as much as I do, please take a moment to leave a five-star review. Your feedback truly helps, and I’d be incredibly grateful if you could share this delightful recipe with your friends and family on Facebook and Pinterest!

CONNECT WITH YUMMI HAUS!
Be sure to follow me on my social media, so you never miss a post!
Substack, FB, Pinterest, IG, Email Subscription
Rate this Recipe
Moose Tracks Ice Cream
Ingredients
Fudge Sauce
- 4 ounces chocolate chopped
- ⅓ cup heavy cream
Ice Cream
- 2 cups heavy whipping cream
- 14 ounces sweetened condensed milk
- 1 tbsp vanilla extract
- 1 cup Reese’s cups chopped
- Fudge sauce from above
Instructions
Fudge Sauce
-
Heat the heavy cream in a small saucepan over medium heat until it begins to bubble– about 5 minutes.
-
Add in the chopped chocolate and stir until the chocolate is fully melted. Set aside to cool to room temperature.
Ice Cream
-
In a large mixing bowl, whip the heavy whipping cream on high speed until stiff peaks form– about 3 minutes.
-
Fold in the sweetened condensed milk and vanilla extract.
-
Add chopped Reese’s cups and fold gently to combine.
-
Transfer to a plastic ice cream tub or loaf pan and swirl in the fudge sauce.
-
Freeze overnight.
Nutritional information for the recipe is provided as a courtesy and is approximate. Please double-check with your own dietary calculator for the best accuracy. We at Yummi Haus cannot guarantee the accuracy of the nutritional information given for any recipe on this site.