
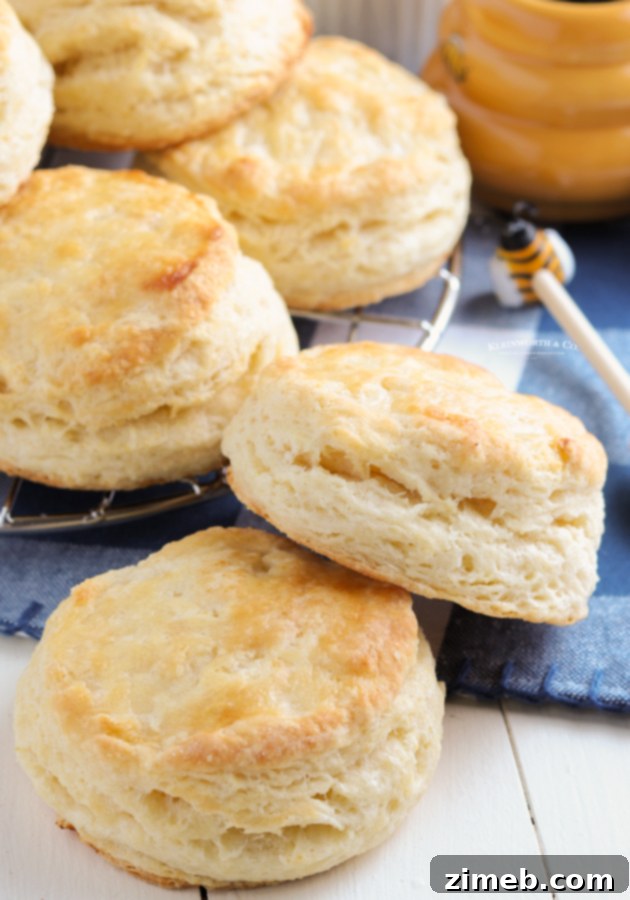
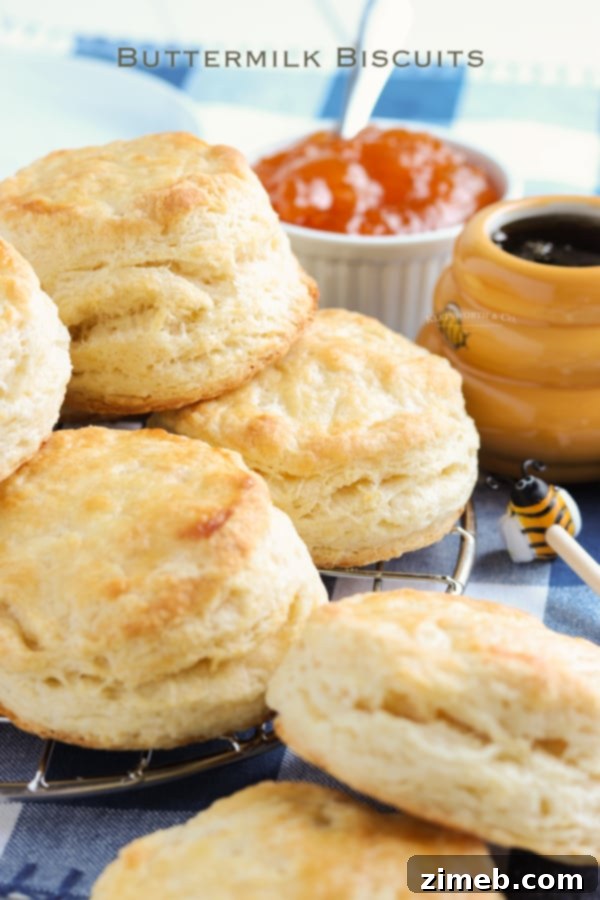
Easy Buttermilk Biscuits are exceptionally fluffy, tender, and famously flaky, making them an ideal accompaniment for butter and honey or a dollop of your favorite jam. This recipe delivers a deliciously simple side dish perfect for any dinner table or festive holiday spread.
There’s something truly special about a batch of warm, homemade buttermilk biscuits, fresh from the oven. These fluffy buttermilk biscuits are precisely what you need for any meal, effortlessly elevating breakfast, lunch, or even an elegant afternoon tea. With minimal ingredients and a straightforward cooking process, this recipe makes creating easy homemade biscuits an absolute breeze.
As an enthusiast for simple yet incredibly satisfying recipes, I especially cherish those that consistently earn rave reviews from my family. When I discover a dish that everyone adores and that I can whip up quickly without fuss, it inevitably becomes a treasured staple in our kitchen. This buttermilk biscuit recipe is undoubtedly one of those culinary gems – everyone simply can’t get enough of their comforting goodness.
These versatile biscuits pair wonderfully with countless dishes. For a truly satisfying and hearty dinner, try serving them alongside our Instant Pot Chicken Pot Pie. The flaky texture of the biscuits is perfect for soaking up every last bit of creamy goodness.
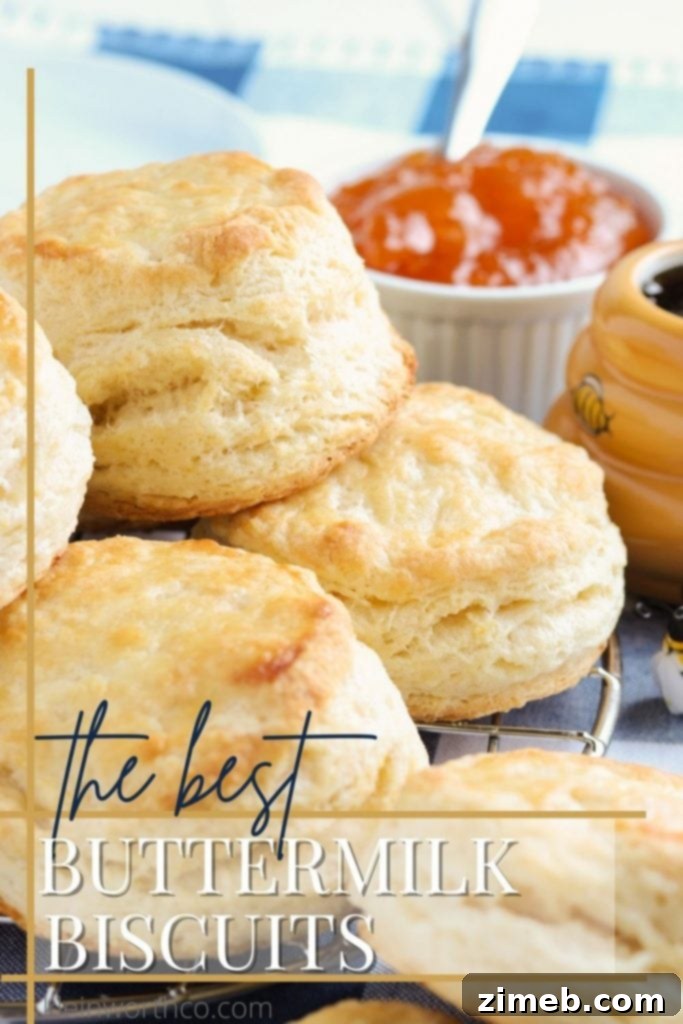
Is there anything more inviting than a warm biscuit slathered with butter first thing in the morning? These best buttermilk biscuits redefine breakfast. Their irresistible fluffiness and delicate, mildly sweet flavor make them ideal for dunking into your morning coffee or tea. Each bite offers a comforting taste that starts your day on the perfect note.
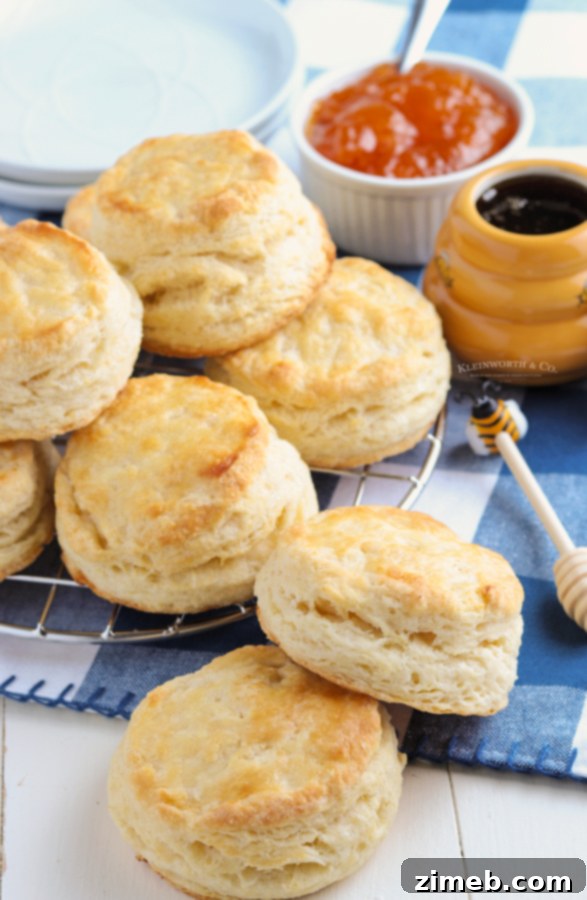
We absolutely adore these flaky buttermilk biscuits! They are not only perfect as a comforting side dish for everyday weeknight dinners but also shine as an essential component of grand holiday feasts. We love to present them to our guests, and we are confident that you and your loved ones will cherish them just as much.
Crafting Fluffy Buttermilk Biscuits from Scratch
Diving into the world of buttermilk biscuits from scratch is a rewarding culinary journey. This recipe simplifies the process, ensuring even novice bakers can achieve light, airy, and layered biscuits that taste like they came from a professional bakery. The secret lies in a few key techniques and understanding your ingredients.
Frequently Asked Questions for Perfect Biscuits
Embarking on your biscuit-making adventure might bring up a few questions. Here, we address some of the most common inquiries to ensure your baking experience is smooth and successful, leading to perfect southern buttermilk biscuits every time.
What if I don’t have buttermilk on hand?
No buttermilk? No problem at all! You can easily create a suitable substitute. For every cup of buttermilk required, simply pour 1 tablespoon of white vinegar or lemon juice into your liquid measuring cup. Then, fill the remainder of the cup to the 1-cup mark with regular milk (any fat percentage will work, but whole milk yields a richer biscuit). Allow this mixture to sit at room temperature for at least 5 minutes. During this time, the acid will curdle the milk, creating a buttermilk-like consistency.
Since this particular recipe emphasizes the use of COLD buttermilk for optimal texture, you can pop your homemade “buttermilk” into the refrigerator after it has sat at room temperature, allowing it to chill thoroughly before incorporating it into your biscuit dough. This ensures the butter remains as cold as possible.
Alternatively, for a convenient pantry staple, consider using buttermilk powder. I’ve linked a great option at the bottom of this post. You can simply whisk it into water according to package directions to make buttermilk whenever the craving for biscuits strikes.
Other viable substitutes include combining 4 tablespoons of regular milk with enough sour cream to make a full cup, or 2 tablespoons of milk with enough plain yogurt to reach the 1-cup mark. A crucial note: avoid using Greek yogurt, as its significantly thicker consistency and higher protein content will not provide the correct texture or react properly with the baking powder, leading to a denser biscuit.
Should I use salted or unsalted butter for biscuits?
The choice between salted and unsalted butter truly boils down to personal preference and what you have readily available. If you appreciate a subtle hint of salt to balance the richness and potential sweetness of your biscuits (especially if serving with jam or honey), then salted butter is an excellent choice.
Personally, I tend to use whatever butter I have on hand and don’t obsess over it too much. However, I generally keep salted butter in my fridge, and I find that extra touch of salt wonderfully complements the delicate flavor profile of these biscuits.
In today’s world, with occasional grocery availability challenges, I’ve learned to adapt and make do with what the store offers. Rest assured, whether you opt for salted or unsalted, these biscuits will still turn out incredibly delicious, provided the butter is *cold*.
Understanding Buttermilk Biscuits and Their Charm
The term “buttermilk biscuits” itself evokes a sense of home, comfort, and culinary tradition. These tender, golden-brown delights are more than just a bread; they are a canvas for butter, jam, gravy, or anything else your heart desires. The slight tang from the buttermilk is what makes them truly distinctive, setting them apart from other quick breads.
Tracing the Origins of Biscuits
The history of the biscuit is surprisingly rich and spans centuries. The very name “biscuit” dates back to the days of Louis XIV and is derived from the Old French “bis” (meaning “twice”) and “cuit” (meaning “cooked”). This moniker perfectly described its original form: a flat cake that was baked once, removed from its pan, and then baked a second time to ensure extreme dryness and longevity.
For many years, this hardy, twice-baked bread served as a crucial staple for soldiers and sailors, often affectionately (or perhaps not so affectionately) dubbed “stone bread.” Its hard, dry nature made it incredibly durable and resistant to spoilage, a significant advantage over yeast-leavened breads that perished quickly.
However, the light, flaky biscuits we cherish today bear little resemblance to their ancient predecessors. The modern biscuit, characterized by its tender layers, is widely believed to have originated in the bustling plantation kitchens of the American South. Here, culinary ingenuity led to a dough meticulously worked with layers of flour and butter, folded repeatedly to create that signature, mouthwatering tender and flaky texture we know and love.
My Biscuit Dough Didn’t Rise – What Went Wrong?
When working with biscuits, a common concern is dough that fails to rise adequately. Unlike yeast rolls or breads where you’d meticulously check liquid temperatures for yeast activation, biscuits rely on chemical leavening. Therefore, if your biscuits come out flat and dense, the most frequent culprit is expired baking powder.
Baking powder, in combination with the acidity of the buttermilk, is the primary leavening agent responsible for those beautiful, airy pockets and a significant rise. If your baking powder isn’t fresh and potent, it won’t produce the necessary carbon dioxide bubbles to lift the dough, resulting in disappointingly flat and heavy biscuits. Always check the expiration date on your leavening agents and, when in doubt, perform a quick freshness test by adding a teaspoon to a bit of hot water; if it fizzes vigorously, it’s good to go!
The Simple Buttermilk Biscuit Recipe Unveiled
Creating these delightful buttermilk biscuits is a straightforward process, built on simple, quality ingredients. The key is to respect the coldness of your butter and buttermilk, which are fundamental to achieving that coveted flaky texture. Let’s gather what we need to make this cherished recipe a reality in your kitchen.
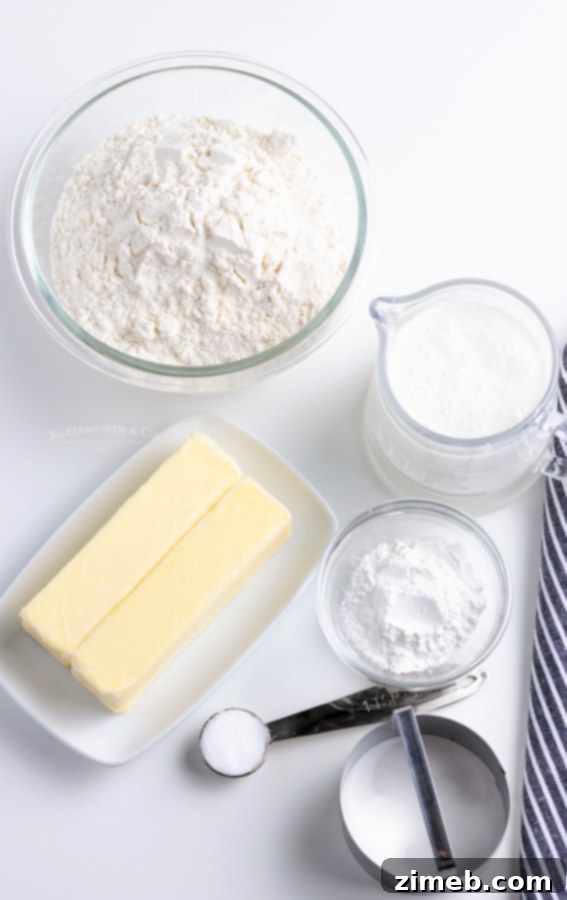
Essential Ingredients for Buttermilk Biscuits
- All-purpose flour
- Baking powder
- Salt
- Unsalted – very cold butter (cubed) **see notes on butter preparation
- Cold buttermilk
Can Buttermilk Biscuits Be Frozen for Later?
Absolutely, freezing buttermilk biscuits is a fantastic way to enjoy homemade goodness whenever you wish! I frequently freeze them to ensure I always have a quick, delicious option available. There are two primary methods for freezing:
Freezing Baked Biscuits: Once your biscuits are baked and have cooled completely to room temperature, wrap each individual biscuit tightly in plastic wrap. This prevents freezer burn and helps maintain their freshness. After wrapping, place all the individually wrapped biscuits into a large zip-top freezer bag or an airtight freezer-safe container. They can be stored in the freezer for up to 3 months. When you’re ready to enjoy, simply thaw at room temperature or reheat gently in a low oven until warmed through.
Freezing Unbaked Dough: For ultimate freshness, you can also freeze the biscuit dough after it has been prepared and cut into individual biscuits. To do this, arrange the cut dough rounds on a baking sheet lined with plastic wrap or parchment paper, ensuring they don’t touch. Place the entire tray in the freezer until the dough rounds are completely solid – this usually takes about 1-2 hours. Once frozen, remove them from the tray and wrap each solid biscuit tightly in plastic wrap, then store them in a zip-top freezer bag for up to 2-3 months.
When it’s time to bake your frozen dough, there’s no need to thaw! Simply preheat your oven as directed in the recipe. Unwrap the frozen biscuits and place them directly on a parchment-lined baking sheet. Bake according to the recipe instructions below, adding a few extra minutes to the baking time since they are starting from a frozen state. This method allows for freshly baked, warm biscuits whenever the craving strikes!
Homemade Buttermilk Biscuits: Step-by-Step Perfection
Mastering homemade buttermilk biscuits is easier than you think. Follow these detailed steps to achieve incredibly light, fluffy, and tender biscuits that will impress everyone at your table. Remember, patience and proper technique are your best friends here.
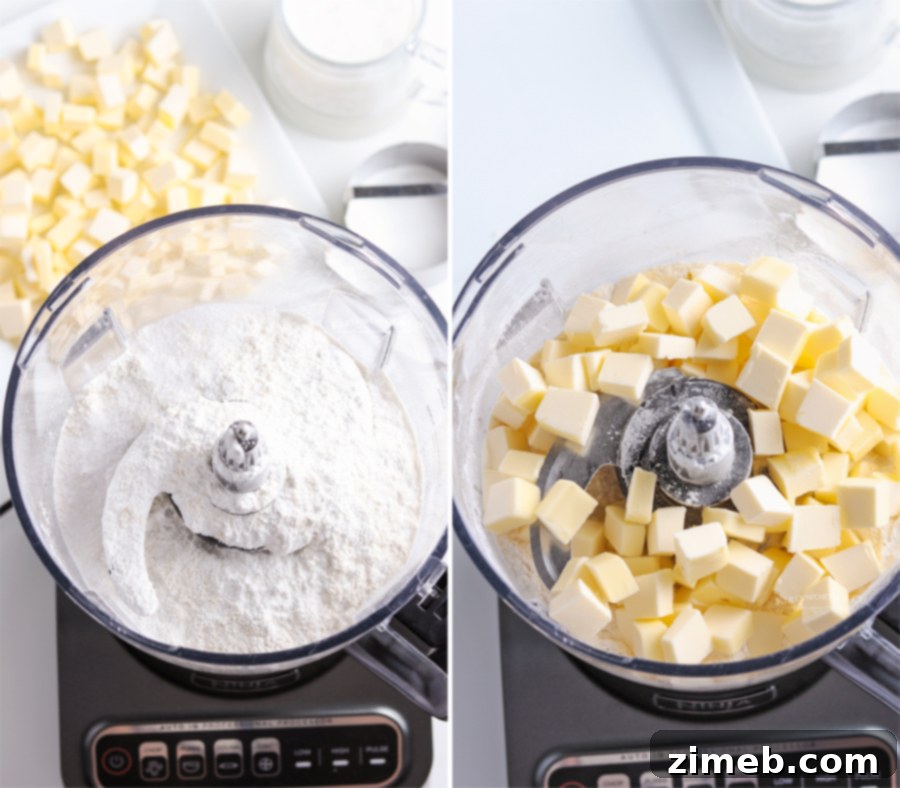
How to Make Easy Buttermilk Biscuits
- In a large mixing bowl or the bowl of a food processor, combine the all-purpose flour, baking powder, and salt. Whisk these dry ingredients thoroughly to ensure even distribution, or pulse lightly in the food processor.
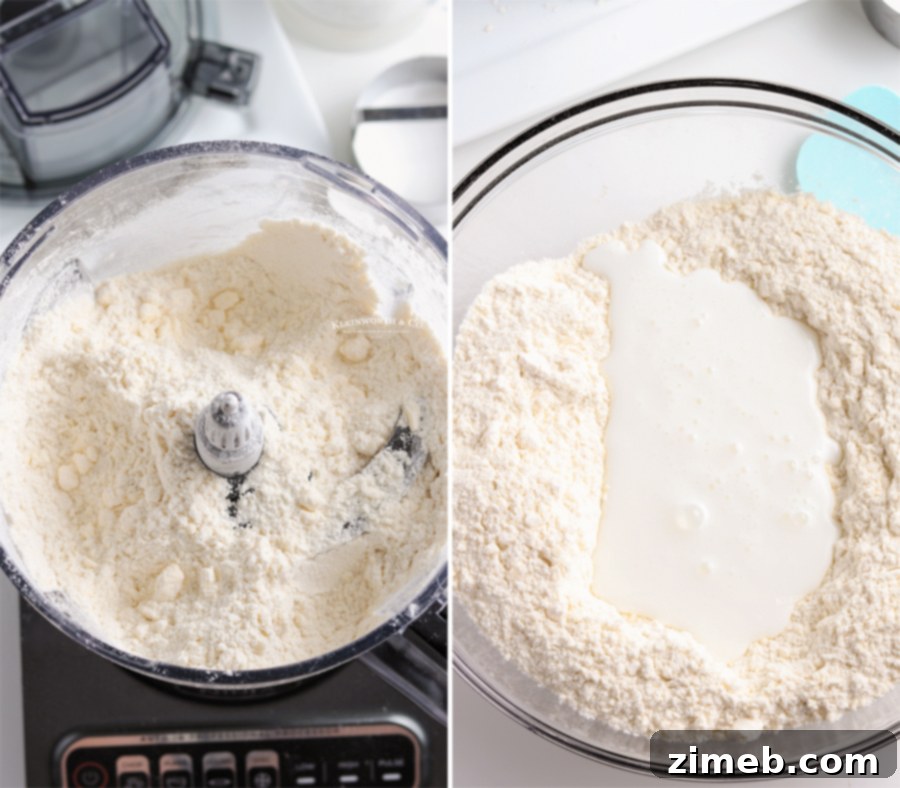
- Add the very cold, cubed butter to the dry ingredients. If using a bowl, cut the butter into the flour mixture with a pastry cutter until it resembles coarse crumbs with some pea-sized butter pieces. If using a food processor, pulse several times until the mixture forms coarse crumbs. The key is to keep the butter as cold as possible and not overmix.
- If you used a food processor, transfer the crumbly mixture to a large mixing bowl.
- Create a small well in the center of the mixture. Pour the cold buttermilk into this well.
- Using a spatula or your hands, gently fold the ingredients together until the dough just begins to come together. Avoid overmixing; a shaggy, slightly sticky dough is perfect.
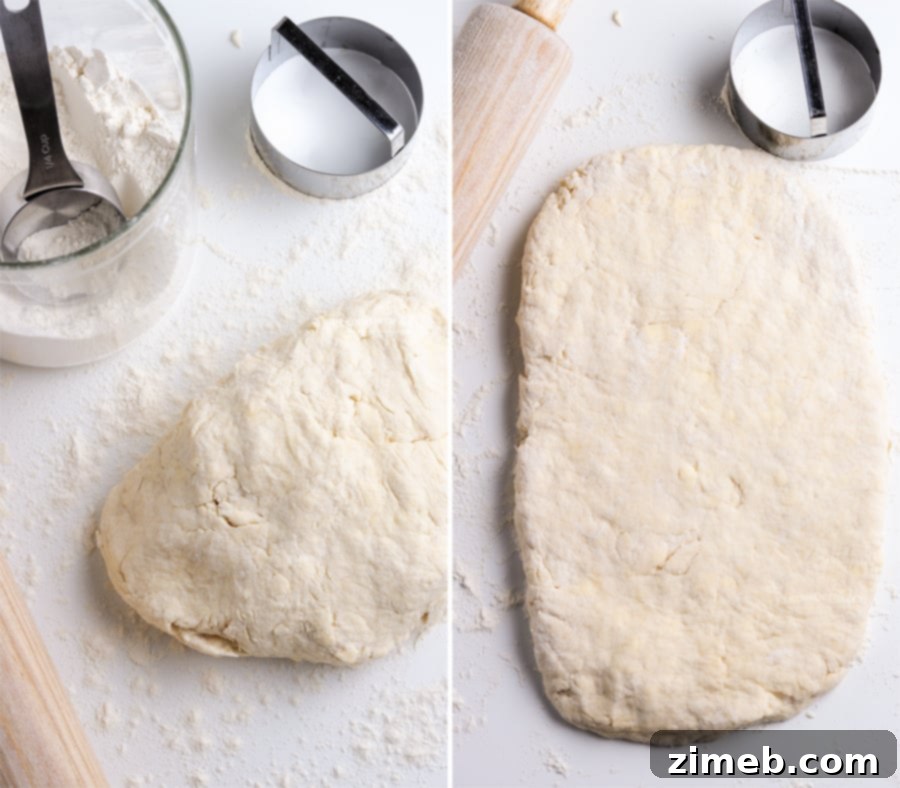
- Lightly flour a clean, smooth work surface. Transfer the biscuit dough from the bowl onto this surface.
- Generously flour your hands. Gently work the dough together just enough to form a cohesive mass.
- Carefully form or roll the dough into a rectangle approximately ¾ inch thick.
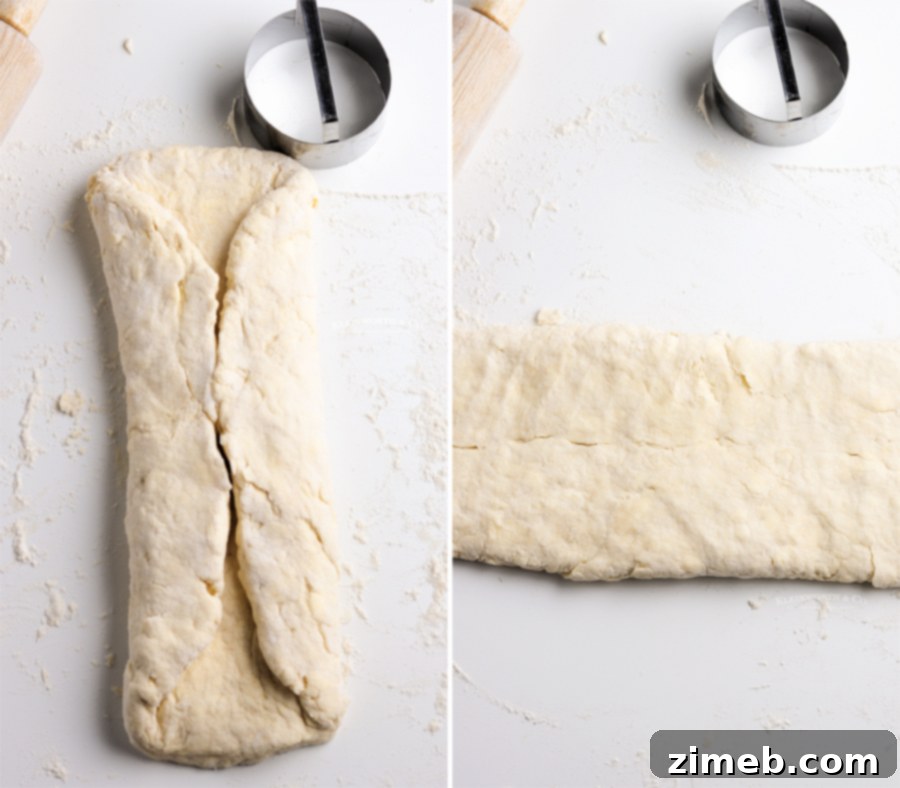
- Perform the first fold: Fold one long side of the rectangle into the center, then fold the other long side over to meet it, creating three layers (like folding a letter). **This layering is crucial for flaky biscuits.**
- Rotate the dough 90 degrees so that the folded seam is now horizontal to you.
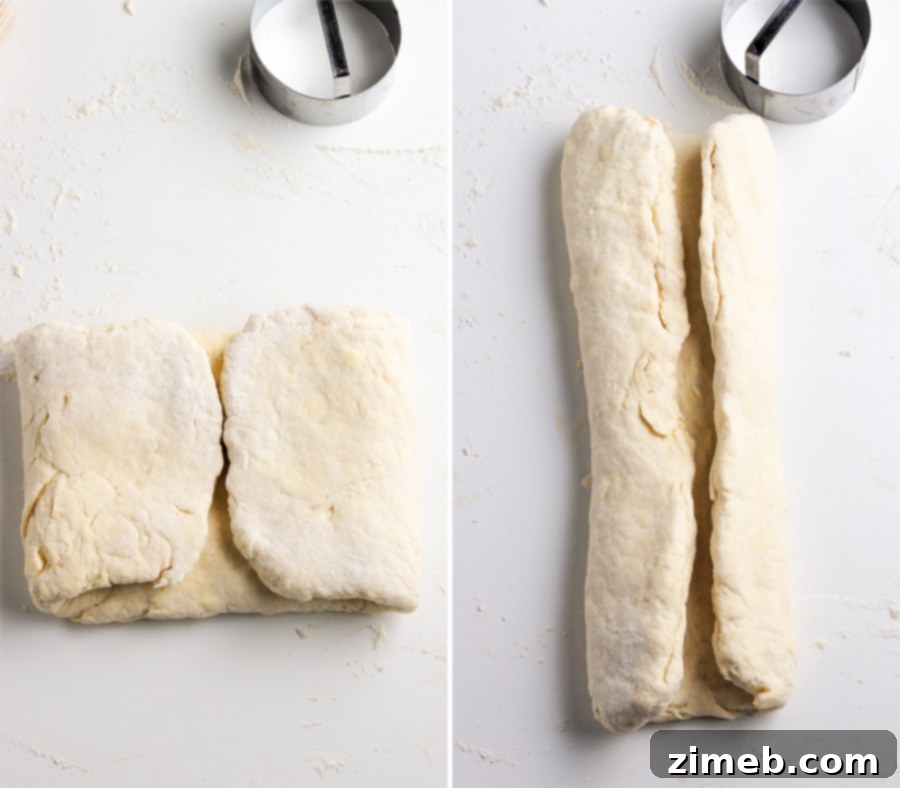
- Gently flatten the dough back into a rectangle. Fold the sides into the middle again, repeating the letter-fold process.
- Turn the dough again (90 degrees) and fold the sides into the middle one more time. This entire folding process should be done quickly to keep the butter cold.
- Turn the dough horizontally again. Gently flatten the dough into a rectangle about 1 ¼ inches thick. This final thickness is important for tall biscuits.
- Preheat your oven to 425 degrees F (220 degrees C).
- Prepare your baking vessel: Generously butter a cast-iron skillet, or line a regular baking sheet with parchment paper or a silicone mat. The cast iron skillet often helps achieve a wonderfully crisp bottom crust.
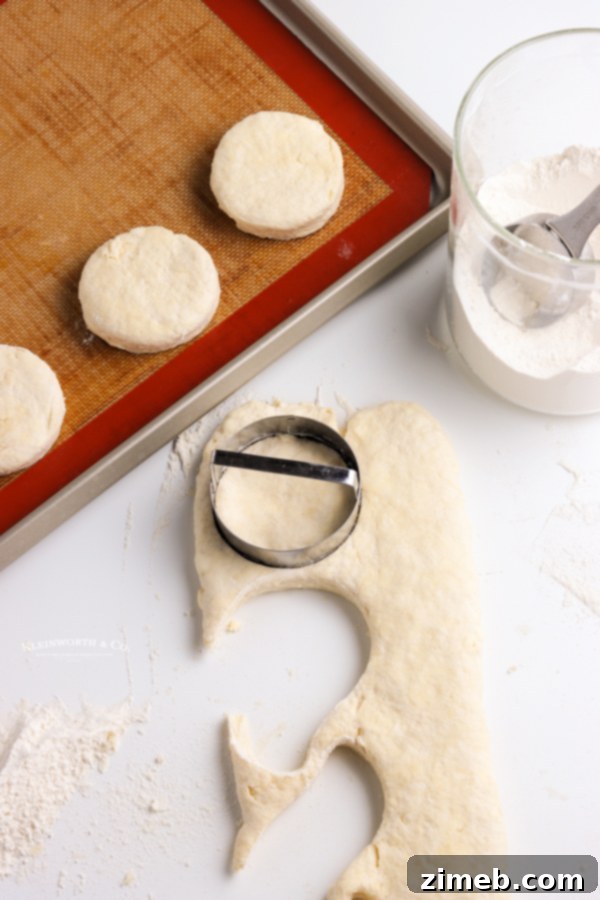
- Using a 2 ½ or 3-inch biscuit cutter, cut out the biscuits. Press the cutter straight down through the dough without twisting. Twisting can seal the edges, preventing the biscuits from rising properly and creating those desired flaky layers. Pull the cutter straight up. Re-roll scraps gently, only once, to minimize gluten development.
- Arrange the cut biscuits in the prepared cast iron skillet or on the baking sheet. For softer sides, place them close together; for crispier sides, space them slightly apart.
- For a beautiful golden-brown top, you can brush the tops of the biscuits with a little extra milk (or an egg wash) if desired.
- Bake for 15-20 minutes, or until the tops are golden brown and the biscuits are fully risen and cooked through.
- Once removed from the oven, for an extra touch of richness, you can brush the warm tops with melted butter.
- Serve immediately while warm, or at room temperature.
- Store any leftover biscuits in an airtight container in the refrigerator for up to 5 days.
Embracing Southern Buttermilk Biscuits Tradition
These aren’t just any biscuits; they embody the spirit of southern buttermilk biscuits. They are a nod to tradition, a staple in Southern households, and a testament to the power of simple ingredients creating something truly extraordinary. The technique of folding the dough, as detailed in this recipe, is what gives them that characteristic height and delicate flakiness, making them a true Southern classic.
Best Practices for Storing Leftover Buttermilk Biscuits
While it’s a rare occurrence in our home, should you find yourself with a few precious leftover biscuits (a testament to their popularity!), proper storage is key to maintaining their texture and flavor. To keep them at their best, place the cooled biscuits in a zip-top bag or an airtight container.
This recipe’s biscuits will remain fresh and delicious at room temperature for up to 3 days. For longer storage, as mentioned above, they can be frozen for up to 3 months. When reheating, a quick warm-up in the oven or toaster oven can bring them back to life, restoring much of their original warmth and tenderness.
Creative Pairings: What to Serve with Buttermilk Biscuits
The versatility of buttermilk biscuits is truly remarkable. They can transition seamlessly from savory to sweet, making them a fantastic addition to almost any meal. Here are some of our family’s most beloved pairings and additions to enjoy with this classic biscuit recipe:
- Savory Dinner Companions:
- Easy Buttermilk Fried Chicken: A quintessential Southern pairing.
- Oven Fried Chicken: For a lighter take on a classic.
- Creamy Gravy: A must-have for a true Southern comfort meal.
- Scrambled Eggs and Sausage: Perfect for a hearty breakfast or brunch.
- Oven Baked Pork Chops: The biscuits are excellent for soaking up pan juices.
- Air Fryer Cod: A surprising but delightful seafood pairing.
- Sweet Spreads and Butters:
- Cinnamon Honey Butter: A sweet, spiced spread that melts divinely on warm biscuits.
- 3-Ingredient Blackberry Jam: Homemade jam is always a winner.
- Slow Cooker Fig Butter: An elegant and flavorful option.
- Italian Garlic Butter: For a savory twist, transforming them into a garlic bread alternative.
- Creamed Honey: A smooth, spreadable honey experience.
Achieving the Best Buttermilk Biscuits: Expert Tips
To consistently bake the best buttermilk biscuits, focusing on a few critical details can make all the difference. These tried-and-true tips ensure maximum flakiness, tenderness, and rise, turning every batch into a masterpiece.
Essential Tips for the BEST Buttermilk Biscuits
- Keep Your Butter Cold: This is arguably the most crucial tip for flaky biscuits. Cut your butter into small cubes and place it in the freezer for 15-20 minutes before you begin mixing. The tiny pockets of cold butter will create steam during baking, which separates the dough into those desirable, tender layers.
- Master the Folding Technique: The precise folding of the dough, as outlined in the instructions, is not just for fun—it’s vital! This process is a form of lamination that builds layers within the dough without overworking it. Each fold creates more surface area for butter distribution, leading to a wonderfully flaky texture.
- Cut Without Twisting: When using a biscuit cutter, press straight down firmly and pull straight up. Do not twist the cutter! Twisting can seal the edges of the biscuits, preventing them from rising properly and inhibiting the formation of those beautiful, distinct flaky layers. You want the edges to remain open to allow for maximum rise and separation.
The Importance of Proper Flour Measurement
Accurate flour measurement is often overlooked but is absolutely critical for biscuit success. The “official” and most recommended way to measure flour for baking is the spoon and level method. This technique ensures that your flour isn’t compacted, which would result in using more flour than the recipe intends, leading to a dry and dense biscuit.
To execute the spoon and level method: first, lightly fluff your all-purpose flour in its container. Then, spoon the flour into your dry measuring cup until it’s overflowing. Finally, use the flat edge of a knife or a straight edge to level off the top, sweeping away any excess flour. While some recipes might be forgiving if you gently fluff and scoop, these homemade buttermilk biscuits demand precision. Failing to follow the spoon and level method will likely result in hard, dense biscuits that lack their signature lightness and tenderness.
Creating Southern Homemade Biscuits: A Labor of Love
There’s a reason southern homemade biscuits hold such a special place in the culinary world. They embody comfort, tradition, and the simple joy of baking. Every step, from chilling the butter to careful folding, contributes to a final product that’s truly unforgettable. This recipe aims to bring that authentic Southern charm straight to your kitchen.
Can This Buttermilk Biscuit Recipe Be Doubled?
Absolutely, this recipe can be doubled with excellent results! If you’re feeding a crowd or simply want to ensure you have plenty of leftovers (or some to freeze for later), feel free to multiply the ingredients. You can bake the sheets side-by-side in a large oven, or if your oven space is limited, bake them in batches back-to-back. I frequently double the recipe and utilize my larger ¾ sheet pan, which allows me to bake a generous quantity, ensuring enough for everyone to enjoy and even some extra for those delightful next-day cravings or to use in a biscuit breakfast casserole.
Why Is My Cooked Biscuit Dough So Dense?
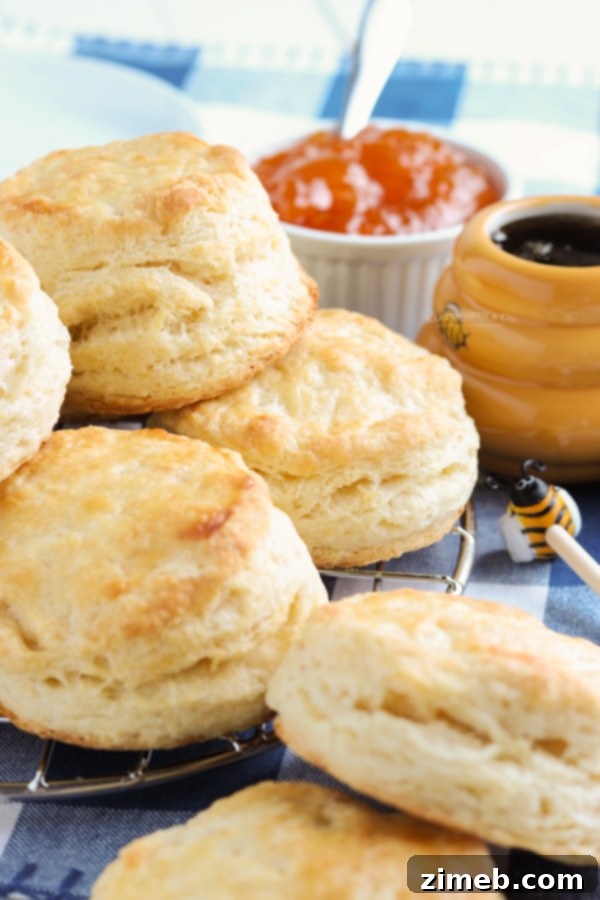
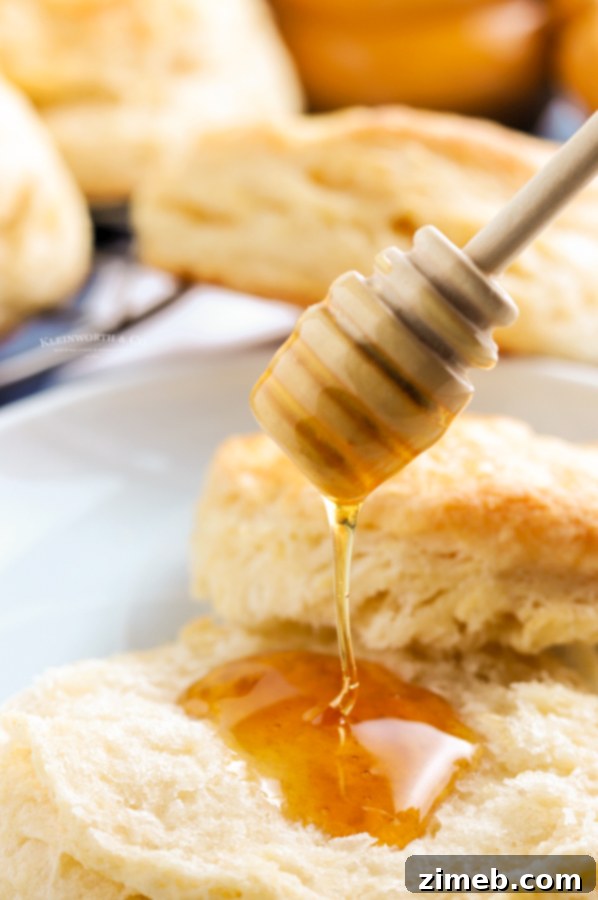
It’s important to note that biscuit dough will appear quite dense *before* baking. However, once baked, it should transform into the light, fluffy, and tender texture you see in the accompanying images. If you find your cooked biscuits are coming out dense and heavy, here are some key suggestions to troubleshoot and achieve that perfect rise and flakiness:
- Improper Folding: This is a primary factor. Ensure you are diligently following the instructions for folding the dough. The repeated folds, combined with the cold butter worked throughout the dough, are precisely what create those signature tender, flaky layers. Without this crucial lamination step, the butter melts out too quickly, and the biscuits will indeed turn out dense. Think of each fold as building in more potential for flakiness.
- Too Much Flour: Over-flouring is another common culprit. Adding too much flour, whether in the initial measurement or during the kneading/rolling process, will make the dough overly stiff and dry. A dry dough restricts gluten development, resulting in a dense and heavy biscuit that can’t expand properly. I know the inclination is to add more flour when the dough feels sticky, but resist the urge. Always use the spoon and level method for measuring the flour. Additionally, if you reside in a lower elevation or a region with higher humidity, you might naturally require less flour on your work surface when handling the dough, as the dough itself might be absorbing more moisture from the air.
- Overworking the Dough: This goes hand-in-hand with too much flour. Excessive handling or kneading develops the gluten too much, leading to a tough, dense texture instead of tender and flaky. Work the dough just enough to bring it together and perform the folds; stop as soon as it’s cohesive.
The Charm of Old Fashioned Buttermilk Biscuits
These old fashioned buttermilk biscuits connect us to a simpler time, a time when baking was a daily ritual and comfort food reigned supreme. The satisfaction of pulling a tray of these golden-brown beauties from the oven is unparalleled, filling your home with an aroma that promises warmth and deliciousness.
Do These Biscuits Require Yeast?
Nope, and that’s precisely what makes making these easy buttermilk biscuits such a joy! Unlike traditional bread recipes, these biscuits rely on baking powder and the acidity of the buttermilk for their rise. This means there’s no need to deal with yeast, no lengthy proofing times, and no waiting for the dough to rise. You simply mix your ingredients, shape the dough, and bake. It’s a perfect solution for those moments when you crave fresh, warm bread but are short on time!
Can I Use Gluten-Free Flour for This Recipe?
I have not personally tested this particular recipe with gluten-free flour blends yet. However, if you’re keen to give it a try, I highly recommend using a high-quality 1:1 gluten-free all-purpose flour blend. These blends are specifically formulated to mimic the properties of regular wheat flour, offering the best possible chance for successful results in terms of texture and structure.
Baking with gluten-free flours can sometimes require slight adjustments in liquid content or resting times, so be prepared for a bit of experimentation. Please do let me know how it turns out if you decide to try it! I would be thrilled to hear about your experience and potentially share your insights with other readers looking for gluten-free options.
Mastering Flaky Buttermilk Biscuits
The quest for flaky buttermilk biscuits ends here. With the right technique and understanding of the ingredients, you’ll consistently achieve biscuits that pull apart into tender, airy layers, ready to melt in your mouth. This recipe is your guide to biscuit perfection, every single time.
My Favorite Tools for Crafting Perfect Biscuits…
This easy biscuit recipe is not only delicious but incredibly straightforward to make. If you’re anything like me, you might already have most of these essential items in your kitchen. However, if you’re new to making homemade biscuits and feeling a bit nervous, rest assured – you’re going to love the results! To make your biscuit-making journey as smooth and successful as possible, I’ve compiled a list of the tools I absolutely rely on when whipping up a batch of these glorious biscuits.
- Large Mixing Bowl: Essential for combining ingredients without a mess.
- 3/4 Sheet Pans: Perfect for baking multiple biscuits at once.
- Cast Iron Skillet: For that authentic Southern touch and crisp bottom.
- Biscuit Cutter: A must-have for perfectly shaped biscuits.
- Food Processor: Great for quickly cutting cold butter into flour.
- Baking Powder: The crucial leavening agent for a good rise.
- All-Purpose Flour: The foundation of your delicious biscuits.
- Buttermilk (or powder): For tenderness and tang.
- Silicone Brush: For brushing milk or melted butter on top.
- Parchment Paper: For easy cleanup and non-stick baking.
If you love this easy biscuit recipe, you’re going to adore these other delightful side dish bread recipes too. Simply click each link below to find the easy, printable recipe and add more deliciousness to your baking repertoire!
Check out this recipe

Check out this recipe

Check out this recipe
Check out this recipe
Check out this recipe
Check out this recipe
Check out this recipe
Check out this recipe
Check out this recipe
Explore More Incredible Biscuit Recipes
If your love for biscuits knows no bounds, you’re in luck! Here are even more fantastic biscuit recipes to explore, each offering a unique twist on this beloved quick bread. Expand your baking repertoire and discover new family favorites:
- 20-Minute Cheddar Biscuits: Fast, cheesy, and utterly delicious.
- 3-Ingredient Skillet Biscuits: Simplicity at its best for a quick bake.
- Garlic Parmesan Pull-Apart Biscuits: A savory, garlicky treat perfect with Italian meals.
- 7-Up Biscuits: An old-school recipe for incredibly light and fluffy biscuits.
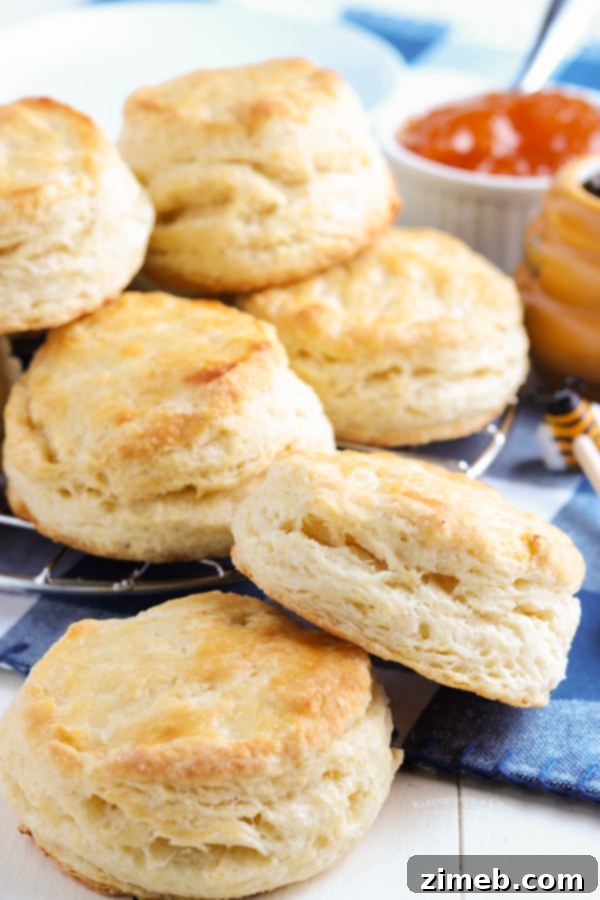
If you’ve fallen in love with this easy buttermilk biscuit recipe as much as I have, please consider leaving a five-star review below. Your feedback means the world! And don’t forget to help me spread the biscuit love by sharing this recipe with your friends and family on Facebook and Pinterest!
CONNECT WITH YUMMI HAUS!
Be sure to follow me on my social media channels, so you never miss a post or a delicious new recipe!
Substack, Facebook, Pinterest, Instagram, Email Subscription
Rate this Recipe
Easy Buttermilk Biscuits
Ingredients
- 2 ½ cups all-purpose flour plus more for rolling
- 2 tablespoons baking powder
- 1 teaspoon salt
- ½ cup unsalted very cold butter cubed **see notes (1 stick)
- 1 cup + 2 tablespoons cold buttermilk
Instructions
-
Add the flour, baking powder and salt to a large bowl or food processor. Whisk to combine or pulse processor lightly.
-
Add the butter to the dry ingredients and combine until crumbs form. If using a bowl, use a pastry cutter, if using the food processor, pulse several times.
-
If using processor, transfer the mixture to a large bowl.
-
Form a well in the center of the mixture and pour in the buttermilk.
-
Fold together until the dough begins to come together.
-
Flour a smooth work surface and transfer the dough from the bowl.
-
Generously flour your hands and begin working the dough together.
-
Form or roll into ¾ inch thick rectangle.
-
Fold one long side into the center, then fold the other long side in **see notes
-
Rotate the dough so that it is horizontal to you.
-
Gently flatten the dough into a rectangle and fold the sides into the middle again.
-
Turn the dough again and fold the sides into the middle again.
-
Turn horizontally again and flatten dough into a rectangle about 1 ¼ inches thick.
-
Preheat the oven to 425 degrees F.
-
Generously butter a cast iron skillet or line a baking sheet with parchment paper or a silicone mat.
-
Use a 2 ½ or 3 inch biscuit cutter to cut the dough. Cut straight down and pull straight up, do not twist the cutter **see notes
-
Place the biscuits in the prepared cast iron skillet or on the baking sheet.
-
Brush the tops of the biscuits with a little extra milk, if you like.
-
Bake for 15-20 minutes or until golden brown.
-
Remove from the oven and brush with the melted butter, if desired.
-
Serve warm or at room temperature.
-
Store in an airtight container in the refrigerator for up to 5 days.
Notes
- Butter – cut the butter into cubes and place in the freezer for 15-20 minutes prior to using.
- Folding – it’s important to fold the dough according to the directions, as this process creates the layers in the biscuits.
- Cutting – be sure not to twist the cutter, it can seal the edges of the biscuits and prevent them from rising. You need the edges to not be sealed so you get those flaky layers.
Nutritional information for the recipe is provided as a courtesy and is approximate. Please double-check with your own dietary calculator for the best accuracy. We at Yummi Haus cannot guarantee the accuracy of the nutritional information given for any recipe on this site.