
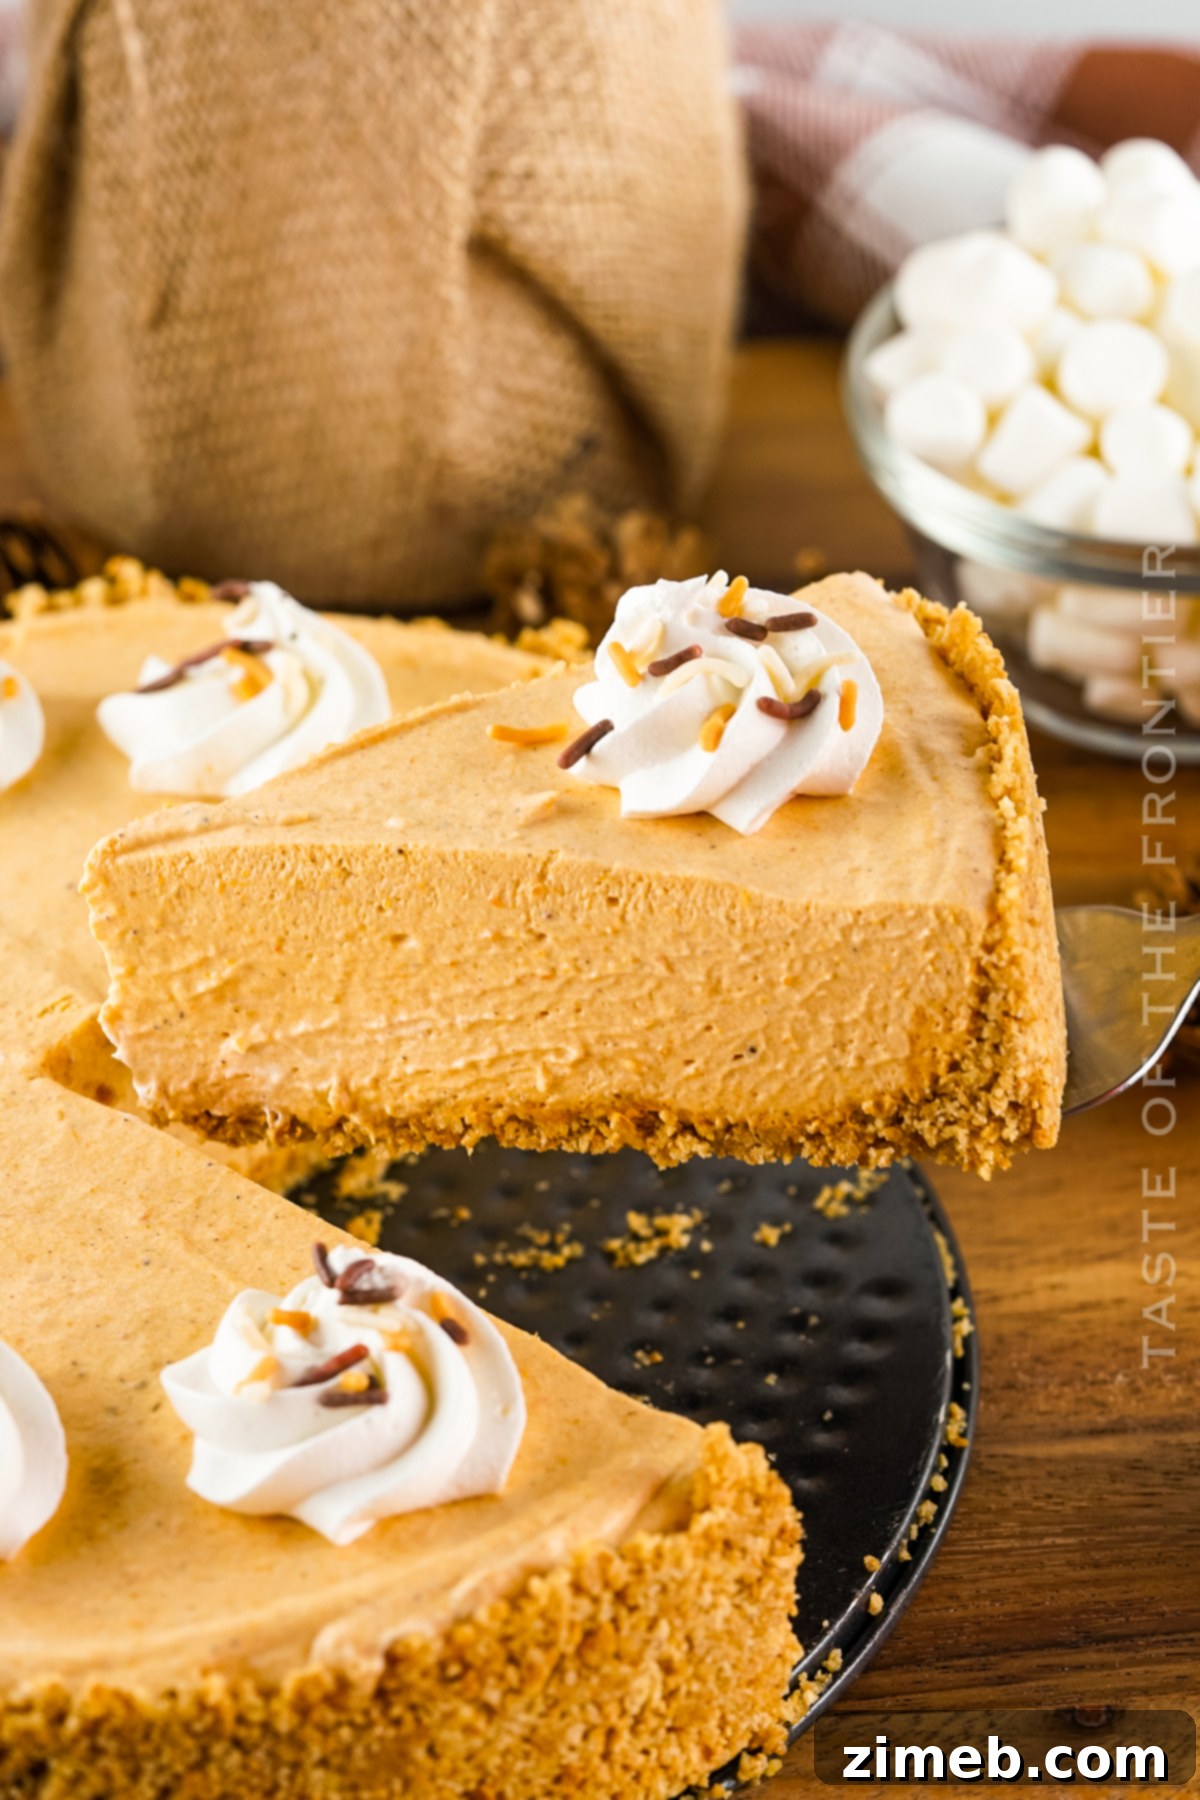
As the crisp air of autumn settles in and colorful leaves adorn the trees, a familiar craving emerges: pumpkin! Embrace the quintessential flavors of fall with this incredibly easy and lusciously creamy No-Bake Pumpkin Pie. It’s the perfect solution for anyone yearning for classic pumpkin pie taste without the hassle of baking. Requiring only a handful of ingredients and minimal effort, this dessert is designed for convenience without sacrificing a single ounce of deliciousness.
There’s something truly special about a slice of pumpkin pie, especially during the festive holiday season. That sweet, aromatic blend of spices and rich pumpkin flavor is simply irresistible. However, if you’re like many home cooks, you might not always have the time or desire to prepare a traditional baked pie from scratch. That’s where this game-changing no-bake pumpkin pie enters the scene!
This effortless recipe delivers all the comforting taste of the beloved classic, minus the extensive prep work and oven time. It’s an ideal choice for busy holiday gatherings or when you need a quick, impressive dessert. Its simplicity makes it perfect for a last-minute craving or a spontaneous treat. This holiday season, delight your family and friends with this stunning yet simple no-bake pumpkin pie. You’ll be amazed at how quickly it comes together and how much everyone loves it!
PIN NOW TO SAVE FOR LATER
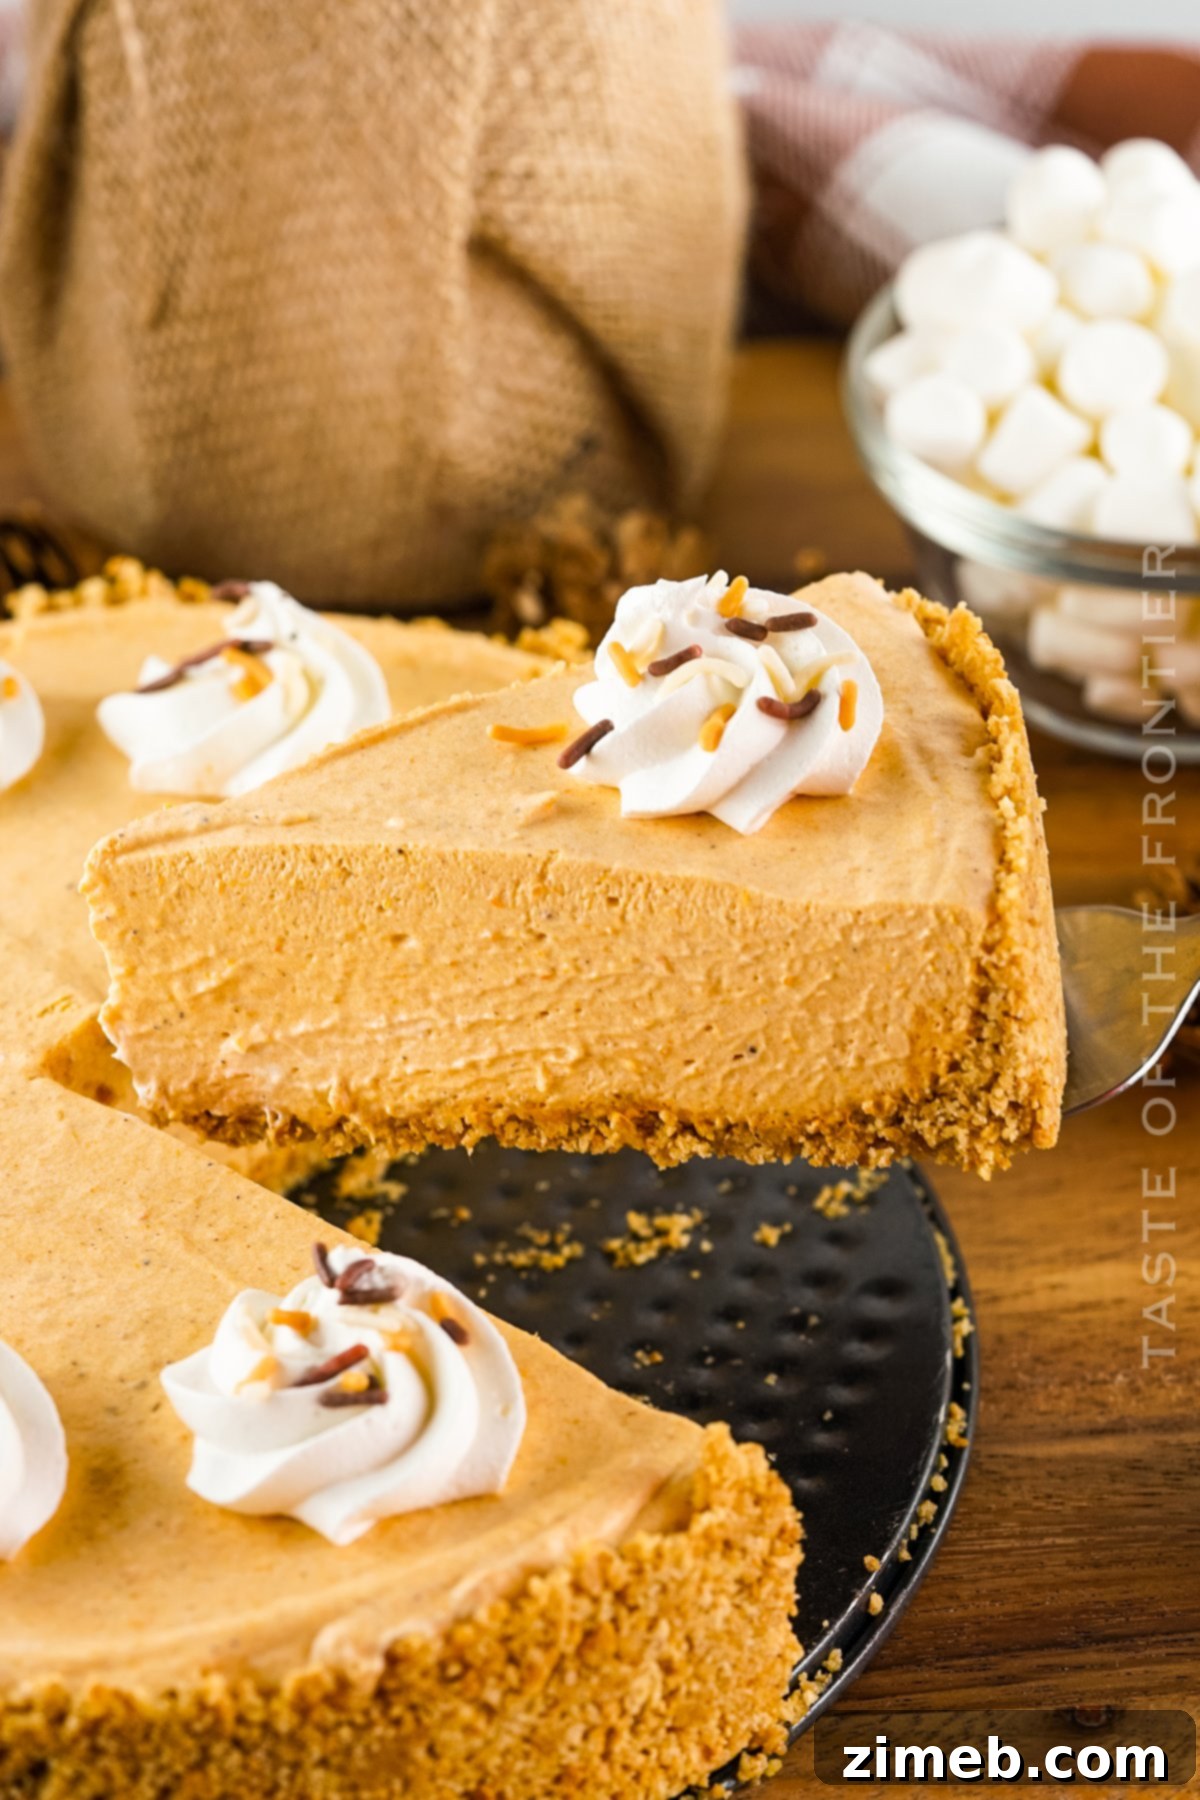
Pumpkin pie is a Thanksgiving staple, a symbol of autumn’s bounty and festive feasts. However, who genuinely wants to be tied to the kitchen oven when there’s so much else to enjoy during the bustling holiday season? This no-bake pumpkin pie recipe offers a quick and wonderfully easy alternative, promising a delicious outcome that will satisfy even the most traditional pie enthusiasts.
What makes this recipe even more appealing is its incredible simplicity. It’s so straightforward that even the kids can join in on the preparation, making it a fantastic opportunity for quality family time and creating cherished holiday memories in the kitchen. This year, trade in complex baking for a delightfully simple and utterly scrumptious dessert. Give this recipe a try—you absolutely won’t be disappointed!
Effortless No-Bake Pumpkin Pie: Your New Favorite Fall Dessert
Frequently Asked Questions About No-Bake Pumpkin Pie
What exactly is a no-bake pumpkin pie?
A no-bake pumpkin pie is a delightful dessert that skips the oven entirely. Instead of baking, its rich, creamy filling, made primarily from cooked and pureed pumpkin, is chilled in the refrigerator until it firms up. This process creates a stable, sliceable pie with a wonderfully smooth texture, making it an excellent choice for those seeking convenience without compromising on flavor.
What is the best way to store No-Bake Pumpkin Pie?
To maintain its creamy consistency and fresh taste, your no-bake pumpkin pie should always be stored in the refrigerator. Ensure it’s tightly covered with plastic wrap or placed in an airtight container to prevent it from absorbing other odors and drying out. When stored properly, this pie will remain delicious for up to 4 days, making it ideal for preparing in advance.
Can I prepare No-Bake Pumpkin Pie ahead of time for a special occasion?
Absolutely! This is one of the standout features of no-bake desserts. You can confidently make this pumpkin pie up to 2 days in advance of your event or gathering. Simply prepare it as directed, cover it securely, and store it in the refrigerator. This advance preparation frees up valuable time on the day of your celebration, allowing you to focus on other dishes or simply relax and enjoy the festivities.
What’s the difference between pumpkin puree and pumpkin pie filling?
This is a crucial distinction for the success of your no-bake pie. Pumpkin puree is simply cooked, mashed pumpkin, typically found in a can with no other ingredients. It has a natural, earthy pumpkin flavor. In contrast, pumpkin pie filling is a pre-mixed product that already contains spices (like cinnamon, nutmeg, ginger, and cloves) and sweeteners. For this specific recipe, you *must* use plain pumpkin puree. Using pumpkin pie filling would result in an overly sweet pie, as our recipe already incorporates carefully measured sweeteners and spices for a balanced flavor profile.
What is the consistency and flavor profile of this easy pumpkin pie?
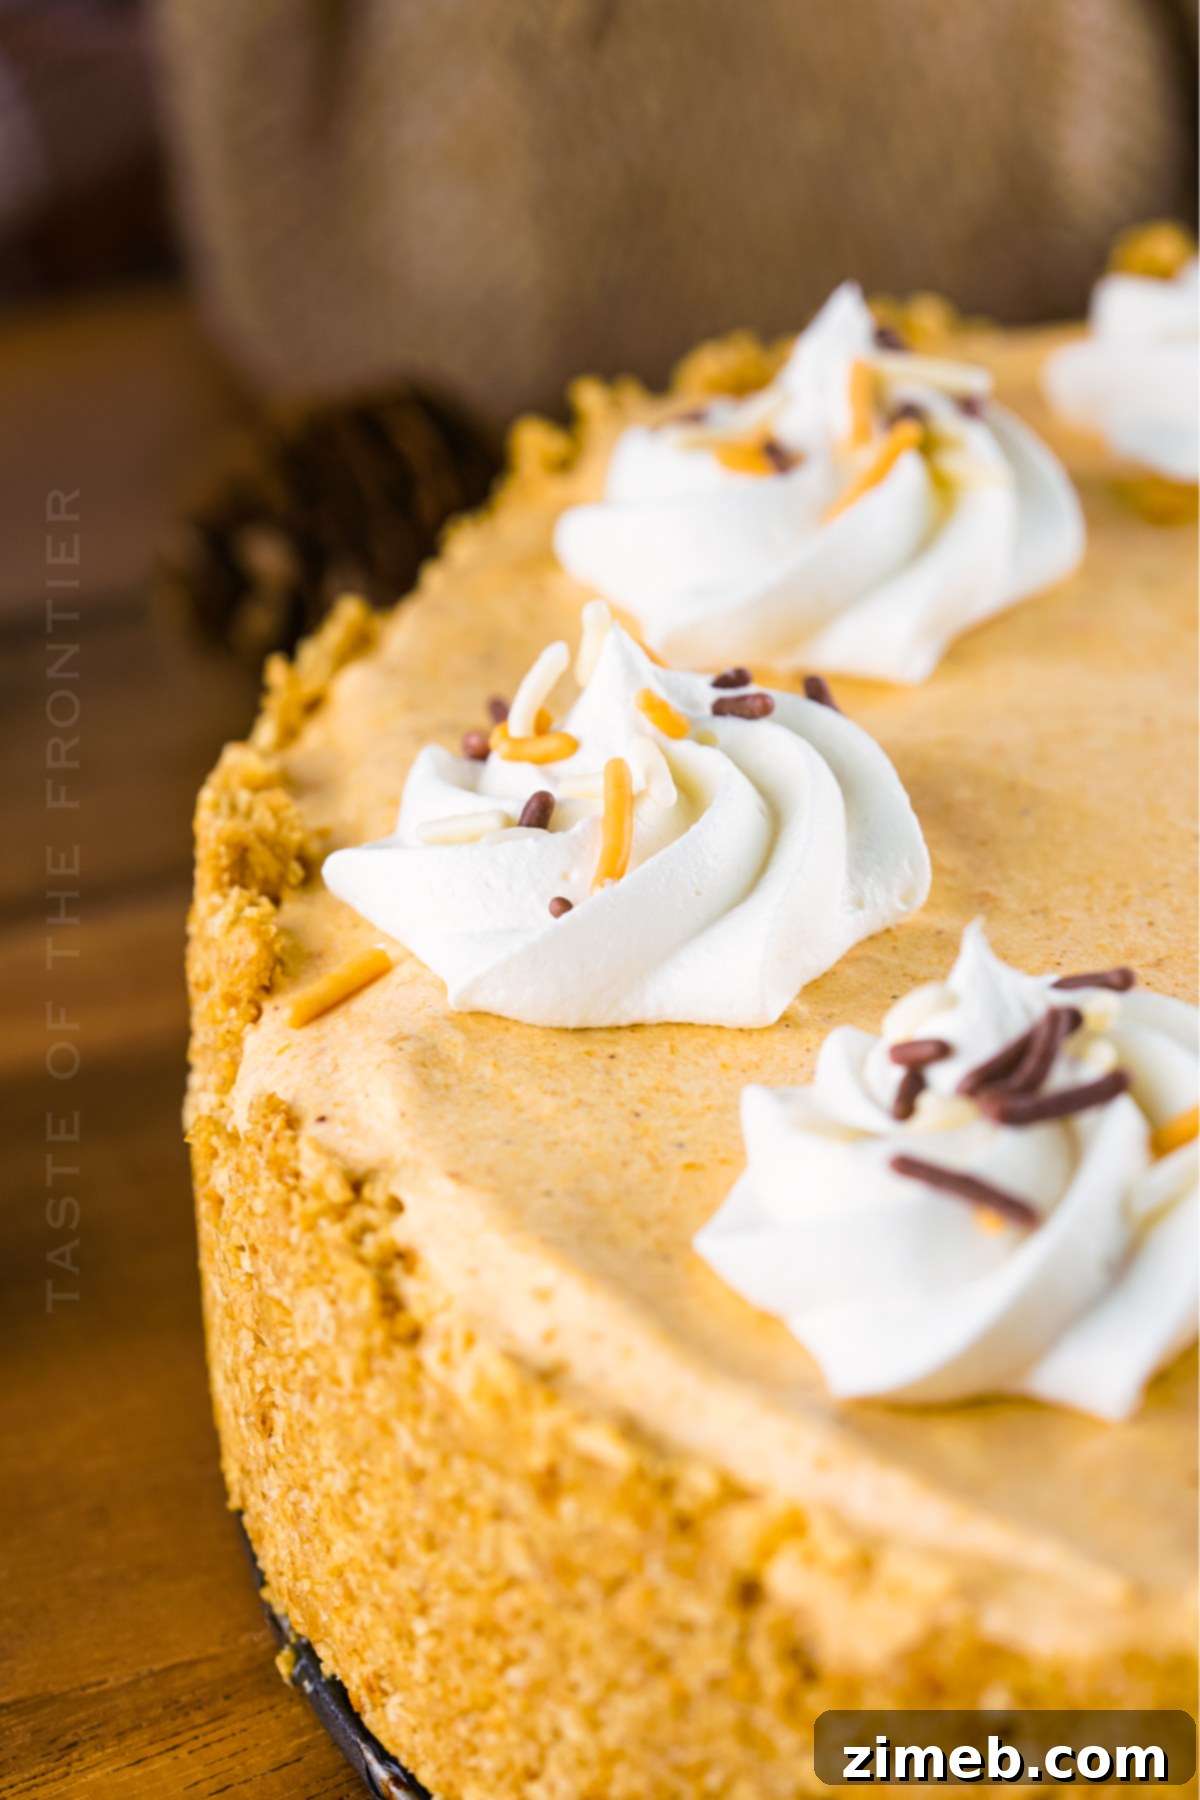
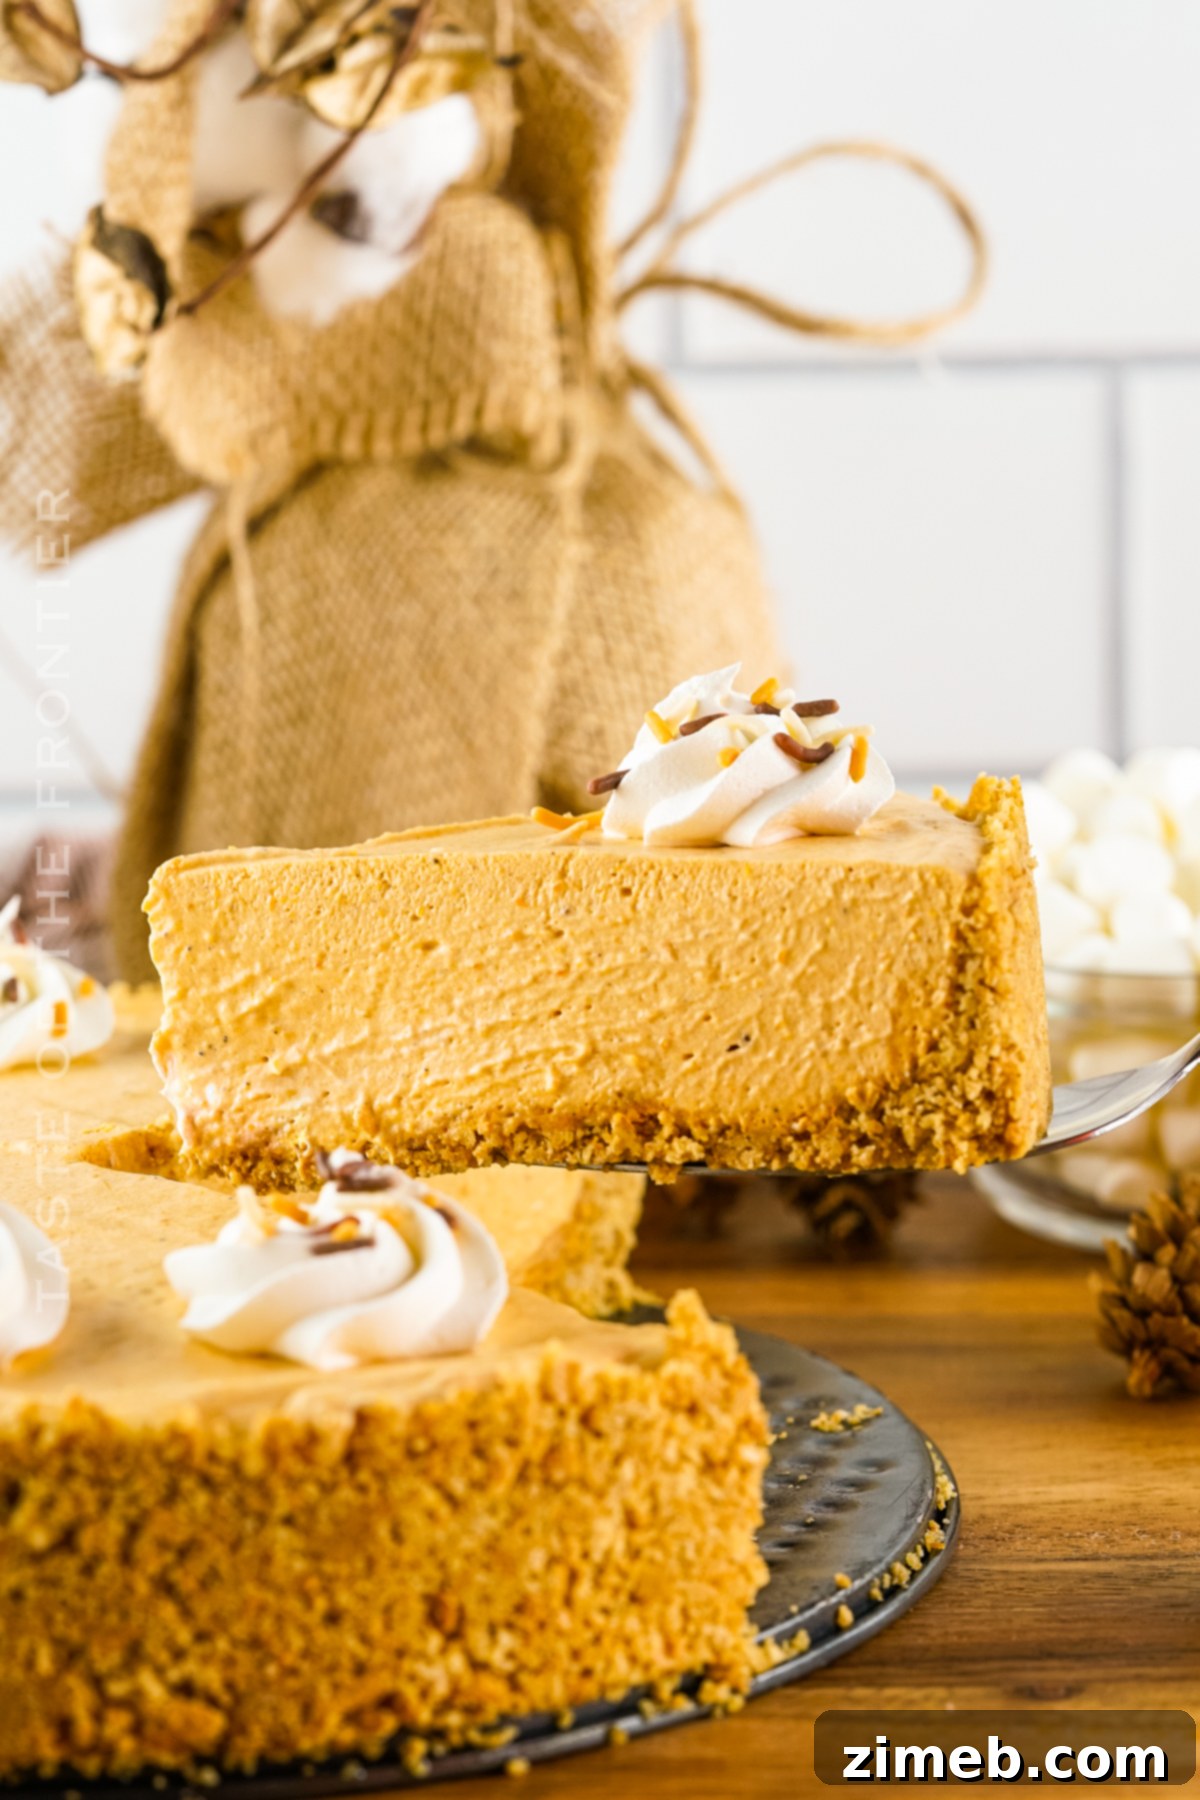
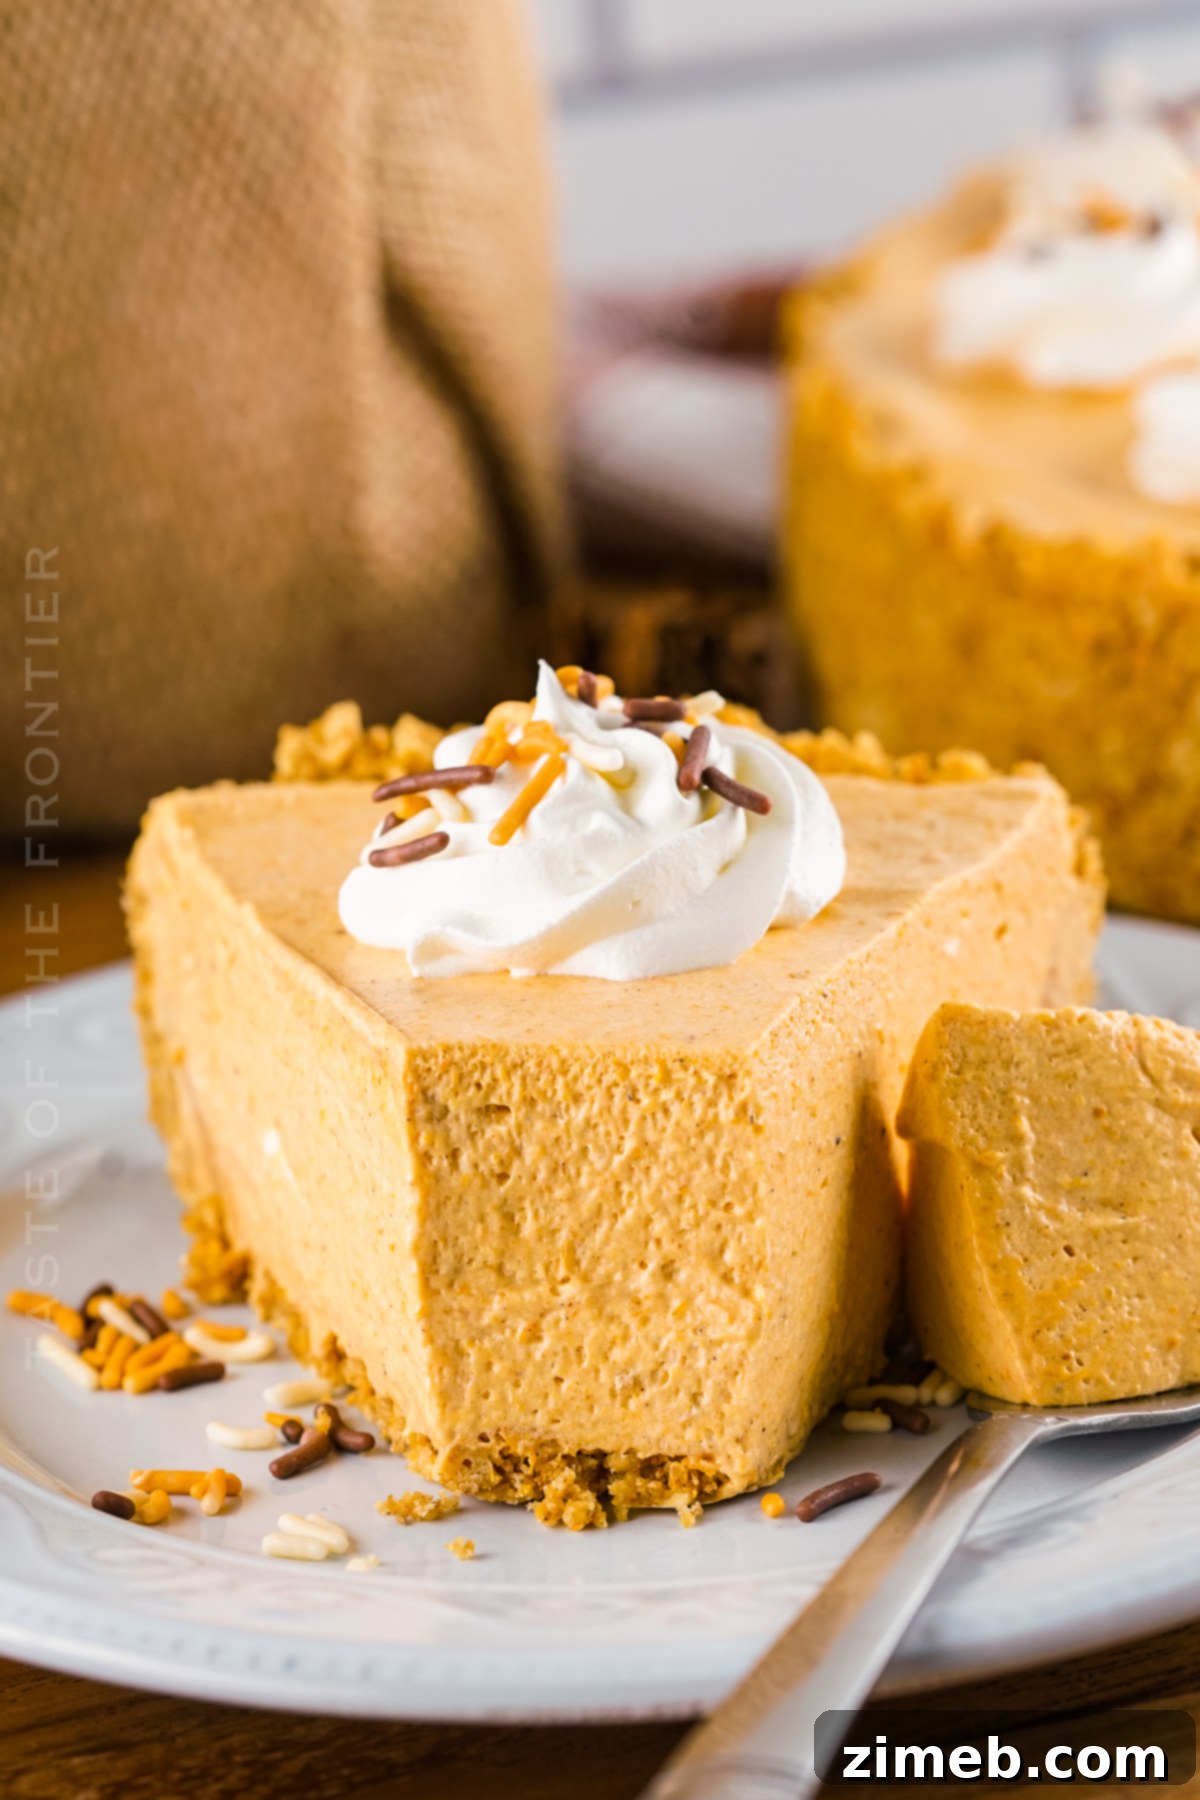
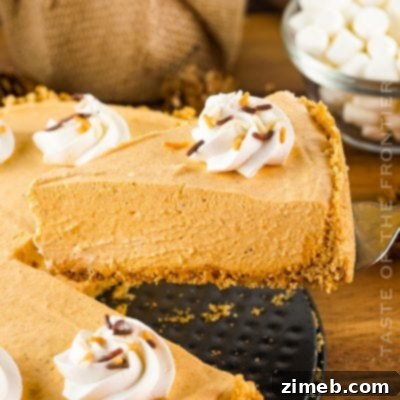
The texture of this no-bake pumpkin pie is truly a highlight. It’s incredibly smooth, light, and wonderfully creamy, almost like a silky mousse. The filling is thick, rich, and melts in your mouth, perfectly complemented by the contrasting texture of the graham cracker crust, which offers a delightful, slightly crumbly base. Flavor-wise, this pie boasts a harmonious blend of sweet and spicy notes. The natural sweetness of the pumpkin puree is enhanced by carefully selected warm spices, while the melted marshmallows contribute a unique, delightful creaminess and a subtle sweetness that makes this pie utterly irresistible.
Crafting the Perfect No-Bake Pumpkin Pie: Ingredients & Method
Essential Ingredients for Your No-Bake Pumpkin Pie
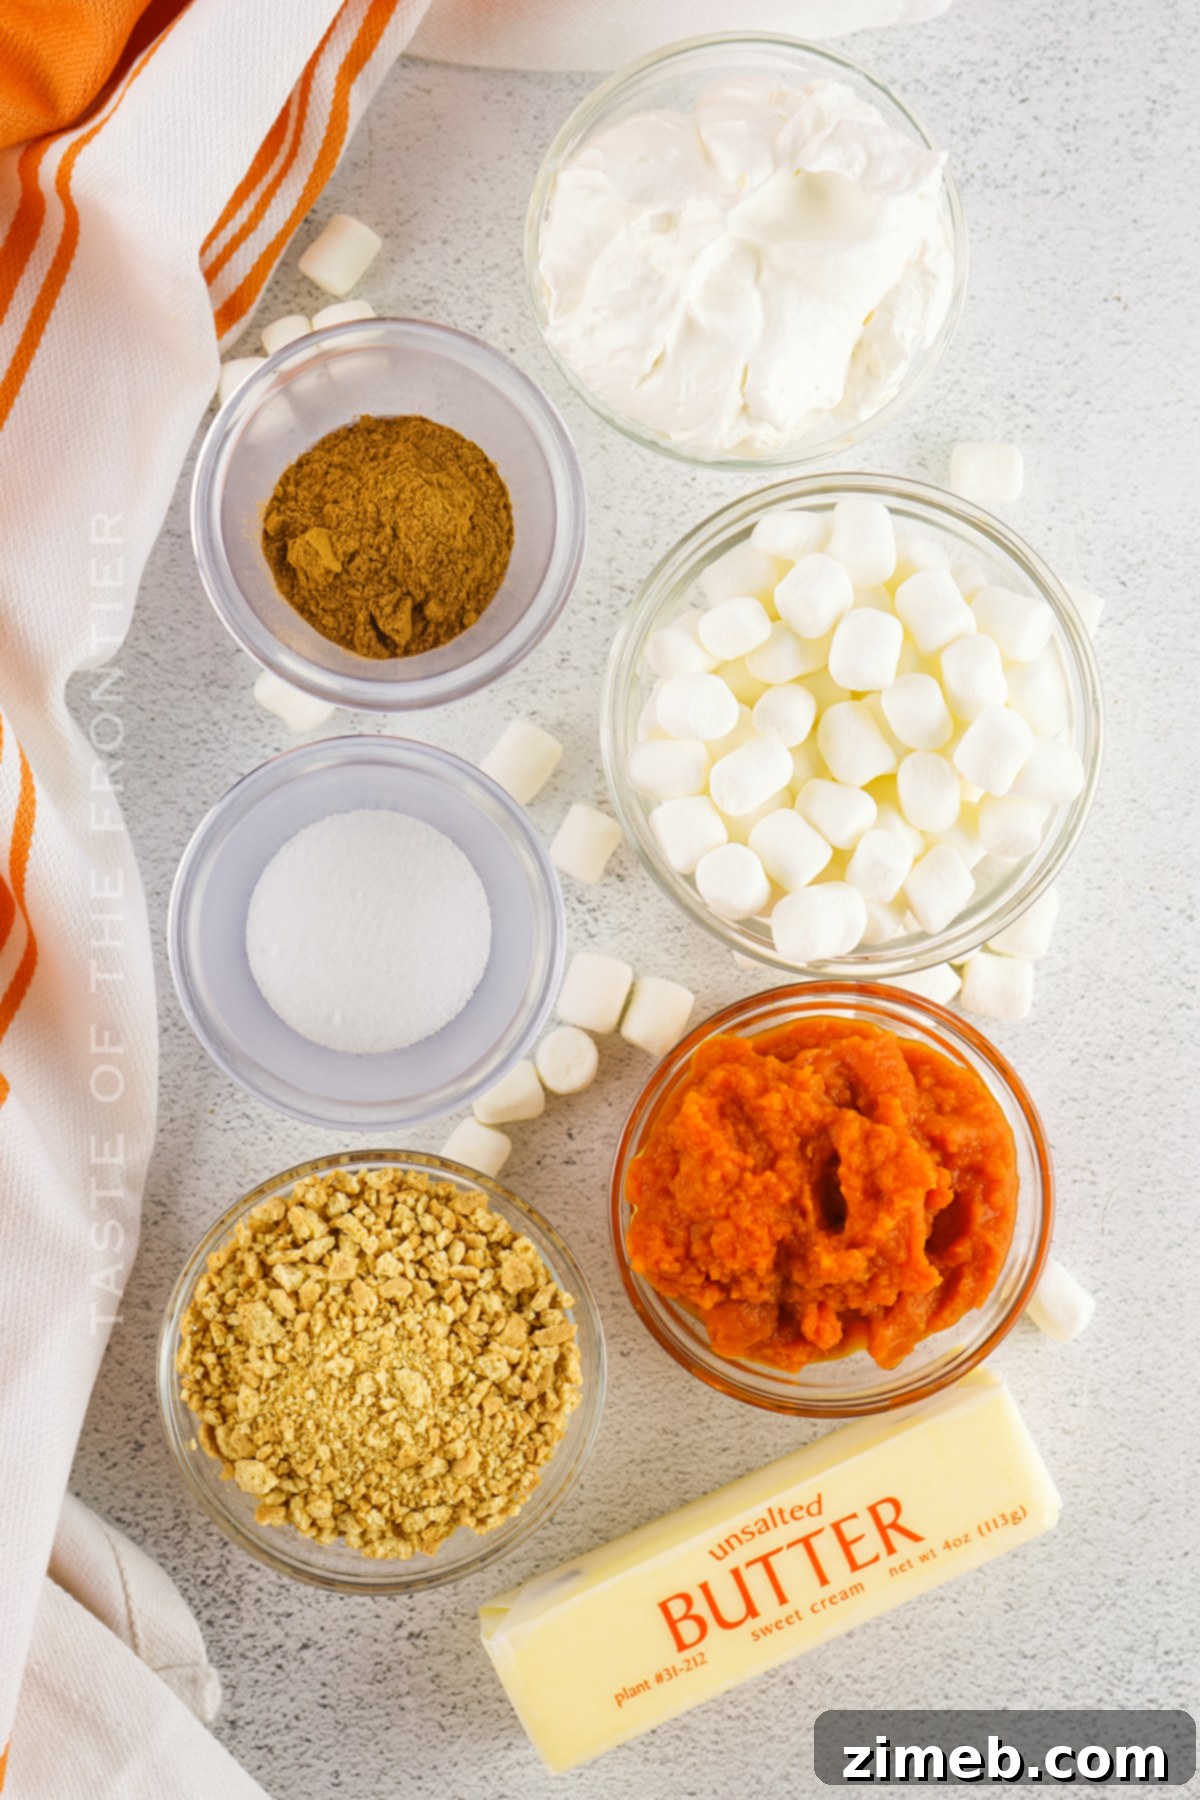
This recipe relies on a few simple, readily available ingredients to create its magic. Here’s what you’ll need:
For the Crust:
- **Graham Crackers:** About 12 full sheets, which will be crushed to form the base.
- **Unsalted Butter:** Melted, to bind the graham cracker crumbs together.
For the Velvety Filling:
- **Mini Marshmallows:** These are key to achieving the pie’s creamy, set texture without baking.
- **Pumpkin Puree:** Ensure it’s 100% pure pumpkin, not pumpkin pie filling. One standard 15-ounce can is usually perfect.
- **Whipped Topping:** Such as Cool Whip, defrosted. You’ll need one large tub for the filling and extra for an optional garnish.
- **Pumpkin Pie Spice:** The signature blend of cinnamon, nutmeg, ginger, and cloves that defines fall flavors.
- **Salt:** A pinch to enhance and balance the sweet flavors.
- **Nonstick Spray:** For preparing your pie pan.
Handy Marshmallow Conversion Chart
- 1 jumbo marshmallow = 4 standard-size marshmallows = 1/2 cup mini-marshmallows
- 1 cup mini-marshmallows = 8 standard-size marshmallows = 1/2 cup marshmallow fluff
- 7 ounces of marshmallow creme = 1.5 cups of marshmallow fluff
- 10 ounce bag of mini-marshmallows = 6 cups = 40 standard-size marshmallows
- 1 standard-size marshmallow = 14 mini-marshmallows
- 8 standard-size marshmallows = 1 cup
- 16-ounce bag of mini-marshmallows = 8.5 cups
- 16-ounce bag of standard-size marshmallows = 63 marshmallows
Creative Variations for Your No-Bake Pumpkin Pie
While the classic no-bake pumpkin pie is phenomenal on its own, its versatility allows for exciting variations:
Mini Pumpkin Pies: For individual servings or a charming dessert buffet, use mini muffin tins. Line each cup with a small pressed circle of the graham cracker crust, then fill with the pumpkin mixture and chill. These are always a crowd-pleaser!
Pumpkin Pie Bars: A fantastic option for serving a larger group. Prepare the crust in an 8×8 or 9×13 inch baking dish, then pour the combined filling ingredients directly over the crust. Chill until firm, then cut into neat, delicious bars. This format is great for potlucks and parties.
Pumpkin Parfaits: Layer crumbled graham crackers, pumpkin filling, and whipped cream in clear glasses or jars for an elegant, layered dessert. These are beautiful and easy to customize.
Swirled Cream Cheese Pumpkin Pie: For an extra layer of decadence, prepare a simple cream cheese mixture (cream cheese, powdered sugar, vanilla) and swirl it into the pumpkin filling before chilling. It adds a lovely tang and richness.
Delightful Pumpkin Pie Toppings to Elevate Your Dessert
No pumpkin pie is complete without a delicious topping. Here are some ideas to make your no-bake pumpkin pie even more special:
Whipped Cream: A light, airy, and classic choice. Homemade whipped cream, made by whipping heavy cream with a touch of sugar and vanilla until stiff peaks form, is always superior. It provides a perfect contrast to the creamy pie filling.
Pecans: A traditional and beloved topping, pecans add a wonderful crunch and nutty flavor that complements the pie’s spices. You can either sprinkle them generously over the entire pie or on individual slices for a beautiful presentation.
Cinnamon: A simple dusting of ground cinnamon over your whipped cream or directly on the pie adds an extra layer of warmth and aromatic spice, enhancing the overall pumpkin flavor.
Vanilla Ice Cream: For a truly indulgent experience, serve your chilled pumpkin pie with a scoop of creamy vanilla ice cream. The cool, refreshing quality of the ice cream beautifully balances the rich, spiced filling, creating a decadent dessert pairing.
Caramel Drizzle: A luscious caramel sauce drizzled over the top adds an extra layer of sweetness and sticky, buttery goodness that pairs incredibly well with pumpkin.
Toasted Coconut Flakes: For a tropical twist and added texture, lightly toast some coconut flakes and sprinkle them over the finished pie.
Chocolate Shavings: A sprinkle of dark or milk chocolate shavings can add a sophisticated touch and a hint of unexpected richness.
Craft Your Own Pumpkin Spice Seasoning
While store-bought pumpkin spice is convenient, making your own ensures the freshest, most vibrant flavors for your pie. It’s incredibly simple:
- 1 tablespoon ground cinnamon
- 1 teaspoon ground ginger
- ¼ teaspoon ground cloves
- ¼ teaspoon ground nutmeg
Instructions:
- Combine all ingredients in a small bowl.
- Stir thoroughly until fully blended.
- Store in an airtight container at room temperature for up to 6 months to maintain freshness and potency.
Why You’ll Fall in Love with This No-Bake Pumpkin Pie
This No-Bake Pumpkin Pie isn’t just a recipe; it’s a celebration of convenience, flavor, and autumnal joy. Here are just a few reasons why it’s destined to become a fall season favorite:
- **Effortless Preparation:** It’s a quick and easy recipe that is perfect for the fall season. Made with just a few simple ingredients, it comes together in no time at all.
- **No Oven Required:** Free up your oven for other dishes, especially during busy holiday cooking. This pie sets beautifully in the refrigerator.
- **Perfect for All Skill Levels:** Whether you’re a seasoned baker or a kitchen novice, this recipe is incredibly forgiving and guarantees delicious results.
- **Kid-Friendly Fun:** Its simplicity makes it a great recipe to involve younger family members, fostering a love for cooking and creating cherished memories.
- **Delicious Flavor:** Enjoy all the comforting, spiced flavors of pumpkin without the fuss of traditional baking. Simply combine the ingredients, pour into your prepared crust, and refrigerate for a few hours until perfectly set. Then, it’s ready to slice and savor!
Step-by-Step: How to Make No-Bake Pumpkin Pie
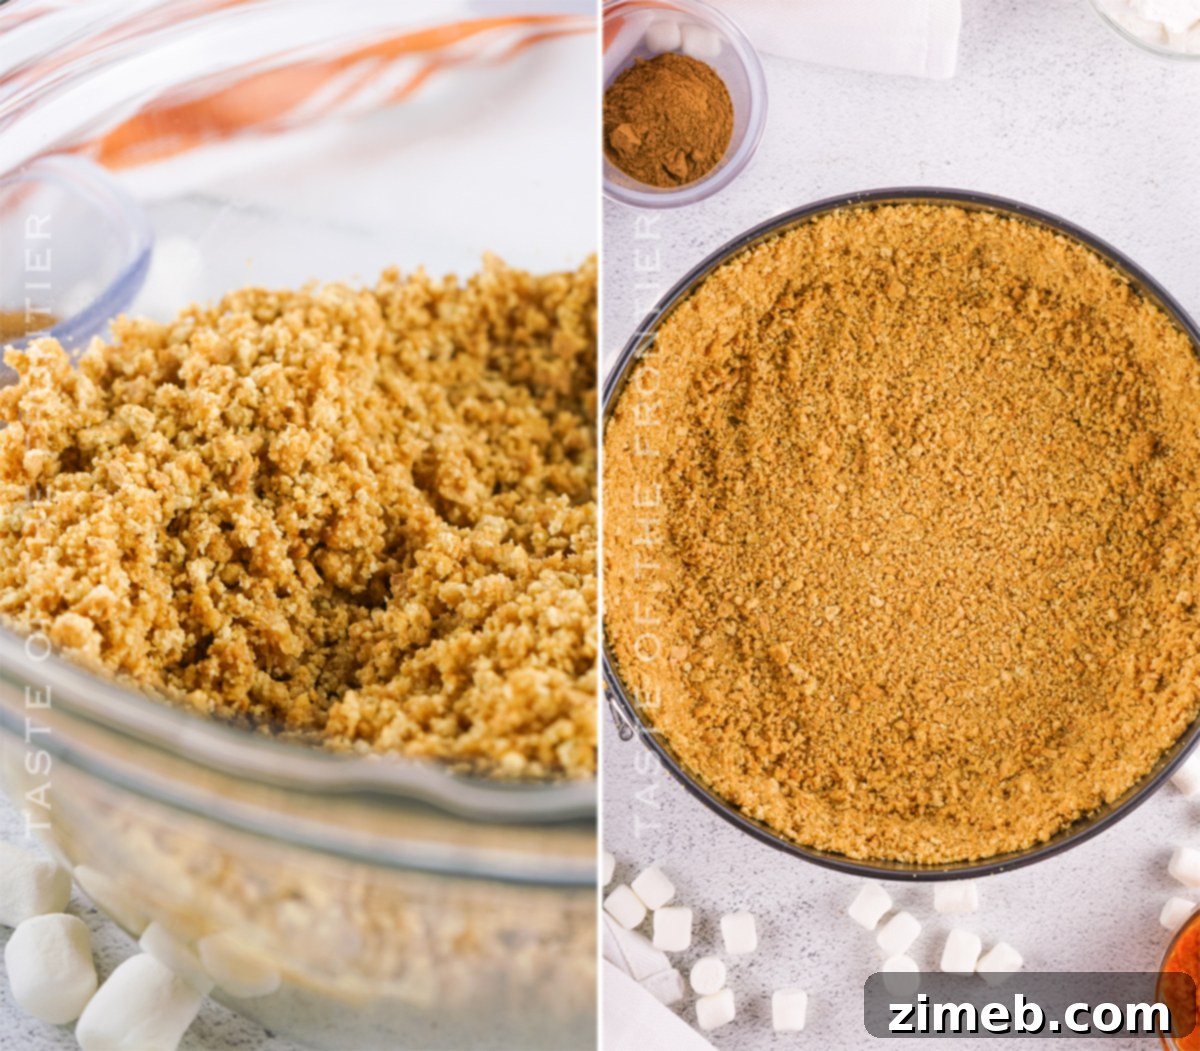
Crafting the No-Bake Graham Cracker Crust
- Lightly spray a 9-inch springform pan with nonstick cooking spray and set it aside.
- Place the graham crackers into a large, sturdy zip-top bag and crush them into fine crumbs using a rolling pin, or for quicker results, process them in a food processor until finely crushed.
- Pour the melted unsalted butter over the crushed graham cracker crumbs and mix thoroughly until the mixture resembles wet sand. If using a food processor, simply add the melted butter directly to the crumbs and blend until combined. You might need to pause and scrape down the sides to ensure even mixing.
- Transfer the crumb mixture into your prepared springform pan. Press it firmly into the bottom and up the sides of the pan, creating an even layer. Use the bottom of a glass or your knuckles for a compact crust.
- Place the crust in the freezer to firm up while you prepare the filling.
Preparing the Silky No-Bake Pumpkin Pie Filling
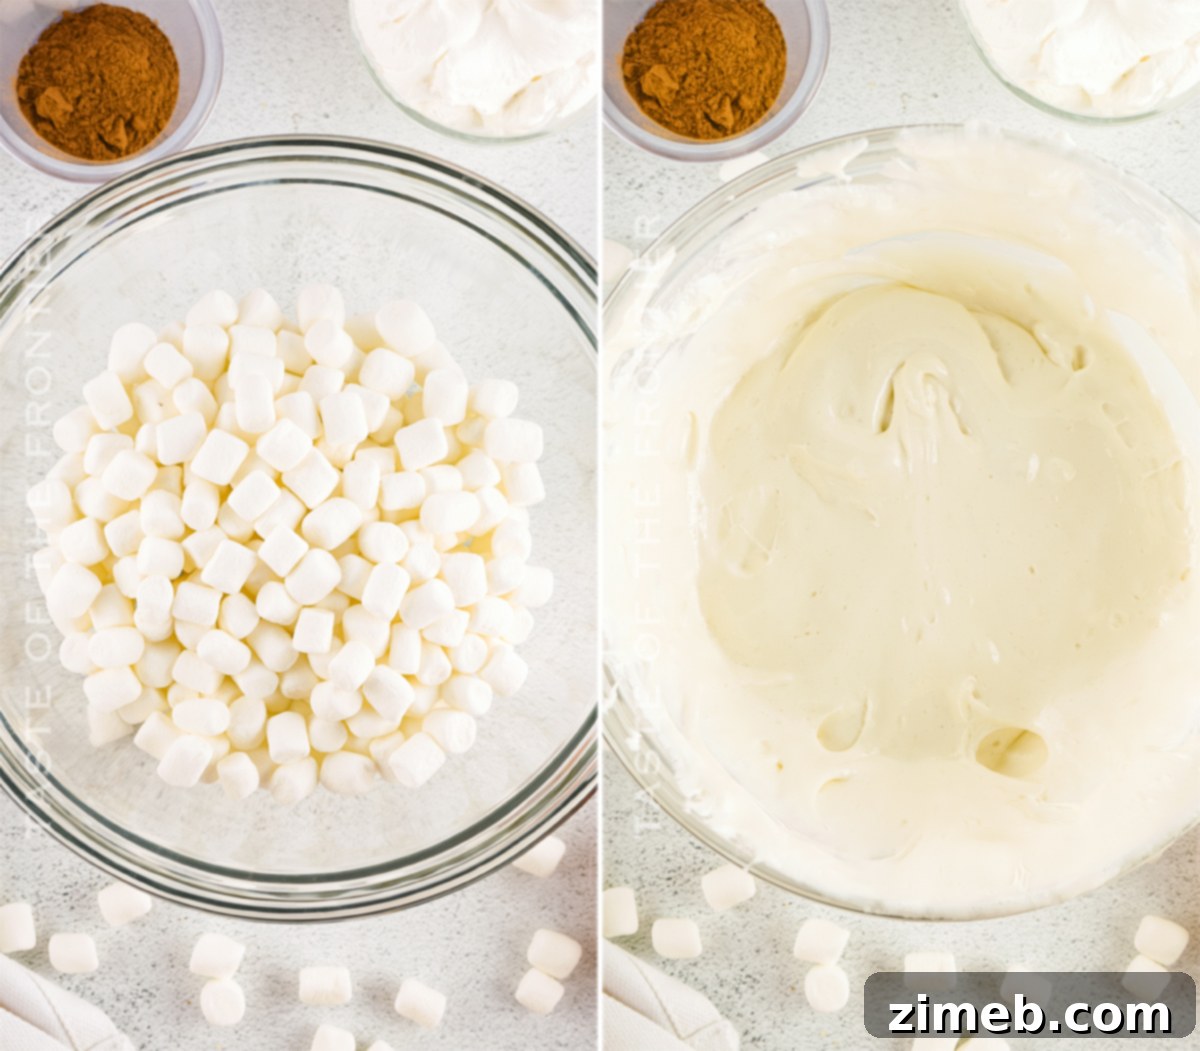
- In a large microwave-safe mixing bowl, add the mini marshmallows. Microwave for approximately two minutes, or until the marshmallows are fully melted and creamy when stirred. Stir thoroughly to remove any lumps.
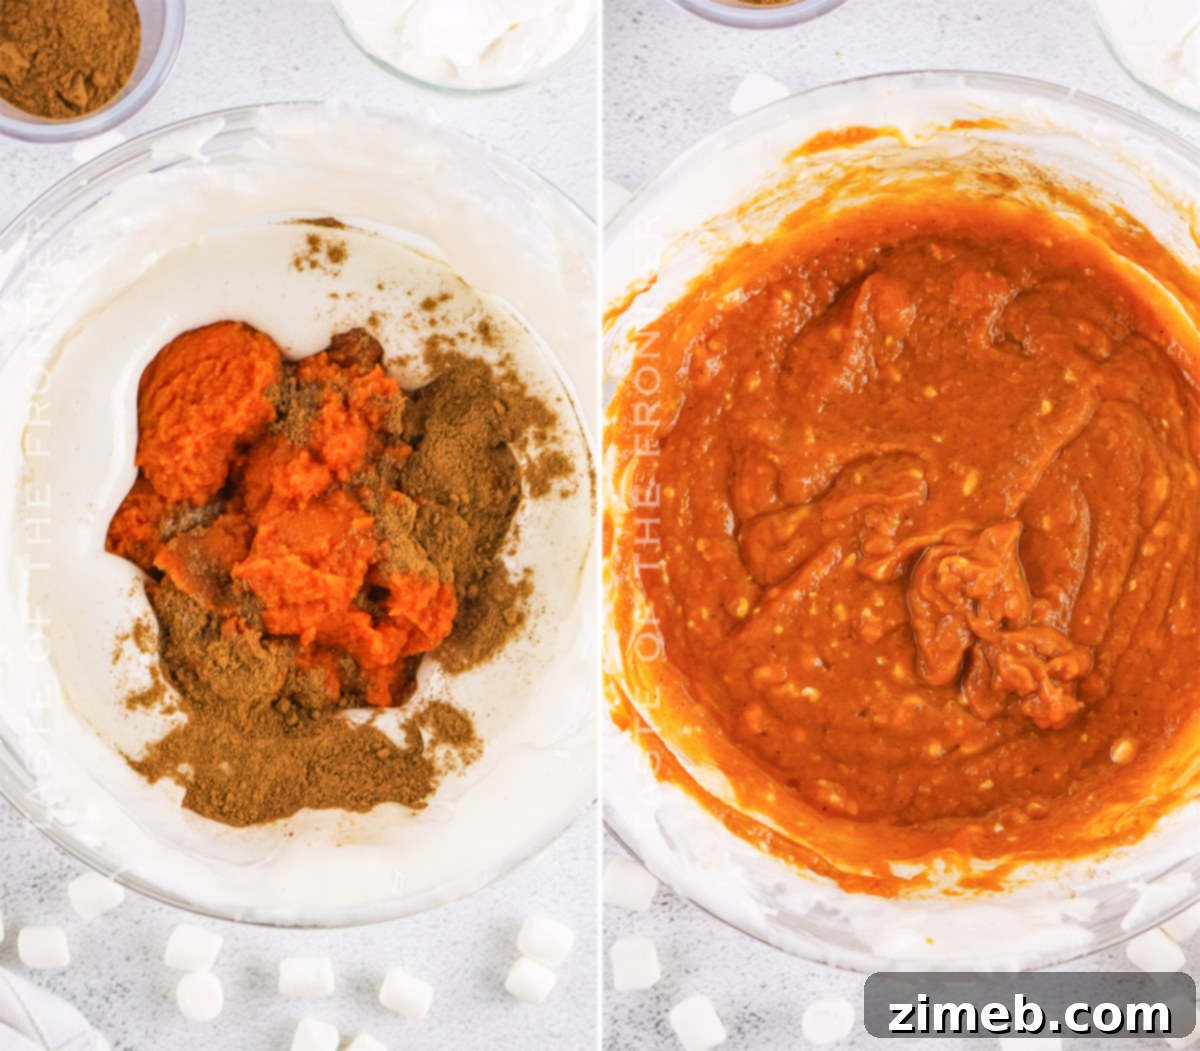
- Working quickly, immediately add the pumpkin puree, pumpkin pie spice, and salt to the melted marshmallows. Stir vigorously and thoroughly until all ingredients are fully combined and the mixture is smooth.
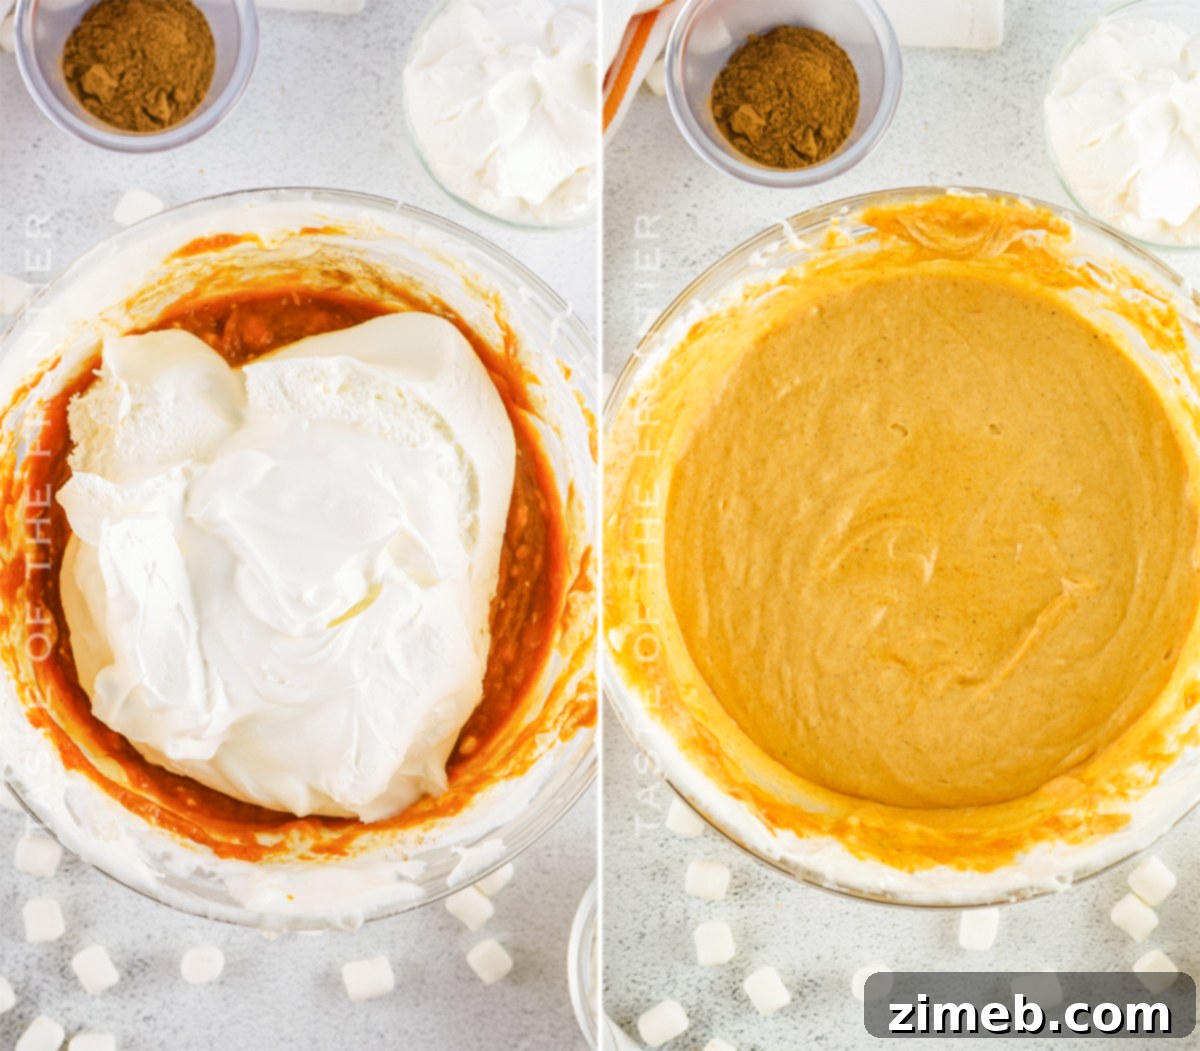
- Gently fold in the thawed whipped topping using a rubber spatula. Once incorporated, whisk the mixture again until everything is light, airy, and completely blended. Ensure there are no streaks of whipped topping.
- Pour the smooth pumpkin filling into the chilled graham cracker crust and spread it evenly with a spoon or spatula.
- Refrigerate the pie for a minimum of 8 hours, or ideally overnight, until it is completely set and can be easily sliced.
- Once firm, top with generous dollops of additional whipped cream, if desired, before serving. Slice, serve, and enjoy this delightful fall treat!
Optimal Serving and Storage for Your No-Bake Pumpkin Pie
This no-bake pumpkin pie is truly at its best when served perfectly chilled. Please resist the urge to let it sit at room temperature for extended periods, as its creamy texture is most enjoyable when cold. For optimal freshness and firmness, serve directly from the refrigerator.
Enhance your slices with these possible toppings:
Whipped cream, a scoop of your favorite ice cream (vanilla, cinnamon, or even coffee flavored!), a rich caramel sauce, a scattering of chocolate chips, or finely chopped nuts like pecans or walnuts. Get creative and make it your own!
Can I freeze this No-Bake Pumpkin Pie?
Yes, this pie freezes beautifully, making it an excellent option for long-term storage or holiday meal prep. To freeze:
Wrap the entire pie (after it has fully chilled and set) tightly in a double layer of plastic wrap, ensuring as much air as possible is removed to prevent freezer burn. For extra protection, you can then place the wrapped pie in a large freezer-safe bag or an airtight container.
The pie will maintain its quality in the freezer for up to 2 months.
Thawing tips for a perfect slice:
For the best texture and flavor, thaw the pie slowly overnight in the refrigerator. This gradual thawing helps maintain its creamy consistency.
If you’re in a hurry, you can place the frozen pie on your kitchen counter and allow it to come to room temperature. This will typically take about 2 hours, but keep an eye on it to prevent it from becoming too warm.
More Expert Tips and Suggestions for This Favorite Fall Dessert
- **Pan Choice is Key:** Always use a springform pan for this recipe. Its removable sides make for incredibly easy removal and presentation of your beautiful pie.
- **Portion Control & Storage:** For convenient grab-and-go treats or easier storage, consider cutting leftover pie into individual servings and storing them in airtight containers in the refrigerator.
- **Ultra Creamy Indulgence:** For an even more decadent and creamy texture, try adding a layer of vanilla pudding or a sweetened cream cheese layer between the crust and the pumpkin filling.
- **Crust Flavor Boost:** Elevate your homemade graham cracker crust by stirring in a tablespoon of brown sugar for added depth and caramel notes.
- **Mixing Flexibility:** This recipe is forgiving! You can easily prepare the filling using either a hand mixer for convenience or a stand mixer for a thoroughly whipped consistency.
- **Optimal Chilling:** For the absolute best results, ensure the pie is thoroughly chilled until just before serving, especially after a big Thanksgiving dinner. Cold temperatures allow the filling to set perfectly.
- **Explore Other Pumpkin Desserts:** Don’t miss our other fantastic pumpkin dessert recipes! We even have a recipe for a traditional baked pumpkin pie if you’re looking for a classic option.
- **Double the Delight:** This recipe’s filling is generous! Easily make two pies by dividing the filling between two store-bought graham cracker crusts if you need to serve a larger crowd or simply want an extra pie.
- **The Right Pumpkin:** Always start with 100% canned pumpkin puree or pure pumpkin. Avoid anything labeled “pumpkin pie filling,” as it contains added spices and sugars that will throw off the recipe’s balance.
- **Whipped Topping Ready:** Have some extra cool whip or homemade stabilized whipped cream on hand for a delicious dollop on top when serving.
The Advantages of Choosing a No-Bake Pumpkin Pie
Beyond its delicious taste, this no-bake pie offers numerous benefits that make it a standout choice:
- **No Baking Required:** The most obvious benefit! Keep your kitchen cool and your oven free for other holiday dishes.
- **Perfect for Make-Ahead:** Easily prepared days in advance, allowing you to reduce stress and enjoy your special occasions more fully.
- **Minimal Mess and Easy Cleanup:** Fewer dishes and no baked-on spills mean less time scrubbing and more time celebrating.
- **Ideal for Non-Bakers:** A fantastic option for anyone who dislikes baking or doesn’t have access to an oven. Everyone can enjoy homemade pie!
- **Light and Refreshing:** Its chilled, creamy texture can be a welcome change from heavier baked desserts.
Pro Tips for a Flawless No-Bake Pumpkin Pie
- **Thaw Your Whipped Topping:** Always ensure your whipped topping is completely thawed before mixing. Frozen or partially frozen topping will not incorporate properly and can lead to a lumpy, uneven filling.
- **Marshmallow Texture is Fine:** When melting marshmallows, don’t worry if tiny lumps remain after stirring. These small pieces will dissolve and blend seamlessly once the whipped topping is added and thoroughly whisked in.
- **Choose the Right Pan:** While a 9-inch springform pan is highly recommended for easy removal and a beautiful presentation, you can use a normal, deep 9-inch pie pan. Alternatively, this recipe is generous enough to make two 8-inch pies if you prefer.
- **Thorough Mixing is Key:** Before pouring the filling into the crust, ensure it is exceptionally well mixed, scraping the bottom of the bowl to confirm all ingredients are evenly incorporated. Undermixing can lead to an inconsistent set.
- **Parchment Paper Not Needed:** The springform pan and nonstick spray are sufficient; no need for parchment paper for the crust.
- **No Pre-Baking for the Crust:** This is a no-bake crust! It doesn’t need to be cooked; simply chilling it in the freezer is enough to firm it up.
- **Freezer Storage:** For extended freshness, store the pie in a sealed, freezer-safe container for up to 2 months. Remember to thaw it for 30 minutes to an hour before serving to achieve the perfect texture.
- **Refrigerator Storage:** If you plan to enjoy it sooner, the pie can be refrigerated, covered, for up to 5 days.
For the Absolute Best Results
- **Crust Creativity:** Don’t limit yourself to graham crackers! Experiment with other delicious crust options like crushed gingersnap cookies for a spicier kick, vanilla wafer cookies, classic Oreo cookies for a chocolatey base, or even chocolate graham crackers for a richer flavor profile.
- **Homemade Whipped Cream:** For unparalleled flavor and stability, we highly recommend using our recipe for homemade stabilized whipped cream. It holds its shape beautifully and adds a superior taste.
- **Avoid Canned Spray Whipped Cream:** Please do not attempt this recipe with regular whipped cream from an aerosol can. It simply will not hold its shape or contribute to the pie’s structure. Only use stabilized whipped cream or a quality whipped topping (like Cool Whip) for this recipe to work correctly.
- **Plan Ahead:** For a truly stress-free holiday or celebration, prepare this recipe the day before. This allows ample chilling time and streamlines your kitchen duties on the big day.
- **Do NOT Skip Chilling:** The chilling process is absolutely essential. It allows the gelatin in the marshmallows to fully set, ensuring your pie holds together beautifully and slices cleanly. Patience is a virtue here!
- **Spice It Up:** Add an extra sprinkle of pumpkin spice to the very top of the pie just before serving, or even mix a little into your whipped cream topping for an extra burst of autumnal flavor.
- **Fresh Marshmallows are a Must:** Trust us on this crucial tip – always use fresh marshmallows! Avoid that old, sticky bag from the back of your pantry. Stale marshmallows will result in a less creamy, less appealing pie. For that signature creamy texture, always opt for the freshest marshmallows available.
Can I use a ready-made crust for this recipe?
For this specific recipe, it’s generally best to make the graham cracker crust yourself. The primary issue with most ready-made, store-bought graham cracker crusts is that they are often not large or deep enough to comfortably hold the volume of this rich, creamy filling. If you truly wish to use store-bought crusts, you would likely need two standard-size crusts and divide the filling evenly between them to avoid overflow and ensure proper setting.
Can I make this with a standard flaky pie crust?
Yes, you certainly can adapt this recipe to use a traditional flaky pie crust! I even have a wonderful homemade pie crust recipe that I would highly recommend for this purpose. The key difference is that a standard pie crust will need to be baked first. You would prepare and bake the pie crust according to its instructions, then let it cool completely before adding the no-bake pumpkin filling mixture. Once the filling is added, chill the pie in the refrigerator as directed in this recipe until it is fully set. This offers a different textural experience while still enjoying the convenience of a no-bake filling.
DON’T MISS THESE HOLIDAY E-BOOKS!


Recommended Kitchen Tools for Making This Fluffy Pumpkin Pie…
This no-bake pumpkin pie recipe is incredibly easy and truly delicious – perfect for this time of year! If you’re a seasoned pro, you might already have these items on hand. If you’re new to making homemade pies and feeling a bit nervous, rest assured you’re going to love how simple this is. I’ve compiled a list of the essential tools I absolutely rely on when making this fantastic pie. (You can also SHOP MY FAVORITES in my online store).
- Springform Pan
- Large Mixing Bowl
- Hand Mixer or Stand Mixer
- Rubber Spatulas
- Saucepan (for melting butter, if not microwaving)
If you adore this easy no-bake pumpkin pie recipe, you’ll be thrilled to discover these other delightful pumpkin-inspired recipes. Click each link below to find the simple, printable instructions and expand your fall dessert repertoire!
Check out this recipe

Check out this recipe
Check out this recipe

Check out this recipe
Check out this recipe

Check out this recipe
Check out this recipe
Check out this recipe
Check out this recipe
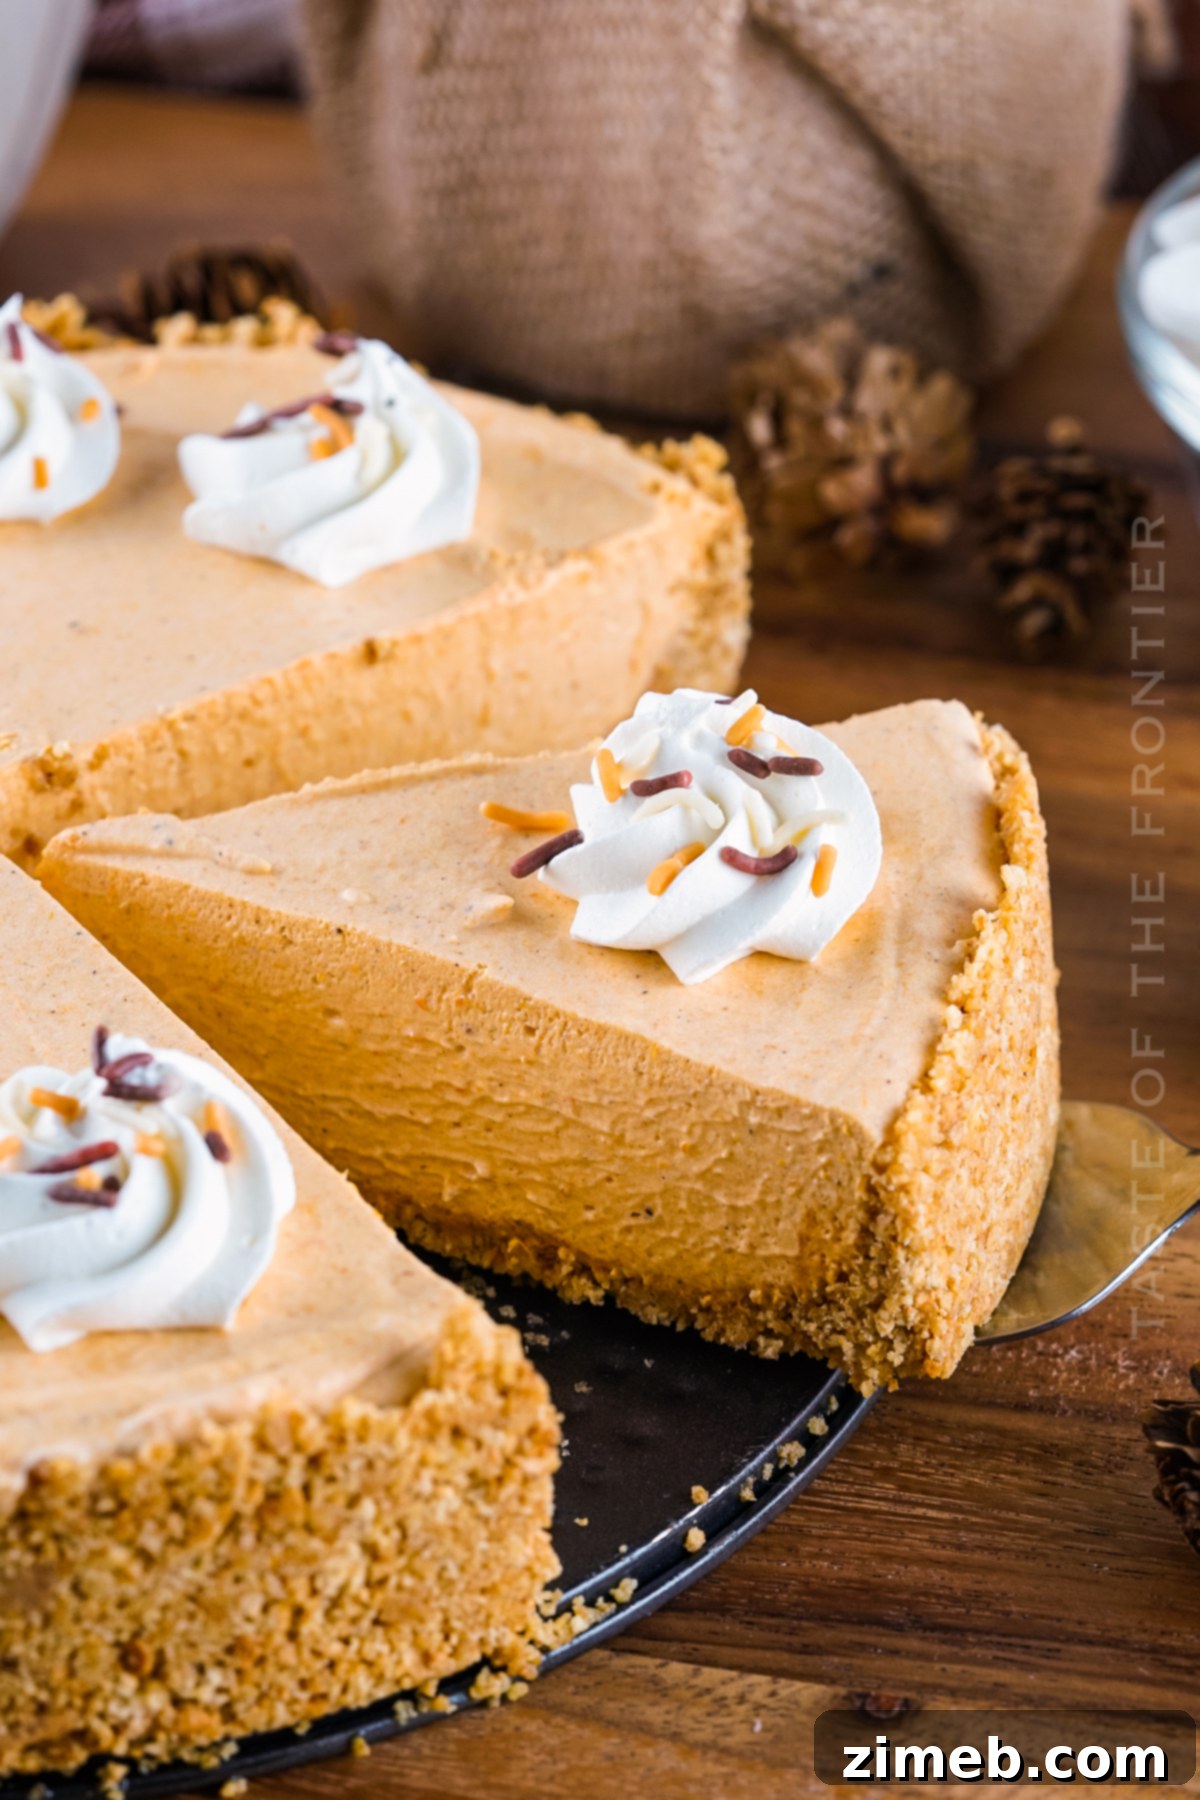
If you’ve loved this recipe for Homemade Creamy No-Bake Pumpkin Pie as much as I do, please take a moment to leave a five-star review. Your feedback is greatly appreciated! Also, don’t forget to help me share this delightful recipe on Facebook and Pinterest so more people can discover this easy fall favorite!
CONNECT WITH YUMMI HAUS!
Be sure to follow me on my social media, so you never miss a post!
Substack, Facebook, Pinterest, Instagram, Email Subscription
No-Bake Pumpkin Pie
Servings: 8
Fall is in the air, which means it’s time for all things pumpkin! This creamy No-Bake Pumpkin Pie is perfect for those wanting to enjoy the taste of pumpkin pie but wants an easy-to-make option.
Pin Recipe
Cook Time: 2 mins
Chill Time: 8 hrs
Total Time: 8 hrs 17 mins
Ingredients
Crust:
- 12 graham crackers (full sheets)
- 7 tablespoons unsalted butter (melted)
Filling:
- 7 cups mini marshmallows
- 15 ounces pumpkin puree (1 can)
- 16 ounces whipped topping (1 large tub + More for Optional Garnish)
- 2 teaspoons pumpkin spice
- ¼ teaspoon salt
- nonstick spray
Instructions
- Spray a springform pan with nonstick spray and set aside.
- Add the graham crackers to a large bag and crush them into tiny pieces using a rolling pin, OR place them in a food processor and blend until finely crushed.
- Add the melted butter to the crushed graham crackers and mix until a wet sand-like mixture forms. If using a processor, just add it straight to the mixture and blend. You may need to mix it once and then continue mixing.
- Place the mixture in the prepared pan and press it up into the bottom and almost all the way up the sides. Place in the freezer until ready to use.
- Add the marshmallows to a large mixing bowl and microwave for two minutes or until the marshmallows are creamy and not lumpy when stirred.
- Immediately and quickly add the pumpkin puree, pumpkin spice, and salt to the melted marshmallows and stir well until fully combined.
- Add the whipped cream and then whisk well. Use a rubber spatula to fold the ingredients and then whisk again.
- Pour into the crust and spread evenly with a spoon.
- Refrigerate for 8 hours or until set and able to be sliced.
- Top with dollops of whipped cream, if desired, serve, and enjoy!
Notes
- Do not try and use whipped topping while it’s frozen. It needs to be thawed for it to properly mix in.
- When mixing in the melted marshmallows, they may leave tiny lumps in the mixture, that’s ok, they mix in once the whipped topping is added. You can use a normal pie pan, but it will need to be a deep pie pan, or you can make two 8-inch pies out of this recipe.
- Do not pour the mixture into the crust until you know for sure that you have mixed it well, all the way through to the bottom. You don’t need parchment paper for this recipe.
- You don’t need to cook the crust for this recipe.
- For storage, you can place the pie in a sealed container and freeze it for up to 2 months. Be sure to thaw for about 30 minutes to an hour before serving.
- You can also refrigerate it, covered, for up to 5 days.
Equipment
- 9-Inch Springform Pan
- Whisk
- Rubber Spatula
Nutrition
Serving: 1g | Calories: 455kcal | Carbohydrates: 71g | Protein: 5g | Fat: 19g | Saturated Fat: 13g | Cholesterol: 27mg | Sodium: 281mg | Potassium: 175mg | Fiber: 2g | Sugar: 46g | Vitamin C: 2mg | Calcium: 62mg | Iron: 1mg | Net Carbohydrates: 70g
Nutritional information for the recipe is provided as a courtesy and is approximate. Please double-check with your own dietary calculator for the best accuracy. We at Yummi Haus cannot guarantee the accuracy of the nutritional information given for any recipe on this site.
Love this recipe?
Follow @KleinworthCo for even more tasty recipes!