
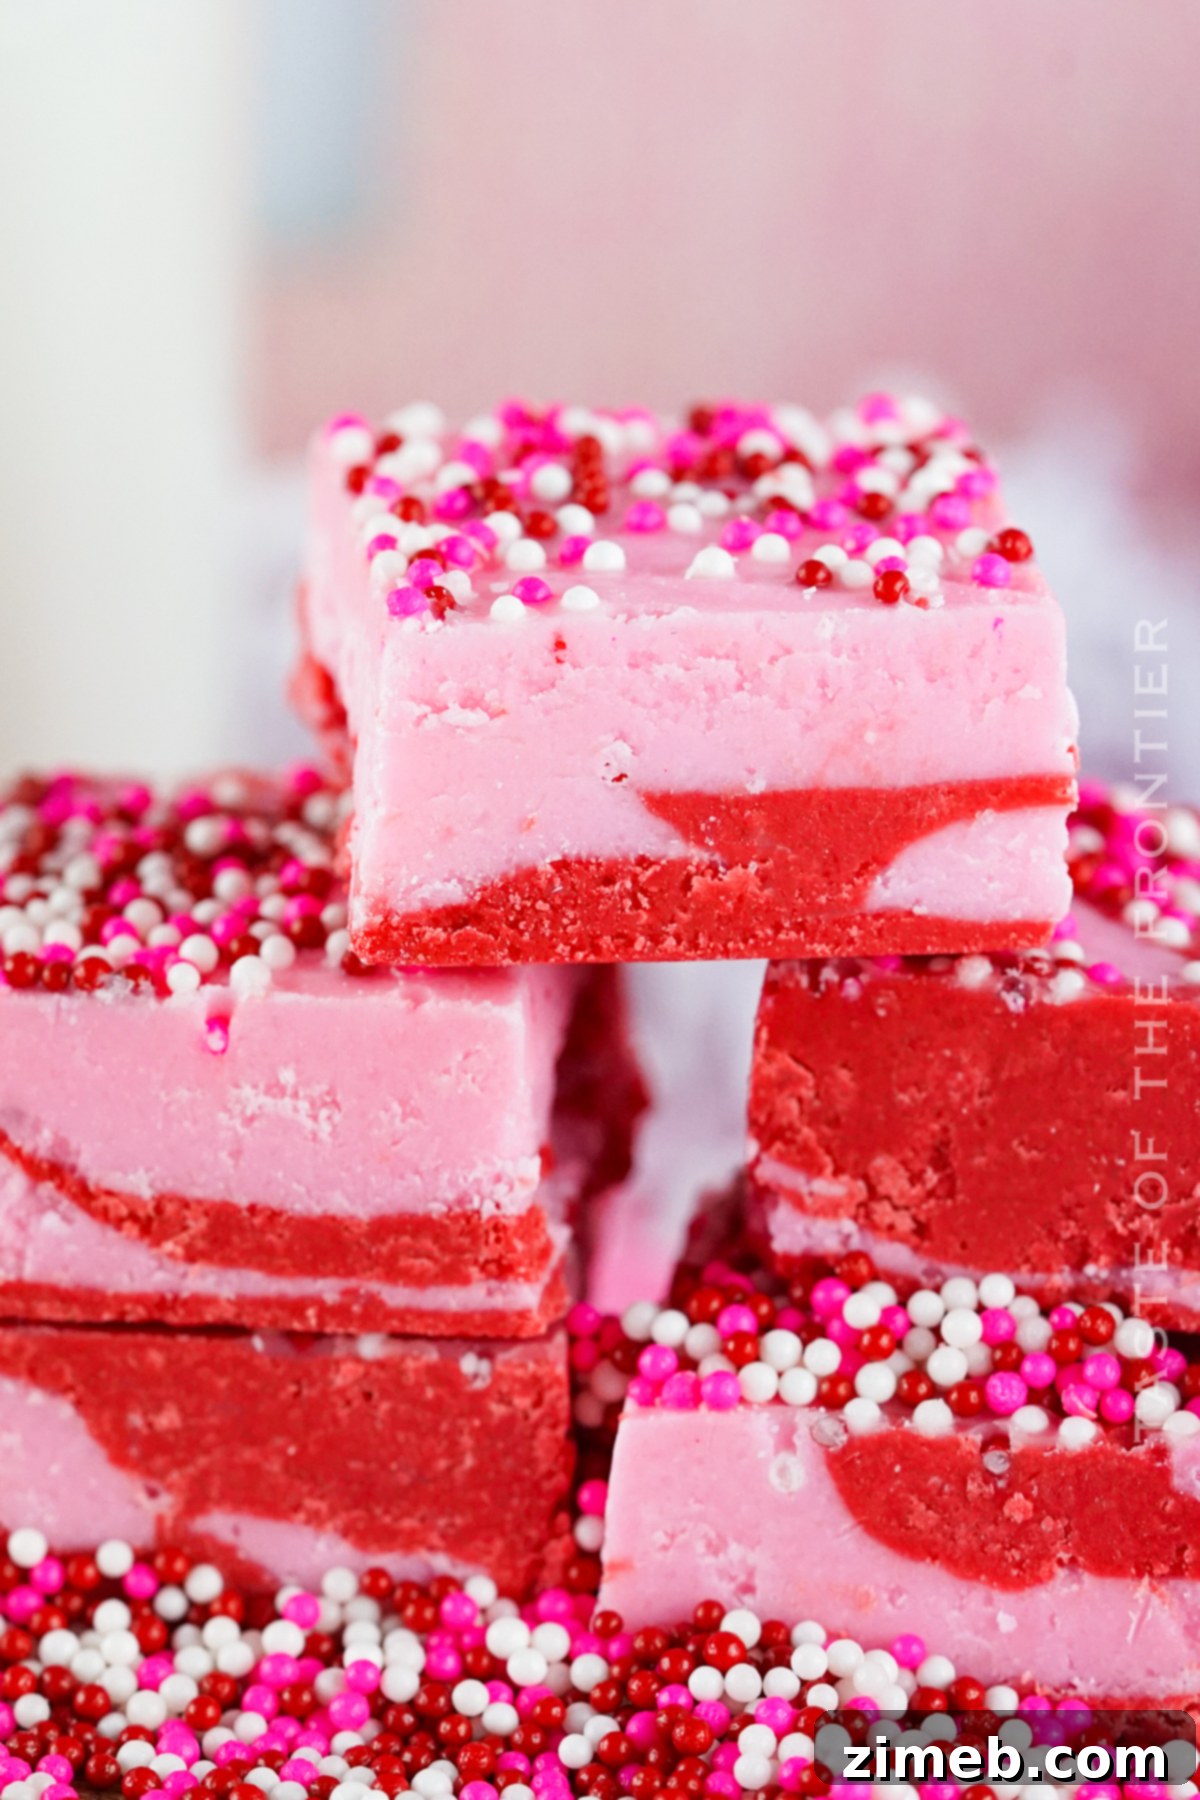
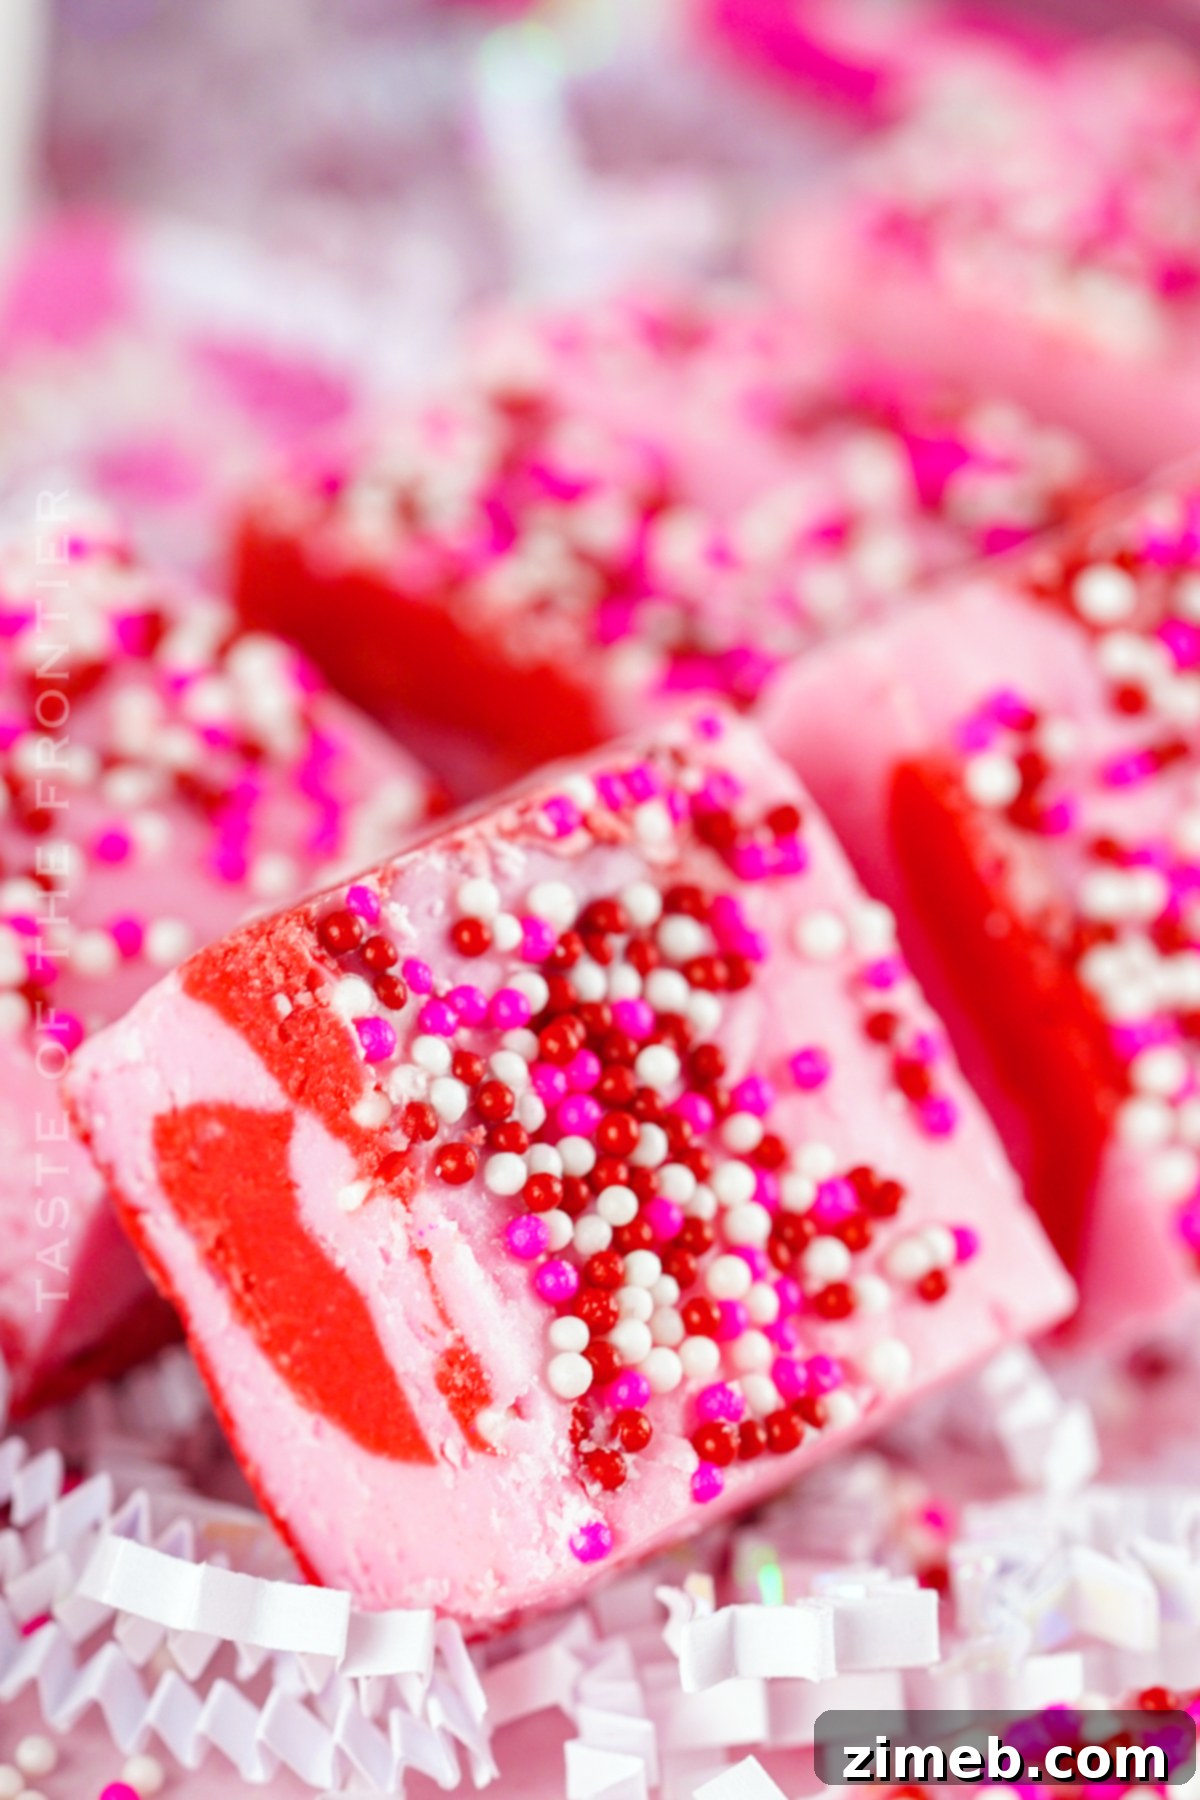
Craving a delightful, fuss-free dessert that’s as beautiful as it is delicious? Look no further than this incredibly easy Strawberry Fudge recipe. Combining the creamy sweetness of buttercream, the vibrant flavor of strawberry extract, and the playful hues of colored candy melts, this recipe creates a stunning red and pink confection that’s perfect for any occasion. While its charming colors make it a natural fit for Valentine’s Day, this delightful treat is truly enjoyable year-round, bringing a burst of strawberry sunshine to your dessert table.
What makes this recipe truly stand out is its simplicity. It’s a quick, no-bake fudge, which means you can ditch the candy thermometer, skip the double boiler, and forget about complicated techniques. This recipe is designed for ease, allowing even novice bakers to achieve perfectly set, delicious fudge without stress. In just a few simple steps, you’ll have a batch of gorgeous strawberry fudge ready to impress!
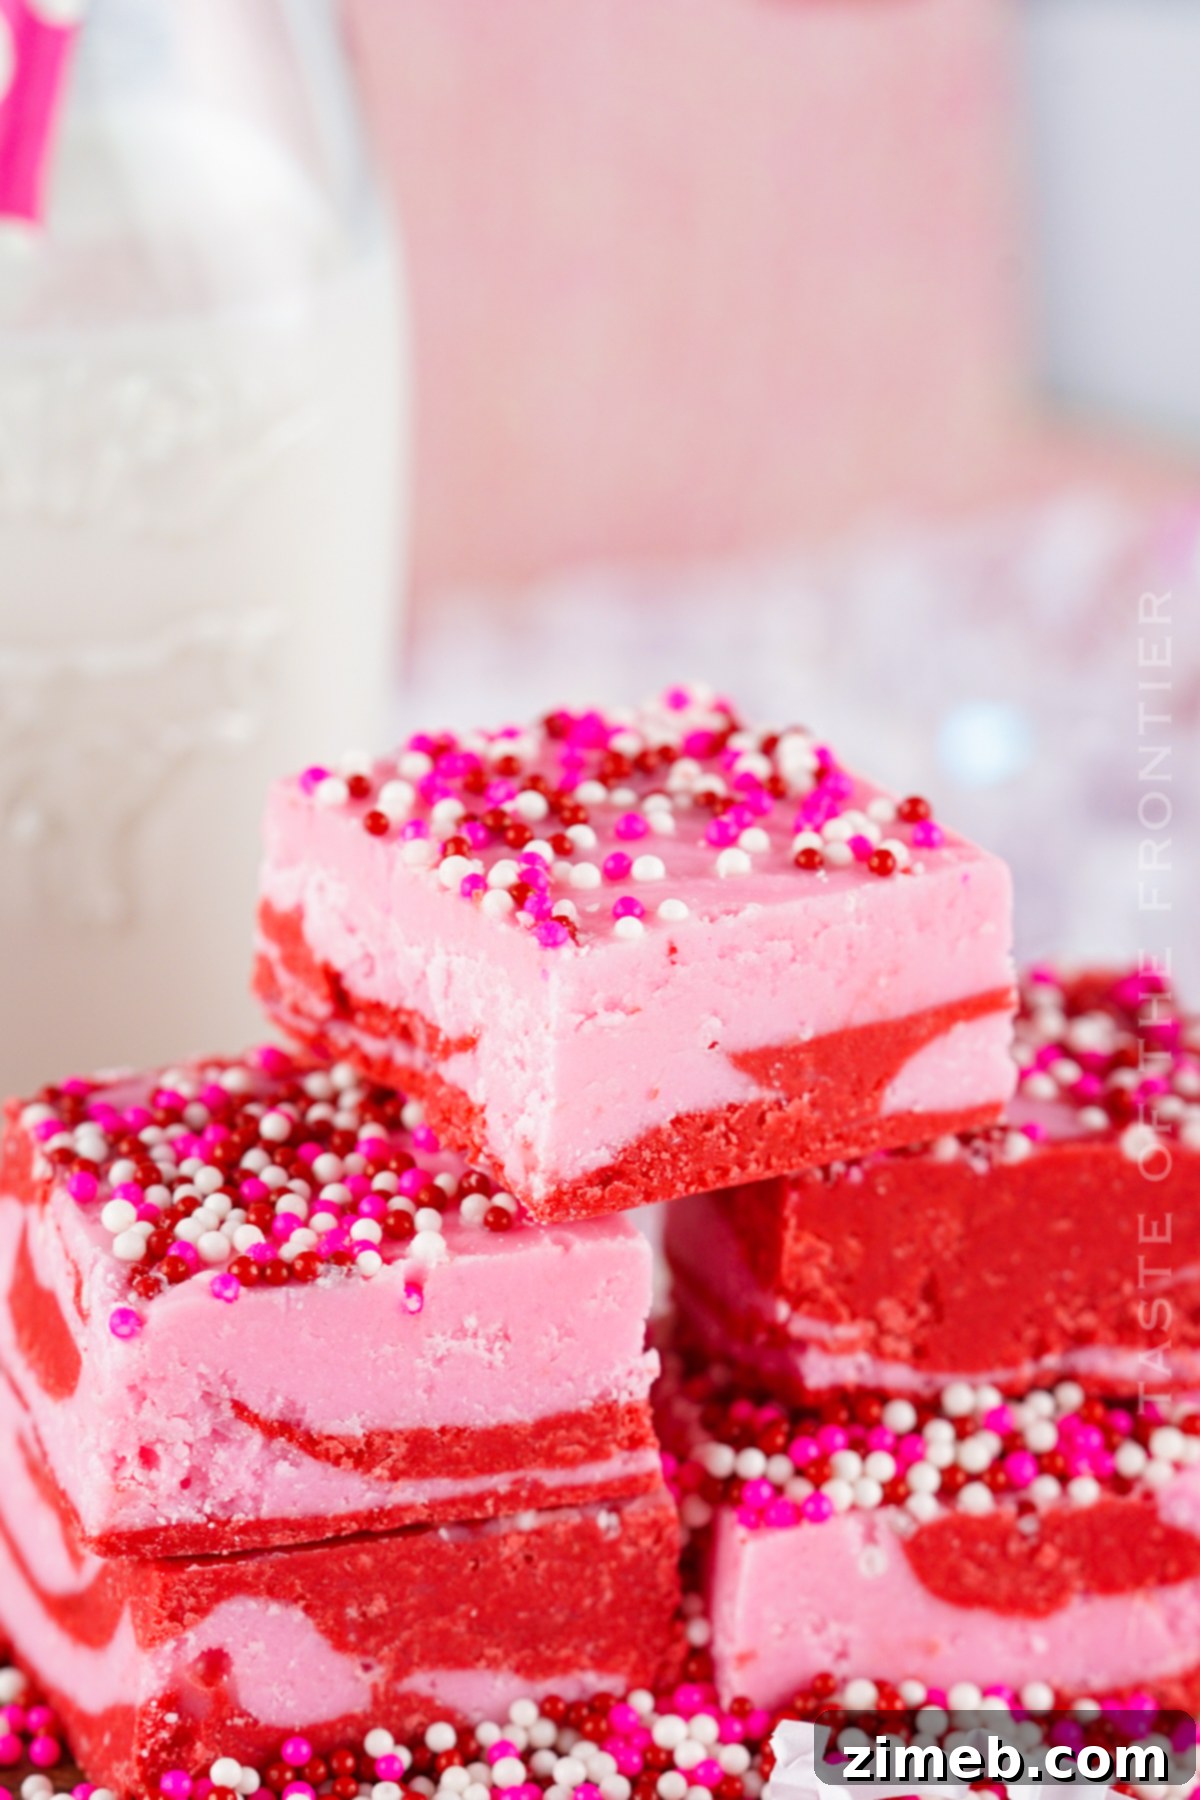
The next time you’re searching for a delicious and incredibly easy fudge recipe, give this strawberry version a try. Its vibrant appearance and irresistible taste make it an ideal dessert for parties, potlucks, or simply as a special homemade gift for friends and family. Imagine gifting a box of these beautiful, sweet squares – it’s a gesture sure to bring smiles and delight!
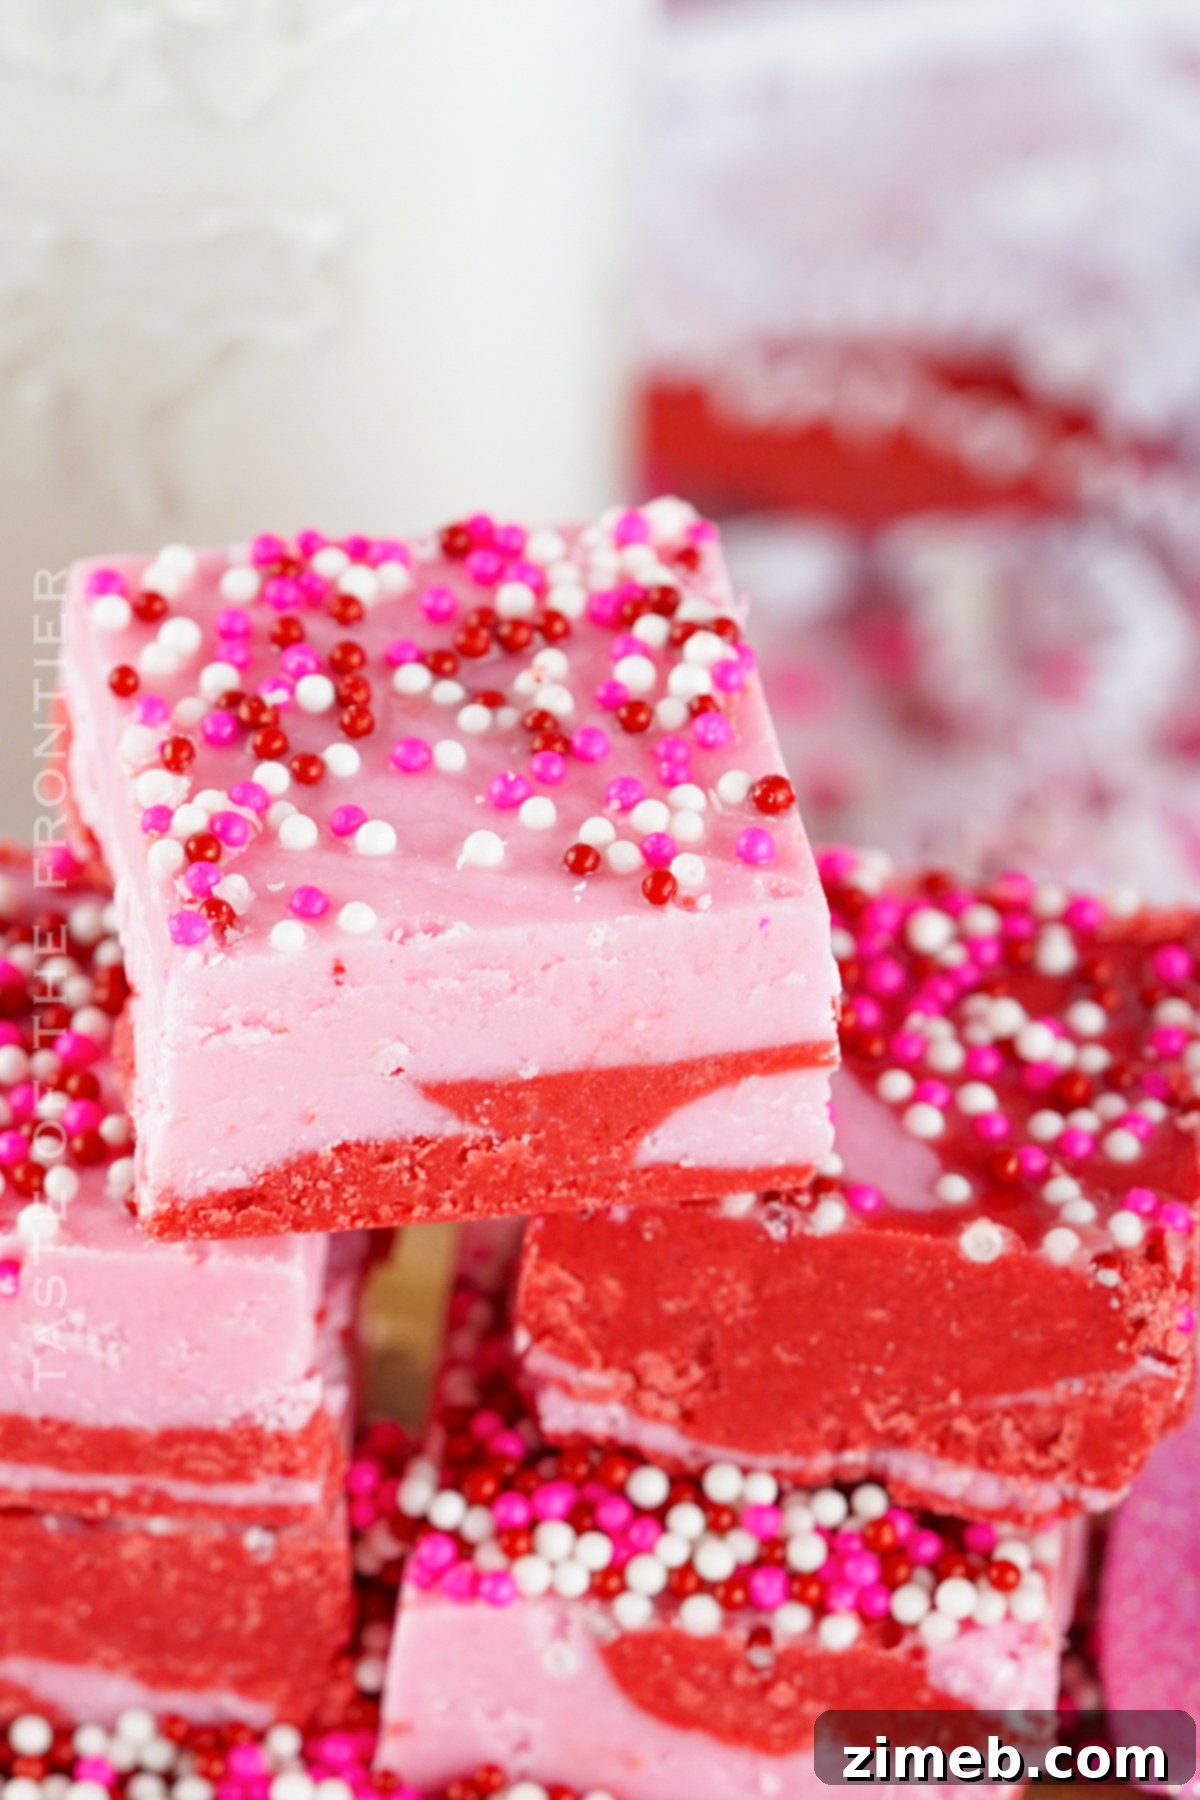
Why You’ll Love This Easy Strawberry Fudge
There are countless reasons why this particular fudge recipe will become a new favorite in your dessert repertoire:
- Effortlessly Fast: In a world where time is a precious commodity, this recipe is a true hero. It comes together remarkably quickly, requiring minimal active cooking time. You can whip up a batch in under 20 minutes, not including chill time, making it perfect for last-minute cravings or unexpected guests. No one will ever guess how little effort went into this show-stopping dessert!
- Incredibly Versatile: While the red and pink hues scream “Valentine’s Day” or “baby shower,” the delightful strawberry flavor is welcome any day of the year. Adjust the sprinkles or colors, and this fudge can fit any holiday or celebration, from summer picnics to winter gatherings.
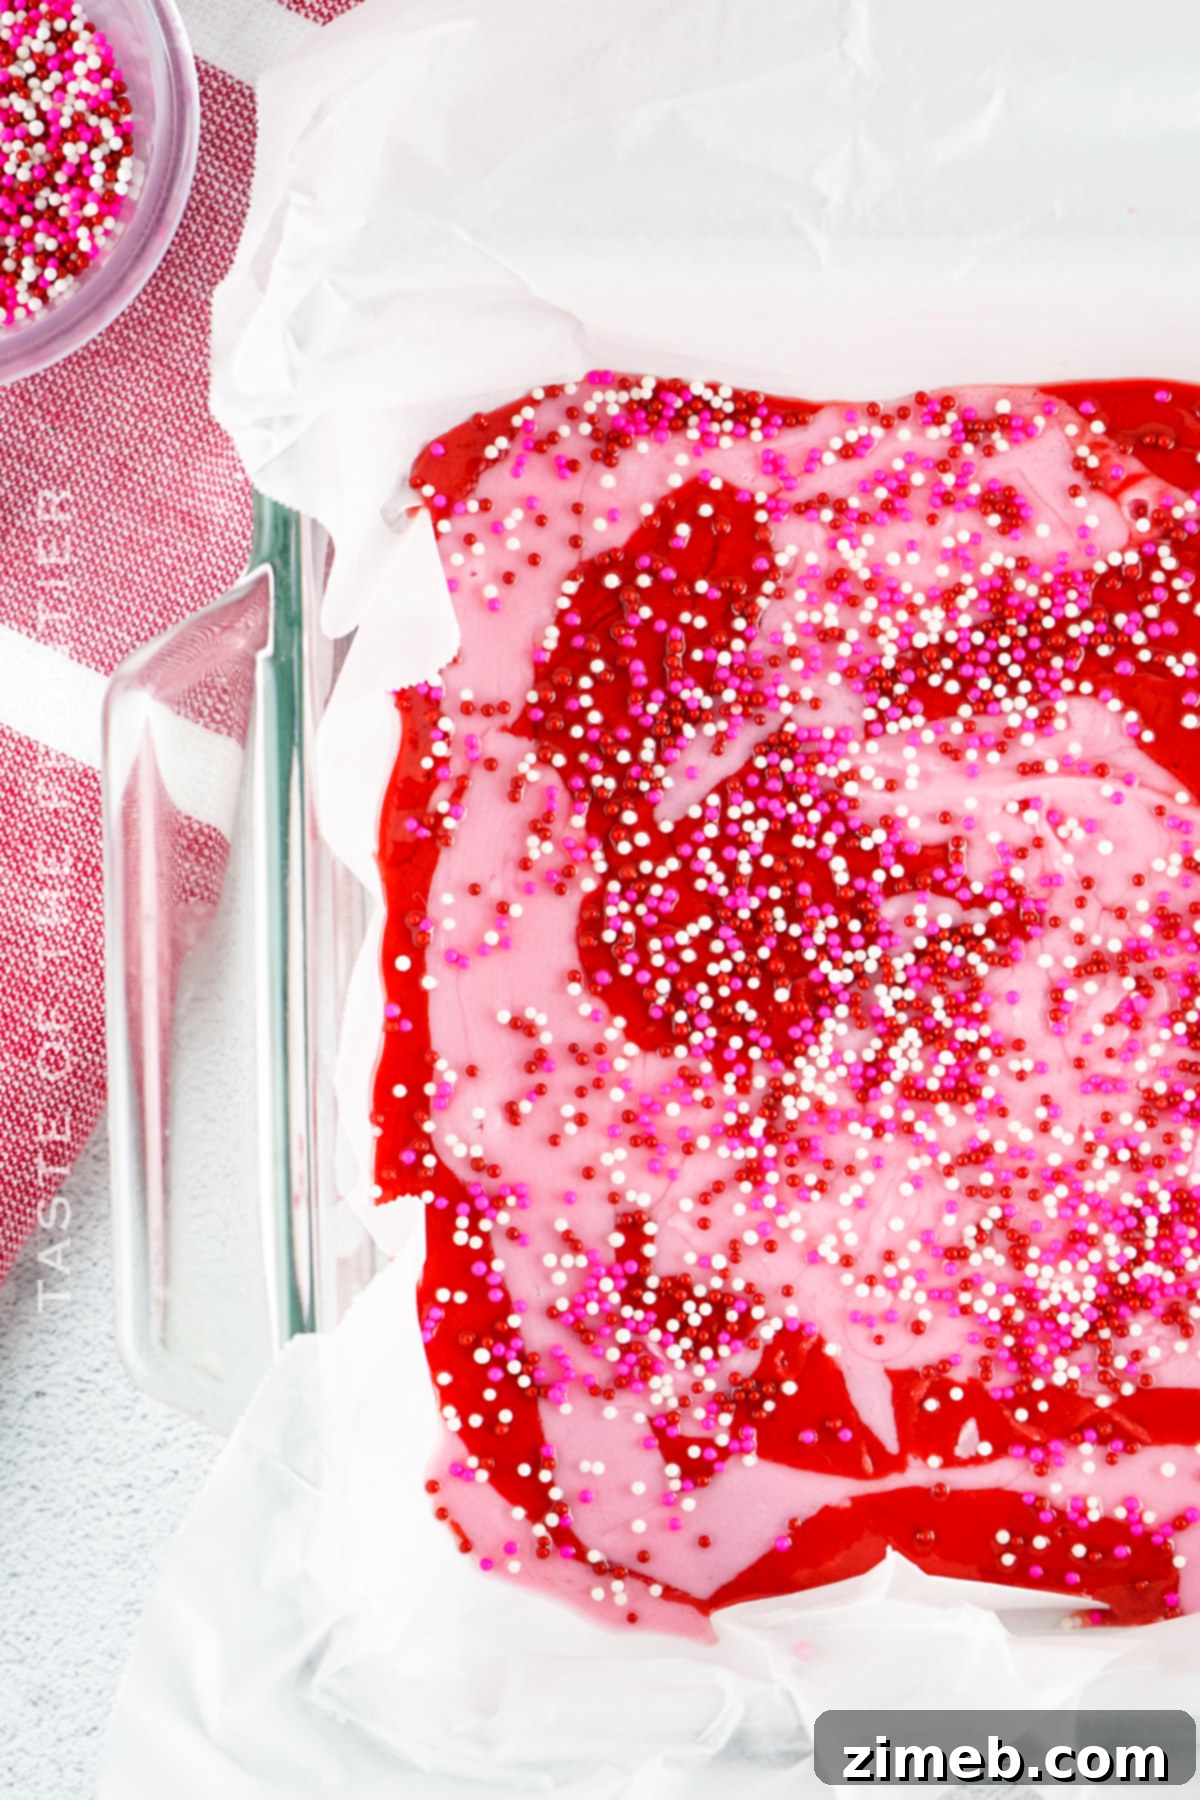
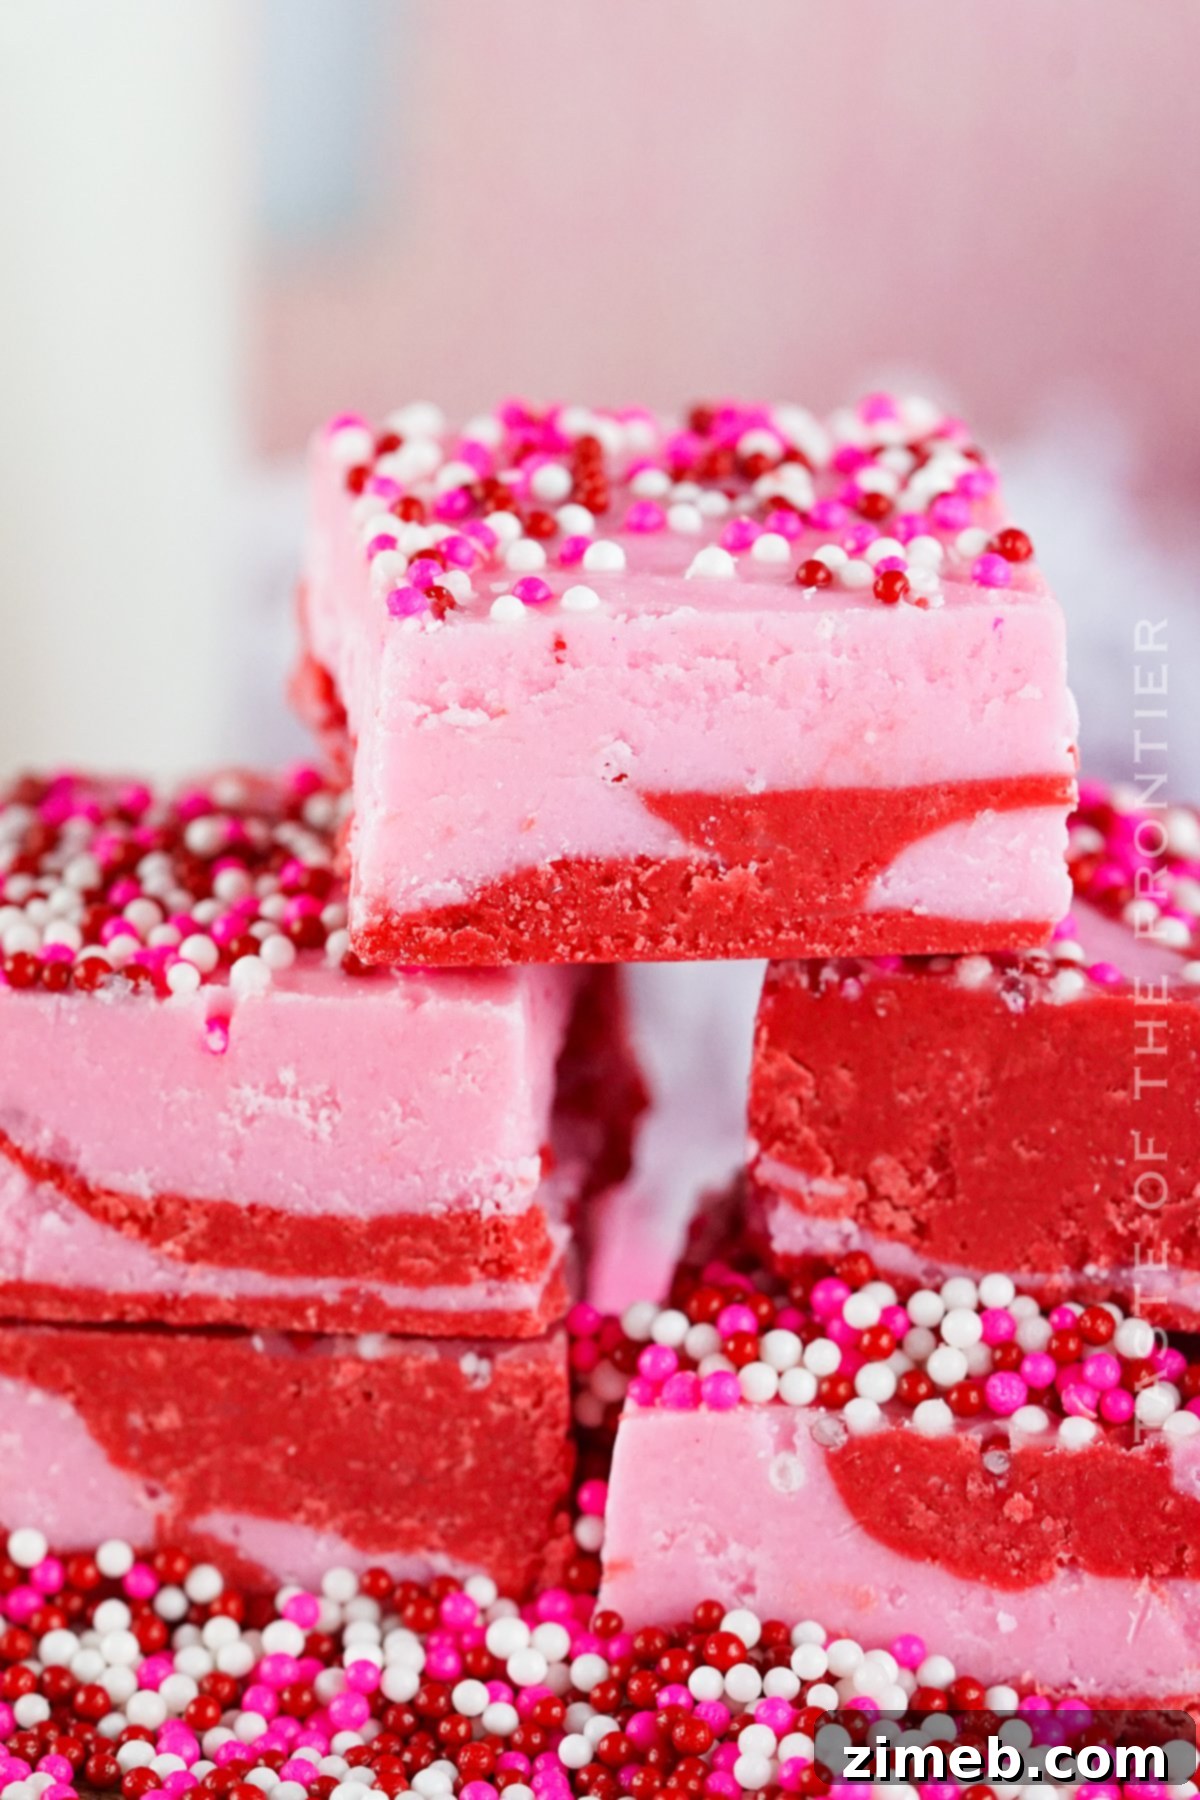
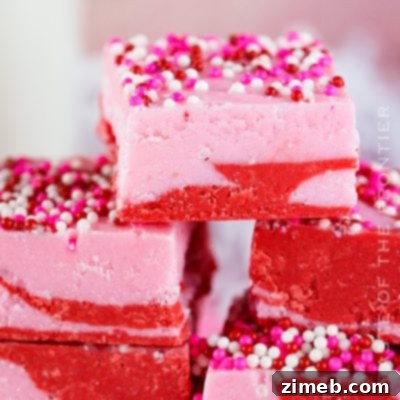
- Visually Stunning: The gorgeous swirl of red and pink, topped with festive sprinkles, makes this one of the prettiest fudge varieties you can create. It’s a feast for the eyes before it even touches the palate, guaranteed to draw compliments and impress everyone who sees it.
- Budget-Friendly: With just a handful of readily available ingredients, this recipe offers an affordable way to create a luxurious, homemade treat. You don’t need obscure or expensive items to achieve exceptional flavor and texture.
- No-Bake Perfection: Say goodbye to sticky candy thermometers and temperamental stovetop methods. This no-bake fudge simplifies the process dramatically, making it accessible to even the most novice bakers.
Common Questions About Making Strawberry Fudge
Even with simple recipes, a few questions often arise. Here are some answers to ensure your strawberry fudge turns out perfectly every time.
How can I enhance the flavor of store-bought frosting for fudge?
Store-bought buttercream frosting is a convenient base for this easy fudge. While it’s perfectly fine on its own, adding flavored extracts is a fantastic way to elevate its taste and customize your fudge. This recipe specifically calls for strawberry extract to amplify the fruity notes, but you can experiment with other flavors you enjoy. A touch of pure vanilla extract can deepen the overall sweetness, or almond extract could add an interesting twist. Remember, extracts are potent, so start with the recommended amount and adjust to your taste preferences. You could also try a tiny pinch of salt to balance the sweetness, or even a very small amount of lemon zest for a brighter strawberry flavor profile.
Should I whip the frosting before using it for this fudge recipe?
While whipping frosting is an excellent technique for achieving a light, airy texture when decorating cakes or cupcakes, it’s generally not recommended for making fudge. Whipping introduces air into the frosting, which results in a fluffy consistency. For fudge, you want a dense, rich, and smooth texture that holds its shape when set. If you whip the frosting, your fudge might end up too light and airy, lacking that signature fudgy bite. The goal is to keep the frosting as dense as possible so it contributes to the firm, yet melt-in-your-mouth, quality of the finished fudge.
Making Strawberry Fudge Ahead of Time
One of the many benefits of this homemade fudge is its excellent shelf life, making it an ideal candidate for preparing in advance. Whether you’re planning for a holiday party, a special event, or simply want to have a delightful treat on hand, you can make the entire recipe well ahead of time. This saves you precious time and effort when the big day arrives, allowing you to focus on other preparations or simply relax and enjoy.
Storage Tips for Freshness
Proper storage is key to keeping your strawberry fudge fresh and delicious for as long as possible. Unlike some traditional fudge recipes that can be stored at room temperature, this frosting-based fudge requires refrigeration or freezing due to its ingredients.
- Refrigerator: To store in the fridge, first ensure the fudge has fully set. Then, wrap the entire block or individual pieces tightly in plastic wrap. For an extra layer of protection against odors and dryness, place the wrapped fudge in an airtight container. Stored this way, your strawberry fudge will remain fresh and delightful for up to 2 weeks.
- Freezing: For longer-term storage, freezing is an excellent option. Wrap the fudge tightly in aluminum foil first, then place it in a freezer-safe container or a heavy-duty freezer bag. This double-layer protection helps prevent freezer burn. You can enjoy frozen fudge for up to 3 months. When ready to serve, simply thaw it in the refrigerator overnight or at room temperature for a few hours.
Expert Tips for the Best Strawberry Fudge
While this recipe is significantly simpler than traditional cooked fudge, a few expert tips will ensure you achieve the absolute best results every single time. Paying attention to these small details can make a big difference in the texture and appearance of your finished strawberry fudge.
- Precision in Chocolate Measurements: Fudge relies on a delicate balance between its main components. Using too many or too few candy melts can drastically affect the final consistency. If you use too much chocolate, the fudge might be too hard or crumbly; too little, and it may not set properly. For optimal results, stick as closely as possible to the recommended measurements.
- Extract Placement is Key: Always add the strawberry extract to the warmed frosting, not directly to the melted candy melts. Adding extract (which is alcohol-based) directly to melted chocolate can cause the chocolate to seize, turning it into a thick, unworkable paste. Mixing it into the frosting first ensures a smooth, well-incorporated flavor without ruining your chocolate.
- Melt Candy Melts Gradually: Resist the temptation to microwave your candy melts all at once. Overheating chocolate can cause it to burn or seize, resulting in a grainy texture. Instead, heat the candy melts in short, 15-30 second intervals, stirring thoroughly after each interval. Continue this process until the melts are smooth and fully melted. This gradual approach ensures an even, silky consistency.
- Start with Room-Temperature Frosting: For the quickest and smoothest melting, ensure your store-bought buttercream frosting is at room temperature before microwaving. Cold frosting will take longer to melt and may result in an unevenly heated mixture, potentially affecting the final fudge texture.
Ingredients for Your Delicious Strawberry Fudge
Gathering the ingredients for this delightful fudge is incredibly simple, requiring just a few items easily found in the baking aisle of your local grocery store. No exotic items or specialty shops needed!
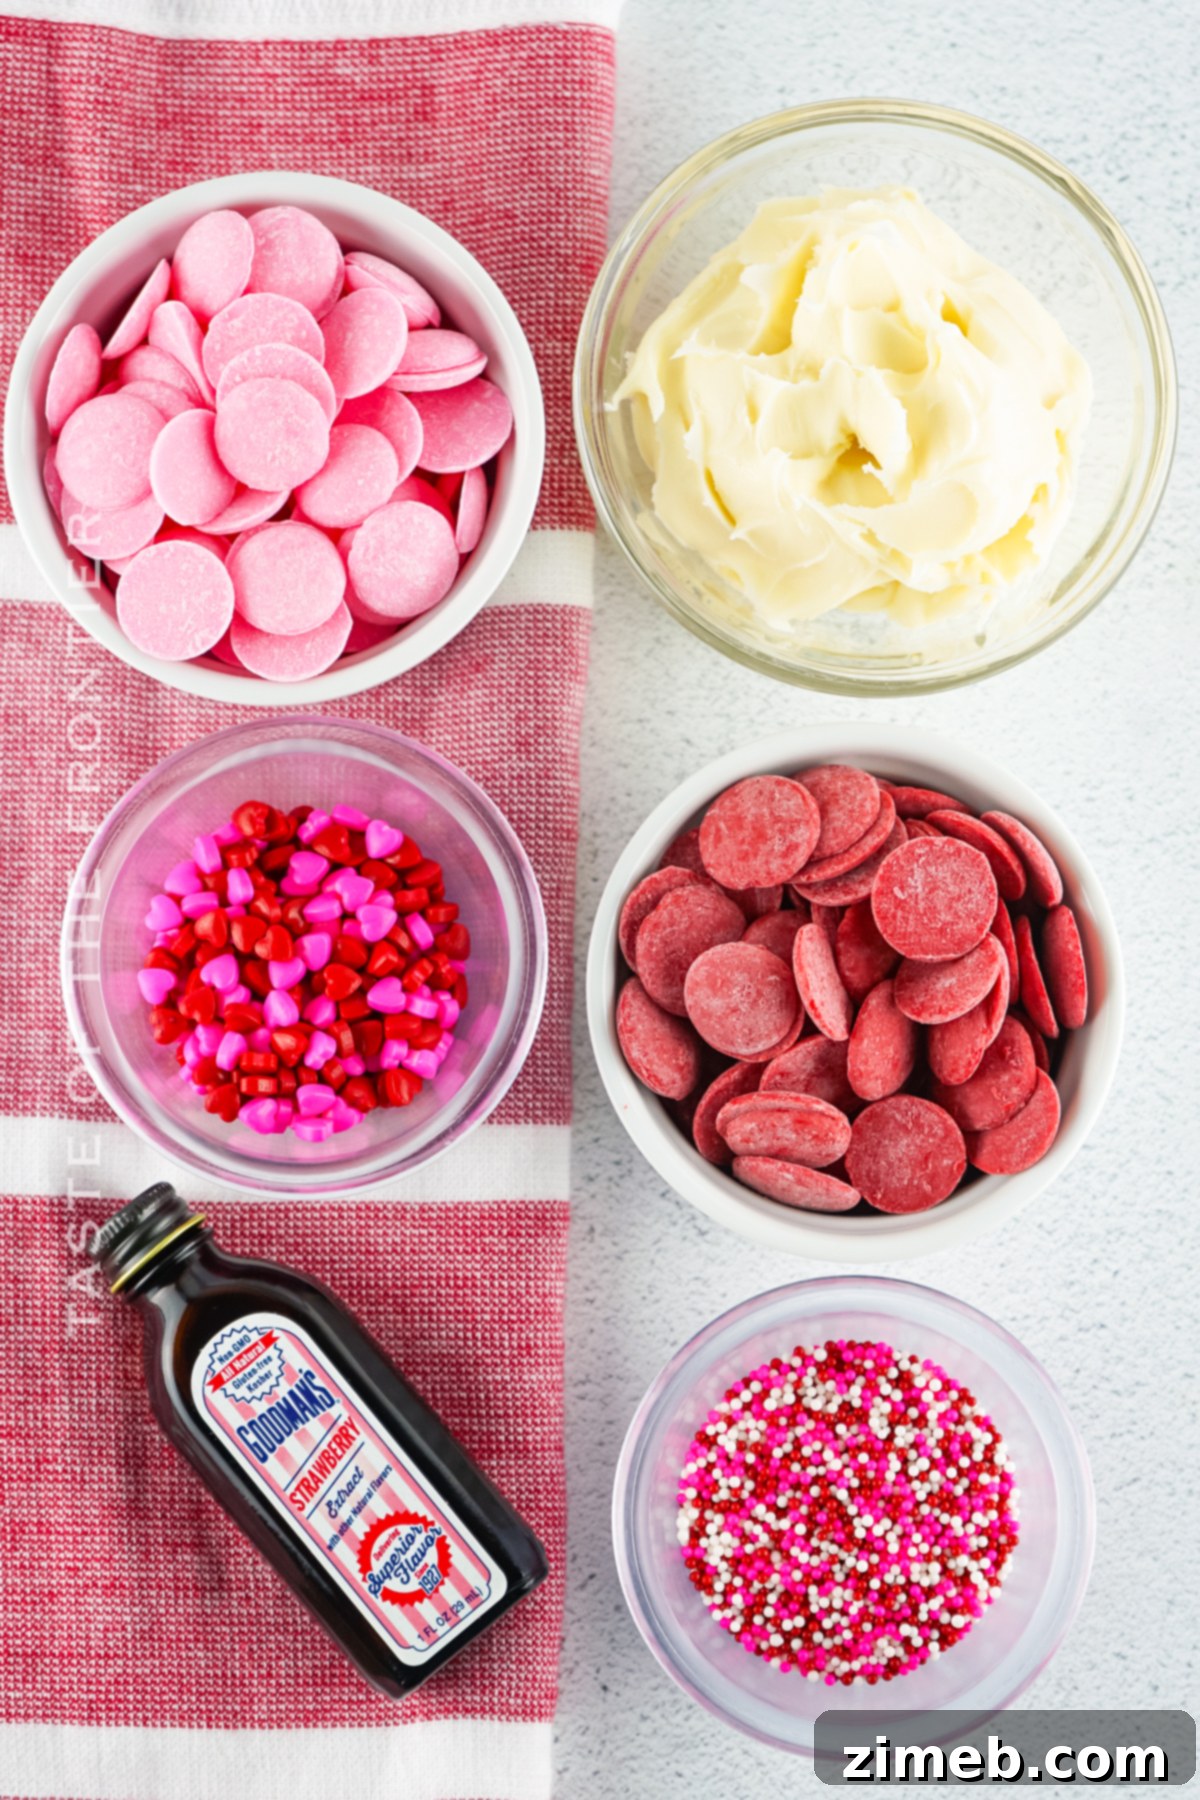
- Buttercream Frosting: One 16-ounce can of premade buttercream frosting is the secret shortcut to this easy recipe. Its creamy base is perfect for creating that classic fudgy texture.
- Red Candy Melts: These add a beautiful vibrant color and a sweet, vanilla-like flavor that pairs perfectly with strawberry.
- Strawberry-Flavored Pink Candy Melts: Not only do these contribute to the lovely pink swirl, but they also boost the overall strawberry essence, creating a truly fruity fudge.
- Strawberry Extract: This concentrated flavor punch ensures your fudge has an unmistakable, delightful strawberry taste.
- Valentine’s Mix Nonpareils Sprinkles (optional): These tiny, colorful balls add a playful crunch and festive visual appeal, especially fitting for Valentine’s Day.
- Pink and Red Heart Sprinkles (optional): For an extra touch of charm and love, heart-shaped sprinkles are a wonderful decorative addition.
Essential Kitchen Supplies You’ll Need
You won’t need a pantry full of specialized gadgets for this recipe. Just a few basic kitchen tools will suffice to create this sweet treat with minimal fuss.
- 8×8 Square Pan: This size pan is perfect for achieving the ideal fudge thickness.
- Parchment Paper or Wax Paper: Essential for easy removal of the fudge from the pan and minimal cleanup.
- Small Microwave-Safe Bowls (2): For melting the individual candy melt colors.
- Large Microwave-Safe Bowl (1): For melting the main portion of frosting.
How to Make Easy Strawberry Fudge: Step-by-Step Guide
Get ready to whip up this delicious strawberry fudge! The process is incredibly straightforward, promising a rewarding and tasty outcome.
- Prepare Your Pan: Begin by lining an 8×8 square pan with parchment paper or wax paper, ensuring there’s enough overhang on the sides to easily lift the fudge out once it’s set. Set this prepared pan aside.
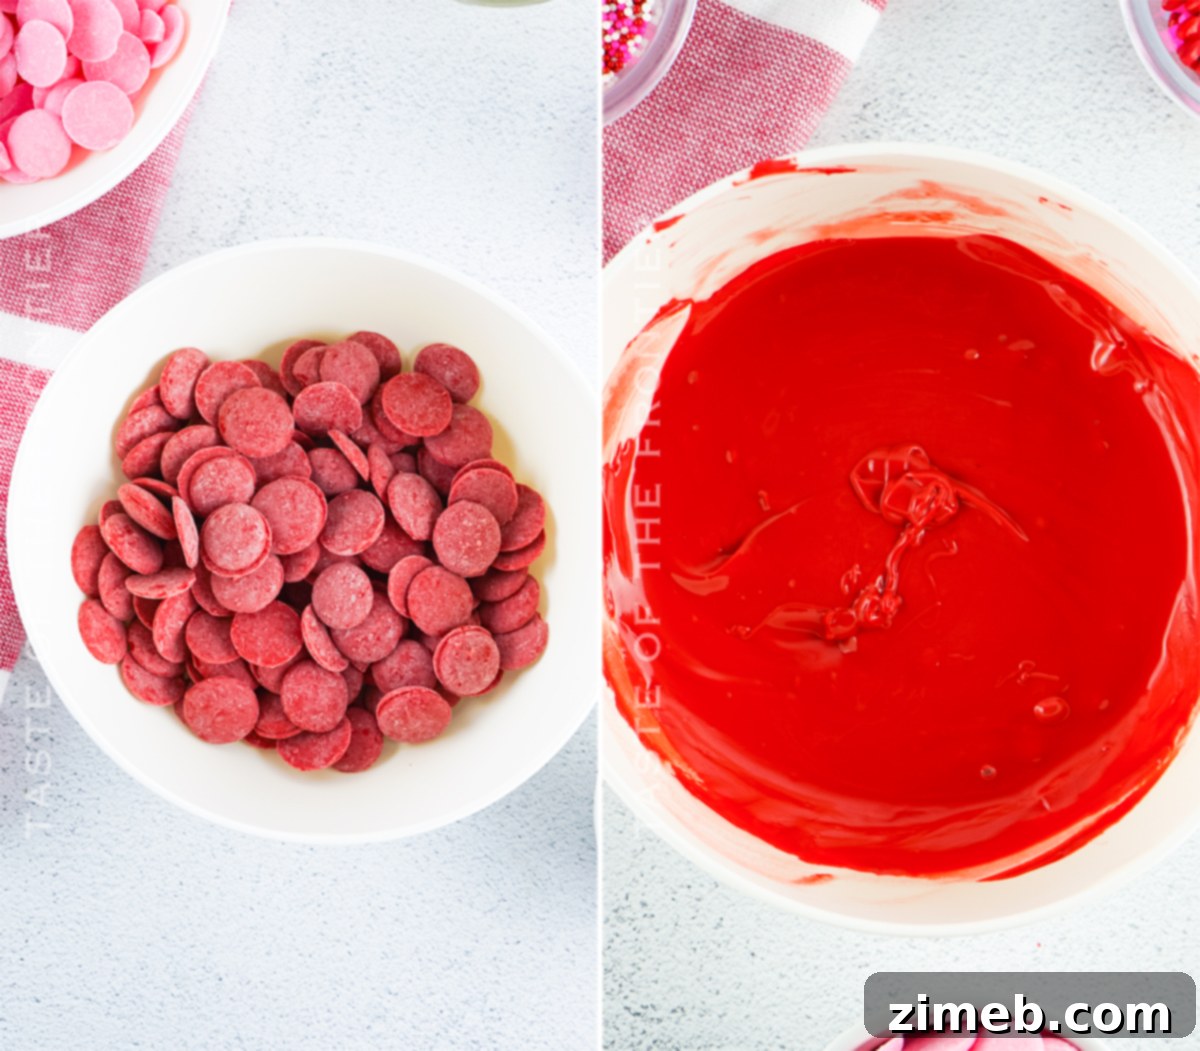
- Melt Red Candy Melts: Pour the red candy melts into one of your small microwave-safe bowls. Heat them in the microwave on 50% power for 15-second intervals, stirring vigorously after each interval. Continue this cautious heating process until the candy melts are completely smooth and free of lumps. This usually takes about 2-3 minutes total.
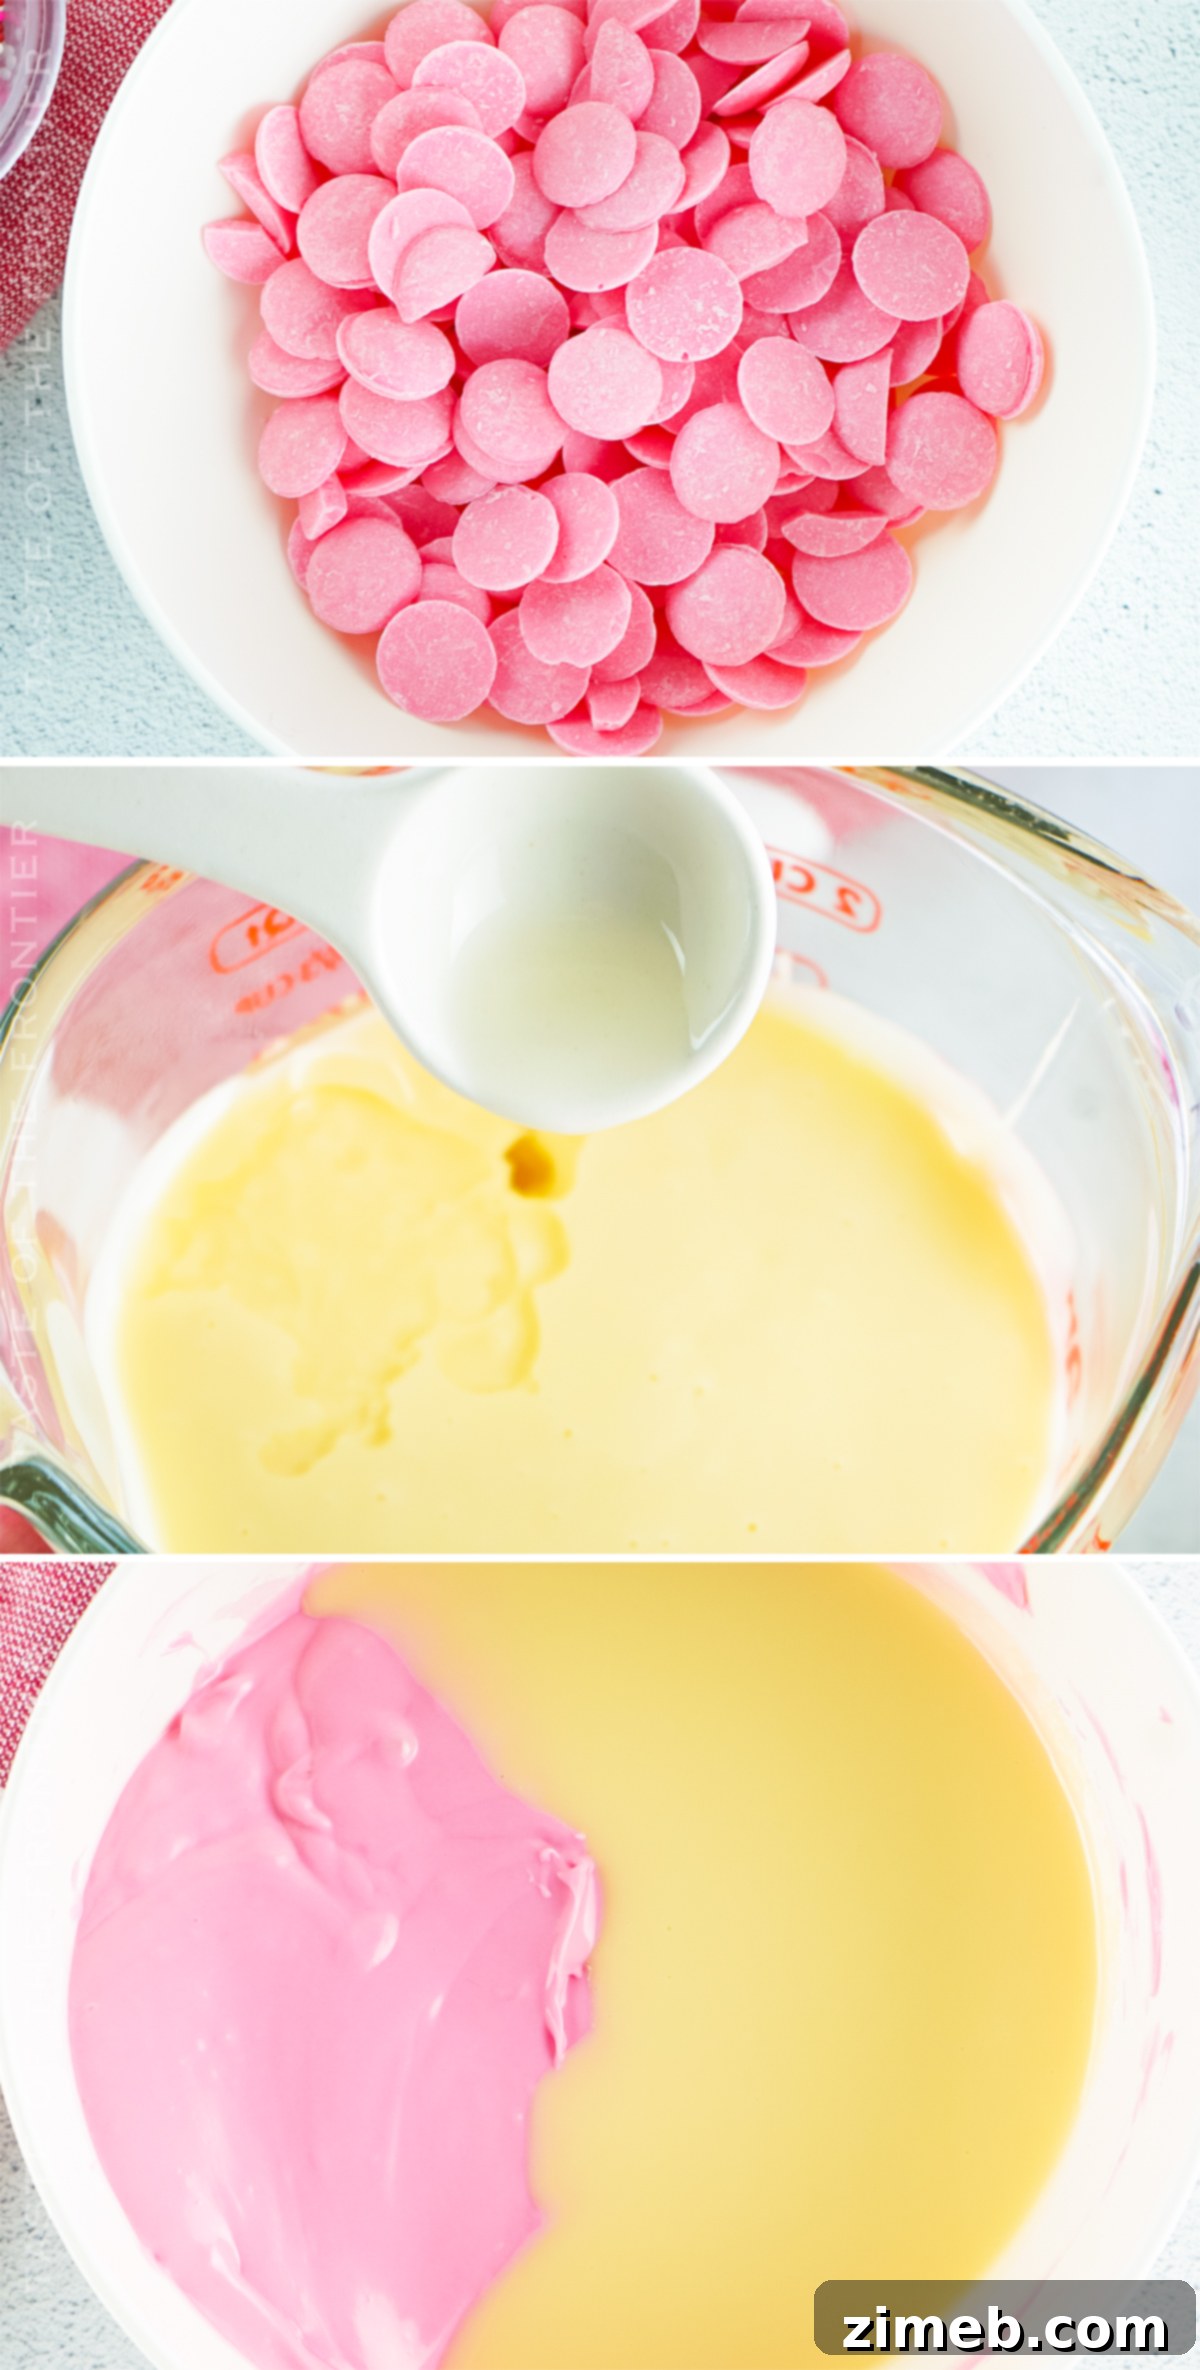
- Melt Pink Candy Melts: Repeat the exact same melting process for the strawberry-flavored pink candy melts in a separate small microwave-safe bowl. It’s crucial to keep the colors separated for the beautiful swirl effect.
- Prepare Frosting: Remove the lid and any foil film from your buttercream frosting container.
- Reserve Frosting (Optional Decoration): If you plan to use heart sprinkles or other decorative elements that need to be “glued” on later, scoop out about ½ teaspoon of the frosting and set it aside in a tiny bowl. This will be used after the fudge has set.
- Melt Remaining Frosting: Place the container with the remaining frosting (without the lid) back into the microwave. Heat it for 45 seconds to 1 minute, or until the frosting is fully melted and has a smooth, pourable consistency.
- Flavor the Frosting: Add the strawberry extract to the melted frosting and stir it thoroughly until the extract is fully incorporated.
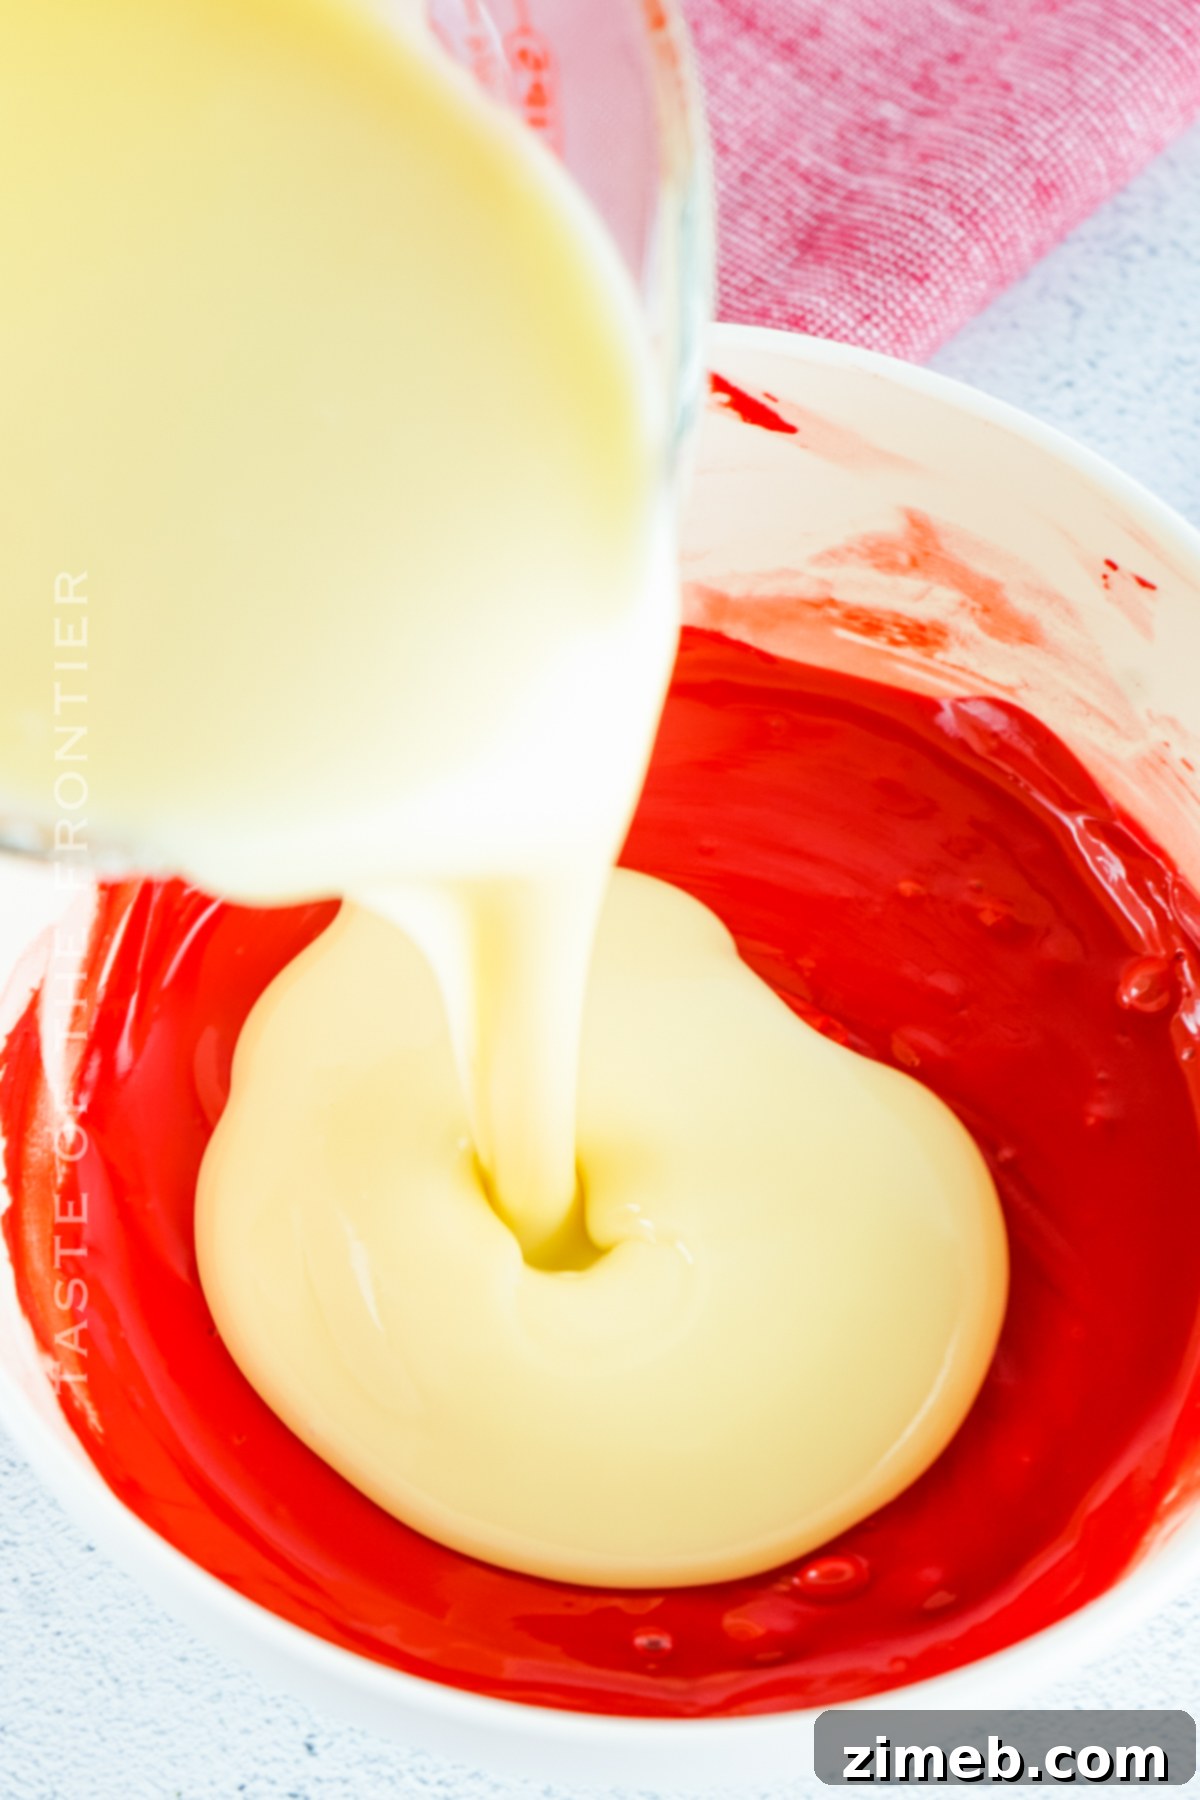
- Combine Colors: Carefully pour half of the flavored, melted frosting mixture into the bowl containing the melted red candy. Pour the remaining half of the frosting into the bowl with the melted pink candy.
- Mix Vigorously: Using a spoon or spatula, vigorously stir the red candy-frosting mixture until it is completely smooth, well combined, and uniform in color. Repeat this vigorous stirring process with the pink candy-frosting mixture in its bowl.
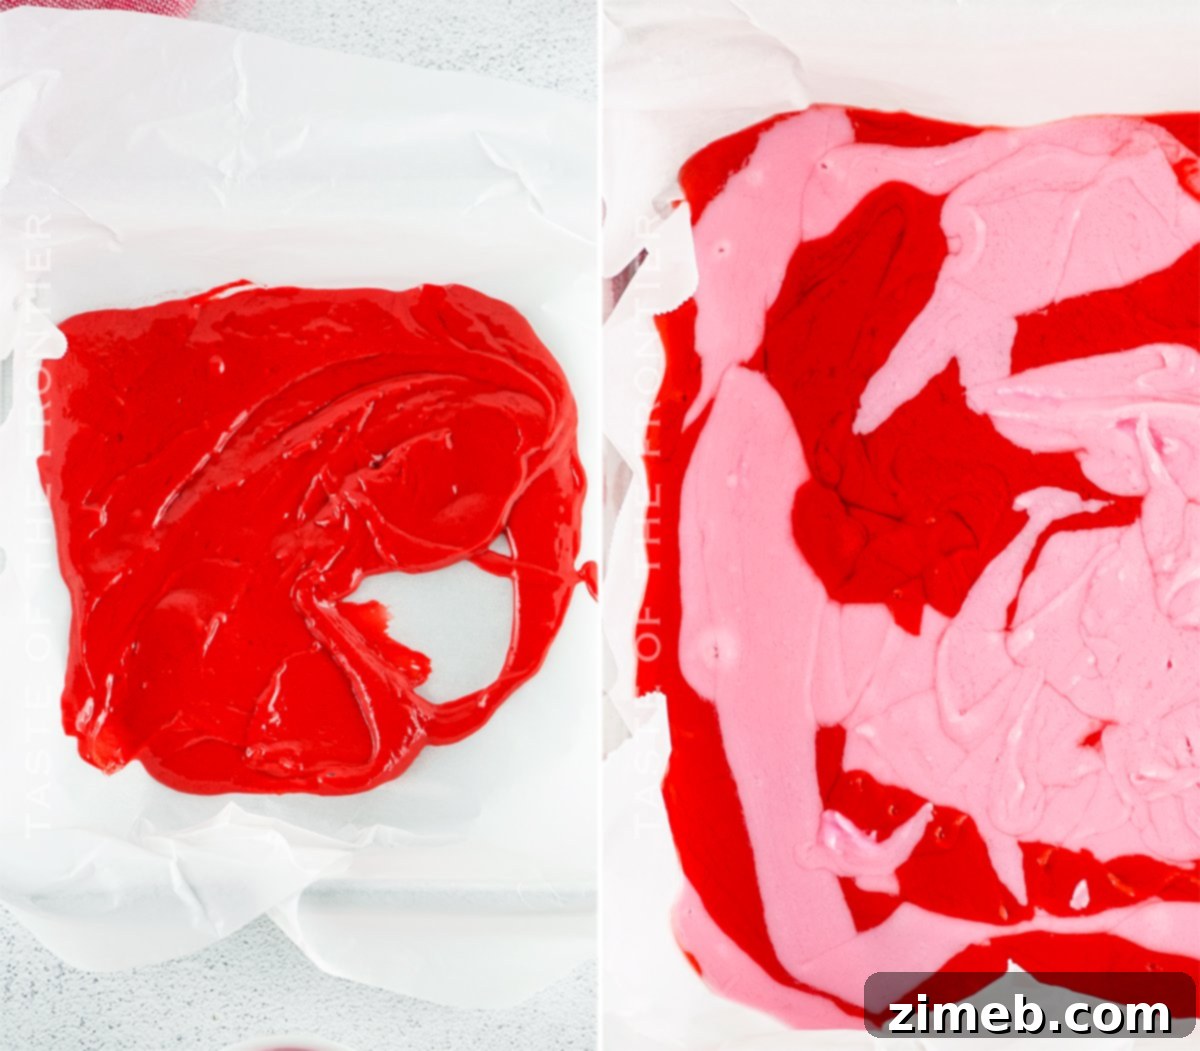
- Create the Swirl: Begin to randomly pour spoonfuls or streams of each colored fudge mixture into your prepared 8×8 pan, alternating between red and pink. As you pour, occasionally tap the pan gently on your countertop. This helps to release any trapped air bubbles and allows the mixtures to naturally even out and create beautiful swirls.
- Add Sprinkles: Once both colors have been poured into the pan and lightly swirled, immediately sprinkle the top of the fudge with your chosen Valentine’s-themed nonpareils. This is best done while the fudge is still soft so the sprinkles adhere well.
- Chill to Set: Place the pan of fudge into the refrigerator and allow it to chill for at least 2 hours, or until it has solidified completely and is firm to the touch.
- Decorate (Optional): Once the fudge is fully set and firm, lift it out of the pan using the parchment paper overhang. Cut it into squares. If desired, use the ½ teaspoon of reserved frosting to dab a tiny amount onto the back of each heart sprinkle, then gently press them into the center of each fudge square for an extra festive touch.
What to Serve With Your Homemade Strawberry Fudge
This vibrant strawberry fudge is absolutely delicious on its own, offering a delightful burst of sweet fruitiness with every bite. However, if you’re looking to elevate the experience or create a more elaborate dessert spread, here are some wonderful pairings:
- Frozen Treats: For a refreshing contrast, serve a piece of strawberry fudge alongside a scoop of classic vanilla ice cream, creamy gelato, or a tangy sorbet. The coolness and smooth texture will perfectly complement the dense fudge.
- Coffee Creations: Dessert and coffee are a match made in heaven. Pair your fudge with a freshly brewed cup of hot coffee, a creamy latte, or a bold espresso. For an extra decadent adult treat, consider adding a splash of Baileys Irish Cream or Kahlua to your coffee.
- Aromatic Teas: If you prefer tea, this fruity fudge pairs beautifully with various blends. Herbal varieties like peppermint or chamomile can offer a soothing balance, while a robust black tea provides a nice counterpoint to the sweetness.
- Cocktails or Wine: For festive occasions or a sophisticated evening, enjoy your strawberry fudge with a sparkling wine or champagne. Its effervescence cuts through the richness of the fudge. Alternatively, whip up a fun, fruity cocktail like a Cosmopolitan or a strawberry daiquiri to amplify the berry theme.
- Fresh Strawberries: Embrace the strawberry flavor by serving the fudge alongside a bowl of fresh, ripe strawberries. You can also garnish individual pieces of fudge with thinly sliced fresh strawberries or a sprinkle of freeze-dried strawberry pieces for added texture and visual appeal.
Variations and Creative Add-ins for Your Signature Fudge
This strawberry fudge recipe is wonderfully adaptable, allowing you to easily customize it and create your own signature version. Don’t be afraid to get creative and experiment with different flavors and textures!
- Flavorful Extracts: While strawberry extract is central to this recipe, you can experiment by swapping out some or all of it for different flavors. Consider raspberry, cherry, or even a hint of almond for a unique twist. You could also try a touch of lemon extract to brighten the strawberry flavor.
- Exciting Toppings: Beyond the nonpareils and heart sprinkles, the possibilities for toppings are endless!
- Chocolate Chips: Sprinkle with white chocolate chips, dark chocolate chips, or mini chocolate chips while the fudge is still soft.
- Nuts: Chopped pecans, walnuts, or almonds can add a delightful crunch.
- Marshmallow Swirl: For an extra layer of sweetness and a soft texture, gently spread marshmallow fluff over the top of the fudge before chilling, then swirl with a knife.
- Crunchy Crust: Create a delicious crunchy topping by sprinkling crushed vanilla wafers, graham cracker crumbs, or even crushed freeze-dried strawberries over the top.
- Coconut Flakes: Toasted coconut flakes can add a lovely tropical note and texture.
- Fun Shapes: Instead of traditional squares or rectangles, unleash your creativity! Once the fudge is fully set, use a cookie cutter to cut out festive shapes like hearts, stars, or even small circles for bite-sized treats.
- Frosting Flavors: While classic buttercream is recommended for its neutral base and creamy texture, you could opt for a pre-flavored canned frosting. A strawberry-flavored frosting would intensify the berry notes, or you could try a cream cheese frosting for a slightly tangy dimension. Just be mindful of how the flavored frosting will interact with the candy melts.
More Delicious Fudge Recipes to Explore
If you’ve fallen in love with making easy fudge, you’re in luck! There’s a whole world of simple fudge recipes waiting for you. Here are some other fantastic variations to try:
- Easy Microwave Reese’s Fudge
- Lemon Oreo Fudge
- Easy Snowflake Fudge
- Frosted Sugar Cookie Fudge
- Easy Holiday Fudge
- Mint Milano Fudge
- Rocky Road Fudge
- Holiday Oreo Fudge
- White Chocolate Holiday Fudge
- Sea Salt Fudge
- Keto Fudge
- Red Velvet Fudge
- Christmas Cookie Fudge
If you enjoyed making this easy Strawberry Fudge, you’ll definitely love exploring these other delicious fudge recipes too. Click each link to discover more simple, printable recipes!
Keto Fudge is a delicious holiday treat made with cream cheese. It is a great low-carb alternative to traditional holiday fudge recipes. Tastes so good, you’ll never know it’s sugar-free.
Check out this recipe
Easy Snowflake Fudge is a super easy winter fudge recipe made with just a handful of ingredients & 2 minutes in the microwave. This is sure to bring BIG smiles!
Check out this recipe
Easy No-Cook Fudge is a quick holiday recipe made with just 5 simple ingredients (+ any mix-ins) whipped together and chilled before serving.
Check out this recipe
Lemon Oreo Fudge is an easy white chocolate fudge recipe for the serious lemon lover. Packed full of lemon Oreo cookies, this is a favorite no-bake dessert.
Check out this recipe
Easy Microwave Reese’s Fudge is a simple fudge recipe packed with peanut butter cups & made with only 4 ingredients & 2 minutes in the microwave.
Check out this recipe
Other Delicious Dessert Ideas
If you’re still in the mood for something sweet after indulging in strawberry fudge, here are a few other delectable dessert recipes to try:
- Red Velvet Cheesecake Brownies
- Fresh Strawberry Cupcakes
- Easy Meringue Cookies
- Valentine Red Velvet Brownies
If you love this recipe for Homemade Strawberry Fudge as much as I do, please consider leaving a five-star review and help me share this delightful recipe with others on Facebook and Pinterest!
CONNECT WITH YUMMI HAUS!
Be sure to follow me on social media, so you never miss a post!
Substack, Facebook, Pinterest, Instagram, Email Subscription
Strawberry Fudge
Course: Dessert
Servings: 16
This easy strawberry fudge recipe brings together sweet buttercream, strawberry extract, and colored candy melts to create a beautiful red and pink strawberry fudge. It’s perfect for Valentine’s day but I enjoy it any time of year!
Pin Recipe
Save Recipe
Prep Time: 15 mins
Cook Time: 7 mins
Chill Time: 2 hrs
Total Time: 2 hrs 22 mins
Ingredients
- 16 ounces buttercream frosting (premade from the store is easiest)
- ¾ cup red candy melts
- ¾ cup strawberry flavored pink candy melts
- 1 teaspoon strawberry extract
- Valentine’s mix nonpareils sprinkles (optional)
- Pink and red heart sprinkles (optional)
Instructions
- Line an 8×8 square pan with parchment paper, making sure to leave some overhang. Set aside.
- Place the red candy melts in a microwave-safe bowl and heat on 50% power, in the microwave, for 2-3 minutes or until smooth when stirred. Stop every 15-30 seconds to stir during the melting process to ensure the candy melts don’t overcook.
- Follow step one for the pink candy melts, keeping the two colors separated in different bowls.
- Remove the lid and foil film from the frosting container.
- Set aside ½ a teaspoon of the frosting before heating, if you will be using the heart or any other type of sprinkles.
- Heat the remaining frosting in the can in the microwave for 45 seconds to 1 minute, or until fully melted and smooth.
- Add the extract to the frosting and stir well.
- Pour half of the frosting into the bowl with the melted red candy melts and the other half into the bowl with the melted pink candy melts.
- Stir each color vigorously until fully mixed.
- Alternate pouring the two colors in random spots into the prepared pan, pausing to tap the pan in between so it evens out and removes bubbles.
- Once all of the chocolate mixtures have been poured into the pan and evened out, sprinkle the top of the fudge with as many Valentine-themed nonpareils as you like.
- Place the fudge in the fridge to chill for 2 hours or until it has solidified.
- If desired, use the frosting that had been set aside and place a dab on the back of a heart sprinkle, and press it into the middle of each fudge square you cut later additional decoration.
Notes
- If the fudge turns out hard or seems to fall apart when you’re cutting it, this means too much chocolate was used. You’ll need to reduce the chocolate the next time around. It will still taste just as good, it just won’t be as soft or pretty.
- If the fudge won’t set up well, it means not enough chocolate was used. You either need to increase the chocolate used or decrease the amount of frosting the next time around.
- The chocolate will slightly seize when the frosting is added to it. This is normal, no need to worry. You just need the mixture to be pourable. Just keep stirring and you’ll be good to go.
- Do not add the extract directly to the chocolate or it will ruin it. The extract seizes the chocolate to a point that it’s not usable.
Equipment
- 8×8 square pan
- Parchment Paper
Nutrition
Serving: 1g | Calories: 172kcal | Carbohydrates: 25g | Protein: 0.1g | Fat: 7g | Sodium: 34mg | Sugar: 24g
Nutritional information for the recipe is provided as a courtesy and is approximate. Please double-check with your own dietary calculator for the best accuracy. We at Yummi Haus cannot guarantee the accuracy of the nutritional information given for any recipe on this site.
Love this recipe?
Follow @KleinworthCo for even more tasty recipes!