
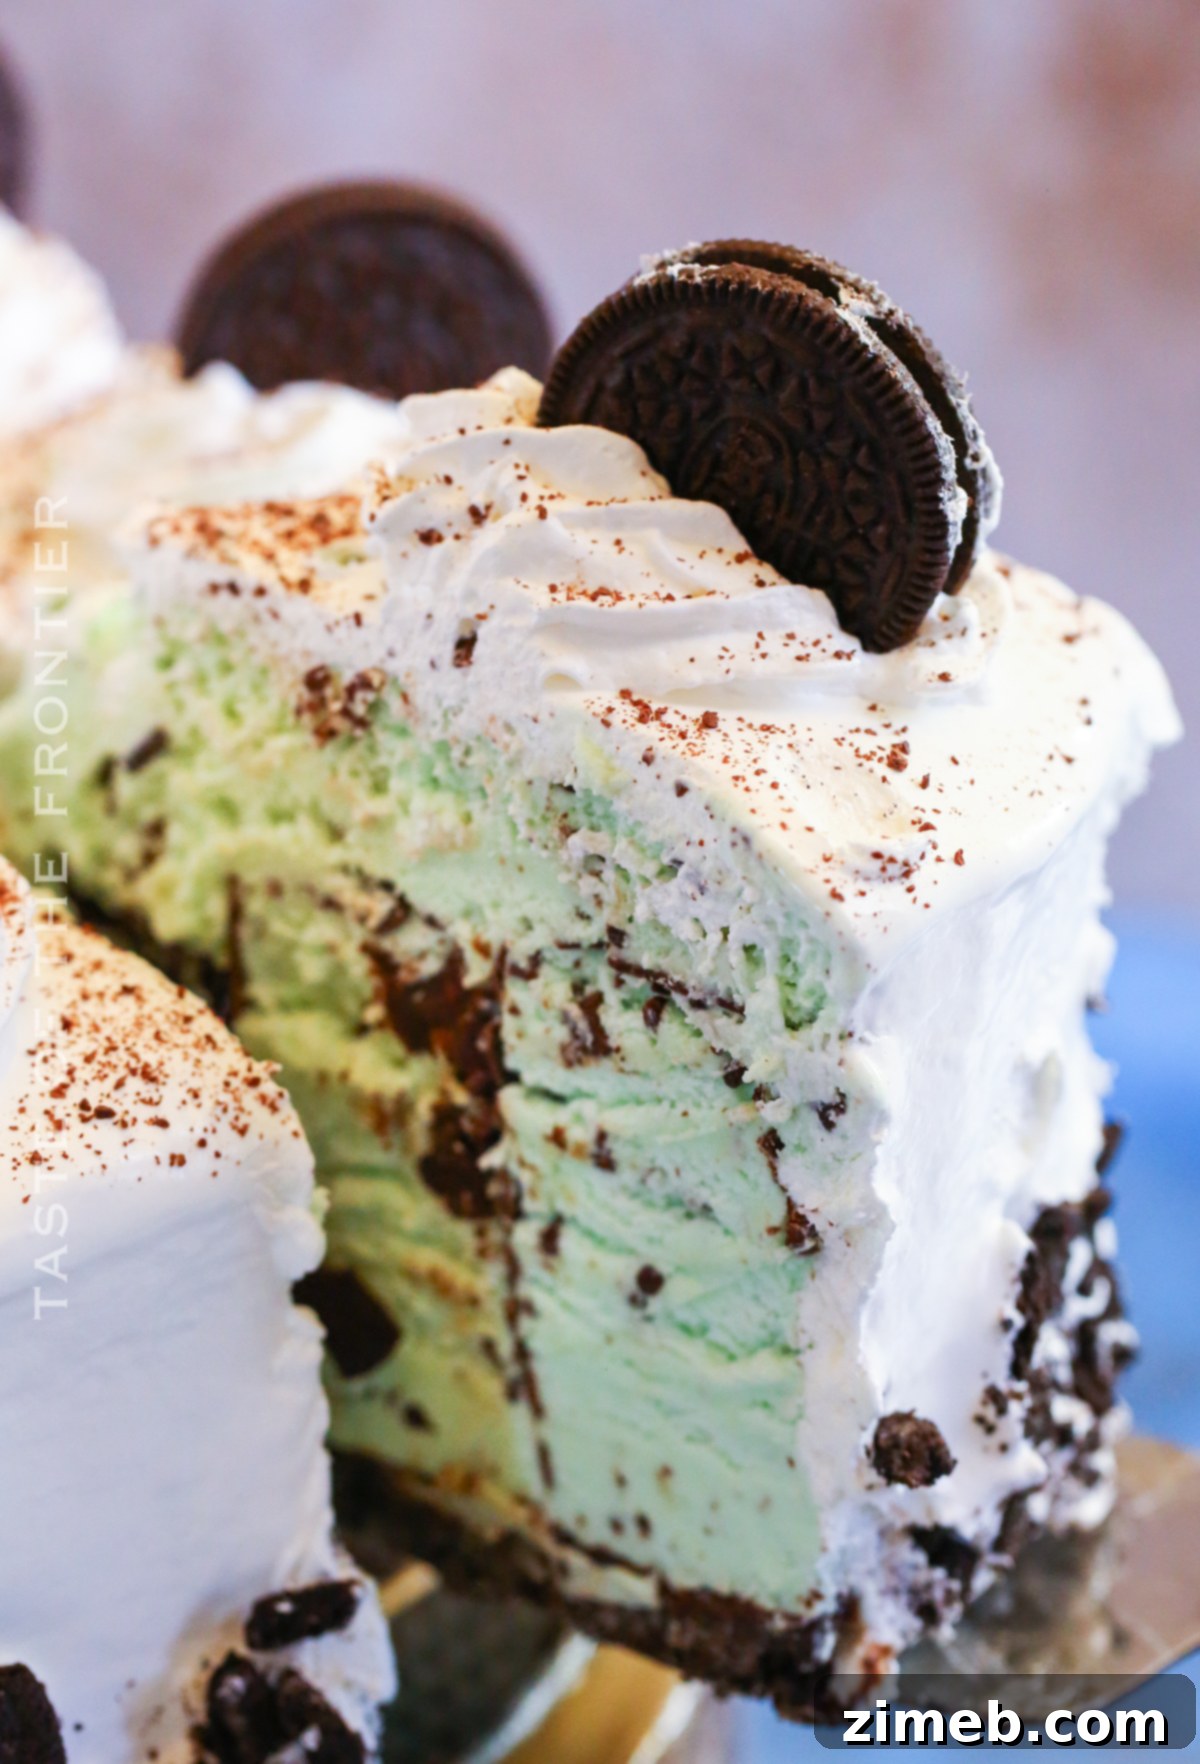
Welcome to the ultimate guide for crafting a show-stopping dessert that promises to be the highlight of any gathering: the **Mint Chocolate Chip Ice Cream Cake**. Forget traditional baked cakes; this frozen masterpiece combines creamy mint chocolate chip ice cream, crunchy Oreo cookies, rich hot fudge, and decadent chocolate-covered ice cream bars into an unforgettable experience. Perfect for birthdays, holidays, or simply an extraordinary treat, this homemade ice cream cake is designed to impress with its layers of flavor and captivating presentation.
Every year, the challenge of creating a truly unique and “over the top” birthday cake falls upon me. This year, my son’s request for an ice cream cake sparked an exciting culinary adventure, especially since mint chocolate chip is his absolute favorite flavor. I envisioned a towering, indulgent creation that would stand out from anything store-bought, a testament to the joy of homemade celebrations.
My search for inspiration led me through old family recipe books and eventually to a clever online concept featuring ice cream sandwiches. While that idea provided a foundation, I knew I wanted to elevate it. My vision for this **mint chocolate chip ice cream cake** involved a bolder mint flavor, an abundance of chocolate, and a significantly grander scale. The result is a cake that is truly magnificent, perfectly suited for an epic celebration, and an absolute triumph of flavor and texture.
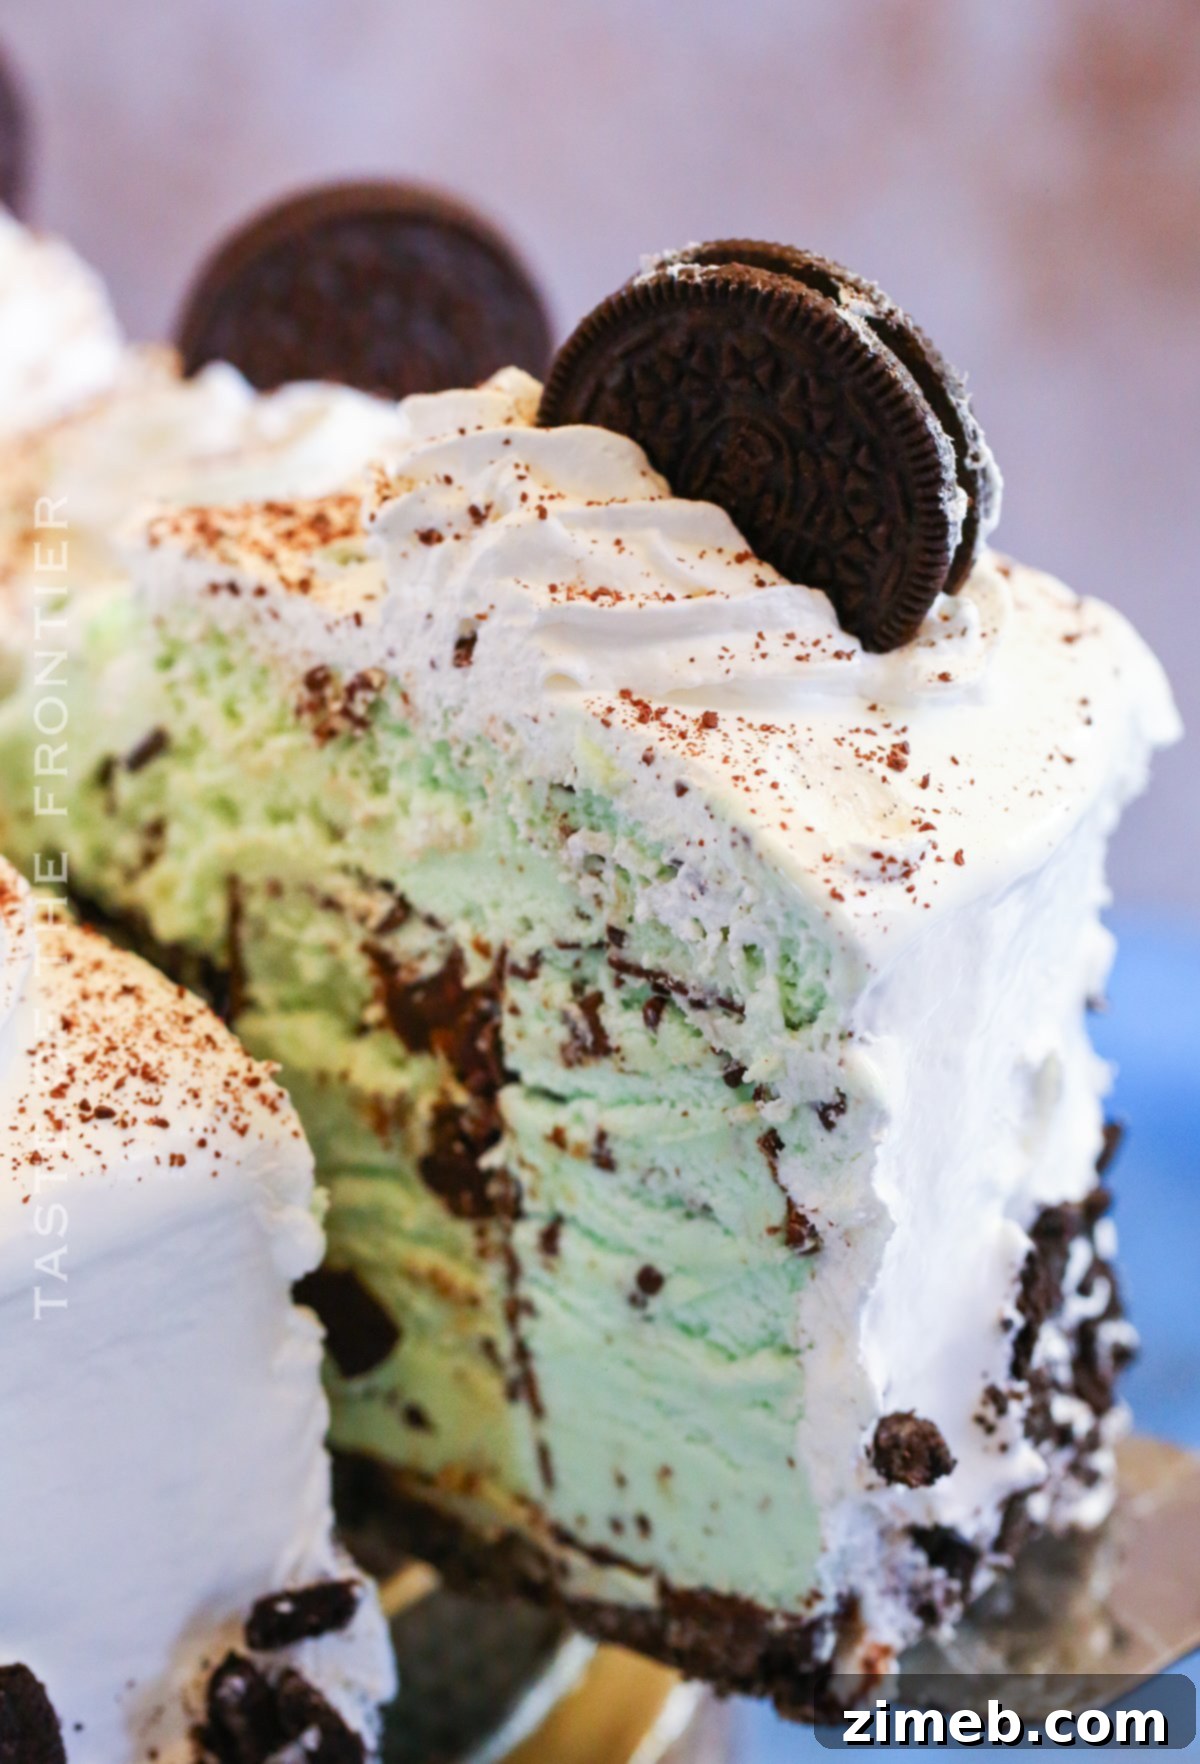
This recipe transforms simple ingredients into an extraordinary dessert. The combination of the cool, refreshing mint ice cream with the rich chocolate elements and the satisfying crunch of Oreos creates a symphony for the taste buds. It’s a bold statement, both in flavor and appearance, making it the ideal centerpiece for your next special occasion. The process, while requiring a few freezing intervals, is straightforward and immensely rewarding, allowing you to create a truly personalized and delicious treat that will be remembered long after the last slice is devoured.
Recently, we had a packed weekend culminating in a quick birthday celebration. Despite the hustle and bustle, this decadent **chocolate mint ice cream cake** was the perfect way to make the moment special and memorable. Its impressive stature and irresistible taste were exactly what was needed to mark the occasion with joy and indulgence.
Frequently Asked Questions About Homemade Ice Cream Cakes
When embarking on the journey of making a homemade ice cream cake, a few common questions often arise. Addressing these can help ensure your cake-making process is smooth and successful, leading to a truly perfect frozen dessert.
Can this recipe be adapted for different ice cream flavors?
Absolutely! While the mint chocolate chip flavor is a delightful choice, this recipe is incredibly versatile. You can easily substitute the mint chip ice cream with your favorite flavor. Imagine a classic vanilla, a decadent chocolate, a vibrant strawberry, or a playful cookies and cream ice cream cake! The key is to ensure your chosen ice cream bars or sandwiches fit comfortably in your springform pan. If you use different Klondike bars (like original chocolate or caramel) or another brand of ice cream sandwiches, simply trim them if necessary to achieve a snug fit around the perimeter of the pan. This flexibility allows for endless customization, ensuring your homemade ice cream cake always suits your personal preferences or the theme of your celebration.
Are there alternative cookie options for the crust?
Yes, the Oreo crust is a fantastic foundation, but you can certainly experiment with other cookie varieties. Chocolate wafers, graham crackers, or even shortbread cookies could make excellent crusts. If you opt for a cookie without a creamy filling like Oreos, you might need to adjust the binding agent slightly. The creamy filling in Oreos helps to hold the crumbs together, creating a sturdy crust. For other cookies, you may need to add a little extra melted butter (approximately 1-2 tablespoons) or a splash of milk to ensure the crumbs are sufficiently moist and bind together well, preventing the crust from crumbling when sliced.
Is homemade whipped cream suitable for decorating?
Homemade whipped cream can be used, but it’s crucial to stabilize it first. Regular whipped cream, whether homemade or from a can, tends to deflate and melt quickly, especially on a frozen cake. To ensure your whipped topping holds its shape beautifully and doesn’t weep, stabilize it with ingredients like gelatin, cornstarch, or cream of tartar. Stabilized whipped cream will give your **ice cream cake recipe** a professional finish that lasts, maintaining its fluffy texture and elegant appearance even after being on display.
Can this large ice cream cake be made smaller?
Absolutely! If you’re not hosting a large crowd or prefer a more modest dessert, this recipe is easily scalable. You can reduce the ingredient quantities proportionally and assemble the cake in a smaller springform pan, such as a 6-inch or 8-inch pan. Alternatively, if you make the full-sized cake, you can cut individual slices, wrap them tightly in plastic wrap, and freeze them. This way, you can enjoy perfectly portioned pieces of delicious **mint ice cream cake** over several months, making it a convenient treat for any time. Freezing individual slices also makes for an excellent make-ahead dessert strategy.
Is a springform pan essential for this recipe?
While a springform pan isn’t strictly necessary, it is highly recommended for ease of assembly and removal. Its removable sides make it incredibly simple to unmold the frozen cake without damaging the delicate layers. However, if you don’t own one, you can still make this delicious **mint chip ice cream cake**. Simply line a regular cake pan with two long strips of parchment paper, crossing them in the center and allowing enough overhang on the sides to create “handles.” Once the cake is fully frozen, you can use these parchment paper handles to gently lift the cake out of the pan, making it accessible for decorating and serving.
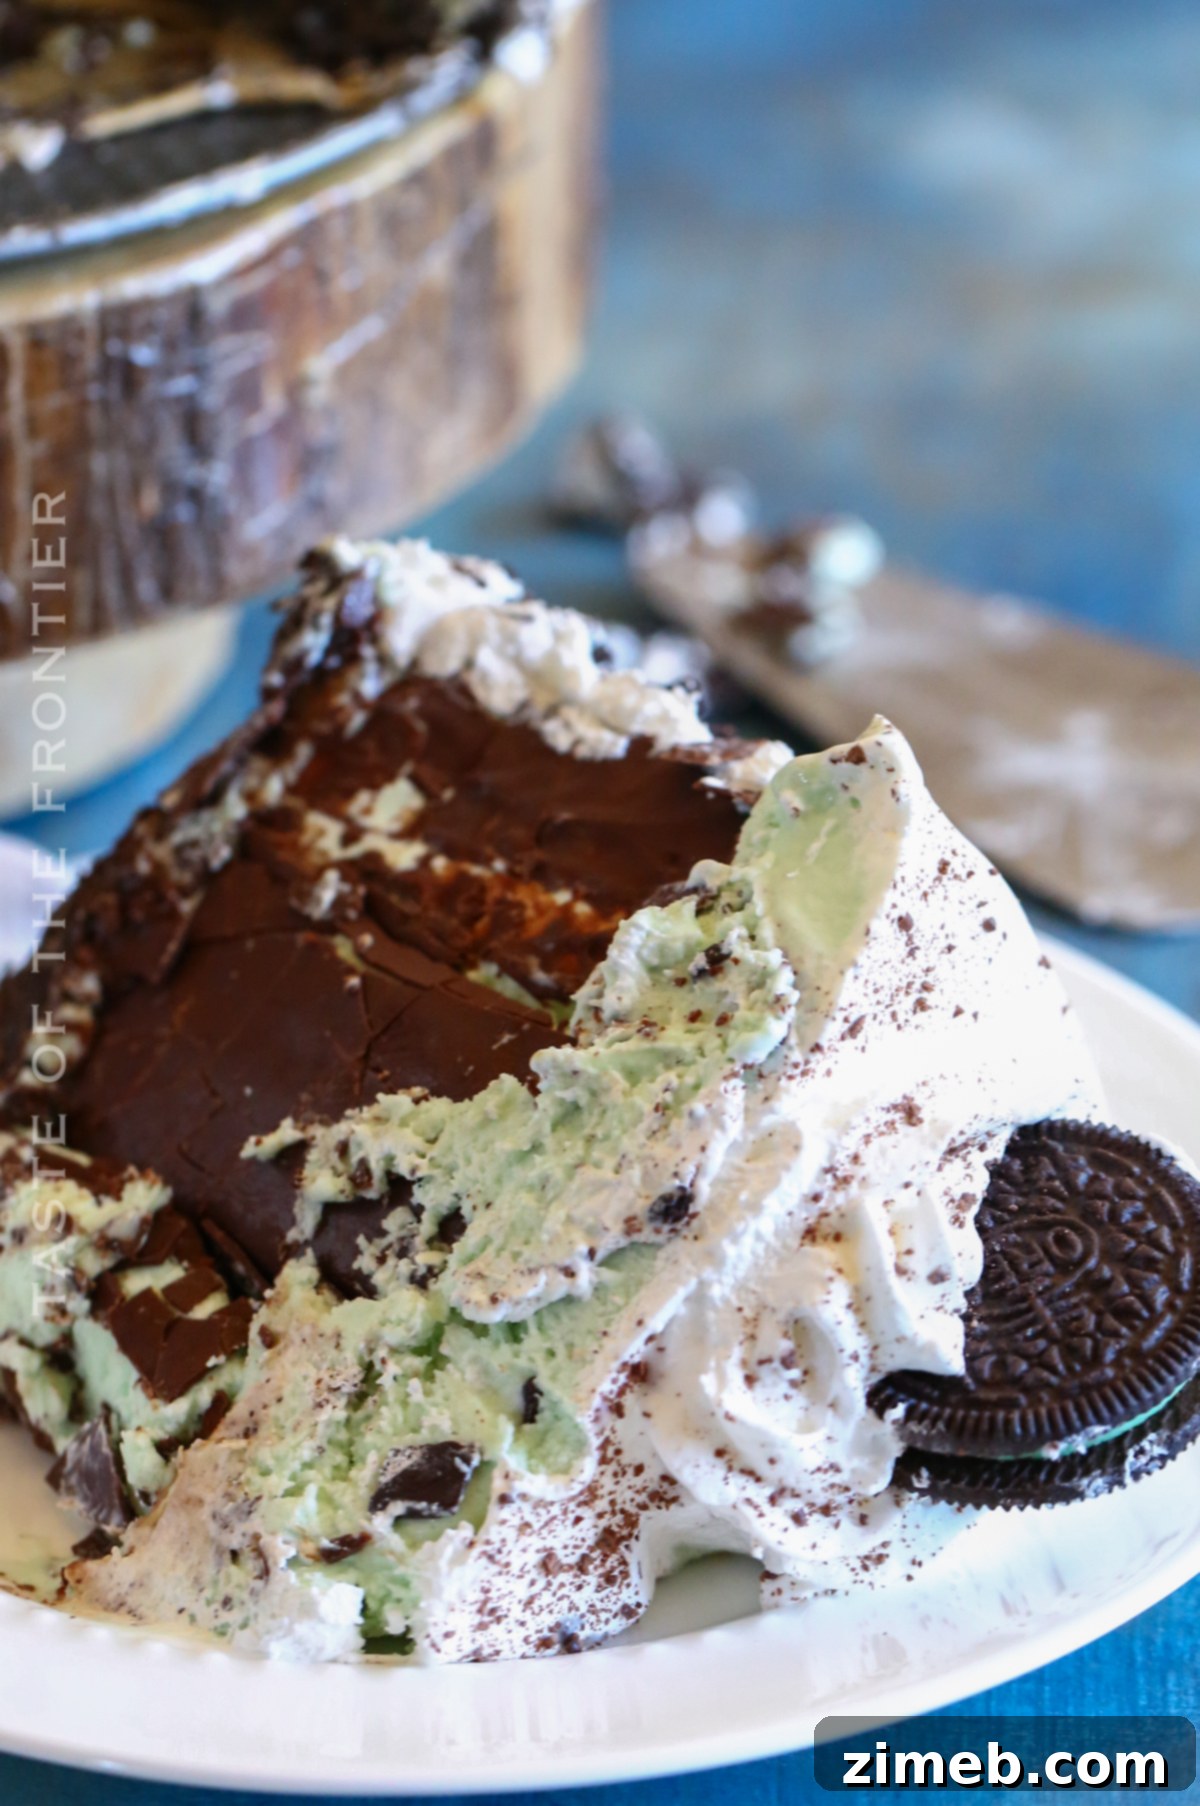
Key Ingredients for Your Mint Chocolate Chip Ice Cream Cake
Crafting this incredible frozen dessert requires a thoughtful selection of ingredients, each playing a vital role in creating its rich flavors and appealing textures:
- Mint Klondike Ice Cream Bars: These form the structural and flavorful core of the cake, offering a delightful minty kick enrobed in chocolate.
- Mint Oreo Cookies: Divided for both the crunchy crust and decorative elements, these cookies infuse the cake with an irresistible mint chocolate flavor and texture.
- Milk: Used to bind the Oreo crumbs together, ensuring a firm and cohesive crust.
- Hot Fudge: A luscious layer that adds a gooey, rich chocolate element, creating a wonderful contrast with the mint.
- Mint Chip Ice Cream: The primary creamy layer, providing intense mint flavor and classic chocolate chip texture throughout the cake.
- Whipped Topping (Stabilized): Essential for the top and sides, providing a light, airy finish that holds its shape.
- Finely Grated Chocolate: An optional but recommended garnish for an extra touch of elegance and chocolatey goodness.
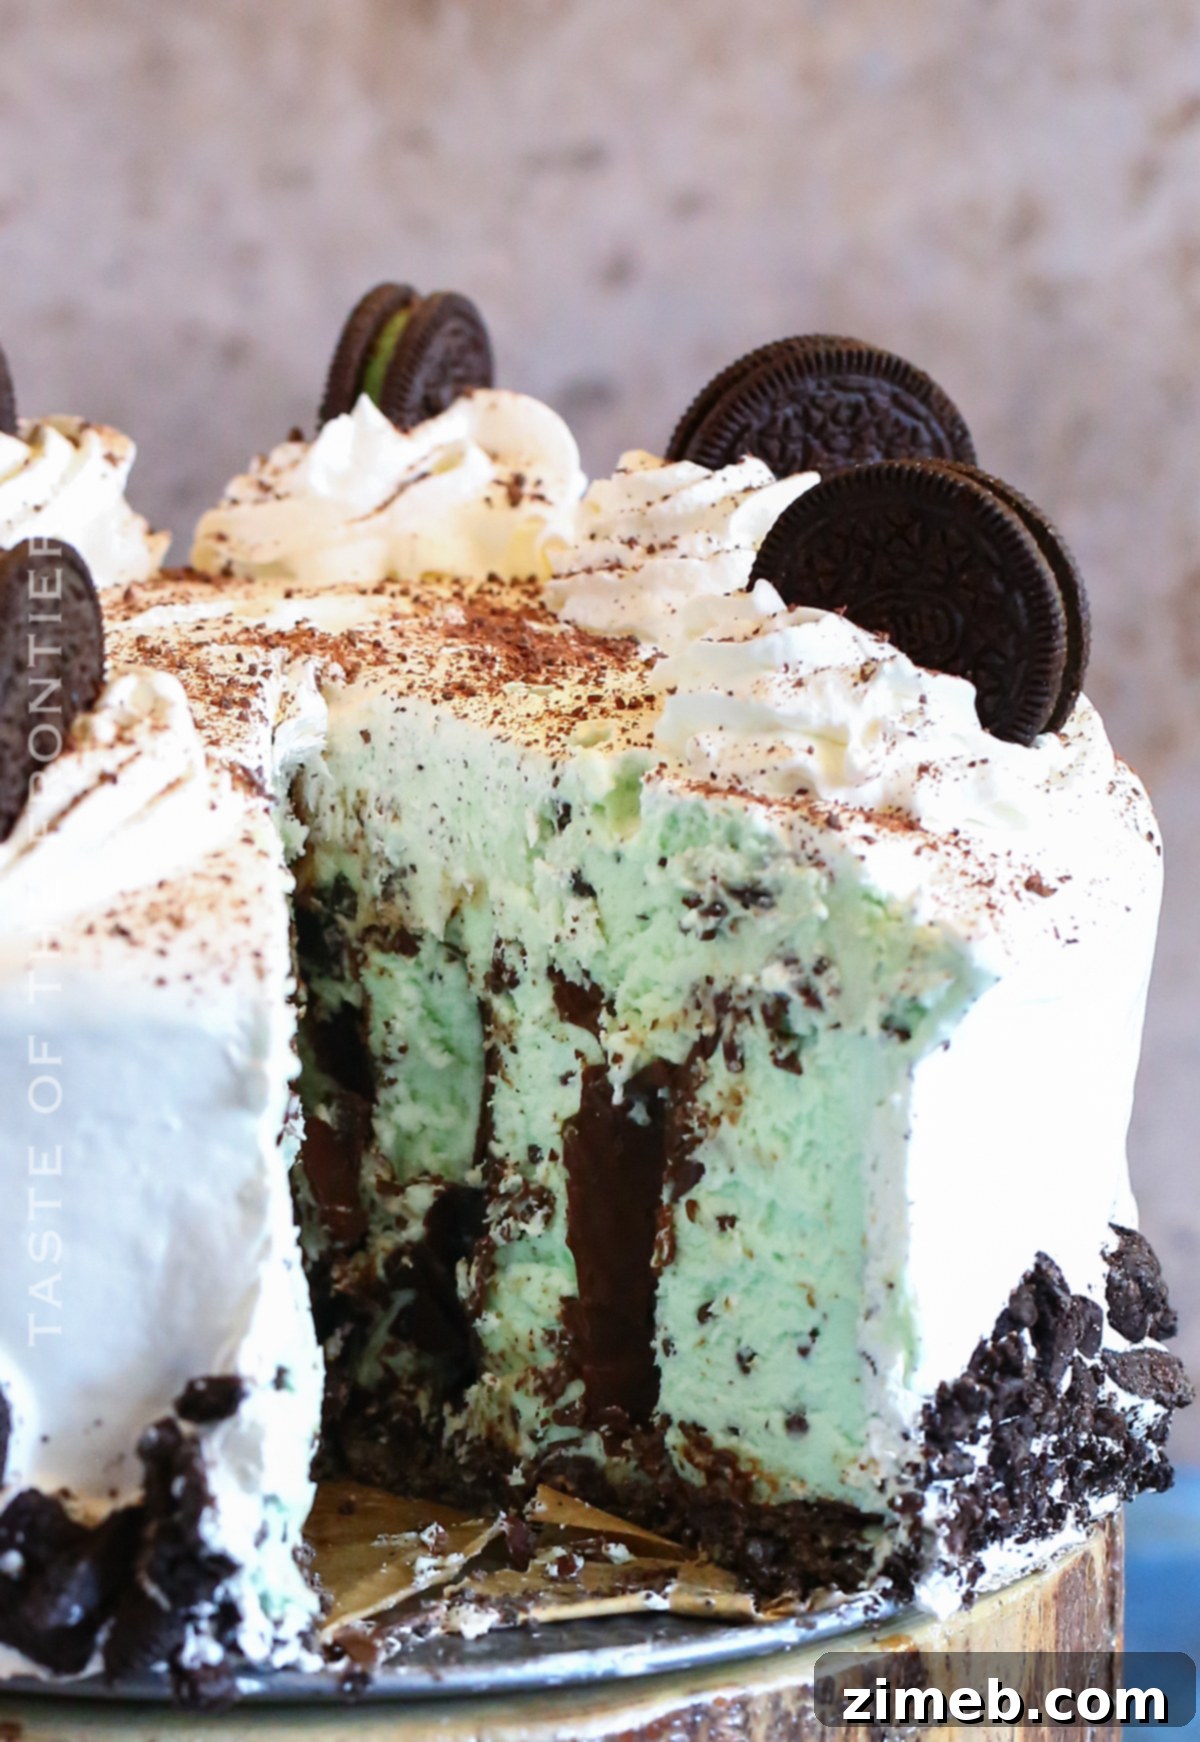
How to Make a Mint Chocolate Chip Ice Cream Cake: Step-by-Step
Creating this stunning **mint chocolate chip ice cream cake** is a process of layering delicious components, with freezing time being your best friend. Follow these steps carefully for a perfect result.
- Prepare Your Workstation: Begin by lining a large baking sheet with parchment paper. This will be used to hold your sliced ice cream bars.
- Slice the Ice Cream Bars: Working quickly to prevent melting, unwrap all of the mint Klondike ice cream bars. Slice each bar in half. Arrange these 44 half bars on your prepared baking sheet and immediately return them to the freezer to keep them firm until ready for assembly.
- Create the Oreo Crust: In a food processor, crush 20 of the mint Oreo cookies (including their creamy filling) until they form fine, even crumbs. Transfer the crumbs to a bowl, add the milk, and stir until the mixture is thoroughly moistened. The consistency should be like wet sand.
- Form the Crust: Press the moist Oreo mixture firmly and evenly into the bottom of a 9-inch springform pan. Use the back of a spoon or your fingers to create a smooth, compact layer.
- Add the Hot Fudge Layer: Gently warm the hot fudge for a few seconds (either in the microwave or a warm water bath) until it’s pourable and easy to spread. Carefully spread an even layer of hot fudge over the Oreo crust.
- Set the Crust: Place the springform pan with the crust and hot fudge layer into the freezer for approximately 15 minutes, allowing it to firm up.
- Prepare for Assembly: Once the crust has set, retrieve it from the freezer along with your pre-cut ice cream bar halves.
How to Assemble an Ice Cream Cake Like a Pro
Assembling the layers quickly and efficiently is key to preventing excessive melting and ensuring a beautifully structured cake.
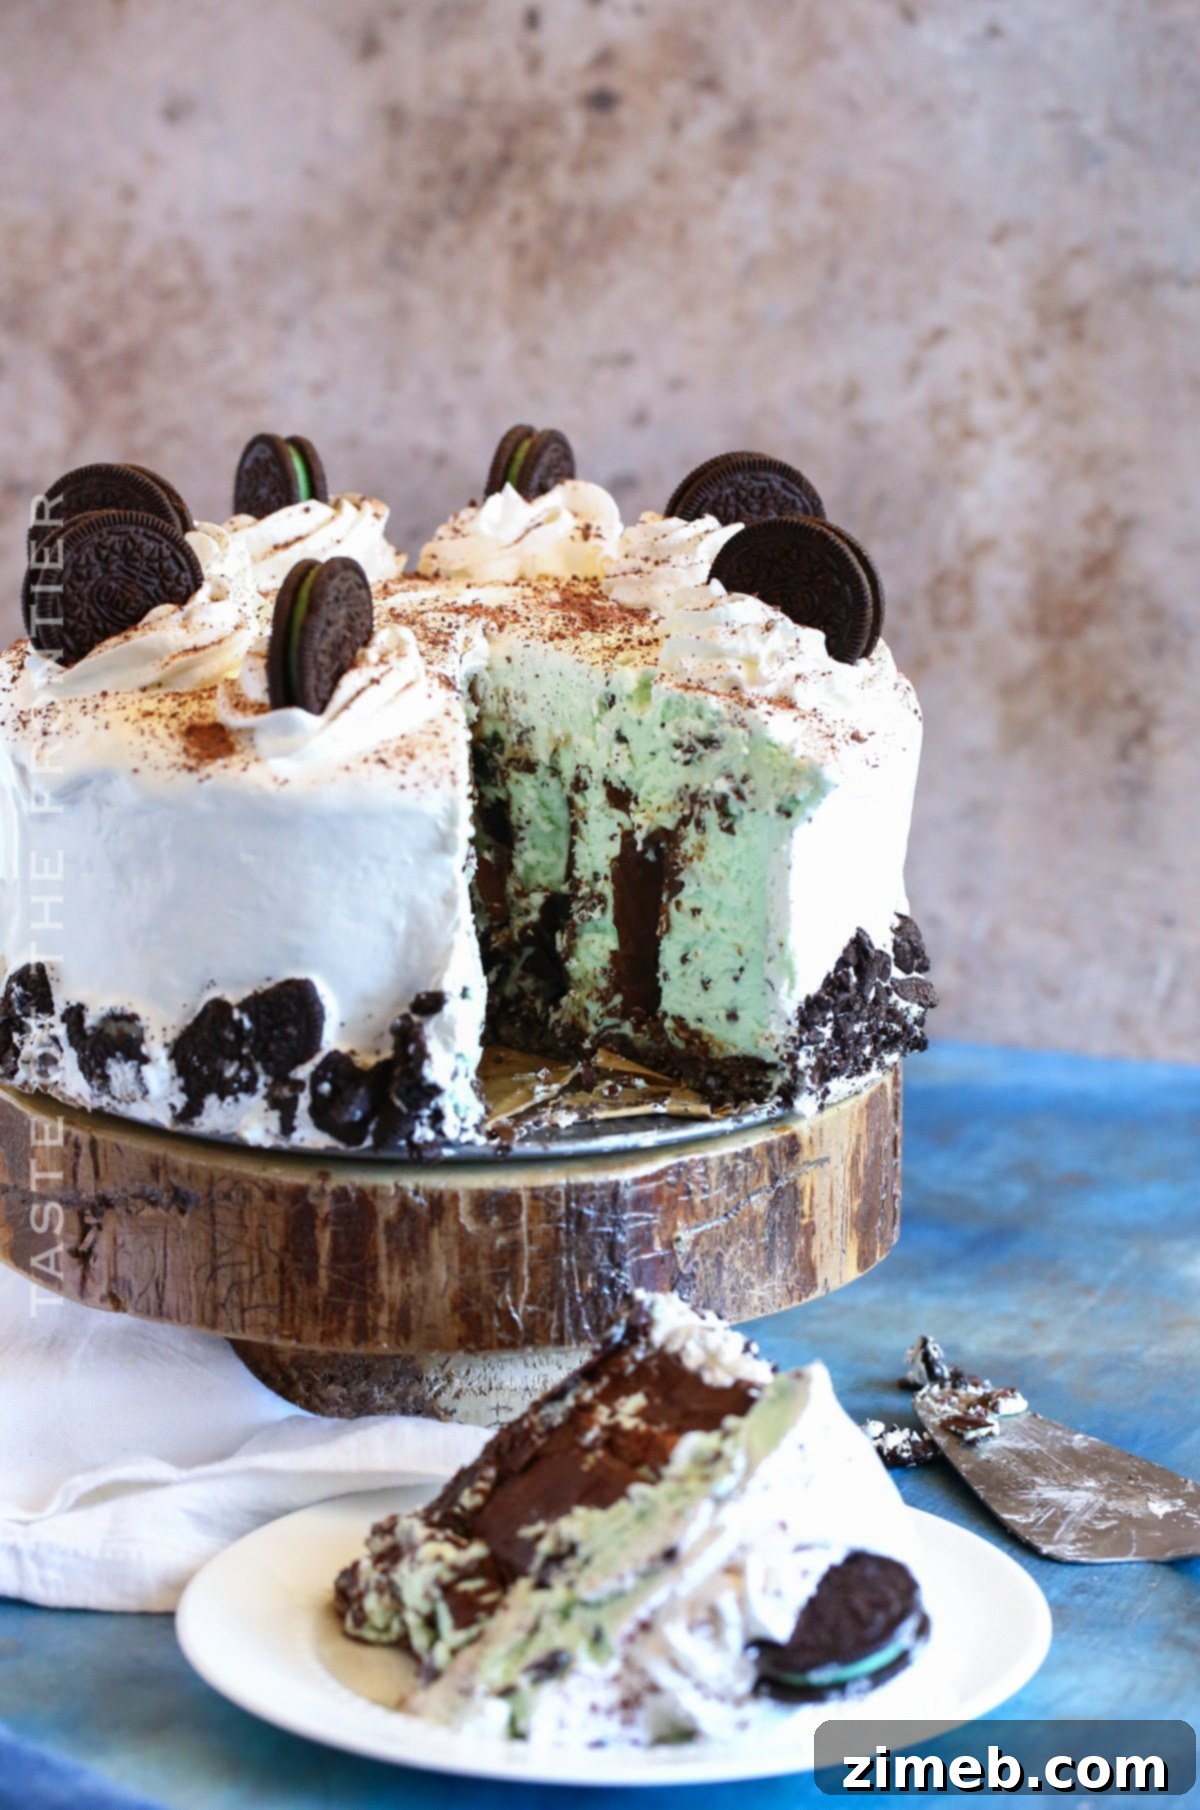
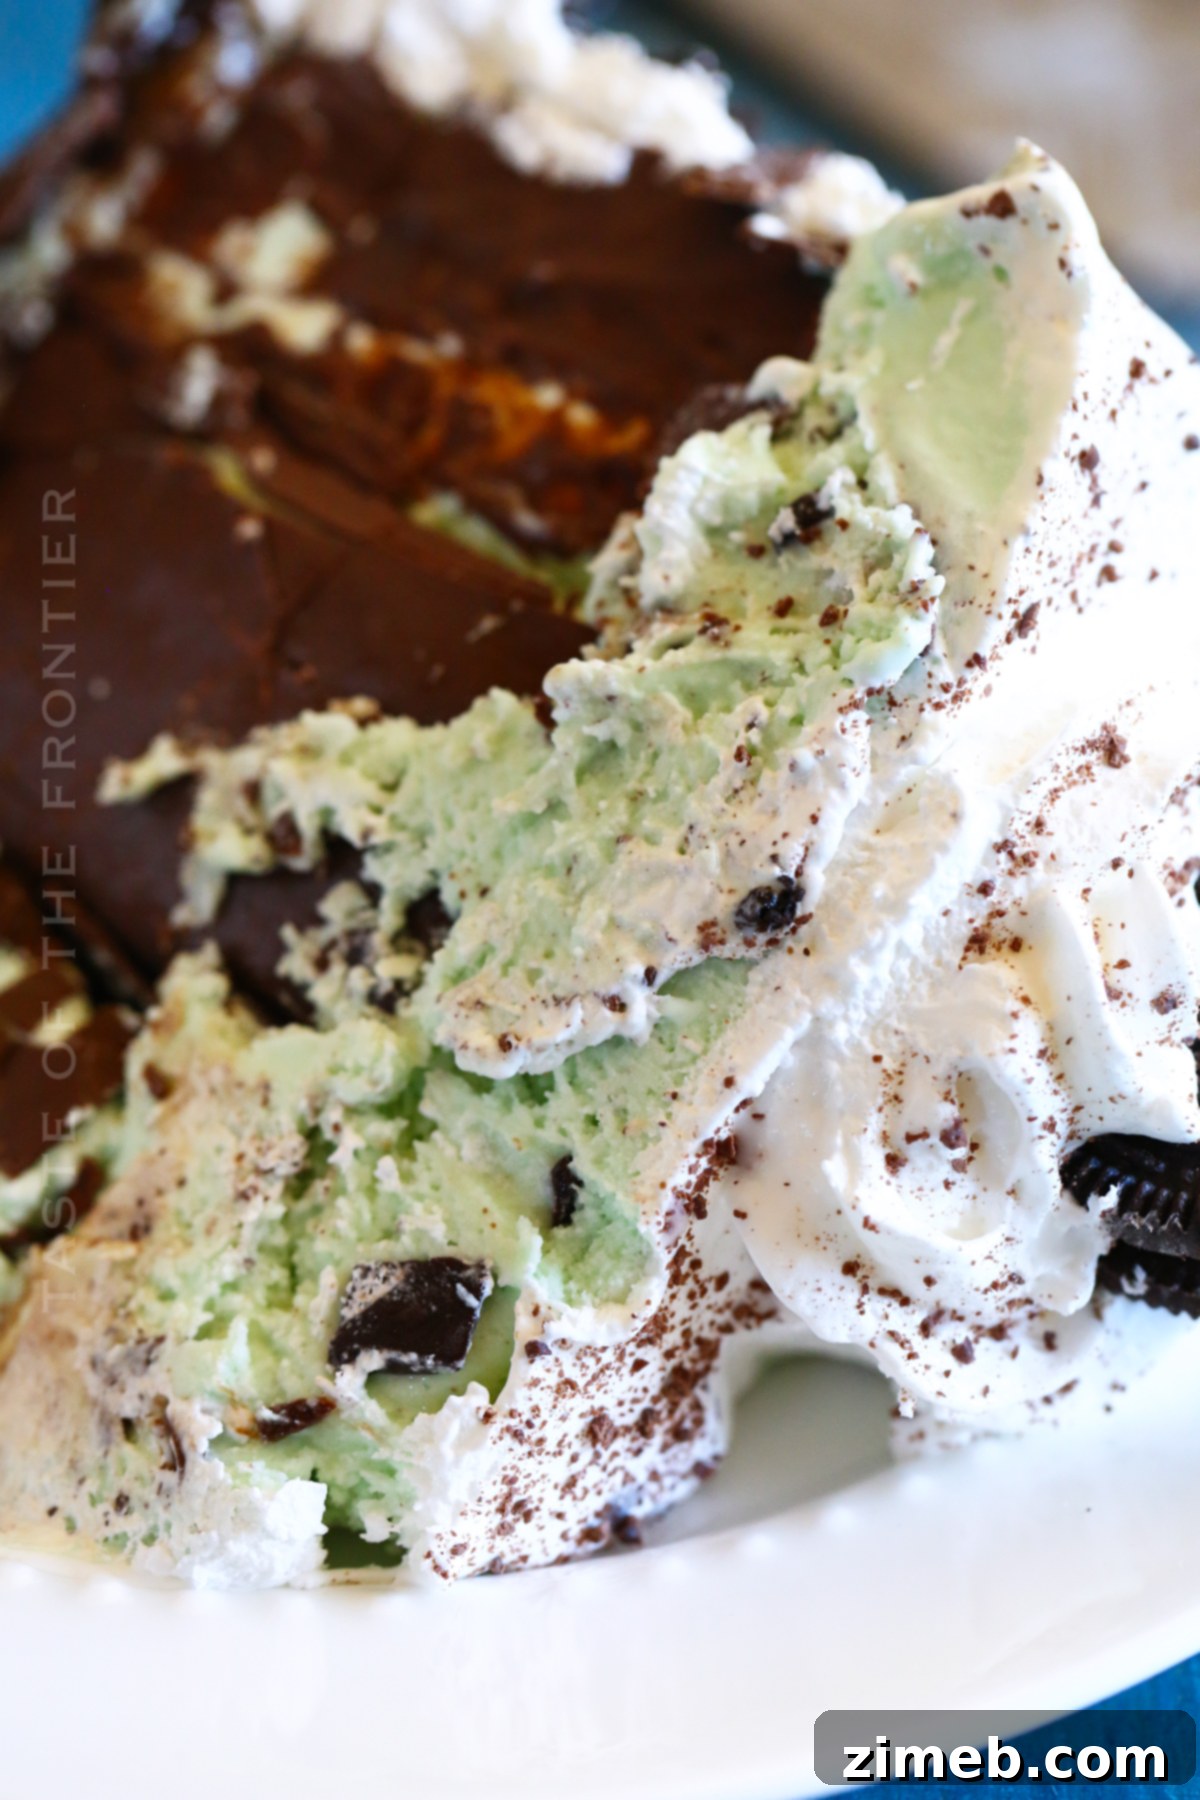
- Assemble the Ice Cream Bar Layer: Working swiftly, arrange the sliced ice cream bars upright around the perimeter of the pan, pressing them tightly together. Continue working in concentric circles until the entire pan is filled with the standing ice cream bar halves. The tight fit helps create a solid base.
- Initial Freeze: Return the assembled cake base to the freezer for at least 1 hour to allow the ice cream bars to reharden completely. This step is crucial for stability.
- Soften the Ice Cream: While the cake is freezing, remove the carton of mint chip ice cream from the freezer and let it soften at room temperature for about 15-20 minutes, or until it’s pliable enough to spread but not fully melted.
- Remove Springform Ring: Once the base is firm and the mint chip ice cream is soft, remove the cake from the freezer. Carefully unclip and remove the outer ring of the springform pan.
- Apply Cake Collar: Gently wrap a clear, plastic cake collar around the sides of the cake. This collar extends above the ice cream bar layer, providing a barrier to create a taller, perfectly smooth second ice cream layer. Secure the collar with tape if needed.
- Add the Mint Chip Layer: With the collar in place, evenly spread the softened mint chip ice cream on top of the ice cream bar layer, filling up to the desired height within the collar. Smooth the top surface.
- Final Freeze for Layers: Return the cake to the freezer for another 1-2 hours to allow the mint chip ice cream layer to reharden completely.
- Prepare Whipped Topping: While the cake is freezing, thaw your whipped topping in the refrigerator. Avoid thawing at room temperature or over-mixing, as this can cause it to deflate and become difficult to spread smoothly onto the cake. Stabilized whipped topping is essential for a beautiful finish.
How to Decorate an Ice Cream Cake for a Stunning Finish
The final touches bring your **mint chocolate ice cream** cake to life, adding both visual appeal and extra flavor.
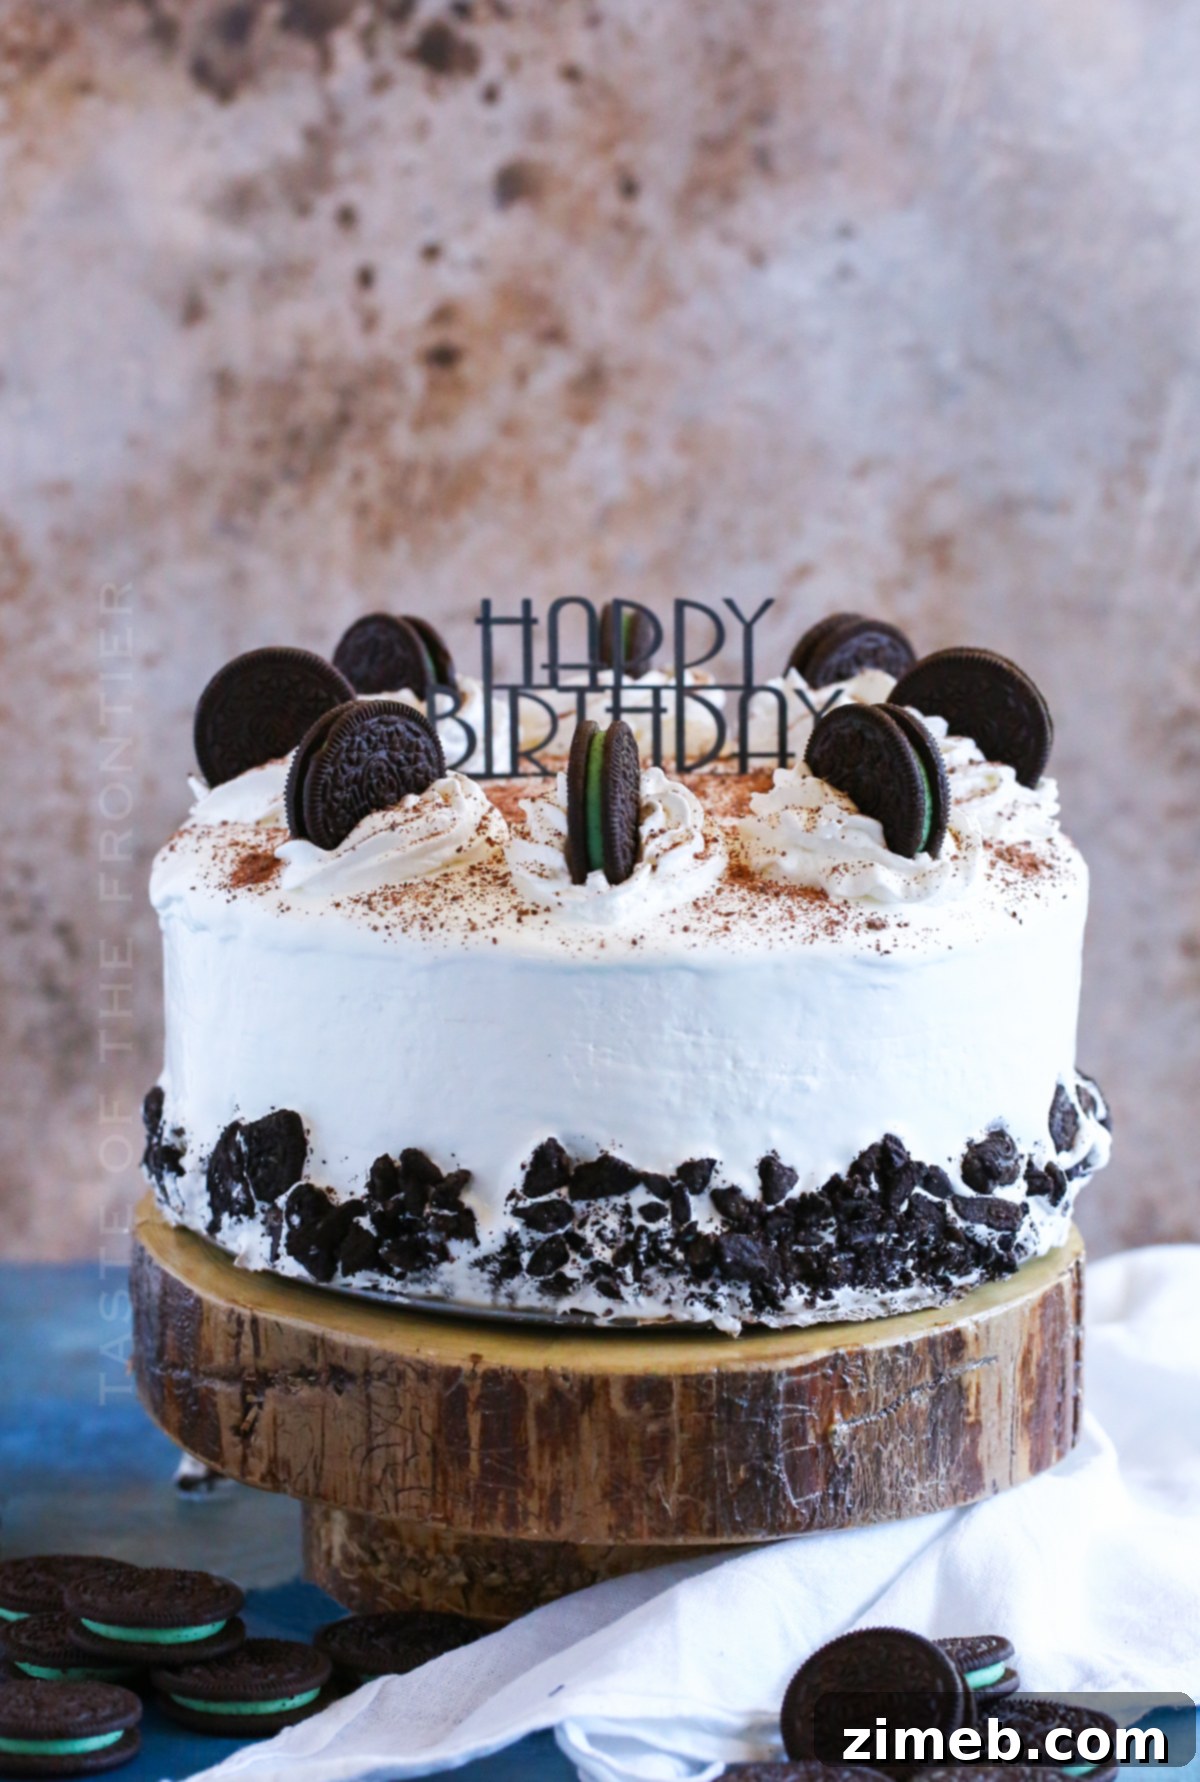
- Apply Whipped Topping: Once the cake layers are firm, remove it from the freezer and carefully peel off the plastic cake collar. Spread the thawed whipped topping generously over the top and sides of the cake, using an offset spatula to smooth it out as much as possible.
- Oreo Side Garnish: Crush some additional mint Oreos and gently press them onto the sides of the cake, creating an appealing crunchy border.
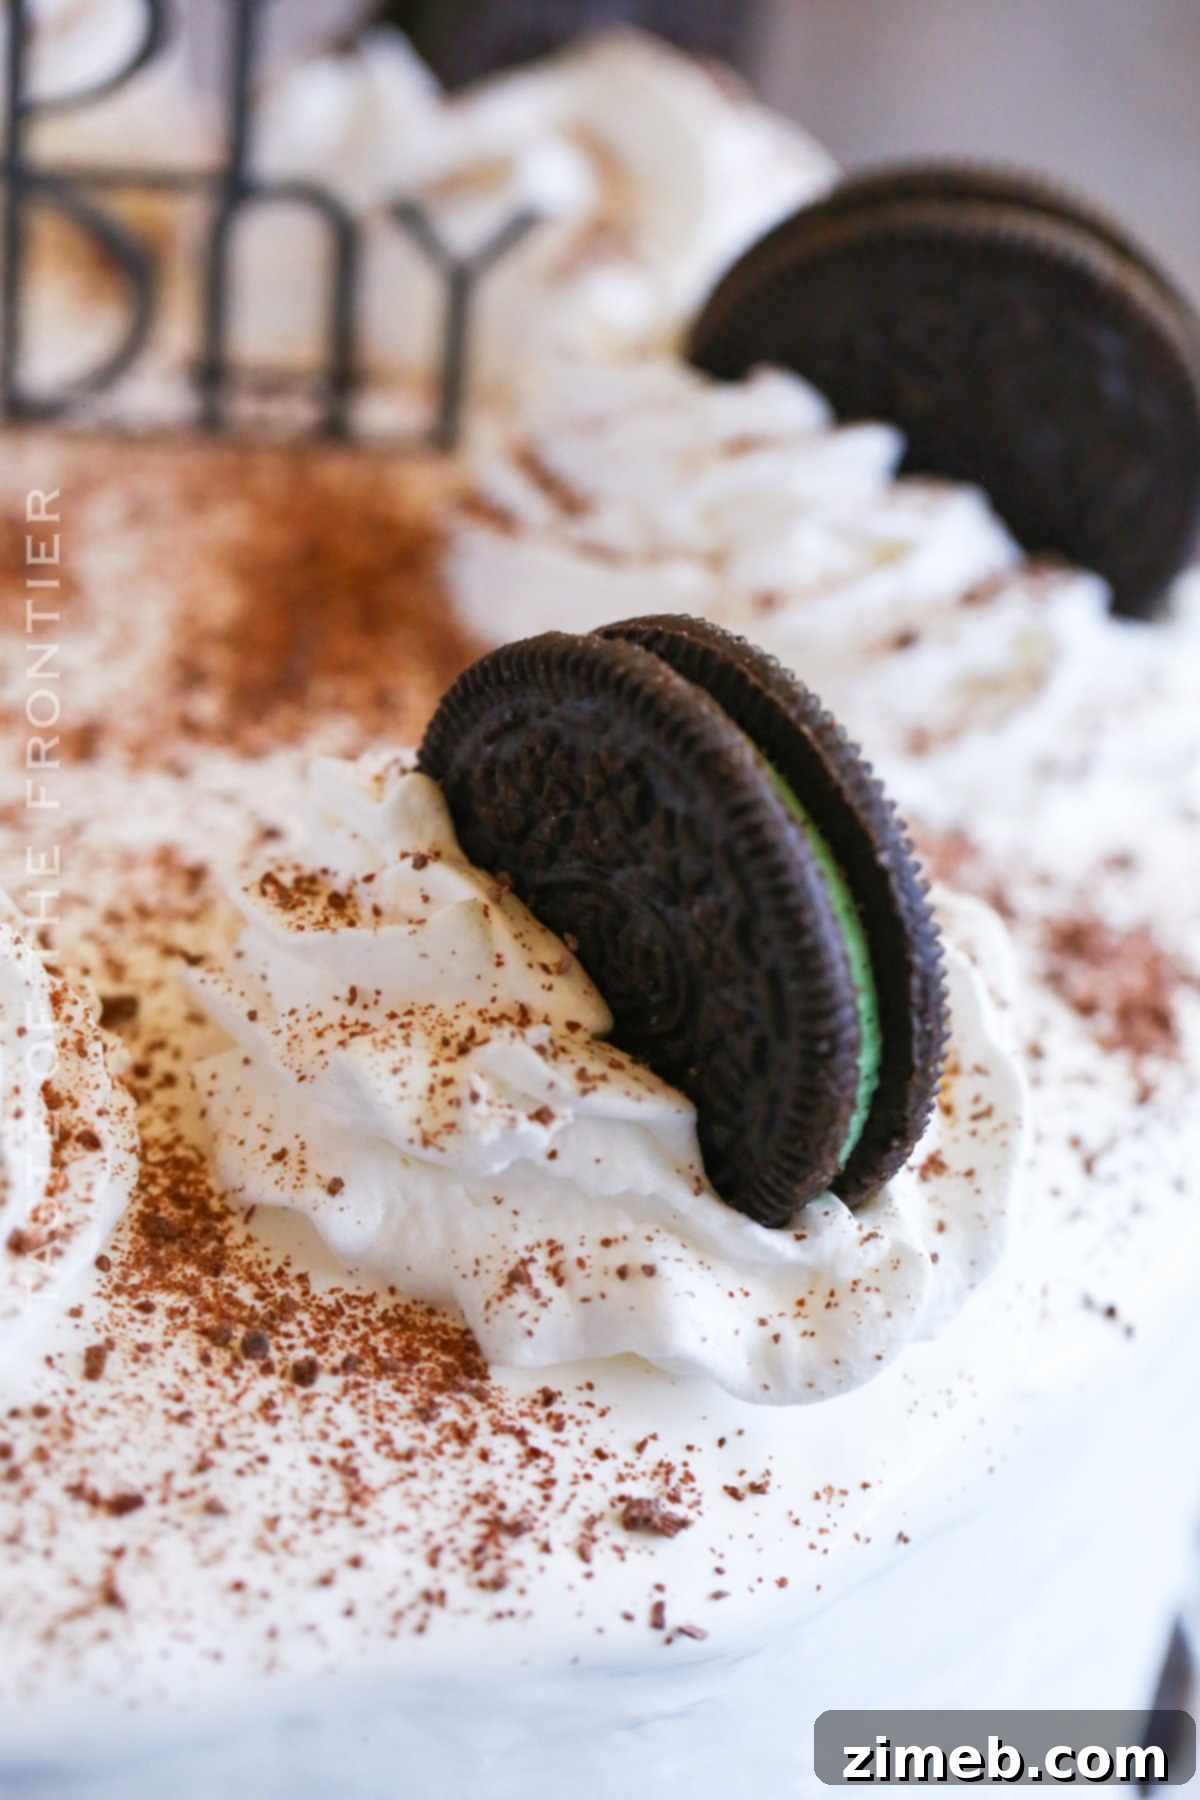
- Pipe and Garnish: Using a piping bag fitted with your favorite tip, pipe additional swirls or rosettes of whipped topping on top of the cake. Garnish with whole or halved Oreo cookies for a classic look.
- Add Extra Toppings: At this stage, you can get creative! Add sprinkles, chocolate shavings, mini chocolate chips, or a drizzle of extra hot fudge to personalize your cake even further.
- Serve and Enjoy: Keep the finished cake frozen until you are ready to serve it. Allow it to sit at room temperature for about 5-10 minutes before slicing for easier cutting.
Essential Tools for Making This Ice Cream Cake
This **ice cream cake recipe** is not only super delicious but also surprisingly manageable, even for those new to frozen desserts. To ensure your success and make the process enjoyable, I’ve compiled a list of my go-to tools that I simply can’t do without when creating this indulgent dessert. Having the right equipment makes all the difference in achieving a professional-looking and perfectly layered cake.
- 9″ springform pan: Crucial for easy cake assembly and clean removal.
- Food Processor: For quickly and efficiently crushing Oreo cookies into fine crumbs for the perfect crust.
- Clear acetate cake collar: This simple tool is a game-changer for building tall, neat layers and achieving straight, smooth sides.
- Offset spatula: Ideal for spreading and smoothing the ice cream layers and whipped topping, giving your cake a polished finish.
- Piping tips & piping bag: For adding beautiful decorative swirls and flourishes with your whipped topping.
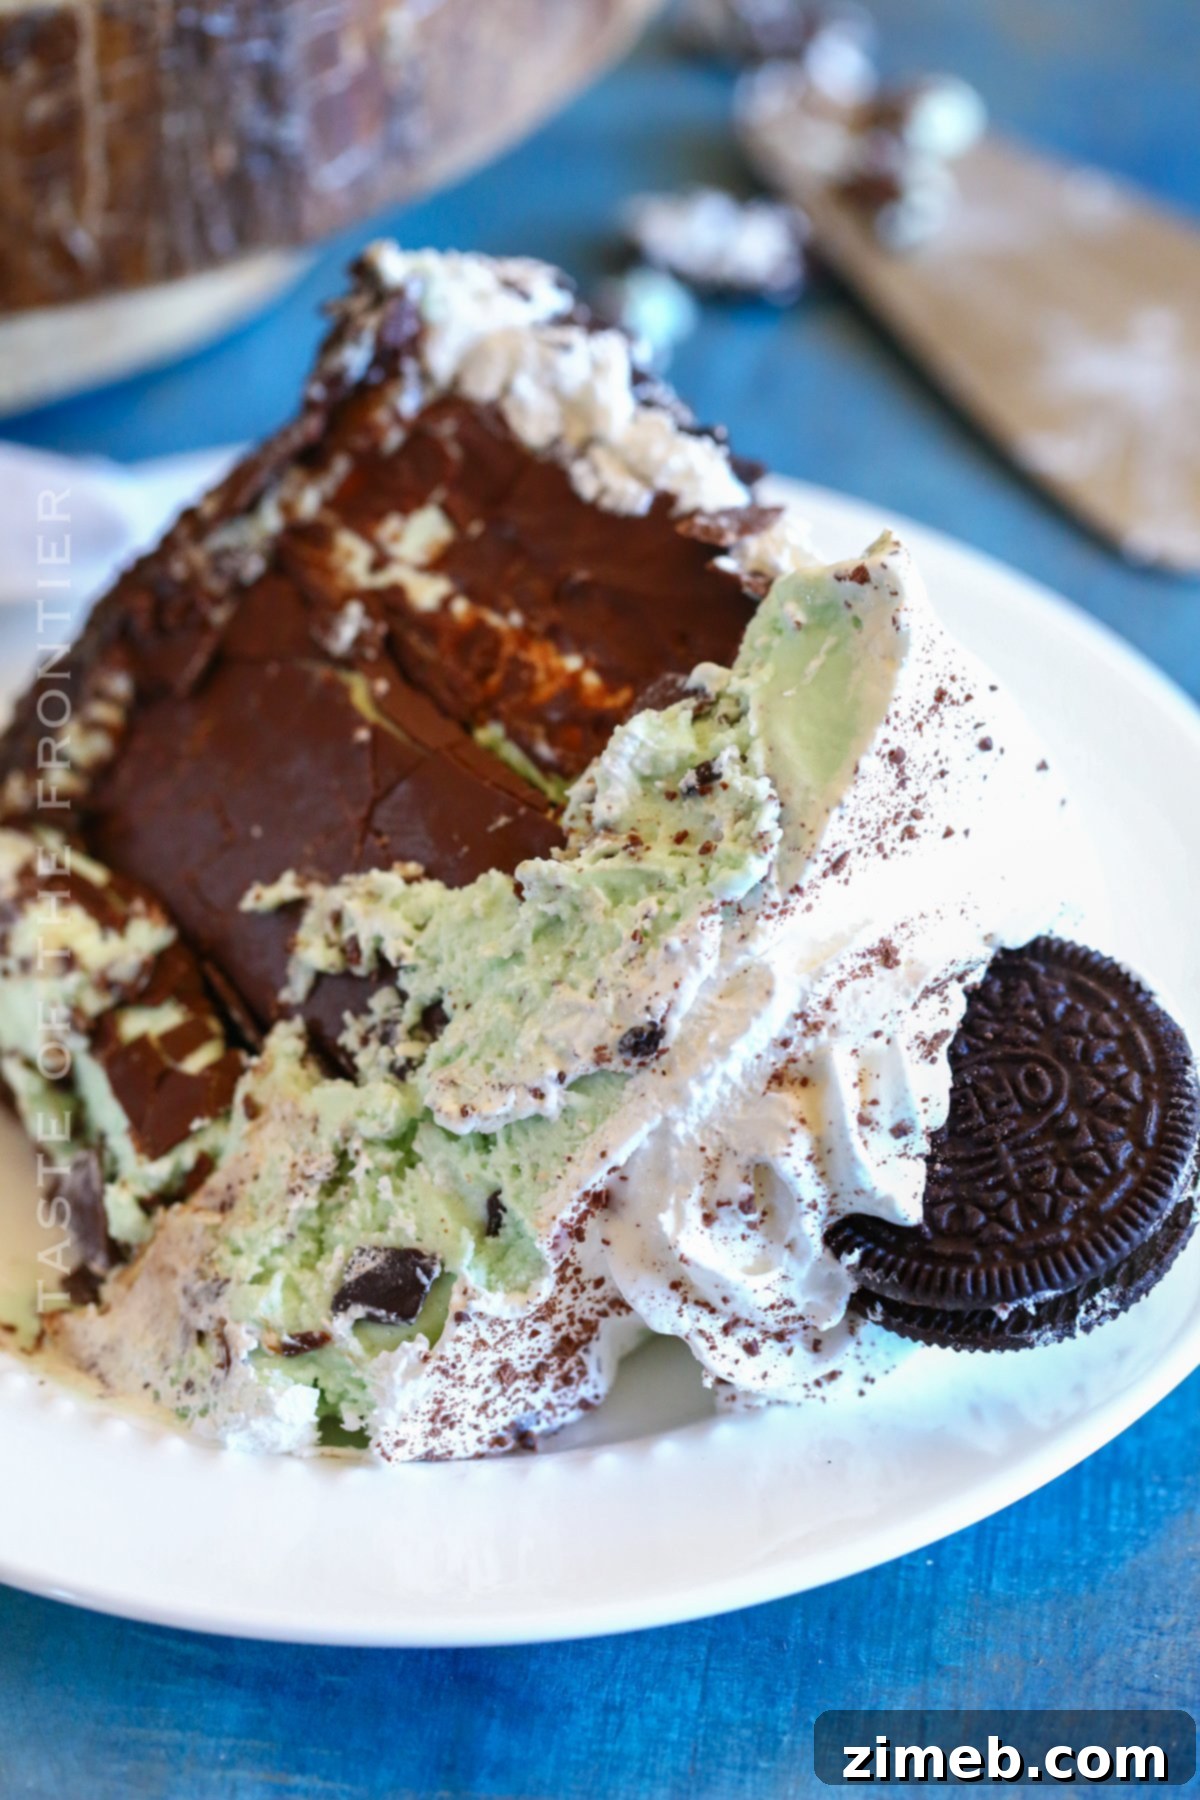
If you’re a fan of frozen treats and love the idea of this Mint Chocolate Chip Ice Cream Cake, you’re going to adore these other fantastic dessert recipes. Each one offers a unique and delightful way to cool down or indulge!
-
Cookie Ice Cream Sandwiches
These classic treats start with deliciously chewy, buttery homemade chocolate chip cookies, then they’re sandwiched together with your favorite ice cream and coated with festive sprinkles!
-
Make a Root Beer Float
Discover the simple joy of a classic Root Beer Float! With bubbly root beer and creamy vanilla ice cream, it’s the ultimate refreshing treat for any warm day.
-
Frozen Bananas
Get ready for a favorite summer snack! These chocolate-covered Frozen Bananas are a delightful, healthy-ish indulgence that everyone will love.
-
Coffee Ice Cream – No Churn
This incredibly easy recipe for no-churn coffee ice cream delivers a bold, rich coffee flavor without the need for an ice cream maker. Simply divine!
-
How to Make a Chocolate Milkshake
Learn how to whip up a perfect Chocolate Milkshake with this simple recipe. It’s a versatile treat that can be customized with your favorite ice cream flavors for any occasion.
-
Chocolate Malted Crunch Ice Cream
Transport yourself back to childhood with this easy homemade Chocolate Malted Crunch Ice Cream, reminiscent of your favorite classic ice cream parlor flavor!
-
Dirty Pineapple Whip Pops
If you enjoy a popular whipped pineapple treat but crave an adult twist, these boozy rum-infused Dirty Pineapple Whip Pops are an absolute must-try!
-
Circus Animal Cookie Ice Cream
This no-churn Circus Animal Cookie Ice Cream recipe is a whimsical dessert that brings back joyful childhood memories with its colorful, fudge-covered cookie pieces.
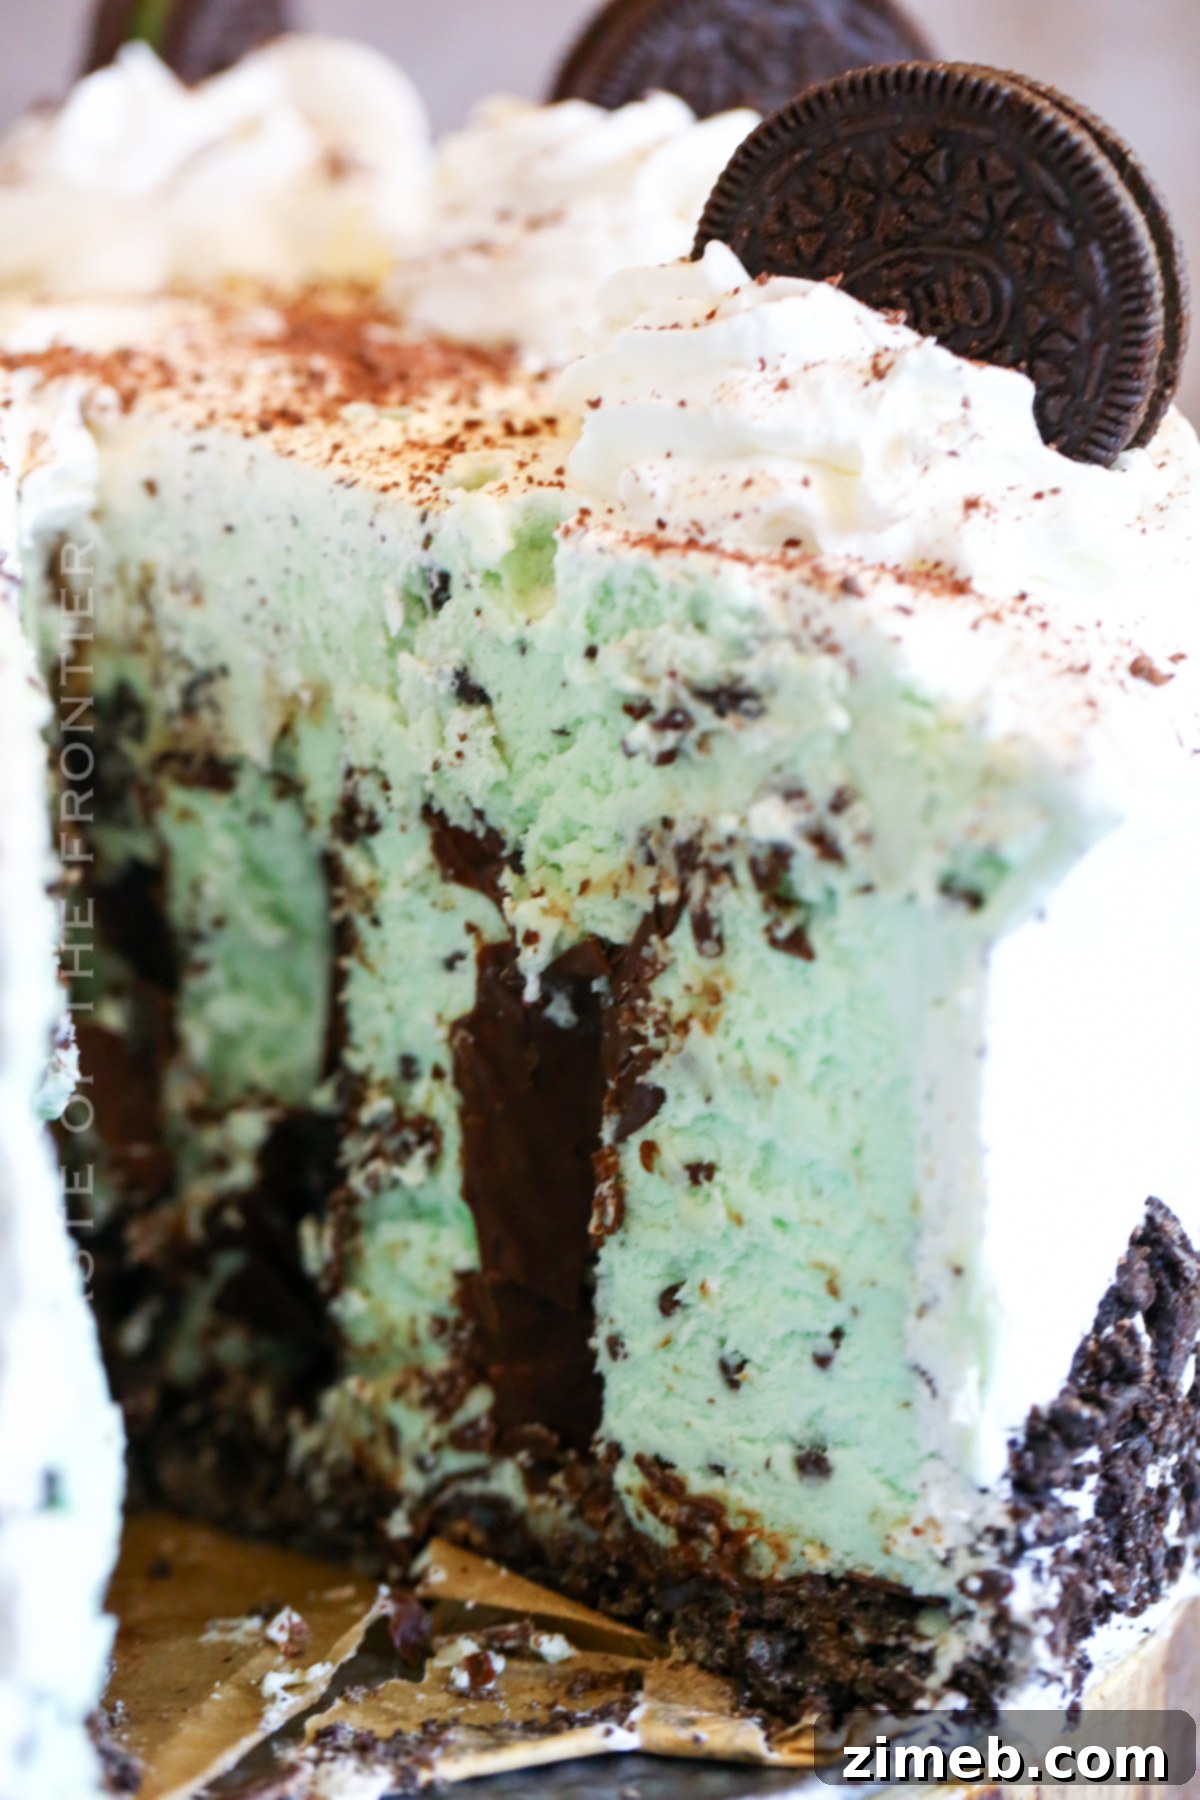
I hope you thoroughly enjoy making and devouring this sensational Mint Chocolate Chip Ice Cream Cake. It’s truly a labor of love that yields magnificent results, making any moment feel like an epic celebration. If you try this recipe and love it as much as I do, please consider leaving a five-star review and sharing your creation on Facebook and Pinterest! Your feedback and shares help spread the joy of homemade desserts.
CONNECT WITH YUMMI HAUS!
Be sure to follow me on my social media, so you never miss a post!
Substack, FB, Pinterest, IG, Email Subscription
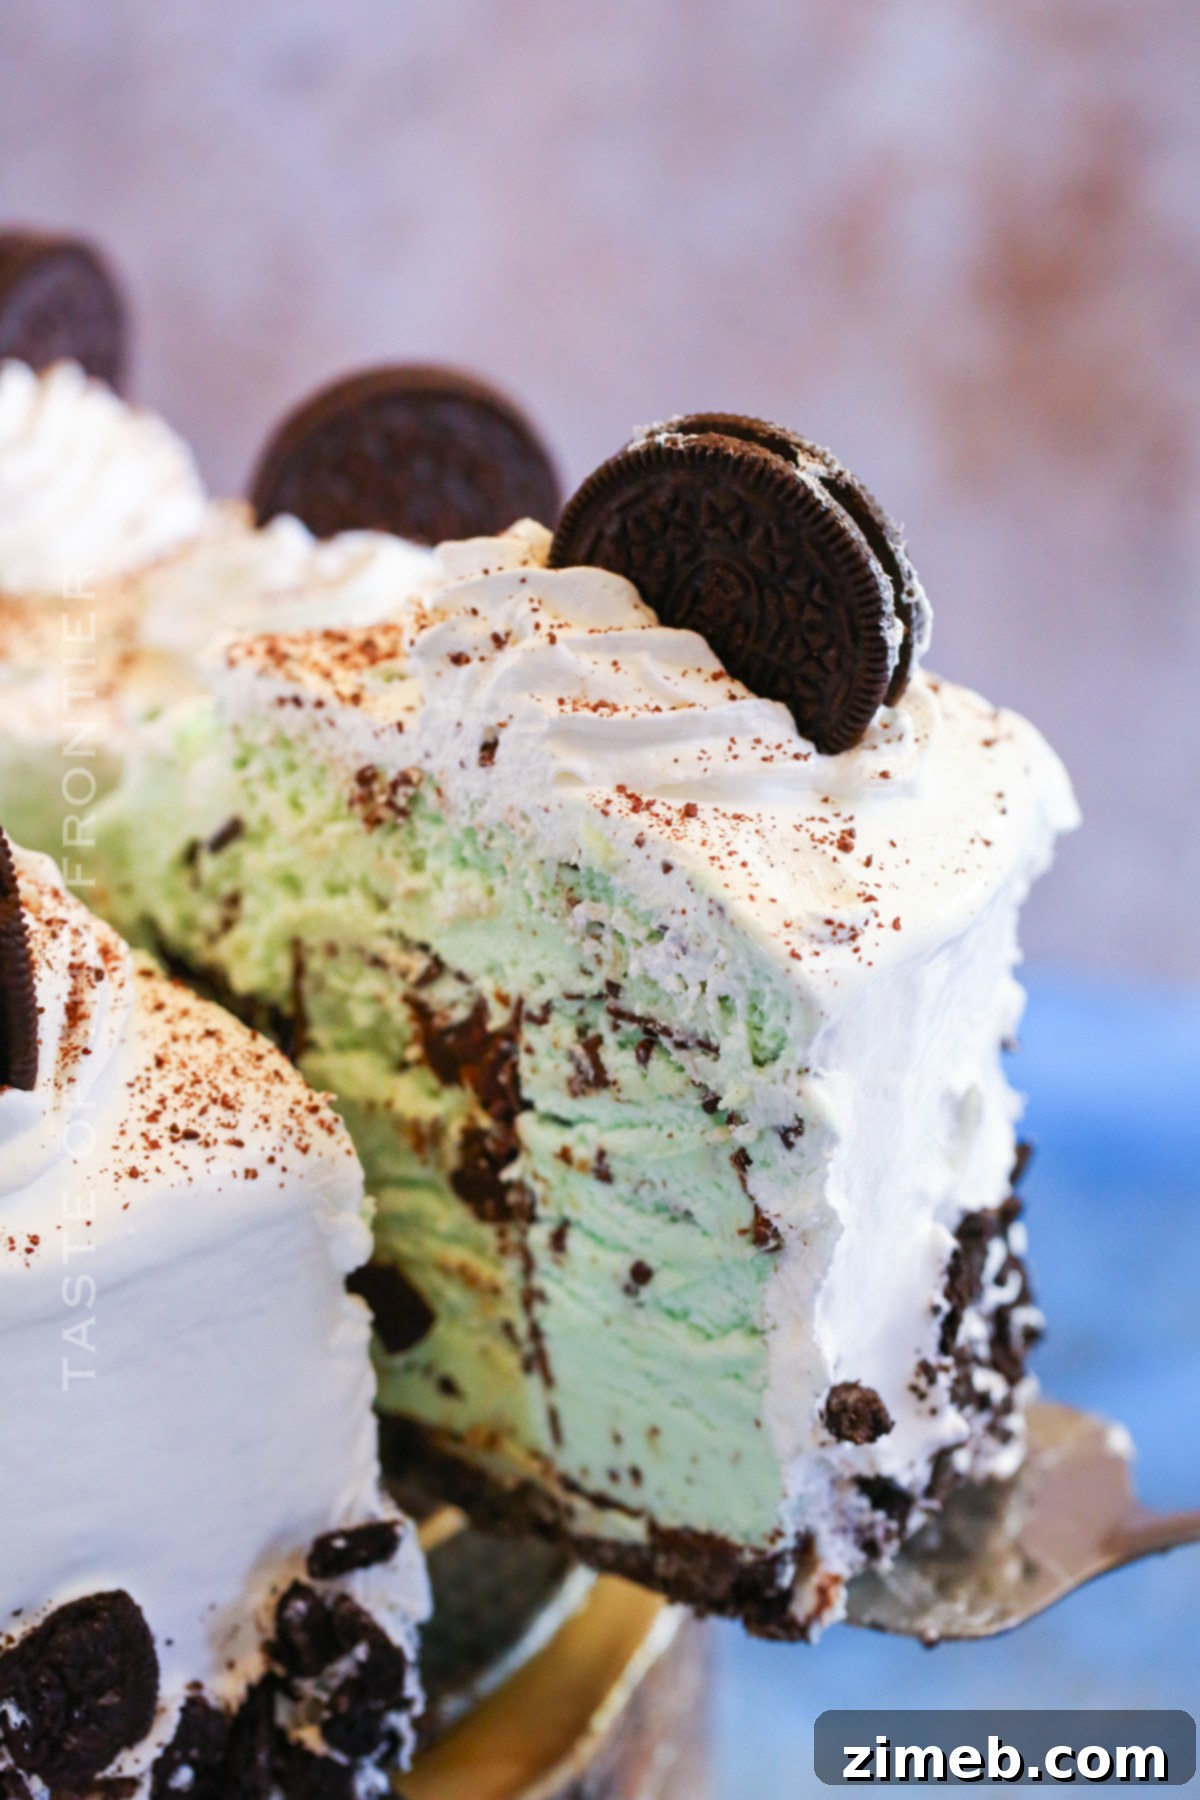
Mint Chocolate Chip Ice Cream Cake
Dessert
16
45 mins
6 hrs
Ingredients
- 22 mint Klondike ice cream bars
- 28-30 mint Oreo cookies – divided
- 2 tbsp milk
- 6 ounces hot fudge
- 48 ounces mint chip ice cream
- 24 ounces whipped topping
- finely grated chocolate for dusting on top – optional
Instructions
-
Line a large baking sheet with parchment.
-
Working quickly – unwrap all of the ice cream bars and slice them in half. Place them on the prepared baking sheet. (You should have 44 half bars). Place them back in the freezer until you are ready to use.
-
Crush 20 of the Oreo cookies in a food processor until you have fine crumbs. (Use the whole cookie including the filling)
-
Stir in the milk and mix until the crumbs are moist.
-
Spread the mixture into the bottom of a springform pan and press into a smooth, even layer.
-
Heat the hot fudge for a few seconds so it is easier to pour and spread. Then spread it into an even layer on top of the Oreo crust.
-
Place the crust in the freezer to set for about 15 minutes.
-
Once the crust has set, remove it and the cut ice cream sandwiches from the freezer.
-
Working very quickly – begin to assemble the sandwiches in the pan, standing them upright, working in circles until all of the sandwiches have been placed in the pan. They should fit pretty tightly.
-
Return to the freezer to reharden the ice cream for at least 1 hour.
-
Remove the carton of ice cream from the freezer and allow it to soften. Once it has softened to the point where you can spread it, remove the assembled cake from the freezer.
-
Remove the outer ring of the springform pan from the cake.
-
Wrap the cake in the clear, plastic cake collar. This will help you to get a taller cake when adding the ice cream layer.
-
Once the collar is secure, spread the softened ice cream on top in an even layer. Return to the freezer to reharden for 1-2 hours.
-
While the cake is refreezing – thaw the whipped topping. I have found that it is best to thaw in the refrigerator. Things like thawing at room temperature and over-mixing tend to make it deflate, making it difficult to spread it onto a cake.
-
Remove the cake from the freezer, remove the cake collar and spread the thawed whipped topping on around the top and sides, smoothing out as best as possible.
-
Press some crushed Oreos onto the sides of the cake.
-
Pipe additional swirls of whipped topping on top of the cake and garnish with Oreo cookies.
-
At this point you can add any sprinkles or other toppings you want.
-
Keep frozen until ready to serve.
Notes
Equipment
-
9″ springform pan
-
Food Processor
-
Clear plastic cake collar
-
Offset spatula
Nutritional information for the recipe is provided as a courtesy and is approximate. Please double-check with your own dietary calculator for the best accuracy. We at Yummi Haus cannot guarantee the accuracy of the nutritional information given for any recipe on this site.