
*Disclosure: Sponsored Post – I have been compensated for this post either monetarily or with product. All opinions are truthful & my own.
Transform Your Home with Easy DIY Clay Coasters: A Premo Clay Project
There’s an undeniable excitement that comes with preparing for a new chapter, especially when it involves a fresh living space. As I embark on the journey of setting up our new home, my mind is buzzing with ideas for significant purchases – perhaps an additional dresser for the munchkin’s very own room, a stylish new dining room table, or comfortable beds for every family member. Yet, amidst these grand plans, I’m also seized by an equally compelling desire: to bid farewell to the old, tired items that have graced our previous residences for far too long. You know the ones – those ubiquitous pieces that you dutifully unpack and display in each new house, simply because they’re what you’ve always had. Well, the time has come for a meaningful change. Cherished family heirlooms will be carefully packed, labeled, and placed in storage, ready for a time when they can truly shine again. As for the remaining random clutter? It’s making its exit.
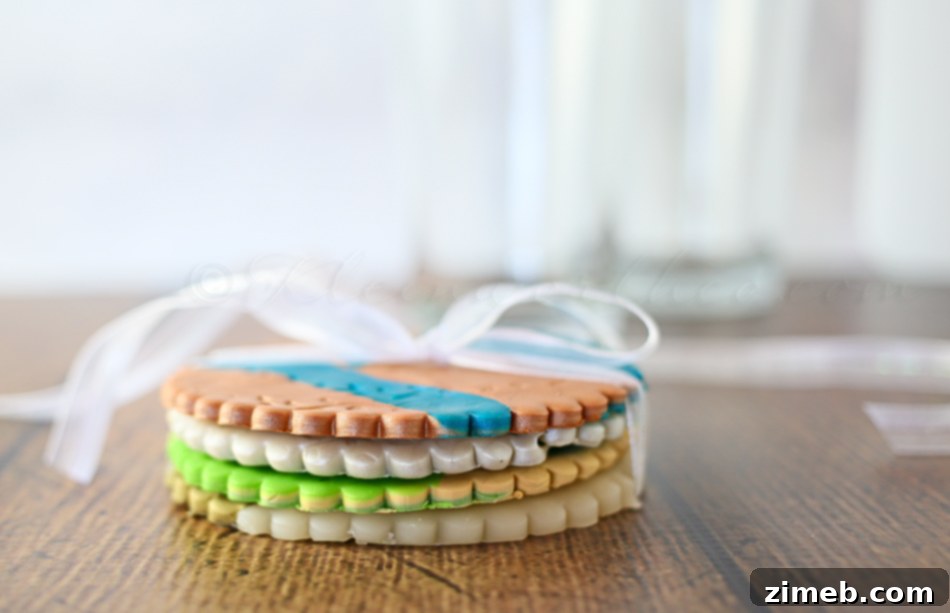
Our strategy for this new beginning is to thoughtfully replace as much as we can, either by purchasing items that perfectly suit our evolving aesthetic or, even better, by crafting them ourselves. This approach allows for a level of personalization that simply can’t be achieved with mass-produced goods. Among the smaller, yet equally significant, items receiving an overdue update are the coasters in our media room. Seriously, these things must be a decade old! It’s a mystery why I haven’t refreshed them sooner, but the timing for this creative endeavor feels absolutely perfect now. When I struggled to find coasters that genuinely complemented our new decor scheme, I reverted to my tried-and-true method for anything I can’t find in stores: I make it myself. And what better medium than Premo Clay? The result? These incredibly easy-to-make DIY Clay Coasters that have utterly transformed our space. Let me guide you through the simple steps so you can create your own stunning set!
Why Choose DIY Clay Coasters for Your Home Decor?
Opting for DIY clay coasters isn’t just about saving money; it’s about infusing your home with personality and charm. Unlike store-bought options that often feel generic, handmade coasters offer unparalleled customization. You can select colors that perfectly match your interior design, experiment with unique textures, and create shapes that reflect your personal style. This creative freedom means your coasters become more than just functional items; they evolve into miniature works of art, conversation starters that add a unique touch of whimsy and elegance to any room. Furthermore, crafting with polymer clay like Premo Clay is an incredibly satisfying experience, accessible even to beginners. It’s a fantastic way to unwind, express your creativity, and make something truly special for your home or as thoughtful, personalized gifts.
Materials You’ll Need for Your Polymer Clay Coasters
Before diving into the creative process, gathering all your materials ensures a smooth and enjoyable crafting session. You’ll find most of these items readily available at craft stores, and many are staples for anyone venturing into polymer clay projects.
Essential Clay and Tools
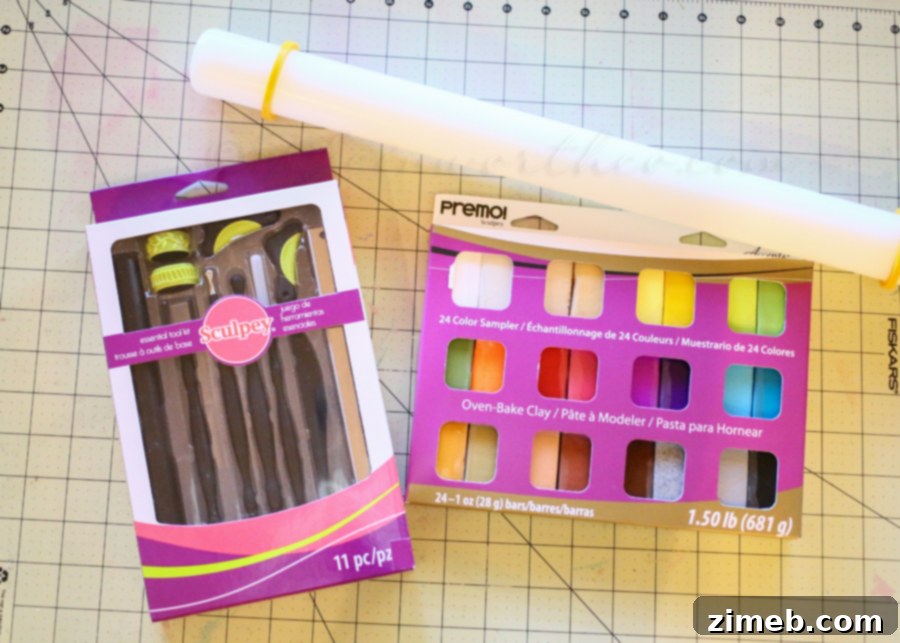
- Premo Clay Set: This is the star of our project! Premo Clay is renowned for its excellent workability, vibrant colors, and durability once baked. Choose a selection of colors that excite you and complement your home’s palette.
- Sculpey Essential Tool Kit: A fantastic starter kit that usually includes a blade, a needle tool, and a few other shaping tools which are incredibly useful for polymer clay crafts.
- Fondant Cutters: While designed for baking, these cutters are perfect for polymer clay. They come in various shapes and sizes, allowing you to create perfectly uniform coasters. Consider round, square, or even more intricate geometric shapes for a unique flair.
- Cutting Mat: Protect your work surface and provide a non-stick area for rolling and cutting your clay. A dedicated craft mat is ideal.
- Acrylic Roller or Pasta Machine: Essential for conditioning and rolling your clay to an even thickness. A pasta machine is a great investment for serious clay artists, but a simple acrylic roller works perfectly for this project.
- Texture Wheel (with vine design wheel or similar): This tool allows you to imprint beautiful patterns onto your clay, adding depth and visual interest to your coasters. If you don’t have a texture wheel, consider using stamps, lace, or even natural objects like leaves for unique imprints.
- Parchment Paper: For lining your baking sheet, preventing sticking, and ensuring even heat distribution during baking.
- Baking Sheet: Any standard baking sheet will do for curing your clay creations.
- Oven: A conventional home oven is all you need to bake your polymer clay.
- Felt Sheets: To create a soft backing for your coasters, protecting your furniture from scratches.
- Strong Adhesive: Such as E6000 or super glue, for attaching the felt backing.
Optional Embellishments and Finishing Touches
- Polymer Clay Glaze or Varnish: For an added layer of protection and to give your coasters a glossy or matte finish, depending on your preference.
- Craft Knife or Blade: For precise trimming and cutting, if needed.
- Rubbing Alcohol and Cotton Swabs: To clean your tools and hands between colors to prevent accidental color mixing.
Step-by-Step Guide: Crafting Your Own Premo Clay Coasters
Now that you have all your tools and materials ready, let’s dive into the fun part: making your personalized DIY clay coasters!
Step 1: Preparation is Key
Begin by laying out your cutting mat on a clean, flat surface. This provides a dedicated workspace and protects your table. Unpack your chosen Premo Clay colors. Before working with the clay, it’s essential to “condition” it. This means kneading it until it becomes soft, pliable, and easy to work with. You can do this by hand, rolling it, or by running it through a pasta machine on its widest setting multiple times until it’s smooth and lump-free. Conditioning is vital for ensuring your finished coasters are strong and durable.
Step 2: Unleash Your Creativity with Color Blending
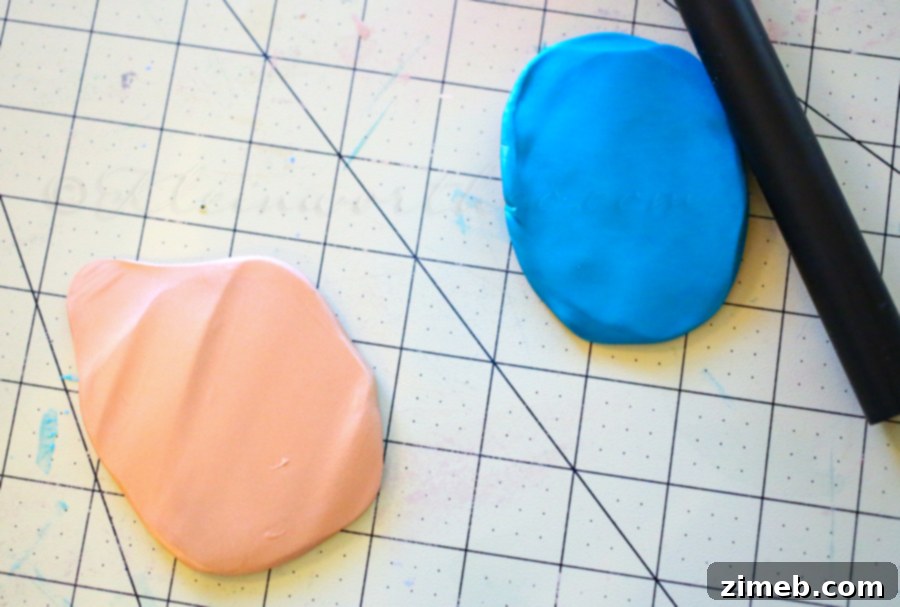
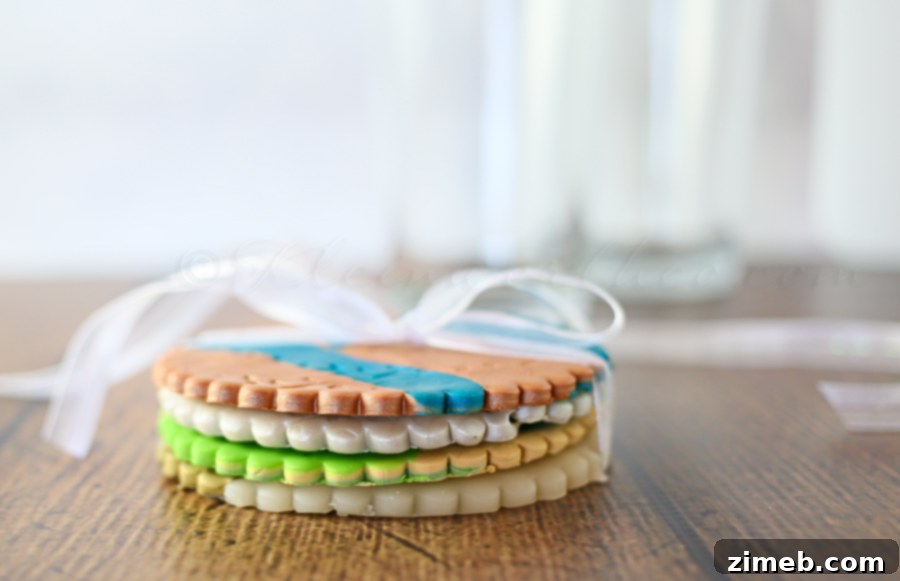
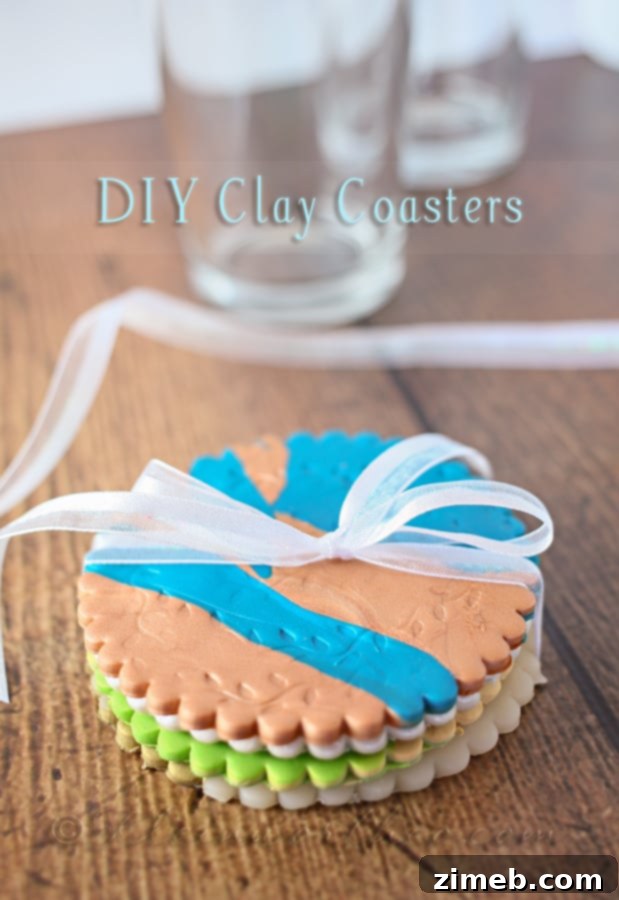
This is where your unique vision comes to life! For my coasters, I opted for several distinct color pairings to achieve a marbled, sophisticated look. I used Copper with Peacock Pearl, Translucent with Antique Gold, Ecru with Bright Green Pearl, and Pearl with Turquoise. The beauty of Premo Clay lies in its rich pigmentation and blendability, allowing for stunning effects. To achieve a marbled or swirled effect, take two or more conditioned colors and roll them into rough snakes or flatten them slightly. Then, twist them together, fold, and gently roll until the colors start to blend in beautiful, random patterns. You don’t want to over-blend; the goal is to see distinct swirls and veins of color rather than a single, uniform hue. Once you’re happy with the blend, roll the combined clay into a semi-flat sheet, aiming for an even thickness of about 1/4 inch, which is ideal for a sturdy coaster.
Step 3: Shaping and Texturizing Your Coasters
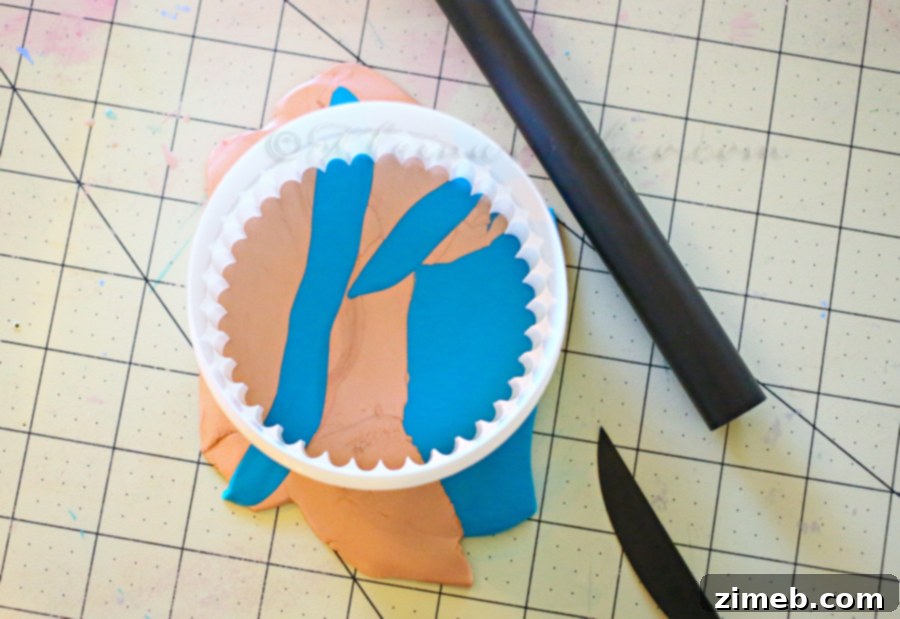
With your beautifully blended and rolled clay sheet ready, it’s time to cut out your coaster shapes. I used a fondant cutter for perfectly symmetrical circles, but feel free to experiment with square, hexagonal, or even custom freehand shapes if you’re feeling adventurous. Press the cutter firmly into the clay and remove the excess around it. Gently lift your newly formed coaster shape. To add an extra layer of visual interest and tactile appeal, I used a texture wheel with a delicate vine design. Carefully roll the texture wheel over the surface of your clay coaster, applying even pressure to create a clear, imprinted pattern. This step adds a professional and handcrafted feel to your work. If you don’t have a texture wheel, consider using other textured items like lace fabric, rubber stamps, or even dried leaves to create unique impressions.
Step 4: Baking Your Clay Coasters to Perfection
Once your coasters are shaped and textured, it’s time to cure them in the oven. Polymer clay does not air dry; it hardens through a controlled baking process. Carefully transfer your clay coasters onto a baking sheet lined with parchment paper. This prevents them from sticking and helps ensure even heat distribution. Preheat your oven to 275 degrees Fahrenheit (135 degrees Celsius). It’s crucial to use an oven thermometer to verify the temperature, as household ovens can fluctuate, and precise temperature control is key to a strong, durable, and color-true finish. Bake your coasters for 30 minutes. Baking at the correct temperature for the recommended time ensures the clay fully cures, making it robust and resilient. Under-baked clay can be brittle, while over-baked clay may darken or become scorched. After 30 minutes, carefully remove the baking sheet from the oven. Allow the coasters to cool completely on the baking sheet before attempting to move them. They will be soft when hot but will harden significantly as they cool down to room temperature.
Step 5: The Finishing Touches
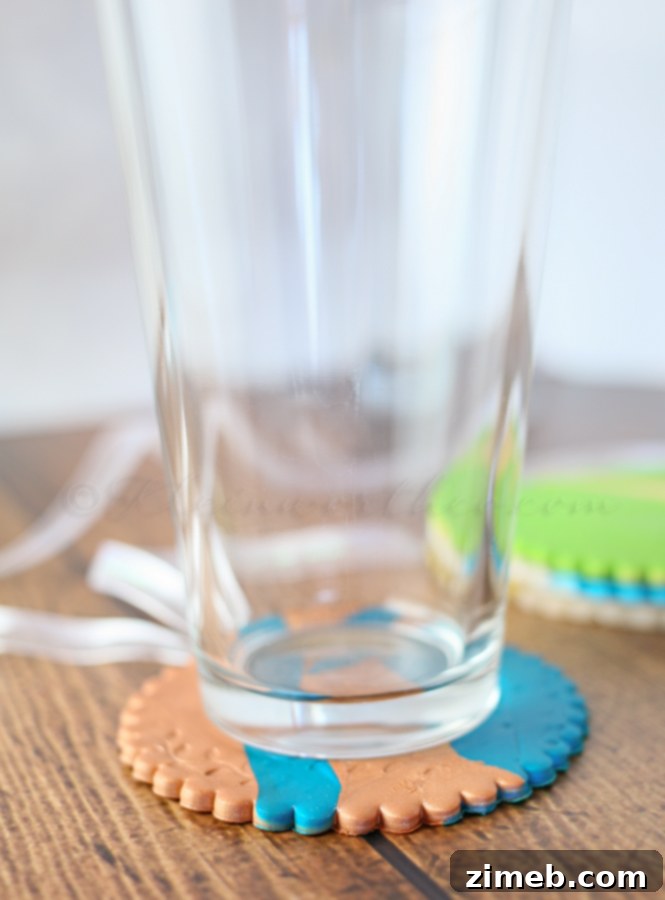
Once your polymer clay coasters are thoroughly cooled and hardened, the final step is to add a protective backing. Cut small circles (or squares, depending on your coaster shape) of felt that are slightly smaller than your coasters. Using a strong adhesive, apply a thin, even layer to the back of each coaster and carefully press the felt piece into place. This felt backing serves a crucial purpose: it prevents any rough spots on the clay from scratching your tables and provides a soft, non-slip surface. For an extra layer of protection and a polished look, you might consider applying a coat of polymer clay glaze or varnish once the felt is securely attached. This will not only enhance the colors but also make your coasters more resistant to moisture and wear. That’s it! The entire process is incredibly straightforward, and clean-up is remarkably quick, making it a perfect project for a relaxing afternoon.
The Joy of Handmade: Why These DIY Coasters Are More Than Just Decor
Completing these DIY Clay Coasters with Premo Clay was an incredibly rewarding experience. There’s a profound satisfaction that comes from creating something beautiful and functional with your own hands, especially when it directly enhances your living space. These coasters are far more than just practical items for protecting surfaces; they are unique expressions of creativity, imbued with personal touch and care. I absolutely loved working on this project, and I’m already envisioning making several sets as thoughtful, personalized gifts for family members for upcoming occasions. Imagine the delight of friends and family receiving a custom-made gift that perfectly matches their home decor, knowing it was crafted with love and attention to detail.
Furthermore, these coasters achieve precisely what I was looking for in our new home: they add a perfect pop of vibrant color and a touch of whimsical charm. The subtle shimmer of the pearl clay variations, combined with the unique marbled patterns, creates a sophisticated yet playful aesthetic that immediately elevates the ambiance of our media room. This project serves as a wonderful reminder that even small, handmade items can have a significant impact on the overall feel and personality of a home. They invite conversation, showcase individuality, and contribute to a welcoming atmosphere that store-bought items often struggle to replicate.
Elevate Your Home Decor with Custom Creations
Embracing DIY projects like these polymer clay coasters is a fantastic way to inject fresh energy into your home decor without breaking the bank. The versatility of Premo Clay means that once you master the basics of coaster making, a world of other creative possibilities opens up. You could experiment with different sizes to create trivets for hot dishes, make decorative trays, or even craft unique jewelry pieces. This hands-on approach allows you to curate a home that truly reflects your taste, piece by piece, rather than relying solely on mass-produced trends. Custom home accents, like these DIY coasters, are excellent for personalizing a space and making it feel uniquely yours. They are not just functional; they are statements of style and creativity that resonate with anyone who appreciates handmade craftsmanship.
Beyond Coasters: Exploring More Premo Clay Projects
If this project has sparked your creative spirit, you’ll be thrilled to discover the extensive range of possibilities with Premo Clay and other polymer clay products. Many resources are available to inspire your next craft adventure, from intricate jewelry making to sculptural art and other functional home decor items. Engaging with the wider crafting community can provide endless ideas and support.
Find More Info & Connect Here
Facebook | Twitter | Blog | Pinterest
More Projects with Premo Clay
Discover further inspiration and tutorials by exploring other projects that utilize the incredible versatility of Premo Clay. From decorative bowls to personalized ornaments, the possibilities are boundless for adding handmade charm to your surroundings.
Frequently Asked Questions About Polymer Clay Coasters
Are polymer clay coasters durable?
Yes, when properly baked, polymer clay coasters are surprisingly durable and robust. They become firm and solid, resisting breakage from typical household use. For added longevity and water resistance, you can seal them with a polymer clay varnish.
Can I clean polymer clay coasters?
Absolutely! For light cleaning, simply wipe them down with a damp cloth. If you’ve sealed them with a varnish, they will be even more resistant to spills and can be gently cleaned with mild soap and water.
Can I use other types of clay for coasters?
While air-dry clay can be used, polymer clay like Premo Clay is highly recommended for coasters due to its superior durability, water resistance (especially when sealed), and ability to achieve vibrant, lasting colors once baked. Air-dry clay typically needs multiple coats of sealant to achieve a similar level of protection.
What if my oven temperature is inaccurate?
An oven thermometer is an inexpensive but invaluable tool for polymer clay artists. Incorrect temperatures can lead to under-baked (brittle) or over-baked (scorched, discolored) clay. Always check your oven’s actual temperature to ensure perfect curing.
Conclusion: Your Next Creative Adventure Awaits
Embarking on DIY projects, particularly with a medium as forgiving and rewarding as Premo Clay, offers a unique opportunity to personalize your home and unleash your inner artist. These DIY Clay Coasters are more than just functional items; they are a testament to creativity, bringing a bespoke touch to your media room or any other space in your home. They are simple to make, offer endless customization possibilities, and result in beautiful, durable pieces that you’ll be proud to display and use for years to come. Whether you’re decluttering, redecorating, or simply looking for a fun and easy craft project, making your own polymer clay coasters is a fantastic choice. So, gather your materials, choose your favorite colors, and get ready to create something truly magnificent. Your home, and your guests, will thank you for the personal touch!
Want More Home Decor Ideas?
If you’re brimming with creative energy after making your coasters, explore these other inspiring home decor projects that can add even more character and functionality to your living space.
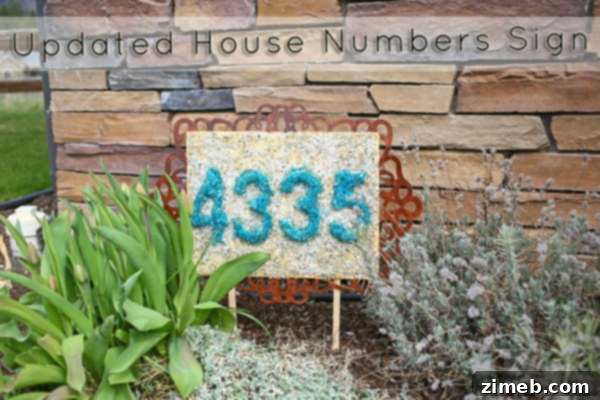
Updated House Numbers Sign
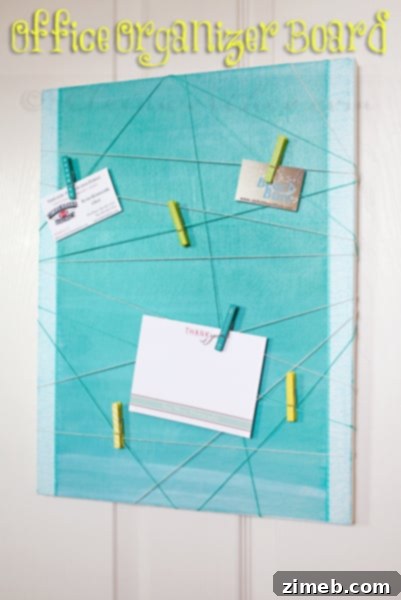
Office Organizer Board
To see where I am linking today, visit HERE.