
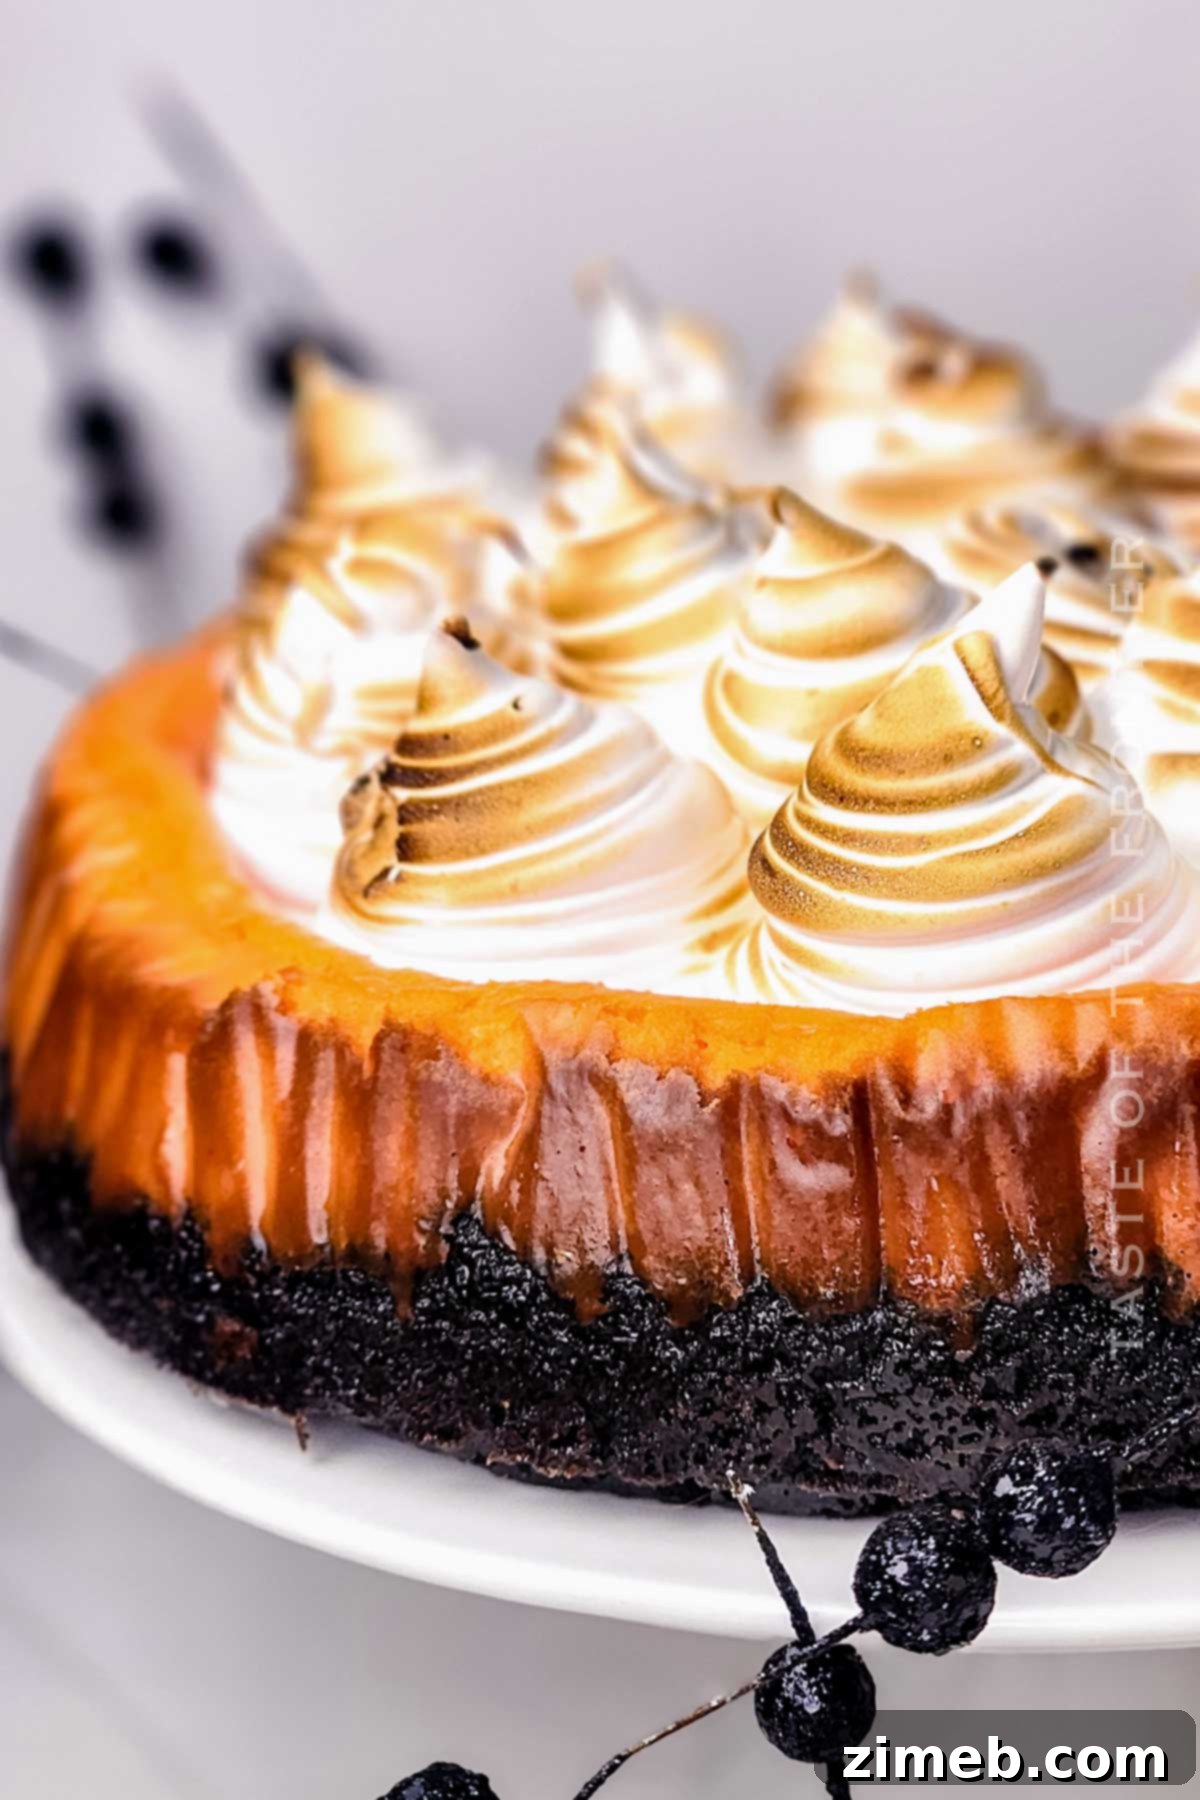
Indulge in the ultimate Halloween Cheesecake – a hauntingly delicious, creamy, and festive dessert guaranteed to be the star of any spooky celebration! This wickedly sweet treat combines classic flavors with an irresistible Halloween twist, making it perfect for both kids and adults.
As the leaves change and a crisp chill fills the air, our thoughts turn to cozy sweaters, pumpkin spice, and, of course, Halloween! This holiday isn’t just about costumes and trick-or-treating; it’s also a fantastic excuse to unleash your creativity in the kitchen. And what better way to celebrate than with a show-stopping Halloween dessert? Forget the usual candy; this year, elevate your spooky feast with a truly extraordinary treat: a creamy, vibrant Halloween Cheesecake with charming meringue ghosts.
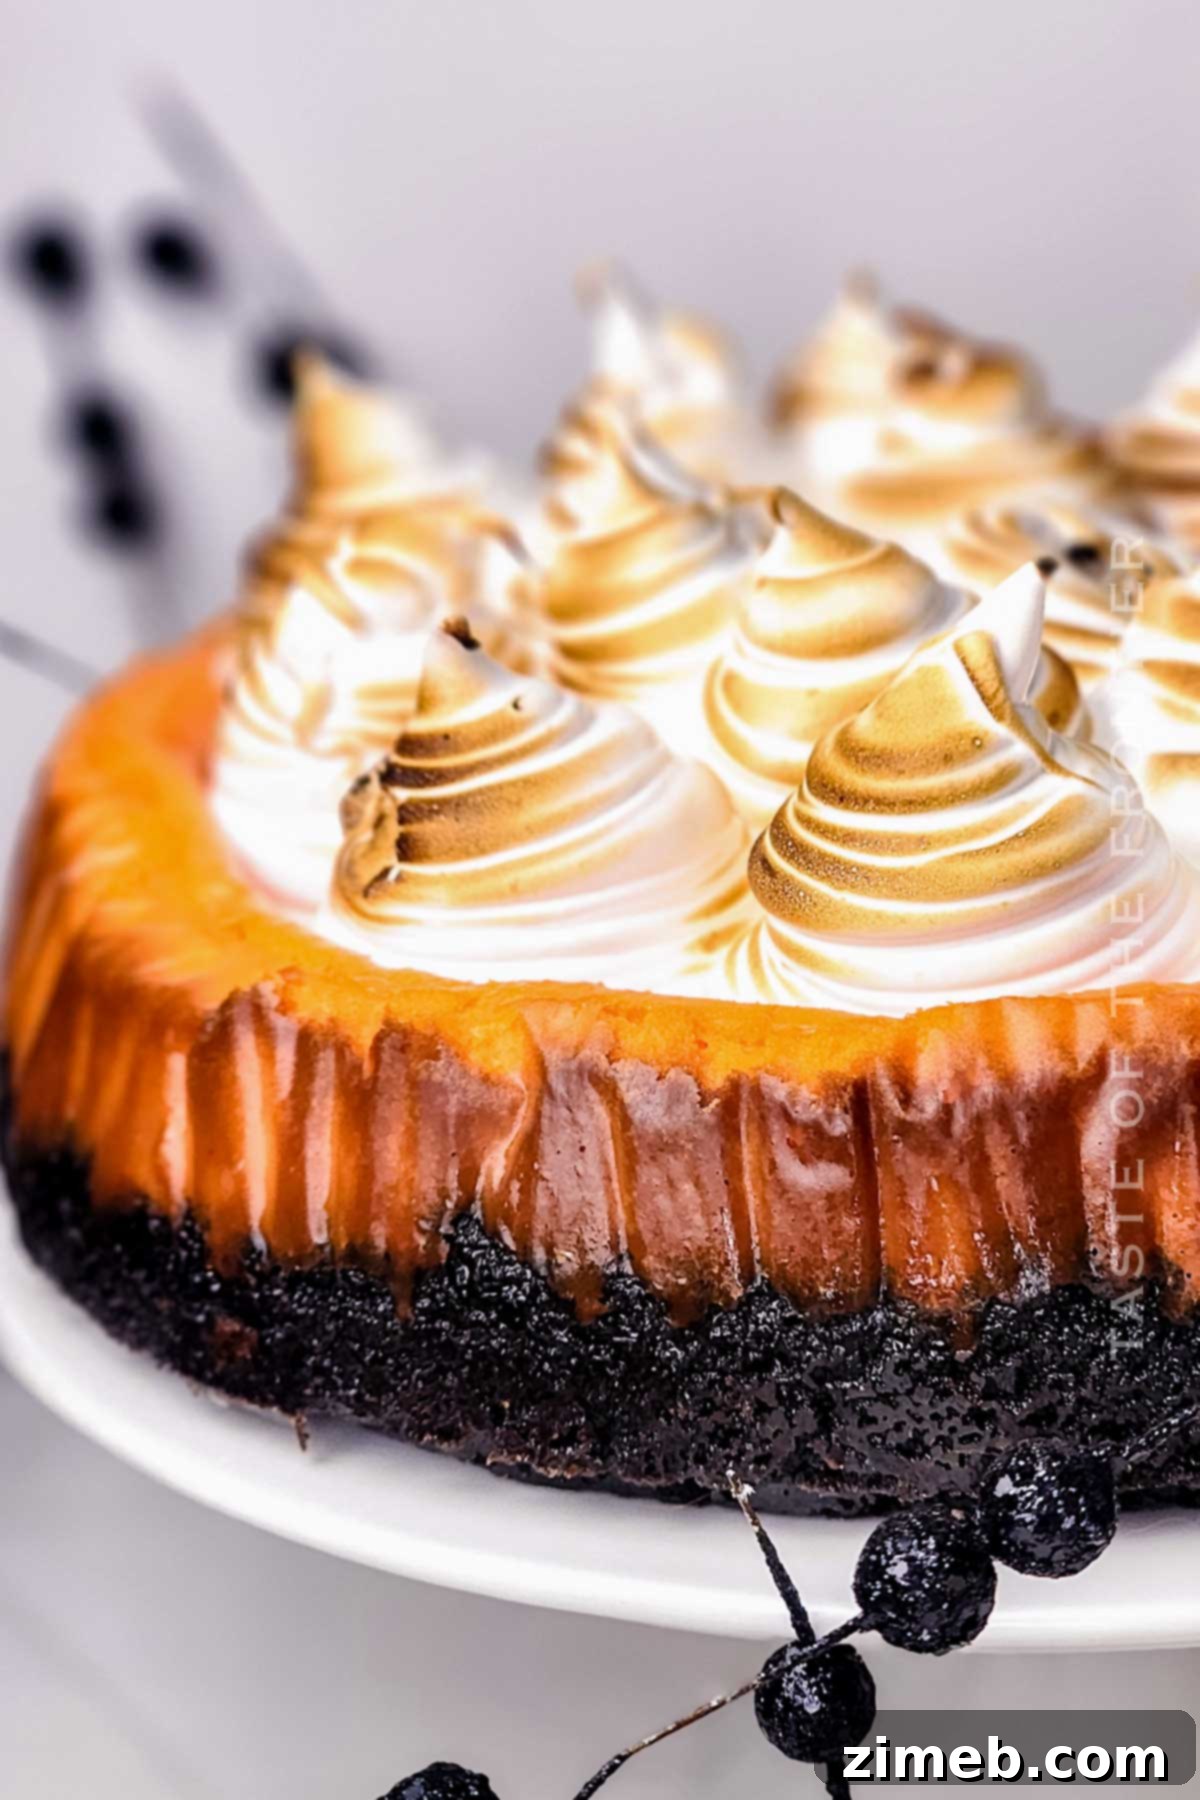
Cheesecake, a beloved dessert worldwide, is celebrated for its rich, creamy texture and delicate sweetness. Its incredible versatility makes it a blank canvas for culinary innovation. You can savor a classic New York-style cheesecake, or you can infuse it with countless flavors and adorn it with imaginative toppings to suit any occasion. For Halloween, we’re taking this beloved dessert to a whole new level by combining a crunchy Oreo cookie crust, a vibrant orange vanilla-flavored cheesecake filling, and playful torched meringue ghosts as a whimsical topping. This delightful confection promises to be a spooky treat that everyone, from the youngest ghoul to the most seasoned witch, will adore.
So, get ready to bake some Halloween magic! I’m thrilled to share my favorite Halloween cheesecake recipe, complete with expert tips and tricks to help you create a dessert that’s both eerie and enchanting this fall season.
Why This Halloween Cheesecake Will Haunt Your Dreams (In a Good Way!)
There are countless reasons why this Halloween Cheesecake should top your baking list this year. It’s more than just a dessert; it’s an experience that combines festive fun with gourmet indulgence.
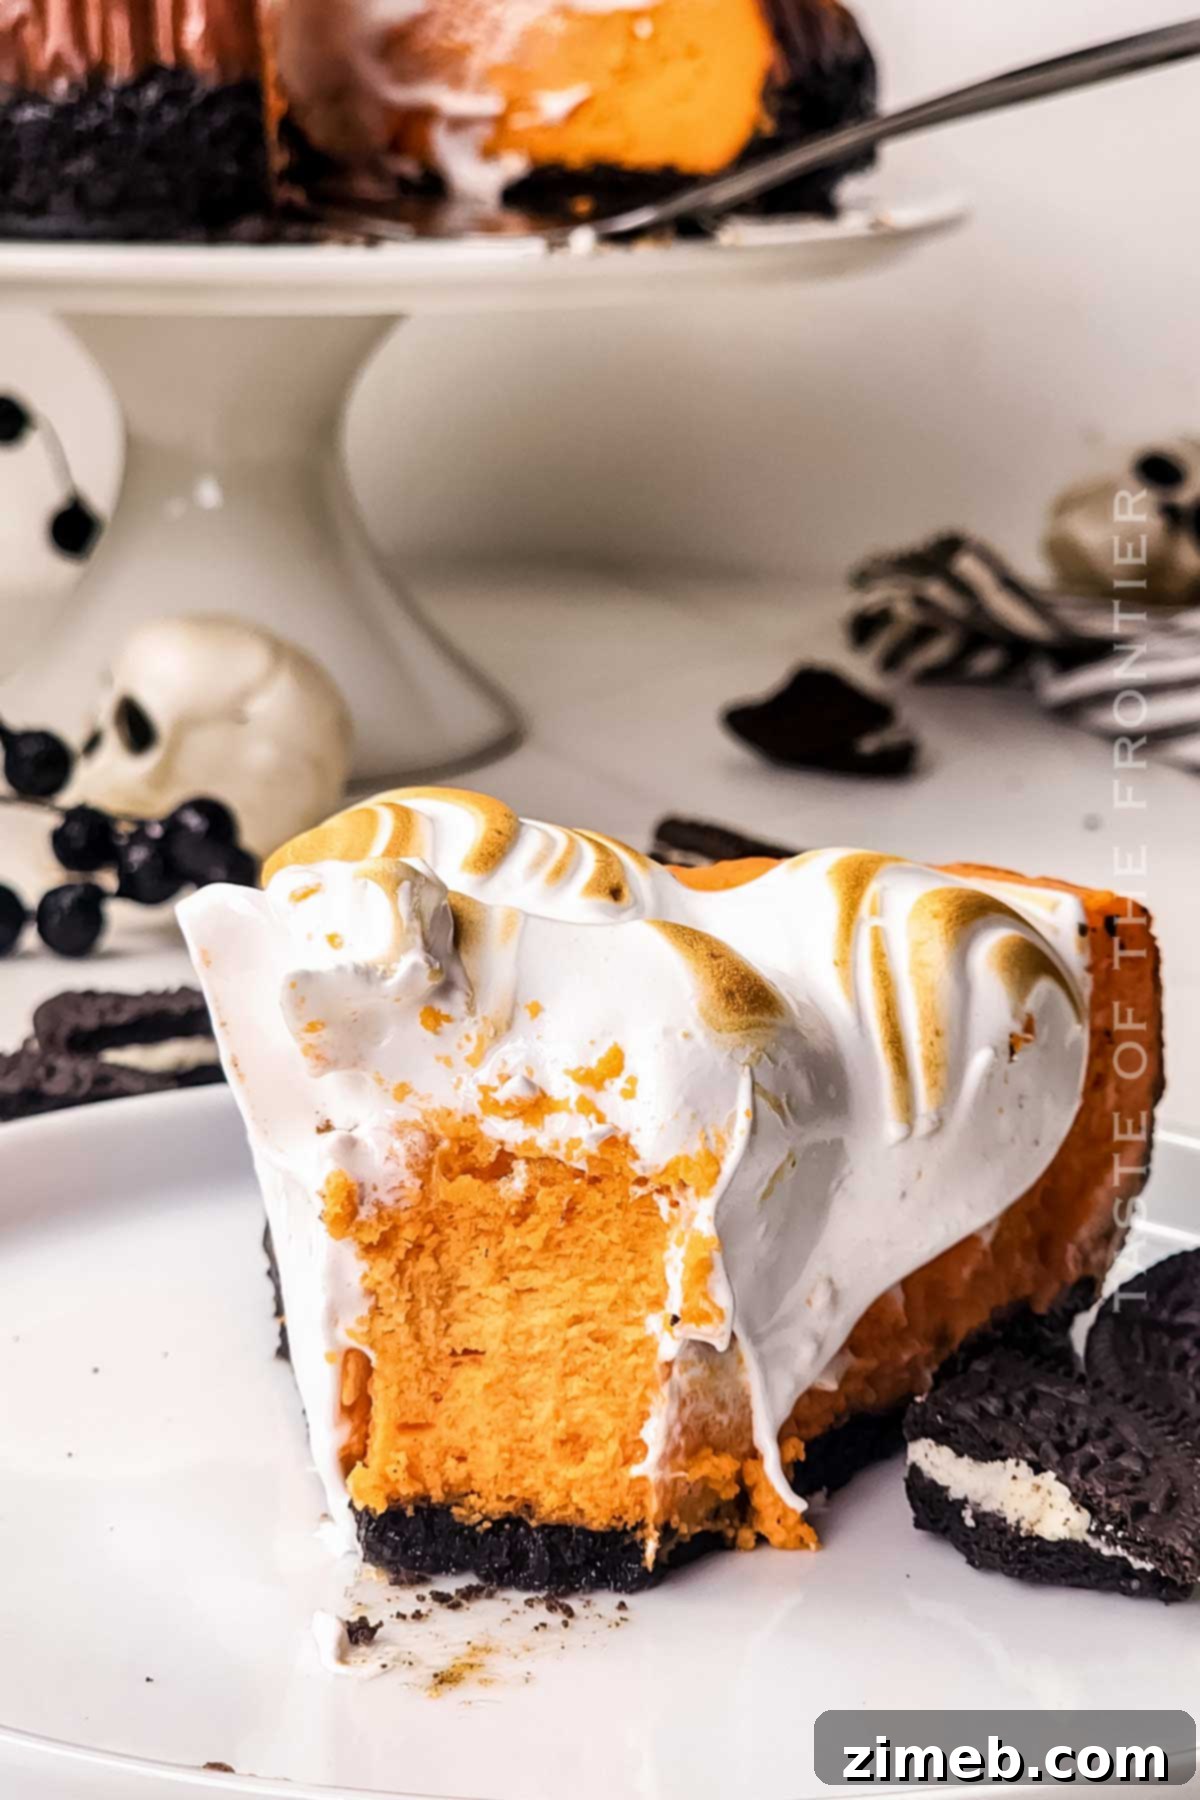
- The Creamiest Halloween Dessert You’ve Ever Tasted: There’s simply no comparison to a homemade cheesecake. This recipe delivers an exceptionally smooth, velvety cheesecake layer that melts in your mouth. Paired with a robust chocolate Oreo cookie crust, a hint of light vanilla flavor, and the adorable, pillowy meringue ghosts on top, it’s a symphony of textures and tastes. This isn’t just a dessert; it’s a centerpiece that demands attention and rave reviews.
- Unleash Your Inner Mad Scientist (Customize and Have Fun!): One of the greatest joys of making cheesecake is its adaptability. This recipe provides a fantastic foundation, but it’s also an invitation to let your imagination run wild. Whether you stick strictly to my design or explore additional fillings and toppings (ideas below!), cheesecake is an incredible canvas. It harmonizes beautifully with a spectrum of colors, flavors, and textures, making it pure fun to experiment with. Halloween is the perfect time for playful indulgence, allowing both kids and adults to embrace their sweet cravings and creative spirit.
- A Spooky Treat You Can Prepare in Advance: Holiday preparations can be hectic, and finding a full day or two to dedicate solely to dessert can be challenging. That’s where this Halloween Cheesecake shines! You can prepare the cheesecake base ahead of time, allowing it to chill and set perfectly, or even freeze it until the big day. This make-ahead convenience means less stress on party day and more time to enjoy the festivities, knowing your wickedly delicious dessert is ready to enchant your guests.
Key Ingredients for a Perfectly Spooky Oreo Cheesecake
Crafting this incredible Halloween cheesecake requires a blend of common pantry staples and a few special additions that bring the festive theme to life. You’ll work with basic ingredients like eggs, sugar, and salt, along with these crucial components:
- Oreos: The foundation of our cheesecake begins with everyone’s favorite chocolate sandwich cookies. Blended into fine crumbs and combined with butter, Oreos create a rich, dark, and perfectly chocolatey crust that beautifully contrasts the vibrant orange filling.
- Cheesecake Filling: Our Halloween-inspired filling is a classic “American” style cheesecake, meaning it features generous amounts of full-fat cream cheese. This ensures a wonderfully rich, dense, and irresistibly creamy texture that cheesecake lovers crave.
- Orange Food Coloring: To truly capture the spirit of Halloween, we tint our cheesecake filling with a food-grade dye. An orange gel food coloring is highly recommended for its concentrated pigment and ease of mixing, allowing you to achieve that perfect pumpkin-patch hue. Feel free to unleash your creativity here; you could opt for other spooky colors like vibrant green, mysterious purple, or even a dramatic black for a truly gothic treat.
- Meringue Topping: The charming ghost topping is made from homemade meringues. These fluffy, sweet clouds are surprisingly simple to prepare using just basic ingredients: egg whites and sugar. When piped and lightly torched, they transform into adorable, slightly golden “ghosts” that add a whimsical touch.
- Cream of Tartar: This powdery acid is a baker’s secret weapon for perfect meringues. Cream of tartar helps to stabilize the egg whites, allowing them to whip up into beautifully voluminous, fluffy, and stiff peaks. Don’t worry, it’s a common baking ingredient easily found in most grocery stores.
For a complete list of ingredients with precise measurements, please refer to the detailed recipe card at the end of this article.
Essential Kitchen Equipment for Your Halloween Cheesecake Adventure
Having the right tools can make all the difference in ensuring a smooth and successful baking experience. Here’s what you’ll need to create your magnificent Halloween Cheesecake:
- 9-inch Springform Pan: This specialized pan is crucial for cheesecakes. Its removable sides allow for easy release of the delicate dessert without damaging its structure, making it perfect for both setting the crust and holding the entire cheesecake during baking.
- Parchment Paper: Lining the bottom of your springform pan with parchment paper is a simple yet effective way to prevent the crust from sticking, ensuring a clean and effortless transfer when serving.
- Food Processor or Ziplock Bag and Rolling Pin: To create the perfect chocolatey crust, you’ll need finely crushed Oreo cookies. A food processor or blender makes quick work of this, but a sturdy ziplock bag and a rolling pin (or even a heavy bottle) can achieve the same results with a bit of elbow grease.
- Electric Mixer (Hand Mixer or Stand Mixer with Whisk Attachment): A good mixer is indispensable for both the creamy cheesecake filling and the airy meringue. While a hand mixer is perfectly adequate, a stand mixer, especially with a whisk attachment, is highly recommended for the meringue. Whipping egg whites to stiff peaks can take 5-6 minutes, and a stand mixer saves your arms from fatigue, ensuring consistently perfect results.
- Double Boiler (or Saucepan and Heat-Resistant Mixing Bowl): For the meringue, you’ll need to gently heat the egg white mixture over simmering water. A double boiler is ideal, but a saucepan with about 2 inches of water, topped with a heat-resistant medium mixing bowl that fits snugly without touching the water, works just as well. This method allows the sugar and cream of tartar to dissolve properly into the egg whites, creating a stable meringue base.
- Piping Bag with a Large Round Metal Piping Tip: To transform your meringue into adorable, spooky ghosts, a piping bag fitted with a large round metal tip will be your best friend. This allows for precise and consistent ghost shapes.
- Butane Torch: This tool is used to lightly toast the meringue ghosts, giving them a beautiful golden-brown finish and adding a subtle depth of flavor. It also helps to “cook” the outside of the meringue, giving it a slightly crisp texture that contrasts the soft interior.
How to Create Your Hauntingly Delicious Halloween Cheesecake with Meringue Topping
While the process of creating this spectacular Halloween cheesecake spans two days, much of the work can be done in advance. The overnight chilling is crucial for the cheesecake to set perfectly, ensuring that delightful creamy texture. Here’s a breakdown of the steps:
Overall Timing Overview:
- Day 1 (Steps 1 & 2): Approximately 2.5-4 hours of active preparation and baking, followed by cooling and overnight chilling. These steps can be completed well in advance.
- Day 2 (Steps 3 & 4): A quick burst of activity, taking a maximum of 30 minutes, right before you plan to serve. This involves making the meringue and decorating.
A quick note: This recipe involves baking. If you prefer a no-bake alternative, I’ve included some ideas below!
Step 1: Crafting the Perfect Oreo Cookie Crust
The foundation of any great cheesecake is a flavorful, sturdy crust. Our Oreo crust provides a delightful chocolatey base that complements the creamy filling beautifully.
- Prepare Your Pan: Begin by lightly coating the bottom and sides of your 9-inch springform pan with cooking oil or a nonstick spray. This aids in easy removal later. For an extra measure of security, you can also line the bottom with a circle of parchment paper.
- Crush the Oreos: Place your Oreo cookies (without the cream filling if using regular, or adjust butter if using Double-Stuf) into a food processor or blender. Process until they form fine, even crumbs. If you don’t have these appliances, simply place the Oreos in a sturdy ziplock bag, seal it, and crush them with a rolling pin or a heavy bottle until finely crumbled.
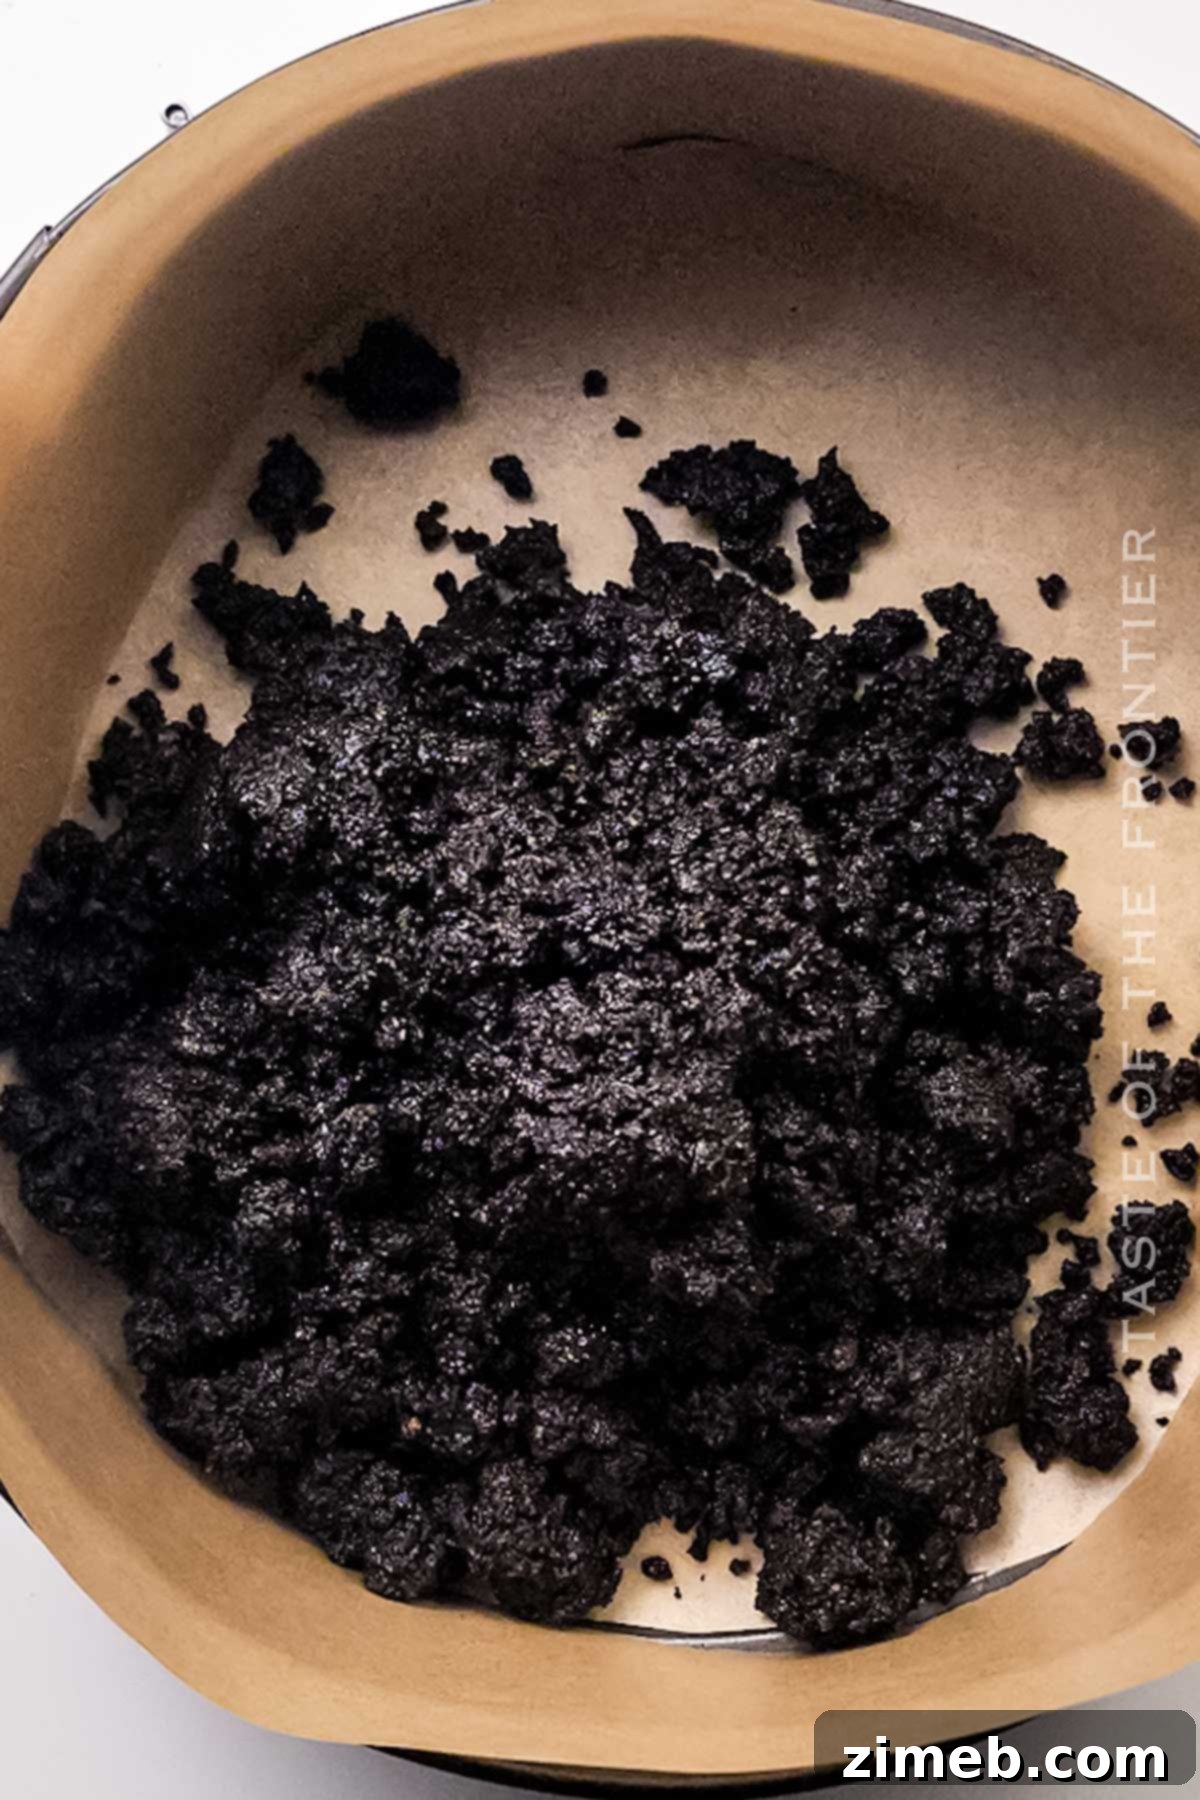
- Combine with Butter: Transfer the cookie crumbs to a medium mixing bowl. Pour in the melted butter and stir thoroughly with a fork until all the crumbs are moistened and well combined. The mixture should resemble wet sand.
- Press into Pan: Transfer the buttery cookie mixture into the prepared springform pan. Using the bottom of a small glass or the back of a spoon, firmly and evenly press the mixture across the bottom of the pan. Ensure it forms a compact, uniform layer.
- Chill the Crust: Place the prepared crust into the freezer while you prepare the cheesecake filling. Chilling helps the crust firm up and prevents it from becoming soggy during baking.
Step 2: Baking the Vibrant Orange Cheesecake Filling
This is where our cheesecake truly takes on its Halloween persona. Patience and precise mixing are key to a crack-free, creamy result.
- Preheat Oven: Preheat your oven to 325 degrees Fahrenheit (160 degrees Celsius).
- Cream Cheese Base: In a large mixing bowl, using a stand mixer with a paddle attachment or a hand mixer, beat the room-temperature cream cheese on medium-high speed until it is completely smooth and free of lumps. This is crucial for a silky cheesecake.
- Add Dry Ingredients: Add the granulated sugar, all-purpose flour, and salt to the cream cheese mixture. Blend again on low speed until just combined. Be careful not to overmix at this stage.
- Incorporate Eggs: Add the eggs one at a time, mixing briefly on low speed after each addition until just incorporated. Scrape down the sides of the bowl between additions to ensure everything is thoroughly mixed. Overmixing the eggs can introduce too much air, leading to cracks in your baked cheesecake.
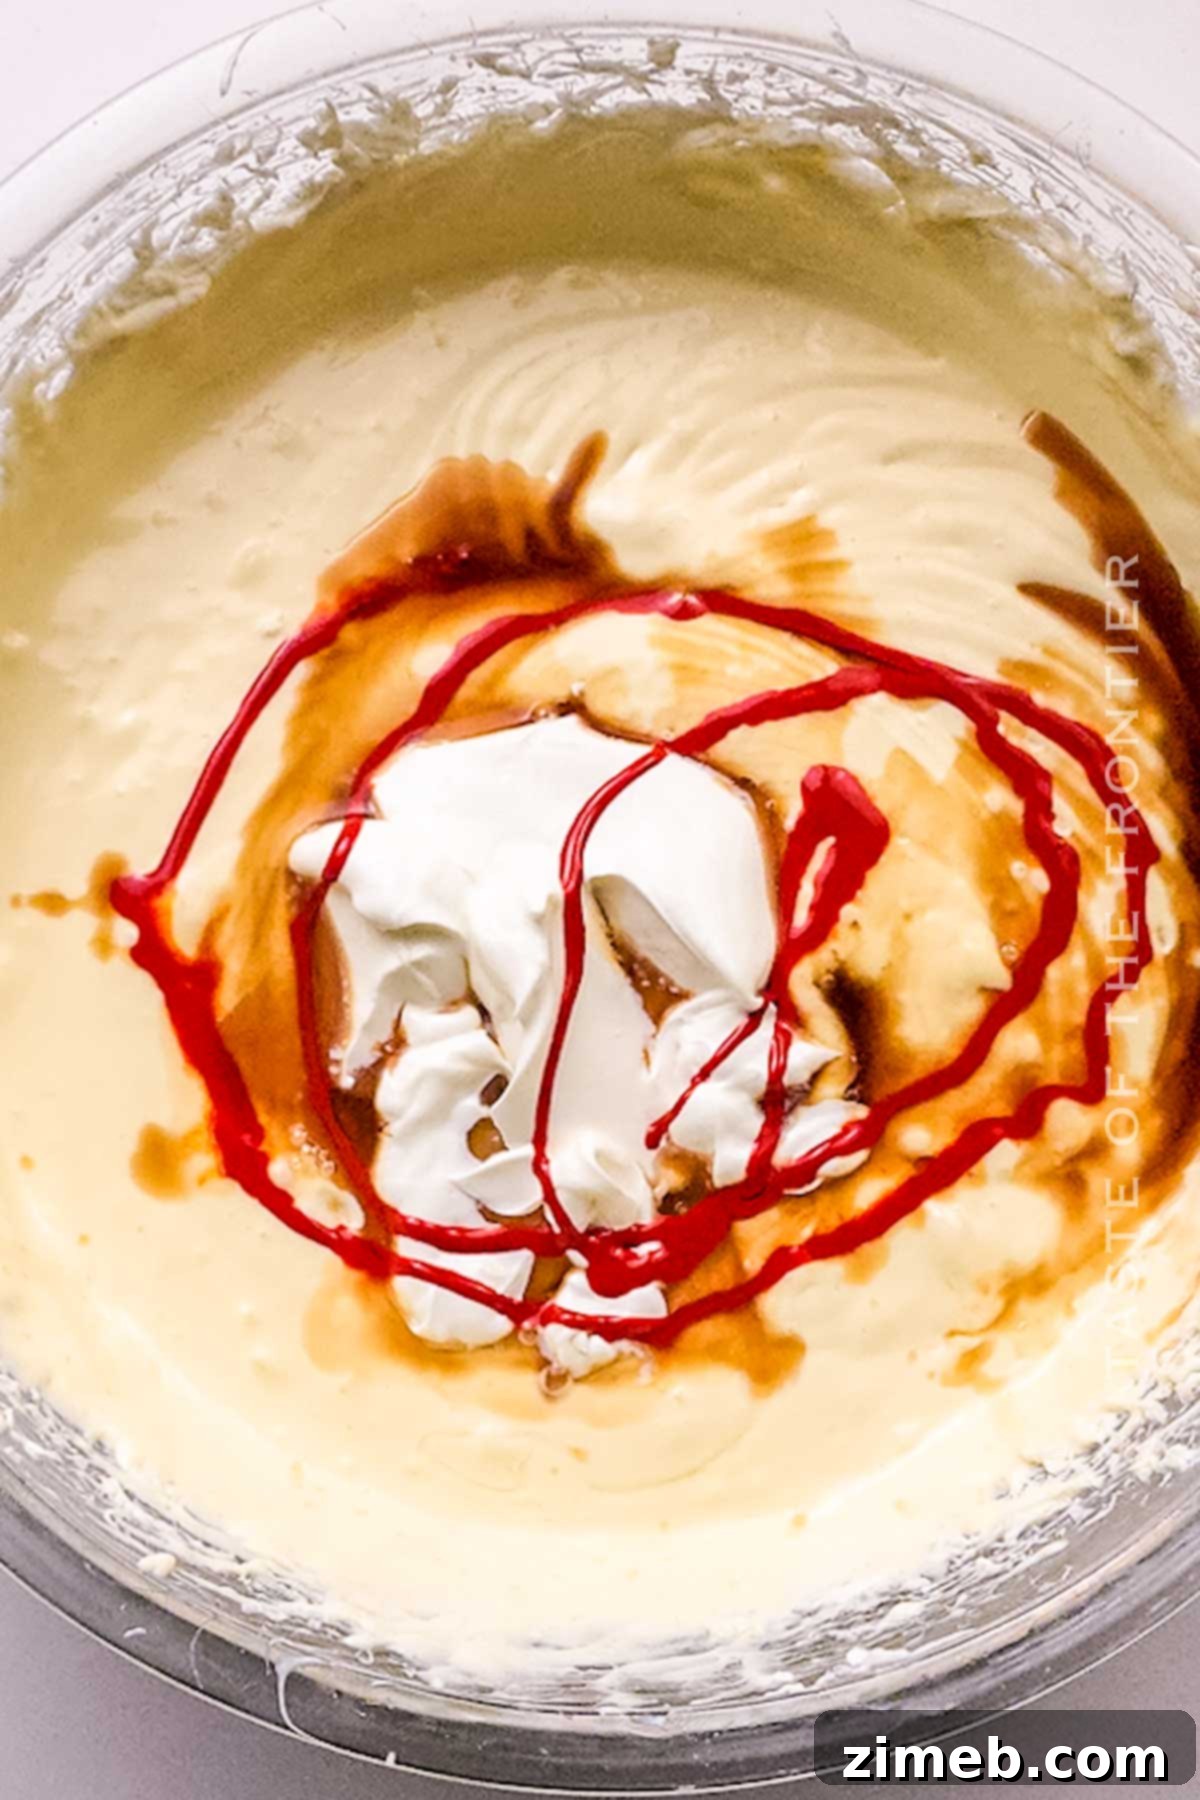
- Flavor and Color: With the last egg, add the sour cream, vanilla extract, and a few drops of orange food dye. Mix on low speed until the batter is smooth and uniformly colored. Start with a few drops of food coloring and gradually add more, mixing after each addition, until you achieve your desired Halloween orange. Remember, the color might deepen slightly during baking, so aim for a vibrant, but not overly intense, shade. Typically, 5-10 drops of gel food coloring are sufficient.
- Fill and Bake: Remove the chilled Oreo crust from the freezer and carefully pour the orange cheesecake filling over it. Gently tap the pan on the counter a few times to release any trapped air bubbles.
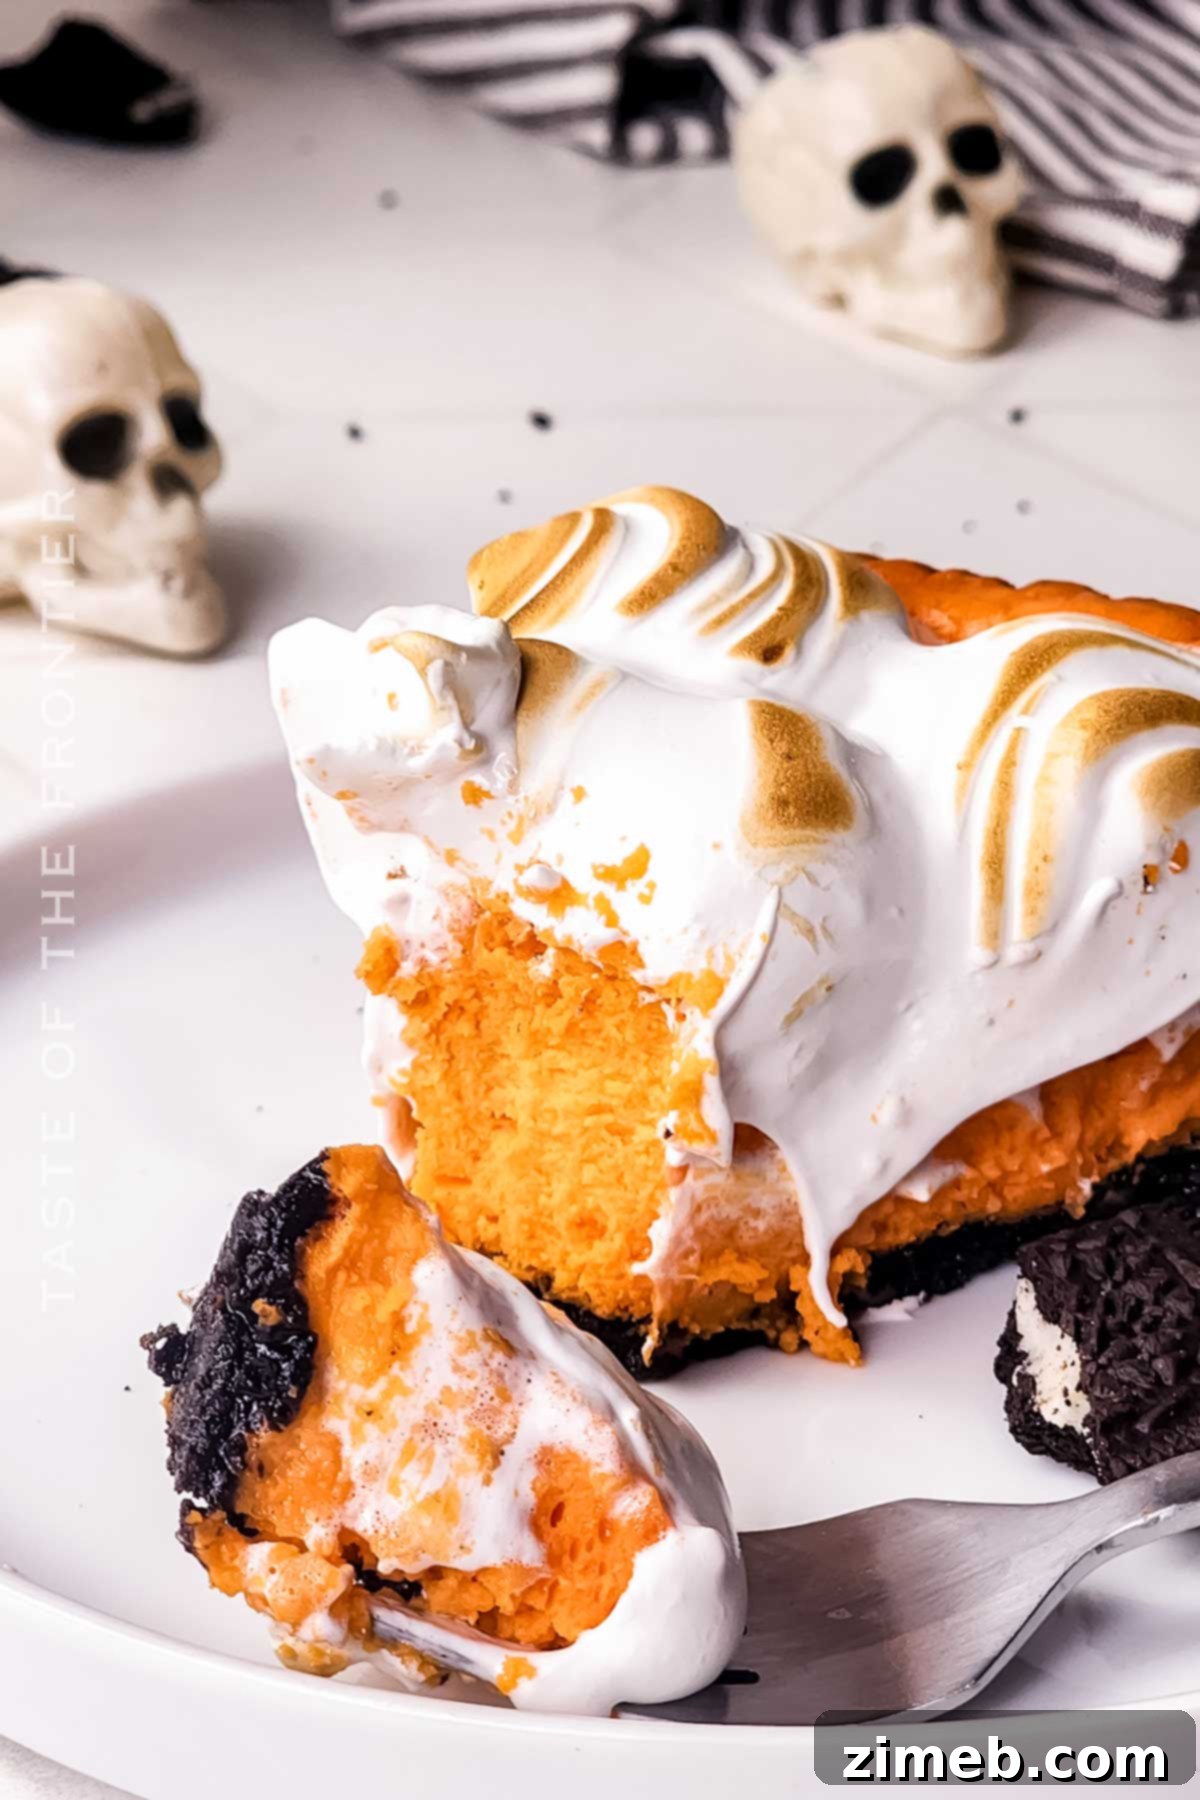
- Bake and Cool (Crucial Step): Bake for approximately 55-60 minutes. The cheesecake is done when the edges are set and appear slightly puffed, but the very center (about a 1-2 inch circle) still has a slight jiggle when gently shaken. This “jiggle test” is vital! Once baked, turn off the oven but leave the cheesecake inside with the oven door propped open slightly (use a wooden spoon to keep it ajar). Let it cool gradually in the warm oven for another hour. This slow cooling prevents cracks.
- Final Chill: Remove the cheesecake from the oven and let it cool completely to room temperature on a wire rack. This can take up to 2 hours. Once fully cooled, cover the cheesecake tightly with plastic wrap and chill it in the refrigerator overnight (at least 8-10 hours, but preferably longer) before decorating. This chilling period is essential for the cheesecake to firm up and develop its optimal texture and flavor.
Step 3: Creating the Ethereal Meringue Topping (Just Before Serving!)
This light, fluffy topping adds a whimsical ghostly element. Prepare it only when you’re ready to decorate and serve, after your cheesecake has had its full overnight chill.
- Combine Ingredients: In a heat-proof mixing bowl (preferably the bowl of your stand mixer, if it’s heat-proof), combine the egg whites, granulated sugar, and cream of tartar.
- Set Up Double Boiler: Place this bowl over a saucepan containing about 2 inches of simmering water (ensure the bottom of the bowl does not touch the water). Set over medium-high heat.
- Whisk to Dissolve: Continuously whisk the mixture by hand until the sugar and cream of tartar have completely dissolved into the egg whites. The mixture will become thin, warm to the touch, and frothy. This process ensures a stable meringue.
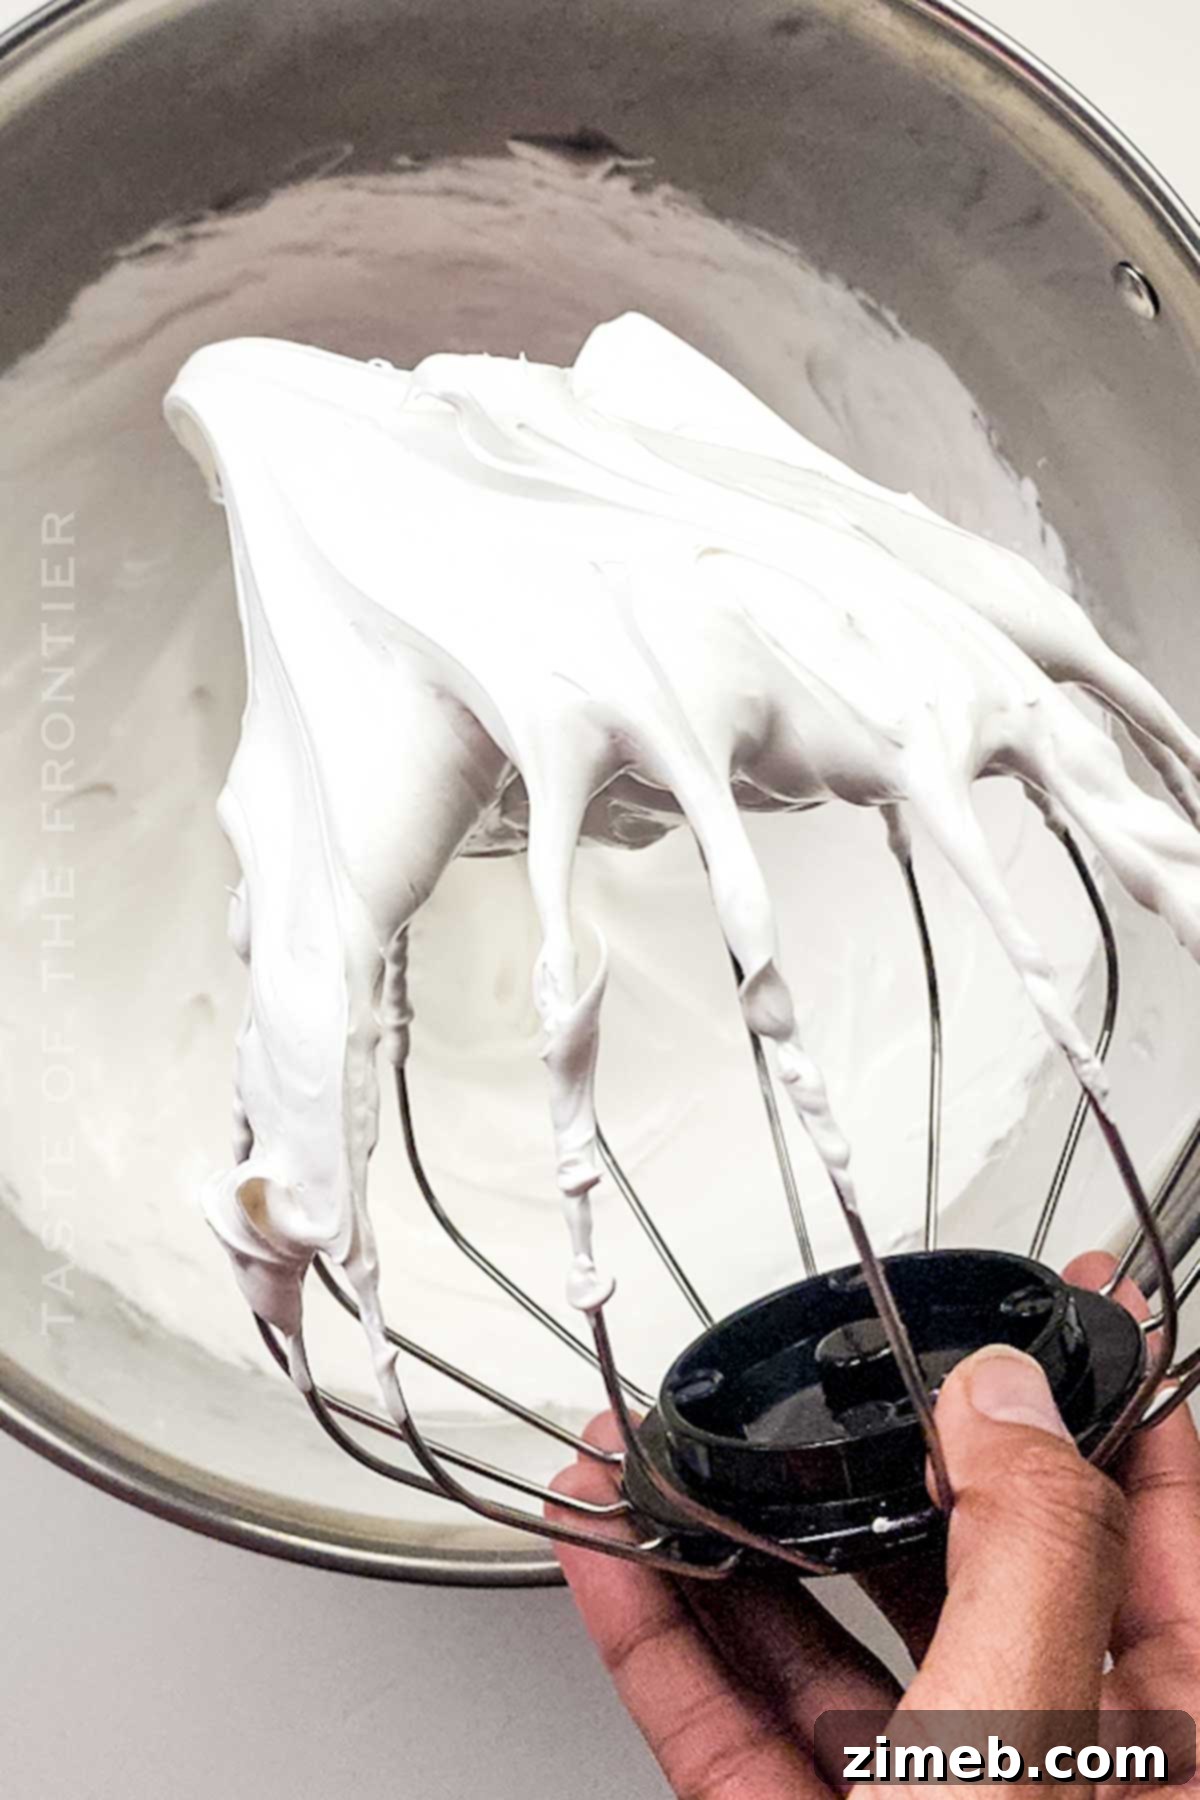
- Whip Meringue: Carefully transfer the bowl to a stand mixer fitted with a whisk attachment. Beat on high speed for about 6 minutes, or until the meringue becomes thick, glossy, and forms stiff peaks. You’ll know it’s ready when you lift the whisk, and the peak of meringue stands upright without drooping.
- Add Vanilla: Gently fold in the vanilla extract for added flavor.
- Prepare for Piping: Transfer the freshly made meringue into a piping bag fitted with a large round metal piping tip.
Step 4: Decorating and Serving Your Spooky Masterpiece
The final touches bring your Halloween Cheesecake to life!
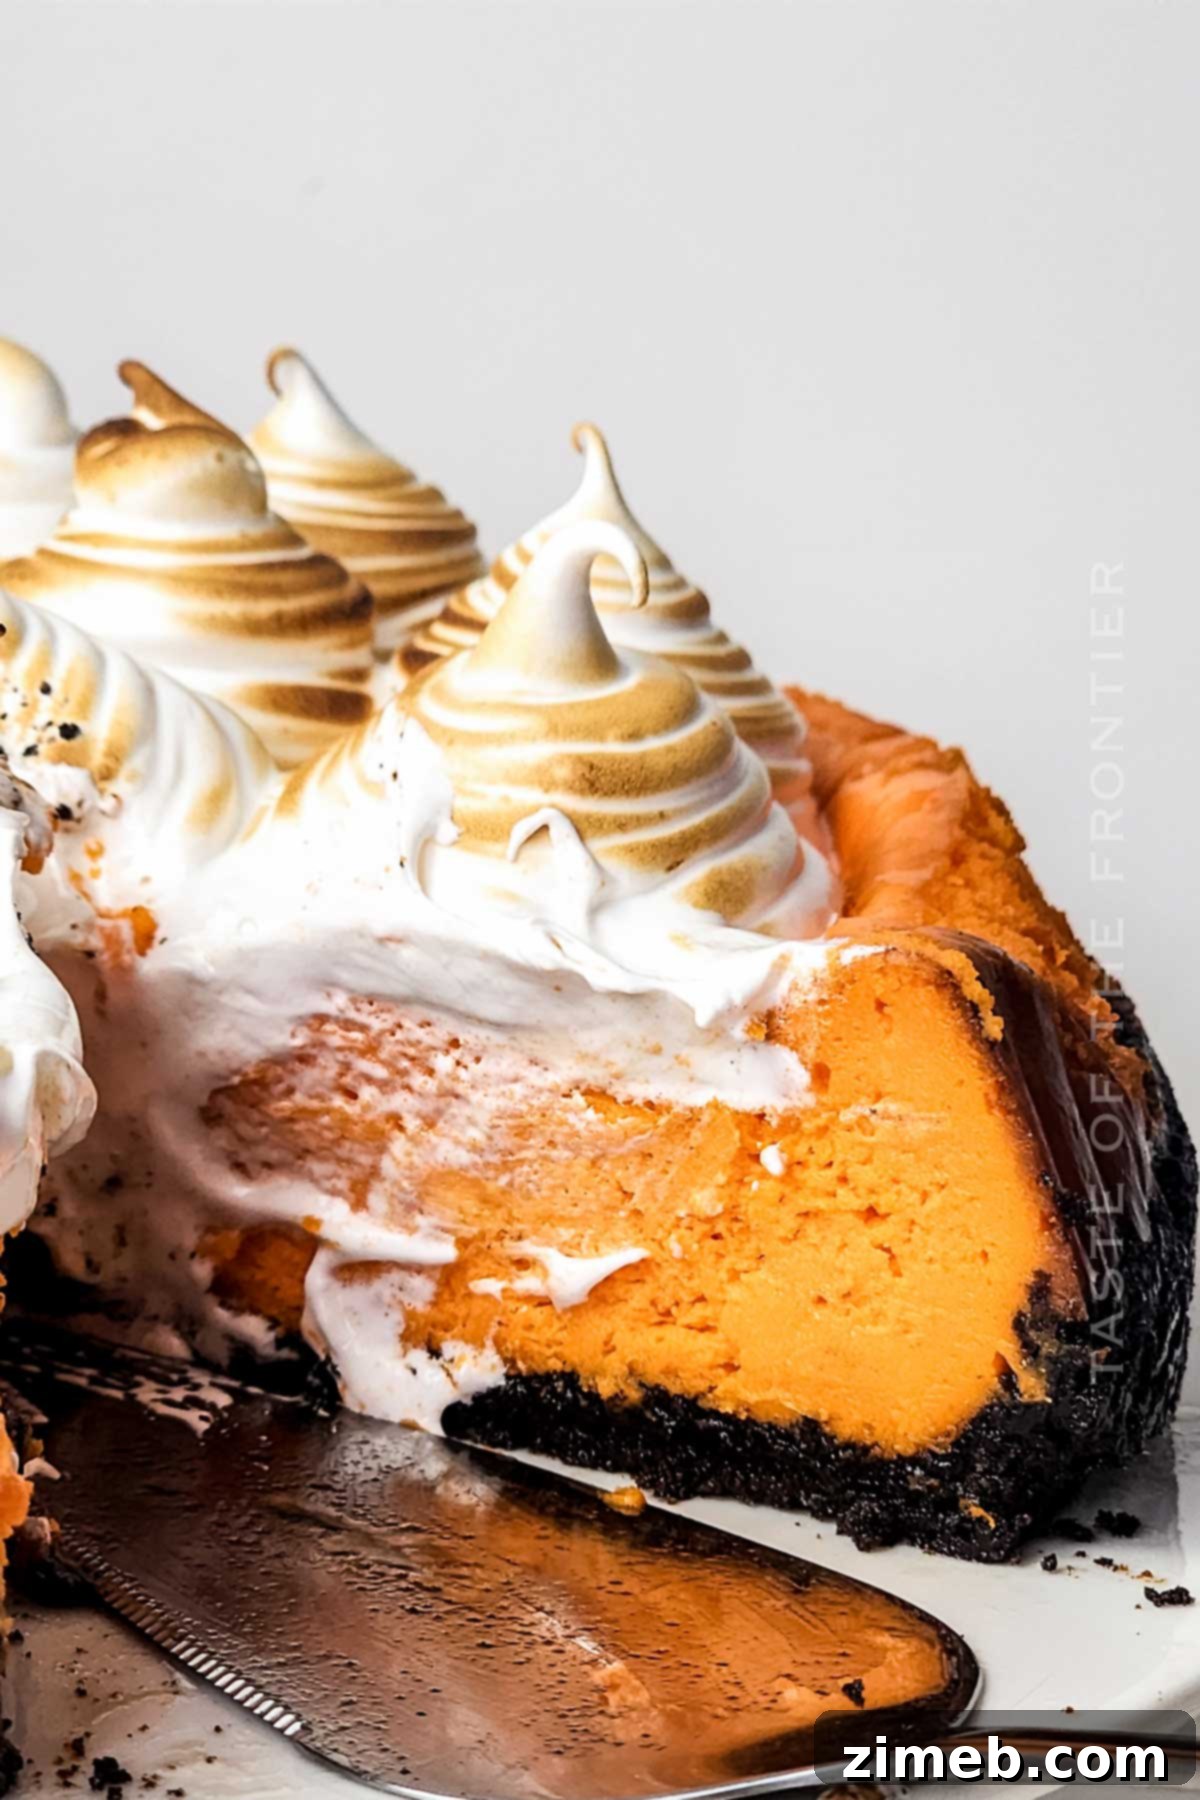
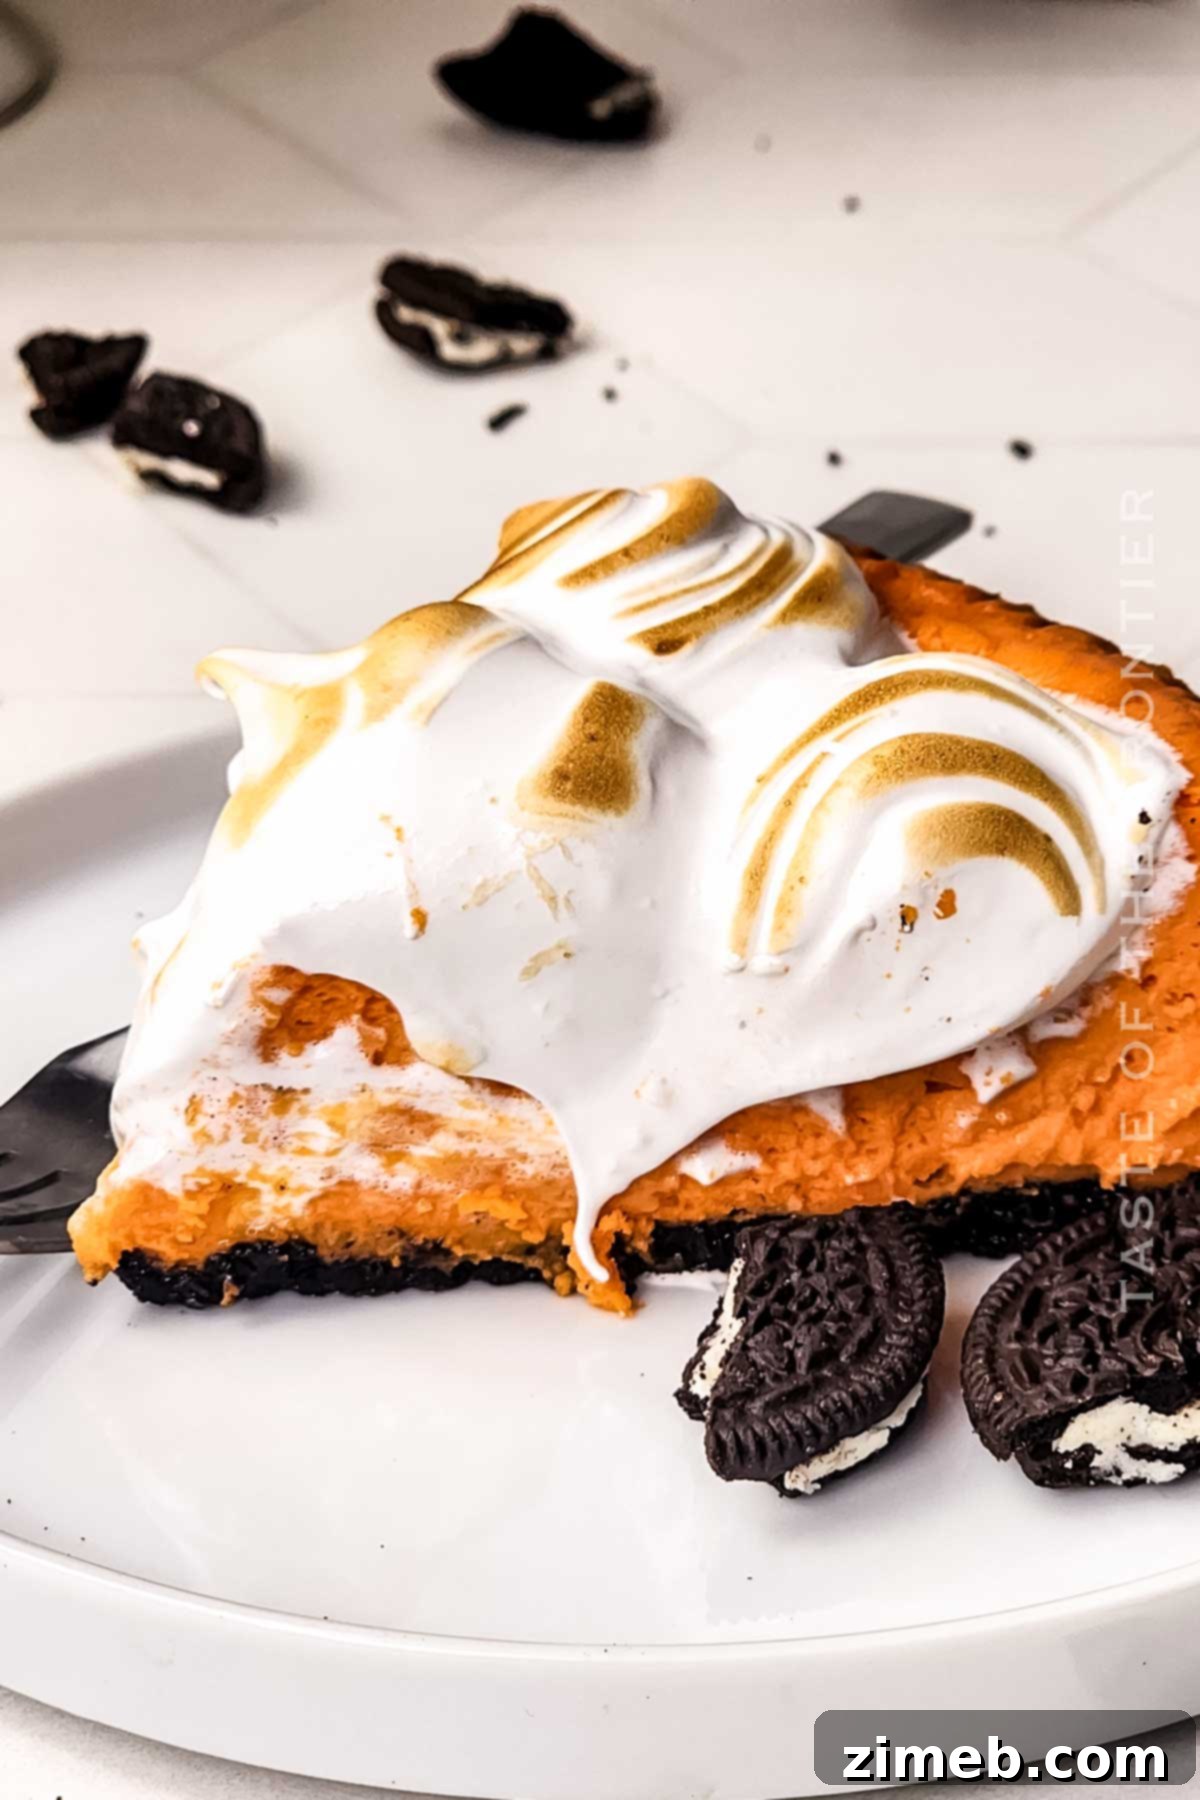
- Pipe Meringue Ghosts: When you’re ready to serve, carefully remove the chilled cheesecake from the springform pan. Pipe the meringue topping onto the cheesecake in large, distinct ghost-like mounds, covering the entire surface of the cake. You can vary the sizes and shapes slightly for a more dynamic look.
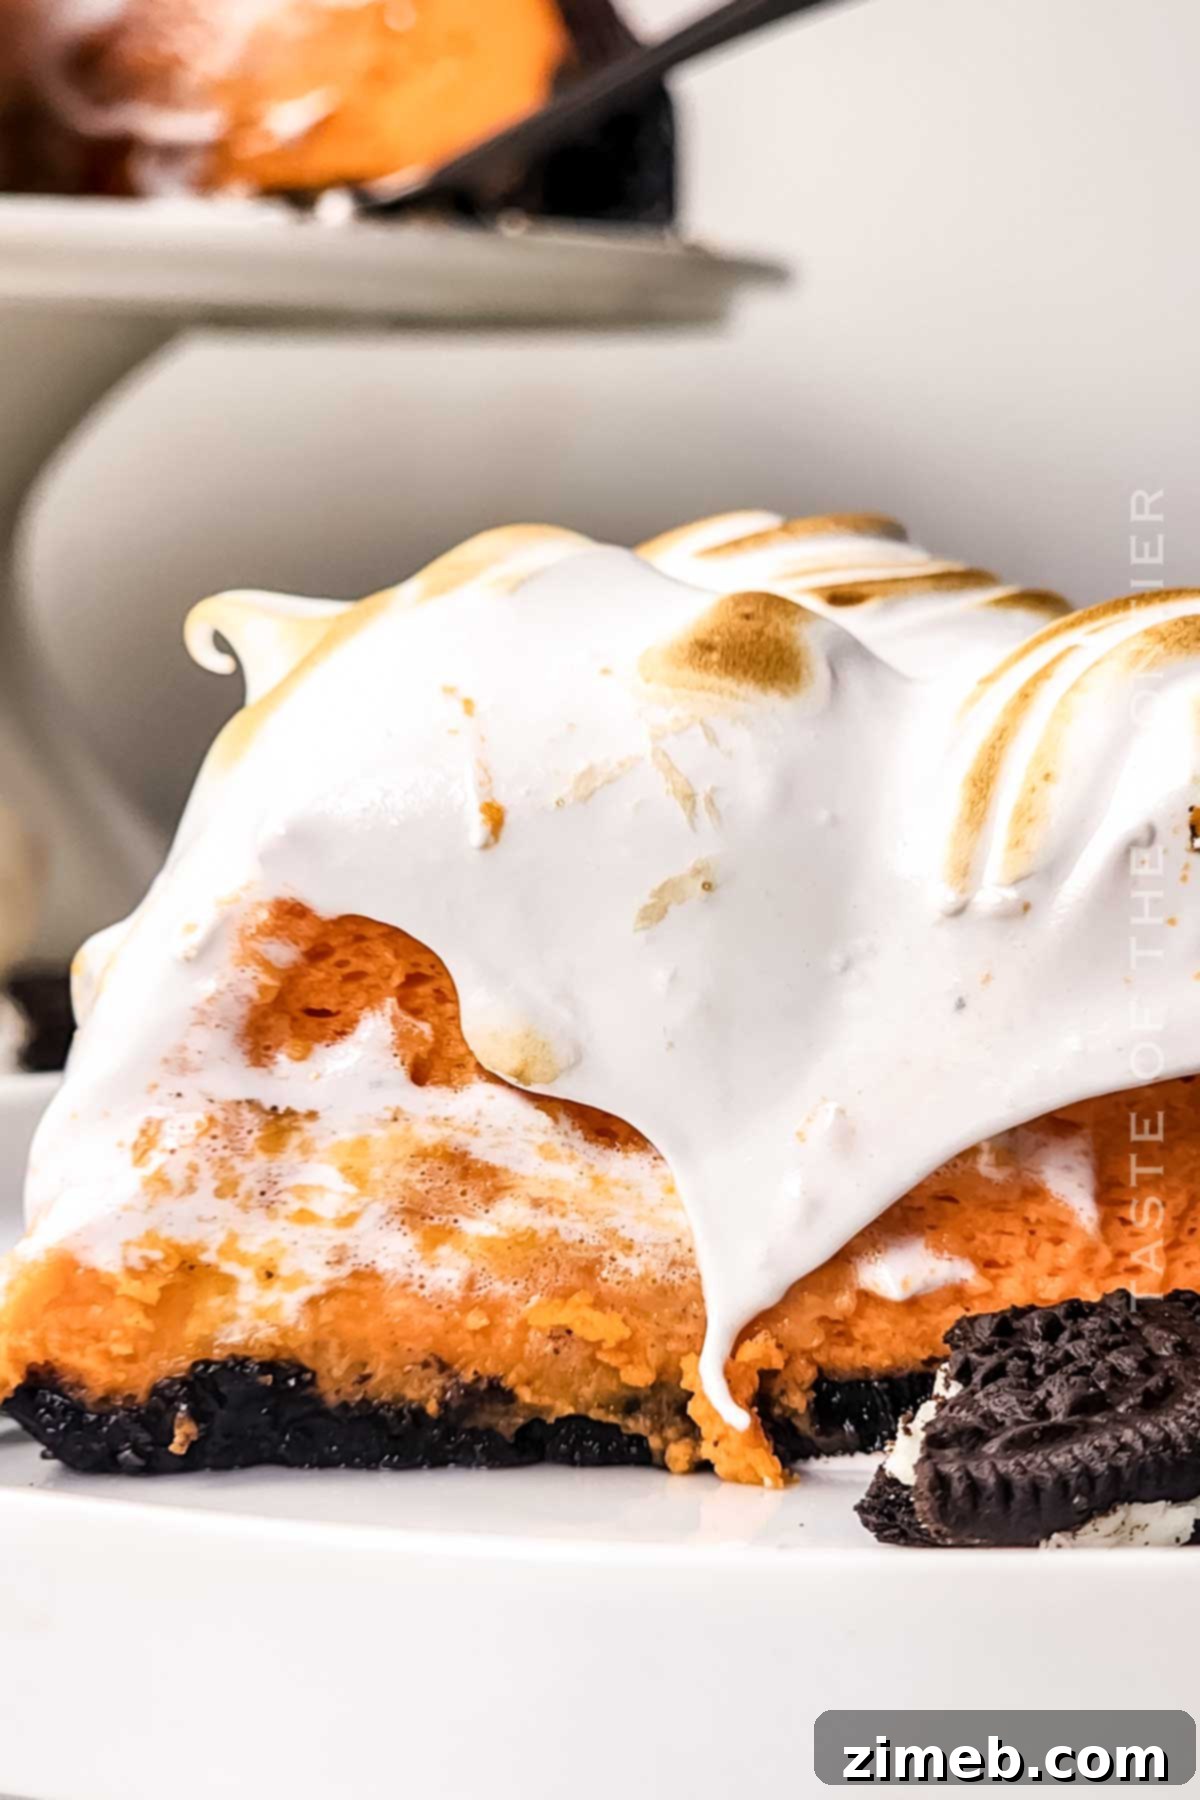
- Toast the Ghosts: Using a butane torch set to medium flame, gently move the torch across the meringue topping. Toast the ghosts until they achieve a beautiful golden-brown color, giving them a slightly caramelized flavor and a lightly crisp exterior. Be careful not to scorch them.
For an extra touch of spooky charm, you can crush any leftover Oreos and sprinkle them around the base of the cake or between the ghost meringues. I am confident your family will absolutely adore this delicious cheesecake, and it’s sure to become a cherished addition to your annual Halloween cookbook!
Halloween Cheesecake Ideas & Creative Variations for Endless Fun
While the classic orange cheesecake with meringue ghosts is undeniably festive, this recipe is incredibly versatile. Don’t hesitate to personalize your Halloween treat with these exciting ideas and variations:
- No-Bake Alternatives for Less Oven Time: For those who prefer a quicker or less heat-intensive method, no-bake cheesecake recipes are a fantastic alternative. The main difference is that instead of baking, you rely solely on refrigeration to set the cheesecake batter. While traditional baked cheesecakes often boast a smoother, more velvety texture, a well-prepared no-bake version can be equally delicious and sweet. You can also explore baking cheesecakes in a water bath for ultra-creamy results, or even using a slow cooker, though I personally find the oven to yield the most consistent texture. Any method, executed correctly, will result in a delightful sweet dessert!
- Explore Cheesecake Flavors and Filling Ideas: My recipe embraces the timeless New York-style vanilla cheesecake, which provides a perfect backdrop for the Halloween theme. However, the possibilities are vast!
- Fruity Twists: Swirl in raspberry puree, strawberry compote, or cherry filling for a “bloody” effect.
- Chocolate Indulgence: Add crushed Oreo cookies directly into the filling, chocolate chips, or a rich chocolate ganache swirl.
- Citrus Zest: A touch of lemon or orange zest can brighten the flavor profile.
- Pumpkin Spice: For a true fall flavor, incorporate pumpkin puree and a blend of cinnamon, nutmeg, ginger, and cloves.
- Candy Mix-ins: Fold in Halloween sprinkles, mini candy corn pieces, or chopped candy bars for added texture and sweetness.
- Halloween Cheesecake in Many Shapes and Forms: Beyond a whole cake, consider these creative presentations:
- Mini Halloween Cheesecakes: Use a muffin tin lined with cupcake liners (to prevent sticking and ensure easy removal) to bake individual mini cheesecakes. These are perfect for portion control and less messy to eat, though they do require decorating each one individually.
- Cheesecake Bars or Brownies: Pour the cheesecake batter over the crust in a rectangular baking pan to create easy-to-slice bars or layer it on top of brownies for a decadent hybrid.
- Cheesecake Cups: Serve individual portions in small glass jars or clear cups, layering the crust, filling, and toppings. This is visually appealing and highly convenient for parties.
Creative Decorating Ideas for Your Spooky Creation
If meringue ghosts aren’t quite your style, or you simply want to add more variety, the options for decorating your Halloween cheesecake are truly endless. The spooky season offers an abundance of edible decorations at your local grocery store!
- Edible Eyeballs: Add googly candy eyes to your meringue ghosts, or place them directly onto the orange cheesecake surface for a truly “watching you” effect.
- Creepy Crawlies: Arrange gummy worms, chocolate spiders, or even plastic spider rings (ensure they are food-safe!) on top of the cake. You can create a “cobweb” design with melted white chocolate or marshmallow fluff.
- Candy Galore: Beyond candy corn, consider pumpkin candies, gummy teeth, colorful Halloween sprinkles, chopped leftover Halloween candy bars, or even chocolate-covered pretzel “spider legs.”
- Marshmallow Ghosts: Instead of meringue, use marshmallow fluff or mini marshmallows arranged to look like ghosts. You can dab on tiny chocolate chip eyes.
- Cookie Decorations: Use small cookies cut into spooky shapes (bats, cats, gravestones) to adorn your cake. You can even write “RIP” on chocolate cookie “tombstones.”
- Whipped Cream Wonders: Instead of meringue, pipe stabilized whipped cream into ghost shapes or create swirling patterns and stars.
- Chocolate Art: Melt white chocolate and pipe simple ghost shapes or intricate cobwebs directly onto the cheesecake or onto parchment paper to harden, then transfer to the cake. Dark chocolate can be melted and drizzled for a dramatic effect.
While the excitement of buying all sorts of Halloween candies is undeniable, try to consider how different colors will interplay, whether the flavors will complement or overpower the cheesecake, and the overall aesthetic. Sometimes, less is truly more for a striking visual impact.
Elevating Your Halloween Cheesecake: More Recipe Enhancements
Beyond decorations, you can also modify the core components of your cheesecake for different textures and flavors:
- Meringue Alternatives for Topping: If you’re not a fan of meringue, or simply want a different texture, consider these alternatives for your topping:
- Stabilized Whipped Cream: A fantastic option! Simply whip heavy whipping cream with powdered sugar and a touch of vanilla extract until soft peaks form. Stabilized whipped cream holds its shape beautifully and provides a lighter, airier contrast to the rich cheesecake.
- Rich Chocolate Ganache: For serious chocolate lovers, a decadent chocolate ganache poured over the chilled cheesecake creates a glossy, intensely chocolatey layer.
- Fruit Curd Glaze: A lemon, lime, or even blood orange curd glaze can add a bright, tangy counterpoint to the sweet cheesecake.
- Melted Marshmallows: For a gooey, campfire-inspired topping, spread melted marshmallows over the cheesecake and lightly toast them.
- Go Big with Layers: Why stop at one layer? Cheesecake can be just one component of a more elaborate dessert. Consider using your cheesecake as:
- A Cake Layer: Bake thinner cheesecake layers and stack them between regular cake layers (chocolate, vanilla, red velvet) for a hybrid dessert.
- A Rich Top Layer: Pour the cheesecake filling over a baked cake base (like a rich chocolate brownie or a soft vanilla sponge) before baking, creating a dual-texture dessert.
You can add various mix-ins to the cake base, such as chocolate chips, fresh fruits, funfetti sprinkles, berries, or citrus flavors, or keep it simple to let the cheesecake shine. While this concept sounds amazing, be mindful that it will likely add to your overall baking time and complexity.
How to Properly Store Your Halloween Cheesecake Before and After the Party
Proper storage is key to maintaining the freshness, moisture, and delicious flavor of your Halloween cheesecake, ensuring it lasts well beyond the party.
- Refrigerator Storage: After the Halloween festivities, any leftover cheesecake should be stored promptly in the refrigerator. To keep it fresh and moist, place it in an airtight container or wrap it tightly with plastic wrap. A well-stored cheesecake will last in the refrigerator for 2 to 7 days, depending on the freshness of ingredients and the exact recipe. This excellent shelf life also makes it a fantastic make-ahead dessert; you can prepare the cheesecake base several days in advance, refrigerate it, and only add the delicate meringue topping just before serving.
- Freezing the Cheesecake: Cheesecake freezes remarkably well! The cheesecake base itself can be frozen for up to two months without significant loss of flavor or texture. For best results, allow the cheesecake to cool completely, then wrap it tightly in several layers of plastic wrap, followed by a layer of aluminum foil. You can freeze it as a whole cake or in individual slices. Thaw frozen cheesecake overnight in the refrigerator before serving.
- Storing Meringue Topping: While best made fresh, meringue topping can also be stored. In an airtight container, it can last in the refrigerator for a day or two, or in the freezer for up to a month. However, its texture might soften slightly upon thawing. For optimal presentation, it’s always recommended to prepare the meringue topping closer to serving time.
Expert Tips for Crafting the Perfect Halloween Cheesecake
Achieving a flawless, delicious cheesecake is easier with these pro tips:
- Always Use Room-Temperature Ingredients for Baking: This is a golden rule for cheesecakes! Room-temperature cream cheese, eggs, and sour cream blend much more smoothly and evenly, preventing lumps and ensuring a consistently creamy batter. This saves you time and frustration and contributes to a superior final texture.
- Opt for Full-Fat Cream Cheese: For the richest, creamiest, and most decadent cheesecake, always choose full-fat cream cheese. Whether you’re baking or making a no-bake version, the higher fat content contributes significantly to the luxurious texture and flavor that makes cheesecake so irresistible.
- Avoid “Double-Stuf” Oreos: While tempting, regular Oreos are best for the crust. Double-Stuf Oreos contain a substantial amount of extra sweet cream, which can make your crust overly sweet and may require adjusting the amount of melted butter to achieve the right consistency. Stick to the classic for optimal results.
- Safety First for Halloween Parties: This recipe is wonderfully family-friendly, but remember to keep the butane torch out of reach of little hands. Adult supervision is essential when toasting the meringue for everyone’s safety.
- Mixing Speed Matters: When beating the cream cheese initially, use a medium or medium-high speed until it’s perfectly smooth. However, once you start adding other ingredients like sugar, eggs, sour cream, and food coloring, switch to low speed. Overbeating the mixture, especially after adding eggs, can incorporate too much air into the batter. This excess air expands during baking and then contracts as the cheesecake cools, leading to unsightly cracks and a sunken center.
- The Sugar Trick (Granulated vs. Powdered): If you find that the granulated sugar you’re using feels too coarse or gritty for your preference, you can substitute it with an equal amount of powdered sugar (confectioners’ sugar). Powdered sugar dissolves more readily, contributing to an even smoother texture. Personally, I find regular granulated sugar works perfectly fine and dissolves well enough for this recipe.
- Enhance Texture with Cheesecake Add-ons (Optional): For an ultra-silky, even lighter cheesecake filling, you can gently fold in some homemade whipped cream (or a store-bought alternative like Cool Whip) or double cream into the cheesecake mixture during Step 2, just before pouring it into the crust. This addition creates a slightly airier, melt-in-your-mouth consistency.
- Flawless Removal from Springform Pan: To effortlessly remove your cheesecake without damaging its beautiful edges, first run a thin, flexible silicone spatula or a sharp knife carefully around the inner edges of the pan. This ensures the cheesecake doesn’t stick to the sides. Only then should you unlock and remove the outer ring of the springform pan.
- The Warm Knife Serving Tip: Cutting neat slices of cheesecake can sometimes be a challenge. The secret? First, allow the chilled cheesecake to sit at room temperature for about 15-20 minutes before cutting. Second, use a sharp knife that has been warmed by running it under hot water and then quickly wiped dry. Re-warm and clean the knife after each slice for perfectly clean, beautiful portions every time! It works like magic!
Popular Questions About Making Cheesecake
How Long Does Cheesecake Really Take To Set?
The chilling period is arguably one of the most critical steps in making a perfect cheesecake, allowing it to firm up and fully develop its rich, creamy texture and distinct flavor. While a minimum of 4 hours of chilling is necessary before serving, I wholeheartedly recommend allowing your cheesecake to set overnight, or for at least 8-10 hours. This extended chilling time makes a noticeable difference in both taste and texture, resulting in a denser, more cohesive, and ultimately more enjoyable dessert. If you absolutely can’t wait overnight, aim for the longest possible chilling duration you can manage after it cools to room temperature.
Can I Use a Water Bath To Cook Cheesecake?
Absolutely! Using a water bath (bain-marie) is an excellent technique for baking this easy Halloween dessert, though it requires a little more setup. A water bath creates a moist, even heat environment around the cheesecake, which is fantastic for preventing cracks, ensuring slow and uniform baking, and producing an incredibly smooth, velvety texture.
Here’s how to set up a DIY water bath:
- Gather Your Pans: You’ll need at least three baking pans of increasing sizes, or your springform pan and some heavy-duty aluminum foil. For perspective, if your recipe calls for a 9-inch springform pan, you might place it into a 10-inch pan, and then both of those into an 11-12 inch pan. The rule of thumb is to use pans that are progressively about 1 inch larger. Avoid significantly larger or differently shaped pans, as this can lead to uneven cooking.
- Foil Protection: If you don’t have all three pan sizes, a workaround is to tightly wrap your springform pan (with the cheesecake inside) in several layers of heavy-duty aluminum foil. This is a crucial step, as the foil creates a waterproof barrier, protecting your cheesecake from any water seeping in – you definitely don’t want a soggy crust!
- Place in Oven and Add Water: Once your cheesecake is secured (either nested in larger pans or wrapped in foil), place the entire setup into your preheated oven. Then, carefully pour hot water into the largest pan until it reaches about halfway up the sides of your springform pan.
The water bath method typically extends the baking time, usually taking around 90 to 110 minutes (almost two hours). While there isn’t one “best” way to make cheesecake – it often comes down to personal preference – many bakers swear by the water bath for its superior results in texture. I occasionally use no-bake or traditional baking methods for convenience, but the water bath is undoubtedly a fantastic technique for achieving ultimate cheesecake perfection.
How To Tell When Your Cheesecake Is Perfectly Baked
Knowing when a cheesecake is truly done baking is a key skill, and it largely comes down to the “jiggle test” and, if you prefer, an internal temperature reading.
- The Jiggle Test: A perfectly baked cheesecake will have edges that appear set and slightly puffed, while a small circle (about 1-2 inches in diameter) right in the center still has a slight, almost custardy jiggle when you gently shake the pan. This is exactly what you want! The residual heat in the oven, as it cools, will continue to cook this slightly jiggly center, resulting in a moist, uniform, and crack-free cheesecake.
- What Not to See:
- If the entire cheesecake top moves like a liquid when gently shaken, it’s definitely not done yet and needs more time in the oven.
- Conversely, if nothing jiggles at all, your cheesecake might be a bit overbaked, potentially leading to a drier texture.
- Using a Baking Thermometer: For those who love precision, an instant-read baking thermometer is your best friend. Insert it into the center of the cheesecake (avoiding the crust). You’re aiming for an internal temperature of 145ºF (63ºC). Once it reaches this temperature, turn off the oven and proceed with the slow cooling method outlined in the recipe.
Mastering this step ensures your Halloween Cheesecake is wonderfully creamy and perfectly baked every time.
If you love this holiday dessert recipe, you’re going to love these other treats too. Please click each link below to find the easy, printable recipe!
Ghoulish Monster Halloween Cupcakes
Ghoulish Monster Halloween Cupcakes are a super cute dessert for your Halloween party. The kids will giggle at this fun & spooky Halloween treat.
Check out this recipe
Mummy Cookies
Looking for a fun, spooky treat to make with your kids this Halloween? Try these Mummy Cookies! Easy to make and enjoyed by all ages.
Check out this recipe
Black Velvet Cake
This Black Velvet Cake decorated as a Mummy Cake for Halloween is perfect for a spooky celebration. Rich, flavorful, and easy to make!
Check out this recipe
Black Candy Apples
Black Candy Apples (or Poison Candy Apples) are the perfect treat to make for your Halloween celebrations. Spooky and fun, kids love ’em.
Check out this recipe
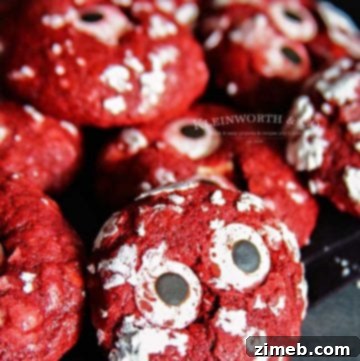
Bloodshot Eyeball Red Velvet Crinkle Cookies
Bloodshot Eyeball Red Velvet Crinkle Cookies are just like the soft & chewy crinkle cookies you love. But these are made spooky, so perfect for Halloween!
Check out this recipe
More Great Cheesecake Recipes
Biscoff Cheesecake
Cinnamon Roll Cheesecake
Hot Chocolate Cheesecake
Easy No-Bake Pumpkin Cheesecake
DON’T MISS THESE HOLIDAY E-BOOKS!


CONNECT WITH YUMMI HAUS!
Be sure to follow me on my social media, so you never miss a post!
Substack, FB, Pinterest, IG, Email Subscription
Rate this Recipe
Halloween Cheesecake
Pin Recipe
Save Recipe
Ingredients
Oreo Crust
- 1 cup Oreos (blended to crumbs)
- ½ cup butter (melted)
Cheesecake Filling
- 24 ounces cream cheese
- 1 cup granulated sugar
- 1 ½ tablespoons all-purpose flour
- ½ teaspoon table salt
- 4 eggs
- ½ cup sour cream
- 1 tablespoon vanilla extract
- Orange Food Dye
Meringue Topping
- 4 egg whites
- 1 cup granulated sugar
- ½ teaspoon cream of tartar
- 1 teaspoon vanilla extract
Instructions
Crust
- Prepare the springform pan by coating the bottom and up the sides of it with cooking oil.
- Blend the Oreos in a food processor or blender until they become crumbs.
- Transfer the crumbs to a mixing bowl and add the melted butter.
- Stir with the fork until combined.
- Transfer this to the prepared springform pan. Press into the bottom of the pan evenly. The flat bottom of a small glass works perfectly for this. Place it in the freezer while you make the filling.
Filling
- Preheat the oven to 325 degrees Fahrenheit.
- Blend the cream cheese with a stand or hand mixer until smooth.
- Add the sugar, flour, and salt. Blend again until combined.
- Add each egg to the mixture one at a time, mixing in between each addition.
- On the last egg, also add the sour cream, vanilla extract, and orange food dye. Mix one more time until smooth. Be sure to add just a few drops of the food coloring at a time and mix in between each addition until the desired Halloween orange color is achieved. Keep in mind that the color may intensify during the baking process.
- Remove the chilled crust from the freezer and pour the orange cheesecake filling on top of the crust.
- Bake for 55-60 minutes or until the edges of the cheesecake are set and the center is still a bit jiggly. Then turn off the oven and open the oven door. Let it sit in the warm oven to finish baking for another hour.
Meringue Topping – make this just prior to decorating and serving
- Combine the egg whites, sugar, and cream of tartar in a heat-proof mixing bowl.
- Place the bowl on top of a double boiler with 2 inches of water in it – over medium-high heat.
- Whisk until the sugar and cream of tartar dissolve into the egg whites. The mixture will become thin and frothy when ready.
- Transfer the mixture to a stand mixer with a whisk attachment.
- Carefully beat on high until it becomes thick, and glossy and forms stiff peaks. (About 6 minutes)
- The meringue will be done when you pull the whisk out, flip it over and the peak stays up.
- Transfer the meringue to a piping bag with a large round metal piping tip.
Decorate
- Once the cheesecake is done, remove it from the oven and let it cool to room temperature. Then cover with plastic wrap and chill in the refrigerator overnight before decorating.
- When ready to serve, pipe the meringue topping in large round ghost-like mounds on top of the cheesecake, covering the whole cake.
- Toast with a butane torch on medium by gently moving the torch across the meringue topping until golden brown.
Equipment
- 9-Inch Springform Pan
- Parchment Paper
- Food Processor/Blender
- Hand mixer
- Stand Mixer w/ Whisk Attachment
- Double boiler
- Piping bag
- Large Round Metal Piping Tip
- Butane torch
Nutrition
Nutritional information for the recipe is provided as a courtesy and is approximate. Please double-check with your own dietary calculator for the best accuracy. We at Yummi Haus cannot guarantee the accuracy of the nutritional information given for any recipe on this site.