

Packed with a delightful medley of flavors, these Kitchen Sink Cookies feature a delicious blend of chocolate chips, crunchy nuts, salty pretzels, and much more, offering a perfect treat for every palate.
Get ready to discover a truly scrumptious treat that your entire family will adore. Imagine a cookie that has everything you could possibly desire, blending a symphony of tastes and textures into one irresistible bite – that’s precisely what we’re creating today: the ultimate Kitchen Sink Cookie!
Kitchen Sink Cookies achieve a perfect harmony of sweet, salty, chewy, and crunchy elements. Every single bite delivers a new and exciting surprise, whether it’s a generous chunk of rich chocolate, a satisfyingly crisp piece of pretzel, or a buttery toffee bit. These cookies are not just a dessert; they’re an adventure in every mouthful, making them an instant favorite for any occasion.

Why You’ll Love Kitchen Sink Cookies
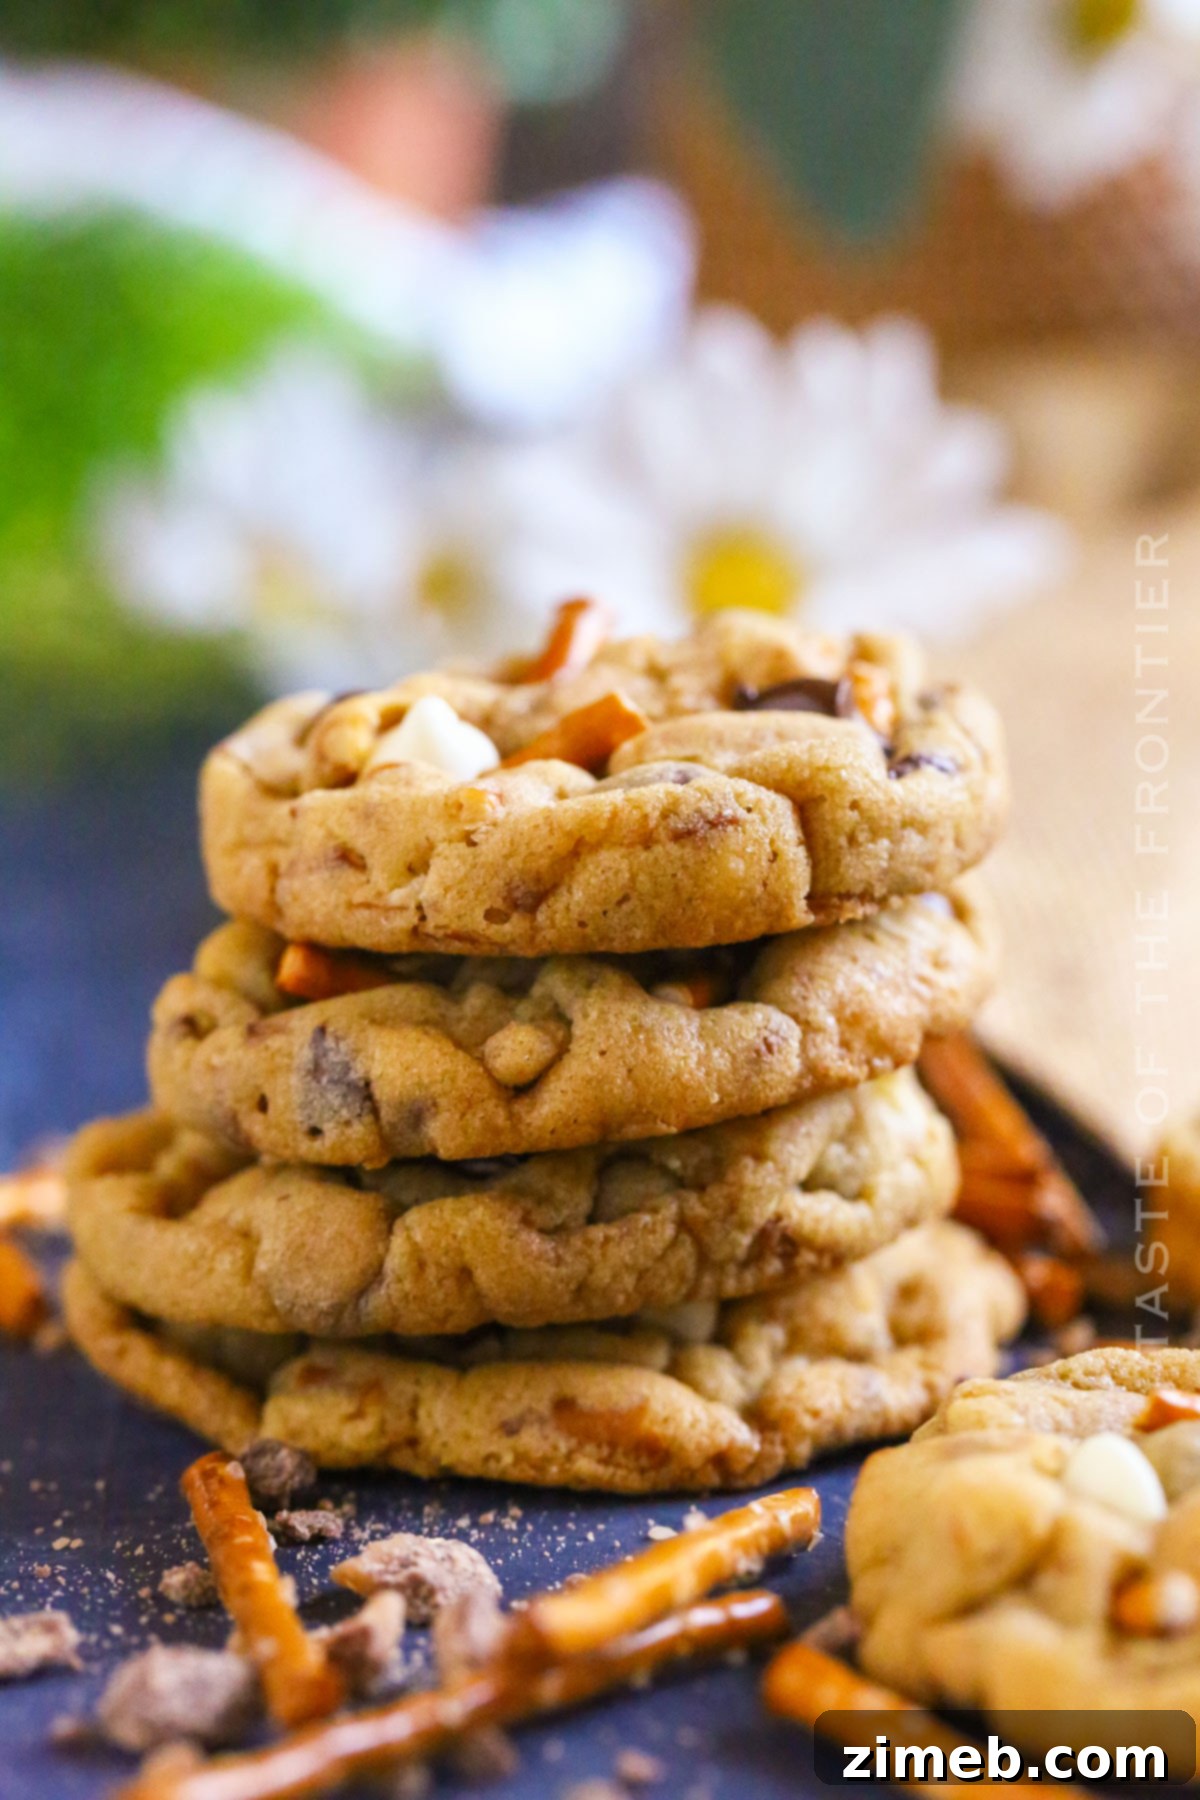
These incredible cookies bake up to a beautiful golden brown, boasting a delightful texture that is both wonderfully chewy and utterly satisfying. They are the ideal indulgence for anyone who loves a little bit of everything in their baked goods!
Kitchen Sink Cookies transcend the ordinary; they invite you to embark on a flavor journey with each bite. They are the perfect canvas to mix and match your favorite flavors into one harmonious cookie, allowing for endless customization and creativity in the kitchen. This versatility is what makes them truly special – you can tailor them to your specific cravings or use up those intriguing leftover snacks in your pantry.
Whether you’re preparing for a lively party, a cozy family gathering, or simply looking for a fun and engaging weekend baking activity, these cookies are guaranteed to bring smiles and delight to everyone who tastes them. Their unique blend of sweet and savory notes appeals to all ages, making them a universal crowd-pleaser.
So, gather your ingredients, preheat your oven, and prepare to create the most delightful, chewy, and utterly irresistible cookies you’ve ever had the pleasure of tasting. Happy baking, and get ready to experience cookie perfection!

Common Questions About Kitchen Sink Cookies
Can I Freeze Kitchen Sink Cookie Dough?
Absolutely! Freezing cookie dough is a fantastic way to ensure you always have fresh, warm cookies on demand. Simply form the cookie dough into balls and arrange them in a single layer on a parchment-lined baking sheet. Freeze until firm, then transfer the frozen dough balls to a freezer-safe bag or airtight container. They will keep well for up to 3 months.
When you’re ready to bake, there’s no need to thaw! Just place the frozen dough balls on a prepared baking sheet and add a few extra minutes to the recommended bake time. This method yields wonderfully chewy cookies with crisp edges, making last-minute baking a breeze.
What If I Don’t Have a Stand Mixer for Cookie Dough?
No stand mixer? No problem at all! Home bakers have been crafting delicious cookies for generations without the aid of heavy-duty mixers. You can easily prepare this Kitchen Sink Cookie dough using a hand mixer, or even by hand with a sturdy spatula and a little extra effort. While a stand mixer can make the creaming process quicker, a good old-fashioned arm workout with a wooden spoon or spatula works just as effectively.
Engaging the kids in the mixing process can be a fun family activity and a great way to spread out the “workload.” It’s a testament to the simplicity of cookie baking that you don’t need fancy equipment to achieve fantastic results. Embrace the manual mixing; it’s a delightful part of the baking experience!
Can I Make Kitchen Sink Cookies Gluten-Free?
Absolutely! It’s simple to adapt this recipe for a gluten-free diet. Substitute the all-purpose flour with your favorite gluten-free flour blend. There are many excellent options available on the market today, often formulated to mimic the texture of traditional flour, perfect for those with food allergies or sensitivities.
Keep in mind that the taste and texture of your gluten-free Kitchen Sink Cookies might vary slightly from the original recipe. Some gluten-free blends can absorb more moisture, so you might need a tiny splash of milk or water if the dough seems too dry. Despite these minor differences, your gluten-free cookies will still be incredibly yummy and packed with all the delightful mix-ins you love!
Proper Storage for Kitchen Sink Cookies
Given how incredibly tasty these cookies are, they might not last long enough to require extensive storage! However, if you manage to have leftovers, knowing how to store them properly will keep them fresh and delicious for longer. Be sure to save this recipe card – you’ll definitely need it again!
Countertop Storage: For immediate enjoyment, store your baked Kitchen Sink Cookies in an airtight container at room temperature. They will remain wonderfully soft and delicious for about 3-5 days. To maintain their chewiness, you can even place a slice of bread in the container with the cookies; the bread will absorb moisture, helping to keep the cookies soft.
Refrigerator Storage: While not strictly necessary for short-term storage, if you prefer a firmer cookie or live in a humid environment, you can move them to the fridge after 3-4 days on the counter. Store them in an airtight container, and they will keep well for up to a week.
Freezer Storage: For long-term enjoyment, baked cookies can be stored in a freezer bag or an airtight container, separated by parchment paper, for up to 3 months. When you’re ready for a treat, simply thaw them at room temperature or warm them slightly in the microwave for a just-baked taste.
Expert Tips for Perfect Kitchen Sink Cookies Every Time
While a “perfect cookie” might be subjective, these Kitchen Sink Cookies undoubtedly come incredibly close! They brilliantly combine all your favorite flavors and textures into one magnificent treat. Follow these expert tips to ensure your cookies are nothing short of spectacular:
- Room Temperature Ingredients are Key: Always ensure your butter and egg yolks are at room temperature. This allows them to cream together smoothly, creating an emulsified, airy base for your dough. Cold ingredients don’t blend evenly, leading to a lumpy dough and potentially denser cookies.
- Don’t Overmix the Dough: Once you add the dry ingredients, mix just until they are barely incorporated. Overmixing develops the gluten in the flour, which can result in tough, dry cookies instead of the desired chewy texture.
- Chill the Dough for Thicker Cookies: For cookies that hold their shape better and spread less during baking, chill the dough for 15-18 minutes before portioning and baking. This helps solidify the fats in the butter, leading to a thicker, chewier cookie with a richer flavor profile.
- Always Use Parchment Paper: Line your cookie sheets with parchment paper for effortless removal of your baked cookies. It also ensures even baking, prevents sticking, and makes cleanup a breeze – no scrubbing sticky pans!
- Keep an Eye on the Oven: Baking times can vary slightly depending on your oven and the size of your cookies. Watch them carefully; the cookies are ready when their edges are just golden brown and the centers still look slightly soft. They will continue to set as they cool, so don’t overbake!
- Measure Flour Correctly: Use the “spoon and level” method for measuring flour. Spoon the flour into your measuring cup until it overflows, then level it off with the back of a knife. Scooping directly from the bag can compact the flour, adding too much to your dough and resulting in dry, crumbly cookies.
Key Ingredients for Unforgettable Kitchen Sink Cookies
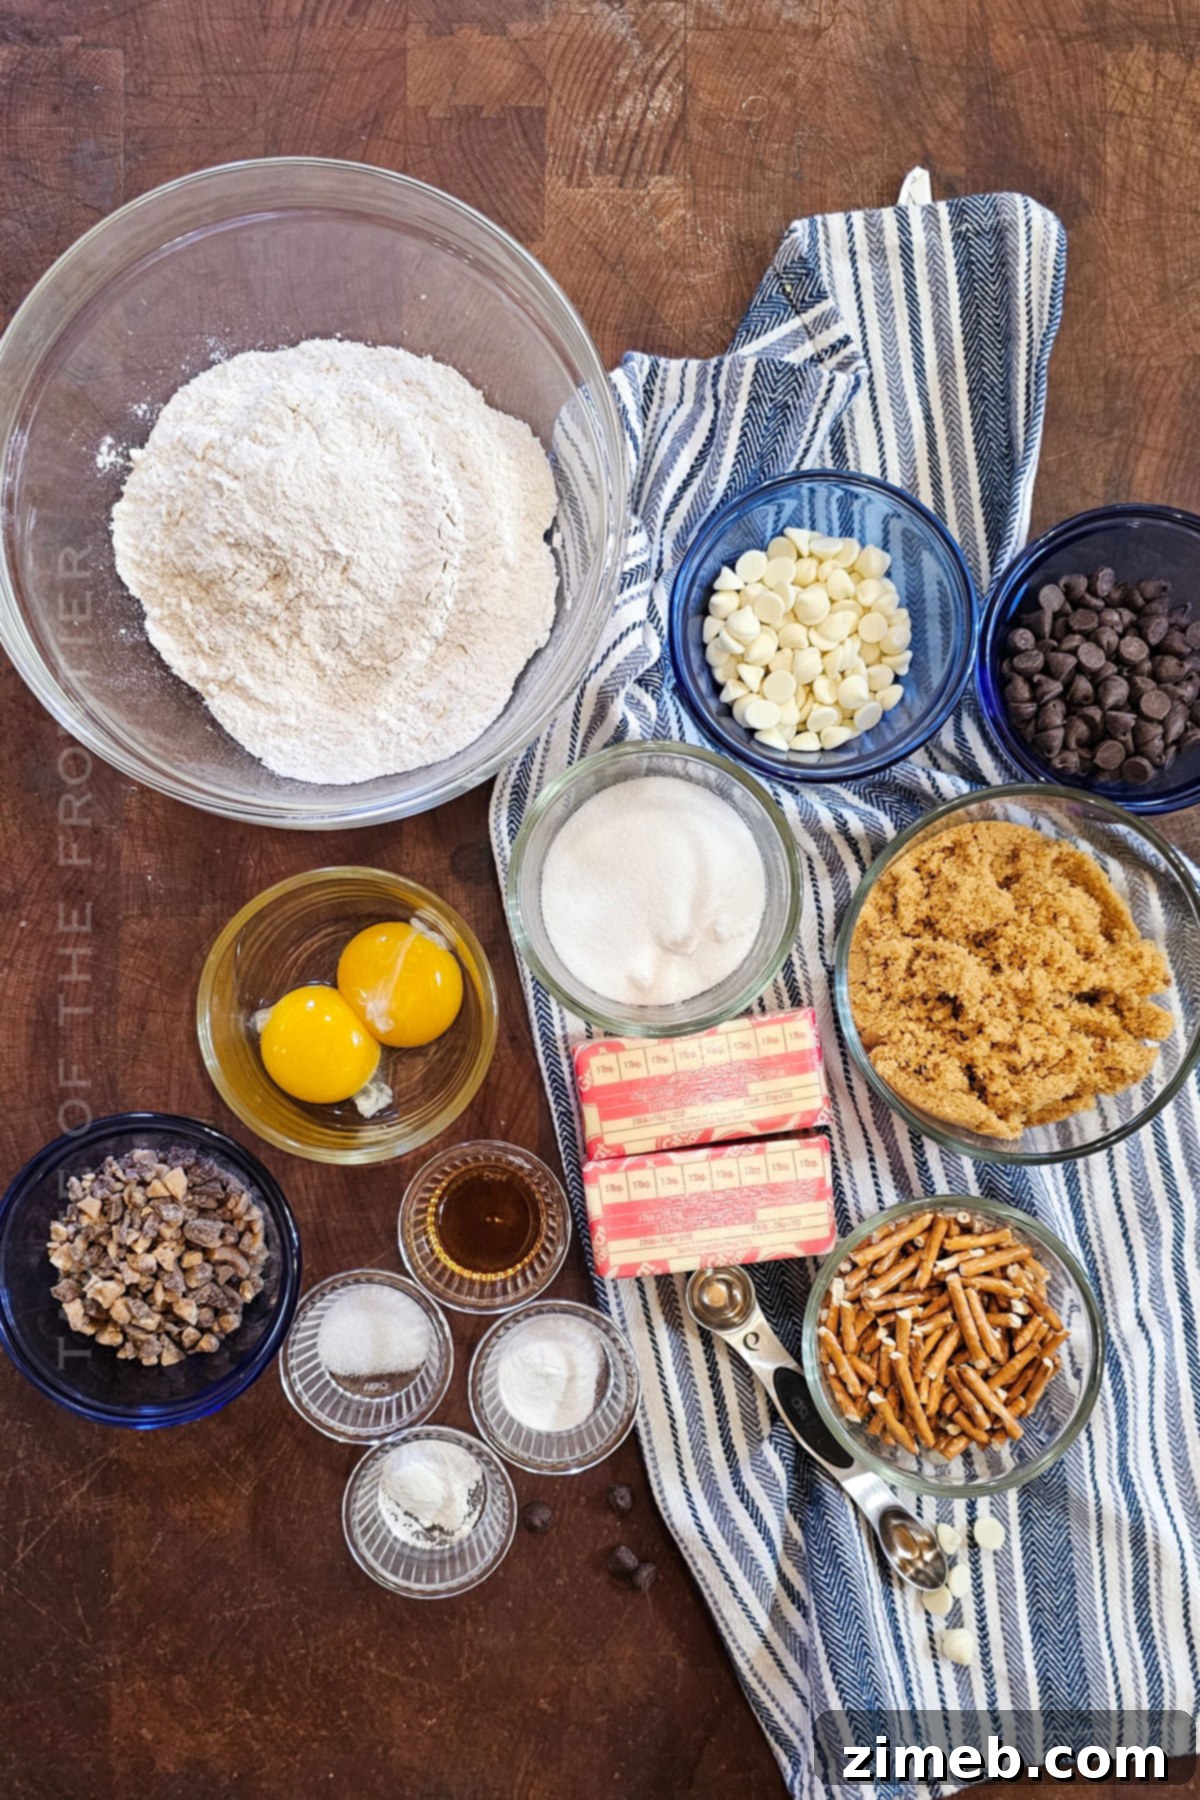
The beauty of Kitchen Sink Cookies lies in their diverse ingredient list, creating layers of flavor and texture that truly amaze. Doesn’t this medley of components sound absolutely amazing? I particularly adore the varying levels of crunch and chewiness that each ingredient contributes. What’s your ultimate favorite mix-in? Let’s dive into the core ingredients that make these cookies so special:
- Butter: The foundation of any great cookie, providing richness and tenderness. Ensure it’s at room temperature for optimal creaming.
- Brown sugar and Granulated White Sugar: A balanced combination, with brown sugar adding moisture and chewiness, and granulated sugar contributing to crisp edges and overall sweetness.
- Egg Yolks: For extra richness, binding, and a wonderfully chewy texture. Using only yolks intensifies the flavor and improves the cookie’s structure.
- Vanilla Extract: A crucial flavor enhancer that elevates all the other ingredients. Don’t skimp on good quality vanilla!
- All-Purpose Flour: The primary dry ingredient, providing structure. Remember to spoon and level for accuracy.
- Baking Powder and Baking Soda: These leavening agents work together to give the cookies their perfect rise and soft interior.
- Table Salt: Essential for balancing the sweetness and enhancing the flavors of all the mix-ins.
- Semi-Sweet and White Chocolate Chips: A delightful duo that offers classic chocolate flavor and creamy sweetness. The contrast in chocolate types adds depth.
- Pretzels: The star of the “salty” component, providing a satisfying crunch and a fantastic sweet and salty dynamic.
- Toffee Pieces: Such as crushed Heath bar, these add a rich, buttery, and caramelized crunch that melts slightly during baking, creating pockets of deliciousness.
- Optional: Other Favorite Mix-Ins: This is where the “kitchen sink” magic truly happens! Feel free to add chopped nuts, dried fruits, potato chips, or other candies to customize your cookies.

Step-by-Step: How to Make Kitchen Sink Cookies
Don’t be intimidated by the impressive name; making these cookies is incredibly straightforward! Just follow these easy, step-by-step instructions, and you’ll be on your way to enjoying your new favorite treat. The process is simple, and the results are incredibly tasty!
- Preheat Oven: Begin by preheating your oven to 350 degrees Fahrenheit (175 degrees Celsius). This ensures your oven is at the correct temperature for even baking.
- Prepare Baking Sheets: Line 2 large baking sheets with parchment paper. This prevents sticking and makes cleanup much easier. Set them aside while you prepare the dough.
- Cream Wet Ingredients: In a large mixing bowl (or the bowl of your stand mixer), combine the softened butter, brown sugar, and granulated sugar. Beat them together on medium speed until the mixture is light, fluffy, and well combined, typically 2-3 minutes.
- Add Egg Yolks and Vanilla: Scrape down the sides of the bowl, then add the egg yolks and vanilla extract. Continue mixing until the mixture becomes fluffy again and thoroughly incorporated, ensuring a rich base for your cookies.
- Incorporate Dry Ingredients: Gradually mix in the all-purpose flour, baking powder, baking soda, and salt. Mix on low speed just until the dry ingredients are combined and a creamy dough forms. Be careful not to overmix at this stage.
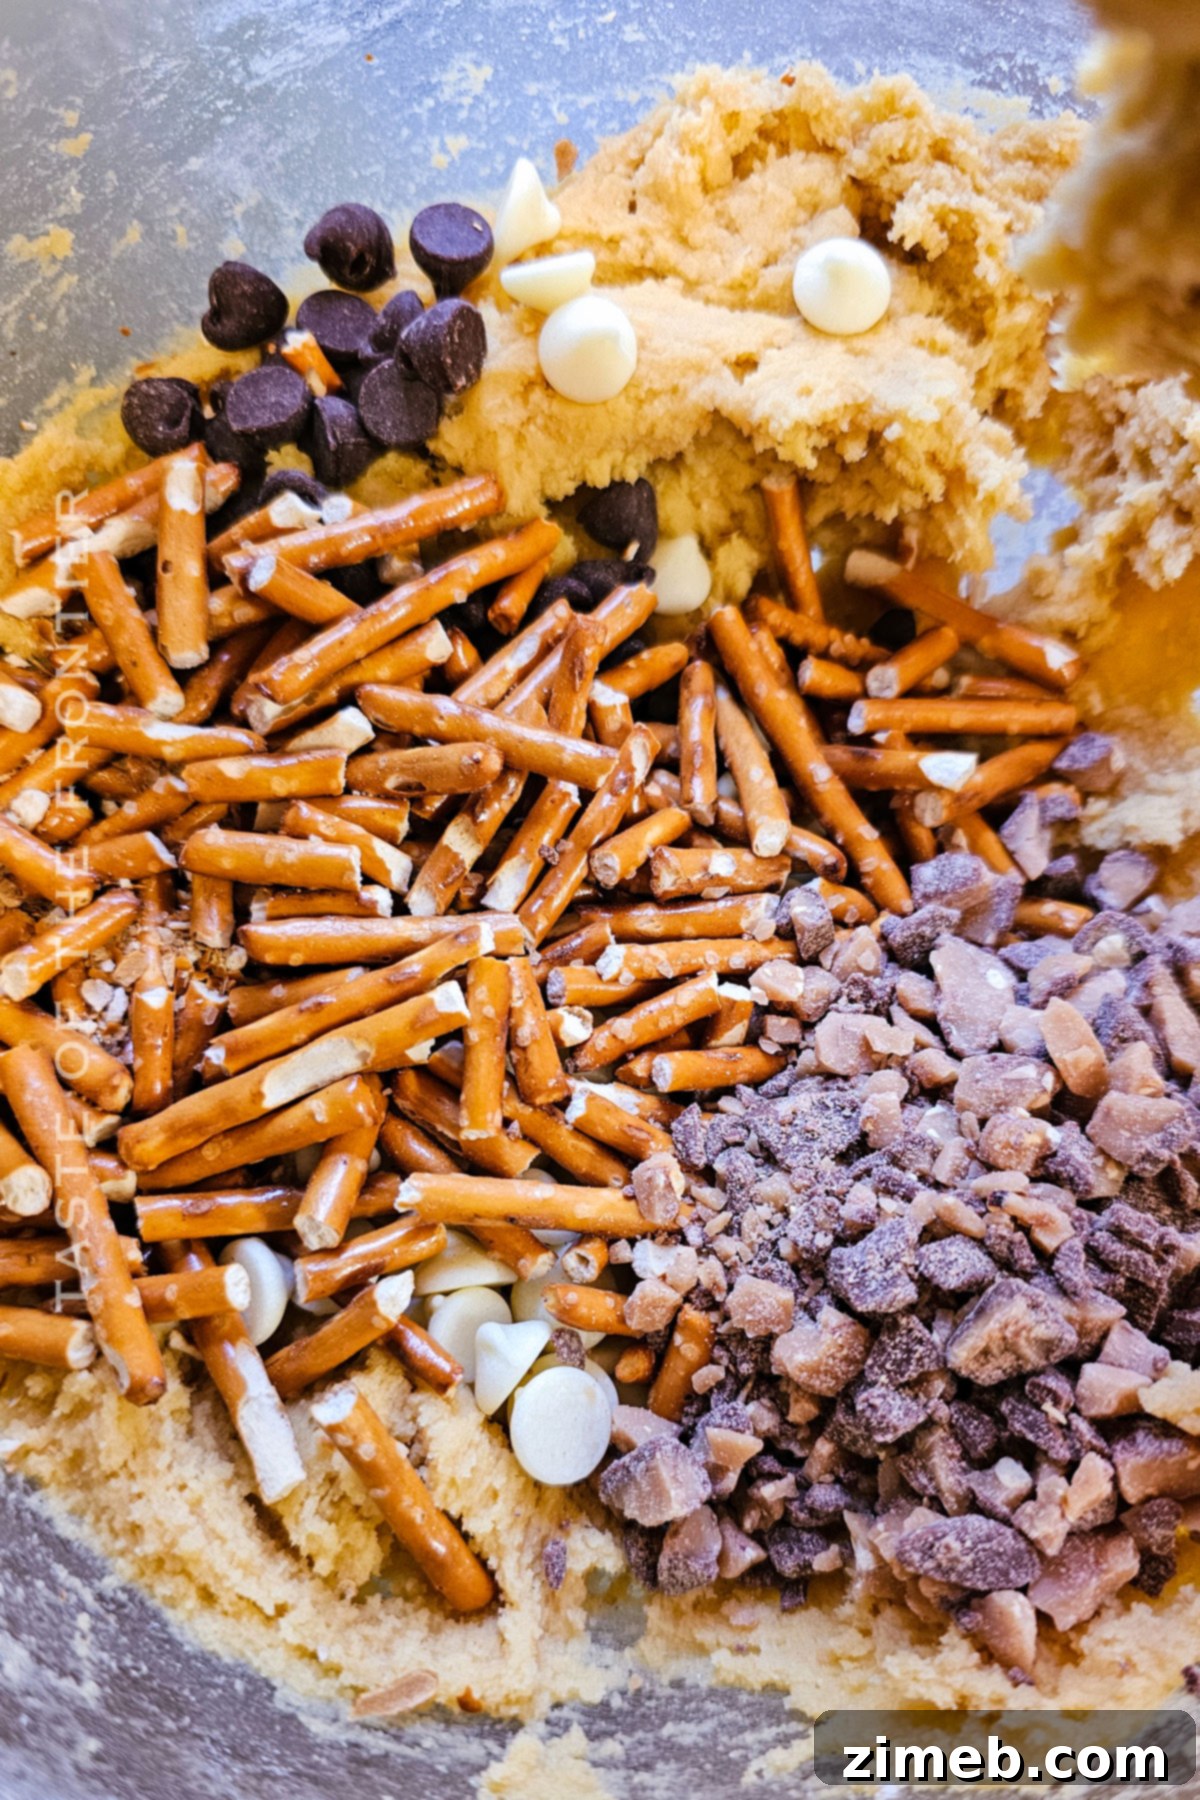
- Fold in Mix-Ins: Gently fold in the chopped pretzels, both semi-sweet and white chocolate chips, and the toffee pieces using a spatula. Distribute them evenly throughout the dough without crushing the pretzels too much.
- Portion and Place: Using a cookie scoop or two spoons, portion the dough into 20-22 balls, each about 1.5 to 2 tablespoons in size. Place them at least 2 inches apart on your prepared baking sheets to allow for proper spreading.
- Bake to Perfection: Bake in the preheated oven for 10-12 minutes. The cookies are done when the edges are golden brown and the centers still look slightly soft.
- Cool and Store: Remove the baking sheets from the oven and allow the cookies to cool on the sheets for about 5 minutes. This helps them set up and prevents them from breaking. Then, transfer them to a wire rack to cool completely before storing them in an airtight container.
OPTIONAL ENHANCEMENT 1 – For Perfectly Round Cookies: Immediately after removing the cookies from the oven, use a large, round cookie cutter (slightly larger than your cookies) or the rim of a glass. Swirl it gently around each hot cookie. This technique reshapes any uneven edges, giving you beautifully uniform, perfectly round cookies.
OPTIONAL ENHANCEMENT 2 – For Extra Visual Appeal and Flavor: As soon as the cookies come out of the oven, immediately press a few additional chocolate chips and pretzel pieces onto the tops of each cookie before they cool. This makes them look even more tempting and ensures every bite is loaded with visible mix-ins.
Essential Kitchen Supplies for Baking Cookies
Having the right tools can make your baking experience much more enjoyable and efficient. Beyond the standard measuring cups and spoons, here are the essential kitchen supplies you’ll need for this easy cookie recipe. I’d definitely include a sturdy rubber spatula in your supply list – it’s truly the best tool for thoroughly scraping bowls and folding in ingredients with care. Making life as easy as possible in the kitchen is always a good idea, right?
- Mixing Bowl or Stand Mixer: A large mixing bowl is suitable for hand mixing, or a stand mixer with a paddle attachment for effortless creaming.
- Cookie Scoop: An ice cream or cookie scoop ensures uniformly sized cookies, which is crucial for even baking.
- Baking Sheets: Heavy-duty baking sheets promote even heat distribution and prevent the bottom of your cookies from burning.
- Parchment Paper: An absolute must for non-stick baking and easy cleanup.
- Wire Rack (for cooling): Essential for allowing air to circulate around the cookies, cooling them completely and preventing sogginess.
- Rubber Spatula: Perfect for scraping down the sides of the bowl and gently folding in delicate mix-ins without overmixing.
Perfect Pairings: What to Serve With Kitchen Sink Cookies
These versatile Kitchen Sink Cookies are a delightful treat on their own, but they also pair beautifully with a variety of beverages and desserts. With so many flavors packed into each cookie, they tend to complement just about anything! I personally love indulging in these after a satisfying dinner. Here are some ideal pairings:
- A refreshing glass of cold milk, a classic companion that perfectly balances the rich flavors of the cookie.
- A comforting cup of your favorite coffee or aromatic tea, ideal for a cozy afternoon or evening treat.
- A generous scoop of vanilla or chocolate ice cream for an extra decadent dessert experience. The cool, creamy ice cream contrasts wonderfully with the chewy cookie.
- A side of fresh fruit, like berries or sliced apples, to provide a light, natural sweetness and a refreshing counterpoint to the sweet and salty flavors of the cookies.
Why These Kitchen Sink Cookies Are a Must-Try
I genuinely believe these cookies boast the perfect blend of flavors and textures, making them the ultimate cookie experience. They are guaranteed to be a hit with your entire family – just give them a try, and you’ll quickly understand why! Here are compelling reasons to make these delicious cookies a staple in your recipe collection:
- Incredibly Versatile: They are perfect for using up those odds and ends of leftover snacks in your pantry, transforming them into a cohesive, delicious treat. This minimizes waste and encourages culinary creativity!
- Guaranteed Crowd Pleaser: With such a diverse array of mix-ins, there truly is something for everyone in these cookies. From chocolate lovers to those who crave a salty crunch, no one will be disappointed.
- Fun to Make: The process of choosing and combining your favorite additions makes these cookies incredibly enjoyable to bake, whether you’re baking solo, with kids, or with friends. It’s an interactive experience from start to finish.
- Perfectly Balanced Flavor Profile: They strike the ideal equilibrium between sweet and salty, chewy and crunchy. This harmonious blend creates a complex flavor experience that keeps you coming back for more.
- Customizable: Beyond just using up leftovers, you can intentionally design your cookies to match specific cravings or dietary preferences (e.g., all chocolate, extra nuts, gluten-free).

Endless Possibilities: Creative Variations and Add-Ins
One of the most exciting aspects of making Kitchen Sink Cookies is the freedom to get creative with your additions. The “fun part” truly comes alive when you get to choose what delightful treasures to include. What’s your ultimate favorite mix-in combination? Share your ideas in the comments – we’d love to hear them! Here are some fantastic ideas to spark your imagination and take your cookies to the next level:
- Nutty Crunch: Enhance the texture and flavor by adding chopped nuts such as pecans, walnuts, almonds, or even peanuts for a savory twist. Toasting them lightly before adding can bring out their rich flavors.
- Chocolate Overload: Don’t limit yourself to just semi-sweet and white chocolate chips! Mix in different types of chocolate chunks or chips, such as milk chocolate, bittersweet chocolate, or even dark chocolate for a more intense cocoa experience. Mini chocolate candies also work wonderfully.
- Fruity Twist: Introduce a delightful chewiness and a burst of flavor with dried fruit. Cranberries, raisins, dried cherries, or chopped apricots can add an extra sweet, tangy, and sometimes tart note that beautifully complements the other ingredients.
- Elevated Salty Flavors: Go beyond pretzels! Incorporate crushed potato chips, cornflakes, or even a sprinkle of flaky sea salt on top before baking for an extra salty kick and textural contrast.
- Candy Creations: Add chopped candy bars (like Snickers or Butterfingers), M&Ms, or even mini marshmallows for pockets of gooey sweetness.
- Spices and Extracts: A pinch of cinnamon, nutmeg, or a dash of almond extract can subtly enhance the overall flavor profile, adding warmth and complexity.
If you love this easy cookie recipe, you’re going to adore these other delightful cookie creations too. Please click each link below to discover the easy, printable recipe!
Check out this recipe

Check out this recipe

Check out this recipe

Check out this recipe

Check out this recipe

More Sweet and Salty Treats to Explore
If you love the delightful combination of sweet and salty, here are more fantastic recipes you’re sure to enjoy!
Sweet and Salty Snack Mix
Pretzel Chocolate Chip Cookies
Kitchen Sink Brownies
Chocolate Bark with Mixed Nuts

CONNECT WITH YUMMI HAUS!
Be sure to follow me on social media, so you never miss a post!
Substack, Facebook, Pinterest, Instagram, Email Subscription


Rate this Recipe
Kitchen Sink Cookies
Dessert
22
cookies
Prep Time
10 minutes
Cook Time
12 minutes
Total Time
22 minutes
Ingredients
- ¾ cup butter – room temperature
- ¾ cup brown sugar – packed
- ¼ cup granulated sugar
- 2 egg yolks
- 1 tbsp vanilla extract
- 1 ½ cups all-purpose flour – spooned and leveled
- ½ tsp baking powder
- ½ tsp baking soda
- ½ tsp table salt
- ⅔ cup pretzels – chopped + more for the tops
- ½ cup semi-sweet chocolate chips + more for the tops
- ½ cup white chocolate chips + more for the tops
- ⅓ cup toffee pieces/bits – such as a crushed Heath bar
Instructions
-
Preheat the oven to 350 degrees.
-
Line 2 baking sheets with parchment. Set aside.
-
Combine the butter, brown sugar, and granulated sugar in the mixing bowl. Beat well until combined and light and fluffy.
-
Add the egg yolks and vanilla, mixing until fluffy again.
-
Slowly mix in the flour, baking powder, baking soda, and salt. Mix until combined and creamy.
-
Fold in the pretzels, both varieties of chocolate chips, and the toffee pieces.
-
Portion the dough into 20-22 balls, placing them at least 2” apart on the prepared baking sheet.
-
Bake for 10-12 minutes.
-
Remove and allow to cool on the baking sheet for 5 minutes before transferring to a wire rack to cool completely before storing.
OPTIONAL – For Perfectly Round Cookies: Immediately use a large, round cookie cutter – swirl it around each cookie to form a perfectly round cookie.
OPTIONAL – For Extra Visual Appeal: Immediately top each cookie with additional chocolate chips and pretzel pieces before they cool.
Notes
ALWAYS use the spoon and level method for measuring the flour for this cookie recipe. Scooping the measuring cup directly into the flour can compact it, inadvertently adding too much to the dough, which results in a dry cookie.
Nutrition
Serving: 1cookie
|
Calories: 202kcal
|
Carbohydrates: 24g
|
Protein: 2g
|
Fat: 11g
|
Saturated Fat: 7g
|
Cholesterol: 39mg
|
Sodium: 168mg
|
Potassium: 60mg
|
Fiber: 1g
|
Sugar: 16g
|
Vitamin C: 0.03mg
|
Calcium: 27mg
|
Iron: 1mg
|
Net Carbohydrates: 23g
Nutritional information for the recipe is provided as a courtesy and is approximate. Please double-check with your own dietary calculator for the best accuracy. We at Yummi Haus cannot guarantee the accuracy of the nutritional information given for any recipe on this site.
Love this recipe?
Follow @KleinworthCo for even more tasty recipes!