
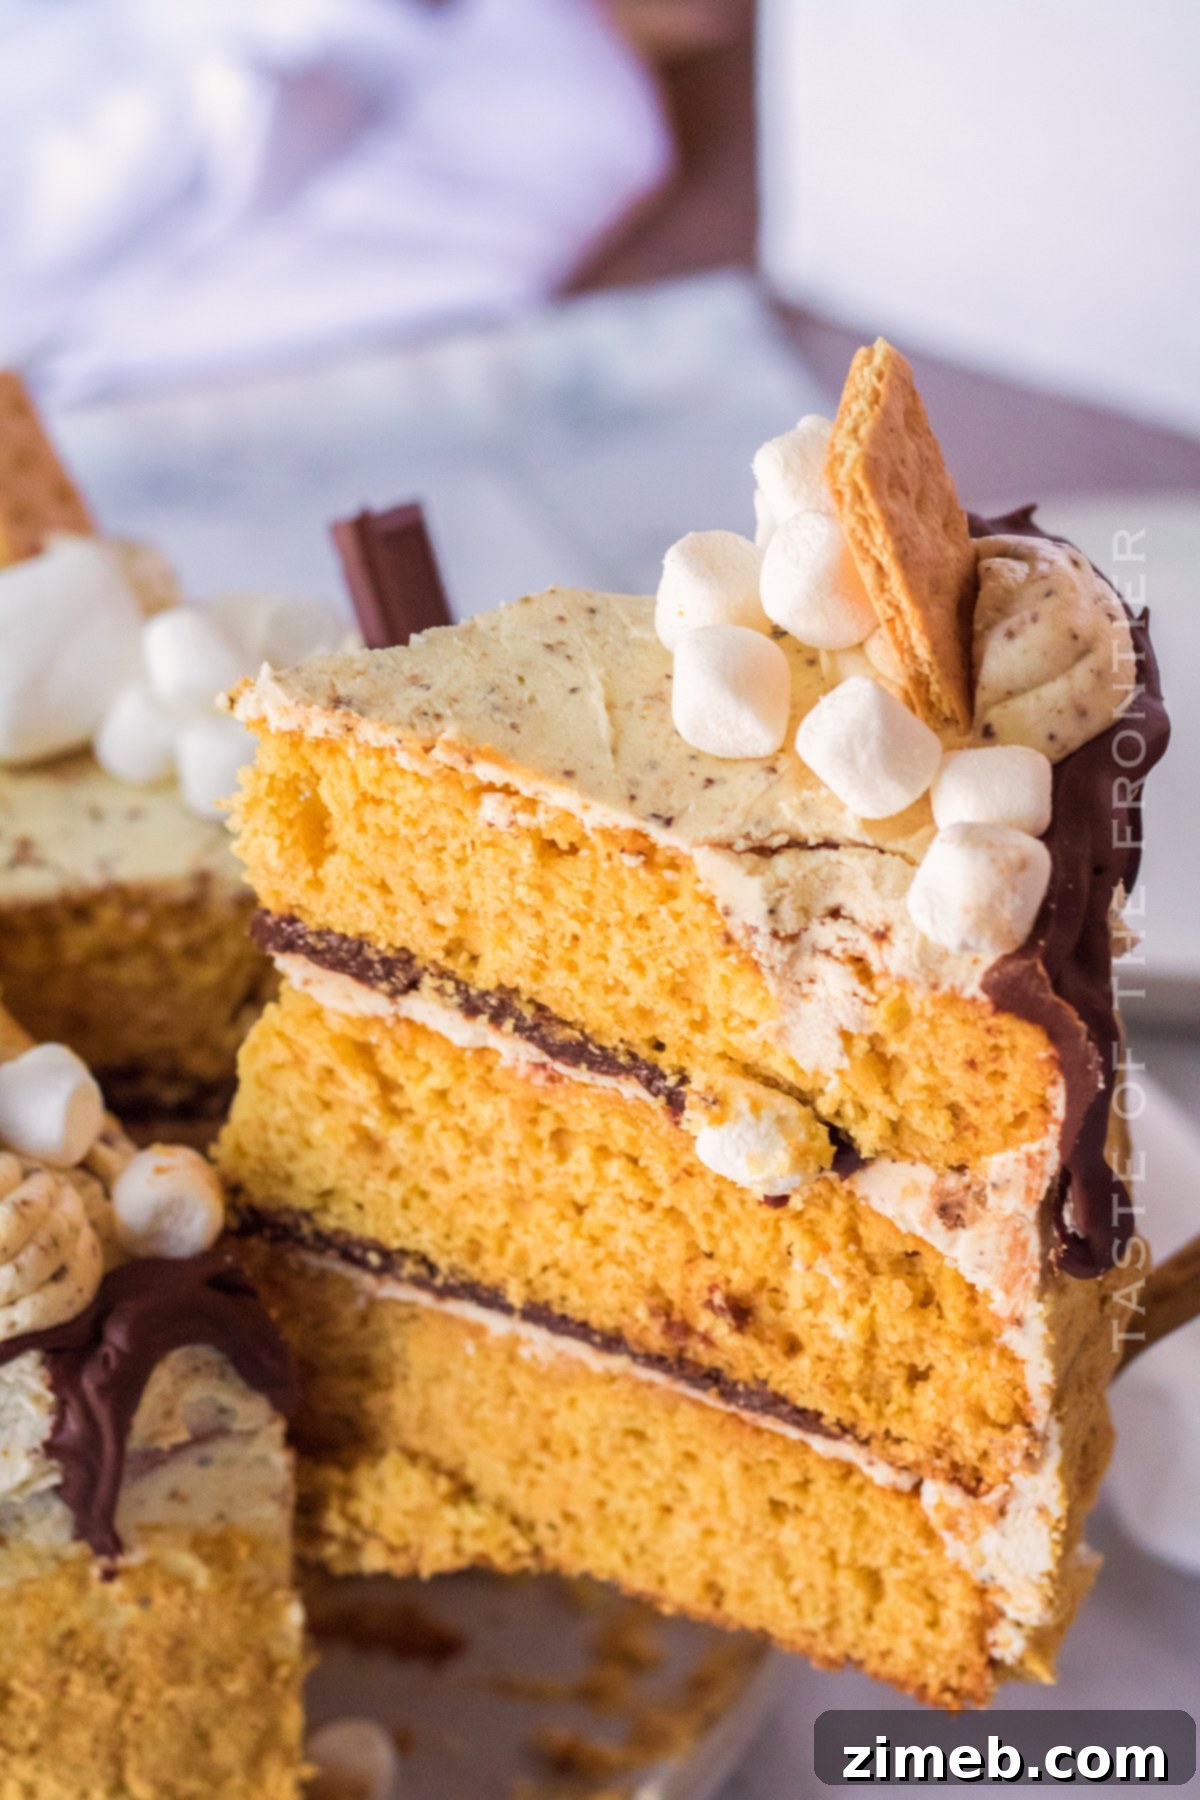
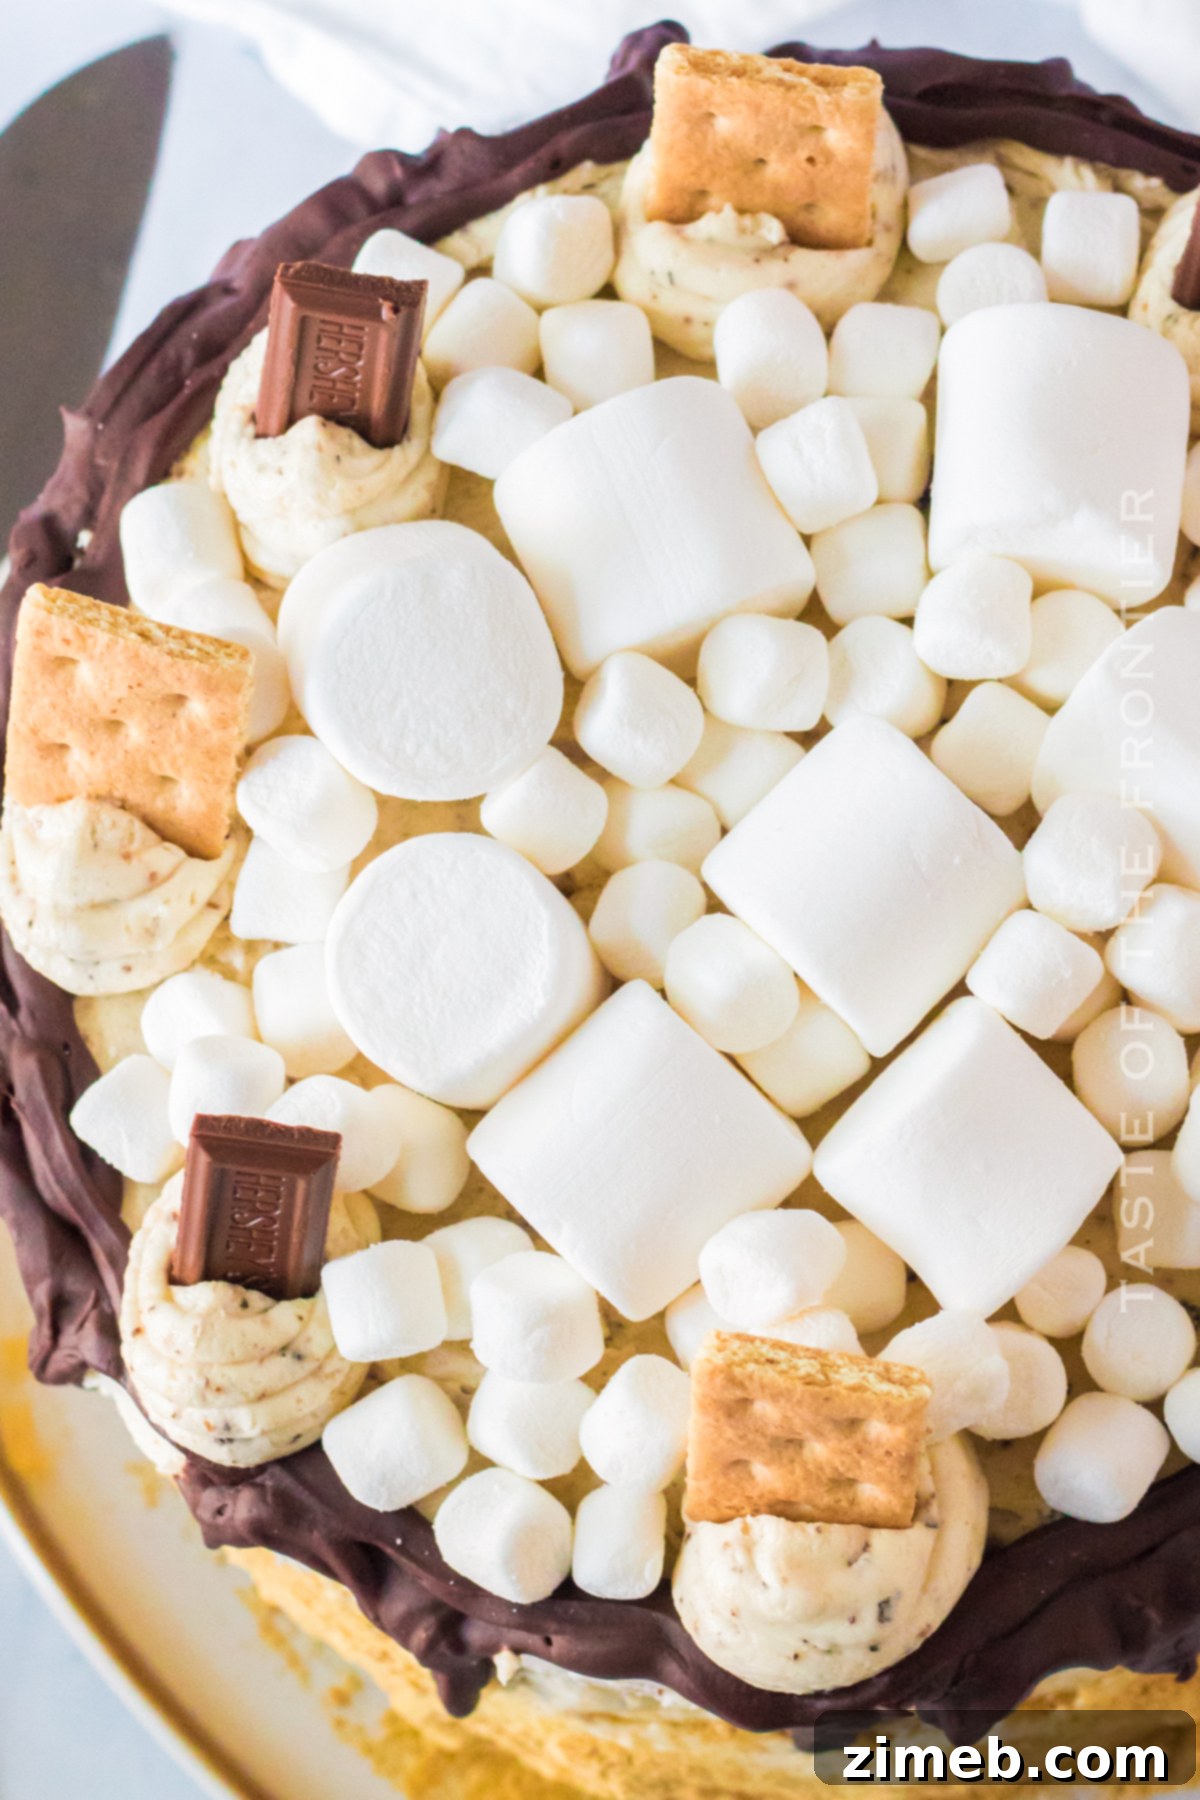
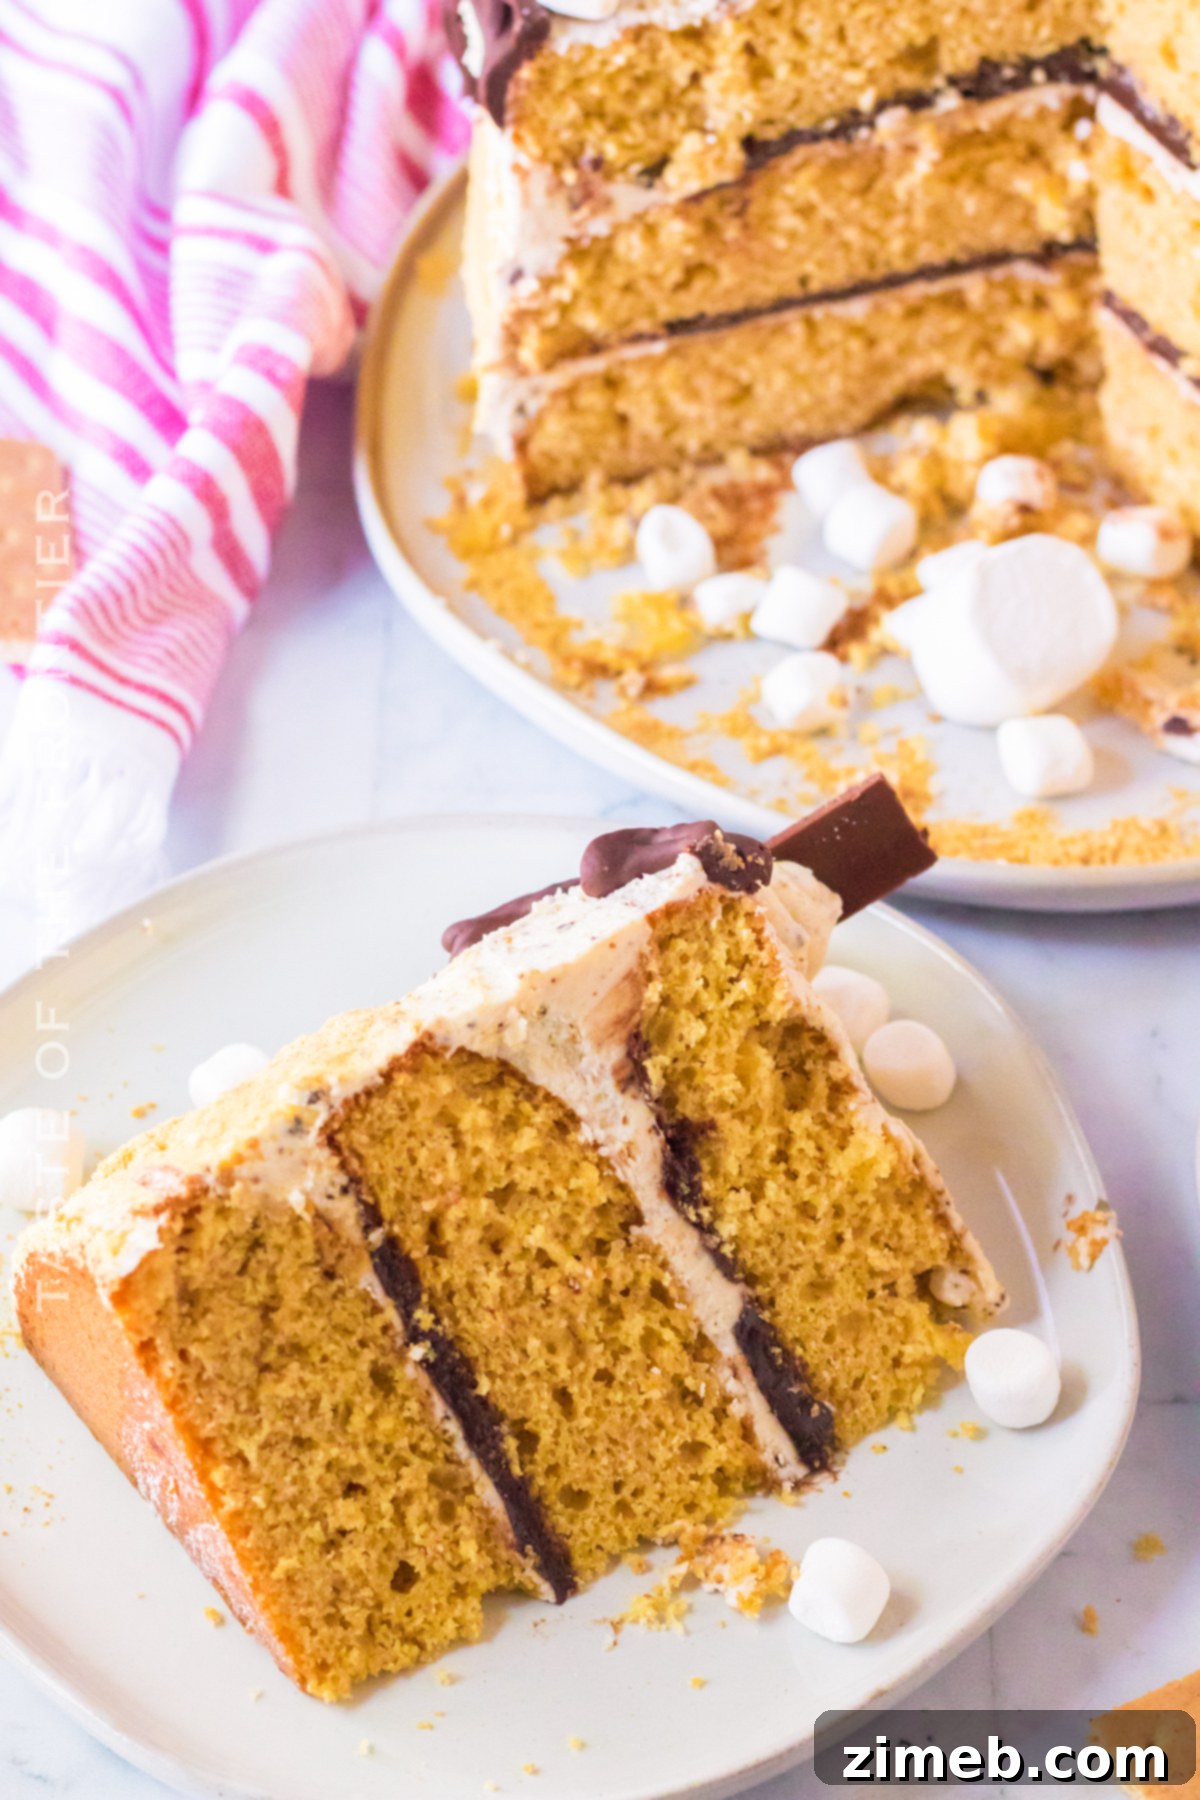
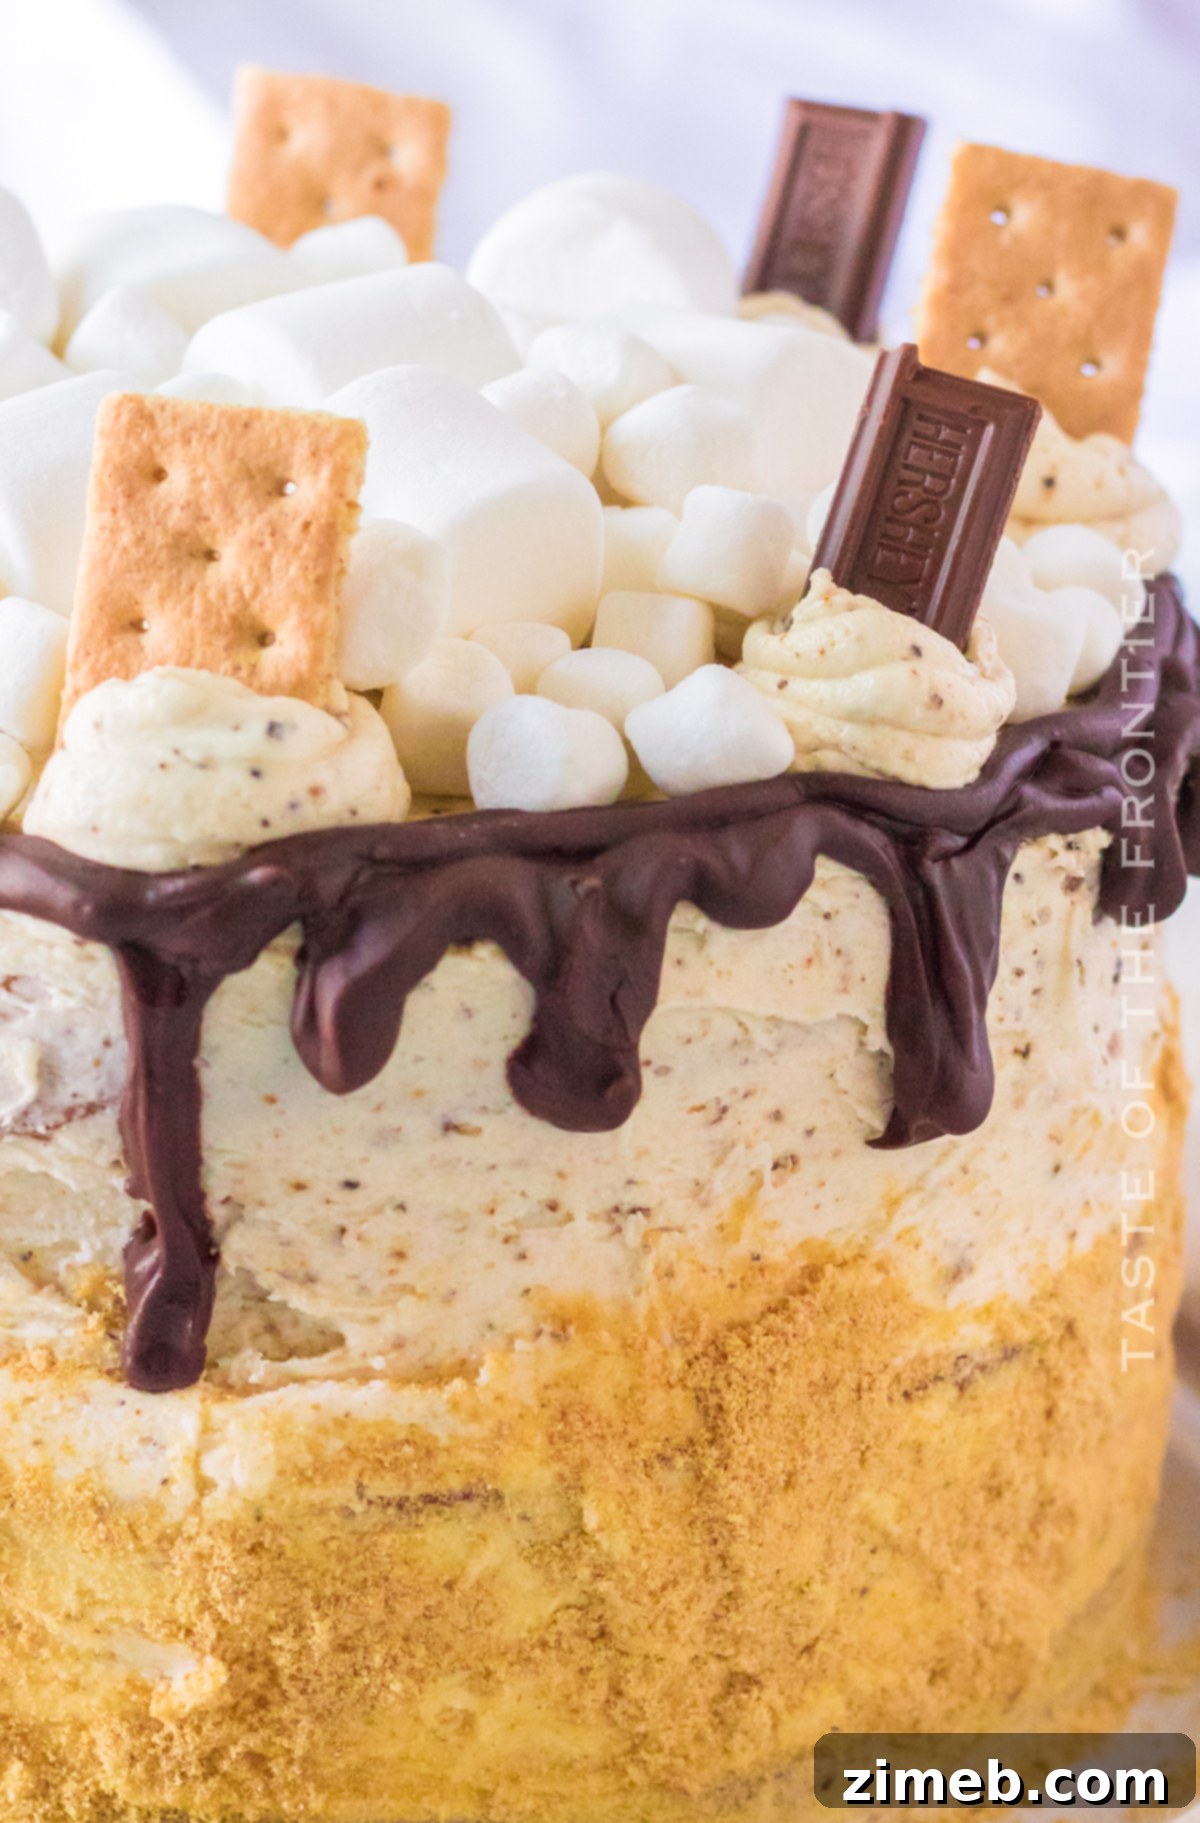
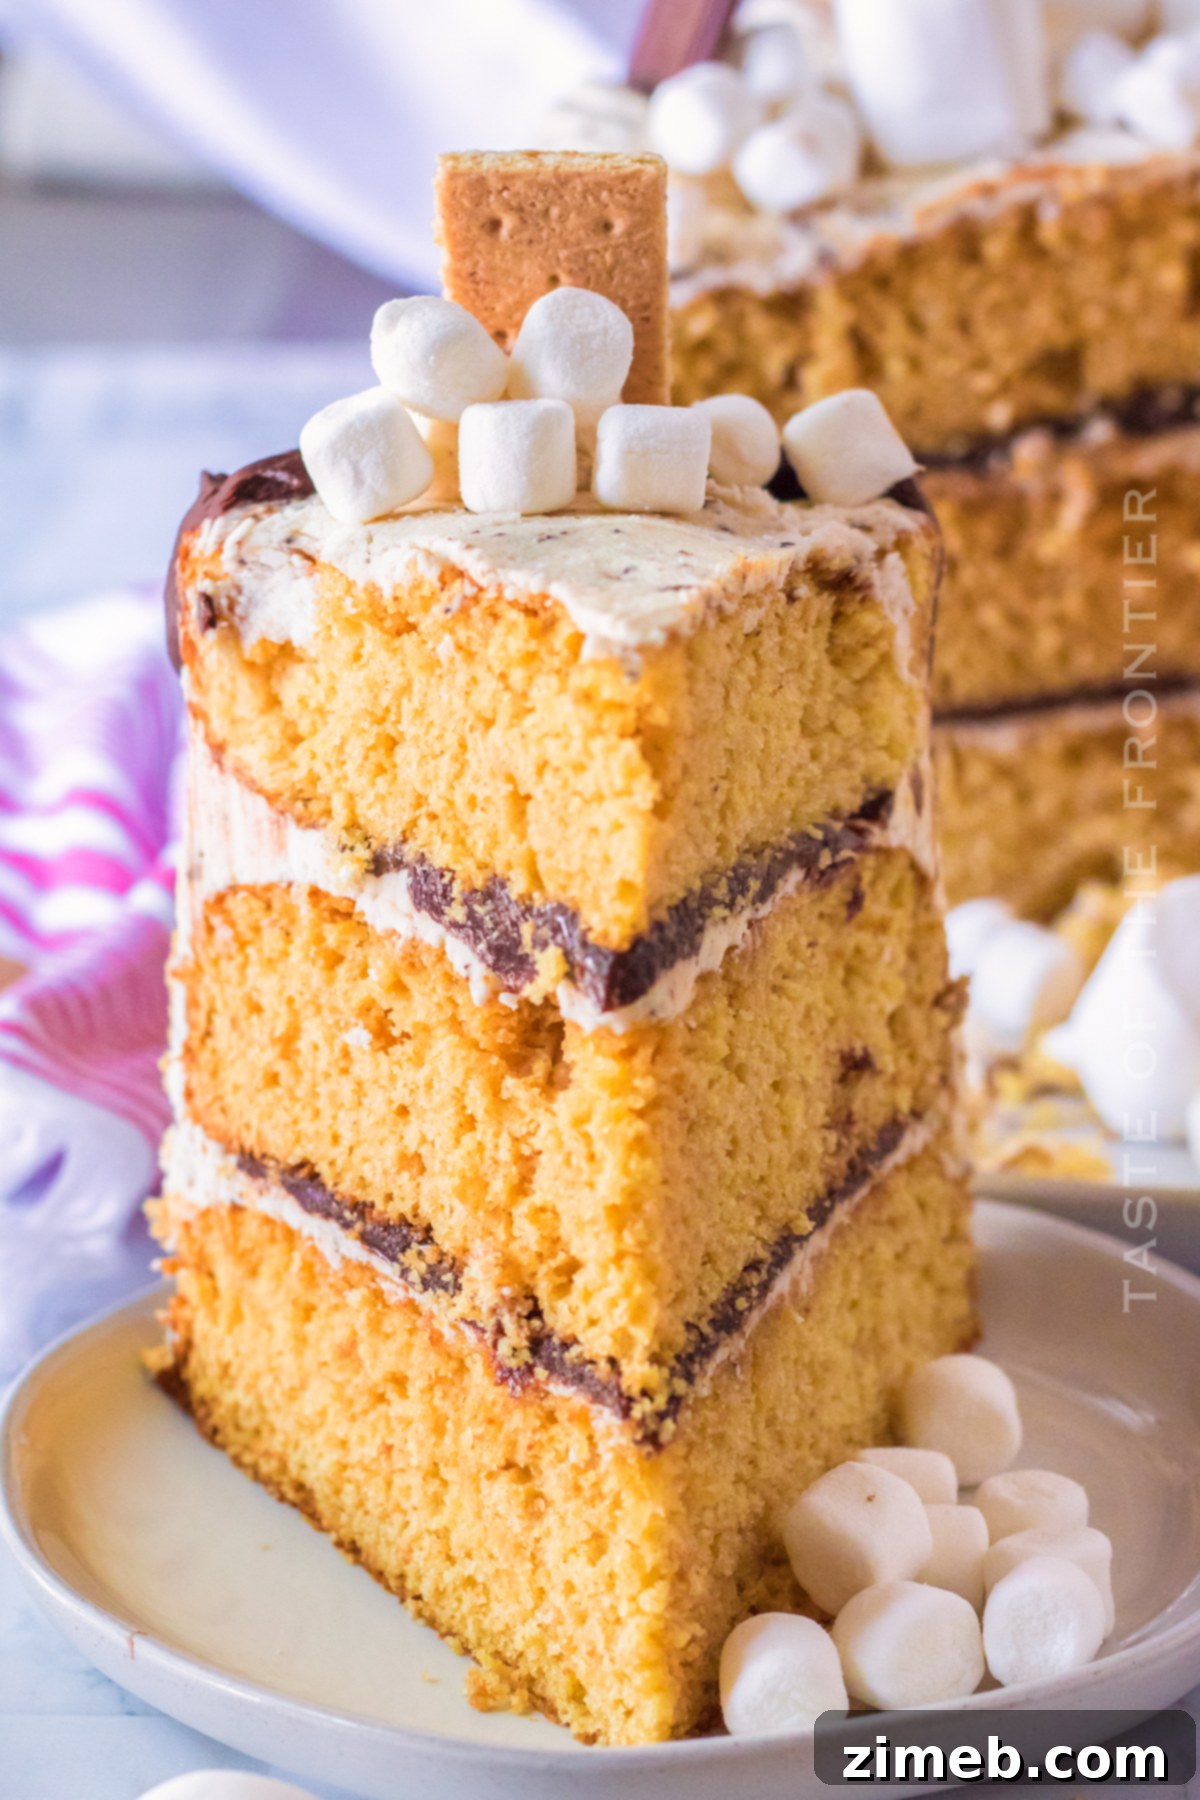
S’mores Cake is the quintessential taste of summer, meticulously crafted with a tender yellow cake base infused with delicate graham cracker crumbs. Each luscious layer is generously spread with rich hot fudge and crowned with a light, airy toasted marshmallow buttercream frosting. Piled high with fluffy marshmallows, chocolate bar pieces, and additional graham crackers, this cake is more than just a dessert; it’s an irresistible celebration of classic campfire flavors. It stands as the ultimate summer centerpiece, perfect for serious s’mores enthusiasts and anyone looking to capture the magic of the season in a slice.
Summer often brings a wave of nostalgia and cherished traditions. For me, one particular tradition stands out: baking a special birthday cake for my mom. Even though she passed away nearly nine years ago, her memory lives on vibrantly in our annual celebrations. My mom was a passionate cake decorator, and she instilled in me a deep appreciation for the artistry and joy a beautifully crafted cake can bring. Thus, I always welcome the opportunity to create an elaborate, show-stopping cake in her honor, pushing my creativity and baking skills.
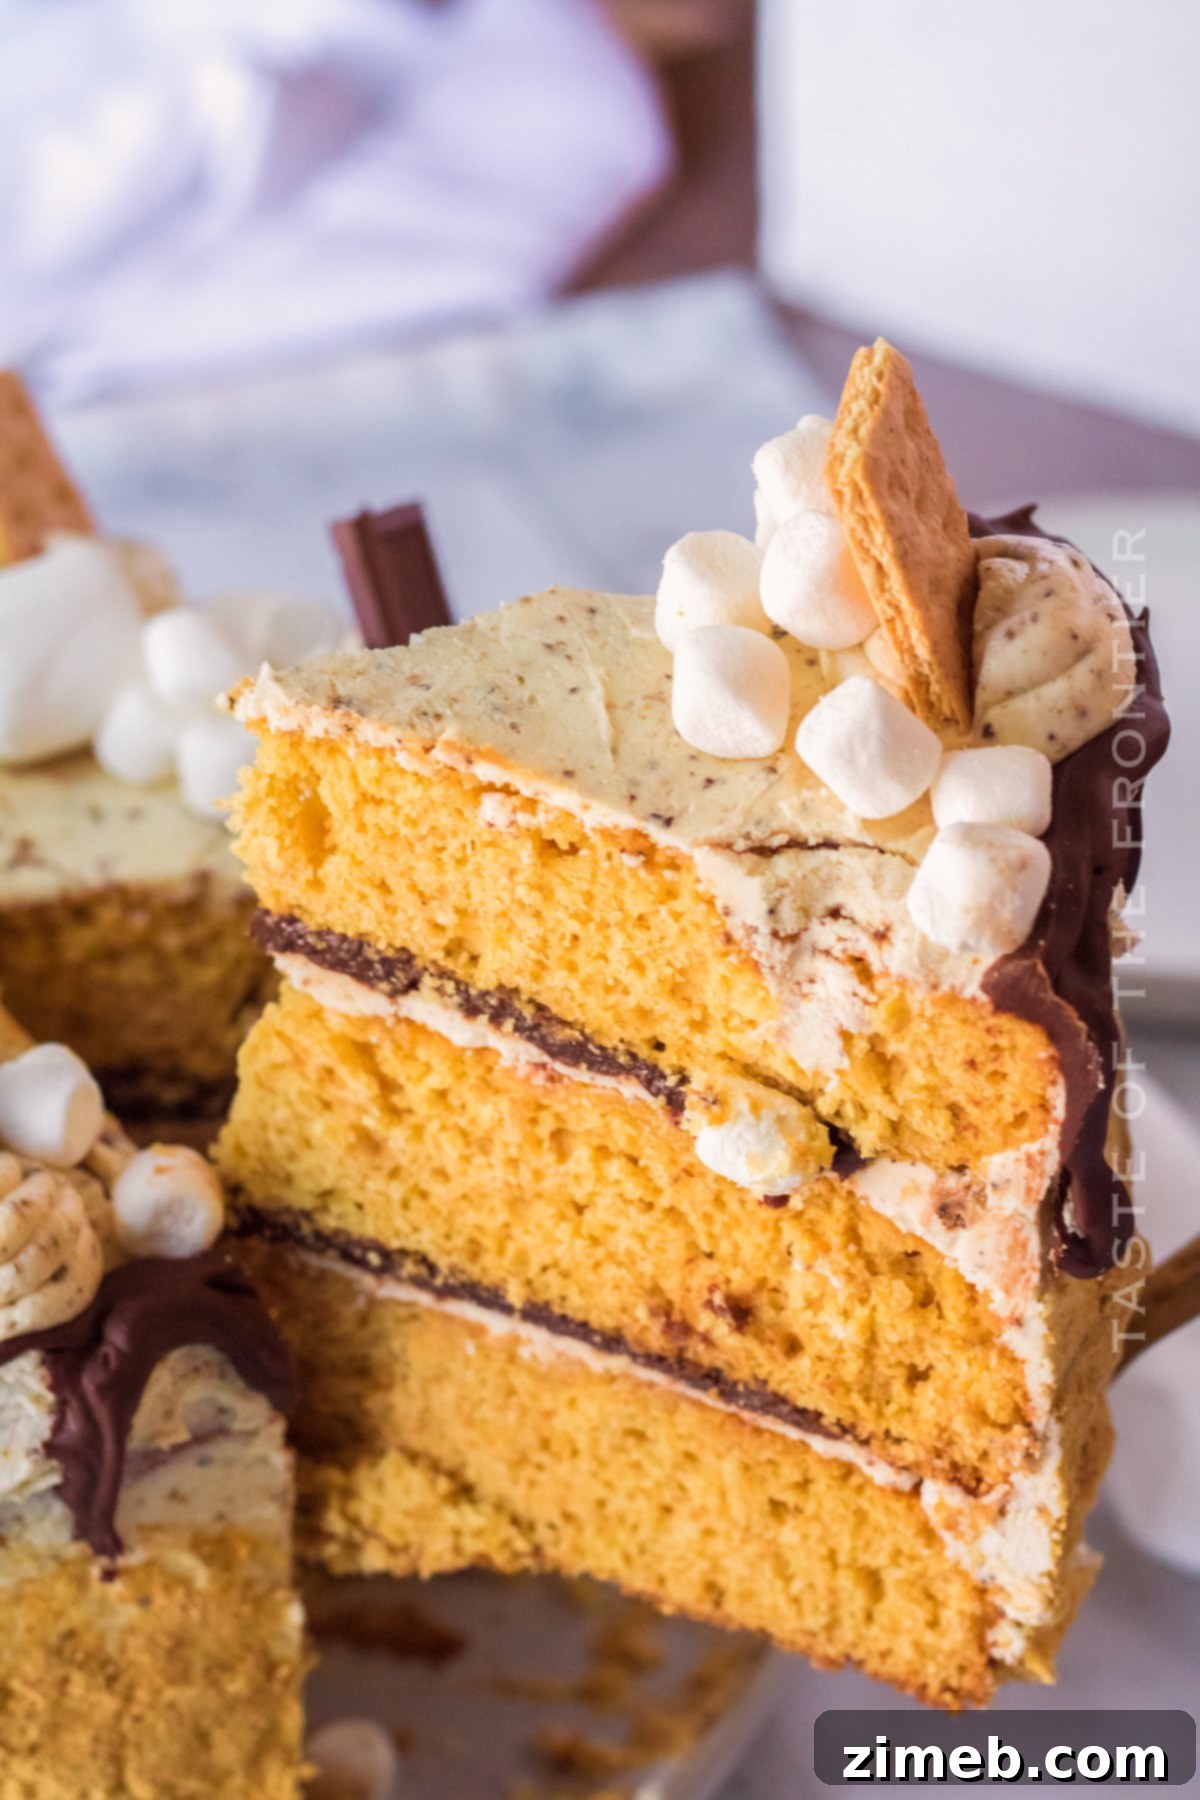
This summer, the choice for her commemorative cake was clear: a S’mores Cake. What flavor profile evokes the warmth and fun of summer more vividly than the beloved s’mores? This dessert instantly transports you to crackling bonfires and starry nights. To truly capture this iconic flavor, we started by incorporating finely crushed graham crackers directly into the cake base, giving it that characteristic subtle crunch and honeyed sweetness. We then ensured a generous application of hot fudge between the layers, delivering a decadent burst of chocolate that perfectly complements the graham cracker notes. The combination creates a rich, multifaceted flavor experience that is both comforting and exciting.
But the true star of this S’mores Cake, in my humble opinion, is the toasted marshmallow buttercream frosting. Oh, my heavens – I was utterly captivated by this frosting! Its divine flavor and wonderfully fluffy texture are beyond compare. The process of lightly toasting the marshmallows before blending them into the buttercream creates an incredible depth of flavor – smoky, sweet, and undeniably irresistible. Honestly, I could happily enjoy this frosting by the spoonful; it’s that good. It transforms a simple cake into an extraordinary summer dessert, making every bite a delightful journey to a campfire experience.
Frequently Asked Questions About S’mores Cake
Can Toasted Marshmallow Buttercream Be Prepared in Advance?
Absolutely! Preparing elements of a cake in stages can significantly streamline the baking and decorating process, especially for multi-layered creations like this S’mores Cake. I often bake the cake layers one day, allowing them to cool completely before wrapping them tightly and freezing them. On the same day, or a day later, I’ll prepare the toasted marshmallow buttercream. Once made, this delightful frosting can be stored in an airtight container in the refrigerator for up to 1-3 days. When you’re ready to use it, simply bring it to room temperature and re-whip it with an electric mixer until it regains its light and fluffy consistency. This make-ahead approach ensures your cake decorating day is less stressful and more enjoyable.
Can Butter Be Substituted for Oil in the Cake Recipe?
While I haven’t personally experimented with swapping oil for butter in this specific S’mores Cake recipe, it’s a common query in baking. Generally, oil contributes to a more moist and tender crumb in cakes, whereas butter can add richness and a distinct flavor but might result in a slightly denser texture. If you’re using a boxed cake mix as a base, there might be specific instructions on the packaging for a butter substitution, which I would recommend following. However, for best results with this particular recipe, which is designed to be very moist, I’d suggest sticking with vegetable oil. If you do decide to try the swap, I’d be keen to hear about your experience and how it turned out!
What’s the Optimal Way to Store Leftover S’mores Cake?
Proper storage is key to keeping your S’mores Cake fresh and delicious. If you have a significant portion of the cake remaining after serving, the best method is to cover it thoroughly. First, wrap the entire cake with plastic wrap, paying special attention to fully cover any exposed cut surfaces to prevent drying. Then, add a layer of aluminum foil over the plastic wrap for extra protection. Store the cake in the refrigerator. For just a few leftover slices, individual airtight containers work perfectly. This cake will maintain its freshness for up to 5 days when properly wrapped and refrigerated. For the best flavor and texture, allow the cake to sit at room temperature for about 20-30 minutes before serving again.
Adapting the S’mores Cake Recipe for Various Pan Sizes
Yes, this versatile S’mores Cake recipe can certainly be adapted to different cake pan sizes! When adjusting, remember that baking times will vary depending on your specific oven, local climate, elevation, and the material of your pans. Always use the toothpick test—insert a toothpick into the center of the cake; if it comes out clean, the cake is ready. Here are some guidelines for different pan configurations:
- Two 9-inch round pans: These wider pans tend to produce a slightly more domed and crusted cake. Adjust your baking time to approximately 30-35 minutes. Monitor closely, as actual baking time can vary.
- Two 8-inch round pans: Divide the batter evenly between the two pans, aiming for about 2 to 2-1/2 cups of batter in each. Bake for 28-32 minutes, checking for doneness.
- Four 6-inch round pans: For a taller, multi-layered presentation, divide the batter evenly among four 6-inch pans, with each receiving about 1-1/3 cups of batter. Bake these smaller layers for 24-30 minutes.
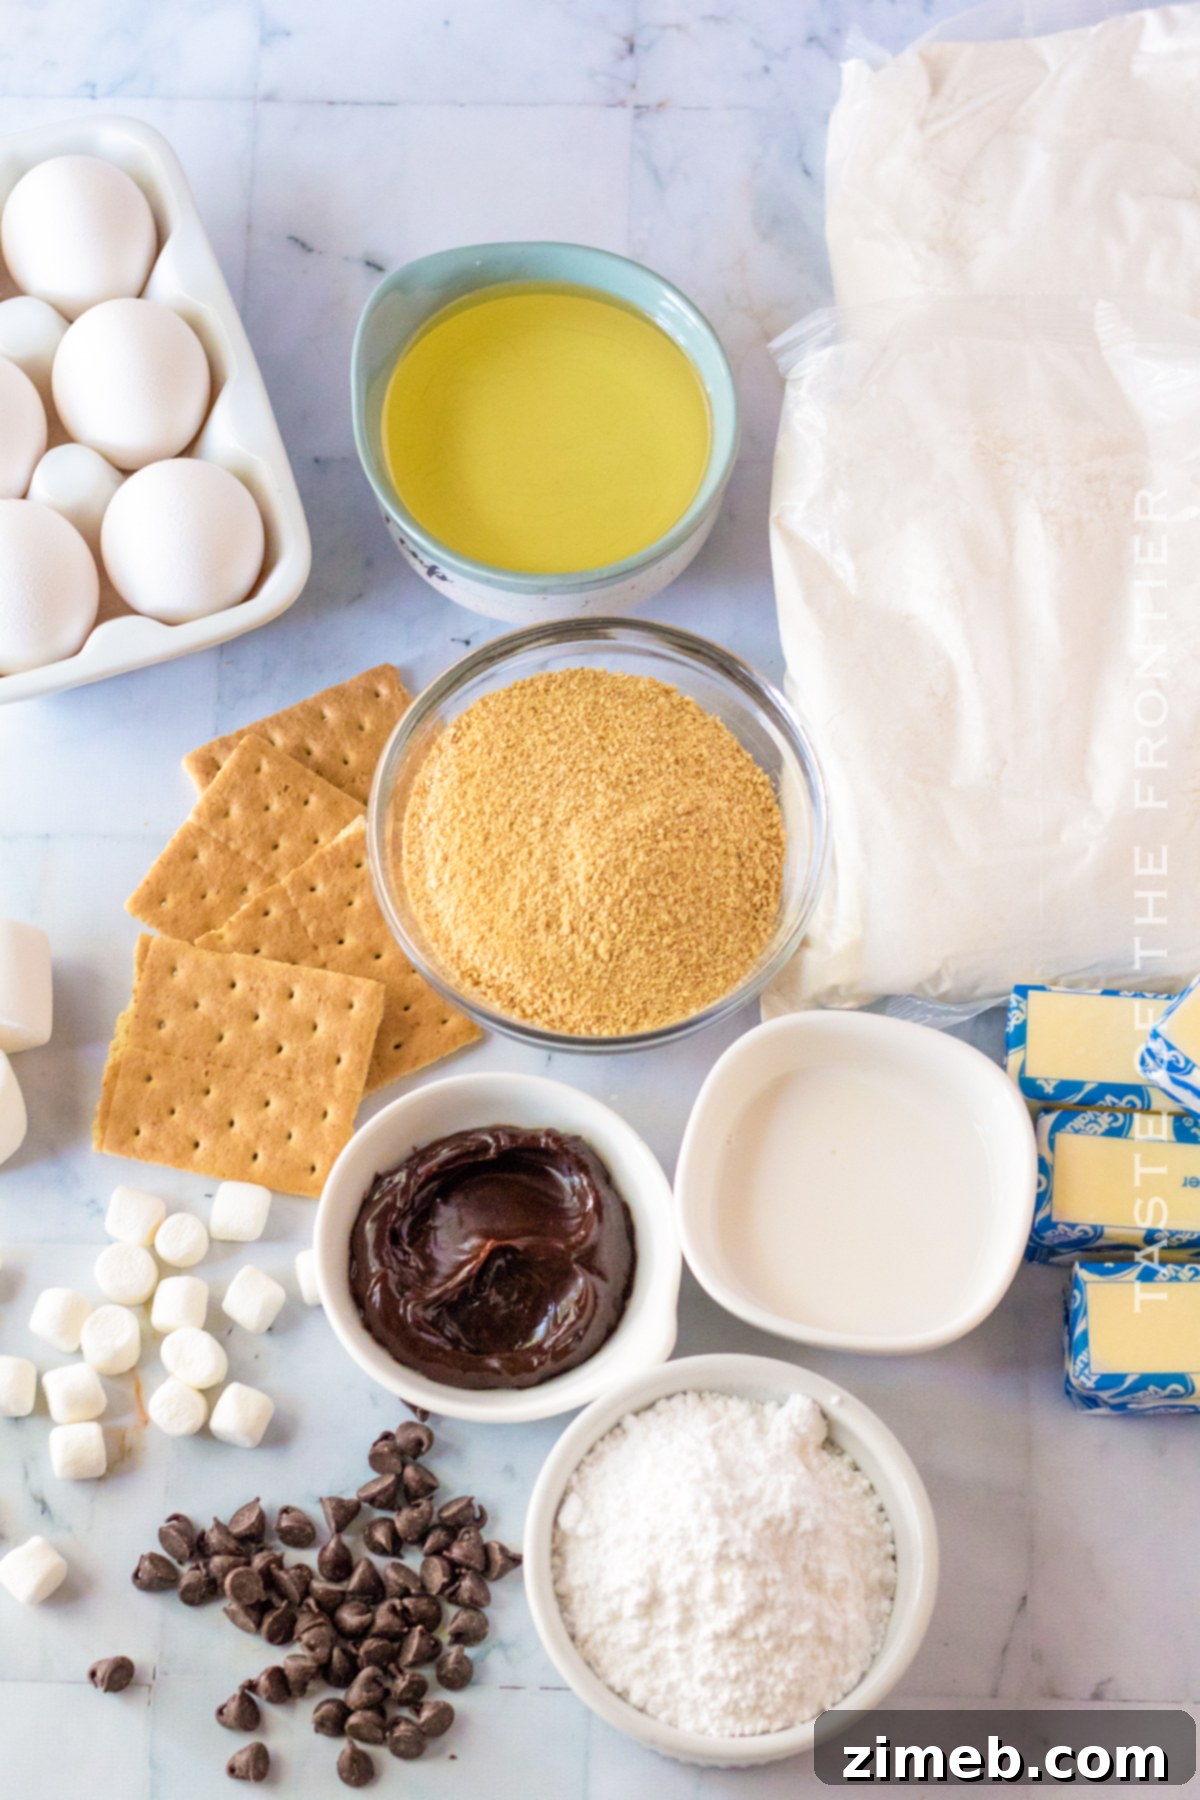
Essential Ingredients for Your S’mores Cake Base
Creating the perfect S’mores Cake starts with simple, accessible ingredients for a moist and flavorful base. Here’s what you’ll need for the cake layers:
- Yellow Cake Mix: We use two boxes to create a substantial, multi-layered cake. This provides a wonderfully moist and tender foundation, reminiscent of classic golden graham crackers.
- Graham Cracker Crumbs: These are crucial for imparting the authentic s’mores flavor and a subtle textural contrast within the cake layers.
- Water: The liquid component for the cake mix, ensuring proper hydration and consistency.
- Vegetable Oil: Adds essential moisture and contributes to the cake’s soft, tender crumb.
- Eggs: Act as a binder and provide structure, richness, and lift to the cake.
Key Ingredients for Toasted Marshmallow Buttercream Frosting
The star of our S’mores Cake is undoubtedly the incredibly flavorful and fluffy toasted marshmallow buttercream. Here’s what you’ll need to create this divine frosting:
- Mini Marshmallows: The magic ingredient! These are toasted to perfection, providing that signature smoky-sweet s’mores flavor that elevates the frosting.
- Unsalted Butter (softened): Crucial for the rich, creamy base of any good buttercream. Ensure it’s softened to room temperature for smooth whipping.
- Confectioner’s Sugar: Also known as powdered sugar, this fine sugar dissolves easily to create a smooth, sweet frosting texture without grittiness. You’ll need two 16-ounce bags for this generous recipe.
Ingredients and Elements to Decorate Your S’mores Cake
The decoration is where your S’mores Cake truly comes to life, capturing the visual appeal of the campfire classic. Here’s what you’ll need to make it picture-perfect:
- Hot Fudge: Used for luscious layers within the cake and for drizzling, providing that rich, melt-in-your-mouth chocolate experience.
- Garnish: This is where you can have fun! Gather a mix of:
- Additional graham cracker crumbs
- Sections of Hershey bars (or your favorite chocolate)
- Whole graham crackers (for dramatic flair)
- Extra mini marshmallows
- Regular-sized marshmallows (for toasting on top, if desired)
For the Optional Decadent Chocolate Ganache Drip
If you desire an extra touch of sophistication and chocolate richness, a simple ganache drip is a fantastic addition:
- Semisweet Chocolate Chips: The base for our smooth, glossy ganache.
- Heavy Whipping Cream: Provides the necessary richness and liquid to create a pourable ganache.
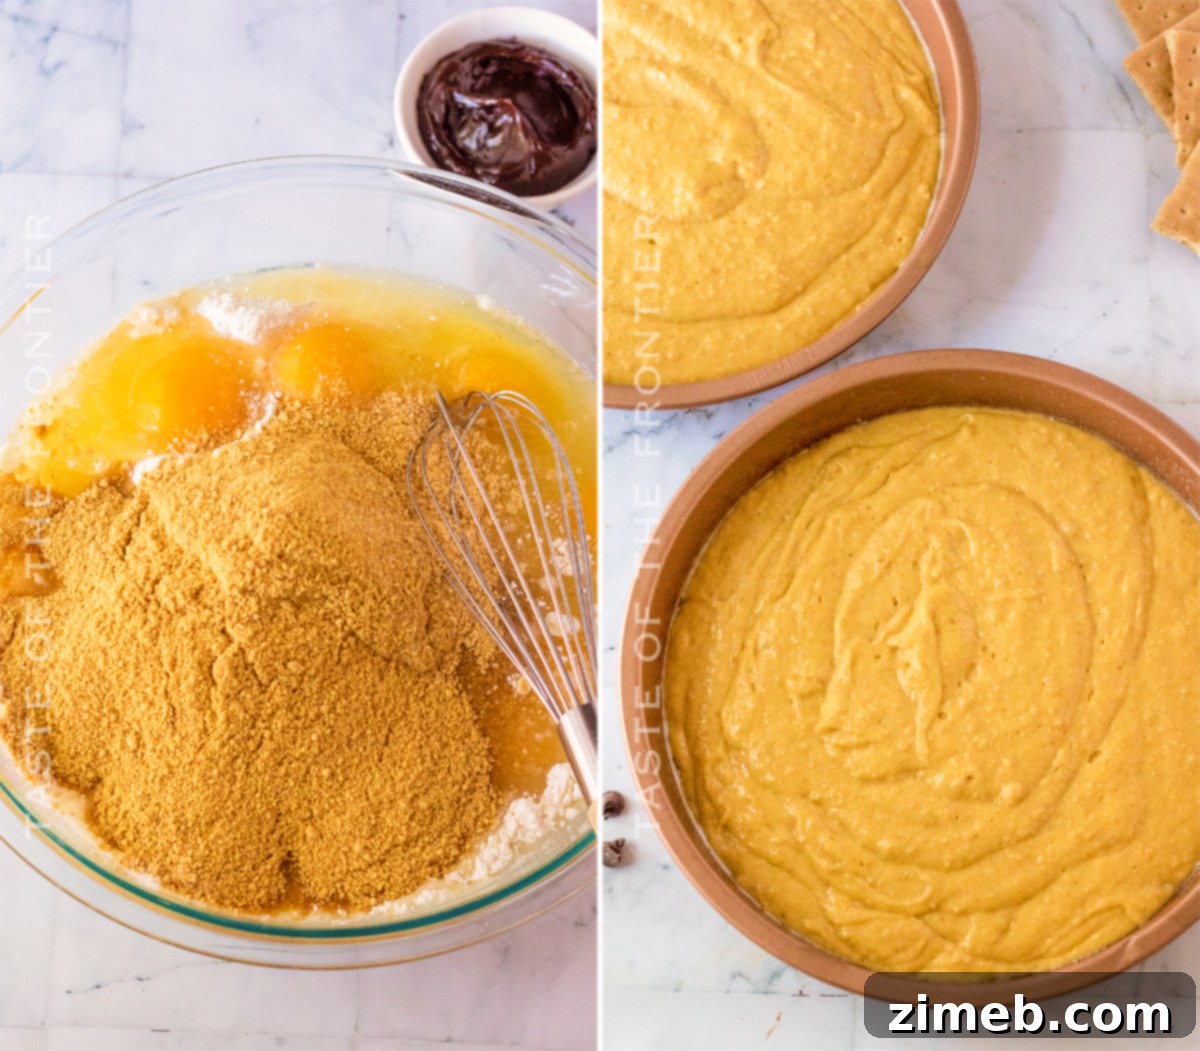
Step-by-Step Guide: Crafting Your Delicious S’mores Cake
Follow these instructions carefully to bake the perfect, moist cake layers for your S’mores masterpiece:
- Begin by preheating your oven to 350 degrees Fahrenheit (175 degrees Celsius). This ensures the oven is at the correct temperature for even baking.
- Lightly grease three 8-inch round cake pans. For an easier release, consider using a homemade baker’s release or lining the bottoms with parchment paper. Set them aside.
- In a large mixing bowl, combine the two boxes of yellow cake mix, graham cracker crumbs, water, vegetable oil, and eggs.
- Using an electric mixer or a sturdy whisk, mix the ingredients until the batter is smooth and well combined, ensuring no dry pockets of cake mix remain.
- Carefully divide the cake batter evenly among the three prepared cake pans.
- Bake in the preheated oven for 20-25 minutes, or until a wooden toothpick inserted into the center of a cake comes out clean.
- Allow the baked cakes to cool in their pans for a brief 5 minutes before carefully inverting them onto a wire cooling rack.
- Let the cakes cool completely on the rack before attempting to decorate. For easier handling during frosting, I often place the cooled cake layers in the freezer for about 15-20 minutes. This firms them up, making them less prone to tearing.
Understanding and Making Baker’s Release
Baker’s Release is an invaluable tool for any baker, particularly when dealing with delicate cakes that need to come out of the pan cleanly. It’s a simple, homemade mixture designed to make removing baked goods from their pans nearly effortless, preventing sticking and preserving the integrity of your cake. This magical blend consists of just three common pantry staples: oil, flour, and shortening.
Making your own Baker’s Release is incredibly straightforward – it’s as simple as 1, 1, & 1:
- Combine equal parts of all-purpose flour, shortening, and cooking oil. I typically prepare a batch using 1 cup of each ingredient.
Thoroughly mix these ingredients together, whisking well until smooth and fully emulsified. Store the mixture in an airtight container at room temperature in your pantry or in the refrigerator for extended freshness. When you’re ready to use it, simply dip a pastry brush into the mixture and generously spread it over the entire interior surface of your cake pan. This creates a non-stick barrier that ensures a perfect release every time.
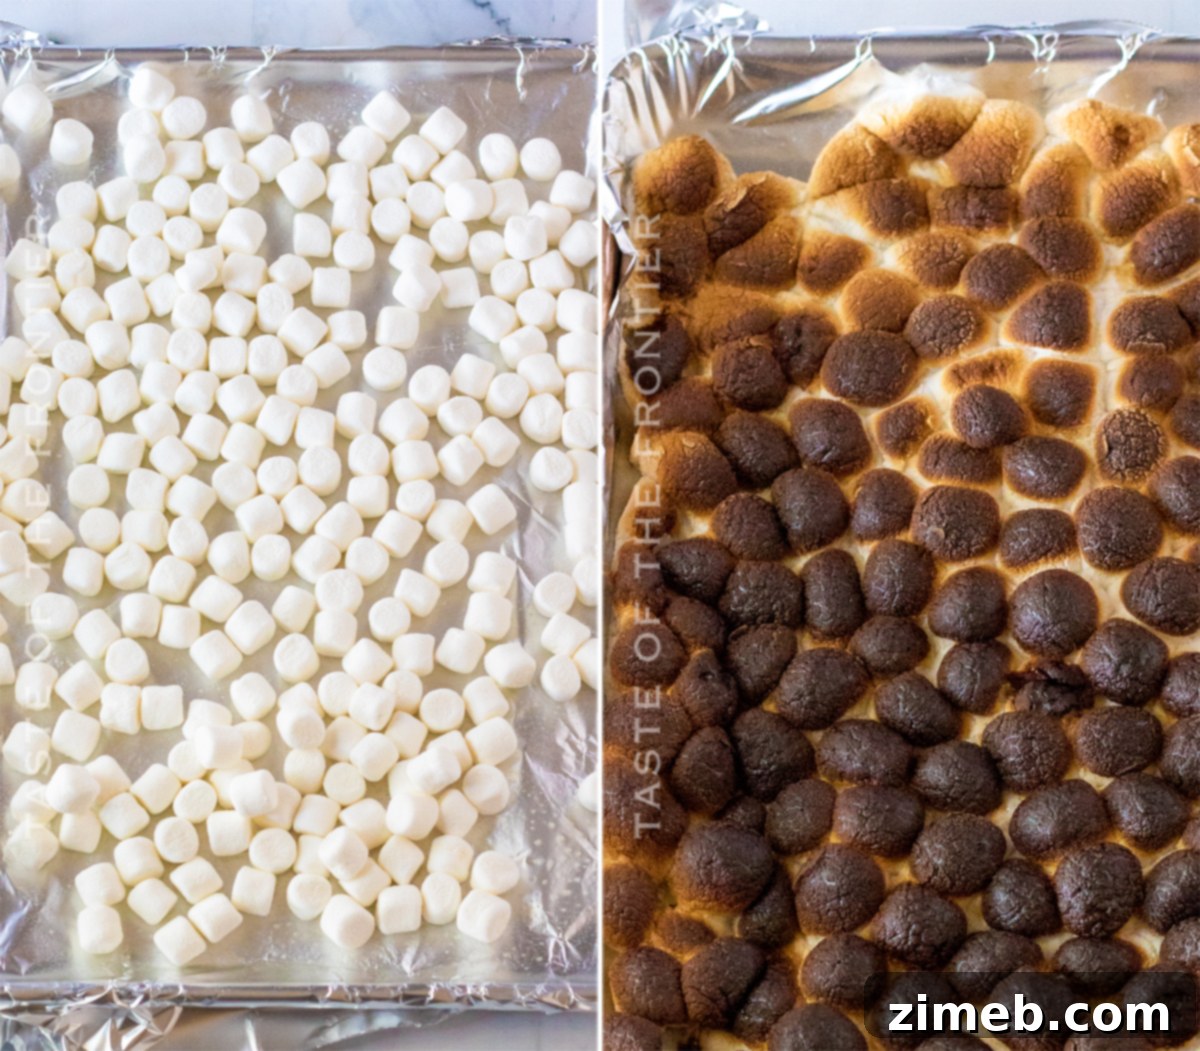
Creating the Irresistible Toasted Marshmallow Buttercream Frosting
This frosting is the heart of our S’mores Cake, delivering that iconic flavor. Here’s how to make it:
- First, adjust your oven rack and turn your oven to the broiler setting. Watch closely, as broilers can vary significantly in intensity.
- Line a baking sheet with aluminum foil and lightly spray it with non-stick cooking spray. This prevents the sticky marshmallows from adhering to the foil.
- Evenly spread out 4 cups of mini marshmallows across the prepared baking sheet. Avoid overcrowding the pan.
- Carefully place the baking sheet under the broiler.
- Crucial Step: Do not take your eyes off the marshmallows! They will toast very quickly, often in just 30-60 seconds, and can burn easily. You’re looking for a beautiful golden-brown color.
- Once perfectly toasted, remove the marshmallows from the oven immediately and quickly transfer them to a large mixing bowl.
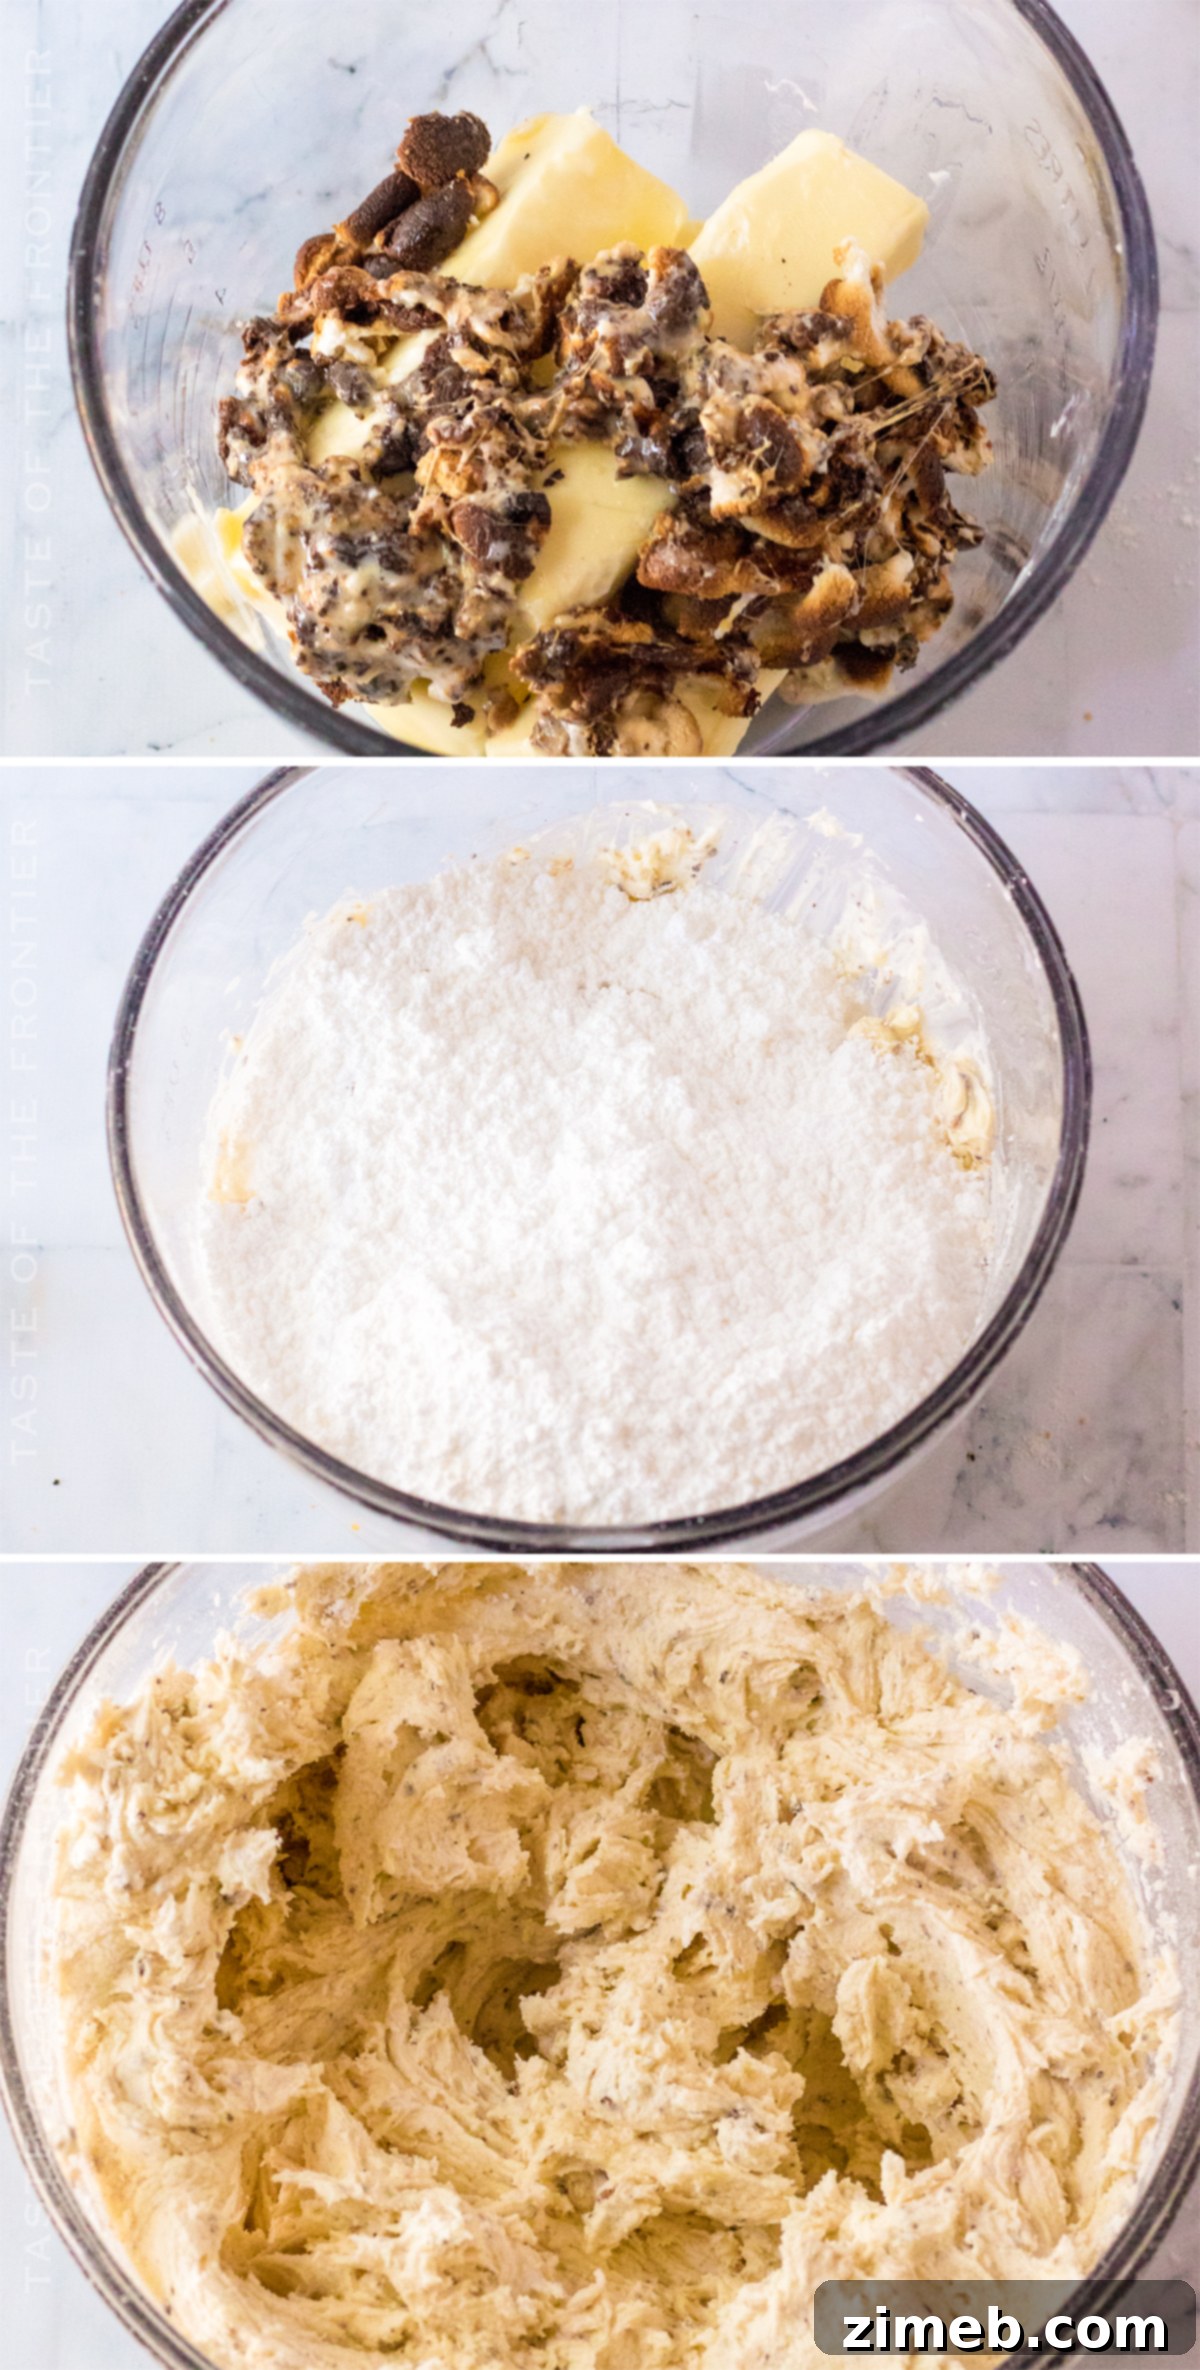
- Add the softened unsalted butter to the bowl with the warm, toasted marshmallows. Using an electric mixer (stand mixer or hand mixer), whip the butter and marshmallows together until well combined and fluffy. The warmth of the marshmallows will help to melt the butter slightly.
- Next, gradually add the confectioner’s sugar, a little at a time, mixing on low speed until incorporated. Increase speed as needed.
- Once all the sugar has been added, increase the mixer speed to medium-high and whip the frosting for an additional 5-7 minutes. This extended whipping time is essential for creating that light, airy, and incredibly fluffy texture that makes this buttercream so delightful.
**Expert Baking Tip: After greasing your cake pans, I highly recommend dusting them. For yellow or white cakes, use a tablespoon of all-purpose flour, and for chocolate cakes, use cocoa powder. Add the chosen powder, shake it around over the sink until all greased areas are lightly coated, then tap out any excess before pouring in your cake batter. This simple step creates an extra non-stick layer, ensuring your baked cakes release perfectly from the pans once cooled.
Assembling and Decorating Your Stunning S’mores Cake
Now for the fun part – bringing all the delicious elements together to create your S’mores masterpiece:
- Carefully place your first cooled cake layer onto your chosen serving plate or cake stand. A cake turntable can make this process much easier.
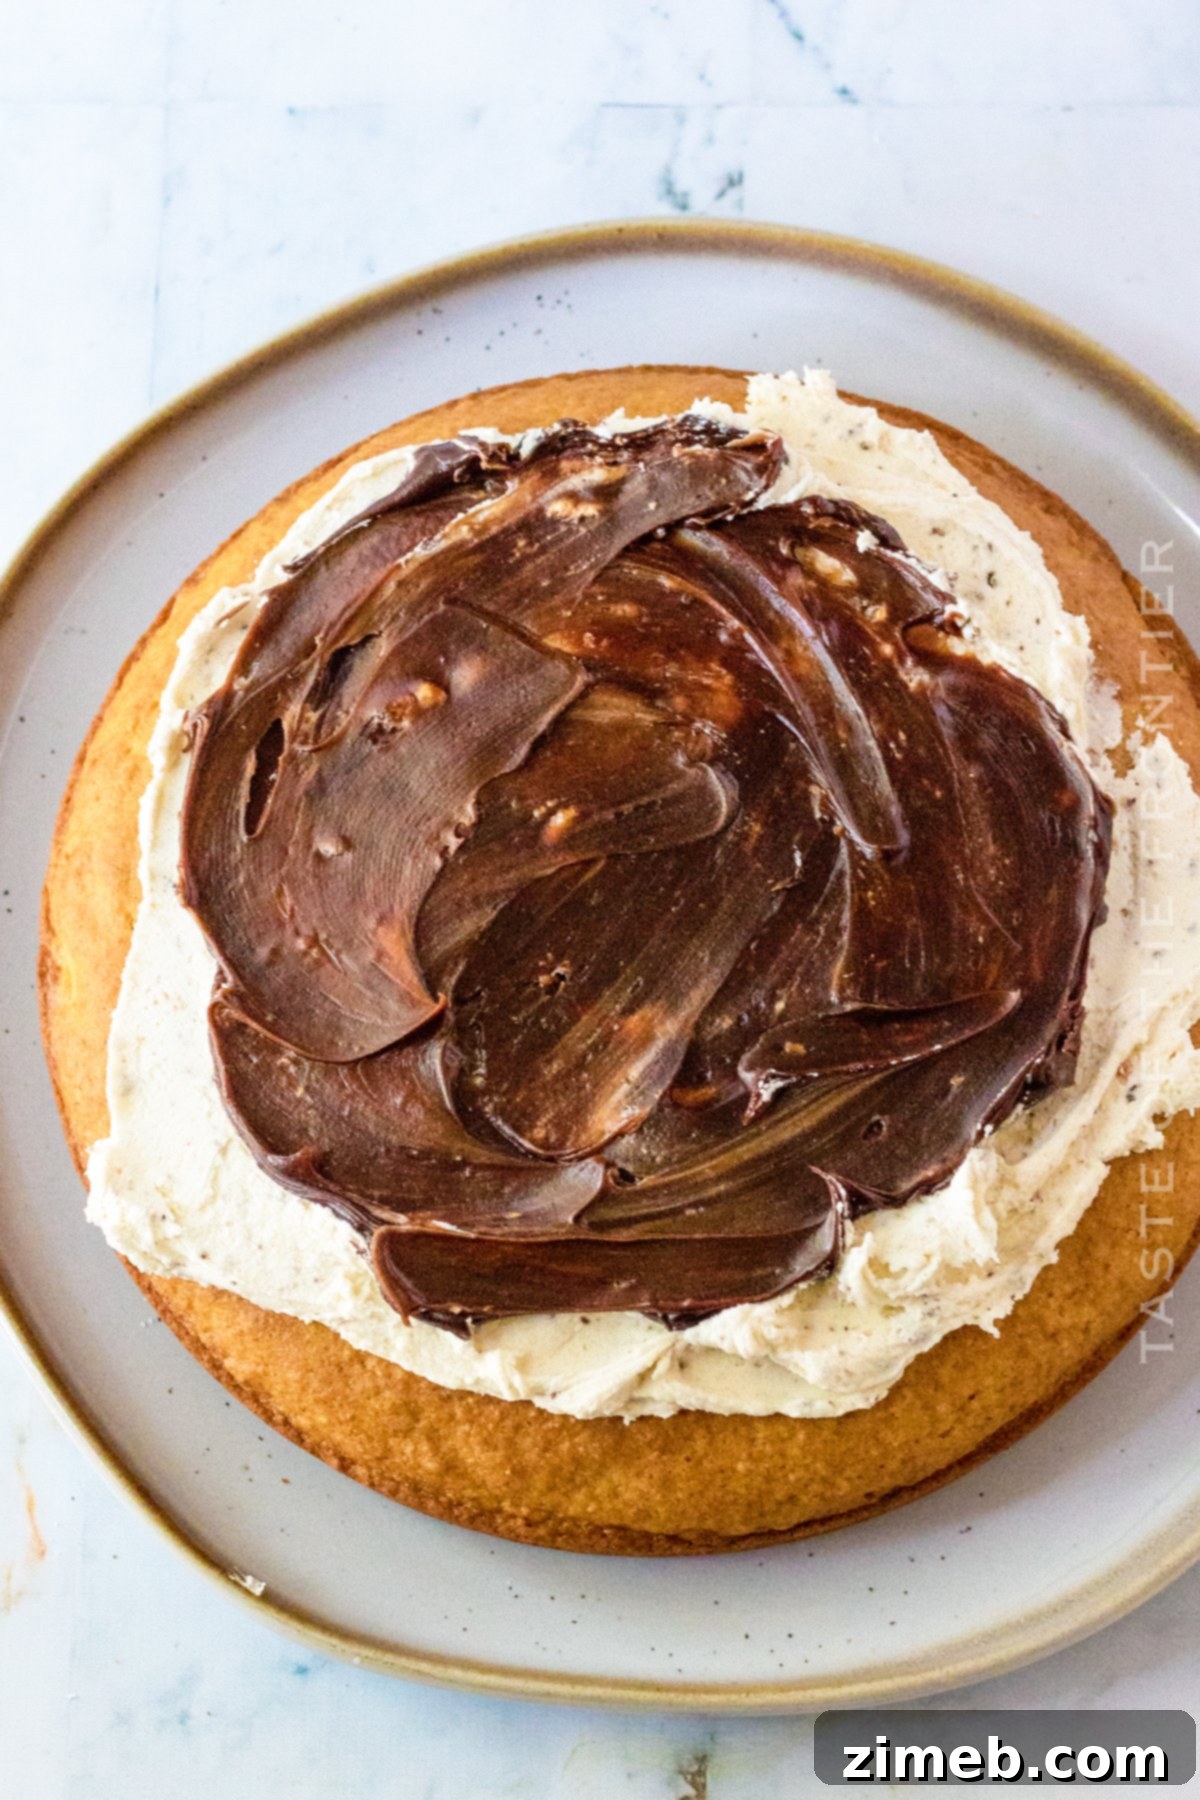
- Generously frost the top of this cake layer with a smooth, even coating of the toasted marshmallow buttercream.
- Spoon half of the hot fudge sauce over the buttercream layer. Don’t worry if the buttercream and fudge mix slightly; it adds to the delicious marbled effect.
- Place the second cake layer on top, aligning it carefully. Repeat the frosting and hot fudge steps with this layer.
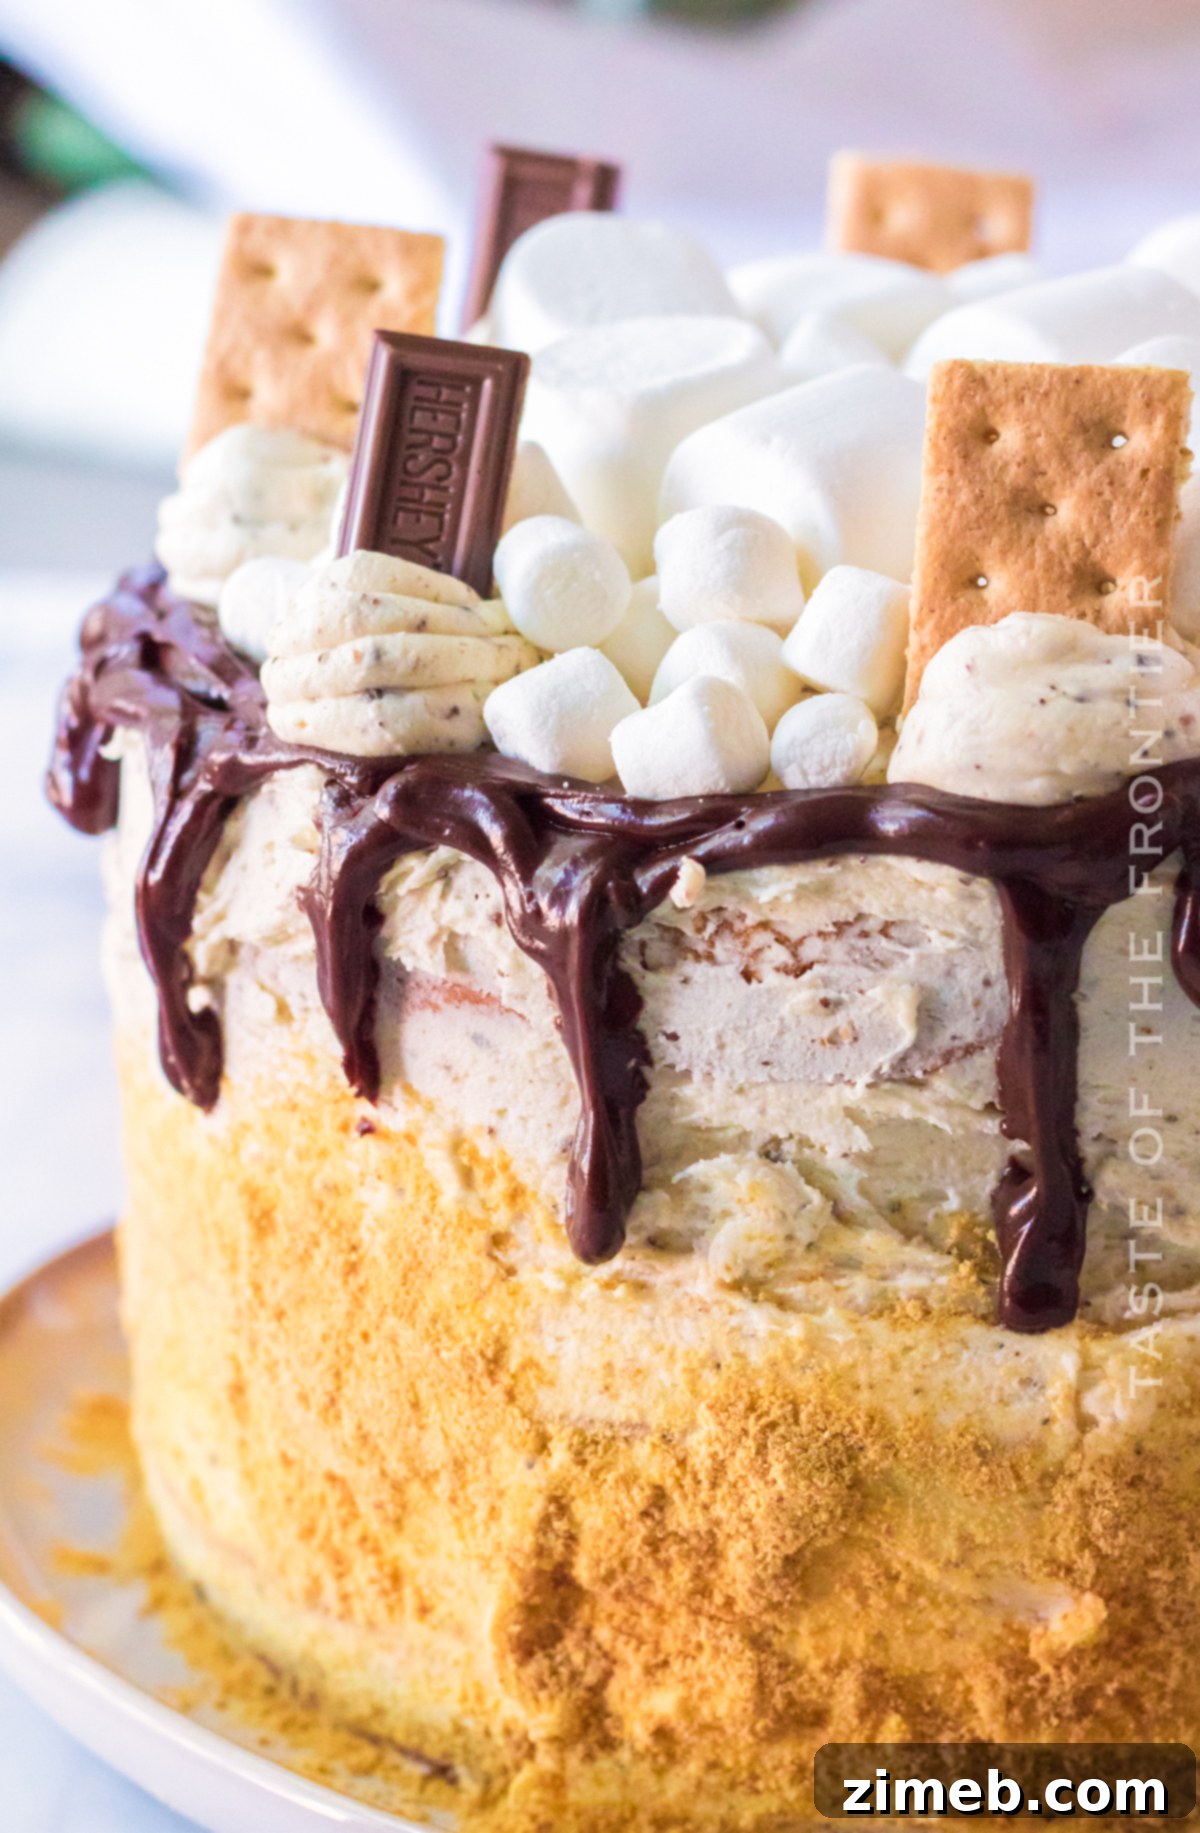
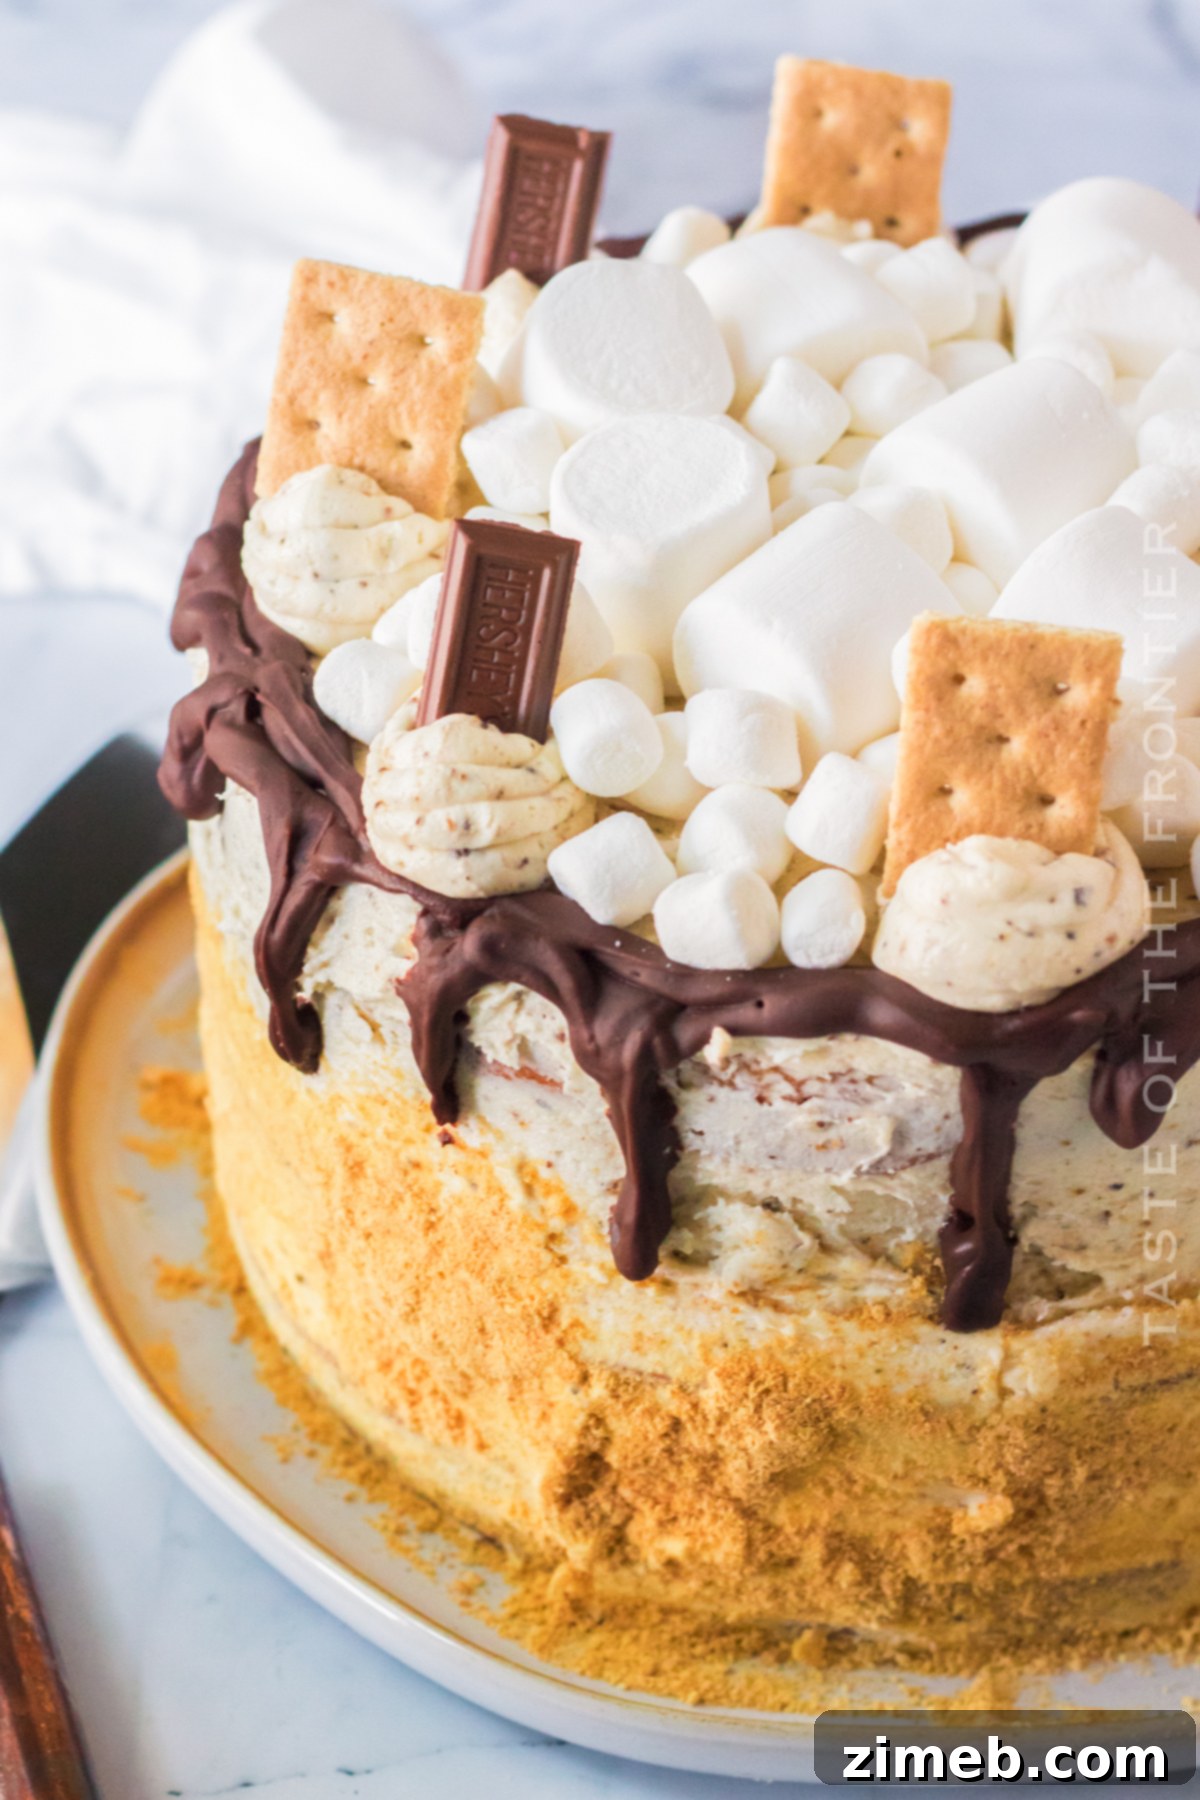
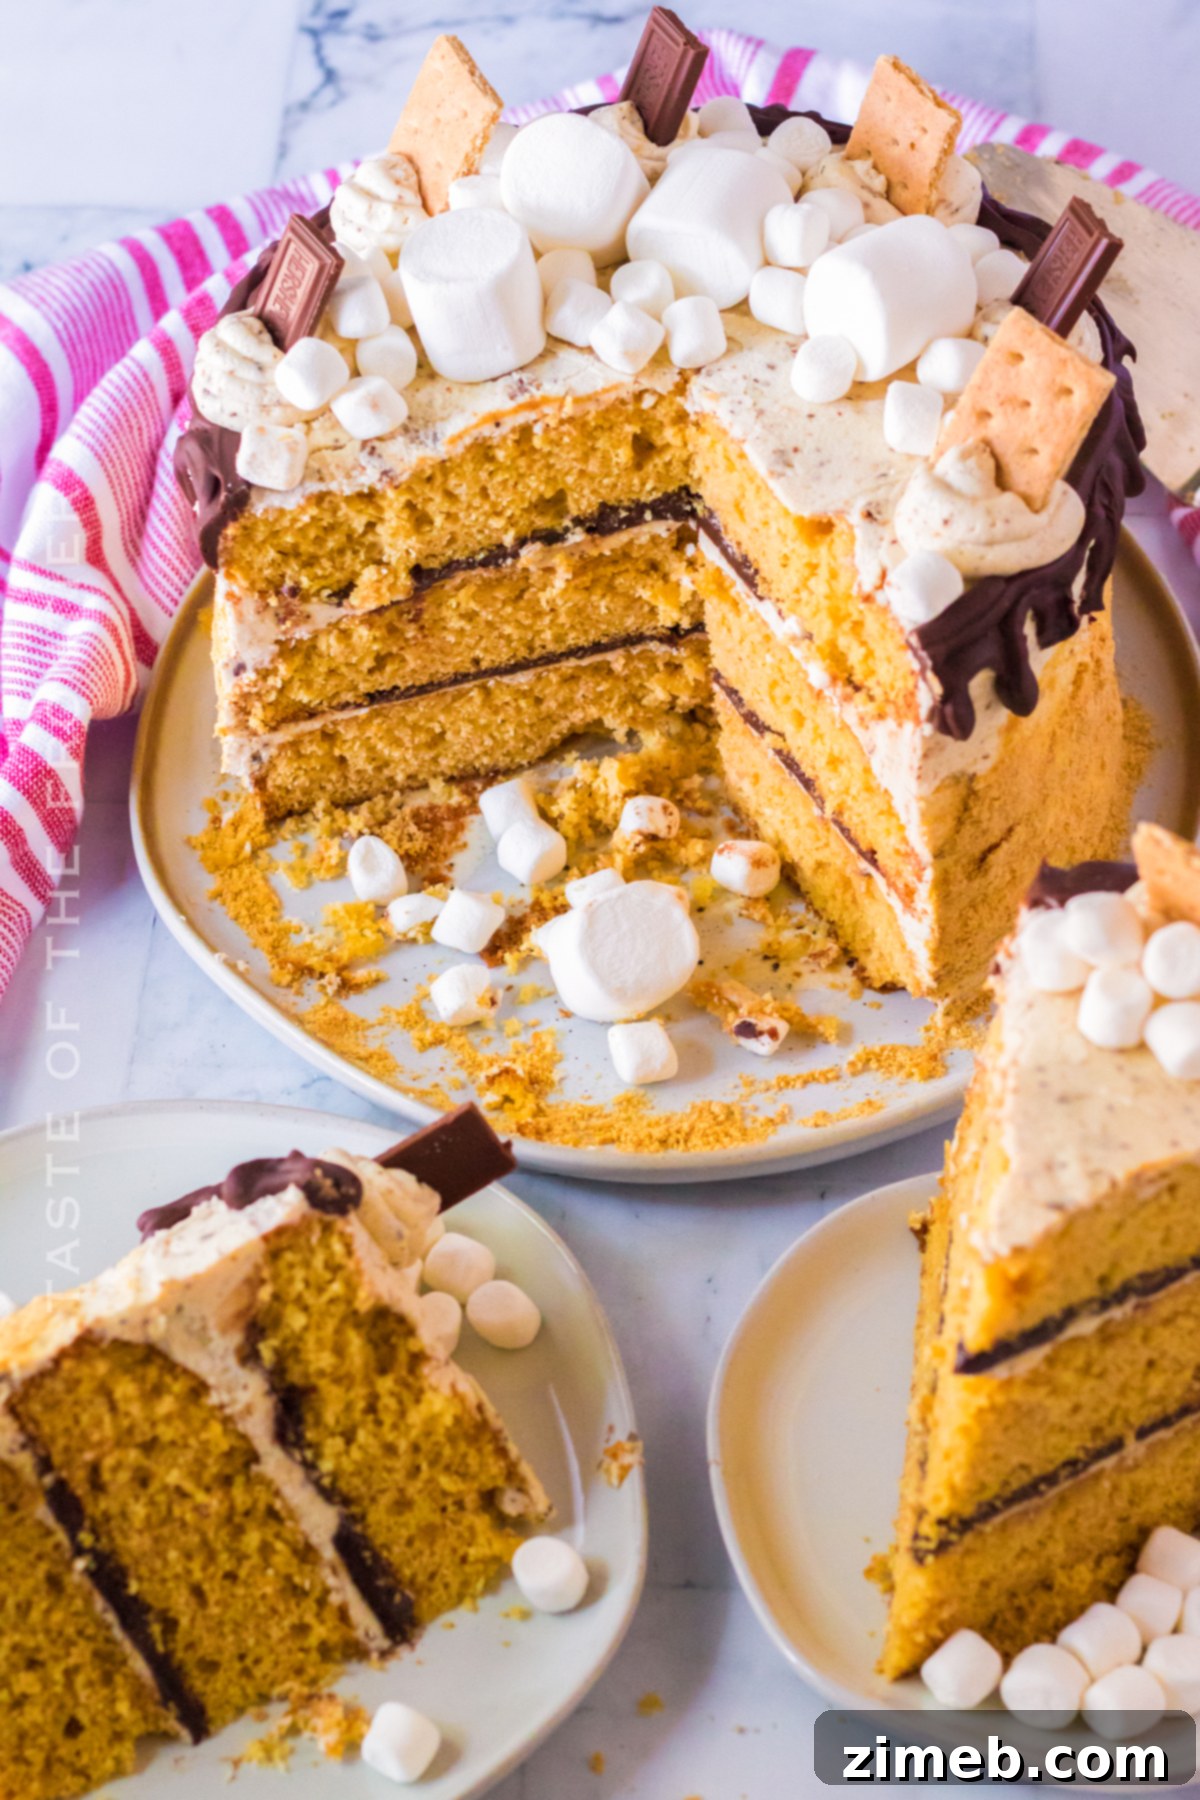
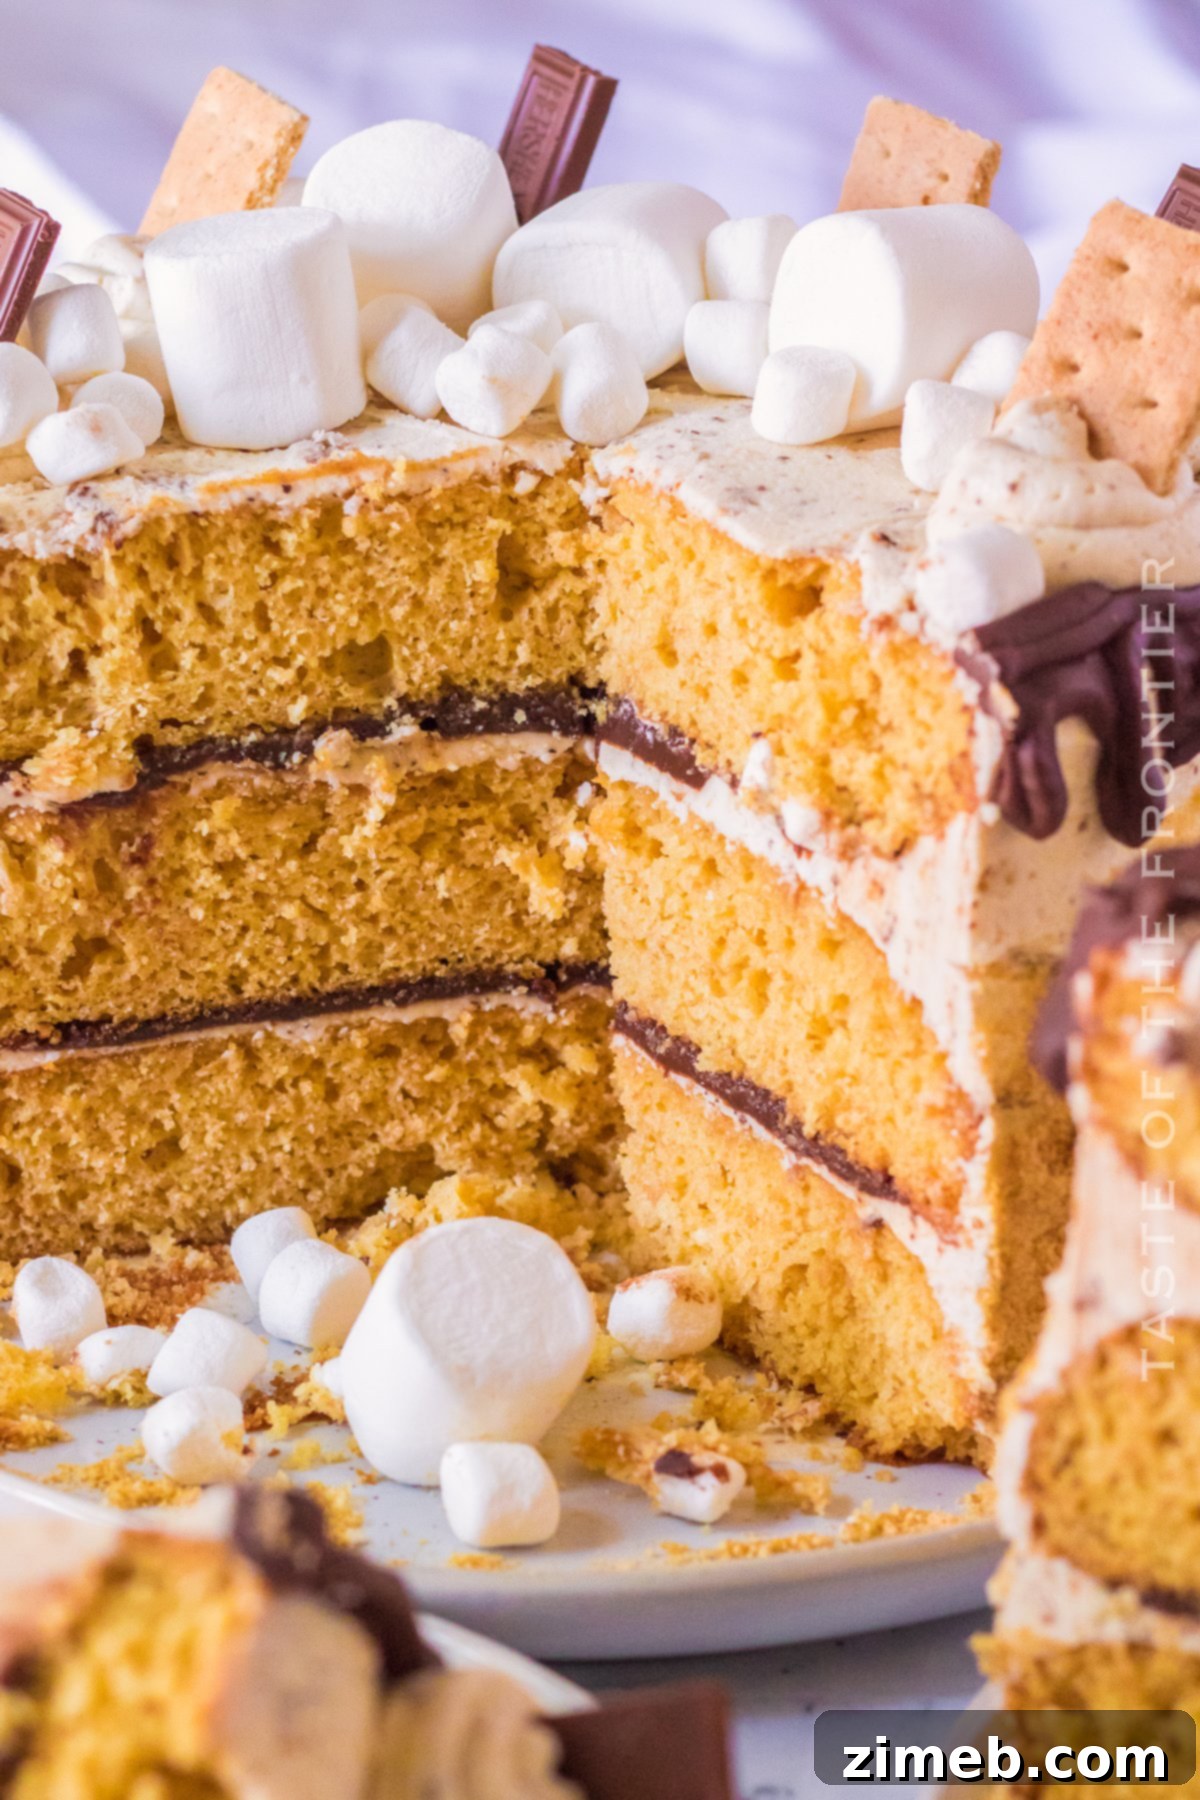
- Gently position the final cake layer on top. Now, use the remaining marshmallow buttercream to frost the entire cake, covering both the top and sides. If you wish to pipe decorative elements later, reserve a portion of frosting.
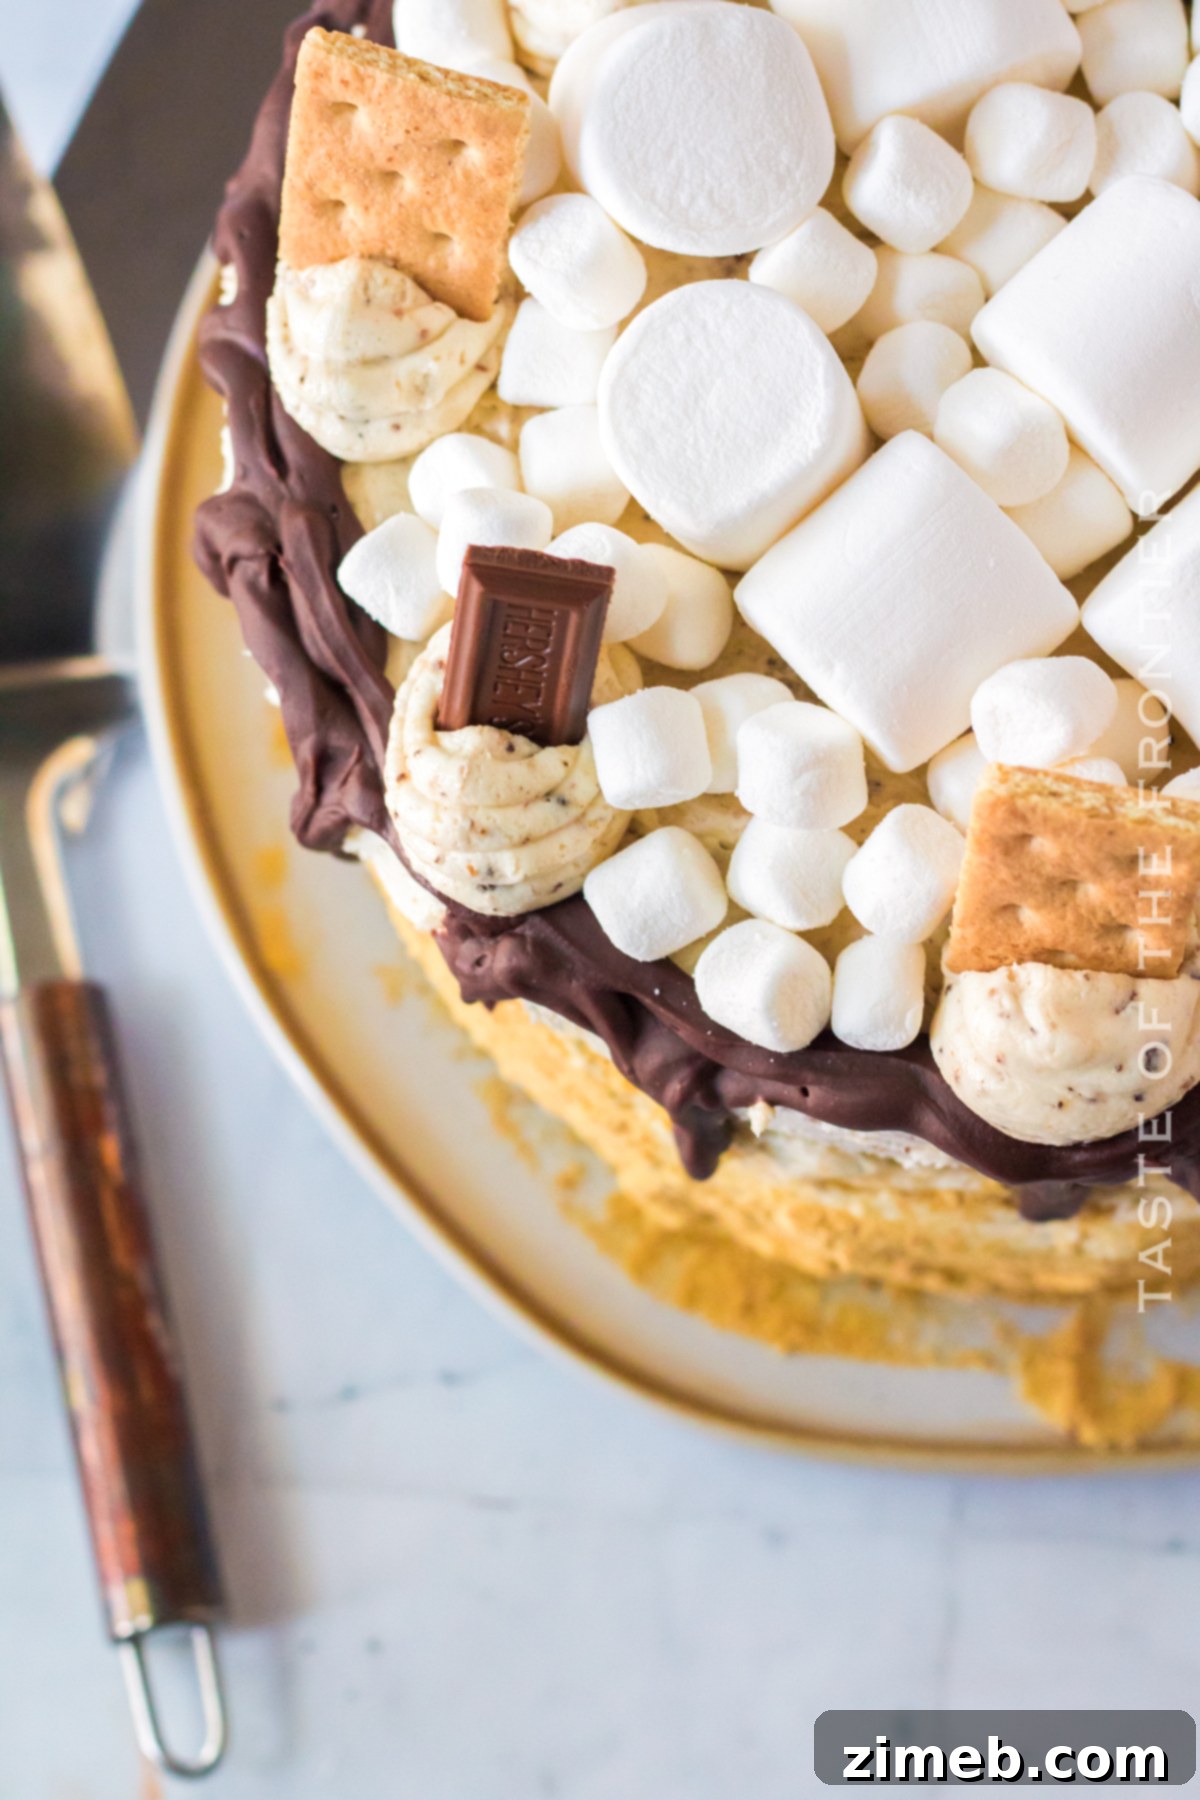
- For the signature s’mores look, take a handful of graham cracker crumbs and gently press or sprinkle them around the bottom half of the cake. This adds texture and visual appeal.
- Finally, unleash your creativity with the garnishes! Decorate the top of the cake with strategically placed graham cracker squares, pieces of Hershey bars (or your preferred chocolate), and plenty of mini or regular marshmallows. You can even lightly toast the top marshmallows with a kitchen torch for an extra authentic touch.
Crafting the Perfect Chocolate Ganache Drip
If you’re adding a ganache drip, here’s how to achieve that professional, glossy finish:
- In a small microwave-safe bowl, gently warm the heavy whipping cream. Heat it in 30-second intervals, stirring in between, until it is hot but not boiling.
- Add the semisweet chocolate chips to the warm cream. Let the mixture sit undisturbed for 5 minutes to allow the chocolate to melt from the residual heat.
- After 5 minutes, whisk the mixture vigorously until it is completely smooth and beautifully glossy.
- Allow the ganache to cool slightly. It should still be pourable but thick enough to create defined drips. Drizzle it carefully around the top edge of the cake, letting it cascade down the sides. Alternatively, transfer the ganache to a piping bag with a small round tip for more controlled drips.
Yield of Toasted Marshmallow Buttercream Frosting
This recipe for toasted marshmallow buttercream frosting provides a generous amount, perfectly sufficient to fill, crumb coat, and elegantly frost and decorate a standard 3-layer, 8-inch round cake. The quantities are balanced to give a lovely, thick coating without being excessive. However, if you have a preference for a noticeably thicker layer of frosting, or if your decorating plans involve elaborate piping or intricate designs that require more volume, I recommend increasing the frosting recipe by half. This ensures you have plenty to work with for all your creative aspirations.
Best Practices for Storing Leftover Ganache
For optimal results and ease of use, it’s always best to apply your chocolate ganache immediately after preparing it, while it’s at the perfect temperature and consistency. However, if you find yourself with leftover ganache, proper storage can ensure it’s still usable later. The ideal way to store any remaining ganache is to transfer it to a decorating bottle or an airtight container and place it in the refrigerator. This will solidify the ganache and keep it fresh.
When you’re ready to use it again, reheating is simple. Microwave the refrigerated ganache on 50% power in short 30-second intervals. After each interval, gently shake or stir the container to distribute the heat. Continue this process until the ganache is heated through and returns to a liquid state, but ensure it’s only slightly warm. You want it warm enough to be pourable, but not hot, to achieve those beautiful, controlled drips on your cake. Overheating can cause it to lose its glossy texture.
Essential Tips and Tricks for Your S’mores Cake Success
- Storage: Keep any leftover S’mores Cake tightly wrapped and refrigerated. It will stay fresh and delicious for 3-5 days. Remember to let it sit at room temperature for 20-30 minutes before serving for the best texture.
- Graham Cracker Crumbs: While you can certainly crush your own graham crackers for this recipe (ensure they are very finely crushed for smooth integration into the batter and frosting), most grocery stores offer pre-crushed graham cracker crumbs in the baking aisle, which can save you time.
- Ganache Alternative: If you’re short on time or prefer a simpler approach, you can easily skip making the homemade ganache. Simply use additional hot fudge sauce for the cake’s internal layers and for a delicious drizzle on top. The cake will be equally as delicious and visually appealing!
For an in-depth guide to mastering the art of chocolate ganache, including various techniques and recipes tailored to different chocolate types, be sure to visit my comprehensive post on making the perfect chocolate ganache!
Transforming S’mores Cake into Cupcakes or a Sheet Cake
Absolutely! This versatile S’mores recipe is not limited to layered round cakes; it adapts beautifully into delicious cupcakes or a convenient sheet cake. To make these variations, you’ll need a single cake mix, 1 cup of graham cracker crumbs, 1 cup of water, ⅔ cup of vegetable oil, and 3 eggs. Prepare the batter as instructed, then pour it into your chosen bakeware.
For cupcakes, fill lined muffin tins about two-thirds full and bake according to standard cupcake directions (usually 18-22 minutes at 350°F). For a 9×13-inch sheet cake, pour the batter into a greased and floured pan and bake until a toothpick comes out clean (typically 25-30 minutes at 350°F). Once baked and cooled, simply spread a layer of hot fudge over the top of your cupcakes or sheet cake, then generously frost with the toasted marshmallow buttercream. Garnish as desired for an equally impressive and delectable treat!
Important Notes for Perfect Ganache Drips and Cake Decorating
- Ganache Consistency is Key: If your ganache drips all the way down the cake and puddles at the bottom, it’s likely still too warm. Allow it to cool further and thicken slightly before trying again. Fortunately, if you’re working with a chilled or frozen cake, it’s often easy to gently scrape off the failed drip with an offset spatula and re-smooth the frosting before attempting another drip.
- Thick Ganache Adjustment: Conversely, if your ganache is too thick and doesn’t flow easily for elegant drips, warm it in the microwave for a very short duration, about 5-10 seconds. Cover the opening of your squirt bottle (if using) and give it a gentle shake to redistribute the heat before attempting your drips again.
- Setting the Ganache: It is crucial to place your cake back into the freezer for 1-2 hours after applying the ganache. This allows the ganache to firm up completely. If you attempt to pipe buttercream on top of ganache that is still warm or fluid, the buttercream will slide right down the sides of your beautifully frosted cake, creating a messy result.
- Adding Sprinkles: If you plan to add sprinkles or other small decorative elements, do so while the ganache is still warm and slightly tacky. This will allow them to adhere properly before the ganache sets.
Explore More Delectable Homemade Cake Recipes!
If you’ve fallen in love with the joy of baking this S’mores Cake, you’re in for a treat with these other fantastic homemade cake creations. Each recipe offers unique flavors and textures, perfect for any occasion. Click each link below to discover the easy, printable recipes and expand your baking repertoire:
- Salted Caramel Mocha Sheet Cake: A delightful blend of sweet and salty, coffee and chocolate.
- Red Velvet Bundt Cake with Kahlua Ganache: A classic with an adult twist, rich and decadent.
- Blueberry Swirl Pound Cake: A moist pound cake with bursts of fresh blueberry.
- Brownie Cookie Dough Freak Cake: An indulgent cake for serious dessert lovers.
- Homemade Funfetti Cake: A joyous, sprinkle-filled cake perfect for celebrations.
- German Chocolate Cake: A timeless classic with distinct coconut-pecan frosting.
- Slow Cooker Carrot Cake: An incredibly moist and easy way to make carrot cake.
- Best White Cake Recipe: A perfectly tender and classic white cake, ideal for any occasion.
- Lemon Pound Cake: Zesty and moist, a refreshing treat.
- Best Yellow Cake Recipe: The foundational classic for many amazing layered cakes.
Can This S’mores Cake Be Frozen for Future Enjoyment?
Yes, absolutely! Freezing your S’mores Cake is a fantastic way to prepare ahead or preserve leftovers, and I often utilize this method at various stages of the baking process. Once baked and completely cooled, the cake layers can be removed from their pans, wrapped tightly in plastic wrap, and then frozen. This is incredibly handy for breaking up the baking process and also provides cold, firm cake layers that are much easier to handle and frost.
I also frequently freeze the cake after assembling the layers and applying a thin “crumb coat” of frosting. This helps to lock in moisture and creates a stable base for the final decorative frosting. Freezing at this stage ensures your final frosting layers go on smoothly without the frosting melting or shifting, which is often a concern with warmer cakes or environments. This technique allows me to get a cake to an advanced stage days before an event, leaving only the final decorating for the night before, minimizing stress.
You can even gently wrap a completely decorated S’mores Cake and freeze it. Just be mindful that the frosting may not be completely rock-hard and can still be dented if items are pushed against it in the freezer. When you’re ready to enjoy, remember to thaw the cake overnight in the refrigerator. For the best flavor and texture, I recommend letting it sit at room temperature for 1-2 hours before serving. This allows the frosting to become creamy again, and the cake layers to reach their optimal moistness, tasting as fresh as the day it was baked.
My Favorite Tools for Crafting This S’mores Cake
This S’mores Cake recipe is designed to be both incredibly easy and deliciously rewarding. Whether you’re a seasoned baker who already has these essentials on hand or a novice feeling a bit nervous about making a homemade cake for the first time, you’re going to adore the process and the result. To ensure your baking journey is smooth and successful, I’ve compiled a list of my absolute must-have tools for creating this fantastic cake. These are the items I truly can’t bake without! (You can also SHOP MY FAVORITES directly in my online store for convenience.)
- Stand Mixer: Essential for effortlessly whipping up fluffy cake batter and perfectly airy buttercream.
- Hand Mixer: A versatile alternative for smaller batches or quick mixing tasks.
- Large Mixing Bowl: Indispensable for combining all your ingredients without spills.
- Piping Bag: For elegant frosting details and controlled ganache drips.
- Piping Tips: To create beautiful borders, swirls, and decorative accents.
- Offset Spatula: Your best friend for smoothly spreading frosting and achieving a professional finish.
- Rubber Scraper: Perfect for scraping down bowls and ensuring no ingredient is left behind.
- Silicone Spatulas: Heat-resistant and flexible, ideal for folding and scraping.
- Cake Pans: High-quality round pans are essential for even baking and beautiful layers.
- Cake Turntable: Makes frosting and decorating your cake so much easier and smoother.
- Decorative Scrapers: For achieving perfectly smooth sides or textured designs on your frosting.
- Cardboard Rounds: Provides a stable base for your cake, making it easier to transfer and serve.
If you absolutely adore this incredible S’mores Cake recipe, you’ll be thrilled to discover these other delightful cake creations too. Each recipe is designed to be easy, satisfying, and perfect for sharing! Please click each link below to find the simple, printable recipe and add more deliciousness to your baking repertoire!
Check out this recipe

Check out this recipe
Check out this recipe
Check out this recipe
Check out this recipe
Check out this recipe
Check out this recipe

Check out this recipe
Check out this recipe
Discover More Creative Cake Ideas
Looking for even more inspiration to satisfy your sweet tooth or impress guests at your next gathering? Here are some other creative and delightful cake recipes to spark your imagination and expand your baking horizons:
Rainbow Cake
Homemade Funfetti Cake
Cake Batter Oreo Cheesecake
Comic Book Cake – Viral Cartoon Cake
Flower Cake
If you’ve enjoyed baking and tasting this incredible S’mores Cake recipe as much as I have, please consider leaving a five-star review below! Your feedback means the world and helps others discover this delightful treat. Don’t forget to help me spread the S’mores love by sharing this recipe on Facebook and Pinterest!
CONNECT WITH YUMMI HAUS!
Be sure to follow me on my social media channels to stay updated and never miss a delicious new post or recipe!
Substack, Facebook, Pinterest, Instagram, Email Subscription
PIN THIS RECIPE TO SAVE FOR LATER
Rate this Recipe
S’mores Cake
Ingredients
Cake
- 2 boxes yellow cake mix 15.25 ounces each
- 2 cups graham cracker crumbs
- 2 cups water
- 1 ⅓ cups vegetable oil
- 6 eggs
Toasted Marshmallow Buttercream Frosting
- 4 cups mini marshmallows
- 2 cups unsalted butter softened
- 2 pounds confectioner’s sugar 2 (16 ounce) bags
Ganache
- 1 cup semisweet chocolate chips
- 1 cup heavy whipping cream
Decorate
- 12 ounces hot fudge
- Garnish graham cracker crumbs, hershey bars, graham crackers, mini marshmallows, regular marshmallows.
Instructions
Cake
-
Preheat the oven to 350 degrees.
-
Lightly grease three 8 inch cake pans. Set aside.
-
In a large mixing bowl combine the 2 cake mixes, graham cracker crumbs, water, oil and eggs.
-
Whisk until smooth and all combined.
-
Divide the batter evenly between the 3 prepared pans.
-
Bake at 350 for 20-25 minutes or until a toothpick inserted comes out clean.
-
Let the cakes cool in the pans for 5 minutes before transferring them from the pans to a cooling rack.
-
Cool the cakes completely before decorating. I like to place them in the freezer to make them easier to handle while decorating.
Frosting
-
Turn your oven on to broil.
-
Line a baking sheet with foil and spray with non-stick spray.
-
Spread out the 4 cups of mini marshmallows on the baking sheet.
-
Place the marshmallows under the broiler.
-
Do not take your eyes off the marshmallows while they are under the broiler. It will only take them a minute to get toasted.
-
Remove the marshmallows from the oven and immediately transfer them to a large mixing bowl.
-
Then add the softened butter to the bowl with the toasted marshmallows and using an electric mixer whip the butter and marshmallow together.
-
Next carefully add the confectioner’s sugar a little at a time.
-
Once all the sugar is added, whip the frosting for 5-7 minutes until light and fluffy.
Decorate
-
Place a cake layer onto the serving plate or cake plate.
-
Frost the top of that cake with a layer of the marshmallow buttercream.
-
Top that with half of the hot fudge sauce. The buttercream and the fudge sauce will mix a little and that’s okay.
-
Repeat with the next layer.
-
Place the final layer on top and frost the whole cake with the marshmallow buttercream. If you like you can reserve some frosting and pipe a bit on the top for decoration.
-
I like to take some graham cracker crumbs and sprinkle them around the bottom half of the cake. I then decorate the top with graham crackers, hershey bars and more marshmallows though this is optional.
Ganache
-
In a small microwave-safe bowl warm the heavy whipping cream in 30 second increments until hot.
-
Add the chocolate chips to the warm cream and let sit for 5 minutes before whisking together. Whisk until smooth and glossy.
-
Let the ganache cool slightly and then drizzle it around the top edge. You can also use a piping bag.
Notes
- Store leftovers in the fridge for 3-5 days.
- While you can crush your own graham crackers you can also buy graham cracker crumbs in the baking section of most stores. If you do crush your own they need to be finely crushed.
- You can skip making the ganache and just use more hot fudge, it will be equally as delicious!
- This can also be made into cupcakes or a 9×13 cake, just use one cake mix, 1 cup of graham cracker crumbs, 1 cup of water, ⅔ cup of oil, and 3 eggs. Then just put the hot fudge on top of your baked cupcakes or 9×13 cake and then frost with the marshmallow frosting.
Equipment
-
3 8″ round cake pans
-
1 Mixer
Nutrition
Nutritional information for the recipe is provided as a courtesy and is approximate. Please double-check with your own dietary calculator for the best accuracy. We at Yummi Haus cannot guarantee the accuracy of the nutritional information given for any recipe on this site.