
This is a Sponsored post written by me on behalf of FrogTape provided by ShurTech Brands, LLC for SocialSpark. All opinions are 100% mine.
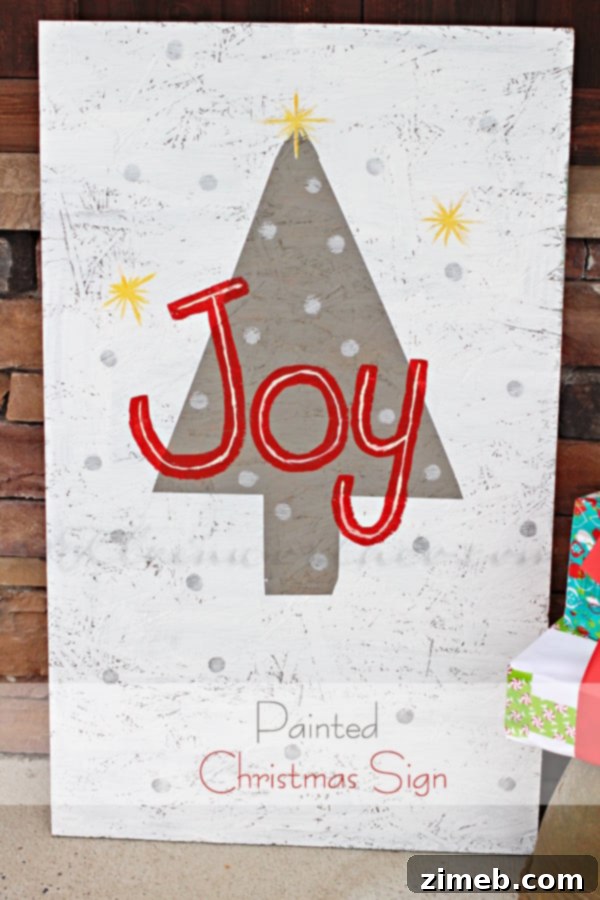
There’s an undeniable joy that comes from crafting personalized decor for your home, especially when preparing for the festive holiday season. For me, painting seasonal signs is a cherished tradition. A well-designed, generously sized sign can instantly transform any space, adding a touch of warmth and personality to your porch, living room, or entryway. This past year, I had grand plans to deck out our porch with beautiful Christmas decorations, and naturally, I channeled my creativity into a new painted sign project. While circumstances might change our holiday decorating plans sometimes, the anticipation of creating stunning pieces for future celebrations remains. One product that consistently elevates my DIY projects, ensuring professional-looking results every time, is FrogTape® Textured Surface. It truly makes a significant difference when you utilize the right tools and materials for the job, especially when dealing with challenging surfaces.
Crafting a Stunning Painted Christmas Sign
The allure of DIY signs lies in their complete customizability. Unlike store-bought decorations, a handmade sign allows you to choose your own colors, fonts, and messages, reflecting your unique style and the spirit of your home. They can be budget-friendly, sustainable (reusing materials), and most importantly, they carry a personal touch that store-bought items simply cannot replicate. For this particular project, I aimed to create a festive Christmas sign that would stand out, and I decided to put FrogTape® Textured Surface to the ultimate test by using it on a piece of plywood. Plywood, with its often rough and uneven grain, presents a common challenge for painters looking to achieve crisp, clean lines. This project was the perfect opportunity to demonstrate how a specialized product can overcome such obstacles.
Gather Your Materials: What You’ll Need
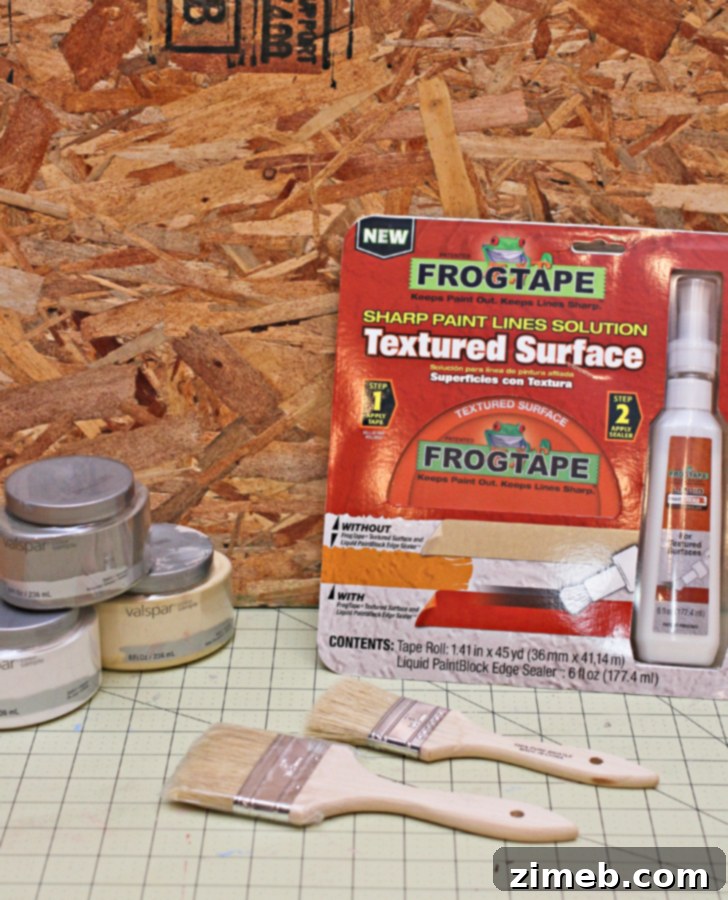
Before diving into any painting project, proper preparation, including gathering all your supplies, is crucial. For this beautiful Christmas sign, here’s what I assembled:
- FrogTape® Textured Surface: This is the star of our project, specifically designed for uneven surfaces.
- Plywood Board: A sturdy, appropriately sized piece of plywood (or your chosen textured surface). Make sure it’s sanded smooth if necessary, and clean.
- Paint Brushes: A selection of brushes, including wider ones for base coats and smaller, angled brushes for detail work.
- Paint Colors: I used a lovely grey for the base coat and an off-white for the top layer, but feel free to choose colors that match your holiday theme. Ensure they are latex-based paints to activate FrogTape’s PaintBlock Technology effectively.
- Damp Rag: Essential for activating the tape’s sealing properties.
- Optional Clear Sealer: An additional clear sealer (not necessarily FrogTape branded) for extra protection on extremely textured surfaces, applied over the tape edges.
- Old Shower Curtain or Drop Cloth: To protect your workspace, especially if you’re painting indoors.
- Additional Text and Decorative Touches: Stencils, permanent markers, or other embellishments for adding festive messages and designs.
On the day I tackled this project, the weather was exceptionally cold, around 16 degrees Fahrenheit. This meant that outdoor painting was completely out of the question. To ensure I could continue with my creative endeavor comfortably, I moved my operation indoors. I spread an old shower curtain over my workspace to protect the floors and surfaces, creating a temporary, safe painting environment. Adapting to conditions like these is a common part of the DIY process, and having a protected indoor space ensures that your projects can continue uninterrupted, regardless of the weather outside.
Step-by-Step Guide to Your Textured Surface Sign
Creating a professional-looking painted sign on a textured surface might seem daunting, but with the right techniques and FrogTape® Textured Surface, it’s an achievable and rewarding project. Here’s how I brought my Christmas sign to life:
1. Apply the Base Coat
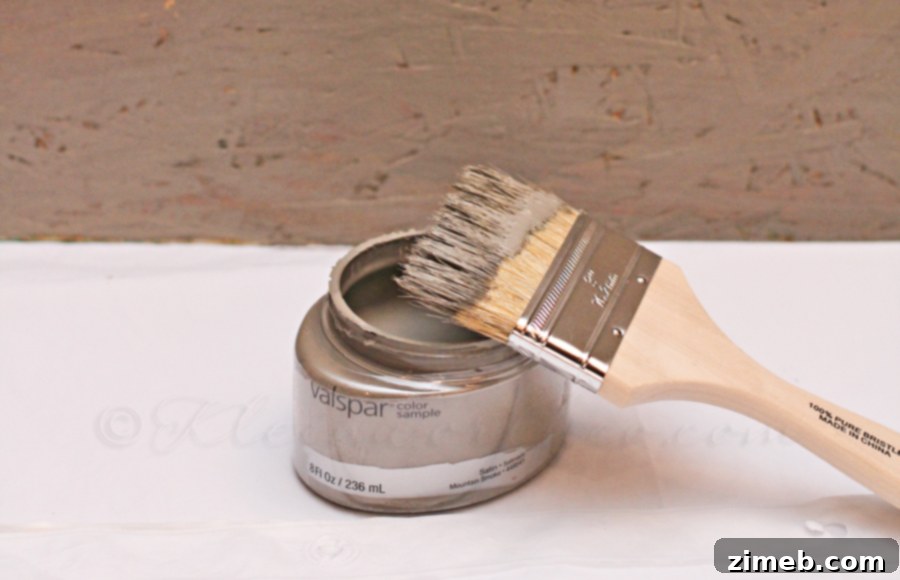
I began by applying a smooth, even coat of the chosen grey paint over the entire plywood board. This serves as the foundational color for your design and helps create depth. Ensure the coverage is consistent, and allow this base coat to dry completely before moving on to the next step. Depending on your paint and surface, this might take a few hours or even overnight. Patience during drying times is key to preventing smudges and ensuring proper adhesion for subsequent layers.
2. Follow the Instructions and Apply FrogTape®
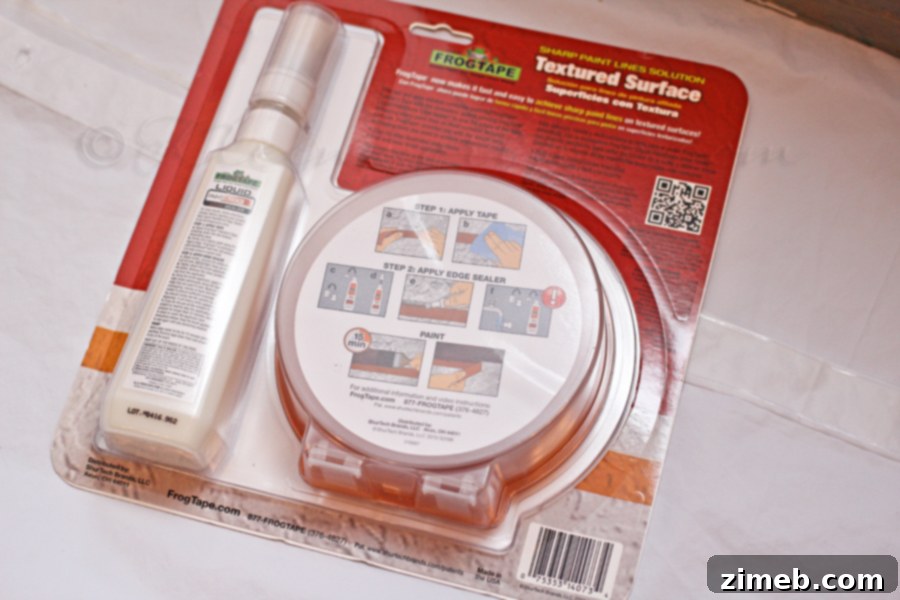
Once the base coat was fully dry, I carefully followed the instructions provided with the FrogTape® Textured Surface. This is where the magic begins. I meticulously placed the tape onto the board, defining the shapes and areas I wanted to remain unpainted in the grey base color. Precision here is paramount to the final look of your sign. Take your time to ensure the tape is firmly pressed down along all edges, creating a tight seal. For textured surfaces, this initial adhesion is crucial to prevent paint seepage.
3. Activate the PaintBlock® Technology
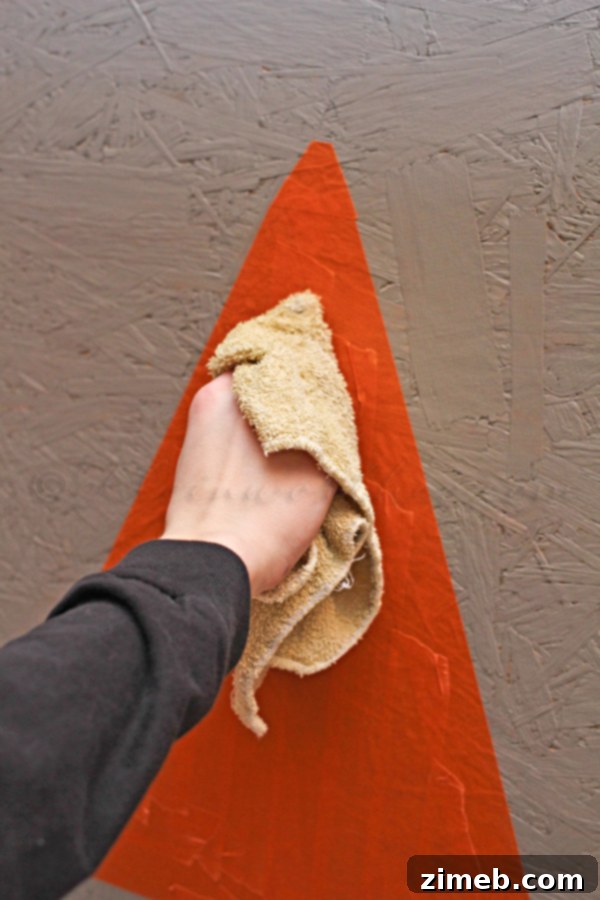
The innovative feature of FrogTape® Textured Surface is its patented PaintBlock® Technology. To activate this, as per the instructions, I took a damp rag and lightly rubbed it along the edges of the tape. This action triggers the pre-coated sealer on the tape. The moisture from the rag reacts with the super absorbent polymer embedded in the tape, causing it to instantly gel and form a micro-barrier. This barrier effectively seals the edges of the tape, creating an impenetrable defense against paint bleed, even on the most textured surfaces like plywood.
4. Optional: Apply an Additional Clear Sealer
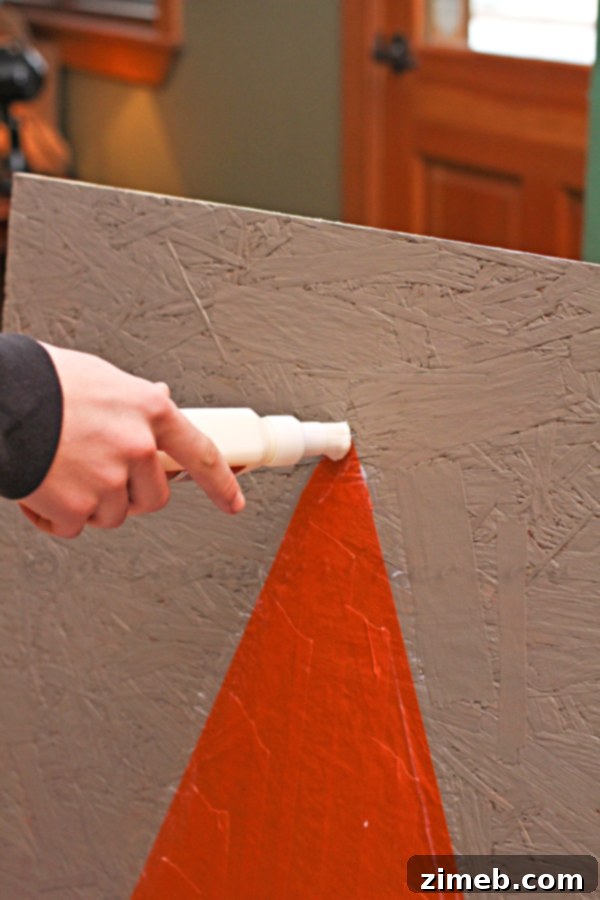
While FrogTape’s PaintBlock® Technology is incredibly effective, for projects on exceptionally rough or porous textured surfaces, or simply for an added layer of assurance, I opted for an extra step. I took a separate bottle of clear sealer and applied a nice, thick coat around the edges of the tape, directly over the activated FrogTape. This step creates an additional physical barrier, further reinforcing the paint bleed prevention. I then allowed this sealer to dry for approximately 15-20 minutes, ensuring it was tacky-dry before proceeding.
5. Apply the Top Coat of Paint
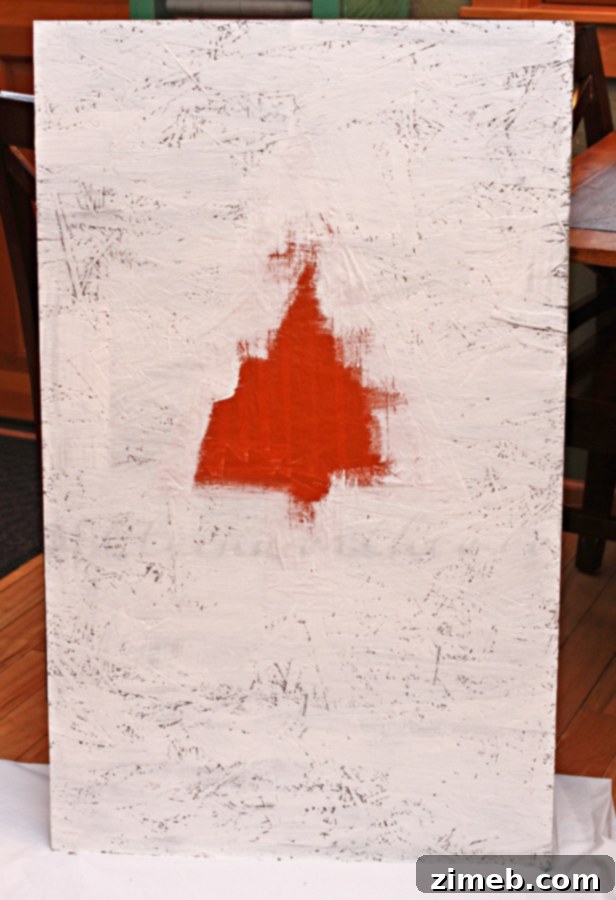
Once the optional sealer (or just the activated tape) was dry, it was time for the top coat. I applied a generous coat of off-white paint over the entire board, painting directly over the FrogTape. The idea was to create a slightly distressed or layered look, allowing subtle hints of the underlying grey base to peek through in places, adding character to the final sign. When painting over tape, use light, even strokes, and avoid oversaturating your brush, which can push paint under the tape.
6. Remove the Tape for a Flawless Finish
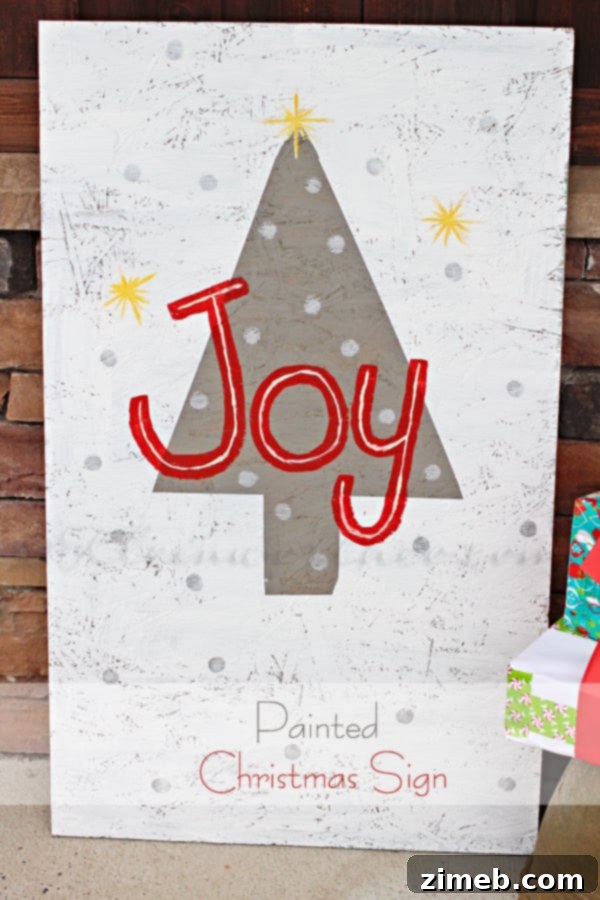
This is often the most satisfying part of any painting project! Once the top coat of paint was dry to the touch (but not fully cured, which can make the tape harder to remove without pulling paint), I carefully peeled off the FrogTape® Textured Surface. To my delight, as expected, there were absolutely no problems – just a perfectly crisp, clean edge! The PaintBlock® Technology truly lived up to its promise, preventing any bleed-through on the textured plywood surface. The result was a sharp, professional-looking design, which then allowed me to add my additional text and decorative touches to complete the Christmas sign. This entire process was so straightforward and enjoyable, making it the perfect creative escape for a cold, snowy day.
The Unrivaled Performance of FrogTape® Textured Surface
My experience with FrogTape® Textured Surface on this project reaffirmed its status as an indispensable tool for any DIY enthusiast. The primary reason I wholeheartedly recommend this product is its exceptional ability to seal gaps that naturally occur when applying tape to an uneven or textured surface. In past projects using conventional painter’s tape on plywood or other rough materials, I would almost always encounter frustrating paint bleed under the edges, compromising the crispness of my designs. With FrogTape® Textured Surface, this common problem is entirely eliminated.
The innovative PaintBlock® Technology is a game-changer. It’s a super-absorbent polymer that, when activated by the water in latex paint or a damp cloth, instantly gels. This creates a micro-barrier that tightly seals the tape’s edges, preventing any paint from seeping underneath. What’s more, I initially had concerns that this sealing process or the tape itself might negatively affect my paint’s adhesion or finish, but those worries were completely unfounded. The paint adhered perfectly right up to the clean line created by the tape, just as it would on any smooth surface. This product has undeniably become my “go-to” for all painting projects, especially since I frequently work on textured surfaces. It consistently ensures my projects turn out much better, saving me time and frustration from touch-ups.
Understanding FrogTape Textured Surface: The Technology Behind Clean Lines
So, what exactly makes FrogTape Textured Surface so effective? It’s all in the science. FrogTape® Textured Surface is uniquely treated with patented PaintBlock® Technology. This technology isn’t just a fancy name; it’s a sophisticated polymer formulation engineered to react specifically with latex paint. When the water in latex paint (or a damp rag, as used in my process to pre-activate) comes into contact with the tape’s edge, the PaintBlock® polymer instantly absorbs that moisture and gels. This gelling action forms a micro-barrier that completely seals the edges of the tape. This invisible, yet incredibly effective, barrier is what prevents paint from bleeding underneath the tape, ensuring you get those professional-grade, sharp lines on any textured surface.
Tips for Achieving Flawless Results on Textured Surfaces
- Surface Preparation: Always start with a clean, dry, and if possible, lightly sanded surface. Removing dirt, dust, and loose particles ensures optimal tape adhesion and paint finish.
- Proper Tape Application: Press the tape down firmly along its entire length, especially the edges. Use a putty knife or your finger to really ensure a tight bond.
- Activate Thoroughly: Don’t skip or rush the activation step with a damp rag. This is crucial for PaintBlock® Technology to work its magic effectively.
- Layering Paint: Apply paint in thin, even coats rather than one thick layer. This reduces the risk of paint building up along the tape’s edge and potentially bleeding or peeling when removed.
- Timely Tape Removal: Remove the tape when the paint is dry to the touch but not completely cured (typically within an hour or two of the final coat). Waiting too long can cause the tape to bond too strongly with the paint, leading to tearing or peeling of your fresh paint when removed. Pull the tape slowly at a 45-degree angle.
- Environment: Ensure you are painting in an environment with adequate ventilation and a temperature range recommended by your paint manufacturer. Extreme temperatures can affect drying times and paint adhesion.
Beyond Christmas: Year-Round Textured Surface Projects
While this project focused on a festive Christmas sign, the utility of FrogTape® Textured Surface extends far beyond holiday decor. Imagine creating crisp, geometric patterns on a textured accent wall, giving an old piece of furniture with a distinct wood grain a fresh, modern look, or even tackling outdoor projects like painting designs on concrete patios or garden planters without the worry of messy lines. Its ability to create clean divisions on stucco, rough wood, or even canvas makes it invaluable for various DIY endeavors. From personalized wedding gifts to custom nursery decor or even upcycling old crates, this tape empowers you to achieve professional results on surfaces that would typically be a painter’s nightmare.
Unleash Your Creativity
The satisfaction of transforming a simple board into a beautiful, personalized piece of art is immense. With FrogTape® Textured Surface, the fear of messy lines on challenging surfaces is eliminated, opening up a world of creative possibilities. Whether you’re a seasoned DIYer or just starting, this product truly simplifies the process of achieving sharp, clean edges, allowing your artistic vision to shine through without compromise. So, embrace the joy of creation, explore new designs, and confidently tackle your next painting project on any textured surface. Your home deserves that extra touch of handmade charm!
Connect with @FrogTape on Twitter for more inspiration and share your own #TexturedSurface projects for the holidays and beyond.