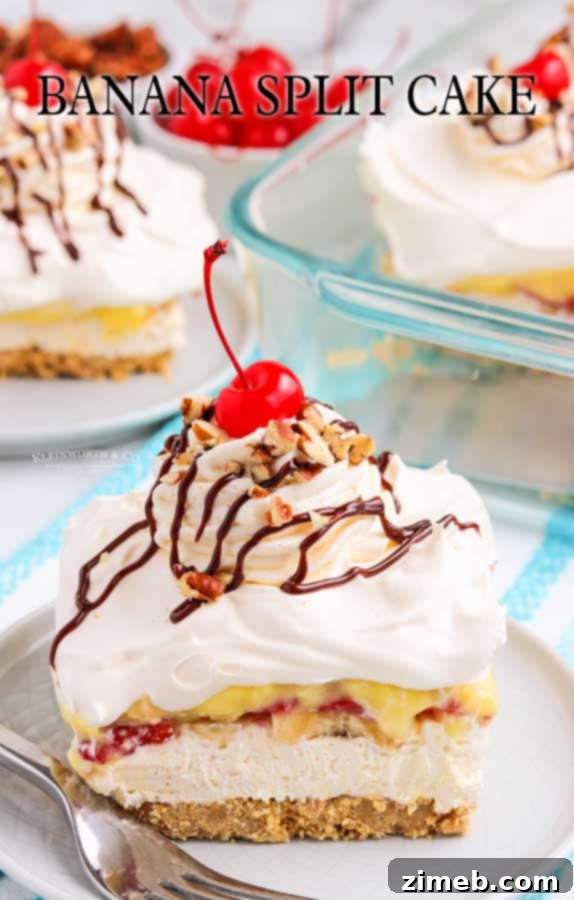
Indulge in the Ultimate No-Bake Banana Split Cake: A Crowd-Pleasing Dessert for Any Occasion
There’s something truly magical about no-bake desserts, isn’t there? For those of us who have experienced scorching summer days, the mere thought of turning on the oven can be enough to deter us from baking. This is precisely why no-bake treats hold a special place in our hearts and kitchens. They offer the perfect solution for satisfying sweet cravings without heating up your home, making them an indispensable part of any warm-weather celebration or simply a delightful everyday indulgence.
This magnificent No-Bake Banana Split Cake is a testament to the enduring appeal of classic, easy-to-make recipes. It’s the kind of dessert that feels both nostalgic and utterly refreshing, bringing together beloved flavors in a convenient, visually stunning package. Imagine all the joy of a traditional banana split – the creamy ice cream, the sweet bananas, the juicy pineapple, the rich chocolate, and the crowning cherry – transformed into a beautifully layered cake that requires no baking whatsoever. It’s a recipe that has been cherished through generations, proving that some treats are simply timeless.
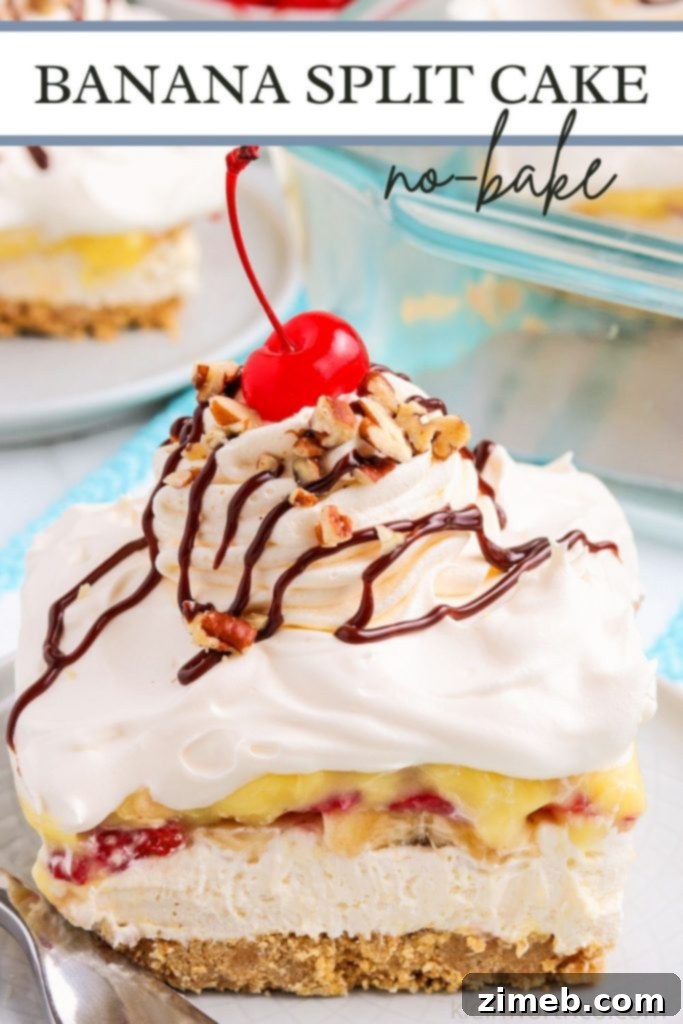
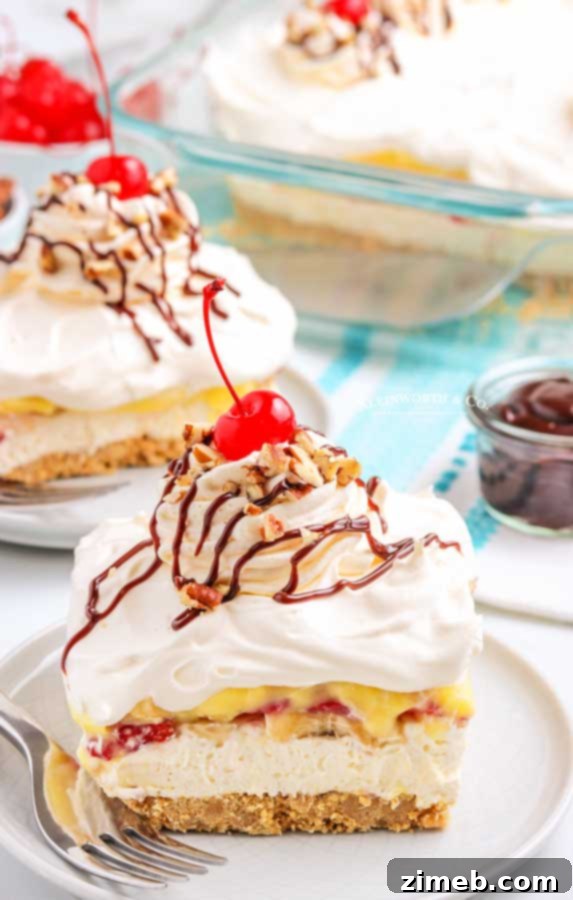
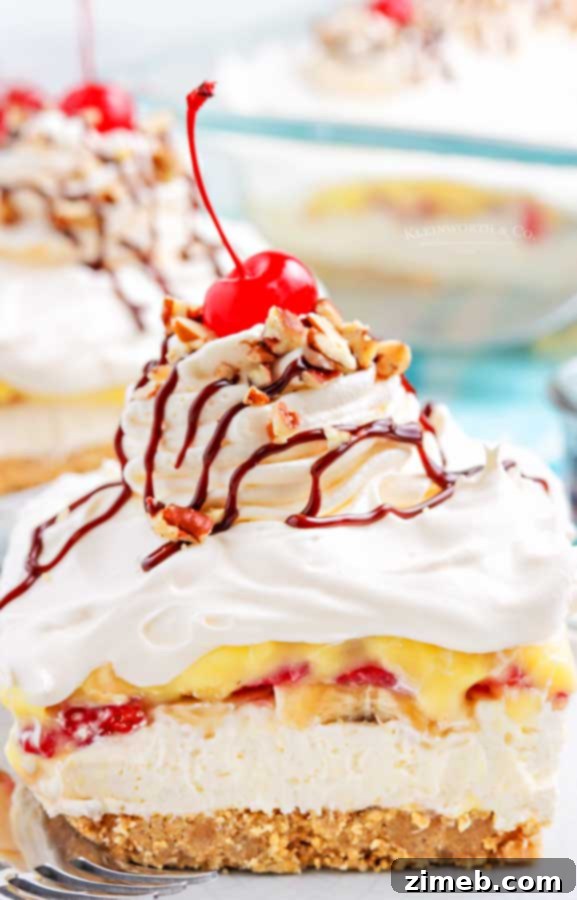
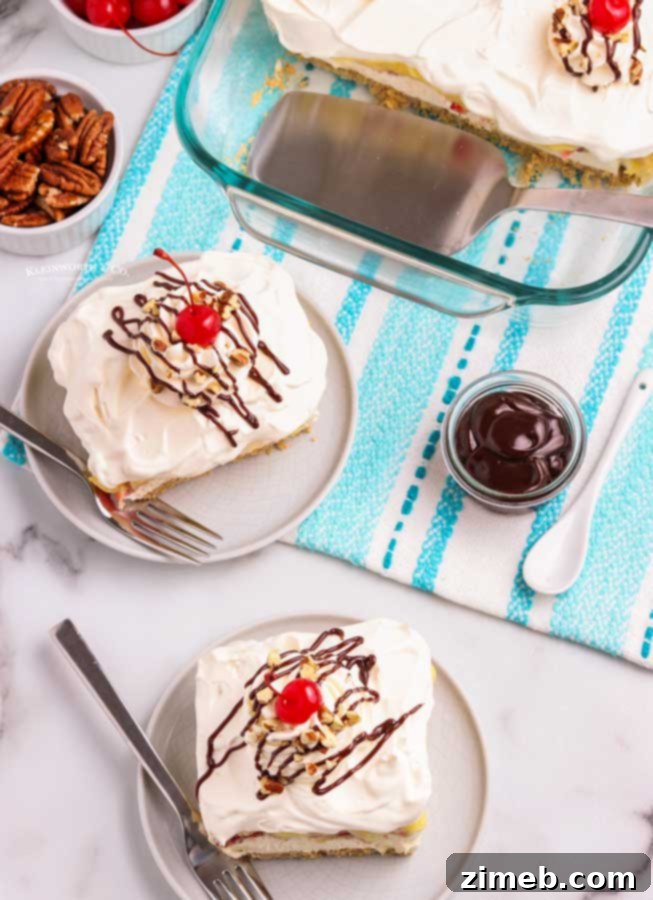
You truly can’t go wrong with this extraordinary dessert. It captures the essence of a classic banana split, presenting it in a cool, layered cake that’s as delightful to look at as it is to eat. Each forkful delivers a harmonious blend of textures and tastes: the crisp graham cracker crust, the smooth and tangy cream cheese layer, fresh sweet bananas and strawberries, vibrant crushed pineapple, and the velvety banana cream pudding, all topped with a generous swirl of whipped cream and your favorite sundae fixings.
While ice cream is often the first thought for cooling down, this Banana Split Cake offers a wonderfully refreshing and exciting alternative. It elevates the dessert experience, providing a fun and unique twist on traditional summer treats. This cake is consistently a showstopper at various events, from lively backyard pool parties and casual summer barbecues to joyous birthday celebrations and even as a well-deserved treat after a long day of outdoor activities. Its ease of preparation combined with its undeniable appeal makes it an instant favorite wherever it’s served.
Your Go-To No-Bake Banana Split Cake Recipe
Creating this delicious no-bake banana split cake is a straightforward process, resulting in a dessert that tastes far more complex than the effort it requires. The beauty of this recipe lies in its layered construction, where each component contributes to a symphony of flavors and textures that evoke the beloved ice cream parlor classic. It’s an ideal choice for bakers of all skill levels, promising a satisfyingly sweet reward without the fuss of an oven.
Frequently Asked Questions About This Delicious No-Bake Treat
What is the best way to store leftover banana split cake?
To keep your Banana Split Cake fresh and delicious, it’s essential to store it properly. Always keep it refrigerated in an airtight container. When chilled correctly, this cake will maintain its quality for up to 7 days. The key is to minimize its time at room temperature, as the fresh fruit and dairy components are best kept cold to preserve their texture and prevent spoilage. If you’re serving it at a party, try to bring it out just before serving and return any leftovers to the fridge promptly.
Can I use a vanilla substitute instead of vanilla extract?
Yes, you can certainly use vanilla essence as an alternative to vanilla extract in this recipe. While vanilla extract, typically made from vanilla beans steeped in alcohol, offers a richer and more complex flavor profile, vanilla essence provides a good alternative with its synthetic vanilla flavor. Keep in mind that vanilla essence can sometimes be stronger or slightly different in taste compared to natural extract, so you might want to adjust the quantity slightly to achieve your desired flavor balance. Always check the concentration of your essence and taste as you go.
Achieving Perfection: Layering Your Banana Split Cake
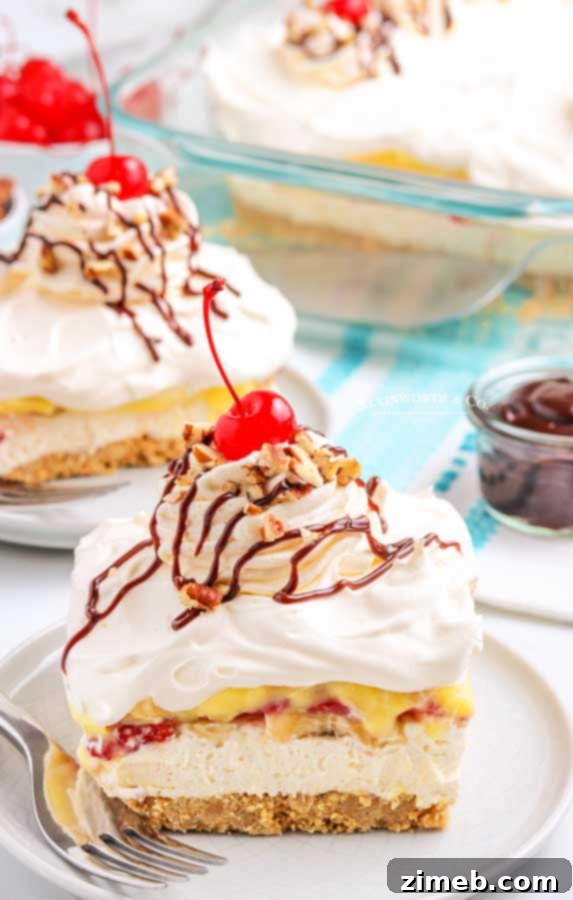
Do I really have to chill the cake for each layer?
Absolutely, yes! Following the chilling instructions between each layer is incredibly important for the success of this no-bake cake. It might feel like a test of patience, but skipping this crucial step will almost certainly lead to a giant, unmanageable mess. Chilling allows each layer to set properly, firming up enough to support the subsequent layers without mixing or bleeding into one another. This ensures that when you finally slice into your beautiful creation, you’ll achieve those distinct, clean, and visually appealing layers that make this dessert so special. Proper chilling also contributes to the cake’s overall stability, making it much easier to cut and serve neat portions.
Expert Tips for Crafting the Best Banana Split Cake
To ensure your no-bake banana split cake turns out perfectly every time, keep these helpful tips in mind. They’ll help you achieve beautiful presentation and maximum flavor, making your dessert truly unforgettable.
- Achieve Clean Slices: For the neatest slices and effortless removal from the pan, freeze the assembled cake for about 30 minutes before cutting. This quick freeze firms up all the layers just enough.
- Smooth Cutting Technique: To ensure clean and even cuts that showcase those gorgeous layers, wipe your knife with a clean, damp cloth between each slice. This prevents sticky residue from marring your presentation.
- Easy Release from the Pan: Before you start slicing and removing the cake, run a butter knife or an offset spatula around the edges of the pan. This simple step helps to loosen the cake, ensuring that each piece comes out clean and doesn’t stick to the sides.
- Optimal Freshness: For the best possible aesthetic appeal and flavor, enjoy the cake within 12 hours of making it. While the acidity in the pineapple helps prevent the bananas from browning for a period, this effect is temporary. After a longer duration, the bananas may start to discolor and become less visually appealing.
- Ripe Bananas are Key: Always use ripe but firm bananas. Overripe bananas can become mushy and release too much moisture, affecting the cake’s texture.
- Thoroughly Drain Pineapple: Make sure to drain the crushed pineapple exceptionally well. Excess liquid can make your cake soggy and prevent layers from setting correctly. Press it firmly against a sieve to extract as much juice as possible.
- Creative Crust Options: While graham cracker crumbs are classic, feel free to experiment with other crusts like vanilla wafers, shortbread cookies, or even Oreo crumbs for a different flavor profile.
- Stabilize Homemade Whipped Cream: If you opt for homemade whipped cream, stabilize it with a little gelatin or cornstarch to prevent it from deflating and weeping over time. This ensures your topping stays fluffy and beautiful.
The Beloved No-Bake Banana Split Icebox Cake
Often referred to as an “icebox cake,” this no-bake banana split dessert perfectly embodies the charm and convenience of chilled, layered treats. The “icebox” moniker comes from a time when refrigerators were known as iceboxes, highlighting the fact that these desserts are assembled and then simply allowed to chill and set, rather than bake. This makes our Banana Split Cake an ideal candidate for hot summer days or any time you need a delicious dessert without the oven.
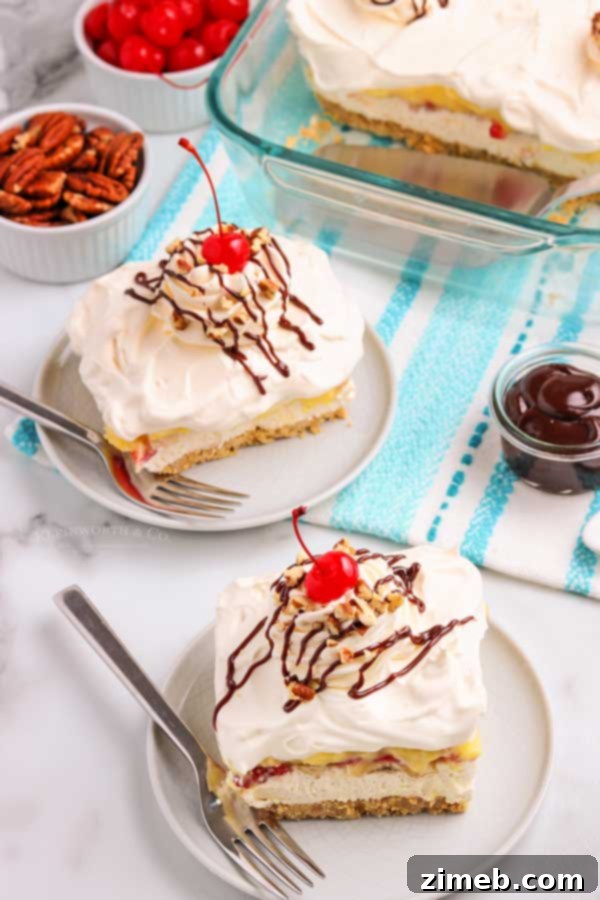
The Complete No-Bake Banana Split Cake Recipe
Get ready to create a show-stopping dessert that will impress everyone. This recipe details everything you need to know for a perfect, easy-to-assemble No-Bake Banana Split Cake.
Ingredients
Crust
- 2 cups graham cracker crumbs (about 10-12 full crackers)
- ¼ cup granulated sugar
- ½ cup unsalted butter (1 stick), melted
Cream Cheese Layer
- 12 ounces cream cheese, softened
- ½ cup granulated sugar
- 1 tsp vanilla extract
- 8 ounces thawed whipped topping or 2 cups whipping cream
Fruit Filling
- 3-4 bananas, sliced
- 10-14 strawberries, cleaned and sliced
- 20 ounces crushed pineapple, drained very well
Pudding Layer
- 2 boxes instant banana cream pudding mix (4-serving size each)
- 2 cups cold milk
Topping & Garnishes
- 8 ounces whipped topping or 2 cups whipping cream
- Chocolate syrup or hot fudge sauce
- Maraschino cherries
- Chopped pecans
Instructions
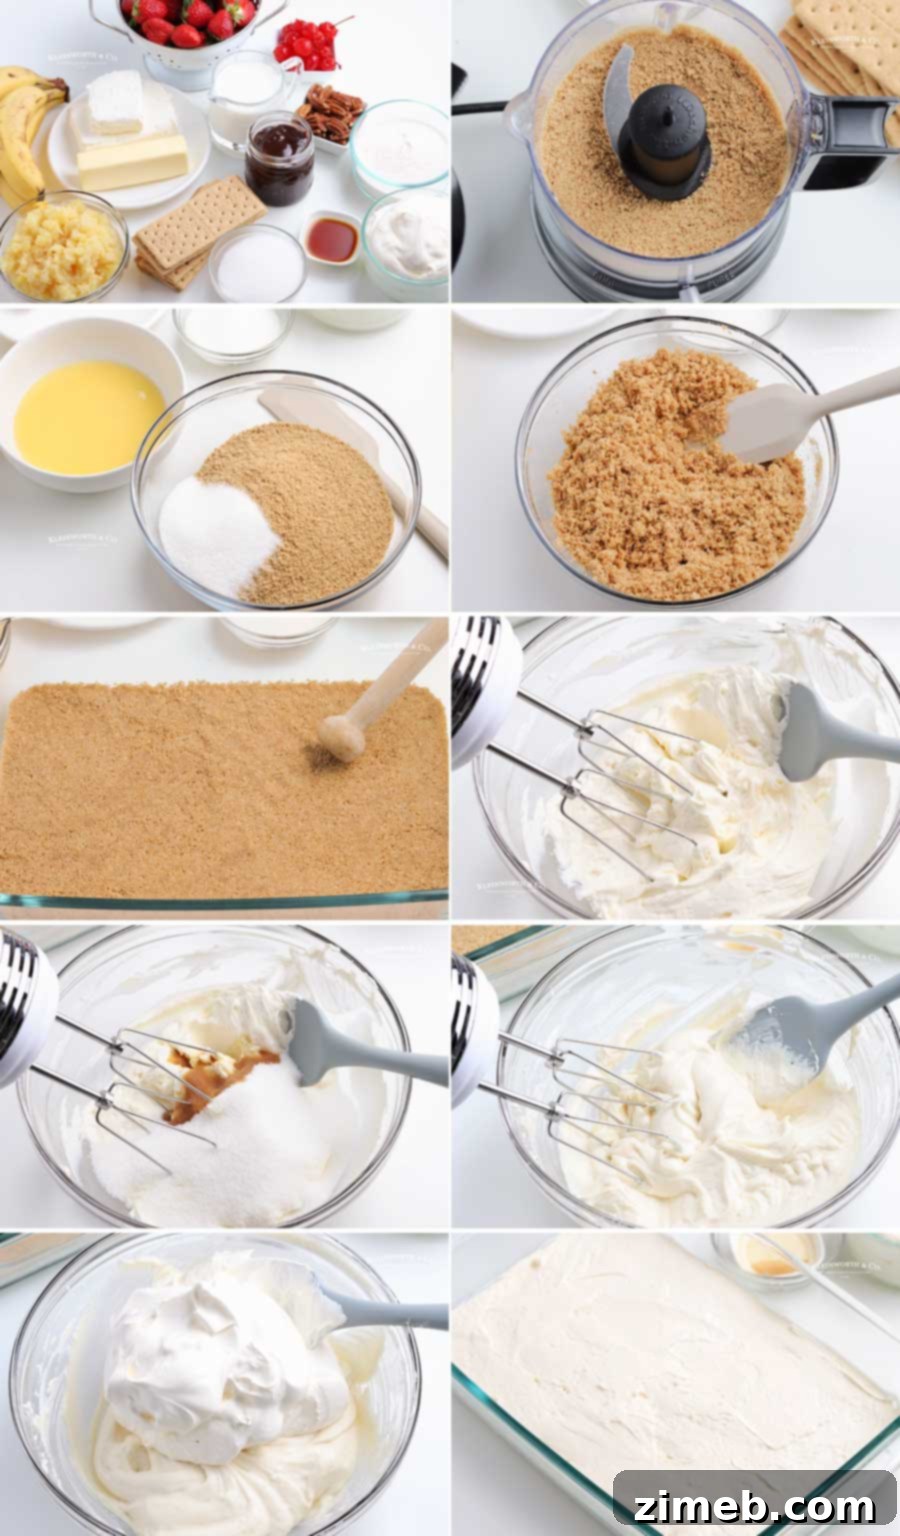
Crust
- Spray a 13×9 inch baking dish with cooking spray or lightly grease with oil.
- Crush the graham crackers into fine crumbs using a food processor or by placing them in a resealable bag and crushing with a rolling pin.
- Transfer the graham cracker crumbs to a medium bowl.
- Stir in ¼ cup of granulated sugar.
- In a small microwave-safe bowl, melt the butter.
- Pour the melted butter over the graham cracker crumbs and sugar mixture, then mix until the crumbs are evenly moistened.
- Press the moistened crumbs firmly and evenly into the bottom of the prepared pan.
- Place the pan in the freezer for about 15-20 minutes to set the crust.
Cream Cheese Layer
- In a large mixing bowl, beat the softened cream cheese until it is completely smooth and creamy.
- Add ½ cup of granulated sugar and the vanilla extract to the cream cheese, then continue to beat until the mixture is smooth and well combined.
- Gently fold in 8 ounces of thawed whipped topping (or 2 cups of freshly whipped cream) until just combined. Be careful not to overmix.
Pudding Layer
- In a separate large bowl, whisk together the instant banana cream pudding mix and 2 cups of cold milk until smooth and slightly thickened.
- Place the bowl in the refrigerator for 5-10 minutes to allow the pudding to thicken further.
Assembling the Layers
- Remove the prepared crust from the freezer. Evenly spread the cream cheese mixture over the chilled graham cracker crust.
- Arrange a single layer of sliced bananas on top of the cream cheese layer.
- Place a single layer of sliced strawberries over the bananas.
- Ensure the crushed pineapple is very well drained, then spread it evenly over the strawberries.
- Remove the thickened pudding from the refrigerator and carefully spread it evenly over the fruit layer.
- Finally, top the entire cake with the remaining whipped topping, spreading it smoothly across the top.
- Chill the assembled cake in the refrigerator for a minimum of 2-5 hours, or preferably overnight, to allow all the layers to set completely and the flavors to meld.
- Once thoroughly chilled, serve with your choice of toppings: a drizzle of chocolate syrup or hot fudge sauce, a scattering of maraschino cherries, and a sprinkle of chopped pecans.
- Store any leftovers in the refrigerator, covered.
Customizing Your No-Bake Banana Split Cake
One of the joys of this No-Bake Banana Split Cake is its versatility. While the classic combination is always a hit, don’t hesitate to personalize it with different ingredients to suit your taste or what you have on hand.
Can homemade whipped cream be used instead of whipped topping?
Absolutely! Using homemade whipped cream instead of store-bought whipped topping will elevate the flavor and texture of your banana split cake significantly. For the best results and to prevent it from deflating over time, I highly recommend stabilizing your homemade whipped cream. This can be done by adding a small amount of unflavored gelatin or cornstarch during the whipping process. As for the aerosol cans of whipped cream, while convenient, they won’t provide the stable, rich, and creamy texture we’re aiming for in this layered dessert. Stick to homemade or a good quality frozen whipped topping for optimal results.
What other easy treats do you recommend?
Our household has a deep affection for easy, delectable treats, and it’s no surprise that our recipe collection is brimming with fantastic options that fit this category. If you loved the simplicity and deliciousness of this Banana Split Cake, you’re sure to find new favorites among these family-approved recipes that we make again and again:
- Skinny Ice Cream Sandwiches
- Chocolate Covered Strawberries
- Funfetti Cake Batter Dip
- Banana Caramel Ice Box Cake
- Chocolate Chip Cookie Dough
- Brownie Batter Dip
- Frozen Bananas
- Sugar Cookie Cookie Dough
Exploring Fruit Variations for Your Banana Split Cake with Pudding
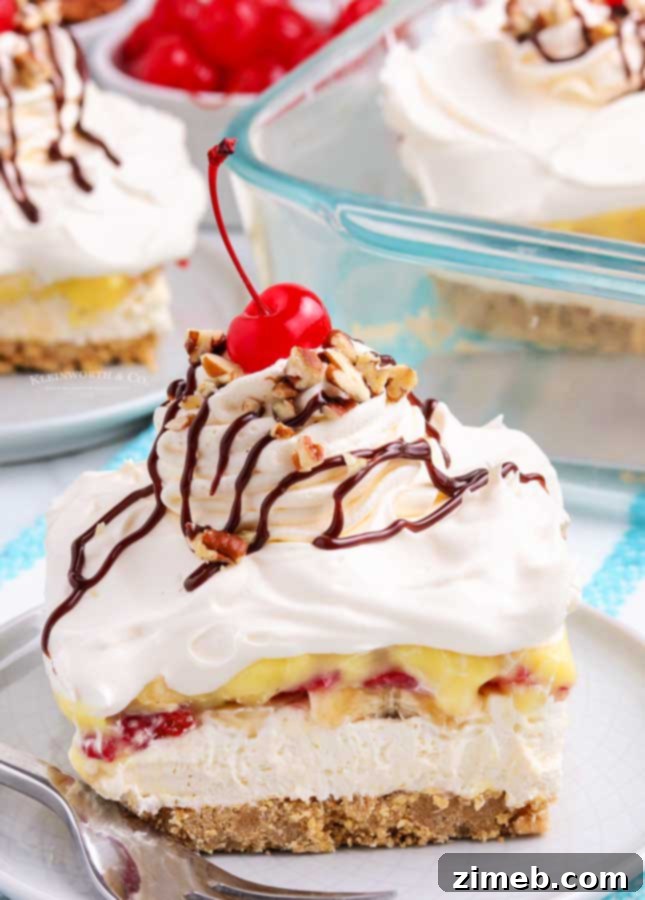
Can this be made with other types of fruit?
Of course! While bananas, strawberries, and pineapple are the classic trio for a banana split, you absolutely can experiment with other types of fruit to personalize your cake. However, it’s crucial to consider the moisture content and stability of your chosen fruits. Many berries, for instance, can release additional moisture as they sit, which might alter the texture of your layered cake, making it less firm. To prevent this, ensure any berries you use are very fresh and preferably firm. Other great options could include sliced peaches, kiwi, or even mandarin oranges (well-drained). Avoid fruits that oxidize quickly, like apples, unless you’re planning to consume the cake immediately, as they can detract from the visual appeal. The key is to choose fruits that complement the sweet and creamy layers and won’t make the cake soggy.
Essential Products for Your Perfect Banana Split Cake
Making this no-bake cake recipe is incredibly easy and the results are always delicious. Whether you’re a seasoned no-bake dessert enthusiast or trying your hand at one for the very first time, having the right tools and ingredients can make all the difference. I’ve compiled a list of my go-to products that help ensure this Banana Split Cake turns out perfectly every single time. These are the items I truly can’t live without when whipping up this delightful dessert.
- Graham cracker crumbs
- Granulated sugar
- Vanilla extract
- Crushed pineapple
- Instant banana cream pudding mix
- Chocolate syrup or hot fudge sauce
- Maraschino cherries
- Chopped pecans
- 13×9 inch Baking dish
- Hand Mixer or Stand Mixer
- Mixing bowls
- Dry – Measuring cups
- Wet – Measuring cups
- Measuring spoons
- Rubber Spatula
- Serving spatula
Why This Easy No-Bake Banana Split Cake Reigns Supreme
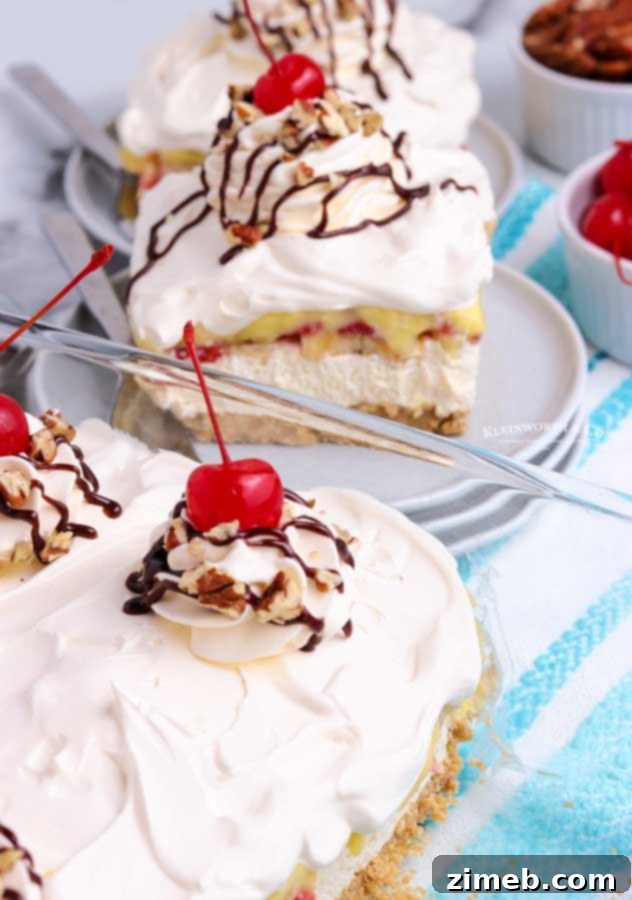
This Easy Banana Split Cake recipe truly encapsulates everything you could want in a dessert: it’s incredibly simple to make, requires no baking, is bursting with fresh and delightful flavors, and consistently brings smiles to everyone’s faces. It’s more than just a recipe; it’s a guaranteed crowd-pleaser and a refreshing take on a beloved classic. Whether you’re hosting a summer gathering or simply craving a sweet escape, this cake delivers. It’s a testament to the fact that the most memorable desserts don’t always require hours in the kitchen or complex techniques.
If you’ve enjoyed creating and tasting this fantastic recipe, we’d be thrilled to hear about your experience! Please consider leaving a five-star review and help us spread the word by sharing it with your friends and family on Facebook and Pinterest. Your feedback and shares mean the world to us!
Check out this recipe
Check out this recipe
Check out this recipe
Check out this recipe
Check out this recipe
Check out this recipe
Connect with Yummi Haus and Share Your Creations!
CONNECT WITH YUMMI HAUS!
Be sure to follow me on my social media, so you never miss a post!
Substack, FB, Pinterest, IG, Email Subscription
Savor the Flavors: Your Perfect No-Bake Banana Split Dessert