
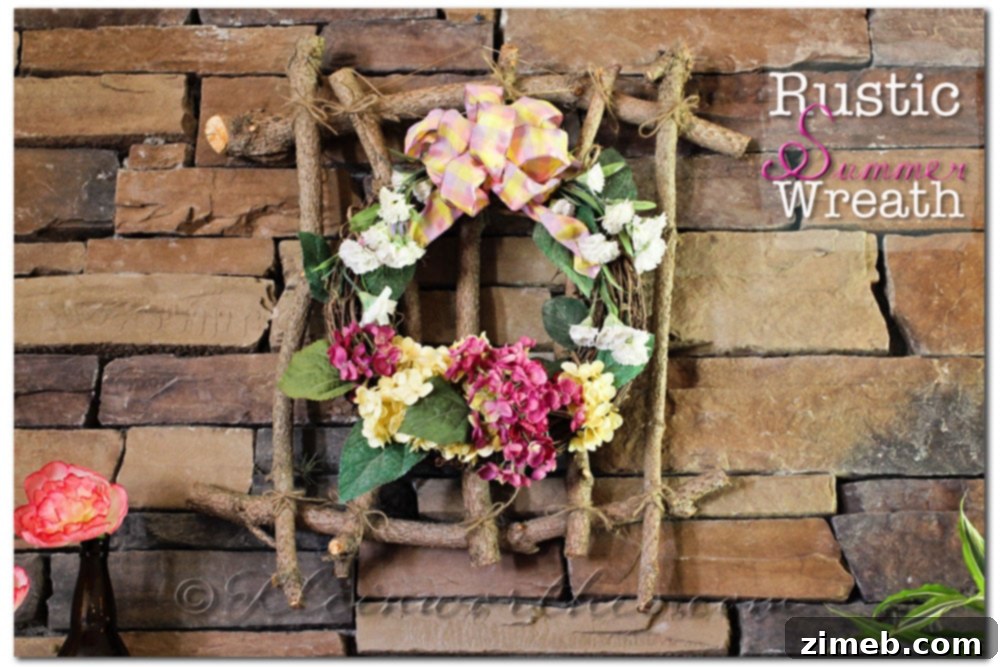
Crafting a Rustic Pine Branch Wreath: A Timeless Touch for Your Home
There’s something incredibly satisfying about transforming natural elements into beautiful home decor. This journey began on a bright Easter day, amidst the glorious spring weather, as we tackled the annual task of cleaning up our yard after winter’s embrace. Among the many chores was trimming the evergreen branches from our towering pine tree. My husband raised an eyebrow, perhaps even thought I was a little eccentric, as I meticulously stripped the pine needles from the freshly cut branches, carefully storing them in a large tote. His skepticism turned to utter bewilderment when I declared my intention to craft something truly unique with them. Little did he know, this seemingly odd collection would soon become the foundation for a charming rustic wreath, finally bringing my vision to life this past weekend.
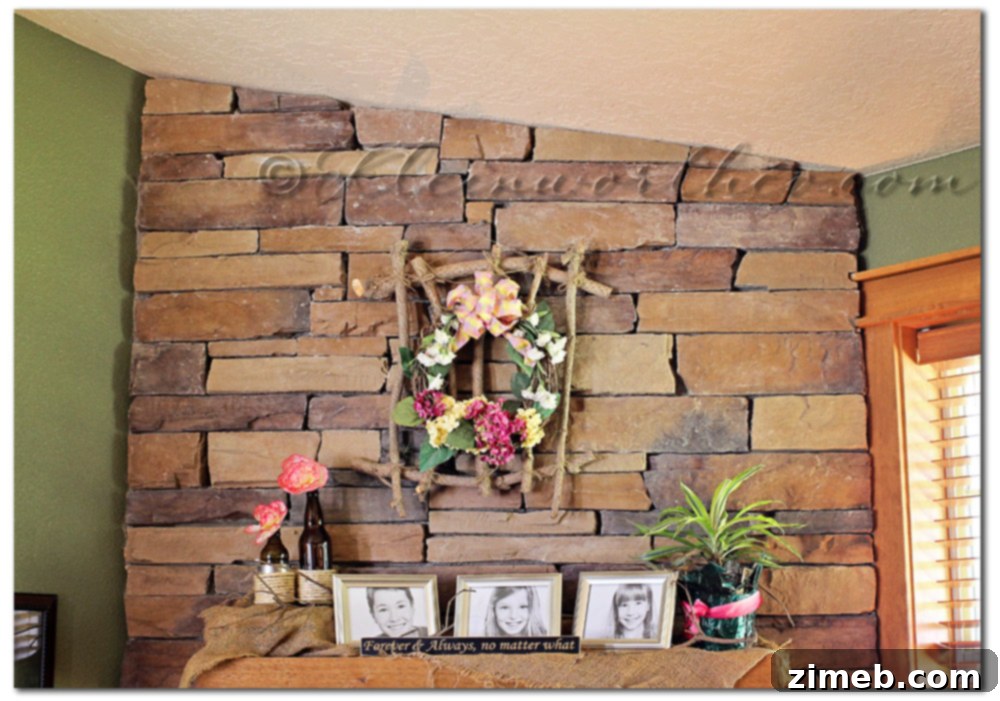
The inspiration for this new creation also stemmed from a desire for change, specifically above our mantel. My previous attempt at spring decor, a coffee filter wreath, had never quite won over my husband. He often teased that it resembled a giant tutu and, with gentle persistence, inquired weekly about when I might concoct something new for the prominent display spot. While I personally enjoyed its whimsical charm, he often lamented that it wasn’t “rustic enough” for our cozy cabin aesthetic. And honestly, he probably had a point. My heart was craving something a little softer, perhaps even “prettier” than the conventional cabin decor. So, I embraced the challenge: to marry my desire for beauty with the rustic charm he cherished. The result? A new piece that perfectly encapsulates both the natural ruggedness of our surroundings and a touch of refined elegance.
The Allure of Rustic Decor and Natural Crafting
Rustic decor holds a special place in the hearts of many homeowners, especially those living in or longing for the tranquility of a cabin-like setting. It celebrates the raw beauty of nature, often incorporating elements that are repurposed, weathered, or found. This style evokes a sense of warmth, comfort, and authenticity, creating spaces that feel grounded and inviting. For us, living in a cabin, embracing rustic elements feels natural and fitting, connecting our interior spaces with the serene outdoors. Crafting with natural materials like pine branches takes this connection a step further. It’s not just about decorating; it’s about bringing a piece of the forest, the garden, or the yard directly into your home, infusing it with organic textures, subtle fragrances, and a story.
Beyond aesthetics, there’s a profound satisfaction in DIY projects, particularly those utilizing materials that might otherwise be discarded. Repurposing pine trimmings into a beautiful wreath is an eco-conscious choice, reducing waste and celebrating the inherent value of natural resources. It’s also an incredibly cost-effective way to refresh your home decor, sidestepping the need to purchase expensive seasonal items. Each hand-crafted wreath becomes a unique statement piece, imbued with personal effort and creativity, making it far more meaningful than any store-bought alternative. This project was a perfect opportunity to combine practicality – yard clean-up – with creative expression, proving that even mundane tasks can spark delightful inspiration.
Gathering Your Simple Materials
One of the most appealing aspects of this project is its simplicity and reliance on readily available materials. For your own rustic pine branch wreath, you will need:
- Fresh Pine Branches: The stars of the show! Gather a good quantity of branches, ideally with varying lengths and thicknesses. Aim for branches that are still pliable and green. The amount you need will depend on the desired fullness and size of your wreath, but it’s always better to have too many than too few.
- Twine or Floral Wire: Strong, natural jute twine offers an authentic rustic look and excellent grip. Floral wire (green or brown) is also an excellent alternative, providing greater strength and discreetness. Ensure it’s sturdy enough to hold the branches firmly.
- Scissors or Garden Clippers: Essential for trimming branches and cutting twine or wire.
- Heavy-Gauge Craft Wire or Picture Hanging Wire: A short piece will be needed for creating a secure hanging loop.
- Optional Embellishments: This is where you infuse your personal style. I chose a previously made small wreath for a pop of color, but you could consider dried berries, small pinecones, cinnamon sticks, dried orange slices, a rustic ribbon, or even a few artificial flowers to complement the natural base.
Before you begin, ensure your pine branches are relatively clean. If they’ve been stored for a while, a quick shake outdoors can remove any loose debris or insects. Trimming off excess pine needles from the bottom parts of the branches will make them easier to handle and wrap, creating a cleaner, more refined look for your wreath’s base.
Step-by-Step Guide to Crafting Your Rustic Wreath
1. Forming the Base: Laying Out Your Pine Branches
The first step involves envisioning the shape and size of your wreath. On a clean, flat surface, begin by laying out your trimmed pine branches in a circular formation. Think of it like building a nest, overlapping the ends to create a continuous ring. Start with some of the thicker, longer branches to establish the overall diameter. As you add more branches, interlace them, ensuring the ends are tucked in to create a sturdy foundation. This initial arrangement is crucial, as it dictates the final look of your wreath. Take your time to adjust the branches, ensuring an even distribution and the desired level of fullness. The goal is to create a robust, interlocked structure before you begin the wrapping process. I just laid them in the formation I wanted, carefully considering how each branch would contribute to the overall aesthetic and stability.
2. Securing the Structure: Wrapping with Twine or Wire
Once you are satisfied with the circular arrangement of your pine branches, it’s time to secure them permanently. Grab your twine or floral wire and begin wrapping it tightly around the entire formation. Start by tying a secure knot around one of the thicker branch intersections. Then, proceed to wrap the twine continuously, overlapping the branches and pulling it taut as you go. Focus on areas where branches intersect or where the wreath feels less stable. The key here is to wrap firmly and consistently, ensuring that every branch is held securely in place. You might need to make several passes, wrapping both horizontally and vertically across the wreath, to achieve maximum stability. The more thoroughly you wrap, the more durable your wreath will be. Continue this process until all branches are holding firmly together, forming a solid, cohesive circle. Don’t be afraid to use a generous amount of twine or wire; it’s essential for the longevity of your handmade creation.
3. Adding a Hanging Mechanism
With the main structure of your wreath complete, the next crucial step is to add a reliable way to hang it. Take your piece of heavy-gauge craft wire or picture hanging wire. Select a sturdy branch at the top of your wreath that feels capable of bearing its weight. Wrap the craft wire securely around this chosen branch, forming a loop. Twist the ends of the wire together several times to create a strong, closed loop. Ensure this loop is substantial enough to fit over a hook or nail without slipping. Test its strength by gently lifting the wreath from this loop; it should feel balanced and secure. This simple addition transforms your beautifully crafted pine circle into a functional piece of decor, ready to adorn your chosen space.
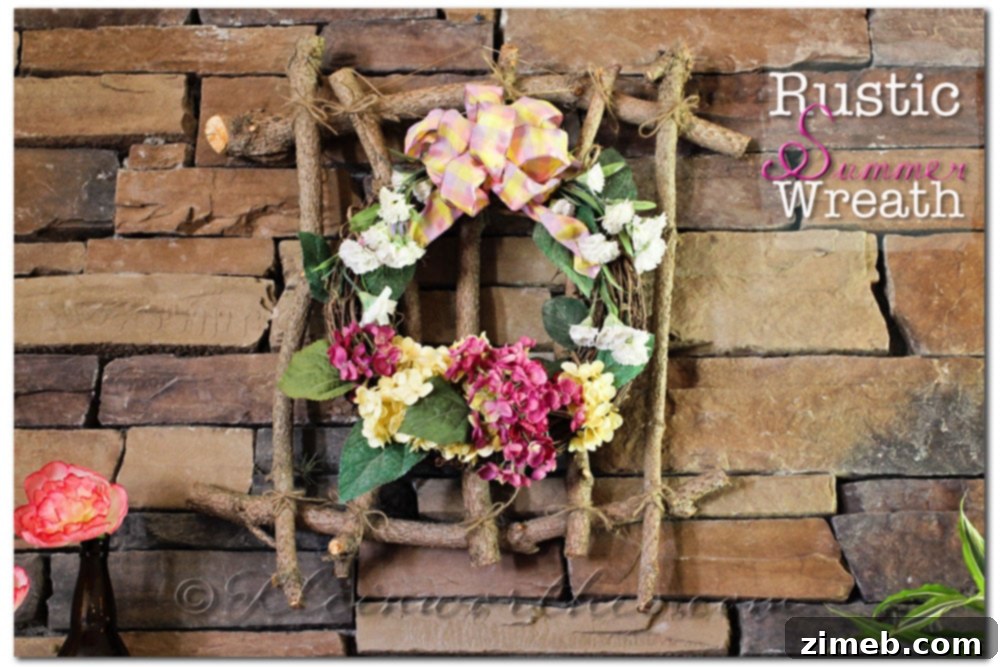
4. Personalizing Your Wreath: The Finishing Touch
Now comes the most enjoyable part: adding your personal touch! This is where the wreath truly comes to life and reflects your individual style. For my wreath, I decided to incorporate one of my previously made smaller wreaths, which I used to display on our old front door. It added a lovely pop of color and an extra layer of texture against the natural pine backdrop. This smaller wreath, incidentally, was far too small for our giant front door now, so repurposing it here worked out perfectly, giving it a new purpose and a prominent display. If you’re adding a similar accent, simply tie it securely onto your pine branch wreath using a smaller piece of twine or floral wire, ensuring it’s centered or positioned aesthetically.
However, the possibilities for personalization are endless. Consider weaving in dried berries, such as hypericum or faux cranberries, for a splash of color, or attaching small pinecones collected from your own yard for added texture and natural charm. A carefully tied rustic burlap ribbon can introduce a touch of farmhouse elegance, while sprigs of dried lavender or eucalyptus could infuse a subtle, pleasant aroma. For a summer theme, you might add a few faux sunflowers or bright fabric accents. For autumn, think mini gourds or fall-colored leaves. The goal is to complement the natural beauty of the pine without overwhelming it, allowing the rustic essence to shine through. This step allows you to tailor the wreath to your specific decor style, the season, or an upcoming holiday, making it truly unique. It worked out perfectly, transforming simple pine branches into a striking and personalized piece.
Maintaining Your Rustic Pine Wreath
Once your beautiful rustic pine wreath is complete, a little care can help it last longer and keep its charm. If you plan to display your wreath outdoors, especially in direct sunlight or exposed to the elements, consider spraying it with a UV protectant or a clear matte sealant. This can help preserve the natural colors of the pine and prevent excessive fading or needle drop. For indoor display, pine wreaths typically fare very well. The fresh pine will gradually dry over time, retaining its shape and a lovely, subtle fragrance. You can gently mist it with water every few days if you wish to prolong the freshness of the needles for a short period, but eventually, it will dry out naturally, becoming a beautifully preserved, everlasting piece of rustic decor. Avoid placing it in excessively hot or humid areas, which might accelerate decay.
Displaying your wreath is just as fun as making it. Above the mantel, as my husband requested, it creates a cozy focal point, especially when paired with flickering candlelight or other natural elements like river stones or a wooden vase. On your front door, it offers a warm and inviting welcome to guests, instantly boosting your home’s curb appeal. You can also hang it on an interior wall, perhaps in a hallway or dining area, to bring a touch of nature indoors. Its versatility means it can easily transition from a summer statement to a fall accent with minimal changes, or even serve as a base for winter holiday embellishments. This simple, elegant piece is a testament to the beauty found in nature and the joy of creating something with your own hands.
Conclusion: A Simple Craft, A Lasting Impression
And there you have it – my new rustic summer wreath. What began as a simple yard clean-up transformed into a delightful crafting adventure, yielding a beautiful and meaningful piece of home decor. This project truly embodies the spirit of DIY: taking humble, natural materials and, with a bit of creativity and effort, turning them into something extraordinary. It’s a super simple project that delivers significant impact, proving that the most charming decorations often come from the heart and from the bounty of nature around us. Weaving together the desire for “pretty” with the undeniable appeal of “cabin decor,” this pine branch wreath is a perfect blend of style and sustainability. I hope this guide inspires you to look at your own yard trimmings with a new perspective and embark on your own rustic crafting journey. The satisfaction of creating something beautiful and functional from scratch is truly unmatched.
For more creative DIY projects and seasonal decor ideas, explore our website. We regularly share inspiration and step-by-step guides to help you transform your home with handmade charm.