
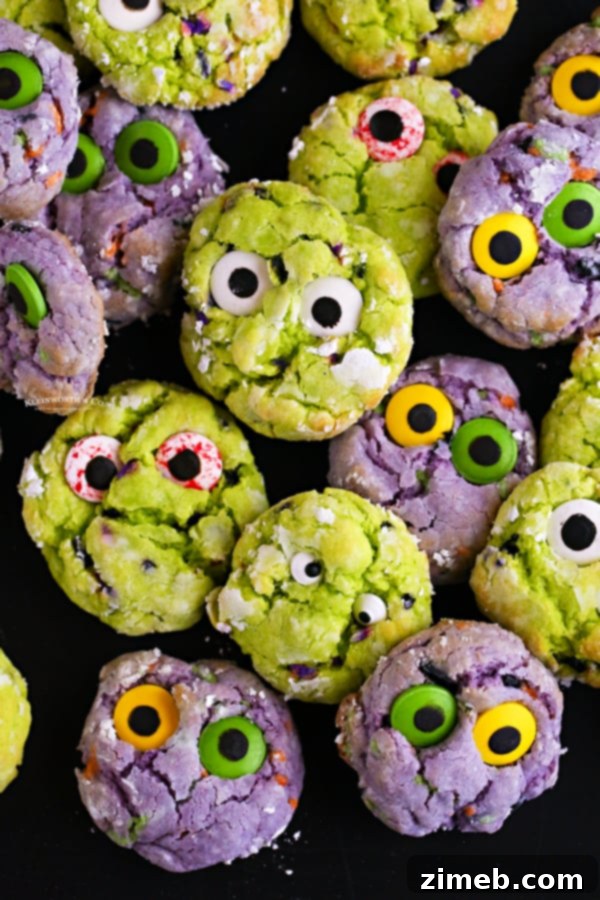
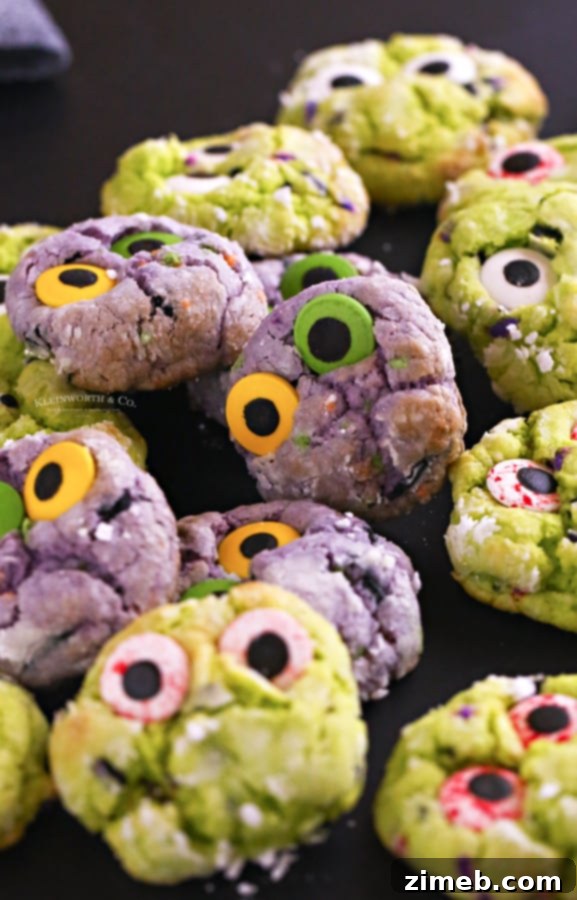
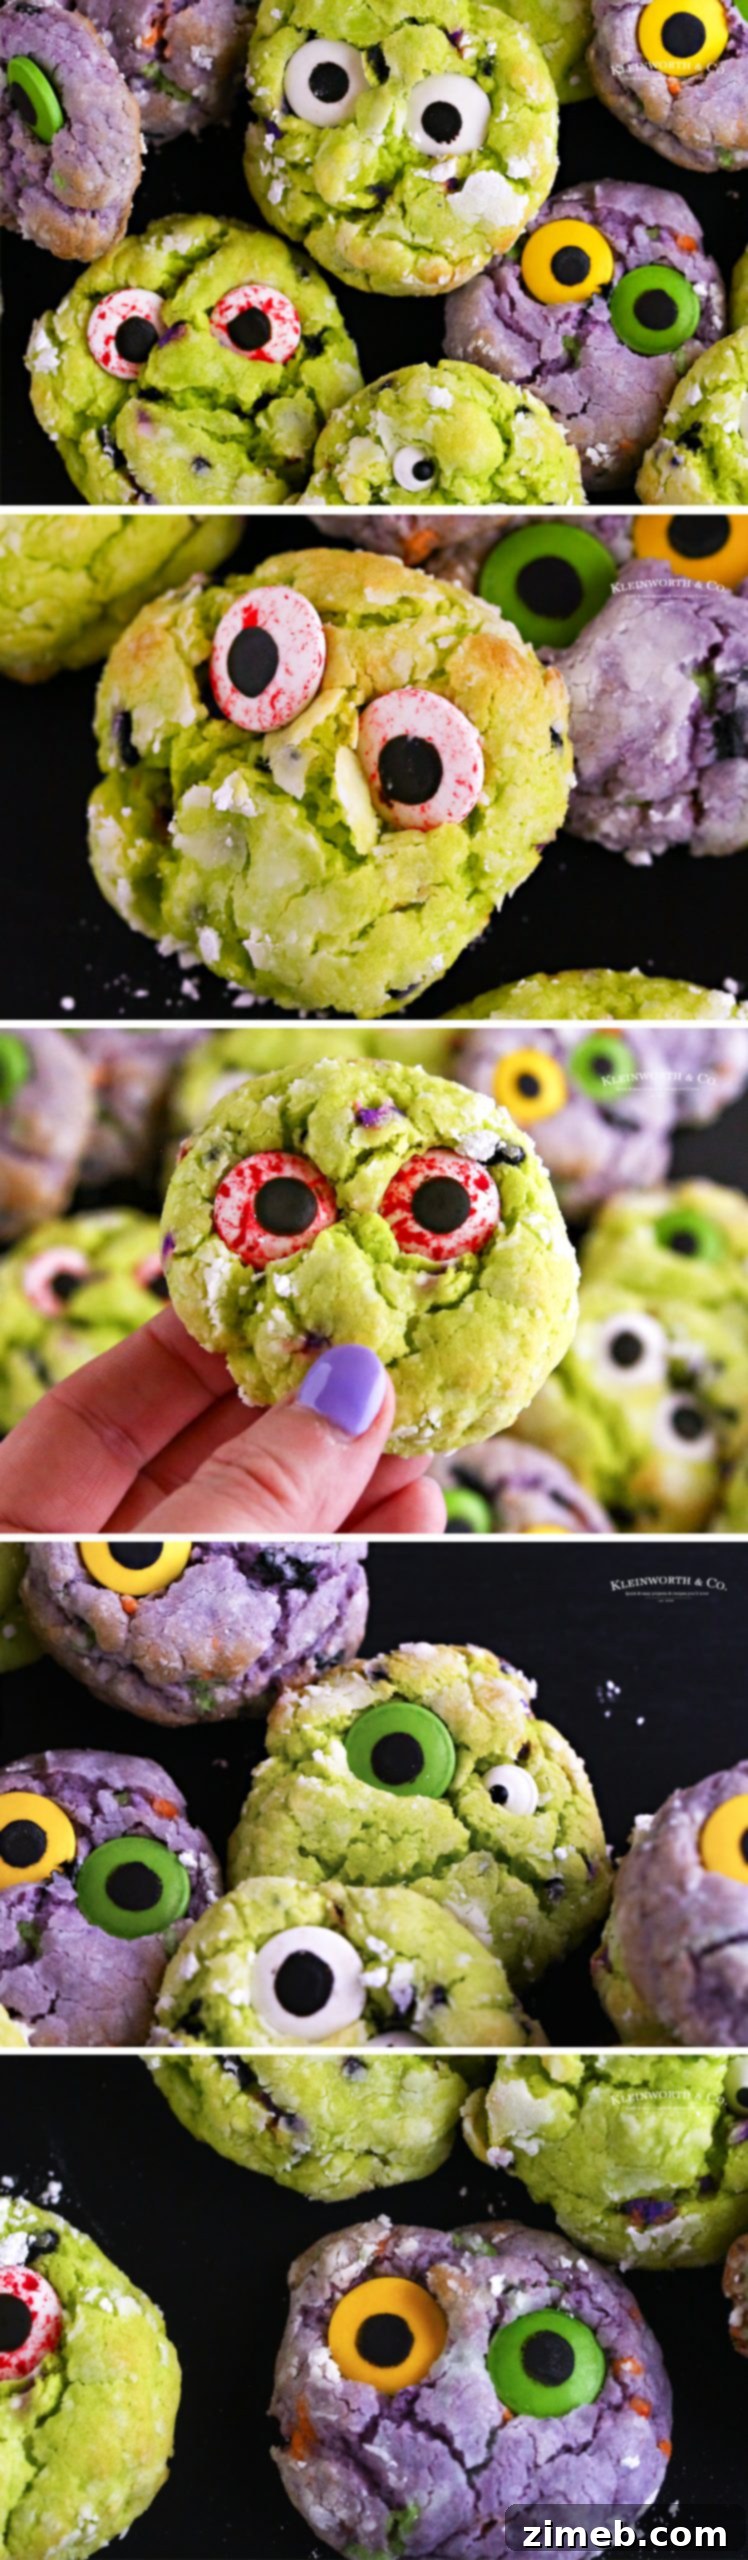
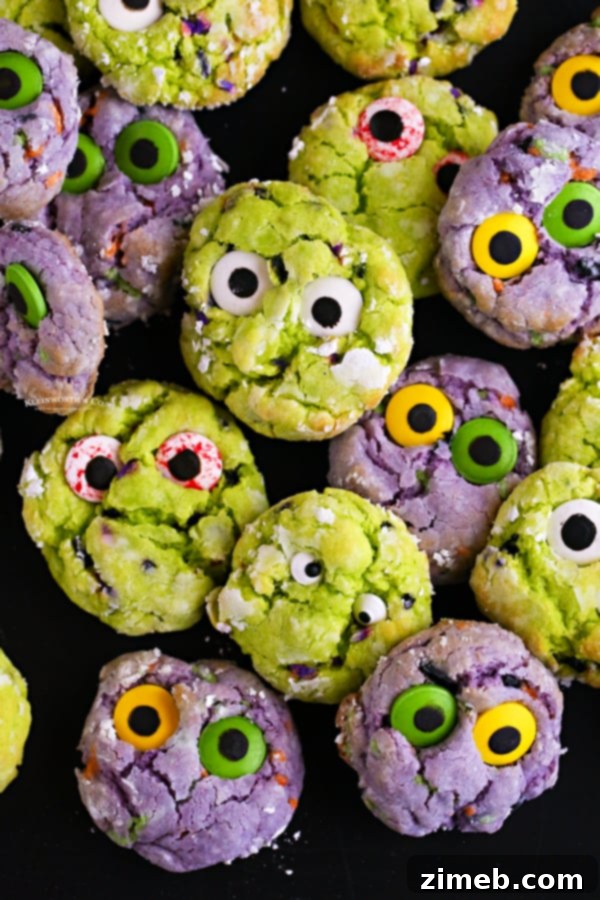
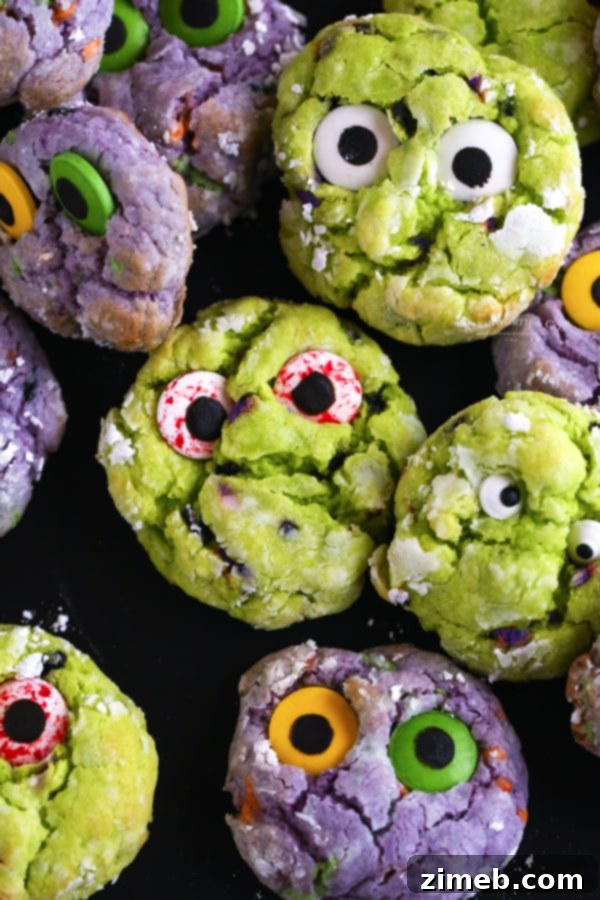
Step into the spooktacular spirit of Halloween with these incredibly fun and frightfully delicious Zombie Cookies! Far from your everyday cake mix creation, these treats are designed to be creepy, ghastly, and utterly irresistible – just like the undead craving brains, but far sweeter! Perfect for adding a touch of spooky charm to your Halloween festivities, these cookies promise a delightful blend of playful horror and gourmet taste.
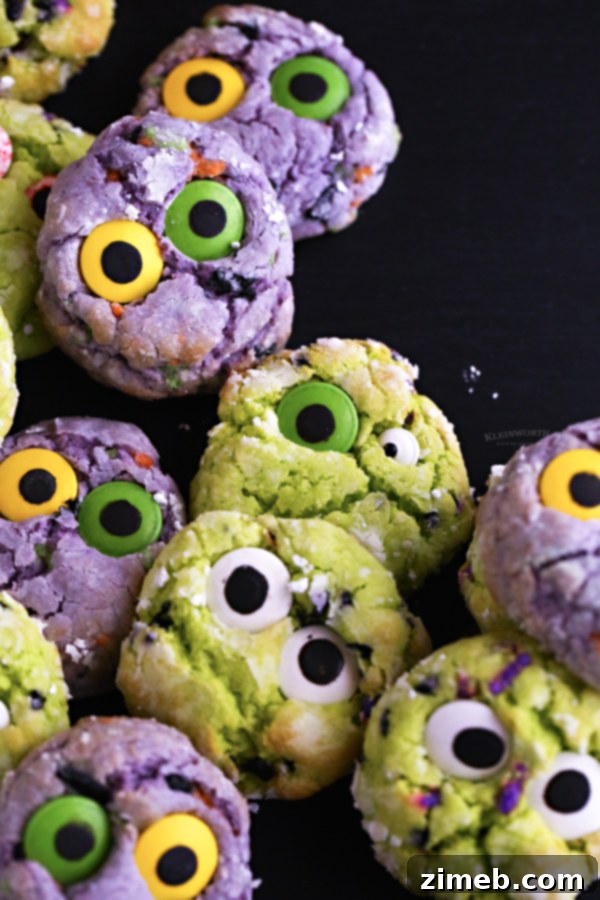
Get ready to unleash a horde of flavor with these super cute and delightfully spooky Zombie Cookies. Crafted from a simple cake mix, they boast a wonderfully soft and chewy texture that melts in your mouth. Tinted with vibrant, ghastly zombie colors, they are the quintessential Halloween treat, striking the perfect balance between sweet indulgence and eerie fun. Whether you’re hosting a monstrous party or simply treating your loved ones, these cookies are guaranteed to be a hit.
You might want to consider making a double batch, because these ghoulish goodies are destined to be a fan favorite! What could possibly be better than devouring these delightfully frightening treats on the spookiest day of the year? They’re not just cookies; they’re an experience, bringing smiles and a touch of delicious terror to everyone who tries them.

Halloween, the most frightful yet fun-filled time of the year, calls for treats that are as enchanting as they are eerie. If you’re pondering what sweet delights to prepare for your upcoming Halloween party, look no further. These Zombie Cookies are the perfect choice to share with your friends, family, and any supernatural guests who might drop by. Their unique appearance and delightful taste make them an instant conversation starter and a memorable part of any celebration.
There’s a special magic in baking for the holiday season, and Halloween holds a particular charm for me. It’s a time of crisp, dark evenings and delightfully creepy aesthetics, offering endless opportunities for joyful activities. From the artistic challenge of carving pumpkins and the excitement of dressing in elaborate costumes to the simple pleasure of collecting candy, Halloween is a feast for the senses. This festive atmosphere always inspires me to create a variety of Halloween cookies, my mind brimming with ideas for everything from the adorably cute to the truly terrifying. These Zombie Cookies capture that essence perfectly!
Easy Cake Mix Halloween Cookies: A Spooky Delight
Unleash your inner baker this Halloween with a recipe that’s as simple as it is spectacular: easy cake mix Halloween cookies! Using a pre-made cake mix as your base dramatically cuts down on prep time, making these Zombie Cookies an ideal choice for busy schedules without compromising on flavor or fun. This clever shortcut allows you to focus on the exciting part – transforming ordinary dough into extraordinary, eerie treats that will captivate everyone. Get ready to impress with minimal effort and maximum spooky impact!
Commonly Asked Questions About Baking Spooky Cookies
To ensure your Zombie Cookies turn out perfectly gruesome and delicious, we’ve gathered answers to some of the most frequently asked questions about this recipe and general cookie-baking best practices. Dive into these tips and tricks to become a Halloween cookie master!
Can You Freeze Zombie Cookies?
Yes, absolutely! While you can freeze baked cookies, for the freshest taste and best texture, I highly recommend freezing the cookie dough rather than the baked cookies. To do this, simply roll your prepared zombie cookie dough into balls, but skip dipping them in confectioner’s sugar at this stage. Place the dough balls on a plate or a cookie sheet and flash freeze them for about an hour until firm. Once they are solid, transfer them to a zip-top freezer bag, ensuring as much air is removed as possible, and freeze for up to one month. When you’re ready to bake, thaw the dough balls on the counter for 20-30 minutes, then roll them in confectioner’s sugar and bake as directed. This method allows you to enjoy freshly baked, spooky treats whenever the craving strikes!
Is Chilling the Cookie Dough Really Necessary?
YES, without a doubt! As difficult as it might be to wait, please do not skip the chilling process for these Zombie Cookies. Chilling is a crucial step that significantly impacts the final texture and appearance of your cookies. When the dough is chilled, the fats solidify, preventing the cookies from spreading too much in the oven. This firmness is key to achieving that beautiful, characteristic crinkle-look that makes these cookies so visually appealing and distinct. Moreover, chilling allows the ingredients to fully hydrate and the flavors to meld, resulting in a richer, more uniform taste.
The good news is that this recipe only requires a 30-minute chill time, which is much less demanding than many other cookie recipes that call for a 4-hour minimum. You can easily fit this into your schedule! For instance, you could make the dough after dinner the night before and then bake fresh cookies in the morning. I often find that I can pop the dough in the fridge, preheat the oven, and use the 30 minutes to wash up any mixing bowls or tidy the kitchen. By the time everything is clean, your dough will be perfectly chilled and ready for baking!
Why Do My Cookies Go Flat?
Flat cookies are a common baking frustration, and it usually boils down to a few key factors. The primary culprits are typically the temperature of your dough at the time of baking or an imbalance in ingredients that help with leavening. Firstly, ensure your dough isn’t too warm before baking; as mentioned, chilling is vital. If your dough is too soft or warm, it will spread rapidly before it has a chance to set, leading to flat, thin cookies. Secondly, always double-check that you’re measuring leavening agents like eggs, baking soda, and baking powder correctly, as they are essential for achieving a nice rise. Make sure these ingredients are also at room temperature when you begin mixing, as this promotes even blending and activation.
Another often-overlooked tip is to always place your cookie dough on a cool baking sheet. If you transfer dough to a hot baking sheet that just came out of the oven, the residual heat will cause the butter to melt too quickly, leading to immediate spreading and flat cookies. To avoid this, it’s incredibly helpful to have a rotation of at least two baking sheets. This way, while one batch is baking or cooling, you can prepare the next batch on a cool tray, ensuring consistent results every time.
Zombie Cookies Recipe: Simple & Spooky
Ready to bring these ghastly goodies to life? Here’s a sneak peek at the magic that goes into creating these easy and impressive Zombie Cookies. With straightforward steps and readily available ingredients, you’ll be whipping up a batch of spooky satisfaction in no time.
What Food Color Do You Recommend for the Best Zombie Hues?
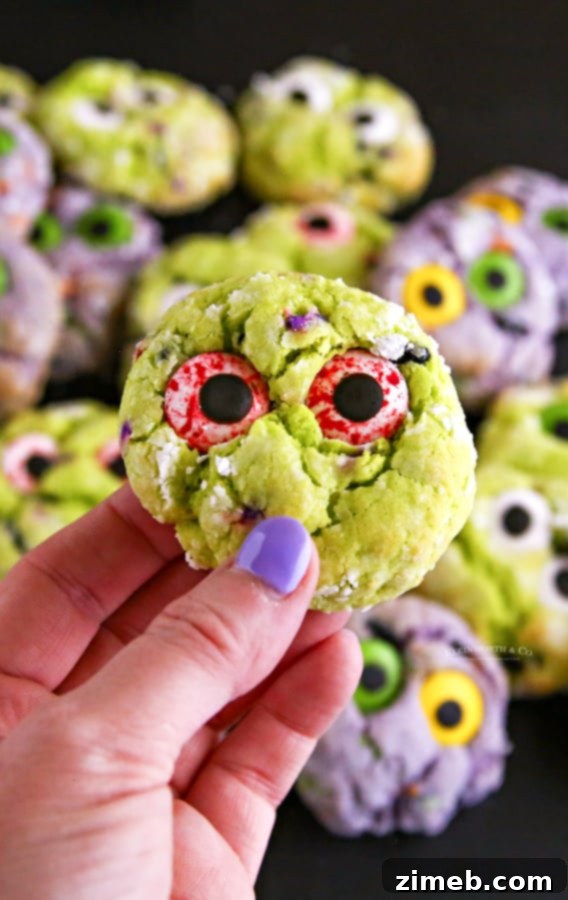
For achieving those truly vibrant and ghastly zombie colors, I wholeheartedly recommend using a soft gel food color. Unlike traditional liquid food coloring, gel colors have a much more intense pigment concentration, meaning you need less product to achieve a dramatic color. This is a significant advantage because using too much liquid food coloring can introduce excess moisture into your dough, altering its consistency and potentially leading to those unwanted flat cookies. For these Zombie Cookies, my go-to shades are electric purple and electric green. These specific colors deliver that unsettling yet festive look that perfectly embodies the zombie theme!
Why Do Ingredients Need to Be at Room Temperature?
Achieving baking perfection often hinges on seemingly small details, and using room temperature ingredients is one of the most critical. This seemingly minor step ensures that everything blends together seamlessly, creating a smooth, homogenous batter without any pesky pockets of unblended butter or cream cheese. When butter and cream cheese are softened to room temperature, they can easily cream together with sugar, effectively trapping tiny air bubbles. This process, known as emulsification, is vital because these trapped air bubbles expand during baking, contributing to a lighter, fluffier, and more tender texture in your finished cookies. Cold ingredients, on the other hand, resist blending and can lead to a dense, uneven dough and a less desirable final product. So, take the extra time to let your ingredients warm up – your cookies will thank you!
What Is the Best Way to Store Leftover Zombie Cookies?
To keep your leftover Zombie Cookies as fresh and delicious as possible, the easiest method is to store them in an airtight container at room temperature. This helps maintain their soft, chewy texture. However, it’s important to note a small detail: the confectioner’s sugar coating that gives these cookies their signature crinkle look might absorb some moisture in the airtight container, especially after the first day. By day two, you might notice the powdered sugar soaking into the cookies a bit, making them appear less “crinkly.” For this reason, I recommend enjoying these delectable treats within 2-3 days for optimal freshness and appearance. While they’ll still taste great after that, they just won’t look as ghastly good!
Can These Cookies Be Made Ahead of Time?
You bet! This recipe is incredibly forgiving and perfect for bakers who like to plan ahead. The cookie dough can be prepared up to 4 days in advance and stored in the refrigerator, making it ideal for party prep or when you want fresh-baked cookies on demand. Just be sure to cover the dough tightly with plastic wrap to prevent it from drying out or absorbing any refrigerator odors. When you’re ready to bake, simply remove the dough from the fridge and let it sit at room temperature for about 20-30 minutes. This allows it to soften slightly, making it much easier to roll and ensuring even baking, delivering perfect Zombie Cookies every time.
Zombie Halloween: Themed Delights
Embrace the spirit of a truly ghoulish Halloween with treats that perfectly complement the festive atmosphere. These vibrant green and purple Zombie Cookies are more than just a dessert; they’re an integral part of your Halloween decor and theme. Imagine a platter of these eerie edibles greeting your guests, their “eyes” watching as everyone dives into the spooky fun!
Essential Ingredients for Your Zombie Cookies
Crafting these deliciously creepy Zombie Cookies requires a simple lineup of ingredients, many of which you likely already have on hand. Here’s what you’ll need to bring your monstrous creations to life:
- Cream cheese – at room temperature for optimal blending and a wonderfully soft, chewy texture.
- Butter – also at room temperature, essential for a smooth dough and proper emulsion.
- Egg – acts as a binder and helps with the cookie’s structure and rise.
- Vanilla extract – for that classic, comforting sweet flavor.
- White cake mix – the star ingredient for convenience and a perfectly tender cookie base.
- Food coloring – vibrant gel colors in purple and green are key for that authentic zombie look.
- Sprinkles – optional, but highly recommended for added texture and a festive touch of “ghoulish glitter.”
- Confectioner’s sugar – for rolling the dough, creating that iconic crinkle effect.
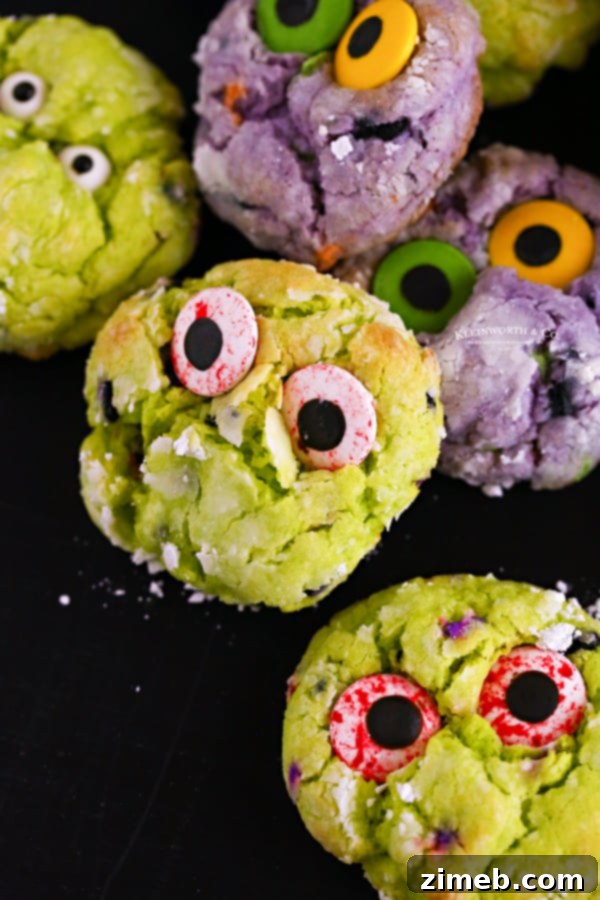
- Candy eyeballs – the crucial finishing touch to give your zombies their unsettling gaze.
Mastering Room Temperature Butter: Three Easy Methods
Achieving perfectly softened butter is a common challenge, but it’s vital for a smooth cookie dough. Here are a few reliable methods to get your butter to that ideal room temperature:
Method One: The Patient Countertop Approach
The simplest way is to plan ahead. Take the butter (and any other dairy or eggs) out of the refrigerator and leave it on your kitchen counter for about 30 minutes to an hour. This allows it to soften naturally. I usually start by pulling out all my chilled ingredients first while I gather my other baking supplies, ensuring everything is at the right temperature by the time I’m ready to mix. This proactive step helps confirm I have all ingredients before diving into the recipe.
However, sometimes it’s winter, and 30 minutes isn’t quite enough, or life just happens, and you’re not that organized. It’s perfectly normal! That’s when my other tricks come in handy.
Method Two: The Microwave “Whisper”
This method requires a delicate touch. Place the butter (still in its paper wrapper, but never foil!) in the microwave. Microwave it for just 2 seconds, then flip it over. Repeat this process – 2 seconds, flip, 2 seconds, flip – continuing until all sides have been gently warmed. Stop immediately if it feels soft enough. **Exercise extreme caution with this method:** overly softened or melted butter from the microwave will drastically alter the final texture of your cookies, leading to a greasy and flat result. The goal is soft, not melted!
Method Three: The Warm Water Bath
My third and often favorite method involves a warm water bath. Place the wrapped butter sticks in a zip-top bag (or leave them in their original packaging if it’s watertight) and submerge them in a bowl of warm (not hot!) water. This works wonderfully for eggs too. If the water temperature is just right, it’s the perfect, gentle way to achieve ideal “room-temperature” ingredients without any risk of melting or cooking.
Delicious Halloween Cookie Recipes
Beyond our ghastly Zombie Cookies, Halloween offers a treasure trove of creative cookie possibilities. From cute ghosts to monstrous treats, there’s a cookie for every spooky celebration. Get inspired and expand your Halloween baking repertoire!
How to Make Spooktacular Zombie Cookies: Step-by-Step Instructions
Creating these eerie yet adorable Zombie Cookies is a straightforward process that’s perfect for bakers of all skill levels. Follow these simple steps to bring your ghastly treats to life:
- In a large mixer bowl, combine the softened cream cheese, butter, egg, and vanilla extract. Beat these ingredients together using an electric mixer until the mixture is light, creamy, and fluffy. This ensures a smooth base for your cookies.
- Gradually add the white cake mix to the wet ingredients. Stir slowly until the cake mix is just combined and no dry streaks remain. Be careful not to overmix, as this can lead to tougher cookies.
- Divide the cookie dough batter evenly into two separate bowls. This will allow you to create two different zombie colors.
- To each bowl, add your desired food coloring (electric purple and electric green work wonderfully for a zombie theme) and any optional sprinkles. Mix thoroughly until the color is uniform throughout the dough and the sprinkles are evenly distributed.
- Cover each bowl of colored dough tightly with plastic wrap and chill in the refrigerator for a minimum of 30 minutes. This crucial step helps the dough firm up, preventing excessive spreading during baking and ensuring those perfect crinkles.
- While the dough chills, preheat your oven to 350 degrees Fahrenheit (175 degrees Celsius). Prepare a baking sheet by lining it with parchment paper for easy cleanup and to prevent sticking.
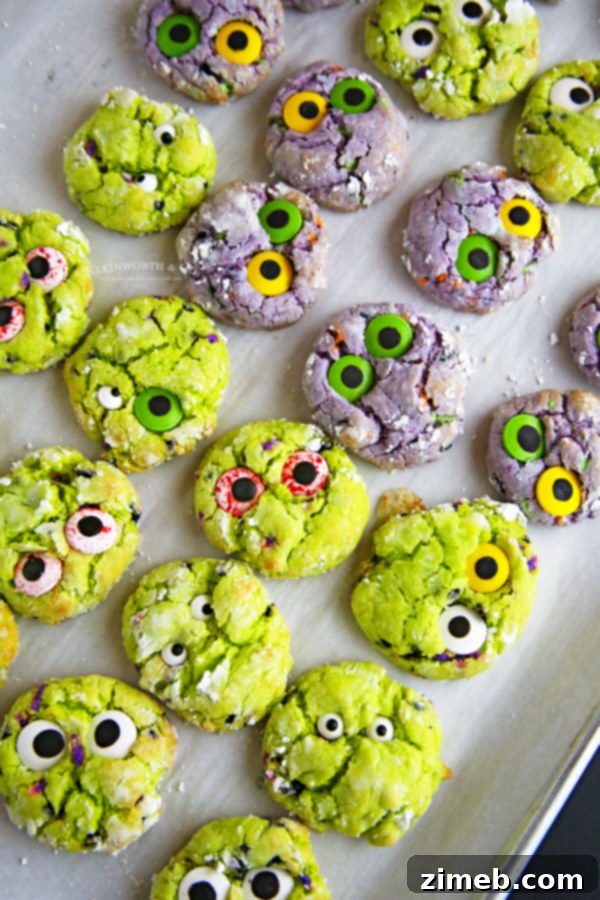
- Once chilled, take 2-3 tablespoon-sized portions of dough and roll them into smooth balls. Then, roll each dough ball generously in confectioner’s sugar to coat them completely.
- Place the sugar-coated dough balls on your parchment-lined baking sheet, leaving some space between them. Gently press them down slightly with the palm of your hand, but avoid completely flattening them; you want them to retain some height.
- Bake for 10-12 minutes. The cookies should be set around the edges but still appear soft in the center. Avoid overbaking to keep them delightfully chewy.
- Immediately after removing the cookies from the oven, while they are still warm, gently press two candy eyeballs onto each cookie. Press them in just deep enough so they adhere securely and don’t fall out once the cookies cool.
- Allow the Zombie Cookies to cool completely on the baking sheet or a wire rack before transferring them to an airtight container for storage. This ensures they set properly and maintain their texture.
Can This Zombie Cookie Recipe Be Doubled?
Absolutely, you can easily double this recipe! A single batch typically yields about 24-30 cookies, depending on the size you roll them. If you’re planning a large Halloween party, school event, or simply want plenty of spooky treats to go around, doubling the ingredients is a straightforward process. Just be sure to use a larger mixing bowl to accommodate the increased volume of dough, and you might need an extra baking sheet or two to bake all your monstrous creations efficiently.
Don’t Miss These Other Delicious Cookie Recipes!
If you loved creating these Zombie Cookies, you’re in for a treat! Explore more delightful and creative cookie recipes that are perfect for any occasion, especially during the festive seasons. Each recipe is designed to be easy to follow and incredibly rewarding.
- Monster Cookies: A colorful and chewy favorite, packed with delightful mix-ins.
- Pumpkin Spice Cookies: Embrace autumn flavors with these warm and inviting cookies.
- M&M Slice and Bake Cookies: Classic convenience meets colorful fun in every slice.
- Pumpkin Shortbread Cookies: Delicate and buttery, with a hint of seasonal pumpkin.
- Fall Sugar Cookies: Beautifully decorated sugar cookies celebrating the harvest season.
- 3-Ingredient Peanut Butter Cookies: Unbelievably easy and packed with peanut butter flavor.
Cute Halloween Cookies: Beyond the Spooky
While our Zombie Cookies lean into the creepy side of Halloween, the holiday is also perfect for a myriad of cute and charming cookie designs. Think friendly ghosts, adorable black cats, smiling pumpkins, or even whimsical witches’ hats. There’s a boundless universe of sweet, imaginative treats waiting to be explored, proving that Halloween baking can be both spooky and sweet, scary and utterly delightful!
DON’T MISS THESE HOLIDAY E-BOOKS!


**If you love these spooky delights, you’ll also want to check out our adorable Halloween Oreo Balls for another easy holiday treat!
Products I Love for Making Spooky Zombie Cookies…
This Zombie Cookie recipe is incredibly easy and yields delightfully delicious results. If you’re like me and relish baking during this time of year, you might already have most of these items on hand. Or, perhaps you’re venturing into the world of cake mix cookies for the first time and feel a little nervous – rest assured, you’re going to absolutely love them! To help you achieve perfect results, I’ve compiled a list of the tools and ingredients I consider essential when making this fantastic cookie recipe.
- Vanilla Extract: Essential for imparting that classic, comforting flavor to your cookies.
- White Cake Mix: The secret to these incredibly easy and tender cake mix cookies.
- Food Coloring: Specifically, vivid gel colors in purple and green to achieve that perfect zombie hue.
- Sprinkles: Optional, but they add a fantastic textural element and a fun, festive touch.
- Confectioner’s Sugar: For coating the dough balls and creating that beautiful crinkle finish.
- Bloodshot Eyeballs: Perfect for giving your zombie cookies a truly creepy and realistic look.
- Green/Yellow Candy Eyes: An alternative for a different spooky eye effect.
- Mini Candy Eyes: For smaller cookies or a variety of eye sizes.
- Standard Candy Eyes: Versatile and classic for any monster-themed treat.
- 3/4 Sheet Pans: Ideal for baking multiple batches evenly.
- Measuring Cups: Accurate measurements are key to baking success.
- Measuring Spoons: For precise additions of smaller ingredients like vanilla.
If you loved making these Easy Zombie Cookies, you’re going to adore these other fantastic treats for Halloween and beyond. Click each link below to discover easy, printable recipes that are sure to become new favorites!
Mummy French Macarons with Maple Cinnamon Filling are an adorable and delicious treat to serve for Halloween, perfectly packed with cozy fall flavors!
Check out this recipe

Looking for a fun & easy Halloween treat? This adorable Monster Bark takes just a couple ingredients & a few minutes to make. The kids just love it!
Check out this recipe

Ghoulish Monster Halloween Cupcakes are a super cute dessert for your Halloween party. The kids will giggle at this fun & spooky Halloween treat.
Check out this recipe

Mummy Shortbread Cookies are the perfect decorated Halloween Cookies with flavors of vanilla, cinnamon & nutmeg. So cute & easy to make!
Check out this recipe

Monster Cupcakes are the perfect treat for your Halloween party. Funny eyes & colorful frosting, these easy desserts will delight all the ghouls & goblins.
Check out this recipe

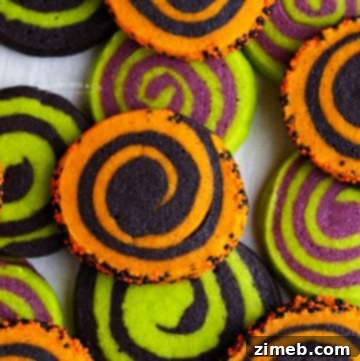
Easy Halloween Sugar Cookies are a soft, pinwheel sugar cookie recipe, made with fun holiday colors like green, orange, purple and black! Perfect for your Halloween celebrations.
Check out this recipe
Festive Candy Corn Cupcakes made with a homemade vanilla cupcake recipe and topped with colorful vanilla buttercream frosting. They’ll be the perfect holiday dessert to serve at any kid or adult Halloween party!
Check out this recipe

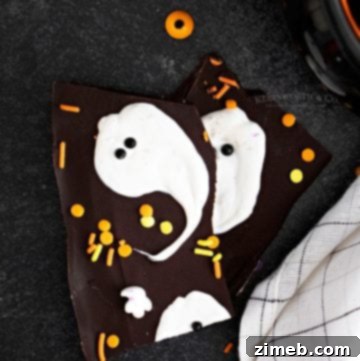
Candy Lovers! This spooky Halloween Bark Recipe is made with white & dark chocolate, candy & more – perfect for all your ghoulish celebrations.
Check out this recipe
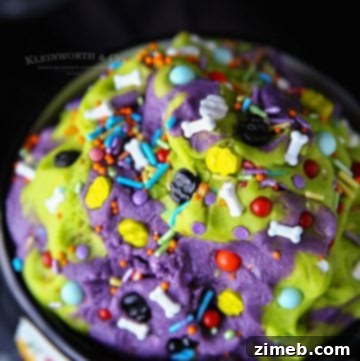
Sugar Skull Cookie Dough is a quick and easy Halloween treat. Green and purple egg-free cookie dough loaded with sugar skull sprinkles is a perfect Day of the Dead dessert.
Check out this recipe
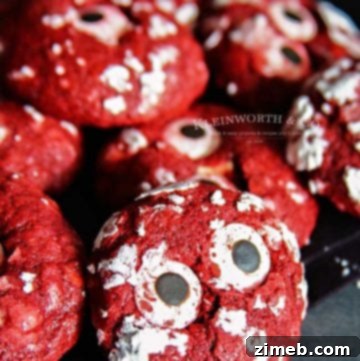
Bloodshot Eyeball Red Velvet Crinkle Cookies are just like the soft & chewy crinkle cookies you love, but made spooky, so they’re perfect for Halloween!
Check out this recipe
More Great Cake Mix Recipe Ideas
If the ease and deliciousness of these Zombie Cookies, made from a simple cake mix, has inspired you, then you’re in for a treat! Cake mix is a versatile secret weapon in the kitchen, allowing you to whip up a wide array of delightful baked goods with minimal effort. Explore these other fantastic cake mix recipes that are sure to become go-to favorites:
Cake Mix Snickerdoodles: The classic cinnamon-sugar favorite made incredibly easy.
Red Velvet Cake Mix Cookies: Indulgent and rich, with that signature red velvet flavor.
Oreo Cake Mix Donuts: Delicious, easy-to-make donuts with cookie crumbles.
Red Velvet Cake Mix Crinkle Cookies: Another crinkle cookie favorite, bursting with red velvet goodness.
Patriotic Cake Mix Cookies: Perfect for national holidays with their vibrant red, white, and blue hues.
Frosted Funfetti Cake Mix Cookies: A party in every bite, topped with creamy frosting.
Funfetti Cake Mix Bars: Easy-to-make dessert bars loaded with colorful sprinkles.
St. Patrick’s Day Cake Mix Cookie Bars: Festive green treats for a lucky celebration.
Birthday Cookies: Simple, cheerful cookies perfect for any birthday bash.
Andes Mint Cookies: A refreshing chocolate and mint combination.
Gooey Butter Cookies: Rich, tender, and irresistibly soft cookies.
Snowman Cookies: Adorable winter treats for the holiday season.
If you loved this recipe for Easy Zombie Cookies as much as I do, please take a moment to leave a five-star review and help spread the spooky joy by sharing it on Facebook and Pinterest! Your support means the world and helps others discover these ghastly good treats.
CONNECT WITH YUMMI HAUS!
Be sure to follow me on my social media, so you never miss a post and stay up-to-date on all the latest delicious recipes and baking tips!
Substack, Facebook, Pinterest, Instagram, Email Subscription

Rate this Recipe
Zombie Cookies
Ingredients
- 8 ounces cream cheese – room temperature
- 1/2 cup butter – room temperature
- 1 egg
- 1 tsp vanilla extract
- 1 box white cake mix
- food coloring – in purple and green
- sprinkles – optional
- confectioner’s sugar
- candy eyeballs
Instructions
-
Combine the cream cheese, butter, egg and vanilla extract in a large mixer bowl. Beat together until light and fluffy.
-
Add the cake mix and stir slowly until just combined.
-
Divide the batter into two bowls.
-
Add the food coloring and any desired sprinkles to each bowl and mix until the color is uniform throughout and the sprinkles are evenly distributed.
-
Cover and chill each color of dough for 30 minutes.
-
Preheat the oven to 350 degrees.
-
Roll 2-3 tablespoon-sized portions into balls and then roll those in the confectioner’s sugar to coat.
-
Place on a parchment-lined baking sheet and press them down slightly but don’t completely flatten.
-
Bake for 10-12 minutes.
-
Add the candy eyes to each of the cookies immediately after removing from the oven before they cool – pressing them in just deep enough so they don’t fall out.
-
Allow to cool completely before storing in an airtight container.
Nutritional information for the recipe is provided as a courtesy and is approximate. Please double-check with your own dietary calculator for the best accuracy. We at Yummi Haus cannot guarantee the accuracy of the nutritional information given for any recipe on this site.