
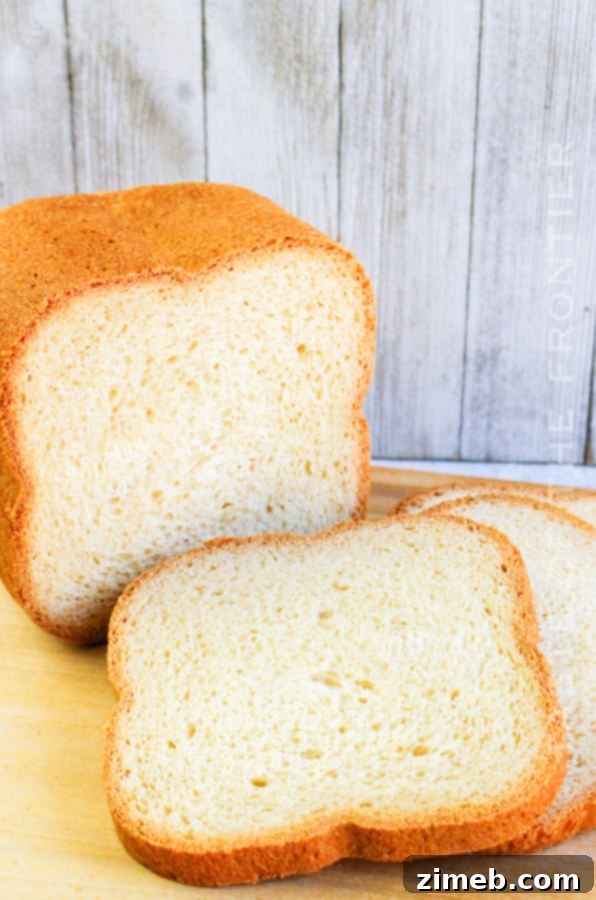
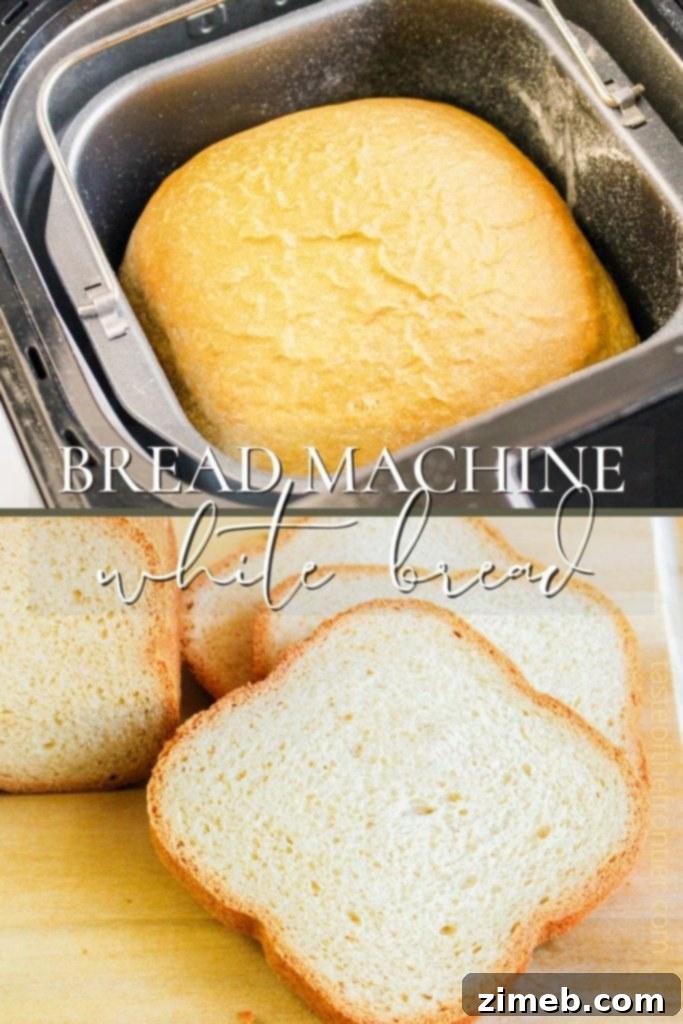
Imagine waking up to the irresistible aroma of freshly baked bread filling your home. With this incredibly versatile, light, and wonderfully fluffy white bread recipe, crafted specifically for your bread machine, that dream can become an everyday reality. This golden loaf is perfect slathered with butter and homemade jam for a delightful breakfast, served alongside a comforting bowl of soup for lunch, or even elevated as a sophisticated appetizer dipped in olive oil and balsamic vinegar for dinner. It’s more than just bread; it’s an experience.
Unleashing the Magic of Your Bread Machine: A Classic White Bread Recipe
Did you recently join the ranks of home bakers with a shiny new bread machine? Or perhaps you’re rediscovering an older model tucked away in the pantry? My personal journey with bread machines began many years ago when they first emerged on the market. Back then, they often relied on expensive pre-packaged mixes, which felt counterintuitive when a store-bought loaf was often cheaper. This year, I decided it was time for an upgrade, and the very first thing I did was test out one of my most cherished, tried-and-true white bread recipes. The sheer satisfaction of watching it produce the same beautifully risen, perfectly textured loaf in the new machine was immense – a joy I simply had to share with you all.
What I truly adore about this particular bread machine white bread recipe is its absolute simplicity and the ability to create a wholesome, delicious loaf entirely from scratch using basic pantry staples. There’s no need for those costly, pre-mixed bags. Over the years, I’ve experimented extensively to perfect a method that works without them, and I’m thrilled to confirm that this recipe performs flawlessly in any modern bread maker. Get ready to experience the incredible taste and convenience of homemade white bread – I know you’ll love it as much as my family does.
The Essential Bread Machine White Bread Recipe: Your Foundation for Delicious Baking
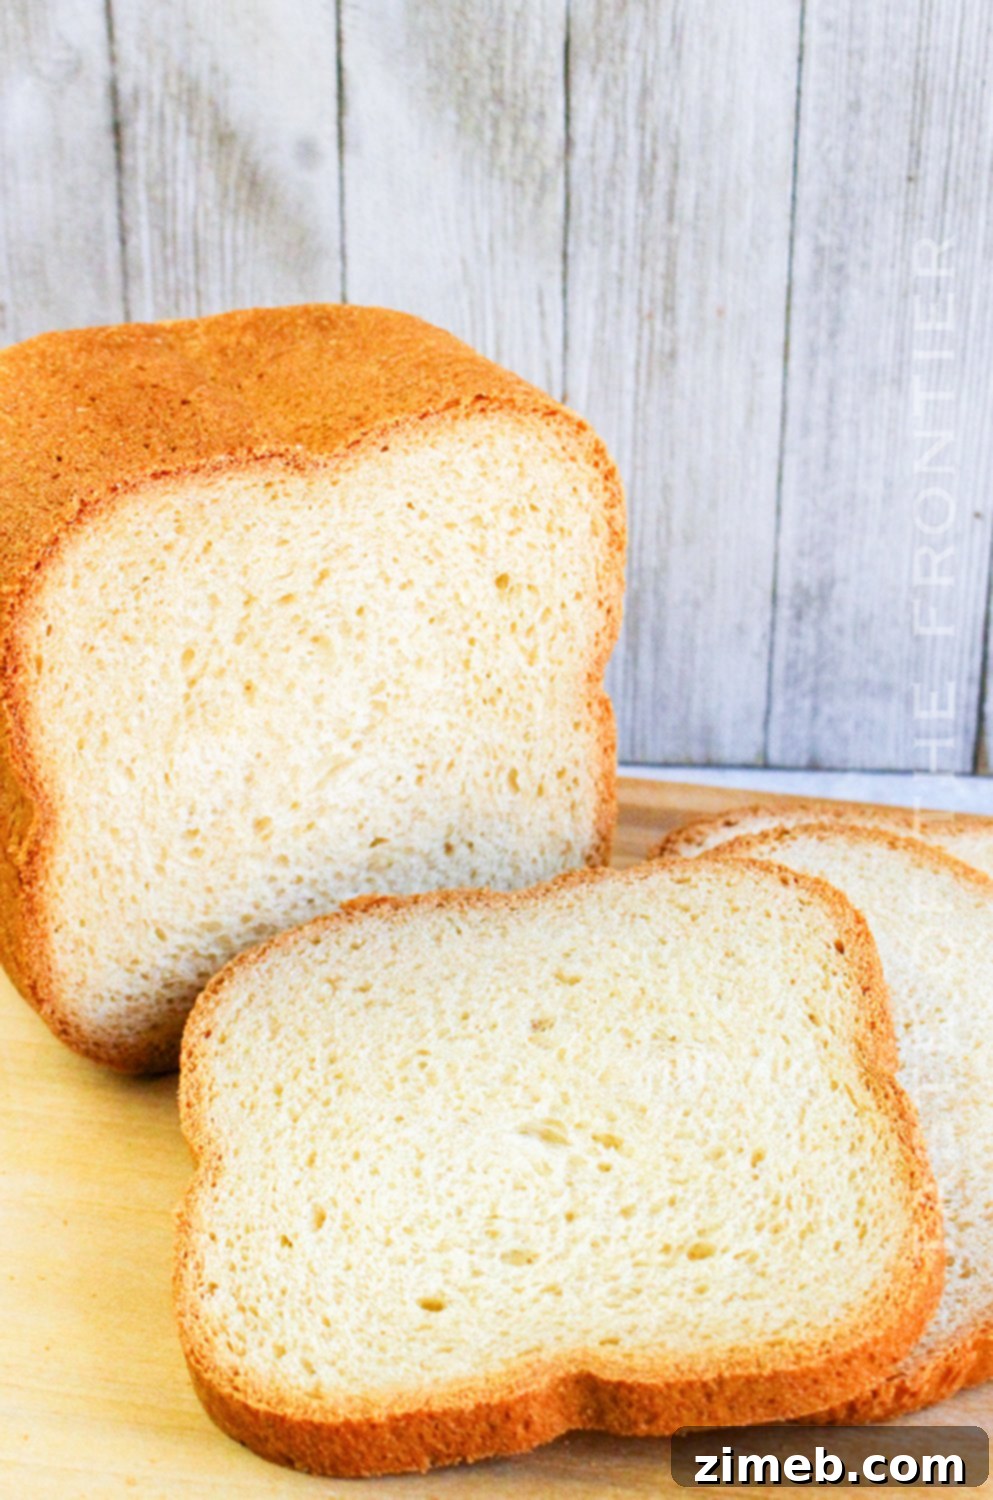
This bread machine white bread recipe stands as a pillar of homemade baking, offering a simple yet incredibly rewarding experience. It consistently produces a loaf that is light, airy, and boasts a delicate crumb, making it ideal for a multitude of uses. Whether you’re looking for the perfect base for your morning toast, a sturdy yet soft sandwich bread recipe, or a versatile side for any meal, this recipe delivers on all fronts. It’s a testament to how effortlessly you can achieve bakery-quality results right in your own kitchen.
The true genius of this recipe lies in its design for the bread machine. This appliance expertly handles all the heavy lifting – from the precise kneading to the controlled rising and the final baking – all with minimal intervention from you. This means less mess, less fuss, and more time to enjoy the delightful scent of fresh bread. The consistency and ease make this an ideal starting point for beginners, and a reliable favorite for seasoned bakers. Embrace the convenience and savor the superior taste of this easy white bread recipe.
Why a Bread Machine is a Game-Changer for Homemade Bread
For anyone debating the merits of a bread machine, allow me to sing its praises. Firstly, the sheer convenience is unparalleled. Imagine simply adding ingredients, pressing a button, and returning hours later to a perfectly baked loaf. No messy flour on the counter, no strenuous kneading by hand, and no constant vigilance over rising times. Secondly, bread machines offer incredible consistency. They provide an optimized environment for yeast activation and dough development, controlling temperature and humidity to ensure an ideal rise every single time. This consistency is particularly valuable for beginners who might find traditional bread making daunting.
Furthermore, making your own homemade white bread with a machine is surprisingly cost-effective in the long run. The ingredients are inexpensive, and you’ll quickly recoup the cost of the machine compared to regularly buying artisanal bread. Beyond savings, you gain complete control over what goes into your bread, ensuring it’s free from preservatives, artificial flavors, and unwanted additives. This makes it a healthier, more wholesome choice for your family. A bread machine truly simplifies the art of baking, making fresh, warm bread an accessible luxury.
Frequently Asked Questions About Baking Bread Machine White Bread
What Exactly is White Bread?
White bread is a beloved staple, often called a white loaf, sandwich loaf, or simply white bread. It’s characterized by its pale color and soft, tender texture, which differentiates it from “whole wheat” or “wheat” bread, typically made with coarser, whole grain flours. The primary flour used in white bread is refined wheat flour, meaning the bran and germ have been removed, resulting in a lighter texture and milder flavor.
The specific ingredients in a fluffy white bread machine recipe significantly impact its final characteristics. Our recipe thoughtfully combines sugar and the right amount of liquid to ensure a soft, moist crumb. Sugar also serves as essential food for the yeast, aiding in a beautiful rise and contributing to a golden-brown crust. Salt is not just for flavor; it’s a critical element that regulates yeast activity and strengthens the gluten structure. Finally, vegetable oil (or butter/shortening) adds a wonderful richness and contributes to the bread’s superior texture and mouthfeel, preventing it from drying out too quickly.
How to Turn All-Purpose Flour into Bread Flour for Baking
Understanding the nuances of flour types is key to successful bread making. Bread flour is celebrated for its higher protein content, typically ranging from 12% to 14%. This is notably higher than all-purpose flour, which usually falls between 8% and 11%. While this difference might seem minimal, it profoundly affects the gluten development in your dough. A higher protein level means more gluten, which translates to a stronger, more elastic dough capable of trapping more air, leading to a higher rise and a chewier, more structured crumb – exactly what you want for a robust bread maker white bread.
If you don’t have bread flour on hand, don’t fret! You can easily create a suitable substitute from all-purpose flour by adding vital wheat gluten. Here’s how to do it for a single cup of “bread flour”:
- 1 Cup All-Purpose Flour (minus 1 1/2 teaspoons)
- 1 1/2 teaspoons Vital Wheat Gluten
Simply whisk these two ingredients together thoroughly before incorporating them into your recipe. The vital wheat gluten effectively fortifies the all-purpose flour, boosting its gluten content to mimic bread flour and ensuring your white bread machine recipe yields a beautifully structured and satisfying loaf.
Mastering the Best White Bread Machine Recipe: Essential Tips
Can This Recipe Be Made with Only All-Purpose Flour?
Yes, absolutely! In most bread machine white bread recipes, all-purpose flour can be swapped with bread flour, and the results will still be quite similar and delicious. While bread flour is preferred due to its higher protein content, which fosters stronger gluten development, yielding a slightly chewier and taller loaf, all-purpose flour will still produce a good rise and a tender crumb. The main difference you might observe is that bread flour tends to help the dough hold its shape and rise straight up, whereas all-purpose flour might result in a loaf that spreads out a bit more during its final rise. For the best outcome when using all-purpose, consider the vital wheat gluten adjustment mentioned earlier.
Can I Use Gluten-Free Flour for This Bread Machine Recipe?
While I haven’t personally tested this easy white bread recipe with gluten-free flours yet, if you’re interested in attempting a gluten-free version, I would strongly recommend using a high-quality gluten-free all-purpose flour blend specifically designed for a 1:1 substitution in traditional recipes. These blends are formulated to mimic the structure and baking properties of wheat flour as closely as possible. Gluten-free baking can be a bit more nuanced, so precise measurements and a good blend are key. If you decide to give it a go, please let me know how it turns out! Your experience could be incredibly valuable to other readers looking for gluten-free options, and I’d love to share your insights.
Decoding the Ingredients for Your Best White Bread Machine Loaf
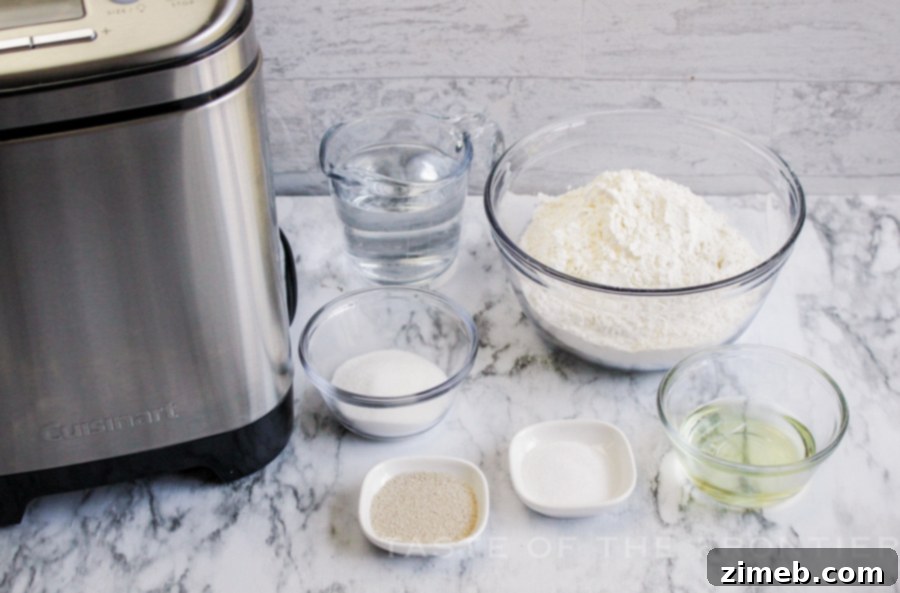
Essential Ingredients for Your Perfect Bread Machine White Bread
Crafting the perfect fluffy white bread machine recipe relies on understanding the role of each ingredient:
- Water: This must be warmed to precisely 110-115 degrees Fahrenheit. This temperature range is critical for activating the active dry yeast. Water that is too hot will kill the yeast, preventing any rise, while water that is too cold will cause the yeast to activate too slowly or not at all. A kitchen thermometer is your best friend here.
- Granulated Sugar: More than just a sweetener, sugar provides vital fuel for the yeast, encouraging it to produce the carbon dioxide bubbles that give bread its airy texture. It also contributes significantly to the tenderness of the crumb and helps achieve that beautiful golden-brown crust.
- Table Salt: Salt is indispensable for both flavor and function. It enhances the overall taste of the bread and, crucially, helps to regulate the yeast’s activity, preventing the dough from over-proofing and collapsing. It also plays a role in strengthening the gluten structure.
- Vegetable Oil: The addition of oil (or melted butter or shortening) imparts a wonderful richness and moistness to the bread. It contributes to a softer crumb, prevents the bread from drying out too quickly, and can extend its shelf life.
- Bread Flour: This is the workhorse of our recipe. Its higher protein content (compared to all-purpose flour) means stronger gluten development, which is essential for trapping gas bubbles, resulting in a well-structured, chewy, and high-rising loaf.
- Active Dry Yeast: This is the living leavening agent that makes your bread rise. Ensure your yeast is fresh and stored correctly to guarantee optimal activity. A standard packet typically contains 2 1/4 teaspoons, which is the perfect amount for this recipe.
My Dough Didn’t Rise – What Happened?
A dough that fails to rise is one of the most common and frustrating issues for home bakers, and it almost always points to problems with your yeast. The primary culprit is often the water temperature used to activate it. If the water is too hot (above 130°F), it will destroy the delicate yeast organisms, rendering them ineffective. Conversely, if the water is too cold (below 105°F), the yeast will not activate sufficiently, leading to a very sluggish or non-existent rise. For the most reliable results, aim for a water temperature between 115-125 degrees Fahrenheit (46-52°C). Investing in a reliable kitchen thermometer will eliminate this guesswork. Additionally, always check the expiration date on your yeast; old or improperly stored yeast can lose its potency.
Crafting Your Perfect Loaf: The Bread Machine White Bread Recipe Guide
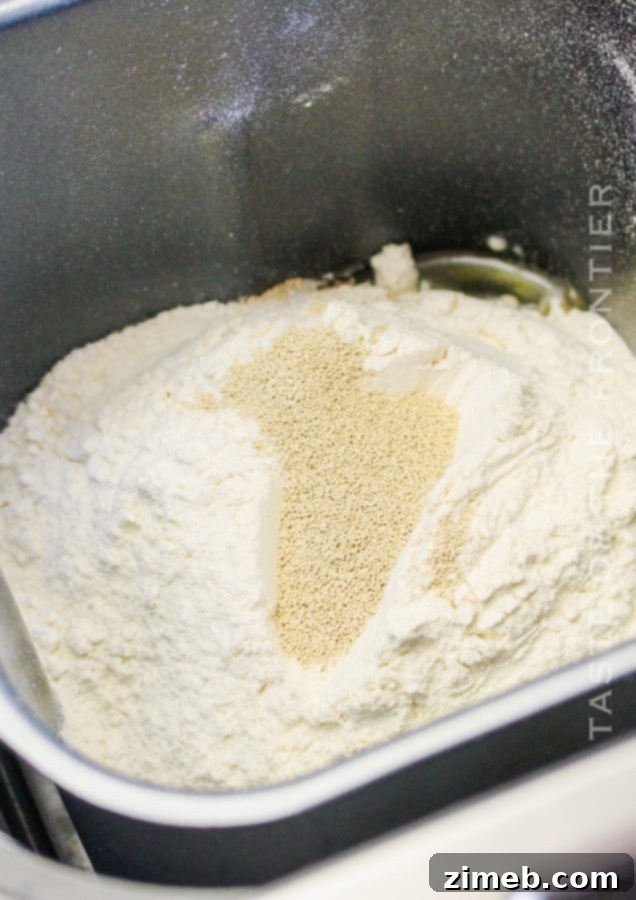
Step-by-Step Instructions: How to Make Bread Machine White Bread
- Add Ingredients: Carefully measure and place all ingredients into your bread machine pan in the exact order specified: first the water, then sugar, salt, oil, followed by the bread flour, and finally, the active dry yeast. Placing the yeast last helps prevent it from prematurely activating or coming into direct contact with salt, which can inhibit its activity.
To Bake Completely in the Bread Machine:
- Select Cycle: Close the lid and program your bread machine using the “white bread” cycle. If your machine doesn’t have a specific “white bread” setting, the “basic” or “light” cycle will usually work perfectly. Start the machine.
- Kneading Paddle Removal (Optional): Some bread machines offer a “paddle signal” during the kneading phase. If your machine has this feature and you wish to avoid a hole in the bottom of your finished loaf, you can pause the machine when the signal sounds. Carefully remove the dough, extract the kneading paddle, gently reshape the dough into a neat loaf, and place it back into the bread pan to allow the baking process to continue.
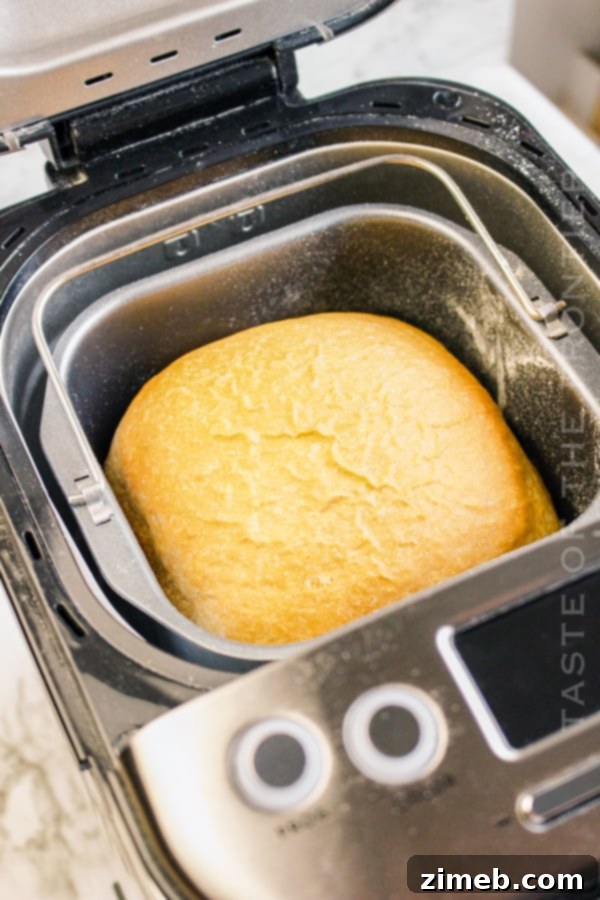
- Cooling: Once the baking cycle is complete and your bread machine white bread is golden brown, carefully remove the bread pan from the machine. Allow the loaf to cool in the pan for about ten minutes. This helps the bread set. Then, carefully invert the pan to release the loaf onto a wire rack. It is crucial to let the bread cool completely on the rack before slicing. This process allows steam to escape, preventing a gummy texture and ensuring a perfectly crisp crust and tender interior.
If Making Regular Loaves or Rolls (for Oven Baking):
- Dough Cycle: Program your bread machine to use the “dough” cycle. This cycle typically includes kneading and the first rise. Always refer to your bread machine’s instruction manual for specific guidance on its dough cycle.
- Punch Down and Prep: Once the dough cycle is complete, carefully remove the dough from the machine and gently punch it down to release any accumulated gases. Turn the dough out onto a lightly floured surface.
- Shape: Divide the dough into two equal portions if you’re making two standard loaves. Alternatively, divide it into twelve smaller portions to create delicious dinner rolls.
- Second Rise & Bake: Place the shaped loaves into greased bread loaf pans, or arrange the rolls in a greased casserole dish. Cover them loosely with plastic wrap or a clean kitchen towel and allow them to rise in a warm, draft-free location until they have visibly doubled in size, which usually takes approximately 1 hour. While the dough is rising, preheat your conventional oven to 350 degrees Fahrenheit (175 degrees Celsius). Bake the loaves or rolls for 20 to 24 minutes, or until they are golden brown on top and sound hollow when tapped.
How Do I Properly Measure Flour for Bread Baking?
Accurate flour measurement is a cornerstone of successful bread baking, and it’s particularly important for achieving the right consistency in your bread maker white bread. The most widely recommended and precise method for measuring flour is the “spoon and level” technique. To do this, gently spoon the flour from its container into your dry measuring cup until it overflows slightly. Then, use the straight edge of a knife or a similar utensil to level off the excess flour, ensuring a flat surface. Avoid directly scooping the flour with the measuring cup from the bag, as this compresses the flour, often resulting in up to 25% more flour than intended. Adding too much flour can lead to a dense, dry, and heavy dough that struggles to rise, ultimately yielding a tough and crumbly loaf.
Maximizing Freshness: Storing Your Bread Maker White Bread
What is the Best Way to Store Leftover White Bread?
Once your homemade white bread has completely cooled, proper storage is paramount to maintaining its freshness and delightful texture. Just like commercial bread, your bread machine white bread will benefit greatly from being stored in an airtight environment. This could be a dedicated bread box, an airtight container, or a trusty zip-top bag. The goal is to minimize air exposure, which is the primary cause of bread drying out and becoming stale.
In certain climates, such as the arid desert environment where I once resided, refrigeration was essential to combat the extremely low humidity and prevent the bread from drying out almost instantly. Now, living in a more humid climate, I still opt to refrigerate our bread. This practice effectively slows down mold growth and provides a more controlled environment, further extending its palatable life. While refrigeration can sometimes slightly alter the texture of bread, making it a little firmer, the benefit of extended freshness often outweighs this minor change, especially if you plan to enjoy the loaf over several days.
Can the Baked Bread Be Frozen for Longer Storage?
Absolutely! Freezing is an excellent and highly recommended method for preserving your baked bread machine white bread for longer periods. To ensure optimal freshness and prevent freezer burn, follow these simple steps: once your loaf has cooled completely to room temperature after baking, wrap it tightly in at least one layer of plastic wrap, making sure to eliminate any air pockets. For extra protection, place the plastic-wrapped loaf into a freezer-safe zip-top bag or an additional layer of aluminum foil. Properly frozen, your bread will maintain its quality for up to three months. When you’re ready to enjoy it, simply thaw it at room temperature or warm slices gently in a toaster or oven. Please note that I have not experimented with freezing raw bread dough for later baking, so I cannot provide accurate guidance on that particular method.
The Ultimate White Bread Recipe for Your Bread Maker
IMPORTANT NOTE: It is crucial to remember that bread machine manufacturers and models vary significantly. Different machines will have unique program timings for their cycles (e.g., “white bread,” “basic,” “dough”). Furthermore, the baking times will differ based on the size of the loaf you are making – a 1-pound loaf will not have the same cooking time as a 2-pound or 3-pound loaf. Always consult and follow the instruction manual that came with your specific bread machine for the most accurate and best results, using the times listed in this recipe as general guidelines.
Why is My Cooked Dough Dense Instead of Fluffy? Troubleshooting Your Bread Machine Loaf
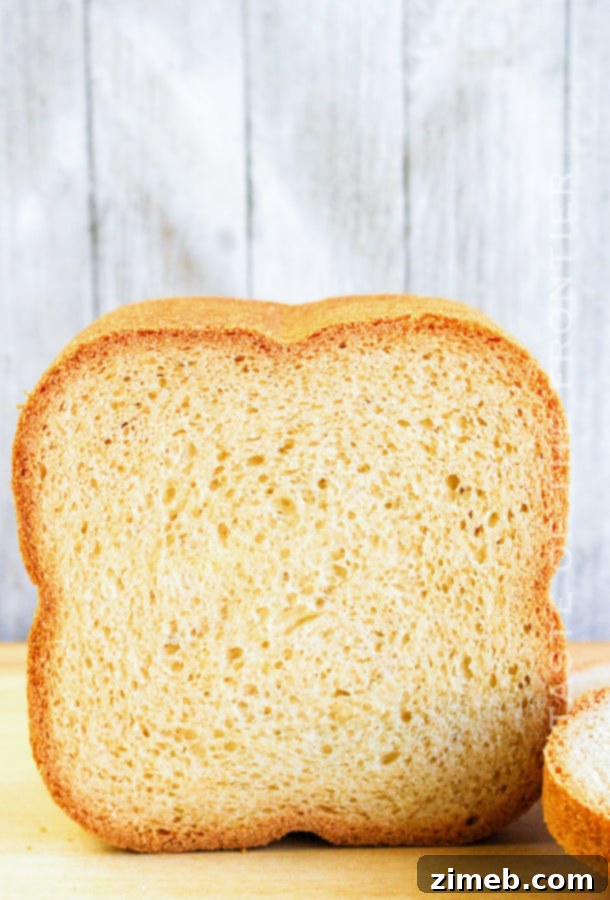
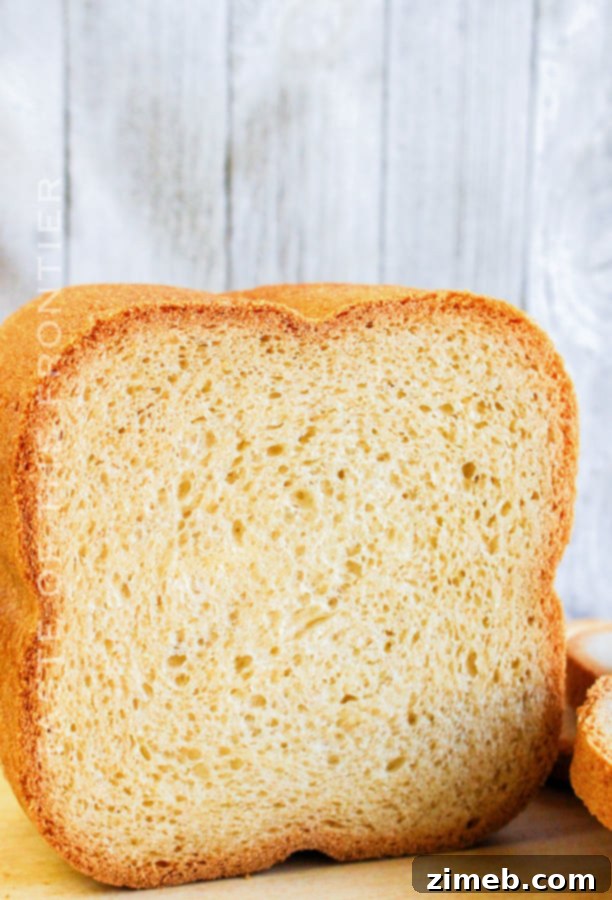
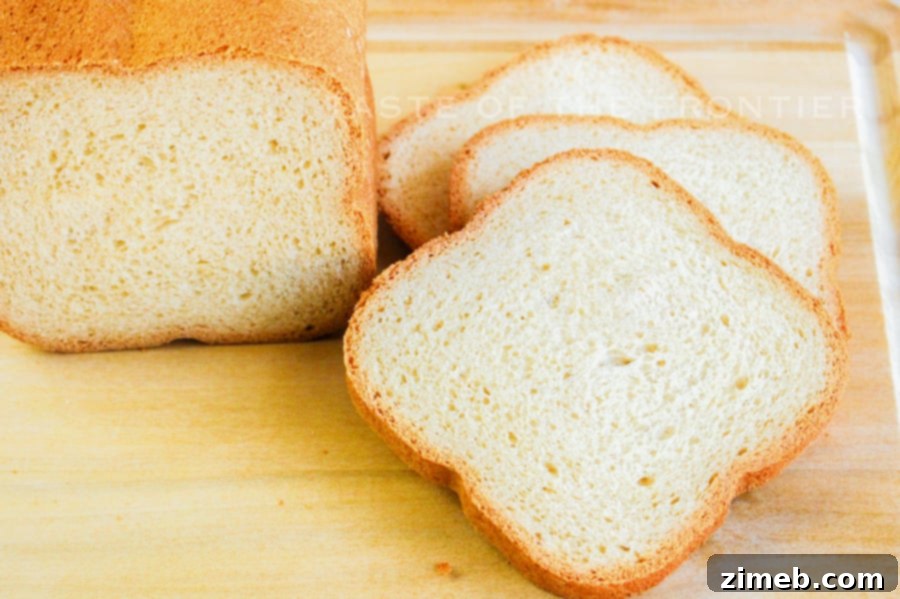
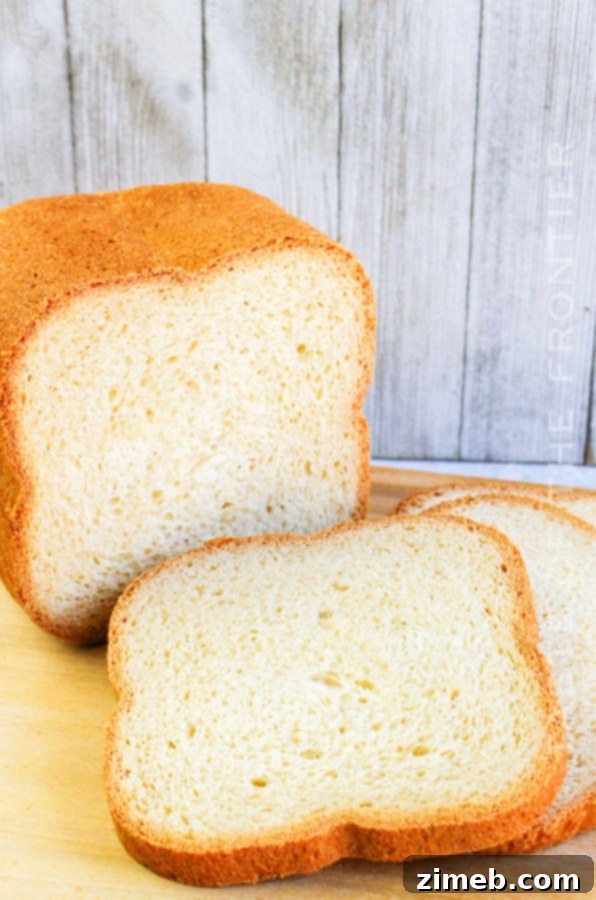
Your bread machine white bread should consistently turn out beautifully light and delightfully fluffy, echoing the images you see here. If you find that your dough isn’t rising adequately or your finished loaf is dense and heavy, here are the most common reasons and effective solutions:
- Kneading: The good news about using a bread machine is that it automates the kneading process, ensuring the dough receives the precise amount of work needed for gluten development. Therefore, issues related to under-kneading are rare when using the correct bread machine cycle.
- Yeast Activity is Key: This is by far the most frequent culprit behind a dense loaf.
- Expired Yeast: Always double-check the expiration date on your yeast package. Yeast is a living organism, and old or inactive yeast simply won’t produce the necessary gases for rising.
- Incorrect Water Temperature: As previously emphasized, water temperature is critical. If your water is too hot, it will kill the yeast. If it’s too cold, the yeast will be sluggish and won’t activate effectively. Aim for a temperature range of 115-125°F (46-52°C) for optimal yeast activity.
- Too Much Flour: It’s a common inclination to add more flour if the dough appears sticky during the initial mixing phase. However, adding excess flour is a sure way to end up with a dense loaf. Too much flour makes the dough stiff, hindering its ability to rise and expand properly. Always ensure you are measuring your flour accurately using the “spoon and level” method, rather than scooping directly from the bag.
- Environmental Factors: While the bread machine largely controls the environment, extreme room temperatures or very low humidity can sometimes slightly affect dough consistency.
Achieving the Perfect Fluffy White Bread Machine Loaf Every Time
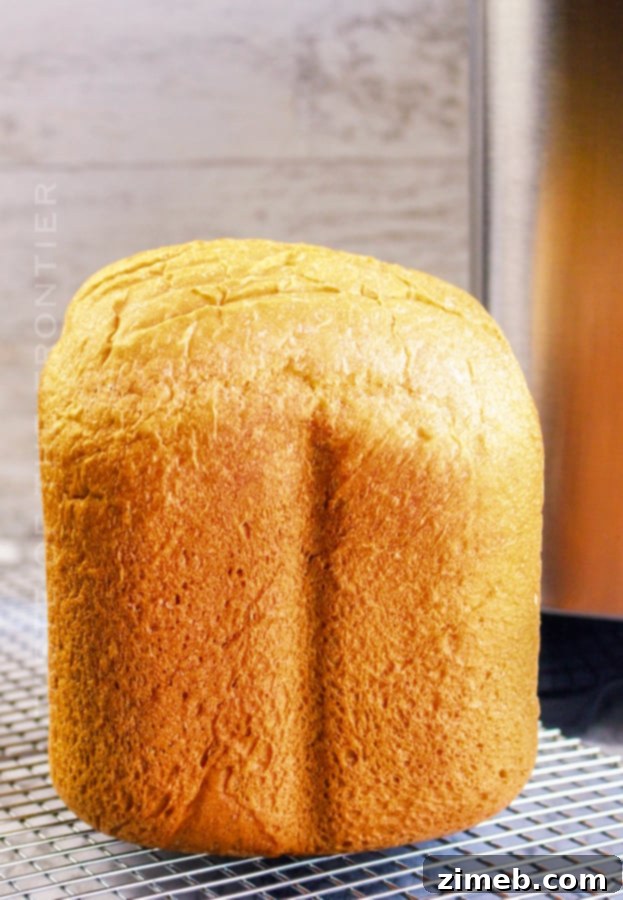
What is the Best Type of Yeast for This Bread Machine Recipe?
For this fluffy white bread machine recipe, you have excellent flexibility when it comes to yeast types. You can successfully use rapid rise yeast, premium instant yeast, or standard active dry yeast. All three varieties will work well, provided they are fresh and active. I often purchase my yeast in bulk from my local store, which isn’t a particular brand-name or anything exceptionally fancy, yet it consistently yields fantastic results. The most crucial factor is ensuring the yeast is not expired and has been stored in a cool, dry place to maintain its leavening power. If your yeast is old or has been exposed to too much air or moisture, its effectiveness will be diminished, directly impacting your bread’s ability to rise beautifully.
Can This Bread Machine Recipe Be Doubled?
Directly doubling this bread machine recipe to bake two loaves simultaneously in a single bread machine is not advisable, as most machines are designed to produce one loaf at a time to ensure proper mixing, kneading, and rising within the confined bread pan. However, if you wish to make more than one loaf, you can certainly run the dough cycle consecutively. Make one batch of dough, remove it, and then immediately prepare and run a second batch. Once both batches of dough have completed their cycles in the bread machine, you can then proceed to shape them into multiple loaves or rolls and bake them together in your conventional oven, following the “If making regular loaves or rolls” instructions provided in the recipe below. This method allows for efficient production of multiple fresh loaves.
Versatile and Delicious: Your Homemade Bread Machine White Bread
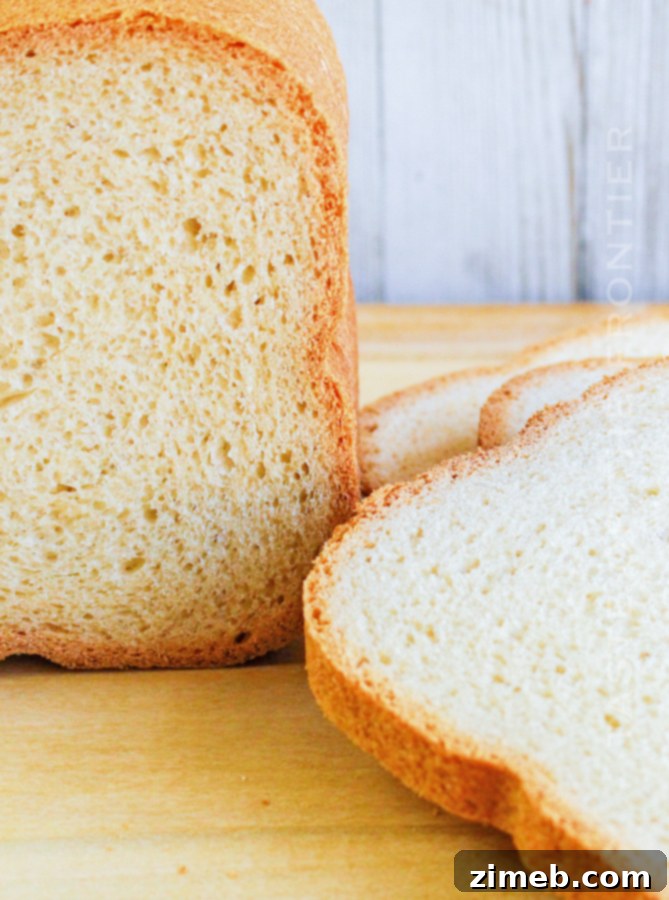
Recommended Products for Perfect Bread Machine Baking
Making this easy white bread recipe is truly a rewarding experience. Whether you’re a seasoned baker who already has these tools, or a nervous beginner taking your first steps into homemade bread, you are going to be absolutely delighted with the results. To ensure your success and enhance your bread-making journey, I’ve compiled a list of essential items that I simply can’t live without when crafting this bread machine recipe.
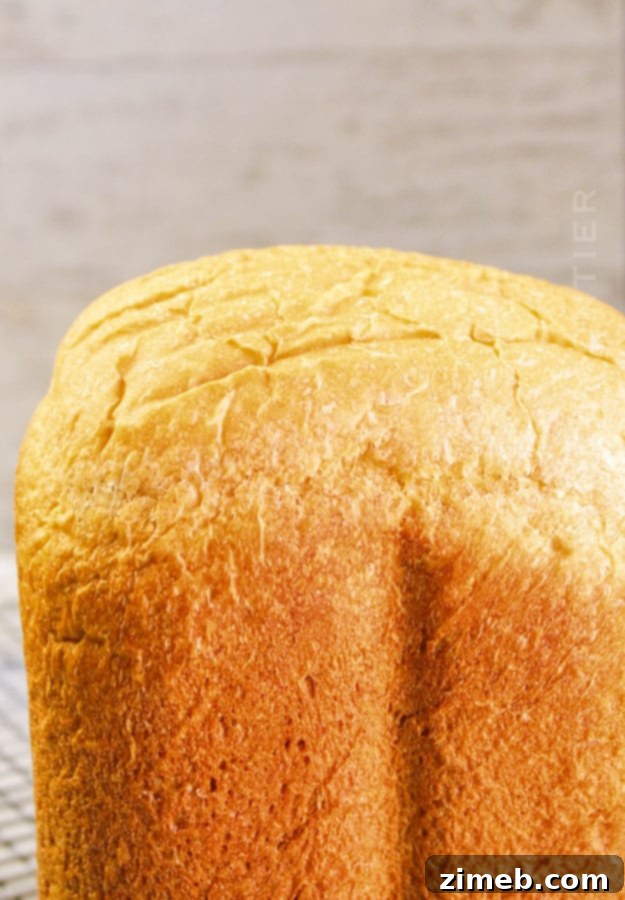
If you adore this easy white bread recipe, you’ll undoubtedly appreciate these other fantastic bread recipes too. Click each link below to discover the simple, printable recipes!
One Hour Disappearing Fat Rolls
Loaded with bacon crumbles, cheddar cheese, and ranch seasoning, these One Hour Disappearing Fat Rolls take dinner rolls to a whole new level.
Check out this recipe
Easy Buttermilk Biscuits
Easy Buttermilk Biscuits are fluffy, tender, flaky, perfect with butter and honey or jam. A deliciously simple dinner and holiday side dish.
Check out this recipe

Incredibly Easy Crusty Artisan Bread
Incredibly Easy Crusty Artisan Bread is a simple, 4-ingredient homemade dutch oven bread recipe that is absolutely foolproof. Perfect alongside every meal. Pair with a delicious cinnamon spreadable honey & it’s pure heaven.
Check out this recipe

Easy Banana Bread
This Easy Banana Bread recipe will be the simplest homemade breakfast recipe you’ll ever make. Just dump, mix & bake for moist, delicious banana bread.
Check out this recipe
Garlic Parmesan Pull Apart Biscuits
Refrigerator biscuits, Italian garlic butter & Parmesan cheese make these Garlic Parmesan Pull Apart Biscuits. A simple side with easy family dinner ideas.
Check out this recipe

20-Minute Cheddar Biscuits
20-Minute Cheddar Biscuits are the perfect side dish. You can’t beat this copycat red lobster biscuit recipe that’s ready in about 20 minutes.
Check out this recipe

Homemade French Bread
Homemade French Bread doesn’t get any easier than this. The perfect golden crust on the outside & soft & chewy on the inside, and the best part is that it is ready in just about an hour. You can’t help but fall in love.
Check out this recipe
Crazy Bread – Copycat Recipe
If you’ve enjoyed making this delicious homemade white bread using your bread machine as much as I have, I would be incredibly grateful if you could take a moment to leave a five-star review below. Your feedback truly helps, and please consider sharing this recipe with friends and family on Facebook and Pinterest to spread the joy of fresh, homemade bread!
CONNECT WITH YUMMI HAUS!
Stay updated with all our latest recipes, tips, and culinary adventures by following us on social media:
Substack, Facebook, Pinterest, Instagram, Email Subscription
Bread Machine White Bread
Course: Breakfast, Side Dish
Servings: 1 loaf
This versatile, light, and fluffy white bread is made in a bread machine and tastes great with butter and jam for breakfast or served with soup for lunch. Try it dipped in olive oil and balsamic vinegar to serve with dinner.
Pin Recipe
Save Recipe
Prep Time: 5 mins
Cook Time: 45 mins
Cycle Time (Proofing/Rising): 1 hr 30 mins
Total Time: 2 hrs 20 mins
Ingredients
- 1 cup water, warmed to 110-115 degrees F (essential for yeast activation)
- 3 tablespoons granulated sugar
- 1 ½ teaspoons table salt
- 3 tablespoons vegetable oil (or melted butter/shortening for richer flavor)
- 3 cups bread flour (or all-purpose flour + vital wheat gluten, see “How to Turn All-Purpose Flour into Bread Flour” section)
- 2 ¼ teaspoons active dry yeast (typically one standard packet)
Instructions
- Prepare Ingredients: Carefully add all ingredients to your bread machine pan in the exact order listed above: water, sugar, salt, oil, bread flour, and finally, yeast. Ensure the yeast does not come into direct contact with salt or water until the machine begins mixing, to prevent premature activation or inhibition.
To Bake Completely in the Bread Machine:
- Select Cycle: Close the lid and program your bread machine for the “white bread” cycle (or “basic” cycle if a “white bread” option isn’t available). Start the machine.
- Kneading Paddle Removal (Optional): If your bread machine signals during the kneading process (check your manual), you may pause it, carefully remove the dough, extract the kneading paddle, gently reshape the dough into a neat loaf, and return it to the pan. This step helps prevent a hole from being left in the bottom of your finished loaf.
- Cooling: Once the baking cycle is complete and your bread is golden brown, promptly remove the bread pan from the machine. Allow the loaf to cool in the pan for 10 minutes. This crucial step helps the bread set. Then, carefully invert the pan to release the loaf onto a wire rack. Let it cool completely on the rack before slicing; this allows steam to escape, preventing a gummy texture and ensuring a perfectly crisp crust and tender interior.
If Making Regular Loaves or Rolls (for Oven Baking):
- Dough Cycle: Program your bread machine to use the “dough” cycle. This will complete the kneading and the first rise. Always refer to your bread machine’s instruction manual for specific guidance on its dough cycle.
- Punch Down and Prep: Once the dough cycle is finished, carefully remove the dough from the machine and gently punch it down to release any accumulated gases. Turn the dough out onto a lightly floured work surface.
- Shape: Divide the dough into two equal portions if you’re making two standard loaves. Alternatively, divide it into twelve smaller portions to create delicious dinner rolls.
- Second Rise & Bake: Place the shaped loaves into greased bread loaf pans, or arrange the rolls in a greased casserole dish. Cover them loosely with plastic wrap or a clean kitchen towel and allow them to rise in a warm, draft-free location until they have visibly doubled in size (approximately 1 hour). While the dough is rising, preheat your conventional oven to 350°F (175°C). Bake the loaves or rolls for 20 to 24 minutes, or until they are golden brown on top and sound hollow when tapped.
Notes
This recipe yields approximately 1 bread machine loaf, or can be divided to make 2 regular oven-baked loaves, or 12 delicious rolls.
IMPORTANT NOTE: Bread machine models and manufacturers vary significantly in their program times and loaf size capacities. For instance, a 1-pound loaf will require different cooking and rising times compared to a 2-pound or 3-pound loaf. Always consult and follow the instruction manual specific to your bread machine for the most accurate and best results.
Equipment
- Bread Machine
- Kitchen Thermometer (highly recommended for accurate water temperature)
- Measuring Cups and Spoons
- Wire Cooling Rack
- (Optional for oven baking: Loaf Pans or Casserole Dish)
Nutritional information for this recipe is provided as a courtesy and is an approximate estimate. For precise dietary values, please verify with your preferred nutritional calculator. Yummi Haus cannot guarantee the exact accuracy of nutritional information provided on this site.
Love this recipe?
Follow @KleinworthCo for even more tasty recipes!