
*Disclosure: Sponsored Post- I have been compensated for this post either monetarily or with product. All opinions are truthful & my own.
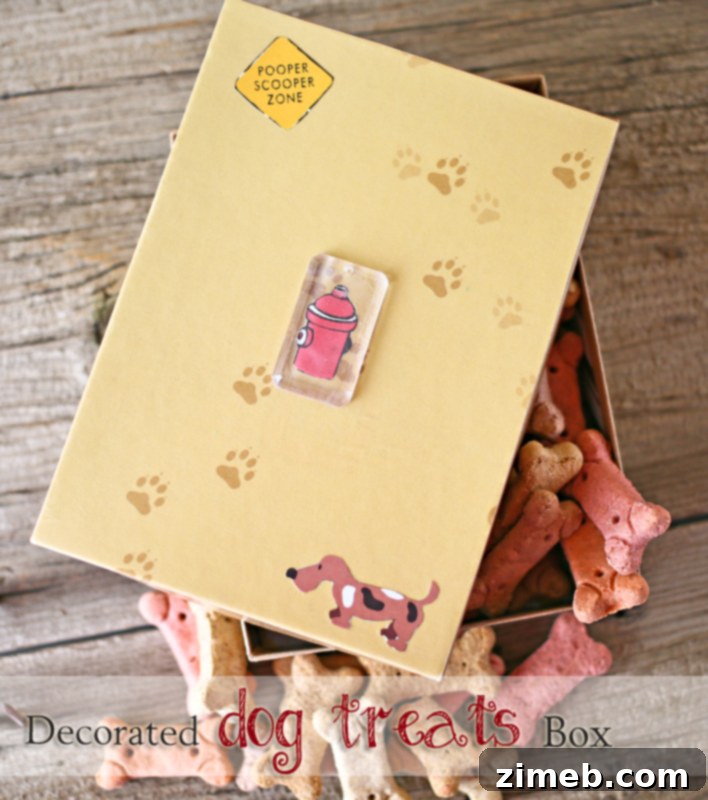
As the calendar flips to a new year, there’s an undeniable energy that encourages fresh starts and renewed organization. January often marks a universal inclination towards decluttering, both physically within our homes and mentally within our minds. Like many, I find immense satisfaction in embracing this “out with the old, in with the new” philosophy. This year, one particular area that caught my attention was the rather uninspired way we stored our furry friend’s treats. My kids, always eager to infuse a touch of cuteness into everything, suggested we create something special for our beloved dog. This led us to explore some fantastic new products from Mod Podge, allowing us to unleash our creativity and craft a delightful solution. I handed over the creative reins to the kids for this project, letting them lead the design decisions. While my crafting to-do list is extensive, this charming dog treat box was the perfect first project to tackle with Mod Podge.
Crafting a Custom & Adorable Dog Treat Box with Mod Podge
Creating a dedicated, charming, and organized space for your pet’s treats doesn’t just look good; it adds a touch of joy to daily routines. Instead of generic bags or bland containers, a custom-decorated box becomes a small piece of functional art in your home. This project is not only incredibly simple but also offers a wonderful opportunity for family bonding, allowing children to participate in a hands-on activity that results in a practical item for their cherished pet. We transformed an ordinary box into something truly special, a container that brings a smile to our faces every time we reach for a treat.
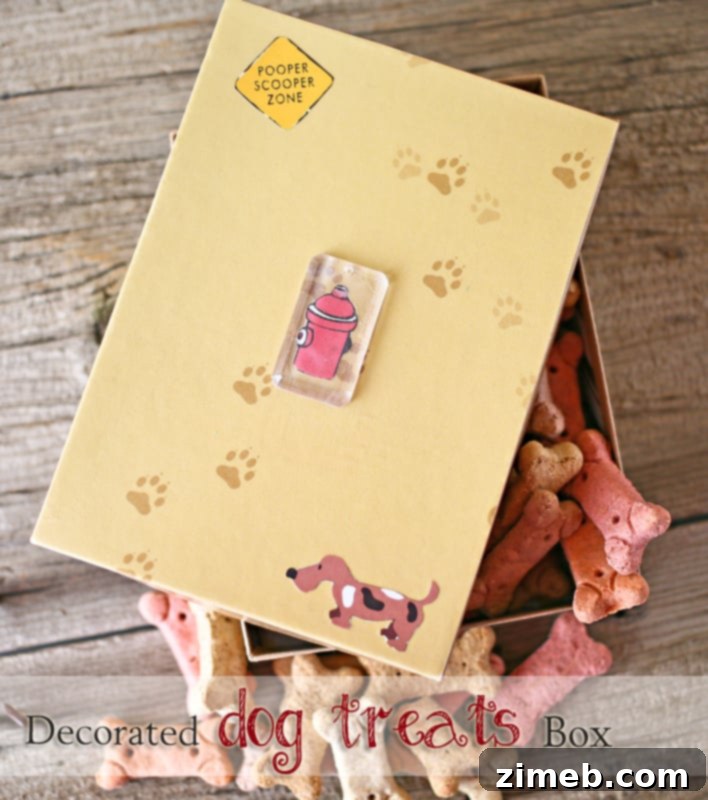
The finished product is absolutely adorable, and the process was surprisingly straightforward. Let me guide you through each step of this fun and rewarding DIY endeavor.
Why Choose DIY Pet Treat Storage?
Beyond the aesthetic appeal, there are numerous benefits to crafting your own pet treat container. Firstly, it allows for complete personalization. You can match your home decor, incorporate your pet’s personality, or simply choose designs that bring you joy. Secondly, it’s a fantastic way to involve children in a meaningful craft project. They learn about design, problem-solving, and the satisfaction of creating something with their own hands. Thirdly, repurposing an old box or container is an eco-friendly choice, giving new life to items that might otherwise be discarded. Finally, a well-sealed, custom box can help keep treats fresher for longer, and the clear separation from human snacks ensures your pet always gets their designated goodies.
Essential Mod Podge Products and Crafting Supplies
Before diving into any craft project, proper preparation is key. I like to lay out all potential supplies, even if I’m not entirely sure I’ll use them all. This allows for flexibility and spontaneous creative changes, which often lead to the most unique outcomes. Here’s a detailed look at the materials we started with, highlighting their specific roles in this project and future creative endeavors:
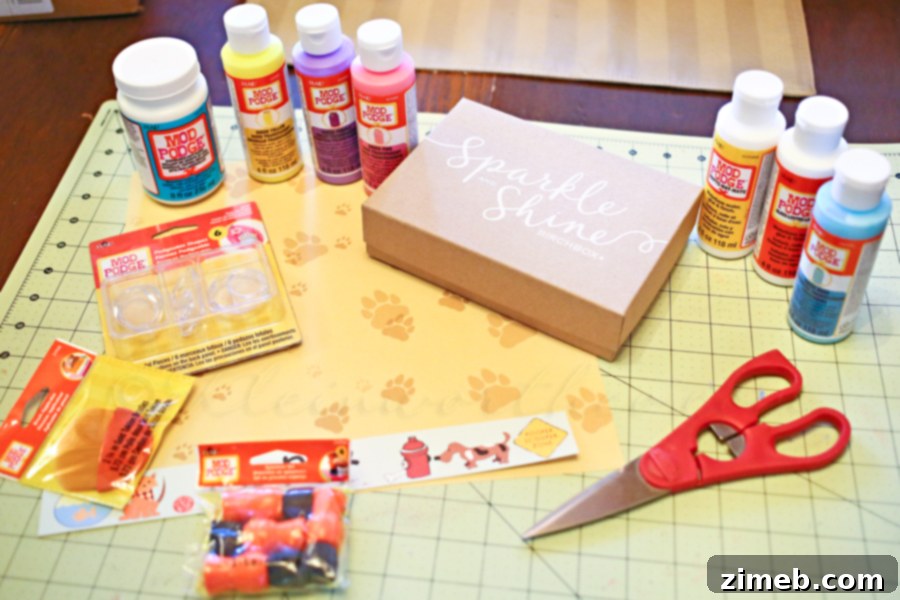
Our Crafting Arsenal:
- Mod Podge Dishwasher Safe Gloss: While not used in this specific project, this is a revolutionary product perfect for items that need frequent cleaning. It offers a durable, top-rack dishwasher-safe finish, making it ideal for custom mugs, glassware, or outdoor decorative pieces. I’m excited to incorporate this into several upcoming craft ideas.
- Mod Podge Sheer Colors (Yellow, Purple, Pink & Blue): These new, transparent color mediums launched recently and are incredibly versatile. Available in nine vibrant shades, they work beautifully on glass, wood, metal, and more, adding a translucent tint. We initially experimented with the blue on a different box (more on that later!), but their true potential lies in tinting jars, creating stained-glass effects, or adding a subtle wash of color to various surfaces. I’m eagerly anticipating using these for many innovative projects.
- Mod Podge Facet Shapes: These pre-cut, dimensional embellishments are fantastic for adding instant visual interest. We chose a charming fire hydrant shape for our dog treat box, but the variety of designs makes them suitable for jewelry making, card embellishments, or mixed media art.
- Mod Podge Stampers: A useful tool for applying Mod Podge or other mediums, ensuring an even coat and smooth finish.
- Mod Podge Brush: Essential for applying Mod Podge smoothly and evenly across larger surfaces.
- Mod Podge Matte Finish: Provides a non-glossy, subtle finish, perfect for areas where you want a more understated look or to protect delicate papers without adding shine.
- Mod Podge Gloss Finish: Delivers a shiny, protective topcoat that enhances colors and adds a polished look. This is excellent for projects that need extra durability and a vibrant sheen.
- Scissors: For precise cutting of scrapbook paper and other embellishments.
- Scrapbook Paper: The decorative element that allows for endless customization. Choose patterns and colors that reflect your style or theme.
- Protective Mat: Absolutely crucial when working with adhesives and paints, especially if you’re like me and often craft on valuable surfaces, such as an antique table.
- An Empty Box: The foundation of our project. Any sturdy cardboard, wood, or plastic box can be transformed.
- Gift Card or Old Credit Card: An excellent tool for smoothing out paper and removing air bubbles, ensuring a flawless finish.
Discover the Versatility of Mod Podge Sheer Colors and Dishwasher Safe Formula!
It’s worth highlighting some of Mod Podge’s most exciting new additions. Mod Podge Sheer Colors, which just launched this month (January 2014), are truly game-changers for crafters. Available in a spectrum of nine transparent hues, these versatile colors can transform ordinary objects into vibrant works of art. They adhere beautifully to a wide array of surfaces including glass, wood, and metal, making them perfect for decorative tinting or creating translucent layers. Imagine custom-tinted mason jars or beautifully colored wooden accents!
Equally impressive is the new Mod Podge Dishwasher Safe formula, also hitting shelves this month. This innovative product provides a durable, waterproof finish that is safe for the top rack of your dishwasher, making it ideal for functional items like mugs, plates, or outdoor decor that require regular cleaning. Its resilience means your personalized creations can be used and enjoyed without fear of damage. I am incredibly eager to dive deeper into projects utilizing both of these fantastic new Mod Podge innovations in the coming weeks and explore their full creative potential.
Don’t miss these insightful tutorial videos from Plaid to get started:
How to Tint Glass with Mod Podge Sheer Colors
Learn How to Use Mod Podge Sheer Colors
Step-by-Step Guide: Crafting Your Custom Dog Treat Box
1. Preparing Your Decorative Paper
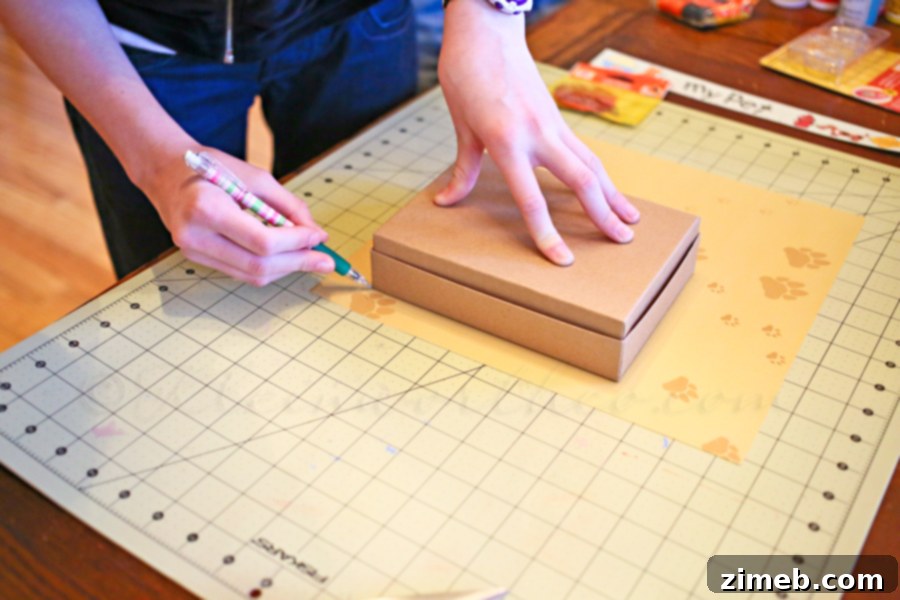
The first step in transforming our plain box was to cover its lid with beautiful scrapbook paper. We carefully placed the lid onto our chosen paper and traced its outline with a pencil. This ensures a precise fit and a clean, professional edge once adhered. Taking your time during this initial tracing and cutting phase will make a significant difference in the final appearance of your decorated box.
2. Embellishing with Facet Shapes
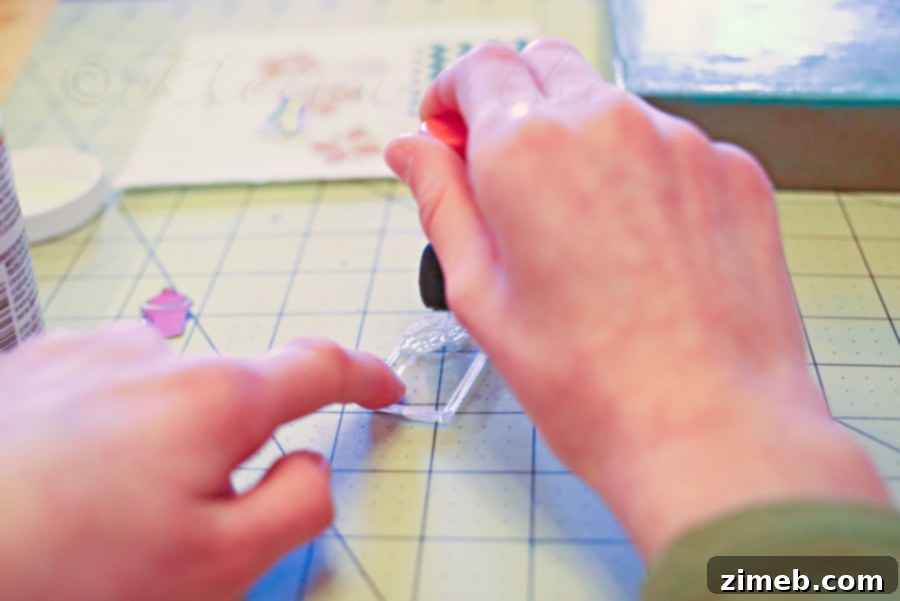
The kids were keen on adding a special touch with one of the Mod Podge Facet Shapes. Our “munchkin” immediately gravitated towards the adorable fire hydrant design, perfectly fitting our dog treat theme. To secure it, she applied a small amount of Mod Podge Gloss to the back of the facet shape. This acts as a strong adhesive, ensuring the embellishment stays firmly in place. Once applied, we carefully positioned the fire hydrant cutout onto our desired spot on the lid, pressing it down gently to ensure good contact.
3. Adhering the Scrapbook Paper to the Lid
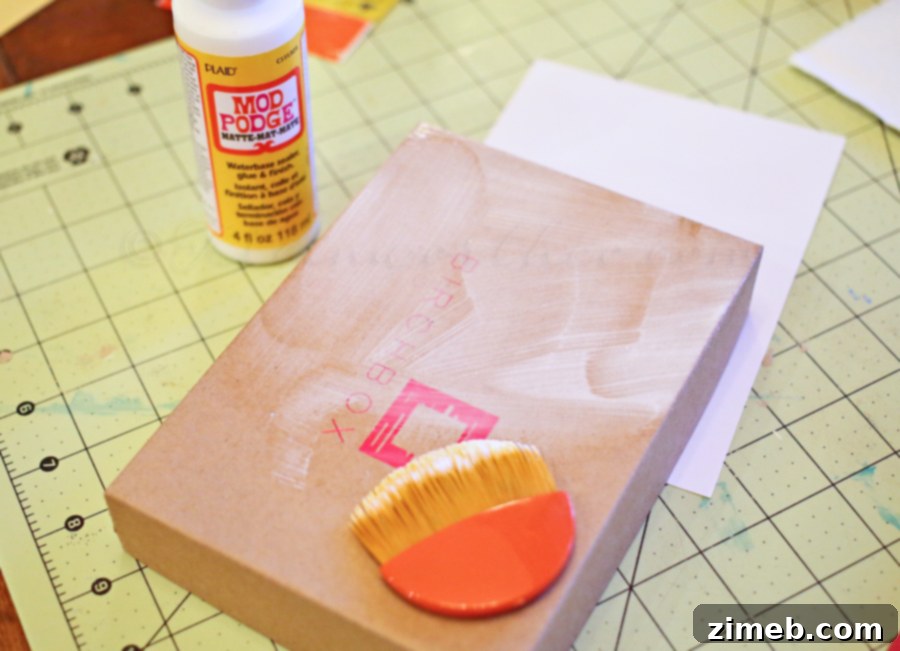
With the facet shape ready, it was time to attach the scrapbook paper to the lid. I applied a generous, even coat of Mod Podge Matte finish directly onto the surface of the box lid. It’s important to achieve good coverage without excessive pooling. Then, I carefully positioned our pre-cut piece of scrapbook paper on top of the wet Mod Podge. To eliminate any air bubbles and ensure a perfectly smooth, flat surface, I used an old gift card (or a credit card) to gently but firmly smooth out the paper from the center outwards. This technique is invaluable for achieving a professional finish without wrinkles or trapped air. After the paper was smooth and securely in place, I applied another top coat of Mod Podge over the entire surface of the paper. This seals the paper, protects it from wear, and creates a durable finish.
A Learning Moment: During this project, we actually started with a different box. The kids initially insisted on using the Mod Podge Sheer Color in blue directly on a brown box. While the Sheer Colors provide a beautiful glossy finish, applying blue over a dark brown surface resulted in a muddy, less vibrant outcome than anticipated. If the box had been white, the blue would likely have popped beautifully. This experience highlighted the importance of considering the base color when working with translucent mediums. I had to step in and adjust our approach, switching to the scrapbook paper method for a more successful result. This moment perfectly illustrates the need for flexibility in crafting and having alternative supplies ready for “on-the-fly” changes. I still adore the potential of the Sheer Colors’ glossy blue finish and am eager to try them again on a more suitable, lighter surface in a future project, so stay tuned for that!
4. Positioning Additional Embellishments
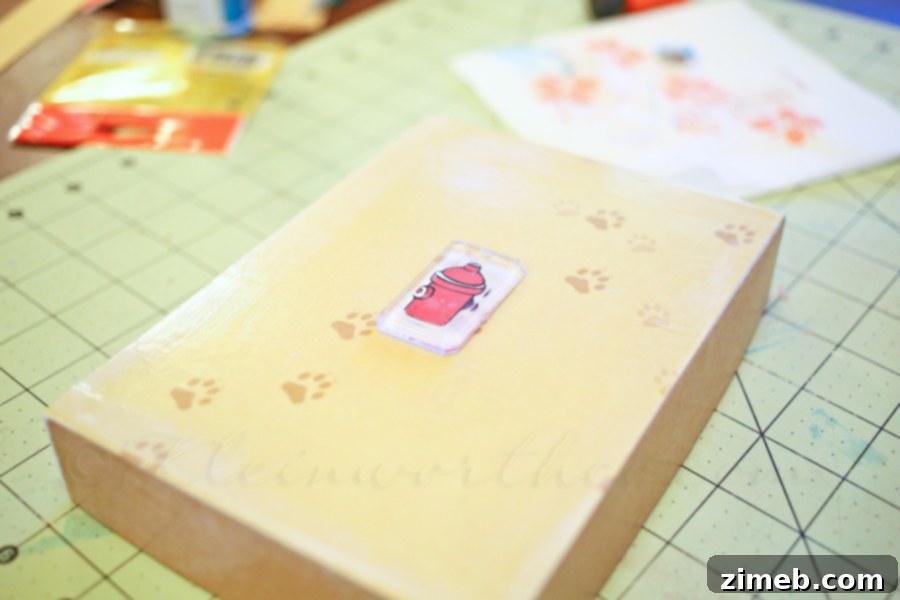
Once the main scrapbook paper layer was secure and partially dry, we carefully placed the Mod Podge Facet Shape with the fire hydrant in the center of the lid. We used Mod Podge as the adhesive, applying a thin layer to the back of the shape before pressing it into position. Next, we added a couple more complementary shapes that we had cut out from coordinating scrapbook paper, using the same method for adhesion. After all the embellishments were in place, we applied a final coat of Mod Podge over everything. This last layer not only seals all the decorative elements, protecting them from everyday wear and tear, but also unifies the entire design, giving it a cohesive and polished look. Allow ample time for drying, ideally overnight, to ensure the Mod Podge fully cures and provides maximum durability.
The Delightful Outcome
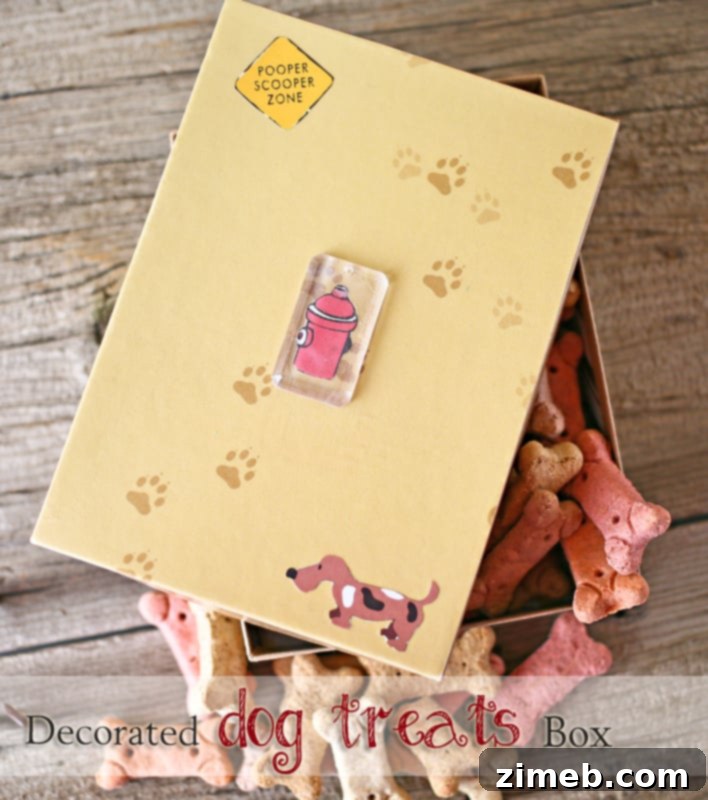
I absolutely adore how this decorated dog treat box turned out! It’s not just a container; it’s a cheerful, personalized accent in our kitchen. The kids’ faces light up with pride every single time they open the box to retrieve a treat for our dog, which is truly the best reward for any craft project. This simple DIY transformed a mundane item into something special and functional.
The little Mod Podge Facet Shapes were a particular hit. My girls are already brainstorming new projects, eagerly looking forward to incorporating them with more decorative papers to create unique jewelry pieces and other decorative items. Their versatility and ease of use make them a fantastic addition to any crafter’s toolkit.
Expand Your Crafting Horizons with Plaid & Mod Podge!
For those eager to dive deeper into the world of crafting, Plaid offers a wealth of resources. Their weekly newsletter is an invaluable source of fresh tutorials, creative ideas, and inspiring projects that cater to all skill levels. Signing up is a fantastic way to keep your creative juices flowing and discover new techniques. Additionally, Plaid’s Pinterest Board is a visual treasure trove, brimming with countless Mod Podge ideas, tips, and finished projects that can spark your next crafting adventure. You’ll find inspiration for every room in your house and every occasion.
Sign up for Plaid’s weekly newsletter for tutorials and inspiration HERE
Get more inspiration and more Mod Podge ideas on Plaid’s Pinterest Board
Ready to start your own Mod Podge journey? You can easily find Mod Podge Sheer Colors, Mod Podge Facet Shapes, and the innovative Dishwasher Safe Mod Podge at Michaels craft stores or conveniently on Plaid’s official website. These products are designed to empower your creativity, making it simpler than ever to personalize your home and craft unique gifts. Explore the possibilities and bring your crafting visions to life!
Find Mod Podge Sheer Colors, Facet Shapes and Dishwasher Safe Mod Podge in Michaels or on Plaid’s website HERE
Check out all these other Mod Podge Projects
To see where I am linking today- visit HERE