
Unlocking Creativity: Your Guide to Crafting Stunning Printables with Photoshop Elements
Welcome to a world where creativity meets practicality! Here on the blog, we love sharing a diverse range of printables – from organizational tools to decorative elements that elevate your home and celebrations. Behind many of these beautiful designs is a powerful yet accessible tool: Photoshop Elements. While it’s renowned for its robust photo editing capabilities, perfect for refining portraits or enhancing product photography, its graphic design features are equally impressive. Many aspiring designers or small business owners might find the initial learning curve intimidating. However, I’m living proof that with a bit of dedication, anyone can master its intricacies. I’m largely self-taught, and it took me years to truly harness all the different ways I now utilize this incredible software. But today, you’re in for a treat! Our amazing friend, Kelly, is joining us to simplify the process and show you just how quickly and easily you can start creating your very own printables right inside Photoshop Elements. Get ready for a fabulous, comprehensive tutorial on how to transform your creative ideas into stunning, ready-to-print graphics!
Mastering Printables: A Step-by-Step Guide with Photoshop Elements
This post contains some affiliate links. Click here to read my full disclosure policy.
Hello everyone! It’s Kelly from Here Comes the Sun, and I’m absolutely thrilled that Gina has invited me to guest post today on one of my absolute favorite topics: graphic design. To say I have a passion for graphic design would be a huge understatement; I love it so much that I’ve built a business around it. Yet, this journey wasn’t always smooth. It involved a lot of trial and error, but eventually, I discovered a program that perfectly suits my creative workflow. Today, I’m excited to share that knowledge with YOU, guiding you through the process of how to create printables with Photoshop Elements.
Why Create Printables? Endless Possibilities for Home and Business
Printables offer an incredibly versatile and cost-effective way to personalize nearly any aspect of your life or business. From organizing your home with custom labels and planner inserts to adding a unique touch to parties with themed decorations like cupcake toppers, banners, and gift tags, the possibilities are limitless. For small business owners and creative entrepreneurs, printables can be a game-changer. Imagine crafting branded packaging elements, creating unique digital products to sell, or designing eye-catching social media graphics that stand out. They empower you to infuse your personal style into everyday items or to create unique, thoughtful gifts. Learning to design your own printables not only sparks your creativity but also opens doors to saving money on commercial products and even generating passive income.
Why Photoshop Elements is Your Go-To for Printable Design
You might be wondering why Photoshop Elements, specifically, is a fantastic choice for creating printables, especially if you’re a beginner or on a budget. Unlike its more complex sibling, Adobe Photoshop, Elements offers a more intuitive and streamlined interface that’s less overwhelming while still packing a powerful punch. It’s significantly more affordable, making it accessible to a wider range of users, from hobbyists to burgeoning entrepreneurs. Elements excels at both pixel-based and vector-like graphics, making it perfect for combining photos with crisp text and shapes – a core requirement for most printables. Its robust set of tools ensures that your designs are high-resolution and print-ready, guaranteeing professional-quality results every time. It bridges the gap between basic editing software and professional design suites, offering the best of both worlds for printable creation.
Designing Your First Printable: A Circle Tag Tutorial
Since I create so many different types of printables for my Etsy shop, I wanted to start with something relatively easy and incredibly versatile. Today, we’re going to dive into making customizable circle tags in Photoshop Elements. I currently use version 11, but rest assured, these steps are largely applicable across newer versions as well. Circle tags are fantastic because they have a multitude of uses: think charming cupcake toppers for a party, personalized stickers for gifts, or even strung together to form an adorable banner. They are a great foundation for learning essential design techniques. To give you some inspiration, here are a few examples of different circle tags I’ve previously created, showcasing their versatility:
Valentine Party Tags
Soccer Party Tags
Captain America Party Tags
Apple Party Tags
STEP-BY-STEP: HOW TO CREATE PRINTABLES WITH PHOTOSHOP ELEMENTS
Step 1: Setting Up Your Canvas for Success
The first and crucial step to any printable project is setting up your canvas correctly. Begin by opening Photoshop Elements. Navigate to the top menu and click on File > New > Blank File. This action will open a dialog box where you define the properties of your new document. From the dropdown menus, ensure you select U.S Paper for the document type, then specify the dimensions as 8.5″x11″, which is the standard letter size for most home printers. Set the background to white, and most importantly, choose a resolution of 300 dpi (dots per inch). This high resolution is absolutely vital for ensuring your printed designs are crisp, clear, and professional-looking, avoiding any pixelation or blurriness. A lower DPI is fine for screen-only graphics, but for print, 300 dpi is the gold standard. Once these settings are configured, click ‘OK’. Your screen will then display your pristine, blank canvas, ready for design (initially, it won’t have the two layers shown in the example image, which come later).
Step 2: Understanding Layers – Your Design Foundation
Layers are the backbone of any sophisticated design in Photoshop Elements, allowing for non-destructive editing and immense flexibility. To create a new layer, go to Layer > New > Layer from the top menu, or use the convenient keyboard shortcut: CTRL-SHIFT-N (Command-Shift-N on Mac). You’ll notice this new, transparent layer appear in the Layers palette, typically located on the right-hand side of your screen. This is where we will thoughtfully place all our design elements, such as shapes and text. Working with separate layers means you can easily move, edit, resize, or even delete individual components of your design without affecting other parts. This flexibility is invaluable and will save you a lot of time and frustration as you create and refine your printables.
Step 3: Crafting Your Basic Shape – The Circle Tag
Now let’s bring some shape to our canvas! On the left-hand side, you’ll find the tools menu. Locate and select the Shape tool, which is often the ninth tool down in the right column. Once selected, look for the dropdown menu in the options bar at the top of the screen and choose Ellipse. This tool allows you to draw perfect circles. For consistent tags, select the ‘fixed size’ option from the dropdown and enter 2.5 inches for both width and height. This ensures all your tags will be the same size, which is perfect for batch printing. With the fixed size set, simply click anywhere on your canvas, and a perfectly sized 2.5-inch circle will instantly appear. To change the color of your circle, navigate to the color dropdown menu in the options bar. Click on the multi-colored circle icon, typically found in the lower right of the color picker. This action will open the comprehensive color palette. Here, you can select any color you desire for your tag; once chosen, click “OK” to apply it to your circle. Feel free to experiment with different hues to match your printable’s theme!
Step 4: Positioning Your Design Element with Precision
With your first circle created and colored, it’s time to position it accurately on the page. Select the Move tool, which is the second tool down on the left-hand side toolbar (it looks like a cross with arrows on each end). Click on your newly created circle and carefully drag it to the upper-left corner of your canvas. Positioning your first element precisely is crucial as it sets the foundation for duplicating and aligning the rest of your tags evenly across the page. Taking a moment to place it correctly now will ensure a professional and organized layout for your entire sheet of printables.
Step 5: Adding Personalized Text to Your Tag
A plain circle is nice, but text brings your tag to life! Click on the Text tool (represented by a “T” icon on the toolbar). From the dropdown menu in the options bar, choose a font that complements your design’s aesthetic. You can change the color of your text using the exact same method you used to change the circle’s color – just click the color dropdown in the options bar and select your desired shade from the color palette. Adjust the text size either by picking a value from the dropdown menu or by clicking on the text box and dragging its corners for a visual adjustment. A key best practice here is to place each line of text on a separate layer. This provides maximum flexibility for individual positioning, sizing, and styling of each text element. Remember the shortcut for a new layer: CTRL-SHIFT-N. Ensure your text layers are positioned *above* the shape layer in the Layers palette; simply click and drag them if they aren’t. Finally, use the Move tool to carefully position each line of text neatly in the middle of your circle, centering it for a balanced look.
Step 6: Merging Layers for a Unified Design Element
Once you are satisfied with the placement and appearance of your circle and text, the next step is to combine them into a single, cohesive unit. This is essential before you start duplicating your tag. In the Layers palette, select all the layers that constitute your single tag – that means your shape layer and all your text layers. Make absolutely sure you do *not* select the background layer at this stage. With all the tag-related layers highlighted, press CTRL-E (Command-E on Mac) to merge them. After merging, your Layers palette will show a single layer for your completed tag, signifying that the circle and its text are now one unified design element. This makes it much easier to duplicate and manipulate the entire tag as a whole.
Step 7: Duplicating Your Design to Fill a Row
Now that you have your perfect single tag, it’s time to create multiple copies to fill a row across your page. With your merged tag layer selected in the Layers palette, press CTRL-J (Command-J on Mac) twice. This action will create two identical copies of your tag, giving you a total of three. Next, using the Move tool, click and drag each of the new copies to the right, arranging them to form a horizontal row across the top of your page. Don’t worry about perfect spacing just yet. For precise and even distribution, select all three tag layers in your Layers palette. Then, at the bottom of the screen, or in the options bar, locate the Distribute menu and select the option to distribute them evenly, often labeled as “left” or “horizontal centers” depending on your version. This will automatically space your tags perfectly, giving your printable a professional and polished appearance.
Step 8: Consolidating Your First Row of Tags
With your first row of three circle tags perfectly aligned and spaced, the next logical step is to merge these three individual tag layers into a single row layer. This simplifies the process for duplicating entire rows down the page. Select all three of the tag layers you just created and aligned in the Layers palette. As before, be very careful to ensure that the background layer remains unselected. Once only your three tag layers are highlighted, press CTRL-E (Command-E on Mac) to merge them. You will now see a single layer representing your complete, horizontally aligned row of tags. This consolidated layer is much easier to work with for the subsequent steps, streamlining your workflow and maintaining a tidy Layers palette.
Step 9: Filling the Page with Multiple Rows of Tags
You’ve successfully created and merged your first row of tags. Now, let’s replicate this row to fill the entire page, creating a sheet of printables. With your merged row layer selected, press CTRL-J (Command-J on Mac) three times. This will generate three additional copies of your entire row of tags. Using the Move tool, click and drag each new row downwards, arranging them vertically to fill the remaining space on your page. Aim for roughly equal spacing between the rows for now. To achieve perfect vertical distribution, highlight all the row layers (again, making sure the background layer is not selected) in your Layers palette. Then, go to the Distribute menu, and choose the option for vertical distribution, typically labeled “Top” or “Vertical Centers.” This action will automatically space your rows evenly from top to bottom, giving your printable a beautifully organized and professional layout.
Step 10: Final Alignment and Centering on the Page
We’re almost at the finish line! The final step in arranging your tags is to perfectly center all your printed elements on the page. First, merge all the individual row layers into one single layer representing your entire sheet of tags. In the Layers palette, select all the rows you’ve just distributed (but still keep the background layer unselected). Press CTRL-E (Command-E on Mac) to merge them. Now you should have two main layers: your background layer and your single merged layer of all the circle tags. To center your printables, select *both* the background layer and your merged circle tag layer in the Layers palette. Then, at the bottom of the screen, or in the options bar, under the “Align” options, click “Center” and then “Middle.” This will perfectly center your entire design, both horizontally and vertically, on your 8.5″x11″ canvas. When you’ve completed these steps, your screen will showcase a perfectly aligned, professional sheet of printable circle tags.
Step 11: Saving Your Masterpiece for Print
Congratulations, you’ve just created an amazing printable! The final, crucial step is to save your work in the correct format for printing. Navigate to File > Save As… from the top menu. In the “Save As” dialog box, choose a descriptive name for your file, such as “CustomCircleTags.pdf.” Most importantly, select PDF (Portable Document Format) from the “Format” or “Save as type” dropdown menu. PDF is the ideal format for printables because it preserves your design’s layout, fonts, and image quality exactly as you created them, ensuring consistent results regardless of the printer or computer used. It’s a universally accepted format for high-quality printing. While you could save as JPG or PNG for web use, PDF is truly superior for anything you intend to print. Click ‘Save’, and your beautifully designed, print-ready file is complete!
Yay! You have just created an amazing printable from scratch! How incredible is that? Are you now eager to delve even deeper and learn more advanced techniques within Photoshop Elements? I’m so excited to tell you all about my new eBook, Photoshop Elements for Creative Entrepreneurs. It just launched yesterday and is absolutely chock-full of essential Photoshop Elements tips and techniques designed to elevate your graphic design skills.
I’ve poured my passion for graphic design into this eBook, and I’m genuinely thrilled to share it with all of you. My goal is to teach people how to approach graphic design in an easy, understandable way, whether you’re a complete beginner or an intermediate user looking to refine your craft. You certainly don’t have to be an aspiring or current entrepreneur to gain a wealth of knowledge from this book; anyone with a creative spark will find it invaluable.
I personally leverage my graphic design skills daily for my blog and my thriving Etsy business, and this book is designed to empower you to do the same, regardless of the size or scope of your venture. However, the fundamental skills you’ll master within this book are universally applicable to any type of graphic design you wish to pursue, be it for personal projects, creative hobbies, or commercial applications. I would absolutely love for you to take a closer look at all this comprehensive book has to offer. You can discover more about its contents and easily purchase it by clicking the link below. Don’t miss out on the opportunity to transform your creative ideas into reality!
Thanks so much, Gina, for letting me take over your site today and share my passion!
Enhance Your Design Skills with Kelly’s Insights
What an absolutely brilliant and thorough tutorial from Kelly! As someone who has personally read Kelly’s book, I can wholeheartedly attest that she has done an exceptional job of breaking down the complexities of Photoshop Elements. She brilliantly explains all its incredible features and, more importantly, how to effectively utilize them for graphic design projects. If you’re serious about taking your design skills to the next level, her book is an indispensable resource that you definitely want to pick up! It’s a fantastic companion to this tutorial, offering even deeper dives into creating professional-looking graphics.
Looking for More Creative Inspiration and Photography Tips?
Mastering Smoke Photography: A Creative Tutorial
Essential Tips for Capturing Dynamic Street Photography
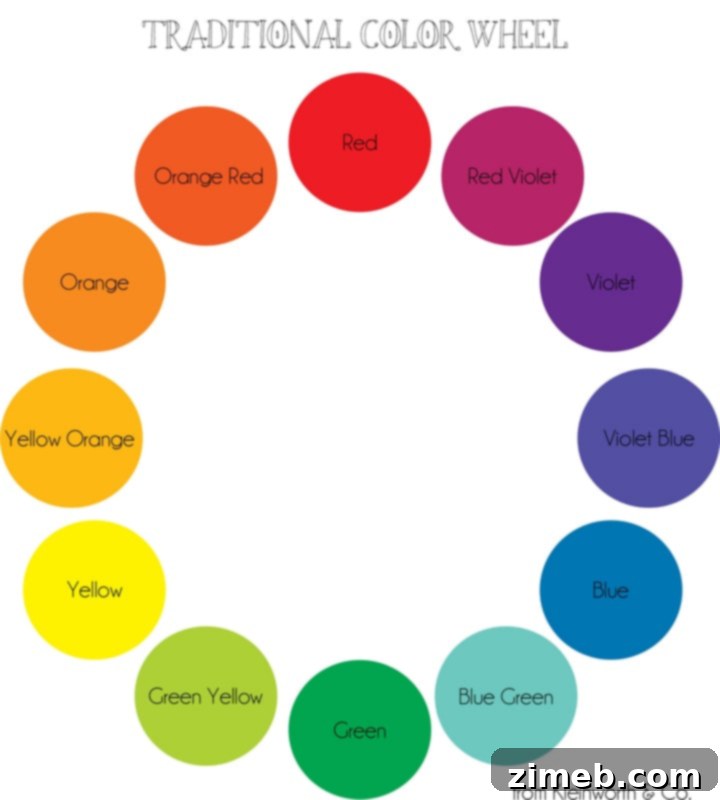
The Art of Choosing Food Photography Props & Color Theory
To see where I am linking today, be sure to visit HERE for more inspiring content.