
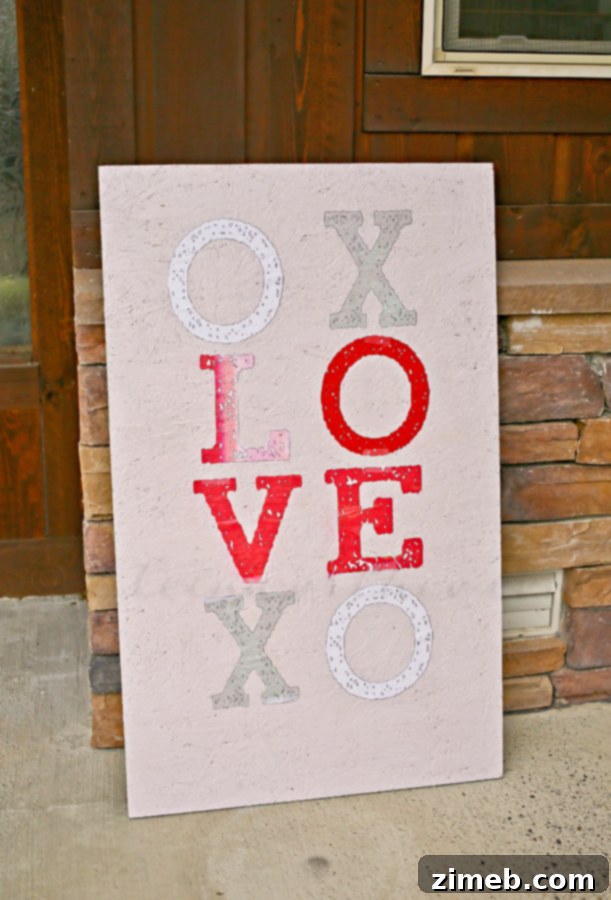
Each season brings its own unique charm, and there’s a special joy in transforming our homes to reflect that spirit. For me, that transformation always begins at the front door with a welcoming wreath. While my monthly wreath tradition is steadfast, last fall, I ventured further, adorning the entire front porch with rustic corn husks and a beautifully painted board. The vision was grand, extending to a festive Christmas board that, alas, never saw the light of our porch due to a spontaneous trip to Southern California. Returning to a porch stripped bare, save for my trusty January wreath, it became clear: the entryway needed some love. With Valentine’s Day approaching and my interior already buzzing with romantic touches, it was time to bring that same festive energy outdoors. And so, the idea for a charming Valentine Porch Sign was born, a simple yet impactful way to spread love right from our doorstep.
The allure of a beautifully decorated front porch extends beyond mere aesthetics; it’s an invitation, a warm embrace for guests, and a daily delight for residents. It sets the tone for the entire home, signaling the care and attention within. For Valentine’s Day, this means an opportunity to infuse our outdoor spaces with warmth, affection, and a touch of heartfelt charm. A custom porch sign, in particular, offers a personalized touch that store-bought decorations simply can’t replicate. It’s not just a decoration; it’s a statement of love, handcrafted and unique to your home.
Crafting Your Own Valentine Porch Sign: A Heartfelt DIY Project
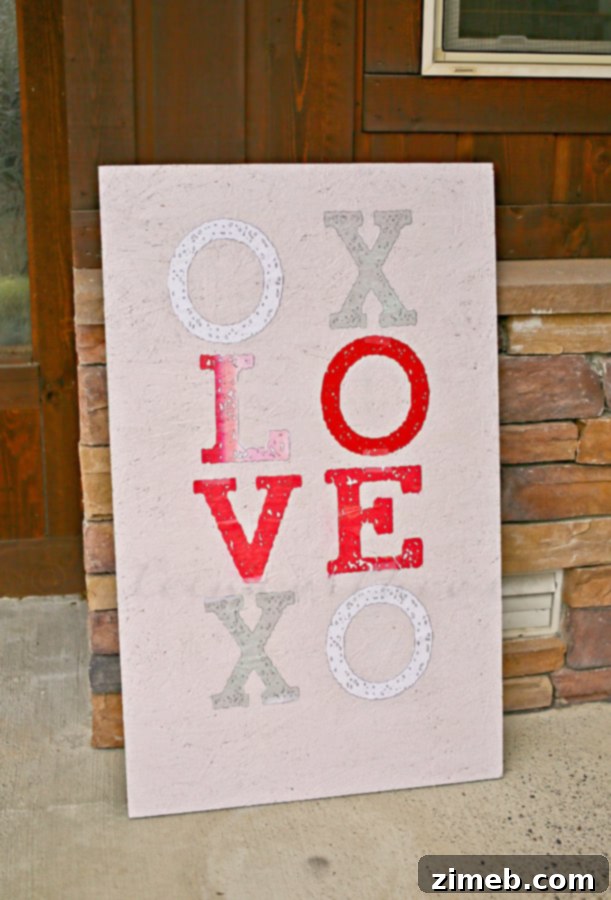
Embarking on this DIY Valentine Porch Sign project was an absolute delight, made even more special by the eager participation of my kids. Crafting together is not just about the end product; it’s about the shared laughter, the learning, and the creation of cherished memories. This project, in particular, proved to be remarkably simple, making it perfect for crafters of all skill levels, including little helpers. The beauty of DIY lies in its accessibility and the immense satisfaction derived from transforming basic materials into something beautiful and meaningful. Below, I’ll walk you through the straightforward steps to create your own charming sign, along with tips and tricks to ensure a flawless finish.
Creating a decorative porch sign doesn’t require an extensive workshop or advanced artistic skills. All it truly needs is a bit of creativity, some common craft supplies, and a willingness to bring your vision to life. The steps are intuitive and designed for success, even for those new to crafting. Let’s dive into the process and uncover just how effortlessly you can craft a stunning piece that will elevate your outdoor Valentine’s Day decor.
Essential Tools and Materials for Your DIY Valentine Sign:
- A wooden board (reclaimed wood, pine, or MDF works well)
- Light lavender (or your preferred color) acrylic or exterior paint
- Paintbrushes (various sizes for board and Mod Podge application)
- Printer and paper for letter templates
- Scissors or a craft knife
- Mod Podge Gloss (or an exterior-grade sealant if preferred)
- A ruler or measuring tape
- Pencil (optional, for light marking)
Step-by-Step Guide to Your Valentine Porch Sign:
- Prepare and Paint Your Board with Love:
The foundation of your sign is the wooden board. For this project, I opted for a standard wooden plank, but feel free to experiment with reclaimed wood for a rustic touch, or even a smooth MDF board for a more polished finish. Begin by ensuring your board is clean and dry. If the surface is rough, a light sanding can create a smoother canvas for your paint. Next, apply a generous, even coat of light lavender paint. This soft, romantic hue perfectly captures the essence of Valentine’s Day without being overtly bold. Depending on the opacity of your paint and the desired finish, you might need two coats. Allow each coat to dry completely before applying the next. For outdoor signs, consider using an exterior-grade paint that offers better weather resistance, though a good sealant will also provide protection. Other popular Valentine’s colors like soft pink, blush, white, or even a deep burgundy could also create a stunning effect. - Design and Cut Your Sweet Message:
With your painted board drying, it’s time to prepare your letters. Using a computer and printer, select a font that reflects the sentiment you wish to convey. Elegant script fonts, classic block letters, or playful whimsical styles all work wonderfully. Print out your chosen Valentine’s Day phrase—”Love,” “Be Mine,” “Happy Valentine’s Day,” or even a simple heart motif—in the desired size. Once printed, carefully cut out each letter and shape using sharp scissors or a craft knife. Precision here will result in crisp, professional-looking text on your sign. If you have a cutting machine like a Cricut or Silhouette, this step becomes even easier and more precise, allowing you to cut from paper or even vinyl. - Arrange and Perfect Your Layout:
Before permanently adhering anything, it’s crucial to arrange your paper letters on the dried board. This step allows you to experiment with spacing, alignment, and overall composition. Play around with different layouts until you find one that is visually appealing and balanced. Use a ruler to ensure your letters are straight and evenly spaced, or embrace a more whimsical, staggered arrangement for a playful vibe. This pre-placement stage is vital for visualizing the final product and making any necessary adjustments to achieve the perfect design. - Adhere Your Letters with Mod Podge Magic:
Now for the exciting part! Mod Podge Gloss is a crafter’s best friend, acting as a glue, a sealer, and a finish all in one. To adhere your letters, apply a thick, even layer of Mod Podge Gloss to the back of each paper letter, one at a time. Carefully place the letter onto its designated spot on the board, pressing down firmly to remove any air bubbles. A credit card or a specialized brayer can be helpful for smoothing out the letters and ensuring full contact with the board. Work methodically, ensuring each letter is securely in place before moving to the next. Allow this initial layer of Mod Podge to dry partially, giving the letters enough time to bond firmly to the board without shifting. This usually takes about 15-30 minutes, depending on humidity. - Seal and Shine for Lasting Beauty:
Once your letters are securely attached and somewhat dry, it’s time for the final, protective layer. Apply another generous, full, thick coat of Mod Podge Gloss over the entire surface of the board, directly over the letters and the painted background. This step serves multiple purposes: it seals the paper letters, protecting them from moisture and wear; it creates a unified, shiny finish over the entire sign; and it adds an extra layer of durability. Ensure the Mod Podge is applied evenly, avoiding drips or puddles. Allow the sign to dry completely, which can take several hours, or even overnight, for the Mod Podge to fully cure and achieve its hard, glossy finish. For signs intended for outdoor display, especially in areas prone to rain or high humidity, considering an additional coat of a clear exterior-grade sealant or a UV-resistant spray can further enhance its longevity and protect against fading.
See? I told you it was simple! With these straightforward steps, you’ve now created a beautiful, personalized Valentine Porch Sign that will bring warmth and cheer to your entryway. The sense of accomplishment that comes from a successful DIY project, especially one that adds such charm to your home, is truly rewarding. This sign isn’t just a decoration; it’s a testament to your creativity and a heartfelt expression of love.
Personalizing Your Porch Sign and Expanding Your Decor:
The beauty of DIY lies in its infinite possibilities for customization. While light lavender and a classic Valentine’s message create a delightful aesthetic, don’t hesitate to infuse your own unique style. Consider adding delicate ribbons in coordinating colors, perhaps a bow at the top for hanging. A sprinkle of fine glitter on the letters (applied while the first layer of Mod Podge is still wet) can add a subtle sparkle, or you could attach small faux flowers or greenery to the corners. For other holidays, simply change the paint colors, the message, and the embellishments to create an entirely new sign, extending the life and versatility of your craft project.
Beyond the sign itself, think about how it integrates with your overall outdoor decor. A new sign often inspires further embellishments. Perhaps a lush, Valentine’s themed wreath for the front door, adorned with roses, hearts, or whimsical cupid arrows, would perfectly complement your new sign. Delicate string lights can add a magical glow during the evenings, enhancing the romantic atmosphere. Consider placing potted plants with pink or red blooms, or even a small decorative lantern next to your sign to create a cohesive and inviting entryway display. Each element works together to create a welcoming and festive impression.
As February swiftly approaches, bringing with it the season of love, my focus now shifts to completing the coordinating Valentine’s Day wreath for the front door. These projects, simple as they may be, collectively transform a house into a home, reflecting the joy and spirit of each passing season. Creating a warm and inviting entryway is more than just decorating; it’s about setting a joyful tone, not only for those who visit but also for your family every time you step through your own front door. I encourage you to embark on your own DIY journey this Valentine’s Day and discover the immense satisfaction of crafting something beautiful with your own hands. Happy crafting!
For more inspiring DIY projects, home decor ideas, and seasonal crafts, make sure to visit our other creative content and resources.