
As a food photographer, one of the most frequently asked questions I encounter revolves around the specifics of my setup. The truth is, there isn’t a single, definitive answer. My approach is highly dynamic, evolving with each project to capture the precise mood and narrative I wish to convey through my culinary images. This variability makes it challenging to provide a static, one-size-fits-all response.
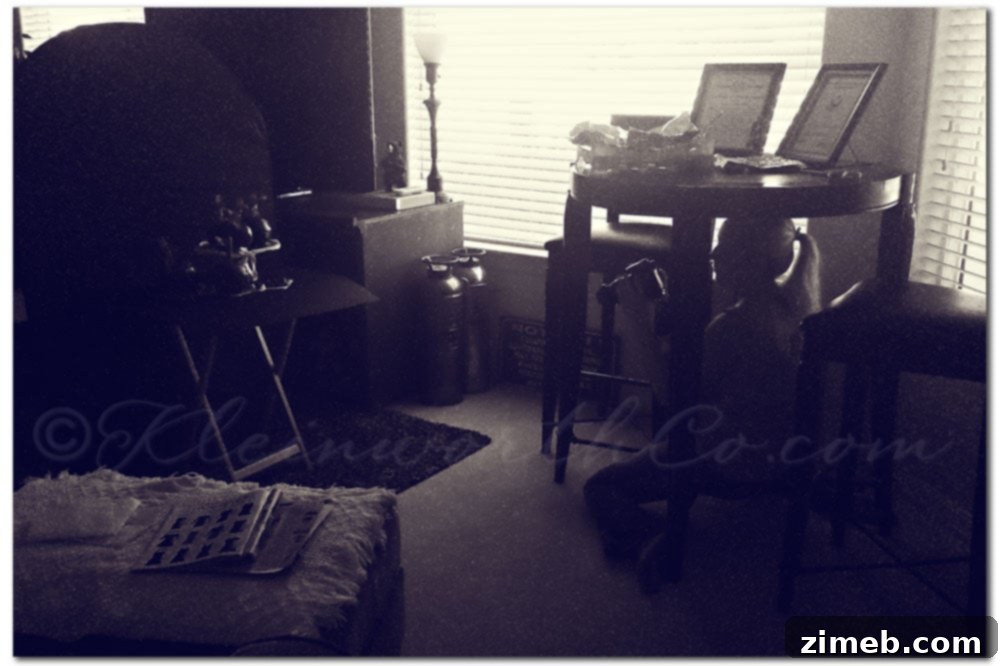
However, an unexpected moment recently offered a perfect illustration of this very point. While meticulously crafting the visuals for the “YUMMIES” collection, which I’ll be sharing later this week, my son, finding my contortions amusing, snapped a candid photo. I suspect he anticipated my displeasure, perhaps hoping to gain some future leverage. To his surprise, I was delighted. This unscripted shot perfectly encapsulates the dedication and unconventional methods I often employ to achieve that elusive perfect capture, serving as an ideal visual aid for today’s discussion on the behind-the-scenes reality of food photography.
Unveiling My Food Photography Sanctuary: The North-Facing Advantage
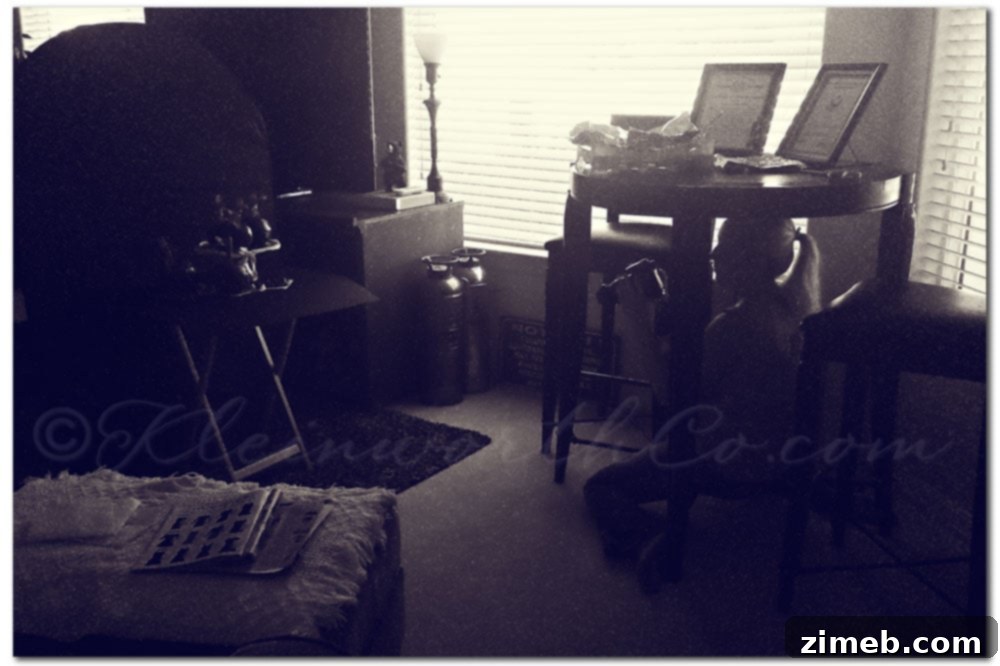
Above, you see me amidst my typical setup, nestled in what we call our “media room.” This space has become my informal studio, primarily due to its exceptional natural light. The windows in this room face directly north, a golden ticket for any photographer relying on ambient light. North-facing windows offer a beautifully consistent, soft, and diffuse light source throughout the entire day, free from the harsh, direct rays of the sun that can create distracting hotspots and deep shadows. This steady illumination is paramount for food photography, allowing me to maintain a predictable lighting environment without constant adjustments, ensuring my whites are clean and my colors true. It’s this consistency that forms the bedrock of my initial setup for most projects.
The Art of Light Shaping: Harnessing Reflectors for Dramatic Effect
Once my subject is positioned to catch this pristine light, my next step involves refining its direction and intensity. You’ll notice my reflector stand strategically placed, with the black side of the reflector acting as a flag behind the food, propped securely against my tripod. While I sometimes opt for a white reflector to gently bounce light back into shadows, lately I’ve been drawn to the more dramatic and moodier aesthetic that a black reflector provides. By absorbing light rather than reflecting it, the black side deepens shadows and enhances contrast, adding a sophisticated, almost painterly depth to the food. This technique is particularly effective for evoking a sense of richness and intimacy, making the dish appear more luxurious and inviting.
On the pub table just above me, you might spot various props and ingredients that have been meticulously arranged and then carefully removed during the styling process. This organized chaos is typical of food photography—every element is considered, yet only a select few make the final cut to avoid visual clutter and keep the focus squarely on the star of the show: the food itself. This table serves as my temporary staging area, allowing for quick swaps and adjustments without disrupting the carefully established lighting.
The Lens That Transforms: Why the 85mm is My Go-To
For this particular series, my intention was to exclusively use my 85mm prime lens. There’s something truly magical about what this lens does for food images. It’s renowned for its ability to produce stunningly creamy bokeh – that beautiful, blurred background effect that makes the subject pop with exquisite clarity. The compression it offers is also sweet, making the food appear more three-dimensional and drawing the viewer’s eye directly to the textures and details of the dish. This lens, in its ideal application, renders food with such a delectable quality that I find myself continually returning to it.
However, every photographer faces technical hurdles. In my case, I work with a cropped-sensor camera. For those unfamiliar, a cropped sensor effectively magnifies the focal length of a lens. So, my 85mm lens behaves more like a 120mm lens on a full-frame camera (85mm x 1.6 crop factor, depending on the brand). While still a fantastic portrait and food lens, this “magnification” means I need a greater distance between myself and the subject to capture the desired frame. This presented a significant challenge in my media room, as I had limited space to move around while simultaneously maintaining the optimal light position on the food. The tight quarters meant I couldn’t just step back; I had to get creative.
Embracing Unconventional Angles: The Pursuit of the Perfect Perspective
This space constraint pushed me to adopt some rather unorthodox shooting positions. For some shots, I found myself literally climbing under the pub table, aiming up to capture a unique perspective that accentuated the dish’s height and arrangement. For others, to achieve a slightly elevated, overhead angle, I stood precariously on top of the pub chairs. These aren’t exactly ergonomic solutions, but they highlight the dedication required to achieve a specific vision.
On other occasions, particularly when I aim for truly flat lay or top-down compositions, I will arrange my entire setup directly on the floor. This provides maximum clearance and stability for overhead shots without the need for risky balancing acts. However, for this particular shoot, my focus was squarely on more side-angle compositions, which inherently meant I preferred not to lay flat on the floor for extended periods – a position I’m no stranger to, having adopted it many times in the past to get precisely the shot I envisioned. The constant quest for varied perspectives, from extreme close-ups to broader table spreads, ensures a dynamic visual story that keeps the audience engaged and offers fresh insights into the culinary creation.
The Raw Truth of Photography: Embracing Imperfection and Post-Processing Potential
Now, regarding the behind-the-scenes image itself: it was captured by my son using his simple point-and-shoot camera, and I’m quite certain it was on an automatic setting. Consequently, the image was extremely noisy – so much so that my initial reaction was doubt about its usability. By my professional standards, it still exhibits a noticeable level of noise. However, this imperfection presents a valuable learning opportunity. Next week, I will be delving into the detailed process of how I managed to salvage this particular image, employing specific post-processing techniques to reduce the noise and make it presentable for sharing here today. It’s a testament to how even seemingly ‘unusable’ raw material can often be transformed with the right digital tools and a bit of effort.
This experience underscores a crucial aspect of modern photography: the journey doesn’t end when the shutter clicks. Post-processing is an integral part of the creative workflow, especially in food photography where subtle adjustments to color, contrast, sharpness, and yes, even noise, can dramatically elevate the final result. It’s about taking the raw capture and refining it to truly reflect the vision and mood intended.
Conclusion: The Endless Pursuit of Culinary Art Through the Lens
Ultimately, my food photography setup is less about rigid adherence to equipment and more about adaptability, creative problem-solving, and an unwavering passion for the subject. Whether it’s the consistent light from a north-facing window, the dramatic flair of a black reflector, the unique compression of an 85mm lens, or the contorted positions taken to achieve a specific angle, every decision serves the singular goal of making the food look as appealing and evocative as possible. The ‘lengths I go through’ are simply part of the enjoyable challenge, transforming a simple dish into a captivating visual narrative.
I hope this glimpse into my creative process provides valuable insights and perhaps inspires you to experiment with your own setups. Remember, the best equipment is often the one you have, combined with a willingness to explore, adapt, and refine your techniques. And always be ready to learn, especially from unexpected captures and the powerful capabilities of post-processing. Be sure to check back next week for the detailed breakdown on noise reduction and image recovery!
Linking with: 52 Weeks of Happiness, Tuesday Around the World & Sweet Shot Tuesday