
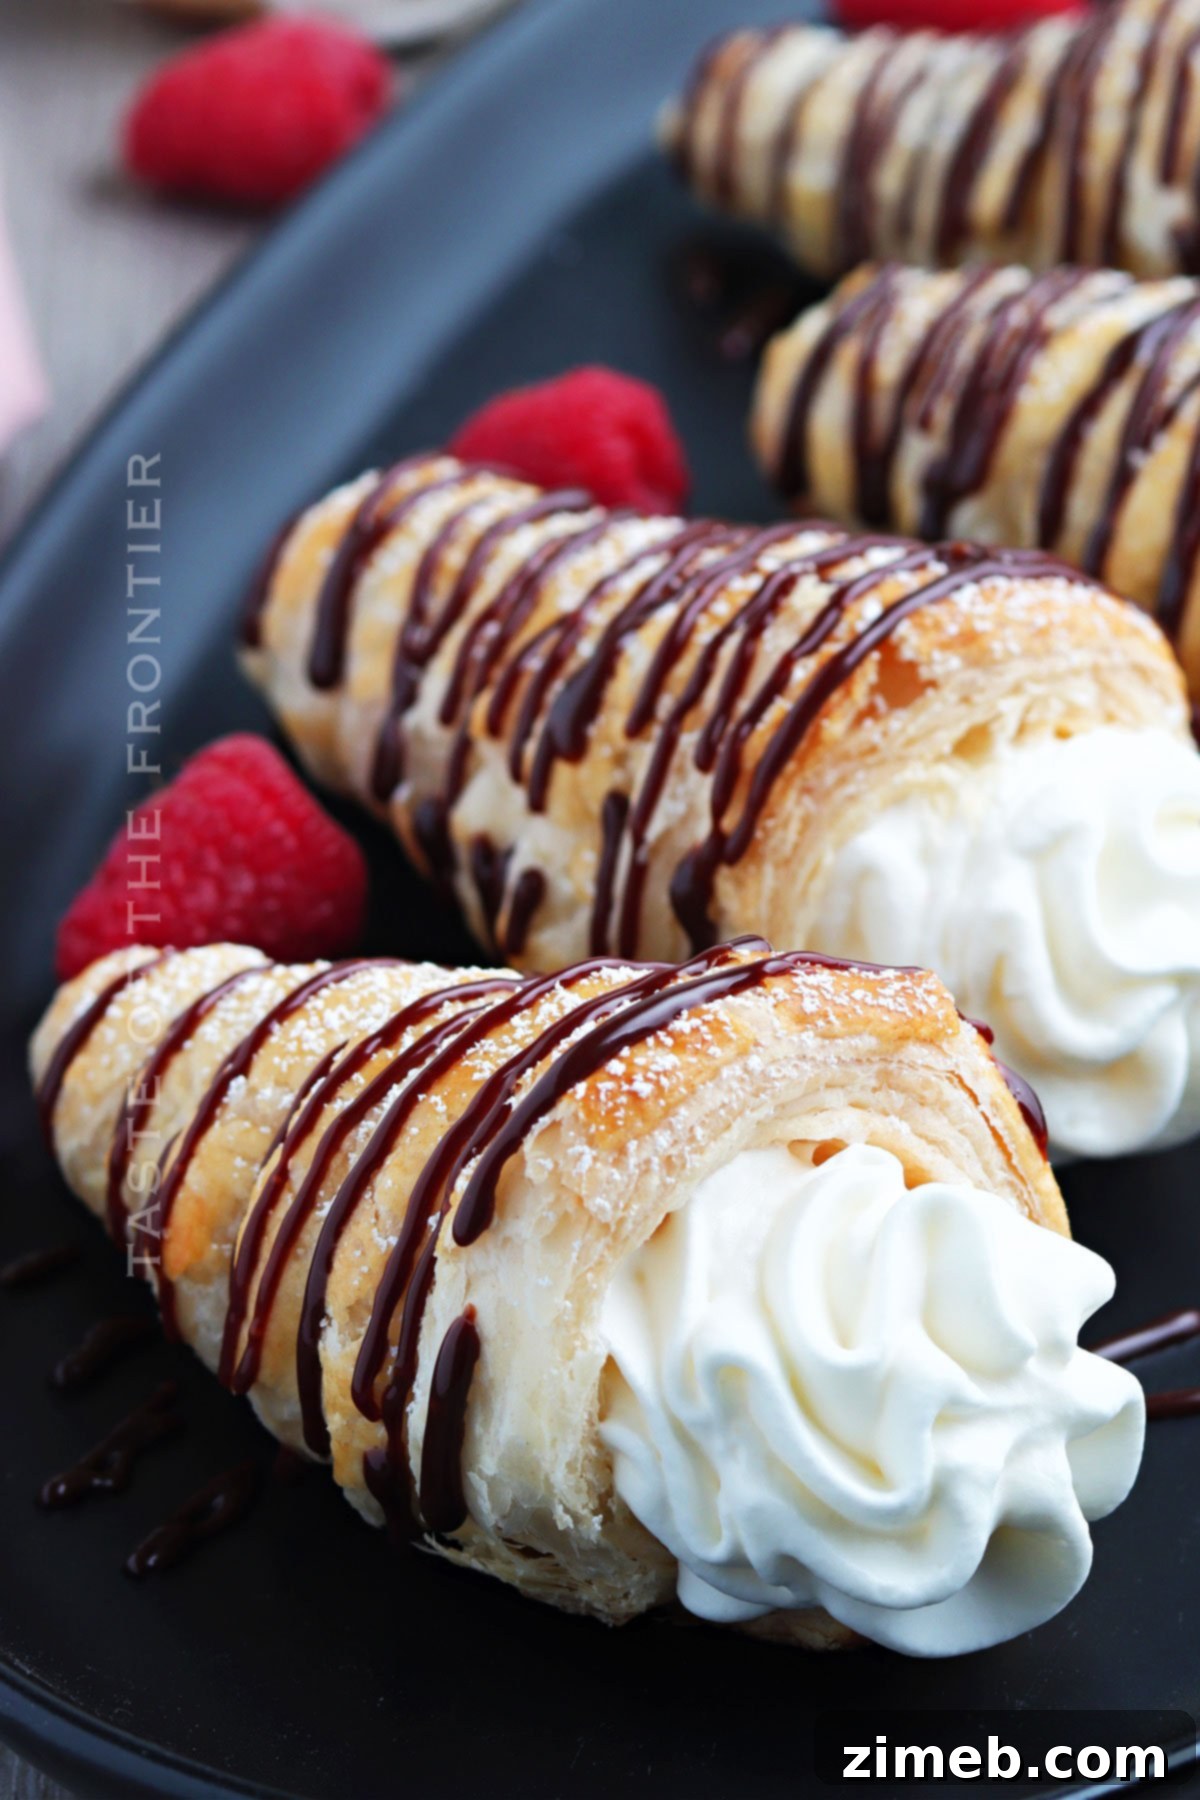
Crunchy, light puff pastry wrapped around a sweet, smooth, and dreamy cream filling – that’s the irresistible magic of Cream Horns with Puff Pastry! Perfect for parties, celebrations, or simply to elevate any ordinary day into a special occasion.
Welcome, baking enthusiasts! Get ready to embark on a delightful culinary adventure as we master the art of making the exquisite Cream Horns with Puff Pastry. These elegant pastries are a true symphony of textures and flavors, promising a crisp, golden shell that shatters delicately to reveal a luscious, velvety cream. This guide is designed to make the process enjoyable and straightforward, ensuring your homemade cream horns are nothing short of spectacular. Prepare to enchant your taste buds and impress everyone with these stunning sweet treats!
The Enchanting Allure of Cream Horns
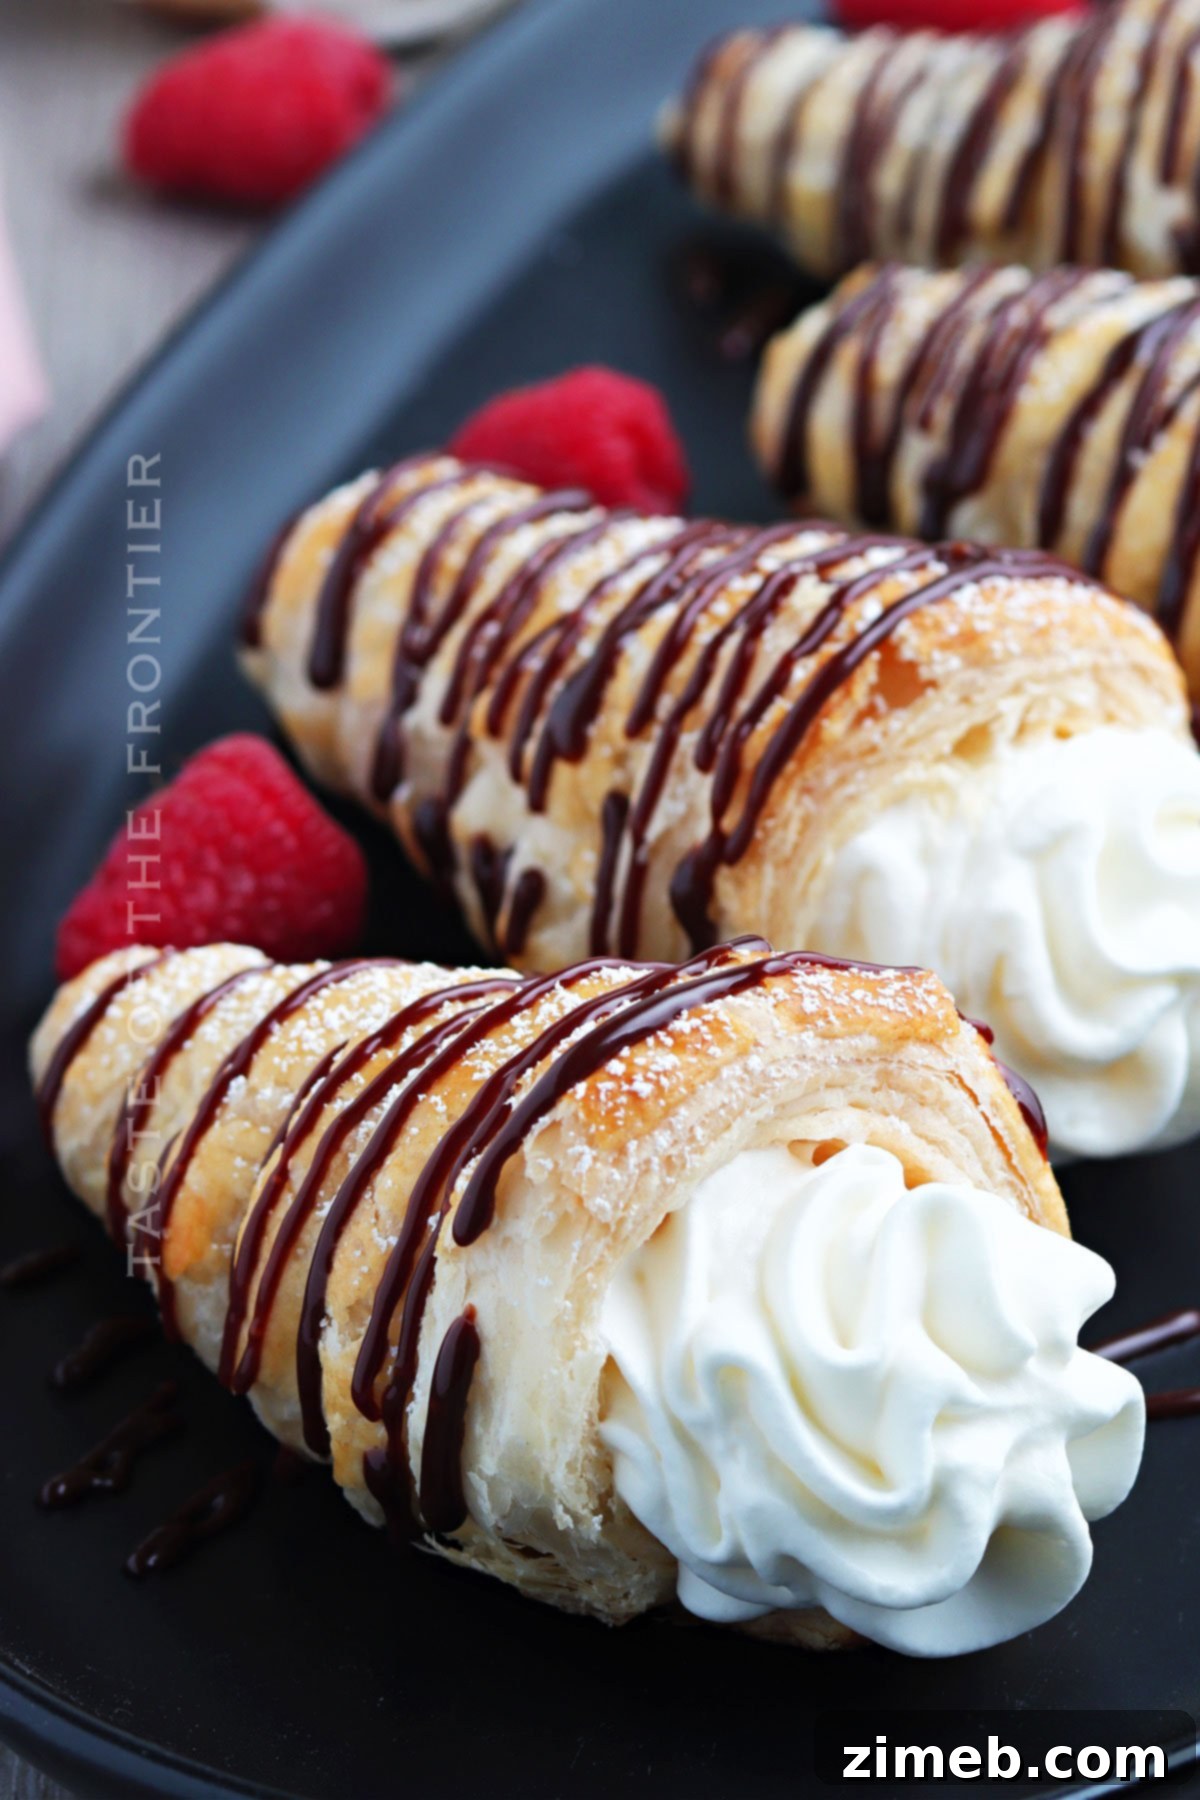
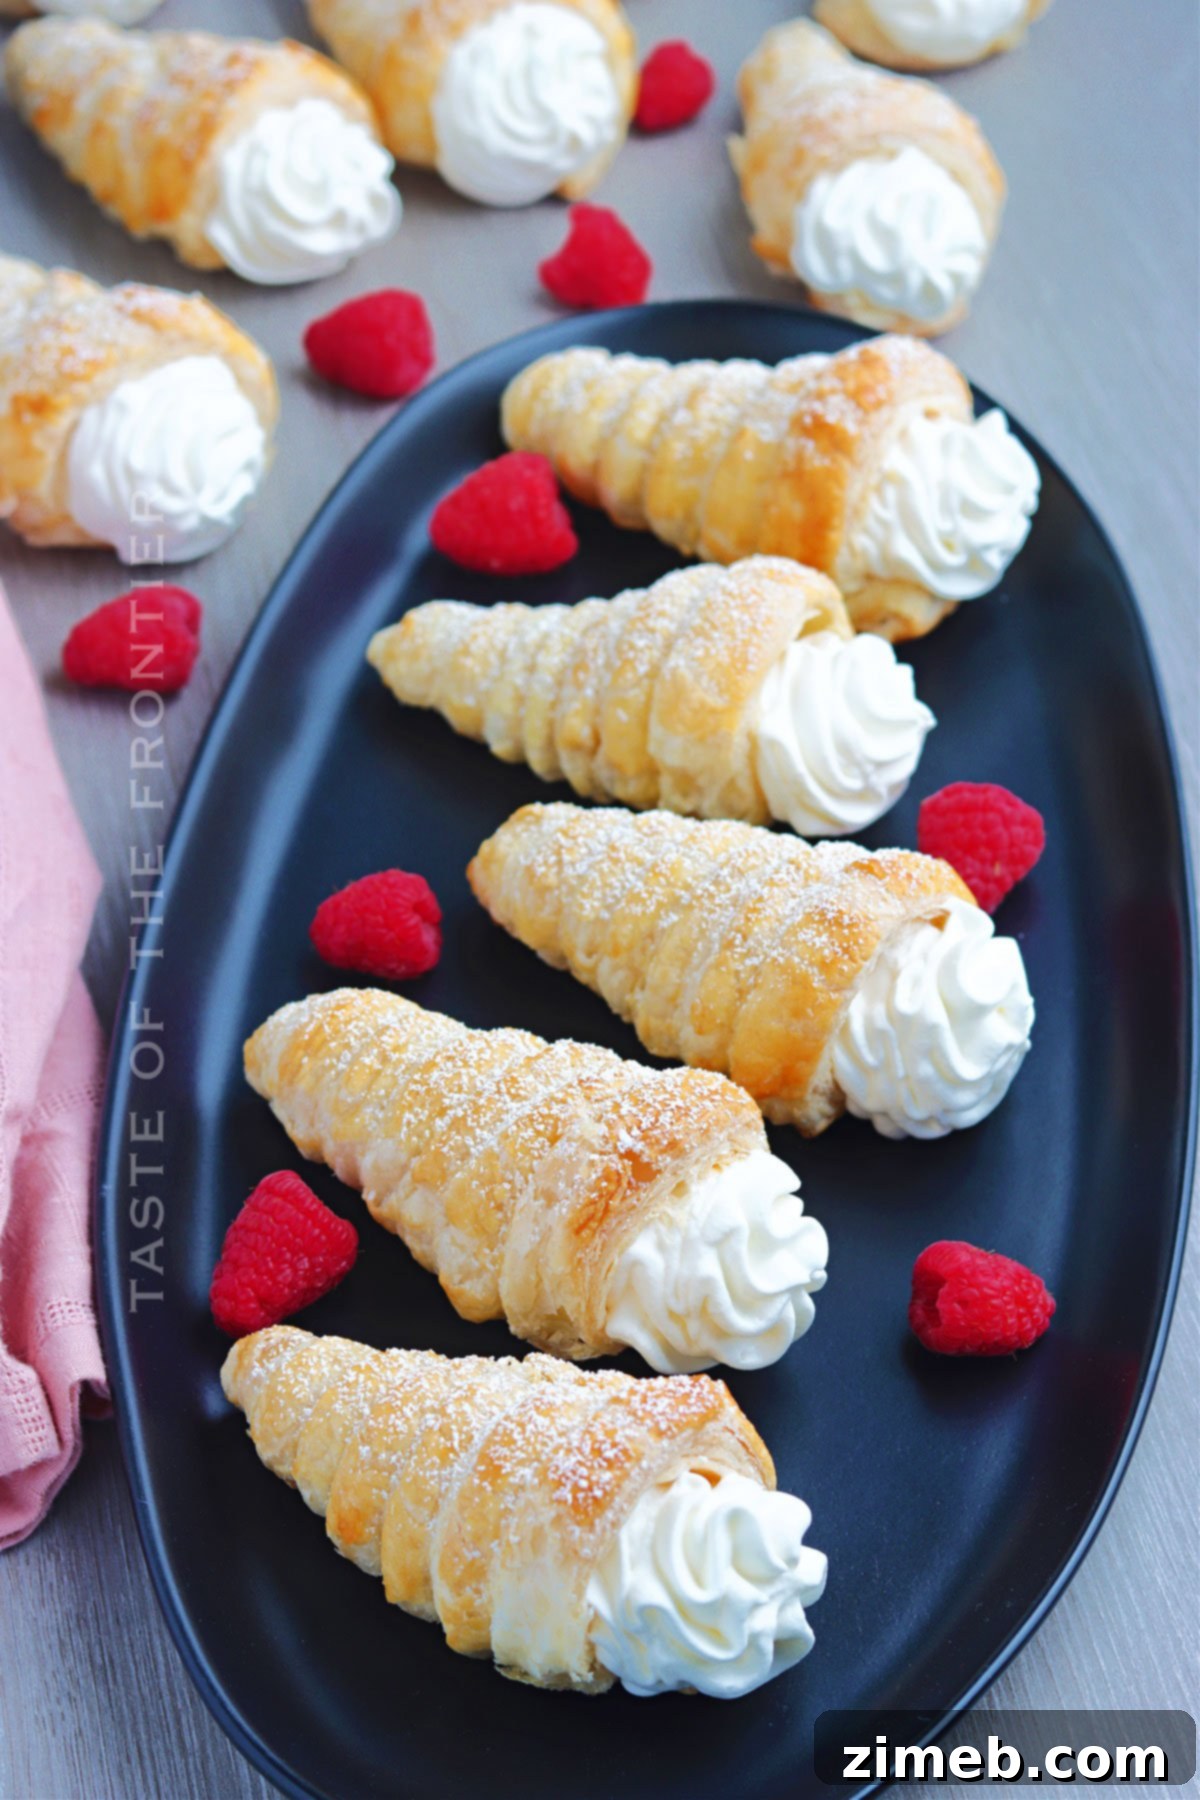
Cream Horns are more than just a dessert; they are a charming confection that brings joy to any gathering. With their distinctive conical shape, golden-brown flaky layers, and rich, sweet cream filling, they offer a sophisticated yet comforting experience in every bite. Originating from European bakeries, these classic pastries have captivated hearts for centuries. Their elegant appearance makes them a fantastic centerpiece for dessert tables, while their delicate structure and delightful taste make them a memorable treat for any palate.
Creating these homemade cream horns is surprisingly simple, especially when utilizing ready-made puff pastry. This recipe streamlines the process, allowing you to achieve bakery-quality results right in your own kitchen without extensive effort. From the satisfying crunch of the pastry to the smooth embrace of the cream, each element plays a crucial role in crafting this iconic dessert. So, gather your ingredients, clear your countertop, and let’s bring a touch of European patisserie magic into your home!
Why You’ll Love Making These Puff Pastry Cream Horns
This cream horn recipe simplifies the process of creating a truly special dessert, turning ordinary moments into extraordinary ones. Here’s why these homemade cream horns will become your new go-to treat:
- Effortlessly Elegant: Despite their sophisticated appearance, these cream horns are remarkably easy to prepare, thanks to the convenience of store-bought puff pastry. They are perfect for impressing guests at parties, family gatherings, or even as a delightful surprise for a quiet afternoon tea.
- A Delight for All Senses: The contrast between the golden, crispy puff pastry shell and the light, sweet, and airy cream filling is pure perfection. Each bite offers a satisfying crunch followed by a smooth, melt-in-your-mouth sensation that is utterly addictive.
- Fun for the Family: Involving kids in the kitchen can be a wonderful experience. Rolling out the pastry, cutting strips, and wrapping them around the molds can be a fun and engaging activity for younger helpers.
- Customizable Delights: This recipe serves as an excellent foundation for endless creativity. The cream filling can be flavored in numerous ways, and the finished pastries can be adorned with a variety of toppings, allowing you to tailor them to any preference or occasion.
- Light & Satisfying: Unlike many heavy desserts, cream horns offer a balance of sweetness and richness without being overly indulgent. They are a delicate finish to any meal or a perfect companion to your favorite hot beverage.
- Perfect for Any Occasion: Whether it’s a birthday, holiday celebration, bridal shower, or just a weekend treat, cream horns add a touch of class and sweetness that everyone appreciates.
Key Ingredients for Perfect Cream Horns
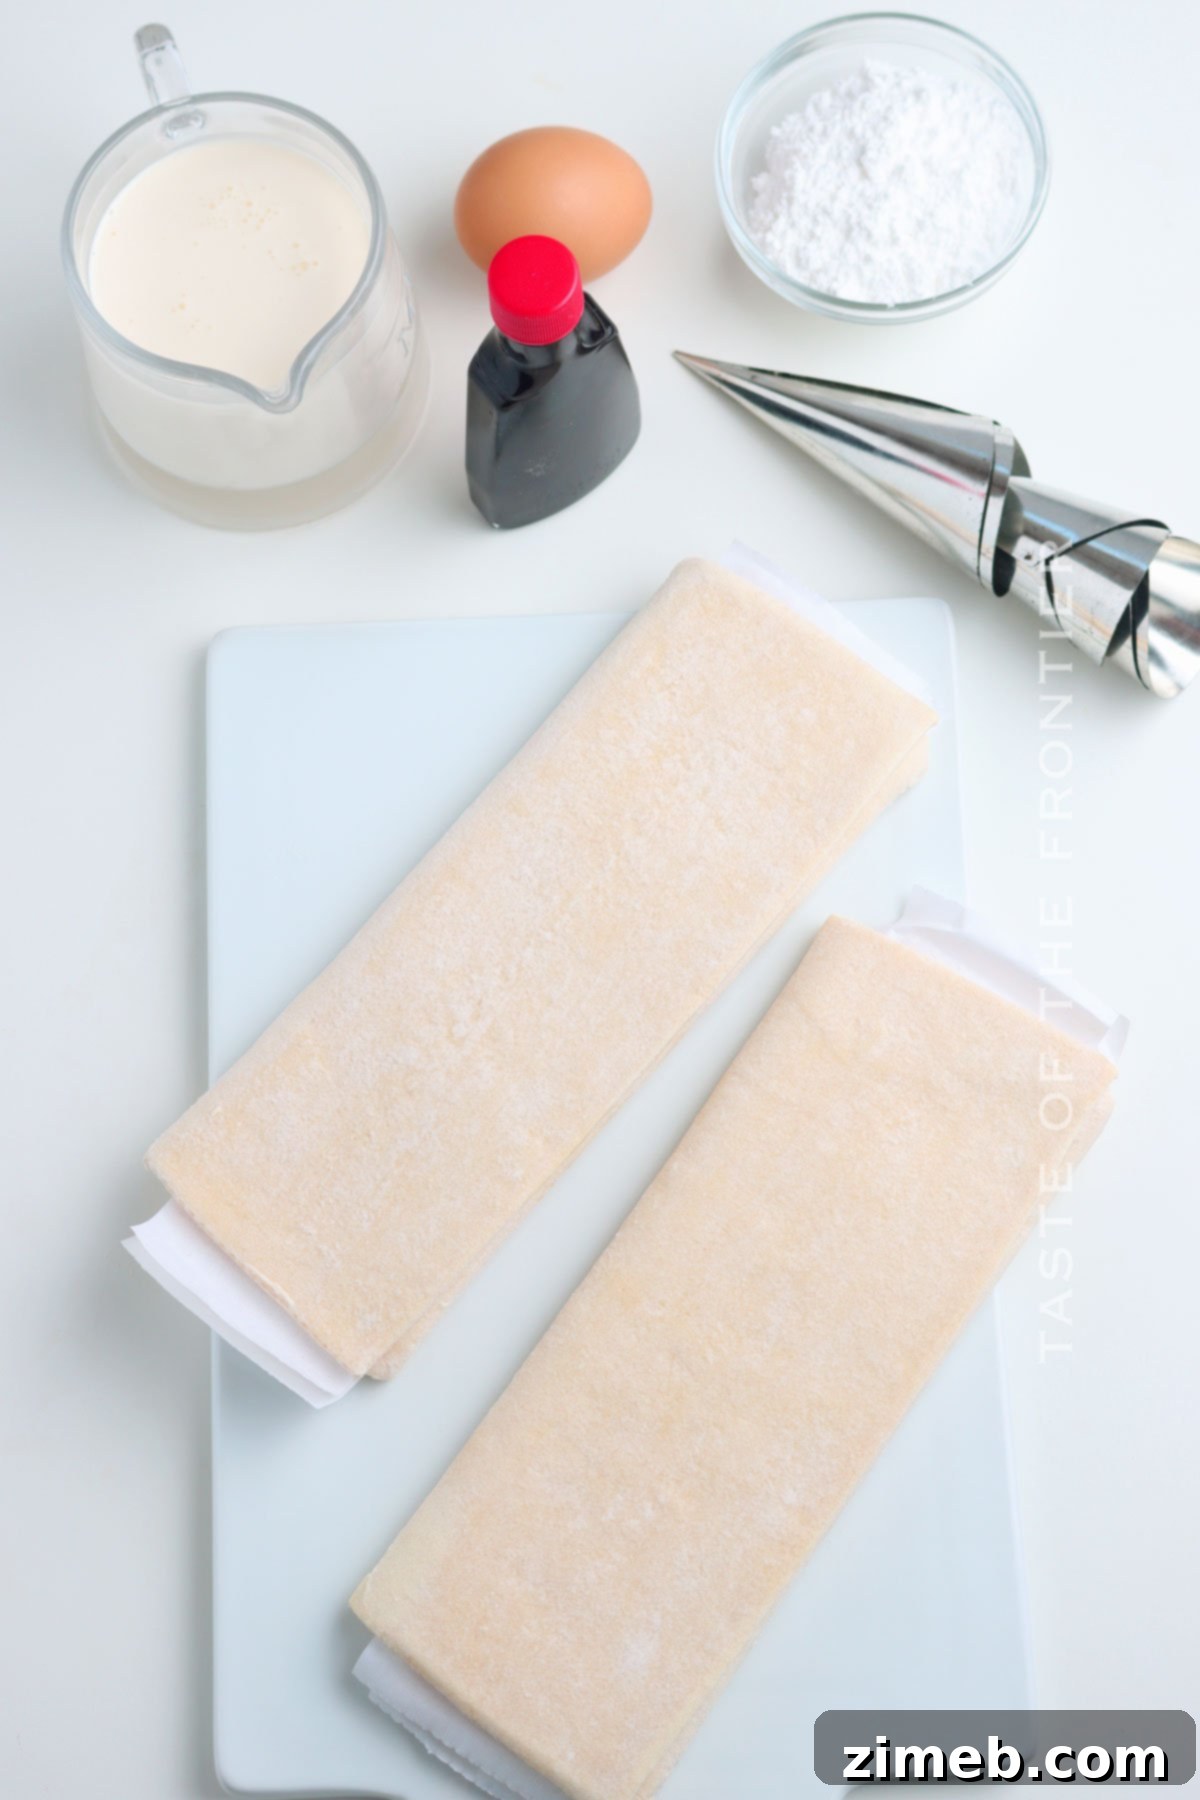
Crafting these delectable cream horns requires just a few simple ingredients, proving that extraordinary desserts don’t always demand a lengthy shopping list. Each component plays a vital role in achieving that signature flaky pastry and rich, creamy filling:
- Puff Pastry: The star of our show! Opt for good quality frozen puff pastry, thawed according to package instructions. This forms the crunchy, multi-layered shell of your cream horns. Its convenience makes this recipe accessible to even novice bakers.
- Large Egg: Used in combination with water to create an egg wash, which gives the pastry a beautiful golden sheen and helps it crisp up perfectly during baking.
- Water: Mixed with the egg for the egg wash, and also used to slightly moisten the pastry edges to ensure they seal properly when wrapped around the molds.
- Heavy Whipping Cream: The base for our luxurious filling. Ensure it’s very cold for optimal whipping results, leading to a stable and fluffy cream.
- Confectioner’s Sugar (Powdered Sugar): Sweetens the whipped cream and also provides that lovely, delicate dusting on the finished cream horns, adding a touch of visual appeal and extra sweetness. Sifting it is crucial for a smooth, lump-free cream.
- Clear Vanilla Extract: A secret weapon for maintaining the pristine white color of your whipped cream filling. Regular vanilla extract can impart a slight yellowish tint, which clear vanilla helps avoid.
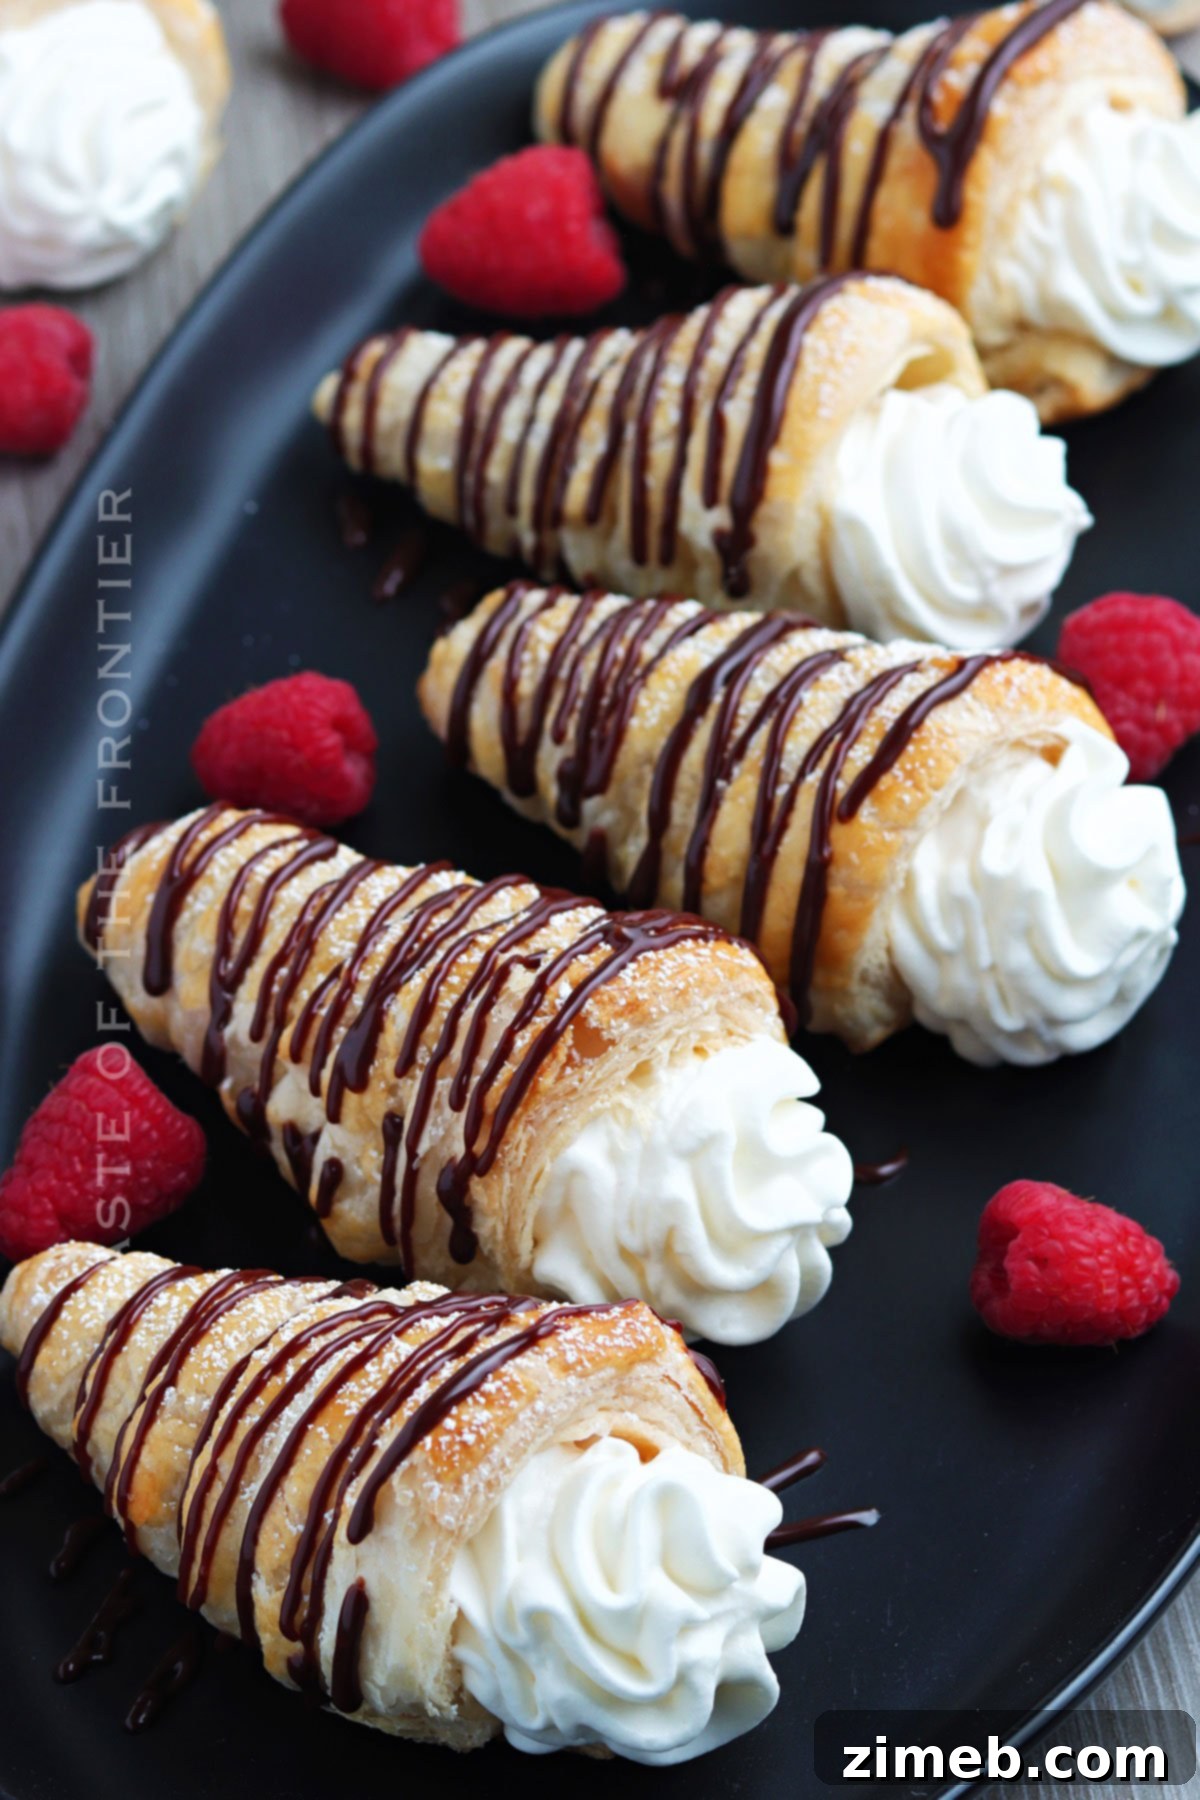
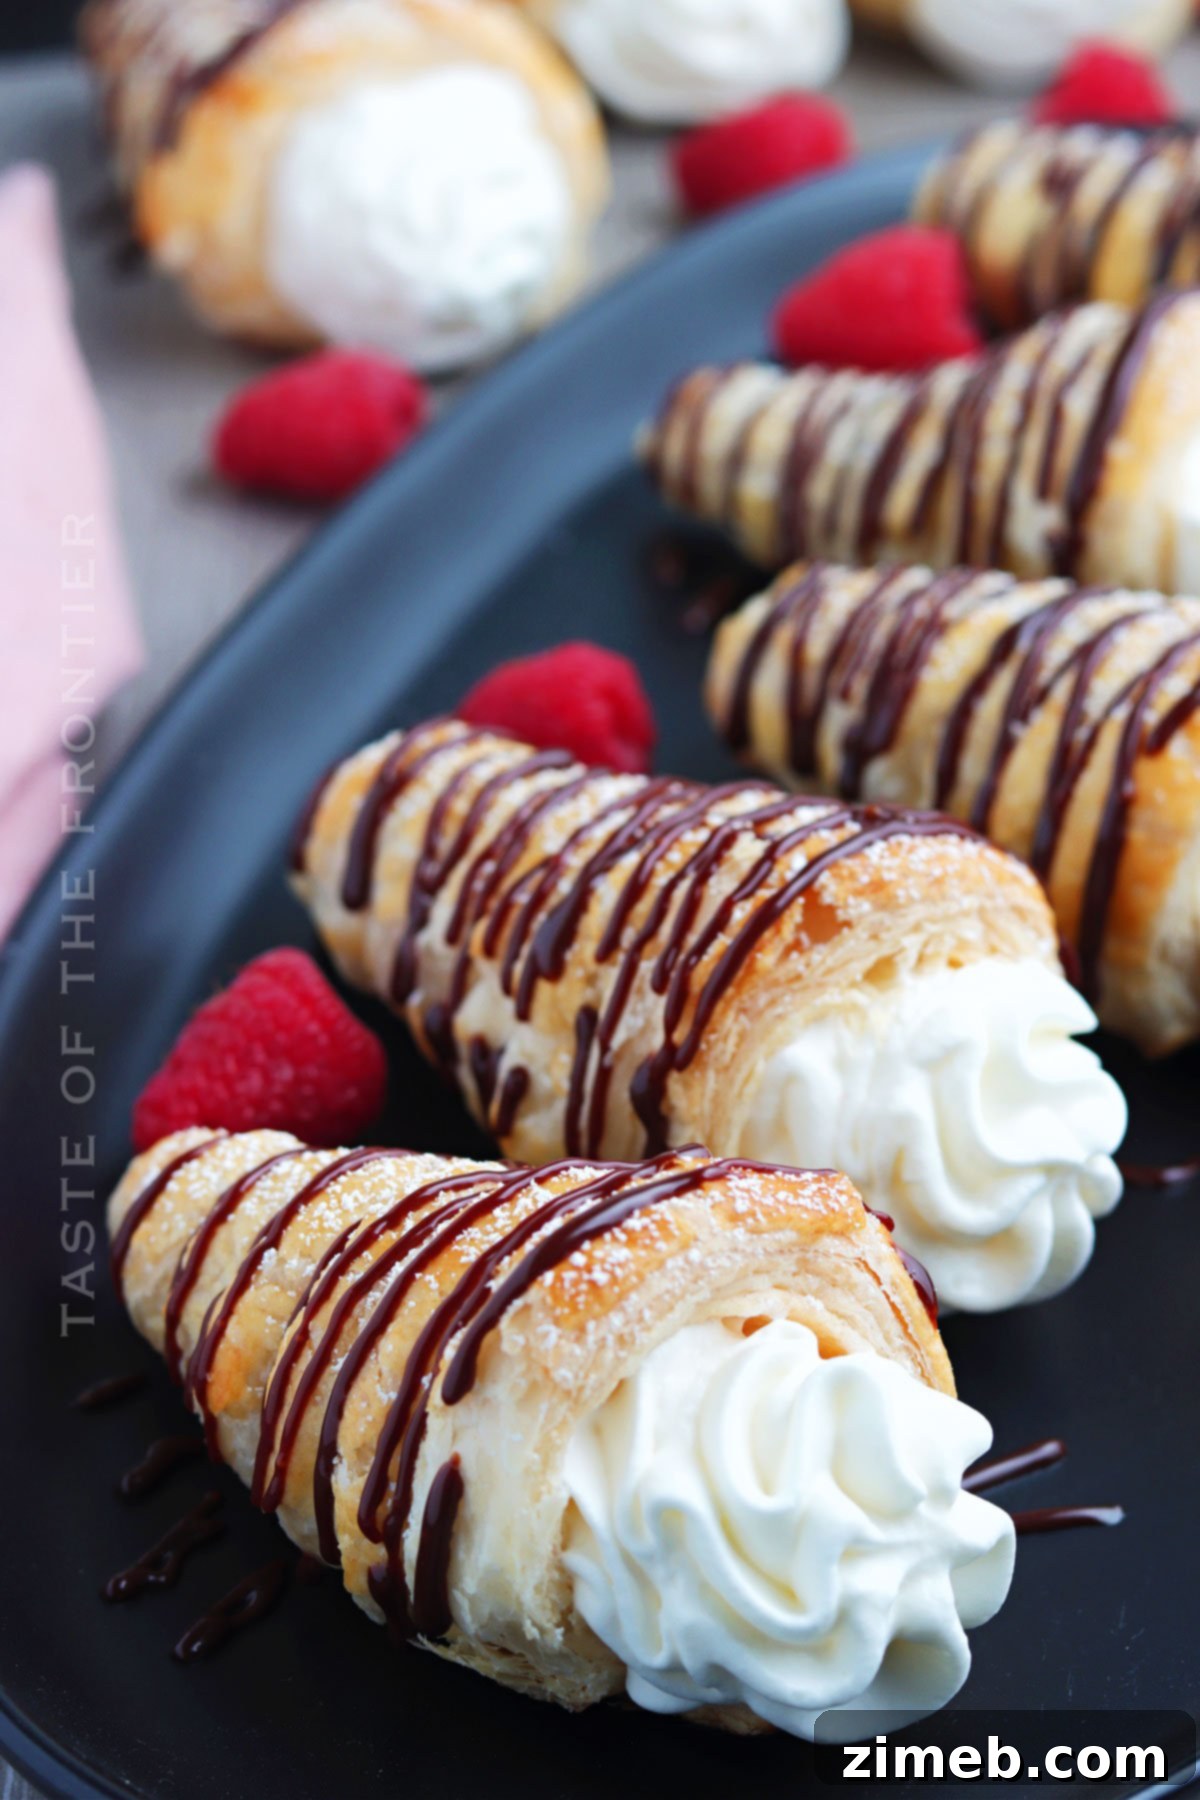
- Serving Options: Elevate your cream horns with a variety of accompaniments. Fresh berries like strawberries and raspberries add a bright, tart counterpoint to the sweet cream. A drizzle of chocolate sauce or hot fudge can transform them into an even more decadent treat.
Essential Kitchen Supplies for Baking Cream Horns
Having the right tools can make all the difference in your baking process. For these delectable puff pastry cream horns, here’s what you’ll need to gather:
- Oven: Essential for baking the puff pastry to golden perfection.
- Baking Sheet Pan: A sturdy pan to hold your cream horn molds during baking.
- Parchment Paper or a Silicone Baking Mat: To line your baking sheet, preventing sticking and ensuring easy cleanup.
- Lightly Floured Surface: For rolling out and handling the puff pastry without it sticking.
- Small Bowl: For preparing the egg wash.
- Pastry Brush: Ideal for applying the egg wash evenly over the pastry strips.
- Cream Horn Molds: These cone-shaped molds are crucial for giving the pastries their distinct spiral form. Stainless steel or aluminum ones are commonly used.
- Wire Rack: For cooling the baked pastry shells completely, which helps maintain their crispness.
- Refrigerator: To chill the heavy whipping cream and the bowl for whipping, ensuring your cream holds stiff peaks.
- Mixing Bowl (Chilled): A cold bowl helps whip heavy cream more effectively and achieve a stable, airy consistency.
- Electric Mixer (Handheld or Stand): For whipping the heavy cream to stiff peaks quickly and efficiently.
- Pastry Bag with a Star Tip: For neat and professional-looking filling of the cream horns. Alternatively, you can use a Ziploc bag with a corner snipped off.
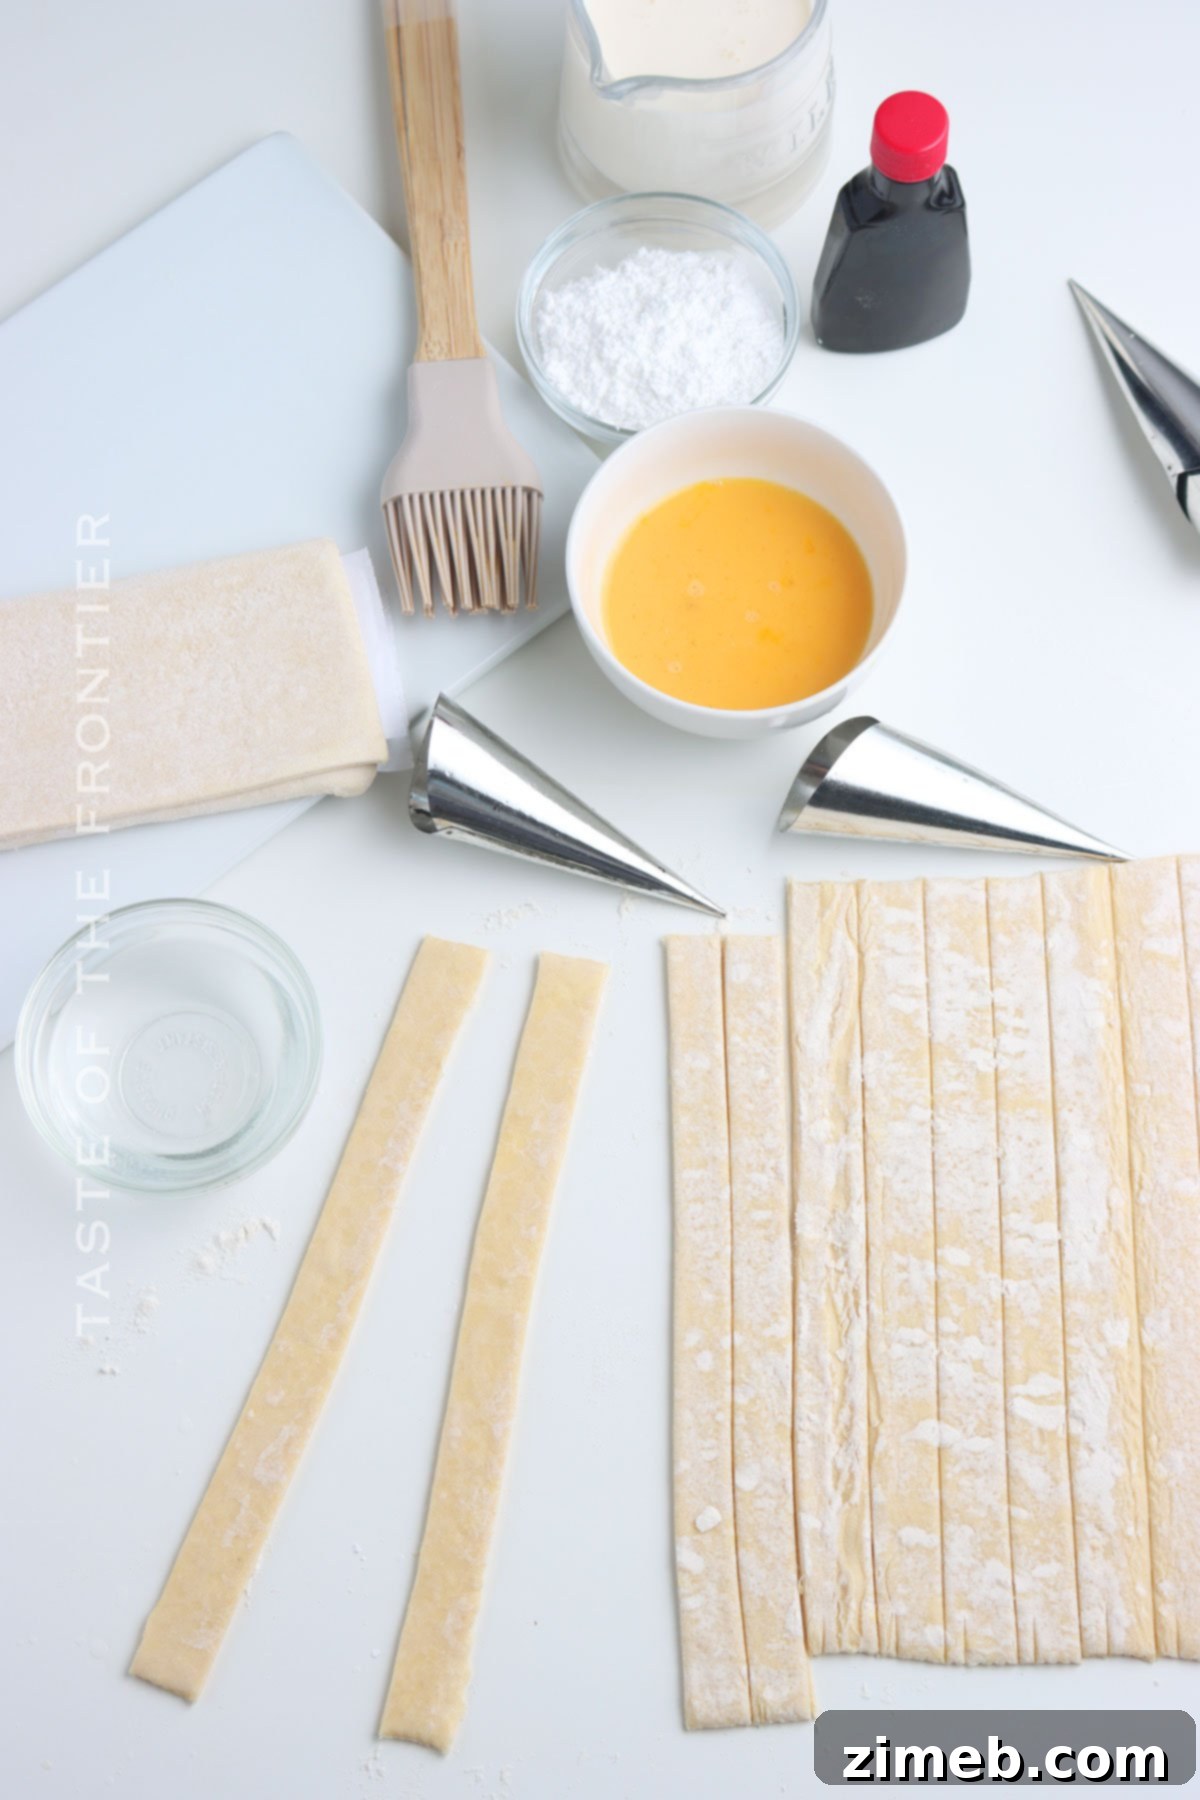
- Sharp Knife or Pizza Cutter: For cleanly cutting the puff pastry into even strips.
Common Questions About Cream Horns with Puff Pastry & Expert Tips
Even seasoned bakers have questions when trying a new recipe. Here are some common queries and essential tips to ensure your Cream Horns turn out perfect every time.
Why Is My Puff Pastry Not Rising?
The magical rise of puff pastry is attributed to the steam generated by the many layers of butter within the dough. If your puff pastry isn’t achieving its characteristic flaky layers, the most common culprit is insufficient chilling. It’s crucial that your puff pastry is properly chilled before baking. Warm pastry causes the butter to melt prematurely, collapsing the layers before steam can expand them. Always ensure your oven is preheated to the correct temperature; a hot oven provides the necessary burst of heat for maximum puff. Avoid opening the oven door frequently, as this drops the temperature and can inhibit rising.
Can Cream Horns Be Made Ahead of Time?
Absolutely! Cream horns are a fantastic make-ahead dessert, which makes them perfect for entertaining. You can bake the pastry horns a day or two in advance. Once baked and cooled, store the hollow pastry shells in an airtight container at room temperature. The key to preventing soggy pastries is to fill them with the creamy goodness just before serving. This maintains the crispness of the puff pastry, ensuring an optimal texture contrast with the smooth filling.
What Are Cream Horn Molds and Do I Need Them?
Cream horn molds are specialized, cone-shaped metal forms that are essential for creating the unique hollow, spiral shape of cream horns (also known as lady locks). Typically made from stainless steel or aluminum, these molds provide the structure around which you wrap the pastry dough before baking. After baking and cooling, the mold is easily removed, leaving a perfectly formed hollow cone ready to be filled with cream, custard, or any preferred filling. If you don’t have commercial molds, you can easily create a DIY version by shaping heavy-duty aluminum foil into cones.
Pro Tips for Flawless Cream Horns
Achieve bakery-worthy results with these simple yet effective tips:
- Keep it Chilled: The golden rule for puff pastry is to keep it cold. A well-chilled pastry guarantees maximum puff and a beautifully golden-brown finish. If the pastry becomes too warm during handling, pop it back into the refrigerator for 10-15 minutes.
- Prevent Sticking: Always line your baking tray with parchment paper or a silicone baking mat. This ensures the delicate pastry horns won’t stick and can be easily removed after baking.
- Perfect Egg Wash: When applying the egg wash, be thorough. Get into all the crevices and overlaps to ensure your pastry horns achieve a lovely, even golden color and a beautiful shine.
- Don’t Overfill: While tempting, avoid overfilling your pastry horns. Leaving a small space at the top prevents the cream from spilling out, keeping your presentation neat and tidy.
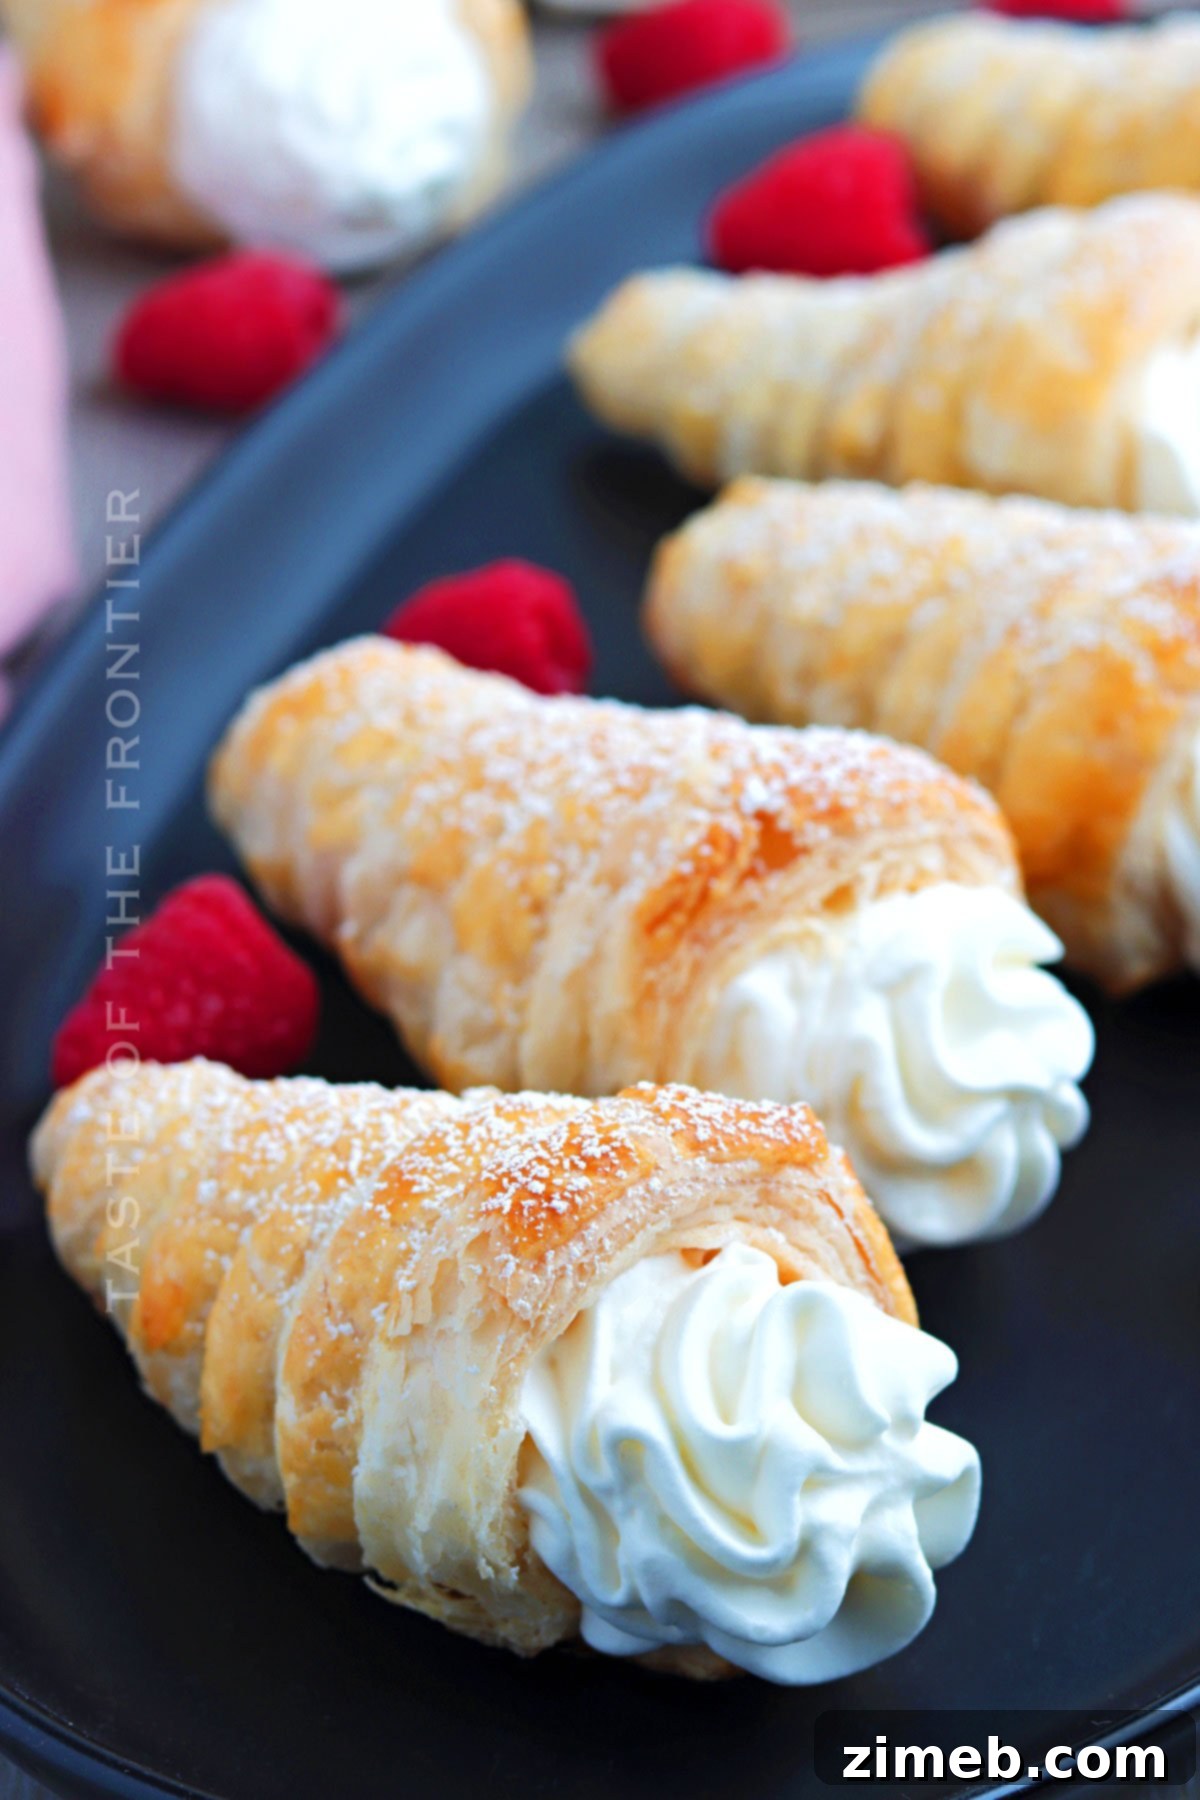
- Dust with Delight: For an extra touch of magic and sweetness, dust your finished cream horns with a little extra confectioner’s sugar just before serving. It enhances their visual appeal and adds a delicate sweetness.
- The Clear Vanilla Advantage: As noted in the ingredients, using clear vanilla extract for your whipped cream ensures it remains brilliantly white, giving your cream horns a pristine, elegant look.
- Whip it Good (and Cold!): For the best whipped cream, use a chilled bowl and cold heavy cream. This helps the cream whip up faster and achieve firm, stable peaks that hold their shape beautifully.
Creative Variations and Serving Suggestions
While classic cream horns are undeniably delicious, this recipe offers a fantastic canvas for your culinary creativity. Feel free to experiment with different fillings and toppings to suit your taste or occasion:
- Flavorful Fillings:
- Lemon Cream: For a zesty twist, swap the vanilla extract in your whipped cream for lemon zest and a squeeze of fresh lemon juice, or even fold in some pre-made lemon curd.
- Chocolate Indulgence: Fold in mini chocolate chips, a spoonful of cocoa powder, or a swirl of melted chocolate into your whipped cream for a chocolatey surprise. A chocolate pastry cream could also be a decadent alternative.
- Nutty Notes: Infuse your cream with a hint of almond extract or finely ground pistachios for a sophisticated flavor profile.
- Fruit Curd: Fill the horns with a vibrant raspberry, passion fruit, or mango curd for a tangy and refreshing treat.
- Delightful Toppings:
- Chocolate Dipped: For extra indulgence, dip the wide end of the baked pastry horn into melted dark, milk, or white chocolate before filling. Let it set before adding the cream.
- Crushed Nuts: Sprinkle some finely crushed pistachios, almonds, or hazelnuts on top of the cream filling for an added crunch and nutty flavor.
- Citrus Zest: A delicate grating of orange or lemon zest over the cream adds a bright, aromatic finish.
- Spices: A light dusting of cinnamon or cardamom can add warmth and intrigue, especially during cooler months.
- Perfect Pairings & Occasions:
- High Tea: Cream horns are a quintessential component of any elegant high tea spread, pairing wonderfully with a variety of teas.
- Coffee Break: Picture taking a delightful break in your afternoon, sitting down with a warm cup of coffee and a cream horn – a truly perfect moment of indulgence.
- Dessert Course: These flaky pastries are the ideal light and sweet treat to conclude a satisfying dinner, acting as the perfect “cherry on top” for any fantastic meal.
- Brunches & Showers: Their delicate nature and beautiful presentation make them perfect for bridal showers, baby showers, or elegant brunch buffets.
How to Store Cream Horns
These delectable cream horns have a tendency to disappear quickly! However, if you happen to have any delightful leftovers, or if you’re planning to bake ahead, here’s how to store them to maintain their freshness and exquisite texture.
Refrigerator Storage for Filled Cream Horns:
If your cream horns are already filled with cream, it’s best to store them in an airtight container (such as Tupperware or a sturdy Ziploc bag) in the refrigerator. They will remain fresh and delicious for up to 2-3 days. While they will still be tasty, the pastry may soften slightly over time due to the moisture from the cream. For the absolute best texture, serving them immediately after filling is recommended.
Refrigerator Storage for Unfilled Pastry Shells:
To preserve the crispness of the puff pastry, it’s highly recommended to store the unfilled, baked pastry horns and the whipped cream separately. Place the cooled pastry horns in an airtight container at room temperature for up to 2 days, or in the refrigerator for up to 3 days. Prepare your whipped cream just before you plan to serve, and then assemble. This method ensures that the pastry remains wonderfully flaky.
Freezer Storage for Unfilled Pastry Shells:
For longer storage, you can freeze the unfilled, baked pastry horns. Once they are completely cooled, arrange them in a single layer on a baking sheet and freeze until solid. Then, transfer the frozen horns to a freezer-safe airtight container or a heavy-duty freezer bag. They can be stored in the freezer for up to a month. When you’re ready to enjoy them, simply thaw the pastry horns at room temperature for about 30 minutes to an hour, or crisp them up gently in a low oven (around 250°F / 120°C) for 5-7 minutes. Once thawed/re-crisped and cooled, fill them with fresh whipped cream and serve.
How to Make Cream Horns with Puff Pastry: Step-by-Step
Forget store-bought pastries; this recipe will help you create gourmet-quality cream horns that will earn you a five-star rating from your dinner guests every single time!
- Prepare Your Oven & Baking Sheet: Preheat your oven to 400°F (200°C). Line a large baking sheet with parchment paper or a silicone baking mat to prevent sticking.
- Thaw & Unroll Pastry: Unroll one sheet of thawed puff pastry onto a lightly floured surface. Ensure it’s fully defrosted but still cold to the touch.
- Cut Pastry Strips: Using a sharp knife or pizza cutter, cut the pastry into even strips. If your puff pastry has natural creases, use them as guides. Typically, you’ll get about 4 strips per section, or roughly 1-inch wide strips.
- Prepare Egg Wash: In a small bowl, lightly beat together the large egg and one tablespoon of water to create an egg wash.
- Moisten Pastry Edges: Take one pastry strip and flip it over. Using your finger or a small pastry brush, lightly wet one end and one long edge of the strip with water. This will help create a secure seal.
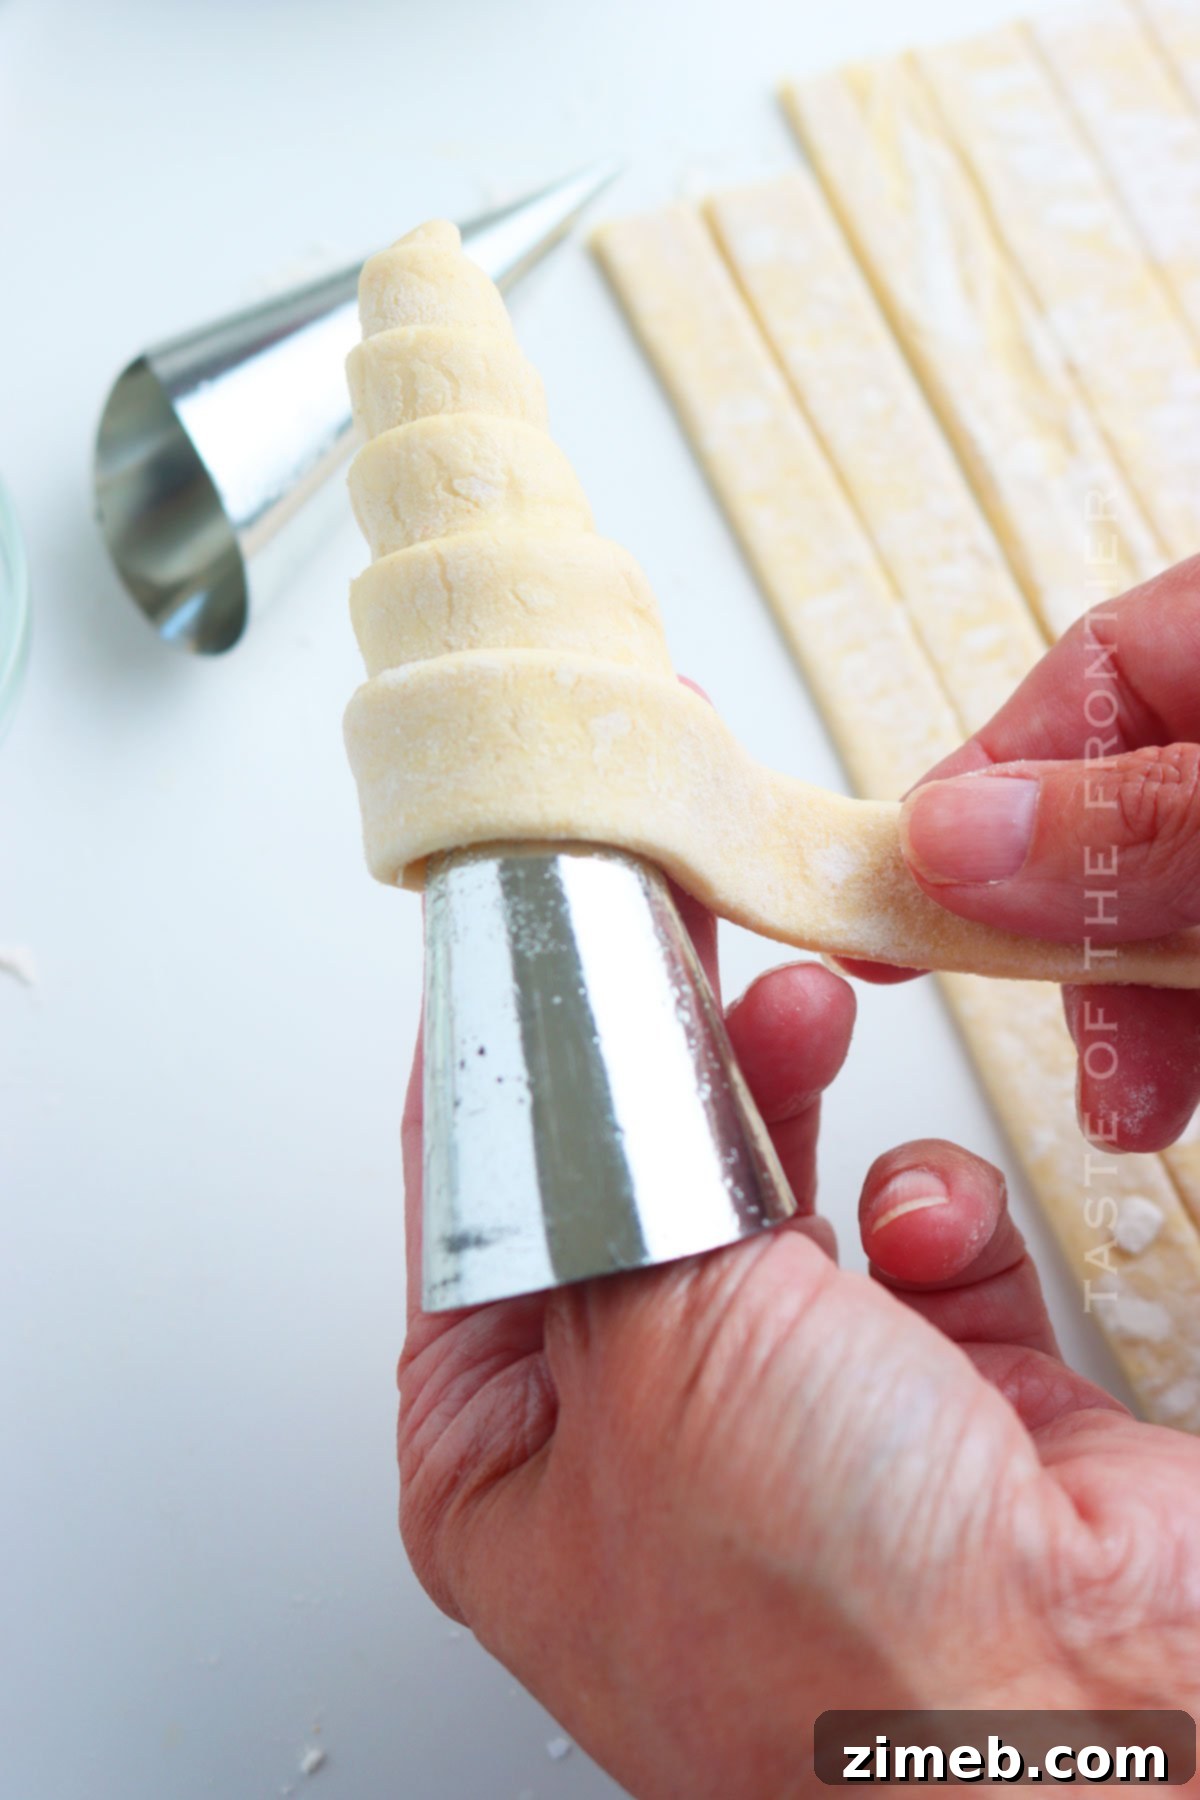
- Wrap the Molds: Starting from the pointed end of a cream horn mold, wrap a pastry strip diagonally around it, slightly overlapping each turn as you work your way up to the wider end. The moistened edge should overlap the dry edge of the previous turn. It will typically take two strips to fully cover one mold, wrapping from one end to the other for a complete spiral.
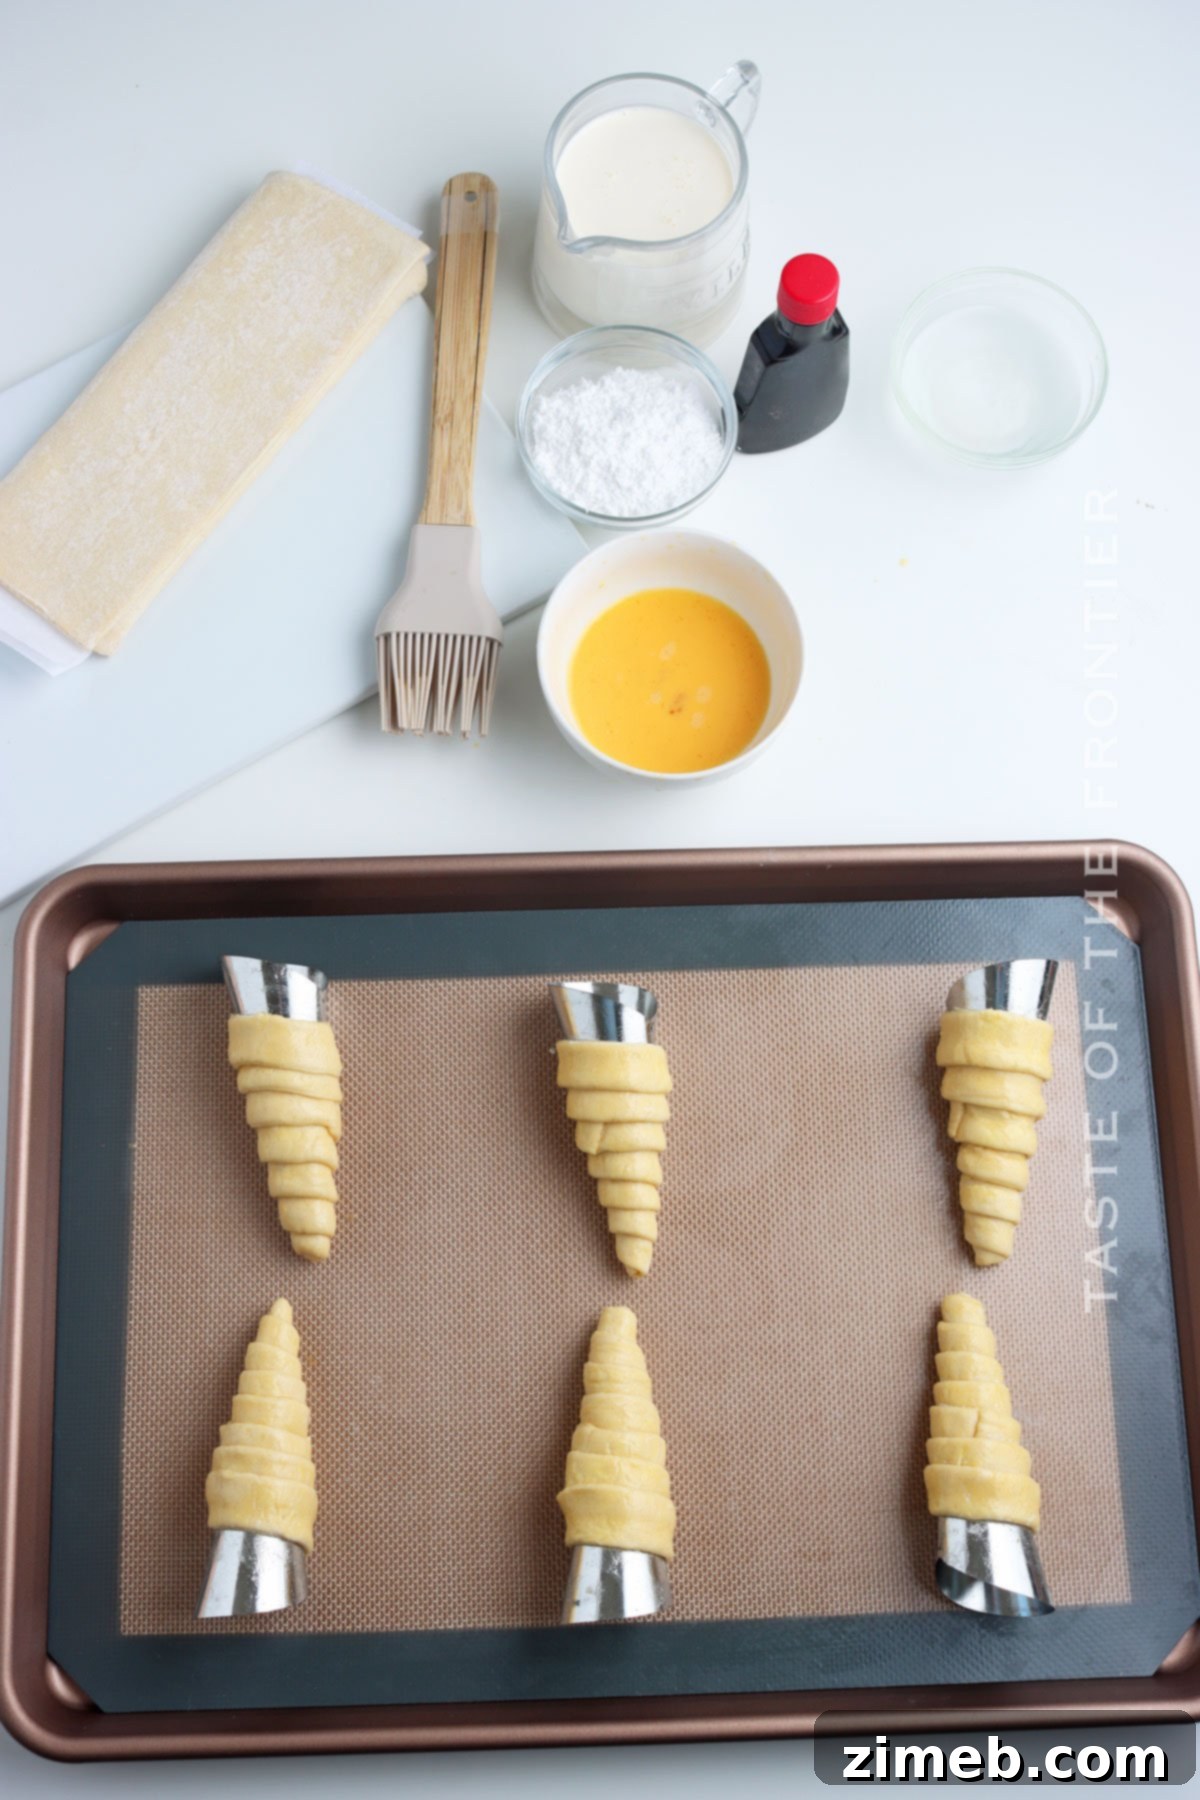
- Apply Egg Wash: Gently brush the wrapped molds with the egg wash, ensuring you get into any cracks or seams for an even golden color.
- Bake to Golden Perfection: Place the prepared molds on your lined baking sheet. Bake for 12-15 minutes, or until the pastry is puffed, golden brown, and delightfully crisp.
- Cool & Unmold: Carefully remove the baked horns from the oven and transfer them to a wire rack to cool completely. This is crucial for maintaining their crispness. Once cooled, gently twist and remove the metal molds from the pastry shells.
- Chill Whipping Bowl: While the horns cool, place the mixing bowl you intend to use for the filling into the refrigerator or freezer to chill. A cold bowl helps significantly in whipping cream to stiff peaks.
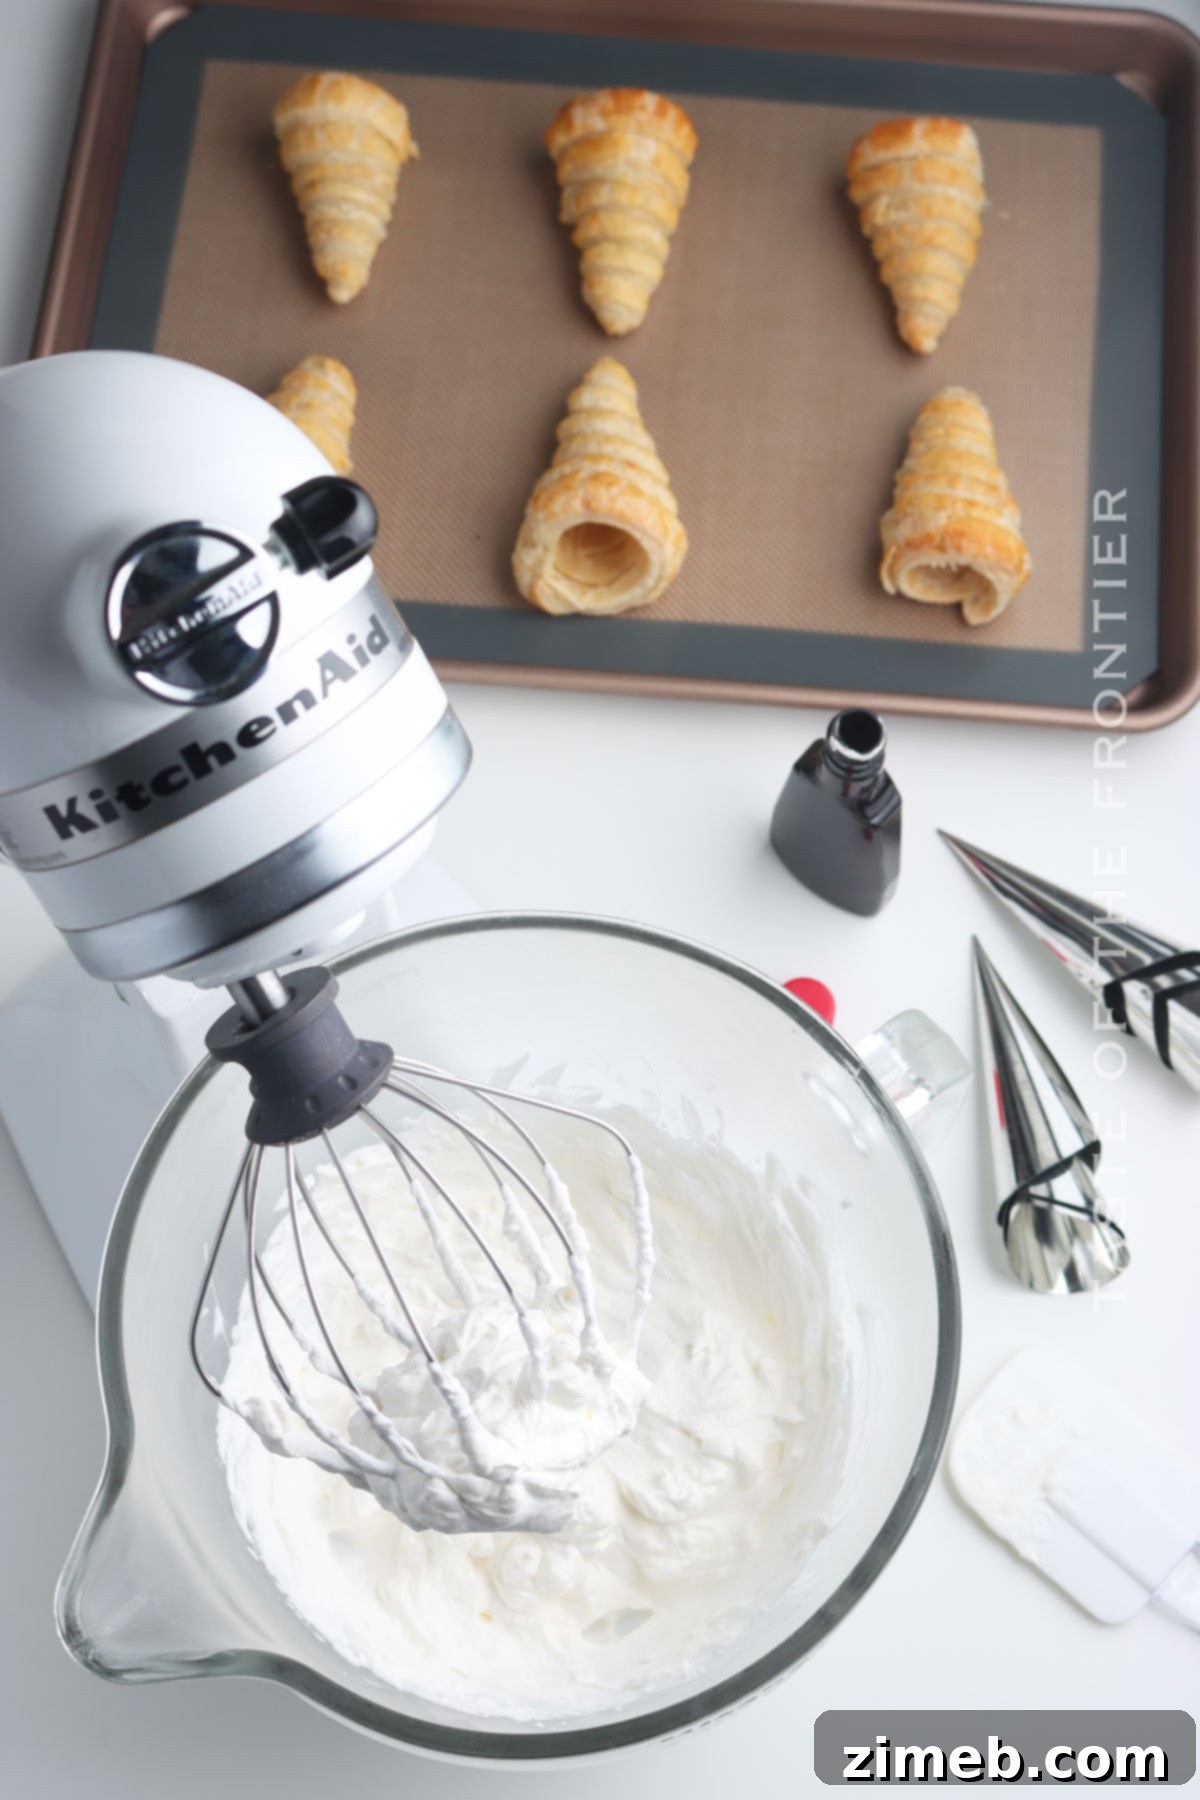
- Whip the Cream: Once the pastry horns are completely cool, remove the chilled bowl from the refrigerator. Pour in the chilled heavy whipping cream and clear vanilla extract.
- Whip to Soft Peaks: Using an electric mixer, beat the cream until soft peaks begin to form.
- Add Sugar & Continue Whipping: Gradually add the sifted confectioner’s sugar and continue beating until stiff peaks form. The cream should be thick and hold its shape.
- Fill the Horns: Transfer the whipped cream to a pastry bag fitted with a star tip (or a Ziploc bag with a corner snipped off). Carefully fill each cooled pastry horn with the cream.
- Garnish & Serve: Dust with additional confectioner’s sugar if desired. Serve immediately with fresh fruit like strawberries or raspberries, or a luscious drizzle of chocolate sauce.
- Store Leftovers: Any leftover filled cream horns should be stored in an airtight container in the refrigerator.
If you love this easy cream horns recipe as much as I do, please take a moment to write a five-star review, and be sure to help me share the joy of baking on Facebook and Pinterest!
CONNECT WITH YUMMI HAUS!
Be sure to follow me on my social media, so you never miss a post!
Substack, FB, Pinterest, IG, Email Subscription
Rate this Recipe
Cream Horns with Puff Pastry
Ingredients
- 17.3 oz puff pastry thawed (1 box)
- 1 large egg
- 1 tablespoon water
- 1 cup heavy whipping cream
- ¼ cup confectioner’s sugar sifted plus more for dusting if you like
- 1 teaspoon clear vanilla extract **see notes
Serving Options
Strawberries
Raspberries
Chocolate Sauce or Hot Fudge Sauce
Instructions
-
Preheat the oven to 400 degrees F.
-
Line a baking sheet with parchment paper or a silicone baking mat.
-
Unroll 1 sheet of the thawed puff pastry onto a lightly floured surface.
-
Cut the pastry into strips using the creases as a divider, cutting each section into 4 strips.
-
In a small bowl, beat together the egg and water.
-
Flip each strip over and using your finger or small brush, wet the edge to the left and both ends with water.
-
Wrap a pastry strip around the cream horn mold diagonally from one end to the other, slightly overlapping each turn. It will take 2 strips to cover 1 horn.
-
Brush the wrapped molds with the egg wash, be sure to get into the cracks.
-
Bake for 12-15 minutes or until golden brown.
-
Remove them from the oven and place them on a wire rack to cool completely. Then remove the molds.
-
Meanwhile, chill the bowl you will be beating the filling in.
-
When the horns are cooled completely, remove the bowl from the refrigerator and pour in the chilled heavy whipping cream and vanilla extract.
-
Beat until soft peaks form.
-
Add the sifted confectioner’s sugar and continue beating until stiff peaks form
-
Transfer the cream to a pastry bag and fill each horn.
-
Dust with additional confectioner’s sugar if you like and serve with fruit or a drizzle of chocolate sauce
-
Store leftovers in the refrigerator.
Notes
Nutrition
Nutritional information for the recipe is provided as a courtesy and is approximate. Please double-check with your own dietary calculator for the best accuracy. We at Yummi Haus cannot guarantee the accuracy of the nutritional information given for any recipe on this site.
More Great Puff Pastry & Sweet Treat Recipes
If you’re now a fan of easy puff pastry desserts, or just love sweet treats, explore these other fantastic recipes:
Check out this recipe
Check out this recipe
Check out this recipe
Check out this recipe
Check out this recipe
Easy Cruffin Recipe
Raspberry Pastry Twists
Strawberry Napoleons
White Chocolate Palmiers