

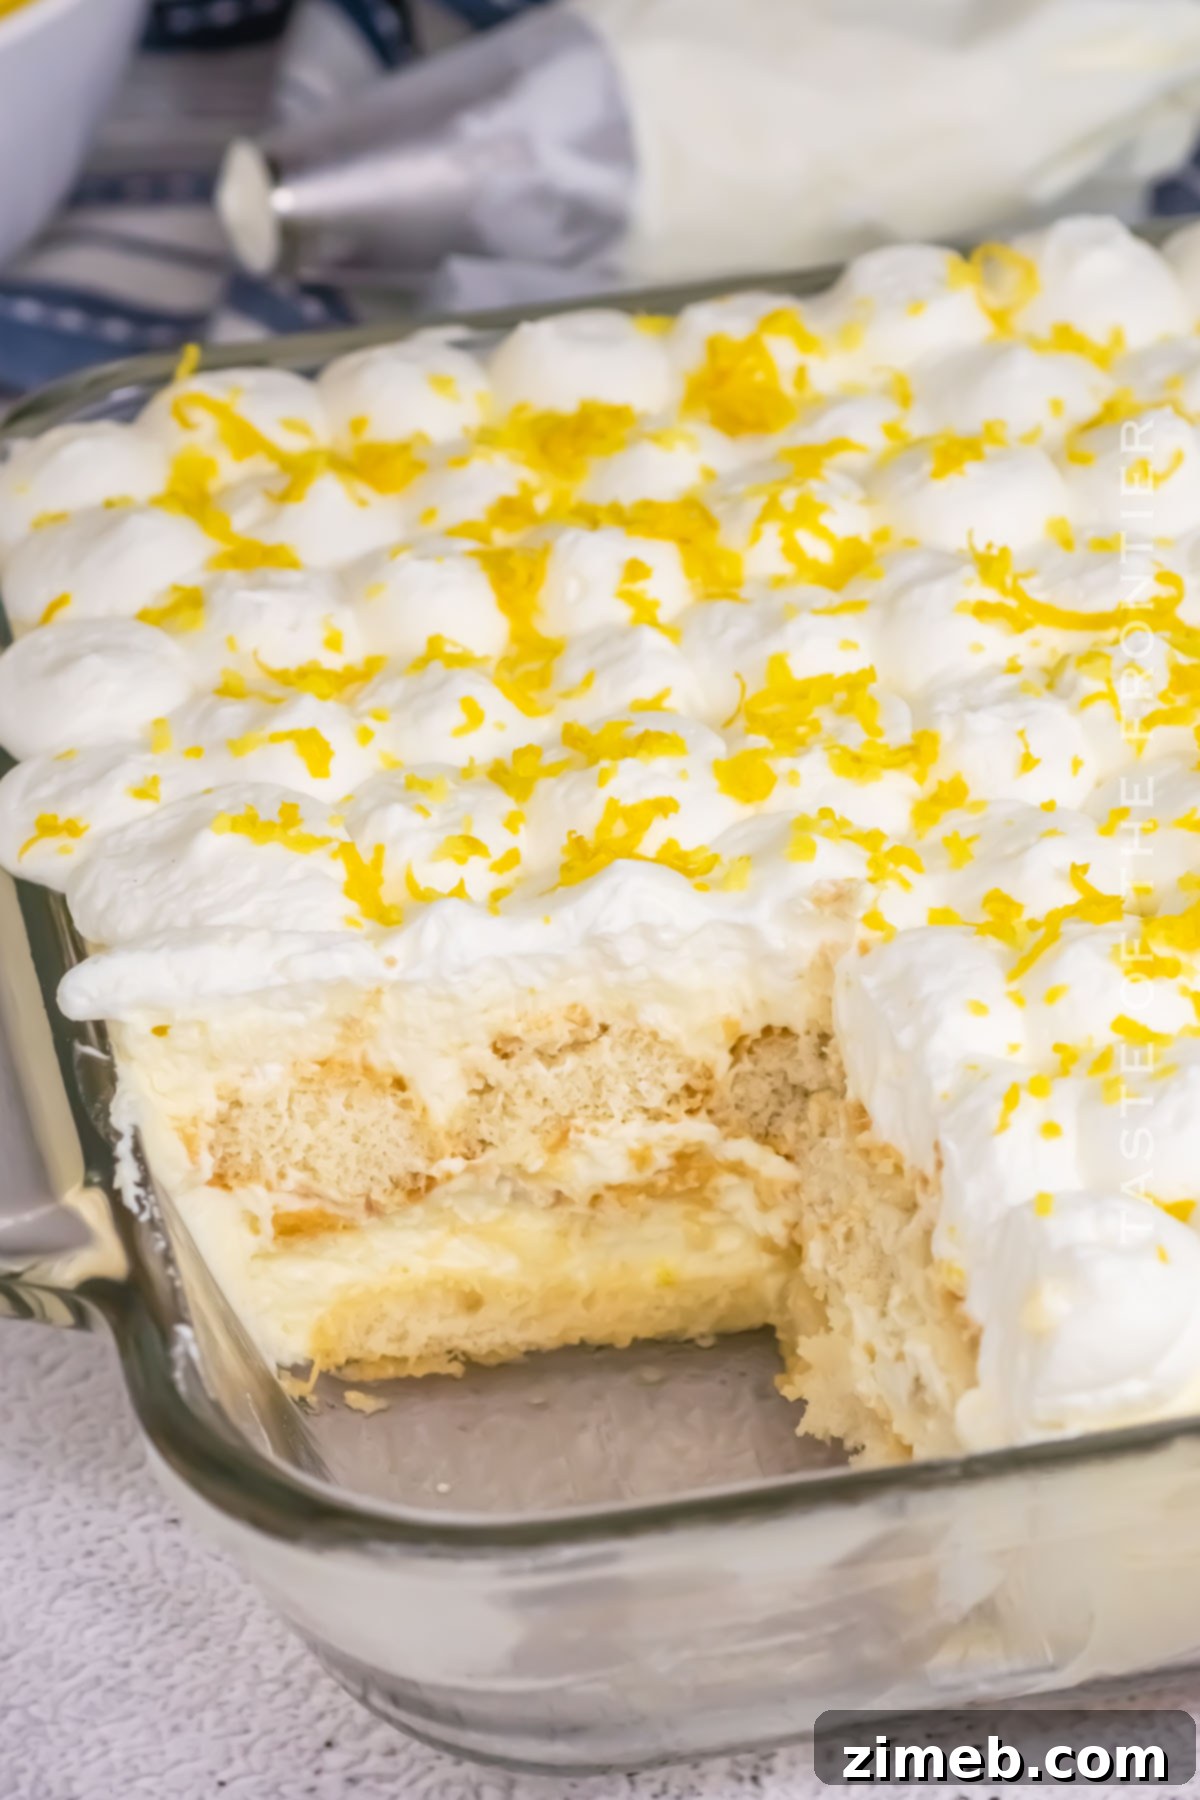
Welcome to a delightful culinary journey where Italian tradition meets a vibrant citrus twist: the exquisite Limoncello Tiramisu. This dessert isn’t just a treat for your taste buds; it’s an experience, transporting you straight to the sun-drenched Amalfi Coast with every spoonful. Forget the ordinary; this Limoncello Tiramisu reimagines the classic Italian masterpiece, infusing it with the bright, zesty essence of lemon liqueur, creating a refreshing and irresistibly creamy delight.
Imagine soft, delicate ladyfinger biscuits, lovingly soaked in a homemade limoncello syrup that bursts with tangy lemon flavor and a subtle alcoholic kick. These tender layers are then nestled between clouds of rich, velvety mascarpone cream, elevated further with the addition of bright lemon curd. The entire creation is crowned with a generous swirl of freshly whipped cream and a sprinkle of aromatic lemon zest, creating a dessert that is as visually stunning as it is incredibly delicious.

Whether you’re hosting a special gathering, celebrating a milestone, or simply craving a taste of Mediterranean sunshine, this Limoncello Tiramisu recipe offers an easy yet elegant solution. Its make-ahead convenience means you can prepare it in advance, allowing the flavors to meld and deepen, resulting in an even more spectacular dessert. The harmonious blend of tangy lemon, creamy mascarpone, and light ladyfingers creates a symphony of textures and flavors that is truly hard to resist. Don’t wait for a special occasion; embrace the joy of creating this enchanting dessert today and let every bite feel like a sunny escape to Southern Italy.
What Makes Limoncello Tiramisu So Special?
This Limoncello Tiramisu stands out from its traditional coffee-infused counterpart by offering a refreshing and unexpected flavor profile. While classic tiramisu is beloved for its rich coffee and cocoa notes, this lemon-centric version brightens the palate with a vibrant zest. It’s an ideal choice for those who prefer fruity desserts or are looking for a lighter, more refreshing option after a meal, especially during warmer months. The golden hue and fragrant aroma of limoncello instantly evoke images of lemon groves under the Italian sun, making it a feast for all senses.
Beyond its unique flavor, the convenience factor of Limoncello Tiramisu is a major draw. As a no-bake dessert, it requires minimal active cooking time, relying primarily on chilling to set its luscious layers. This makes it a perfect candidate for busy hosts or anyone who appreciates a show-stopping dessert without the oven time. It’s also incredibly versatile, easily adaptable for different serving sizes and occasions, from intimate dinners to large parties.
Common Questions About Limoncello Tiramisu
Can I use cream cheese instead of mascarpone cheese?
While mascarpone cheese is truly ideal for its signature rich, buttery, and incredibly creamy texture, cream cheese can be used as a substitute in a pinch. However, be aware that cream cheese has a tangier flavor and a slightly firmer consistency. For the best results when substituting, ensure your cream cheese is at room temperature to allow it to blend smoothly and prevent lumps. A useful tip is to combine it with a tablespoon or two of heavy cream to help mimic mascarpone’s creaminess.
What if I don’t have limoncello?
Limoncello liqueur is crucial for the authentic, intense lemon flavor and a touch of alcoholic complexity in this tiramisu. If you don’t have it, you have a couple of options. For a non-alcoholic version, you can create a concentrated lemon syrup using fresh lemon juice, sugar, and water, perhaps with a touch of lemon extract for intensified flavor. If you want to retain a subtle alcoholic note, you can combine fresh lemon juice with a small amount of vodka or a clear citrus-flavored liqueur. Remember, while these alternatives work, they won’t perfectly replicate the distinct sweetness and aroma of traditional limoncello.

How long should I soak the ladyfingers?
Unlike traditional tiramisu, where ladyfingers are briefly dipped in coffee, for Limoncello Tiramisu, you’ll be using a vibrant lemon-infused syrup. The key here is a quick dip – literally just a second or two per side. Ladyfingers are highly absorbent, and over-soaking them will lead to a soggy, mushy tiramisu texture, which is far from ideal. You want them just moistened enough to absorb the lemon flavor and moisture, softening slightly but retaining their structure. A quick flip in the syrup is all that’s needed to achieve this perfect balance.
Can I make Limoncello Tiramisu ahead of time?
Absolutely! Limoncello Tiramisu is an excellent make-ahead dessert. In fact, it often tastes even better the next day after the flavors have had ample time to meld and the ladyfingers have fully softened and absorbed the limoncello syrup. Prepare it a day in advance, cover it loosely with plastic wrap, and chill it in the refrigerator overnight for optimal flavor and texture development. This makes it a perfect choice for entertaining, allowing you to focus on your guests.
Storage Guidelines
For the best possible taste and texture, this Limoncello Tiramisu is truly exceptional when enjoyed fresh, ideally within a day or two of preparation. While it remains delicious, prolonged storage can cause the ladyfingers to become overly soft. Proper storage is key to preserving its delightful qualities.
Refrigerator
Store your Limoncello Tiramisu, covered tightly with plastic wrap or in an airtight container, in the refrigerator for up to 2-3 days. This prevents it from absorbing odors from other foods and keeps it fresh.
Freezer
Freezing is generally not recommended for this dessert. The delicate creamy layers and the texture of the ladyfingers can change significantly upon thawing, leading to a watery consistency and a less appealing overall experience.

Expert Tips for Tiramisu Perfection
Creating a truly memorable Limoncello Tiramisu is an art, but with these expert tips, you’ll achieve perfection every time. The bright sweetness and zesty zing from the lemon-soaked ladyfingers are what make this dish incredibly special, especially for fellow lemon dessert enthusiasts!
- **Achieve Stiff Peaks for Whipped Cream:** When whipping your heavy cream, whether for mixing into the mascarpone or for the topping, ensure you achieve stiff peaks. This is crucial for creating that light, airy, and stable texture that makes tiramisu so delightful. Over-whipping can lead to grainy cream, so watch it closely.
- **Gentle Folding is Key:** When combining the whipped cream with the mascarpone mixture, use a large rubber spatula and fold gently. This technique helps to maintain the airiness of the whipped cream and prevents the mascarpone from becoming too dense or separating.
- **Room Temperature Mascarpone:** For the smoothest possible mascarpone cream, ensure your mascarpone cheese is at room temperature before you begin mixing. This allows it to loosen easily and combine seamlessly with other ingredients without clumping.
- **Don’t Overmix Mascarpone:** Mascarpone is delicate. Once you’ve added the lemon curd, limoncello, and lemon juice, mix just until combined on low speed. Overmixing can cause the mascarpone to separate and become grainy.
- **The Ladyfinger Dip:** As mentioned, a quick dip is paramount. Each ladyfinger should only be in the syrup for a second or two per side. It should be moistened but not saturated to avoid a soggy final product.
- **Ample Chilling Time:** Do not rush the chilling process. A minimum of four hours is required for the tiramisu to set properly and for the flavors to fully meld. Chilling overnight yields the best results, allowing the dessert to firm up beautifully and achieve its optimal taste.
- **Garnish with Fresh Lemon Zest:** For an extra burst of fresh lemon aroma and visual appeal, garnish your tiramisu with finely grated lemon zest just before serving. This adds a beautiful finishing touch and enhances the citrus experience.
Essential Ingredients
Every component in this Limoncello Tiramisu recipe plays a vital role in creating its irresistible flavor and texture. It’s truly hard to pick a favorite part—from the delicate cookies to the luxurious cheese and the tangy lemon curd, it all comes together beautifully!
- Ladyfinger cookies: These light, airy biscuits are the perfect vehicle for soaking up the limoncello syrup without becoming overly heavy.
- Mascarpone cheese: The star of the creamy layer, mascarpone provides unparalleled richness and a silky smooth texture.
- Lemon curd (homemade or store-bought): Adds an intense burst of tangy lemon flavor and vibrant color to the mascarpone cream.
- Heavy whipping cream: Whipped to stiff peaks, it lightens the mascarpone mixture and forms a luscious topping.
- Granulated sugar: Sweetens both the limoncello syrup and the mascarpone cream.
- Confectioner’s sugar: Used to sweeten and stabilize the whipped topping.
- Limoncello liqueur: The key ingredient for infusing the tiramisu with its signature lemon and alcoholic notes.
- Fresh lemon juice: Enhances the tartness and freshness of the lemon syrup and mascarpone cream.
- Water: Used in the limoncello syrup to create the perfect consistency for soaking.
How to Make Limoncello Tiramisu: A Step-by-Step Guide
Crafting this sunny dessert is simpler than you might think! We’ve broken down the process into easy, manageable steps to ensure your Limoncello Tiramisu comes together flawlessly, ready to impress.
1. Prepare the Zesty Limoncello Syrup
- In a small saucepan, combine the granulated sugar and water. Bring the mixture to a gentle boil over medium heat, stirring continuously until all the sugar has completely dissolved, creating a clear syrup.
- Remove the saucepan from the heat and stir in the limoncello liqueur and fresh lemon juice. Allow this flavorful syrup to cool completely to room temperature before using it. This is crucial for preventing the ladyfingers from becoming mushy.
2. Craft the Creamy Mascarpone Layers
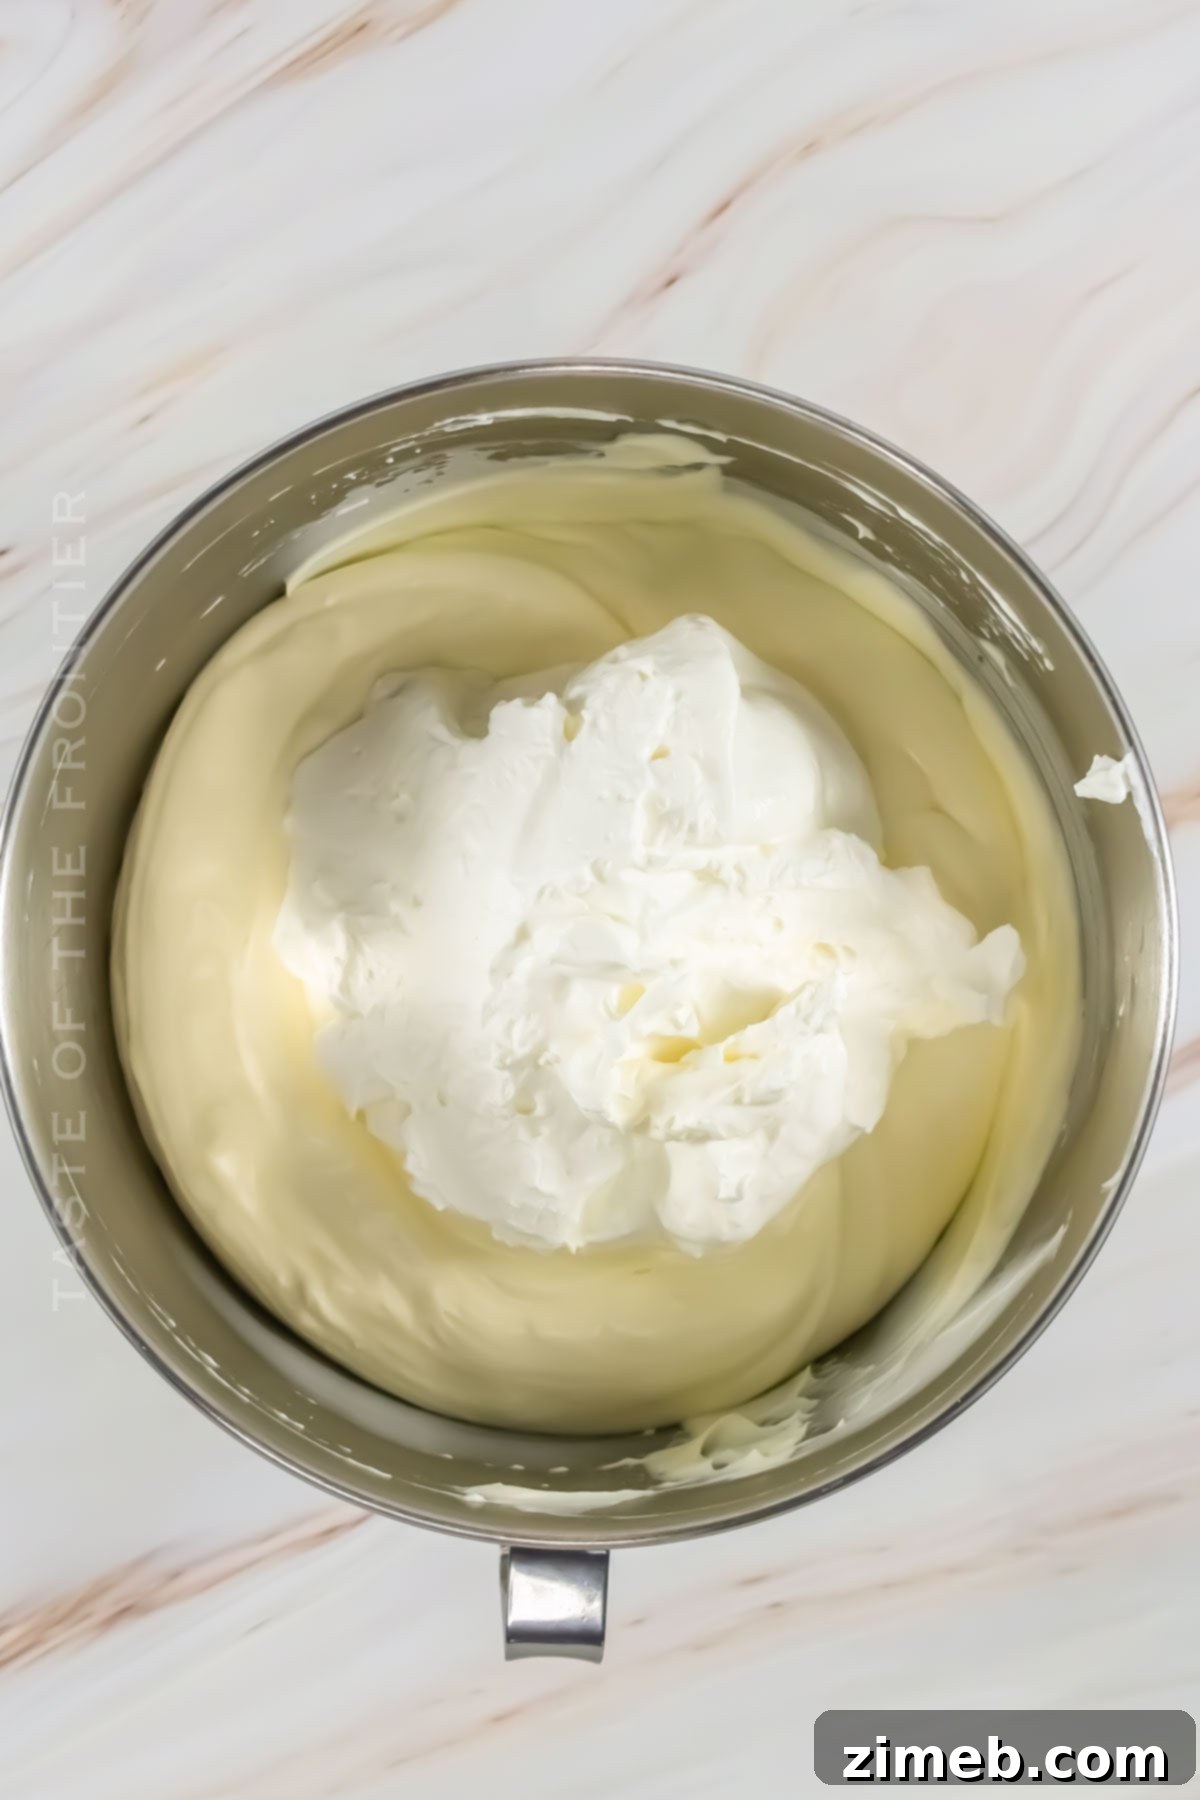
- In the bowl of a stand mixer fitted with the paddle attachment, add the softened mascarpone cheese. Beat on low speed for about 30 seconds, just enough to loosen its consistency.
- Add the lemon curd to the mascarpone and mix on low speed until just combined.
- Pour in the limoncello and lemon juice. Mix gently on low speed until everything is barely incorporated. Be careful not to overmix the mascarpone mixture, as it can separate and become grainy. Set this mixture aside.
- In a separate, clean bowl (or using a clean stand mixer bowl with the whisk attachment), combine the heavy whipping cream and the remaining granulated sugar. Whip on medium-high speed for 2-3 minutes, or until stiff peaks form. The cream should be thick and hold its shape.
- Gently fold about half of the whipped cream into the mascarpone mixture using a rubber spatula. Once mostly incorporated, fold in the remaining whipped cream until the mixture is light, airy, and uniformly combined.
3. Assemble Your Tiramisu Masterpiece
- Before you start assembling, ensure your workspace is prepared: have your ladyfinger cookies unwrapped, the cooled limoncello syrup within reach, and your creamy mascarpone mixture ready.
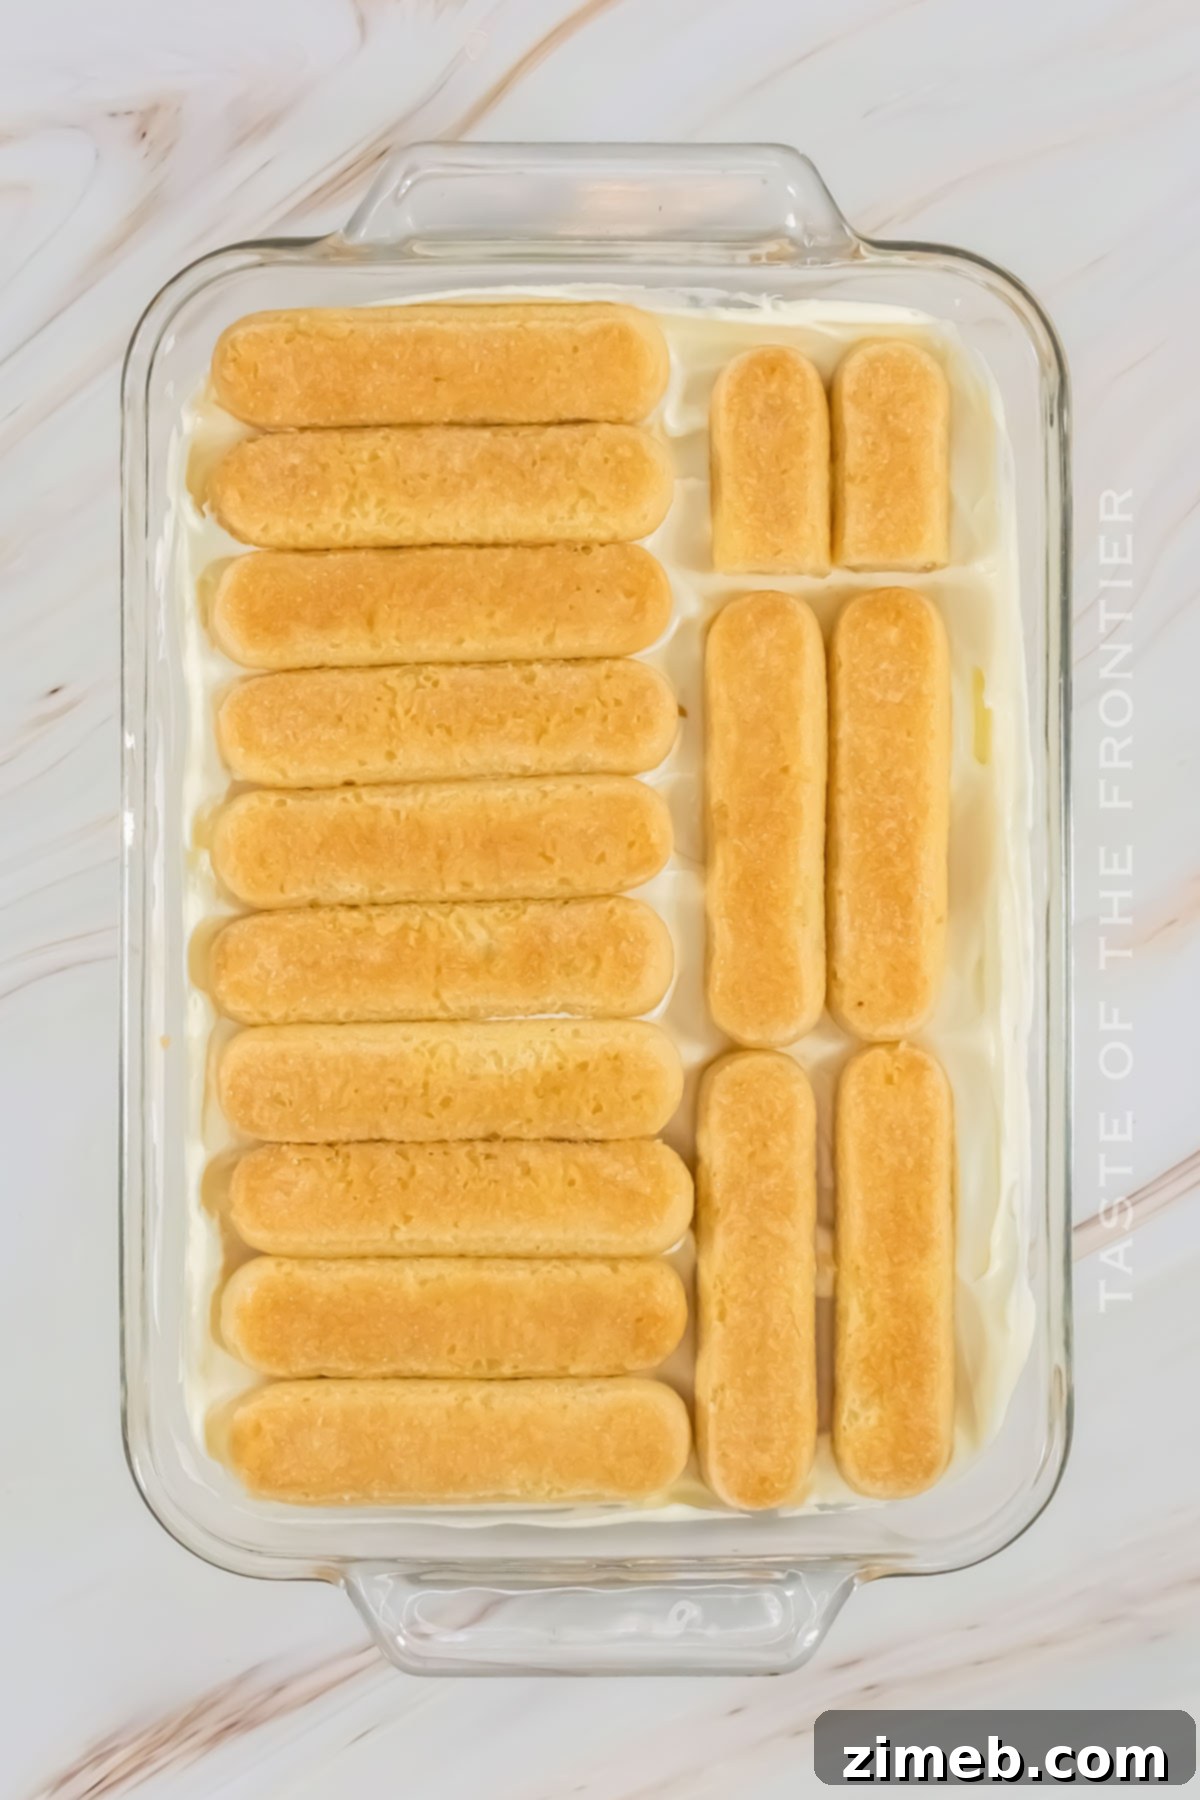
- Take a 9×13 inch baking dish. Dip one ladyfinger cookie into the cooled limoncello syrup, quickly flipping it to coat both sides. This should be a very brief dip to prevent sogginess.
- Arrange the dipped ladyfinger flat in the bottom of your baking dish. Continue this process, placing ladyfingers side-by-side, cutting or breaking some cookies as needed to cover the entire bottom of the dish. Remember: speed is key when dipping!
- Carefully spread approximately half of the mascarpone filling evenly over the layer of ladyfingers, smoothing it out to the edges of the dish.
- Repeat with another layer of quickly dipped ladyfingers, covering the mascarpone cream completely.
- Finish with the remaining mascarpone filling, spreading it smoothly to create the top creamy layer.
- Loosely cover the baking dish with plastic wrap and chill in the refrigerator for a minimum of four hours. For the absolute best flavor and texture, chilling overnight is highly recommended.
4. The Perfect Whipped Topping & Garnish
- Just before serving, prepare the final whipped topping. In the bowl of a stand mixer, combine the heavy cream and confectioner’s sugar.
- Whip with the whisk attachment on medium-high speed until firm, stiff peaks are achieved.
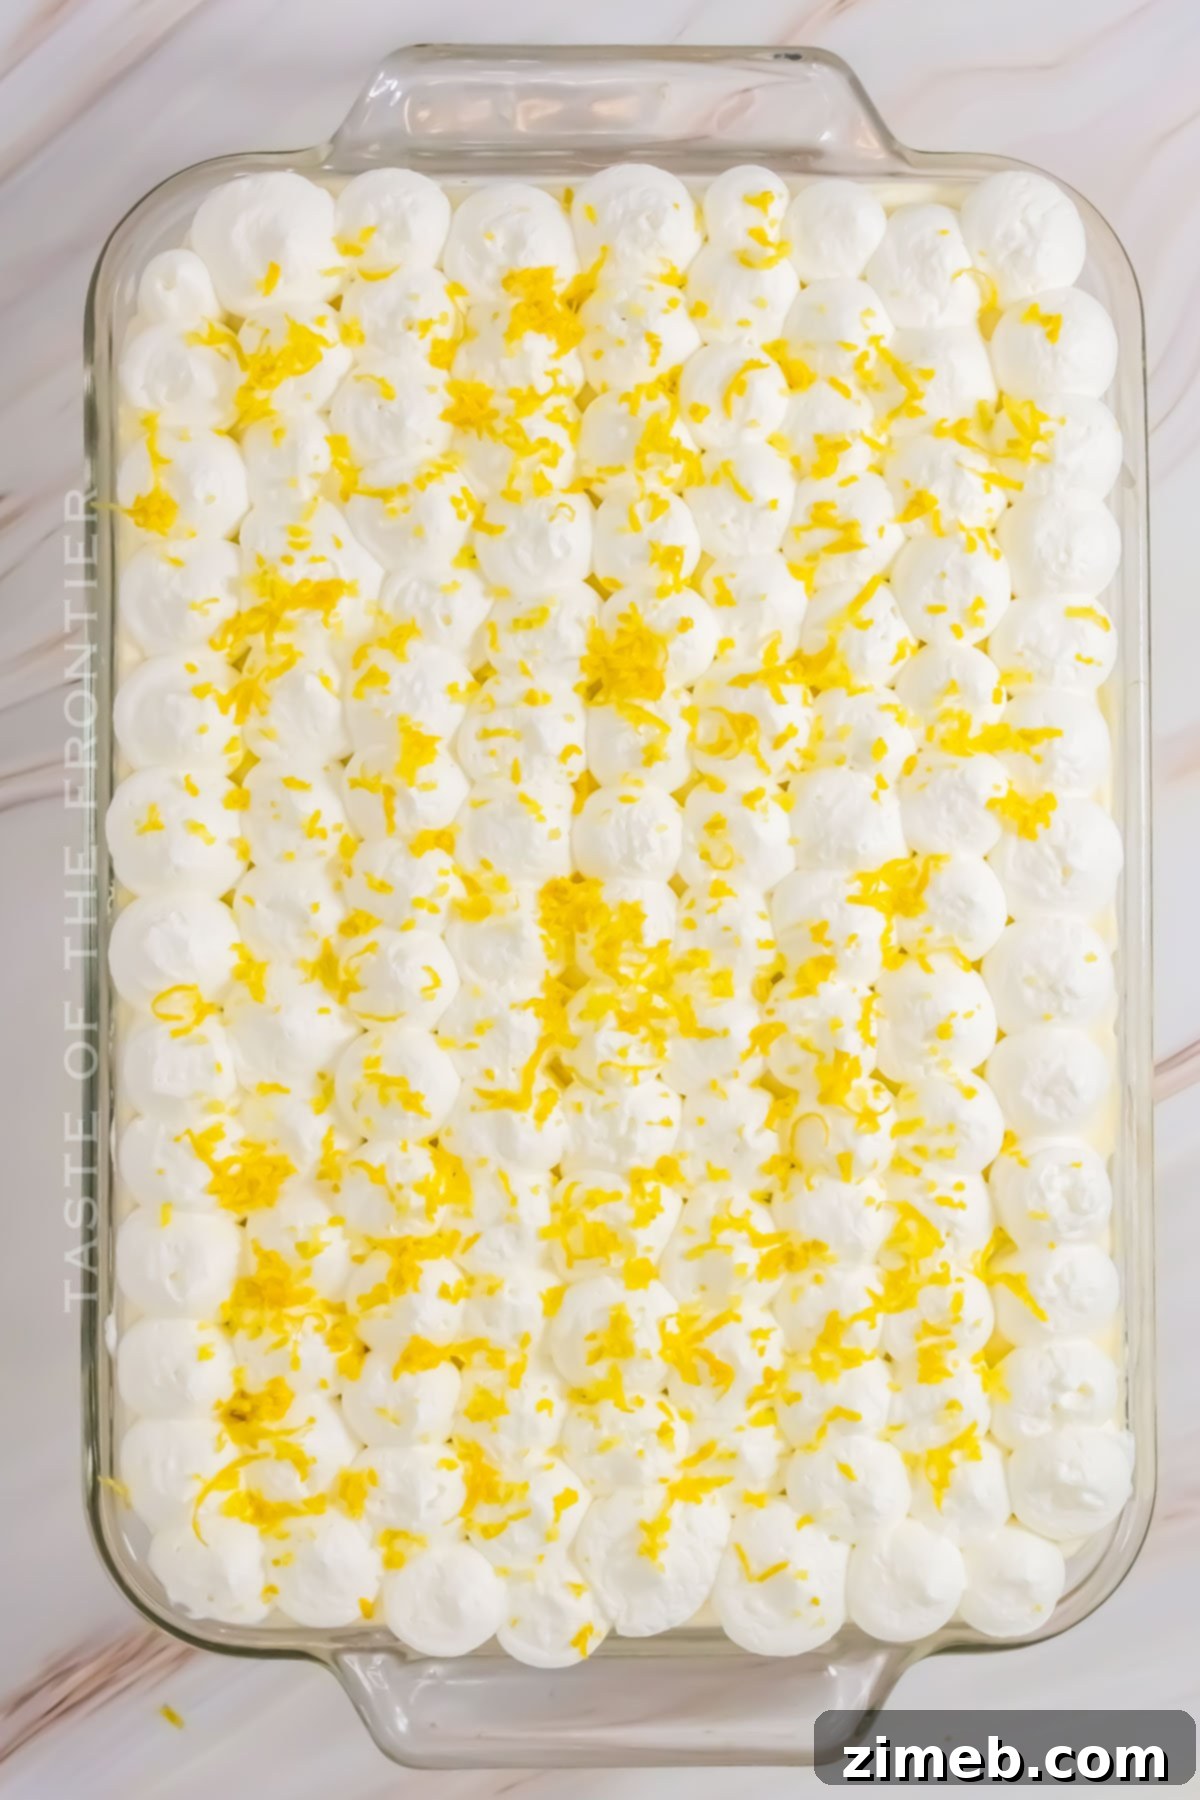
- Transfer the whipped cream to a piping bag fitted with a large round tip (or simply use a spoon/spatula). Pipe small dollops or spread an even layer across the entire top surface of the tiramisu.
- Finally, generously sprinkle fresh lemon zest over the whipped topping for an irresistible aroma and a burst of vibrant color. Serve chilled and enjoy!
Kitchen Essentials for Your Limoncello Tiramisu
Having the right tools on hand makes the preparation of this delightful Limoncello Tiramisu even smoother. These essential kitchen supplies will ensure you can create this recipe with ease:
- A 9×13 baking dish: Perfect for assembling the layers of your tiramisu. A glass dish also allows you to admire the beautiful layers.
- Mixing bowls: You’ll need at least two – one for the mascarpone mixture and another for whipping the heavy cream.
- A small saucepan: For preparing the limoncello syrup, ensuring the sugar dissolves perfectly.
- Electric mixer or whisk: Essential for whipping the heavy cream to stiff peaks and for gently combining the mascarpone mixture. A stand mixer is ideal, but a hand mixer works just as well.
- Rubber spatula: Crucial for gently folding the whipped cream into the mascarpone mixture, maintaining its airy texture.
- Piping bag with a large round tip (optional): For a professional finish to your whipped cream topping. You can also simply spread the cream with a spoon or spatula.
Perfect Pairings: What to Serve With Limoncello Tiramisu
The bright and sweet lemony flavor of this tiramisu pairs wonderfully with various beverages and accompaniments. A contrasting darker flavor or fresh fruit can beautifully balance the dessert’s zestiness.
- **For an Authentic Italian Experience:** Pair this zesty dessert with a strong, hot cup of espresso. The robust, slightly bitter notes of the coffee provide a perfect counterpoint to the sweet lemon. Alternatively, a chilled shot of limoncello itself or a light dessert wine, such as a Moscato d’Asti, complements the flavors beautifully.
- **Refreshing Fruit Accompaniments:** Serve alongside a bowl of fresh berries like strawberries, blueberries, or raspberries. Their natural sweetness and slight tartness offer a refreshing contrast and add a pop of color to the presentation.
- **Herbal Infusions:** A light herbal tea, such as mint or chamomile, can also provide a gentle and refreshing palate cleanser after this rich dessert.
Why You Should Make Limoncello Tiramisu
If you’re looking to expand your culinary horizons and try something truly special, this Limoncello Tiramisu is an absolute must. It’s an adventure in flavor that was incredibly fun to create, and the results are simply amazing!
- It’s a truly creative and delicious take on traditional tiramisu, guaranteed to impress your family and friends with its unique flavor profile.
- Perfect for celebrations of all kinds, sunny brunches, or as a refreshing and elegant end to any hearty meal. Its vibrant character makes it particularly appealing for spring and summer events.
- A fantastic way to enjoy the brightness of fresh lemons and the irresistible, aromatic flavor of limoncello, making for a truly memorable dessert experience.
- It offers make-ahead convenience, allowing you to prepare it in advance and save time on the day of your event, ensuring flavors have ample time to develop.
Creative Variations and Delicious Add-Ins for Limoncello Tiramisu
While the classic Limoncello Tiramisu is a star on its own, don’t hesitate to experiment with these delightful variations and add-ins to make it your own. I’d love to hear how your recipe turns out in the comments!
- Incorporate fresh raspberries or blueberries between the layers for a burst of additional fruitiness and a beautiful color contrast. Their slight tartness complements the lemon wonderfully.
- Experiment with different citrus flavors for a varied take on this dessert. Consider using **orange or grapefruit liqueur** and zest to create an equally vibrant, but subtly different, flavor profile.
- Add a thin layer of extra lemon curd directly on top of the mascarpone layers before adding the next round of ladyfingers for an intensified lemon kick.
- For a crunchy texture contrast, sprinkle a thin layer of finely crushed **almond biscotti or amaretti cookies** between the ladyfinger and cream layers.
- Create a **non-alcoholic version** by substituting limoncello with extra lemon juice, lemon extract, and a lemon-flavored simple syrup.

If you love this easy dessert recipe, you’re going to love these other no-bake treats and tiramisu recipes too. Please click each link below to find the easy, printable recipe!
Other No-Bake Delights
Banana Split Cake
Banana Split Cake is an easy no-bake dessert that’s perfect for any occasion. Quick to make, great for birthdays, BBQs, game day & more!
Check out this recipe

Oreo Icebox Cake
This Oreo Icebox Cake is the perfect no-bake summer treat for all your parties and get-togethers. So creamy and packed full of Oreo-flavor.
Check out this recipe

Cherry Delight Recipe
Cherry Delight Recipe is a simple, no-bake treat that is great for parties, holidays, potlucks, picnics, and backyard BBQs. Everyone loves it!
Check out this recipe

Dirt Cake Recipe
This Dirt Cake Recipe is made with crushed Oreo cookies layered with a luscious pudding mixture. It’s the easiest no-bake dessert around!
Check out this recipe

Lemon Icebox Pie
Indulge in the refreshing tanginess of a No-Bake Lemon Icebox Pie. This easy-to-make dessert promises a burst of citrusy flavor with every creamy bite.
Check out this recipe

Explore More Tiramisu Creations
- Easy Tiramisu Recipe
- Biscoff Tiramisu
- Tiramisu Cheesecake
- Strawberry Tiramisu

CONNECT WITH YUMMI HAUS!
Be sure to follow me on my social media, so you never miss a post!
Substack, FB, Pinterest, IG, Email Subscription


Limoncello Tiramisu
Rating: 5 out of 5 stars
Course: Dessert
Servings: 12 servings
Limoncello Tiramisu combines the refreshing citrus notes of Limoncello liqueur with creamy mascarpone and delicate ladyfinger biscuits.
Pin Recipe
Save Recipe
Prep Time: 10 mins
Chill Time: 4 hrs
Total Time: 4 hrs 10 mins
Ingredients
Limoncello Syrup
- 1 ¼ cup water
- ½ cup granulated sugar
- 1 cup limoncello
- ¼ cup lemon juice
Tiramisu
- 14 oz ladyfinger cookies (2 packages)
- 24 ounces mascarpone cheese (3 packages)
- 15 oz lemon curd (homemade or store-bought)
- ½ cup limoncello
- ¼ cup lemon juice
- 2 cups heavy whipping cream
- ⅓ cup granulated sugar
Whipped Topping
- 1 cup heavy cream
- ¼ cup confectioner’s sugar
Garnish
- Zest from 1-2 lemons, to garnish
Instructions
Syrup
- Combine the sugar and water in a small saucepan. Bring to a boil over medium heat. Stir until the sugar is melted.
- Add in the limoncello and lemon juice and set to the side to cool while making the rest of the tiramisu items.
Tiramisu
- Add the mascarpone cheese to the bowl of a stand mixer. Beat for about 30 seconds just to loosen up the cheese. Add in the lemon curd and mix just until combined.
- Add in the limoncello and lemon juice. Mix on low speed just until combined. Do not overmix the mascarpone mixture as it will separate. Set aside.
- In another bowl, combine the heavy whipping cream and sugar. Mix on medium/high speed for 2-3 minutes or until stiff peaks form.
- Fold in about half of the whipped cream to the mascarpone mixture. Then fold in the remaining whipped cream until completely combined.
- Prepare the workspace – have the ladyfinger cookies unwrapped, the cooled syrup handy, and the mascarpone mixture.
- Using a 9×13 baking dish, dip a ladyfinger in the syrup, quickly flip it to coat both sides and then lay it flat in the baking dish.
- Continue until the ladyfingers cover the bottom of the dish – cutting/breaking some cookies to fit. NOTE – Soaking too long in the syrup will lead to soggy and mushy tiramisu.
- Spread about half of the mascarpone filling over the cookies and smooth it evenly to the edges.
- Repeat with another layer of dipped cookies.
- Repeat with another layer of the remaining mascarpone filling.
- Cover loosely with plastic wrap and chill for a minimum of four hours – it is best to chill overnight.
- When ready to serve, make the whipped topping.
Whipped Topping
- Combine the heavy cream and confectioner’s sugar in the bowl of a stand mixer.
- Whip with the whisk attachment until you achieve stiff peaks.
- Transfer the whipped cream to a piping bag fitted with a large round tip and pipe small dollops across the entire top of the tiramisu.
- Sprinkle with the lemon zest.
Notes
Storage: Tiramisu can be stored in the fridge for up to 2-3 days, covered tightly.
Nutrition
Serving: 1 serving | Calories: 815kcal | Carbohydrates: 72g | Protein: 10g | Fat: 47g | Saturated Fat: 29g | Cholesterol: 178mg | Sodium: 199mg | Potassium: 93mg | Fiber: 0.4g | Sugar: 51g | Vitamin C: 4mg | Calcium: 128mg | Iron: 1mg | Net Carbohydrates: 70g
Nutritional information for the recipe is provided as a courtesy and is approximate. We cannot guarantee the accuracy of the nutritional information given for any recipe.
Love this recipe?
Follow @KleinworthCo for even more tasty recipes!