
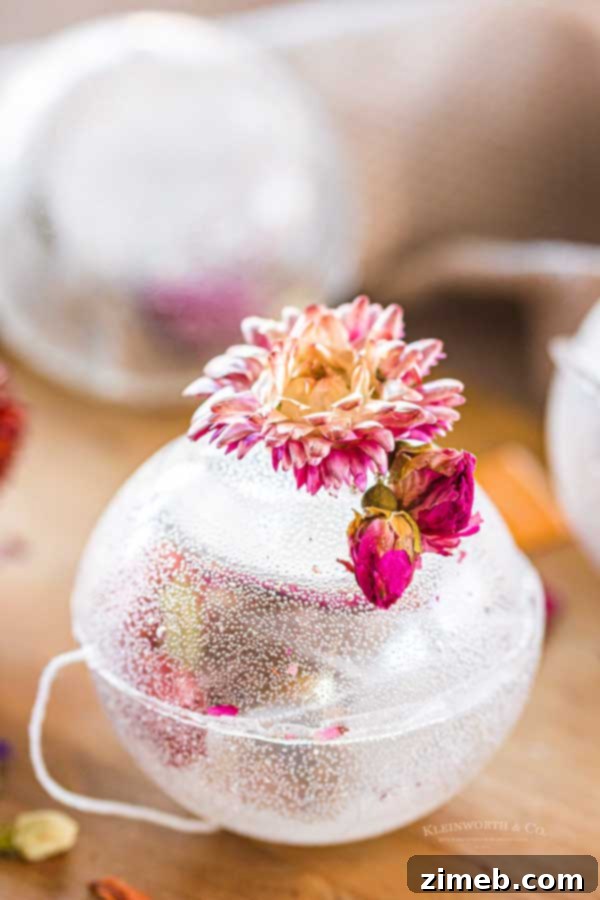
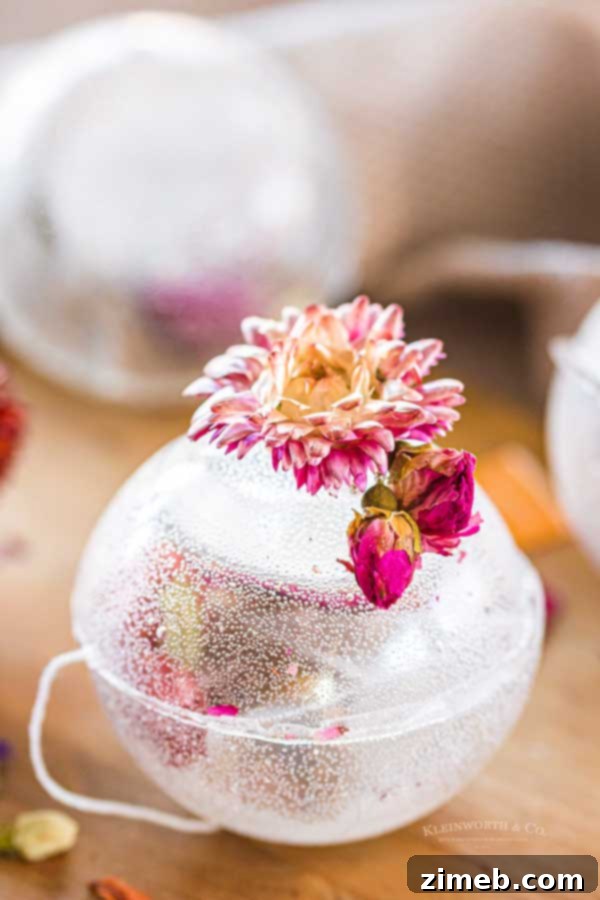
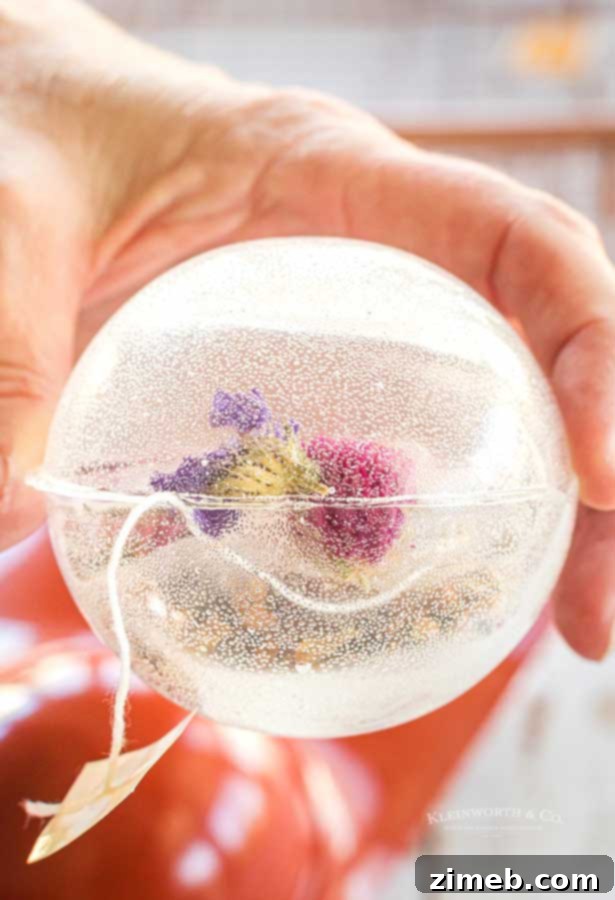
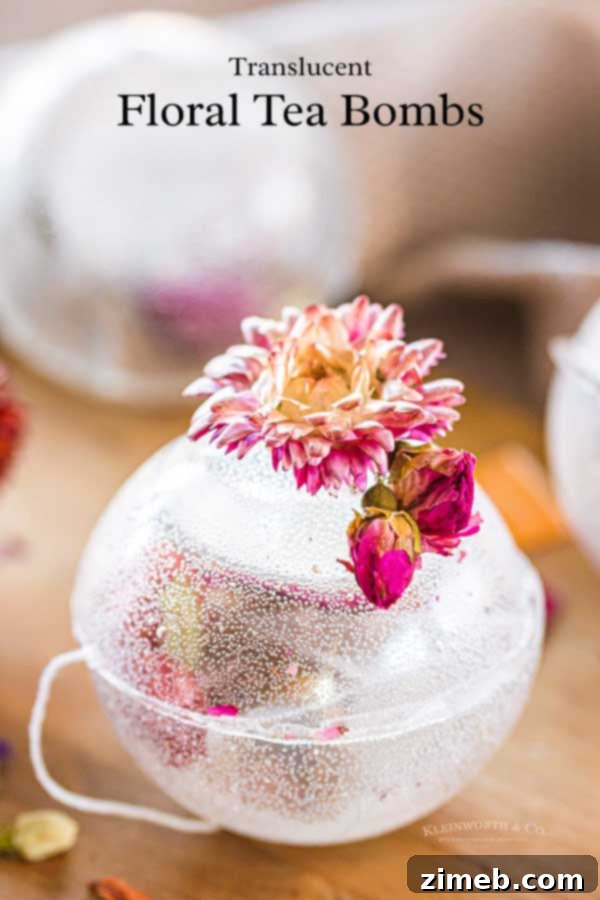
Delightful translucent spheres brimming with fragrant floral tea make these DIY Tea Bombs an exquisite gift for any tea connoisseur in your life. Simply add hot water for an instant, elegant brew.
For every devoted tea lover, the arrival of these beautiful, translucent floral tea bombs marks a truly exciting moment. Following the widespread sensation of hot chocolate bombs that captivated TikTok last fall, it was only a matter of time before this innovative concept received a sophisticated upgrade, transforming into these enchanting tea-infused creations.
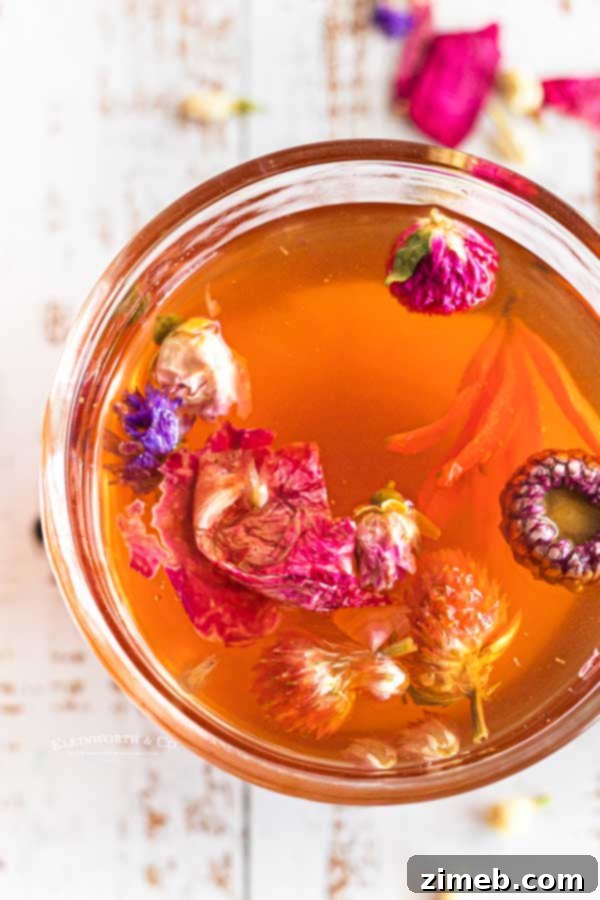
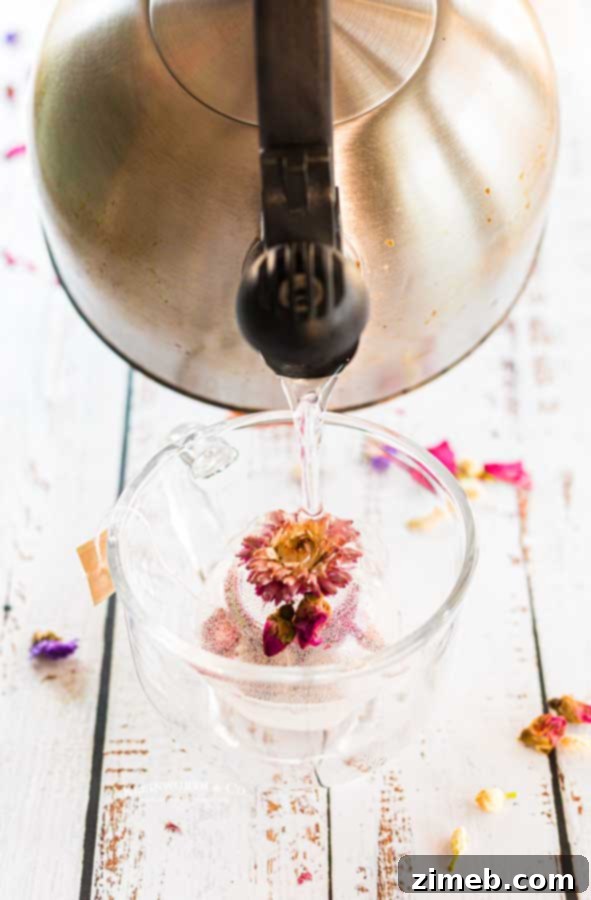
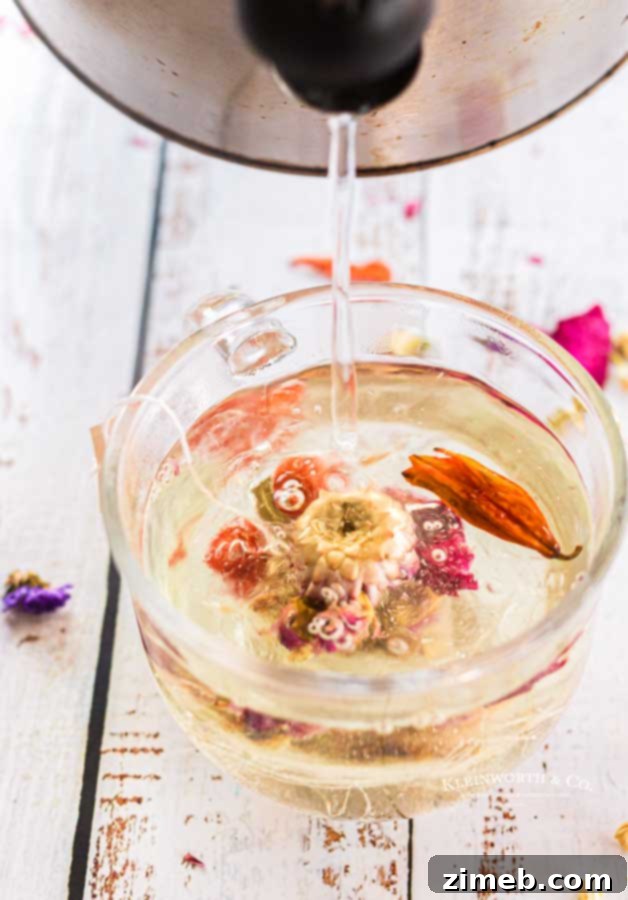
The fundamental idea behind these tea bombs mirrors that of their cocoa counterparts: a delicate candy sphere carefully filled with all the necessary ingredients for a perfect cup of tea. As the globe gracefully melts into hot water, it releases its aromatic contents – premium tea leaves and delicate edible flowers – culminating in a truly delightful and soothing experience that promises pure relaxation. This novel presentation elevates the daily tea ritual into something truly special and memorable.
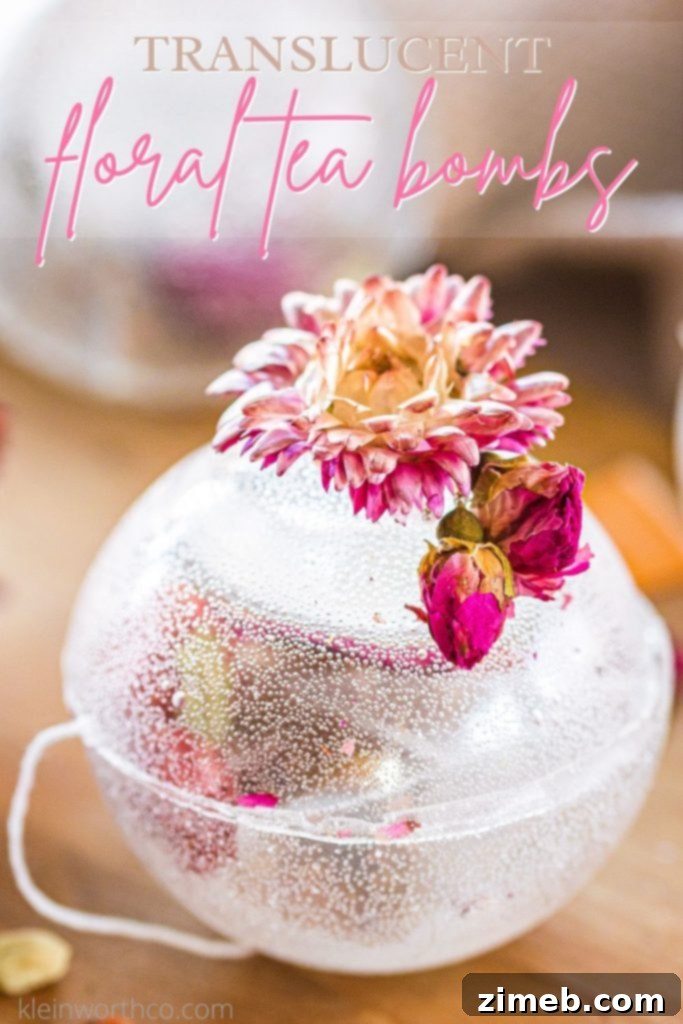
In my opinion, these tea bombs represent the most aesthetically pleasing way to savor, present, and gift tea. Their exquisite appearance and interactive nature are simply unmatched. I know I would be absolutely thrilled to receive a thoughtful package of these stunning floral tea globes. They are not merely a beverage but an experience, a small moment of luxury that enhances the senses and brings a touch of magic to an everyday routine.
The moment I first encountered this brilliant idea, I knew instantly that I had to recreate them. Given the immense popularity and widespread appeal of the hot chocolate bombs, crafting a tea-infused version was an undeniable “must-make” project. It’s a natural evolution of a beloved trend, offering a more refined and aromatic alternative for those who appreciate the subtle complexities of a good cup of tea.
While the process of making these tea bombs might require a little more precision and patience compared to their chocolate counterparts, the effort is undeniably worthwhile. If you’re looking to elevate your tea experience, impress guests, or create truly unique and personalized gifts, these beautiful spheres are an endeavor you absolutely must try. They transform a simple cup of tea into an art form.
Crafting Your Own Tea Bombs: A Guide to the Perfect Brew
Frequently Asked Questions About Tea Bombs
What exactly are tea bombs?
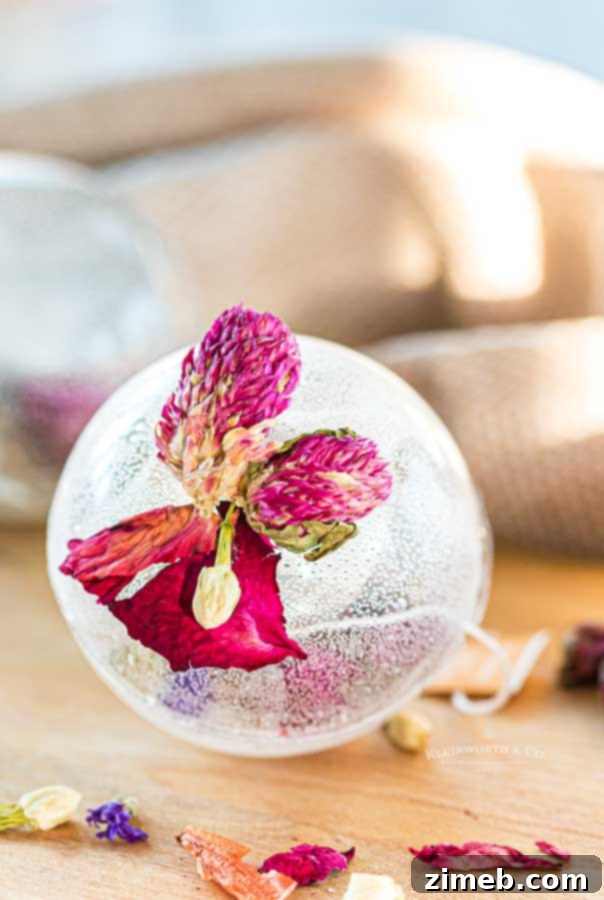
Tea bombs are a creative and delightful spin-off from the widely popular hot chocolate bomb trend. They consist of a hollow, spherical shell made predominantly from Isomalt or granulated sugar, which is then carefully filled with all the essential ingredients needed for brewing a delicious cup of tea. The true magic unfolds when this elegant globe is placed into a mug of hot water; the shell gently melts, releasing the tea and often, delicate edible flowers, into the hot liquid, creating a mesmerizing and aromatic beverage experience. It’s a visually stunning and incredibly convenient way to enjoy a sophisticated cup of tea.
Choosing the Best Tea for Your Tea Bombs
Selecting the perfect tea for your bombs is a wonderfully personal choice, allowing for endless customization to suit any palate. Since I aim for versatility and cater to diverse preferences, and because my household enjoys a wide array of flavors, I always keep a variety pack of tea flavors readily available. This ensures that anyone can easily pick their preferred blend. For convenience, I make sure the tea bag tag subtly protrudes from the finished bomb, making flavor selection effortless. Consider popular choices like calming chamomile, robust Earl Grey, refreshing green tea, or aromatic jasmine. Loose leaf tea can also be used, allowing for even greater customization in both flavor and quantity, making each tea bomb a truly unique creation.
Embracing the Beauty of Floral Tea Infusions
Can I make tea bombs without Isomalt?
Absolutely, yes! While Isomalt is prized for its ability to create beautifully clear, translucent shells and its low impact on blood sugar (as it’s derived from beet sugar), I understand it might not be as readily available as granulated sugar for everyone. If you choose to use granulated sugar, your tea bombs will have a lovely opaque finish rather than a see-through one, but they will be just as charming and delicious. To add a vibrant touch, you can easily incorporate a few drops of gel food coloring to make them truly stunning.
When opting for the granulated sugar method, a candy thermometer is essential for achieving the perfect consistency. You’ll need to cook the mixture until it reaches the HARD CRACK stage, which is precisely 300 degrees Fahrenheit (approximately 149 degrees Celsius). For an accurate reading, always measure the temperature from the center of the pot, ensuring the thermometer doesn’t touch the bottom or sides, as this can lead to an incorrect measurement and potentially cause scorching. Avoid attaching the thermometer to the side of the pot with a clip, as this can create a hot spot and cause burning.
For the granulated sugar base, you will need:
- 1 cup granulated sugar
- 1/3 cup light corn syrup
- 2 tbsp water
The Beauty of Flower Bomb Tea: Ingredients at a Glance
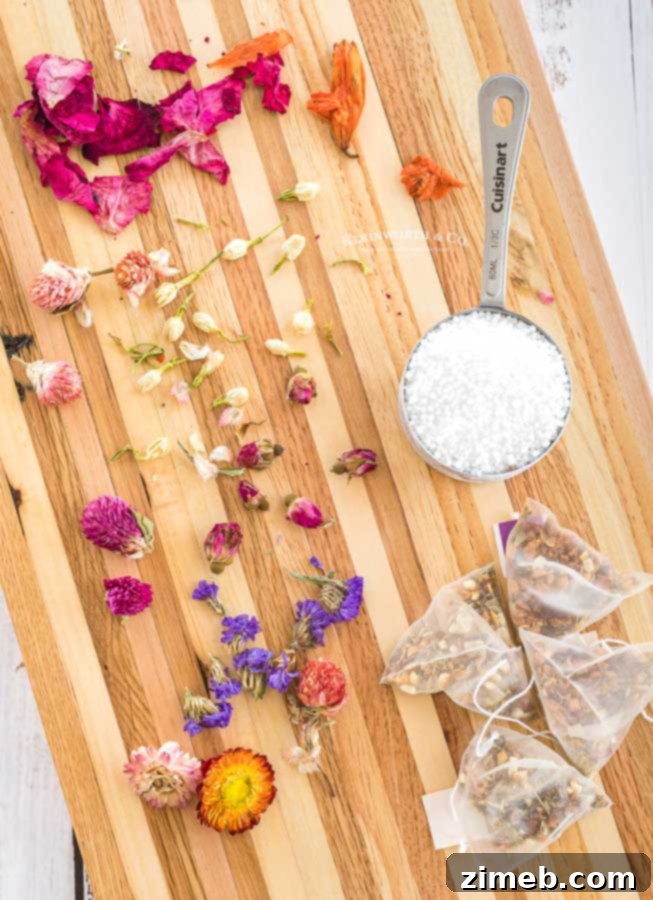
Essential Ingredients for Your Hot Tea Bombs
- Isomalt Crystals (for translucent shells) or Granulated Sugar, Light Corn Syrup, and Water (for opaque shells)
- Tea Bags in a flavor of your choice (consider black, green, herbal, or chai) – loose leaf tea can also be used for a more gourmet touch.
- Dried Edible Flowers (ensure they are culinary grade and safe for consumption).
- Optional: Gel Food Coloring (for sugar bombs or to add tint to Isomalt).
What kind of edible flowers should I use for tea bombs?
When creating floral tea bombs, the most critical aspect is ensuring that you are using only high-quality, dried edible flowers specifically prepared for human consumption. These aren’t just for beauty; they infuse your tea with delicate aromas and flavors, enhancing the entire experience. My personal favorites, cherished for their taste, aroma, and visual appeal, include fragrant Jasmine, charming Rosebuds, calming Lavender, bright Marigold petals, soothing Chamomile, and delicate Pink Rose Petals. Always source your edible flowers from reputable suppliers to guarantee their safety and purity. These natural additions transform a simple tea bomb into an aromatic work of art.
Mastering the Art of TikTok Hot Tea Bombs: A Step-by-Step Guide
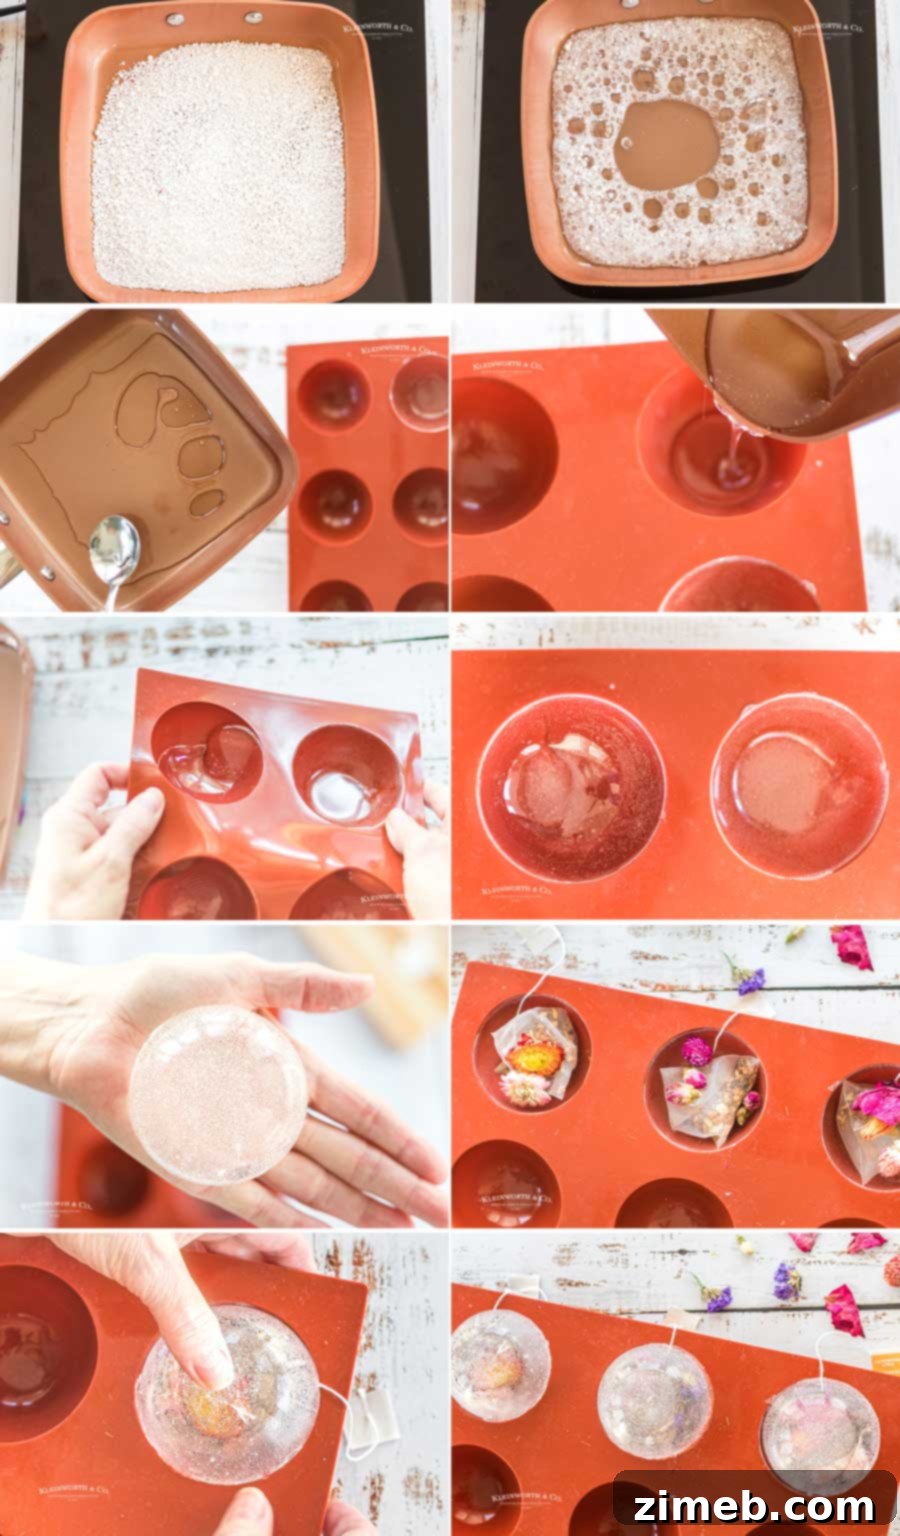
How to make Hot Tea Bombs: The Isomalt Method
- In a small saucepan, begin by melting your Isomalt crystals over medium-high heat. Patience is key here; avoid the urge to stir immediately.
- Allow the Isomalt crystals to melt undisturbed. You may gently shake the pan to facilitate even melting if necessary, but refrain from stirring until all the crystals have completely liquified. This prevents crystallization and ensures a smooth finish.
- Once fully melted, give the liquid a gentle stir to eliminate any remaining bubbles and ensure it becomes perfectly clear. This step is crucial for achieving that signature translucent appearance.
- Working quickly and with extreme caution, carefully pour or spoon about two tablespoons of the molten Isomalt into your silicone mold cavities. Remember, the mixture is incredibly hot and can cause severe burns, so consider wearing protective gloves.
- Gently rotate the mold to evenly coat the interior of each cavity, ensuring every part is covered. This technique will create a perfectly smooth and beautifully translucent half-sphere shell.
- Allow the Isomalt half-orbs to cool and solidify for approximately 20-30 minutes before proceeding to the next stage of assembly. They should be firm to the touch.
- If you have more molds or need to make additional shells, the Isomalt can be carefully reheated multiple times. Just be vigilant to avoid burning it, which can alter its clarity and taste.
- Once all the orbs have completely cooled and hardened, gently remove the top halves from the mold by pushing them up from the bottom. For easier assembly later, leave the bottom halves securely nestled within their mold cavities.
How to assemble hot tea bombs
- Carefully place your chosen tea bags into the bottom half of each globe (which should still be in the mold). Alongside the tea, add your selection of edible flowers or herbs. For convenience, you can leave the teabag string hanging outside the mold if desired.
- Heat a small, clean skillet over very low heat. This will be your tool for delicately smoothing and melting the edges of your Isomalt spheres, allowing them to fuse together seamlessly.
- Once the skillet is warm, gently place one of the free-standing globe tops onto the hot surface for just a few seconds until its edge becomes slightly softened and melted. Then, quickly and precisely, place it on top of a bottom half that is filled with tea and flowers and still in its mold. The melted edges will cool and solidify, joining the two halves to form a complete sphere.
- Repeat step 11 for any remaining globes, taking care to work efficiently before the Isomalt cools completely.
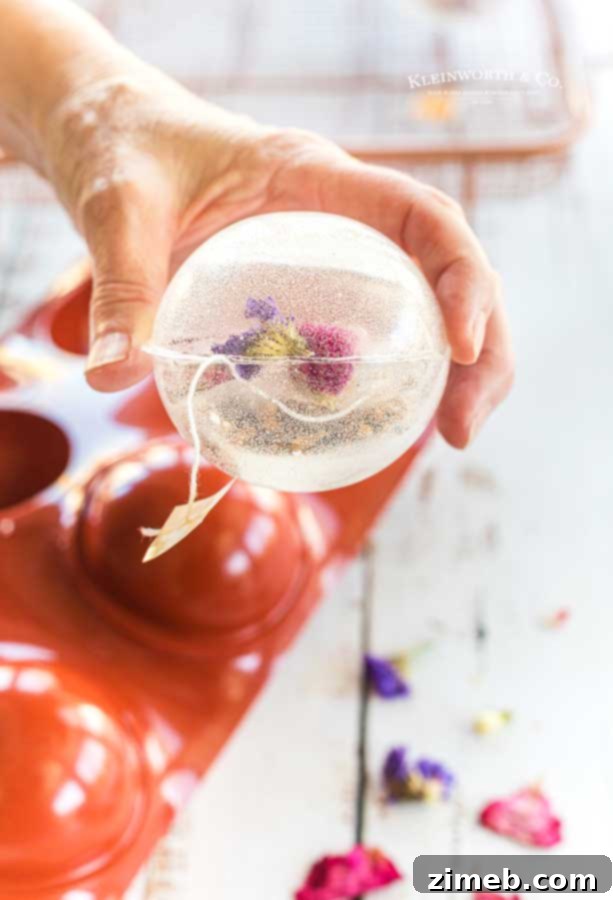
- After allowing approximately 5-10 minutes for the joined globes to fully set, you should be able to gently remove each complete tea bomb from its mold by pressing up from the bottom. Handle with extreme care, as the globes are delicate and can be quite fragile.
- (Optional) For an extra touch of elegance, you can attach additional edible flowers to the exterior of the globes. To do this, melt a small amount of Isomalt in a clean pan. Carefully dip one end of a flower into the melted Isomalt and gently press it onto the globe. This decorative step is best performed while wearing sugar gloves for safety.
Exquisite Floral Tea Bombs: Ready for Enjoyment
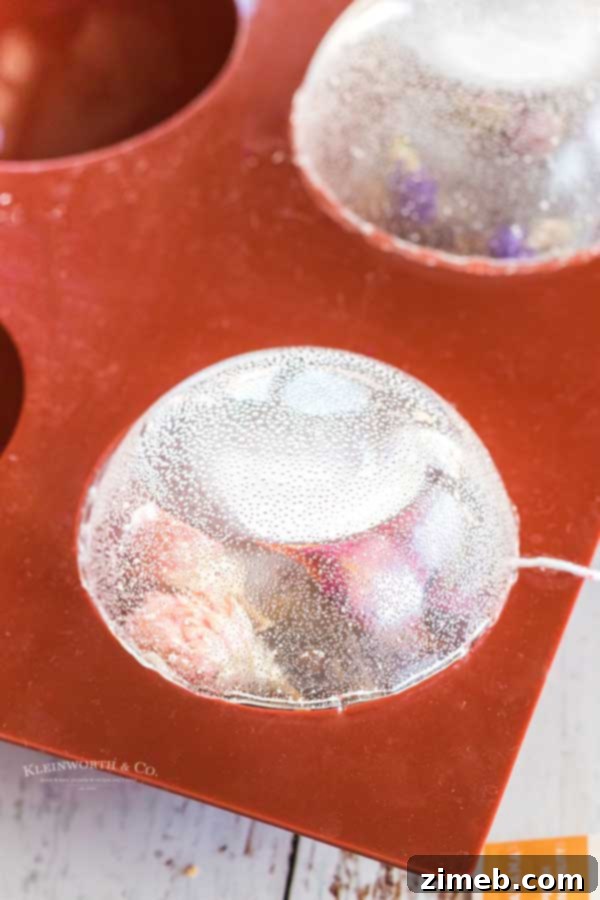
Choosing the Best Mold for Perfect Tea Bombs
The right mold is crucial for creating perfectly shaped and easy-to-release tea bombs. I personally highly recommend this 2-inch silicone mold. It’s ideal for producing three complete tea bombs, a convenient size for most standard tea bags. This particular mold often comes as part of a set that includes smaller versions, offering you the flexibility to create a variety of sizes if you wish to make a larger quantity or experiment with different designs. While smaller molds are an option, for the typical size of tea bags, the 2-inch mold truly offers the best fit and aesthetic. If you prefer using loose leaf tea, you have more freedom to portion out the tea to fit into smaller globes, and the overall crafting process remains the same regardless of mold size.
How to properly store your homemade tea bombs
Proper storage is essential to maintain the beautiful appearance and structural integrity of your floral tea globes. These delicate creations should be stored in a cool, dry place, away from direct sunlight and excessive heat. Refrigeration is generally not necessary and can even introduce unwanted moisture, which may cause the bombs to become sticky or cloudy. To protect them from humidity, which is their biggest enemy, place your tea bombs in a paper sack or a sealed airtight container and fold over the top. Any exposure to high humidity can make them tacky to the touch and compromise their translucent finish. Stored correctly, your tea bombs will remain perfect until you’re ready to enjoy them or gift them.
DIY Tea Bombs: Unleash Your Creativity
Which candy thermometer is best for sugar-based tea bombs?
When you’re making this recipe using Isomalt, you’ll find that a candy thermometer isn’t typically required, as Isomalt melts predictably. However, if you opt for the granulated sugar method to create your tea bomb shells, a reliable candy thermometer becomes an indispensable tool. It’s crucial for reaching that precise “HARD CRACK” stage necessary for structural integrity. I personally recommend this particular candy thermometer for its accuracy and ease of use, ensuring your sugar shells turn out perfectly every time. Precision is key when working with sugar, and a good thermometer is your best friend.
Can I use regular liquid food coloring in my tea bombs?
While you can certainly incorporate food coloring into both the Isomalt and granulated sugar methods to achieve vibrant and beautiful tea bomb shells, I strongly advise against using standard liquid food coloring. The added moisture from liquid dyes can adversely affect the consistency of melted Isomalt or sugar, leading to a less stable or clear product. Instead, for superior results, please use gel food coloring. Gel colors are highly concentrated and contain minimal water, allowing you to achieve intense hues without compromising the delicate structure of your candy shells.
Thoughtful Gifts for Tea Lovers: Handmade Tea Bombs
How to easily clean hard candy from your pots
Let’s be honest, the cleanup after making hard candy or Isomalt creations isn’t the most glamorous part of the process, especially when faced with stubborn, stuck-on residue. But fear not! It doesn’t have to be a difficult chore. Here are some incredibly effective methods I rely on to effortlessly remove hardened candy from my pots, making cleanup a breeze:
- **Immediate Soak:** The moment you’ve emptied your pot of molten candy, immediately fill it with hot, soapy water. Let it soak while you finish other tasks; this often loosens the candy enough for easy scrubbing later.
- **Gentle Boil Method:** For more persistent residue, fill the pot with water and add a few drops of dish soap. Place it back on the stovetop over low heat and bring it to a gentle boil for several minutes. The heat and soap will work together to dissolve and release the stuck-on candy, making it simple to wash away.
- **Overnight Dryer Sheet Soak:** This might sound unconventional, but it’s remarkably effective! Fill your pot with warm water, then submerge a dryer sheet in the water. Let it sit overnight. The fabric softener in the sheet helps to break down the hardened sugar, allowing it to easily wipe away the next morning.
Can tea bombs be made in the microwave?
Yes, absolutely! For those who prefer a quicker or stovetop-free method, you can indeed make the Isomalt shells for your tea bombs using a microwave. This offers a convenient alternative to melting on the stovetop. Please follow these straightforward instructions for the microwave method:
- Place the Isomalt crystals into a large, glass, microwave-safe measuring cup or bowl. Ensure it’s large enough to prevent overflow as the Isomalt melts.
- Heat the Isomalt on high power, stopping to stir the crystals every 30 seconds. Continue this process until the Isomalt is completely melted and clear. Stirring frequently helps distribute heat and prevents scorching.
- Once your Isomalt is perfectly melted, proceed directly to step 4 of the main recipe instructions for molding your tea bomb shells.
The Charm of Flower Tea: An Experience Unveiled
Products I love for making this homemade tea bombs recipe…
This tea bombs recipe provides a genuinely beautiful and thoughtful gift for the tea lover in your life, or a luxurious treat to enjoy all for yourself. If you’re an experienced crafter, you might already have several of these essential items on hand. However, if this is your first foray into making homemade tea bombs, you might feel a little nervous – but rest assured, you are going to absolutely adore the results! I’ve compiled a list below of the indispensable tools and ingredients that I simply cannot make this tea bomb recipe without, ensuring your success from start to finish.
- Small Saucepan: Essential for melting Isomalt or sugar safely and effectively.
- 2″ Silicone Mold: The perfect size for crafting elegant tea bomb spheres.
- Protective Glove SetforIsomalt/Sugar handling: Crucial for safety when working with hot molten sugar.
- Isomalt Crystals: For achieving those stunning, clear, translucent shells.
- Isomalt Crystals with Protective Gloves -SET: A convenient bundle to get started with safety in mind.
- Tea Bags in a flavor of your choice: Allowing for personalized tea experiences.
- Loose Leaf Tea: For a more gourmet, customizable, and often fresher tea experience.
- Dried Edible Flowers: Adding visual beauty and delicate aromas to your tea bombs.
- **Candy Thermometer**: (If using the granulated sugar method) for precise temperature control.
- **Gel Food Coloring**: (Optional) to add vibrant hues to your sugar-based tea bombs.
Inspiring Gift Ideas for Tea Enthusiasts
If you’ve fallen in love with this Tea Bombs recipe and are searching for more unique and special gift ideas or delightful treats, you’re in for a treat! Please click each link below to explore the easy, printable recipes and get inspired!
Check out this recipe
Check out this recipe
Check out this recipe
Check out this recipe
Check out this recipe
Check out this recipe
Check out this recipe
Check out this recipe
More Inspiring Gift Ideas for Tea Drinkers
If you’ve cherished this recipe for Homemade Tea Bombs as much as I do, please take a moment to leave a five-star review below. Your feedback means the world! And be sure to help me share this delightful creation on Facebook and Pinterest, so more tea lovers can discover the magic of these beautiful spheres!
CONNECT WITH YUMMI HAUS!
Be sure to follow me on my social media channels, so you never miss a post or a delicious new recipe!
Substack, Facebook, Pinterest, Instagram, Email Subscription
Rate this Recipe
Translucent Tea Bombs Recipe
Ingredients
- 1/2 cup Isomalt Crystals
- 3 Tea Bags in a flavor of your choice or loose leaf tea
- Dried Edible Flowers
Granulated Sugar Method (for opaque shells)
- 1 cup granulated sugar
- 1/3 cup light corn syrup
- 2 tbsp water
- Gel Food Coloring optional, for color
Instructions
Isomalt Method (for translucent shells)
-
In a small saucepan, melt isomalt crystals over medium-high heat.
-
Do not stir isomalt while it is melting. Allow the crystals to melt completely. Gently shake the pan to facilitate melting if needed, but only stir once all crystals have liquified.
-
Once completely melted and clear, stir gently until any visible bubbles have disappeared.
-
Working quickly and with extreme caution (wear protective gloves), pour or spoon about 2 tablespoons of the very hot liquid into the mold cavities, avoiding skin contact.
-
Rotate the mold to evenly coat the entire inside of each cavity, creating a smooth translucent shell.
-
Allow the half-orbs to cool and harden for about 20-30 minutes before proceeding.
-
If needed, this process can be repeated for additional molds. Isomalt can be reheated multiple times, ensuring you don’t burn it.
-
Once fully cooled, gently remove the top halves from the mold by pushing from the bottom. Leave the bottom halves in the mold for easier assembly.
-
Place tea bags (or loose leaf tea) and edible flowers/herbs into the bottom half of the globes (still in the mold). You can leave the teabag string outside the mold if preferred.
-
Place a small skillet over low heat. This will be used to gently melt and smooth the edges of the orbs for joining.
-
Once the skillet is heated, carefully place one globe top onto the hot skillet for a few seconds to slightly melt its edge. Quickly place it on top of a filled bottom half (still in the mold). The melted edges will bond the halves together.
-
Repeat step 10 for the remaining globes.
-
After 5-10 minutes, gently remove the entire globe from the mold by pressing up from the bottom. Handle carefully, as the globes are fragile.
-
(Optional) To attach extra flowers to the exterior, melt a small amount of Isomalt in a pan. Carefully dip one end of a flower into the melted Isomalt and attach it to the globe. This is best done with sugar gloves.
Granulated Sugar Method (for opaque shells)
-
Combine the granulated sugar, light corn syrup, and water in a small saucepan.
-
Insert a candy thermometer. Cook the mixture until it reaches the HARD CRACK stage, which is 300 degrees Fahrenheit (approx. 149°C). Be sure to measure the temp from the center and avoid touching the bottom or sides of the pot.
-
Once the sugar mixture reaches 300°F, proceed to step 4 of the Isomalt Method above for molding and assembly. You can also stir in a few drops of gel food coloring at this stage for vibrant shells.
Microwave Method (for Isomalt)
-
Place the Isomalt crystals in a large, glass, microwave-safe measuring cup or bowl.
-
Heat on high power, stirring every 30 seconds, until the Isomalt is completely melted and clear.
-
Then, continue starting at step 4 of the Isomalt Method above for molding and assembly.
Notes
- It is highly recommended to use sugar gloves to minimize the risk of burns, as melted Isomalt and sugar are extremely hot.
- Depending on the size of your molds and tea bags, you may need to gently fold tea bags to fit them snugly inside the globes. Ensure the bags are fully contained before sealing the two halves.
- Creating perfect tea globes is a learned skill. Don’t be discouraged if your first attempts aren’t flawless; practice makes perfect, and they will improve with each try!
- Tea globes are delicate and quite fragile, so handle them with utmost care to prevent shattering.
- Isomalt crystals are derived from beet sugar and are generally considered to have a minimal impact on blood sugar levels, making them a good choice for those monitoring sugar intake.
- Isomalt itself has a mild sweetness. If you prefer a sweeter tea, you can add a pinch of sugar or another sweetener into the bomb along with the tea and flowers.
For the granulated sugar method:
- Always measure the temperature from the center of the pot. Do not let the thermometer touch the bottom or sides, as this will result in an inaccurate reading.
- Attaching the thermometer to the side of the pot with its included clip can create a localized hot spot in that area, potentially causing the sugar to burn.
Equipment
-
1 Small Saucepan
-
1 Large Cavity Semi-Sphere Silicone Mold
-
Protective Gloves (Sugar Gloves)
-
Candy Thermometer (if using granulated sugar)
Nutritional information for the recipe is provided as a courtesy and is approximate. Please double-check with your own dietary calculator for the best accuracy. We at Yummi Haus cannot guarantee the accuracy of the nutritional information given for any recipe on this site.