
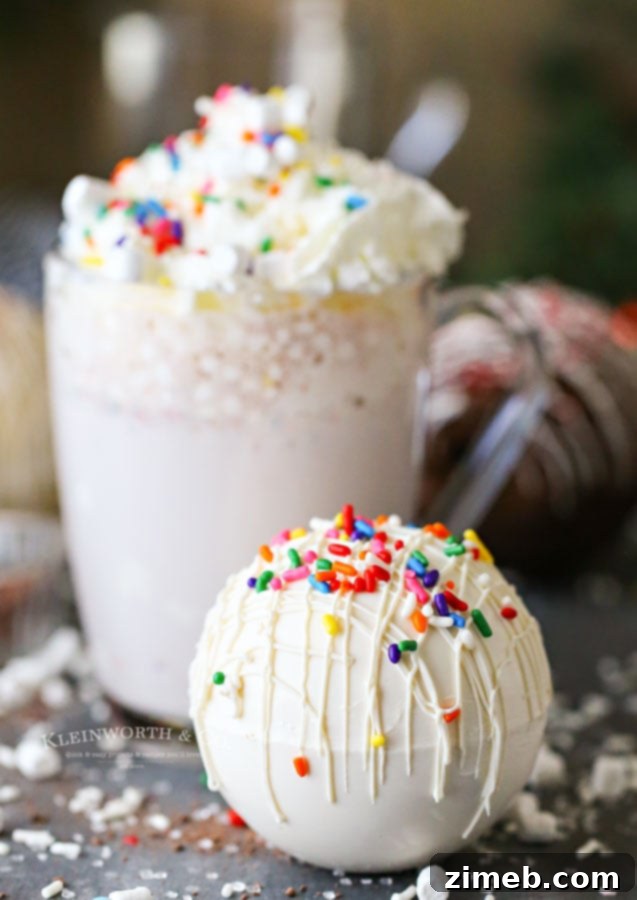
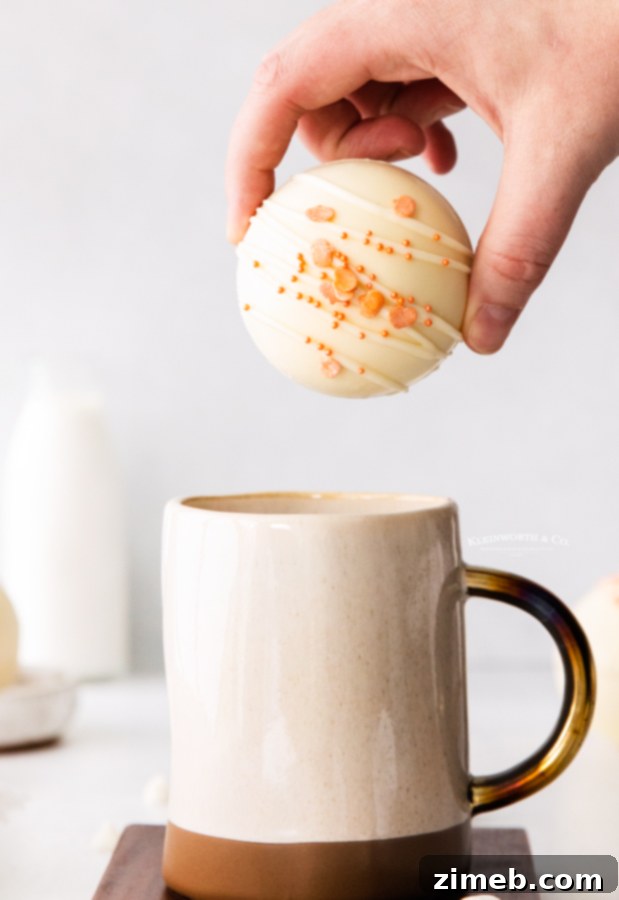
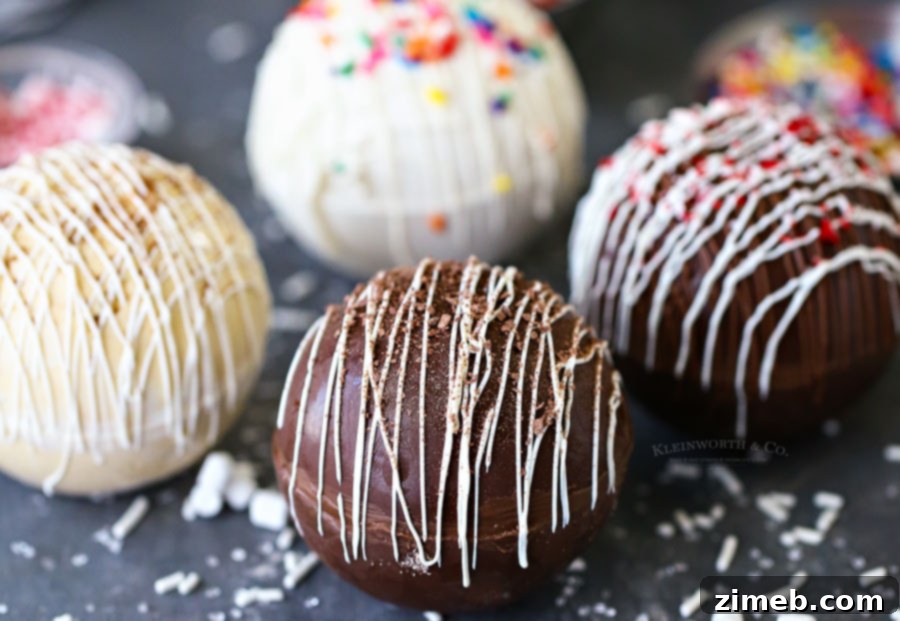
Get ready to transform your ordinary hot chocolate experience into something truly extraordinary! Hot Chocolate Bombs have taken the culinary world by storm, offering a delightful and interactive way to enjoy a classic comfort drink. Imagine a perfectly crafted chocolate sphere, brimming with rich cocoa mix, fluffy marshmallows, whimsical sprinkles, and other delicious surprises. Drop it into a mug of hot milk, and watch as the chocolate melts away, revealing a magical eruption of goodness that turns your drink into a luxurious treat.
This comprehensive guide dives deep into the enchanting world of hot chocolate bombs, exploring a myriad of flavors beyond the traditional. From classic chocolate and refreshing peppermint to festive sugar cookie, warm pumpkin spice, creamy white chocolate, decadent red velvet, and spiced eggnog – there’s a flavor for every palate and every season. We’ll also show you how to create charming heart-shaped bombs perfect for Valentine’s Day, and fun rainbow marshmallow-filled ones for St. Patrick’s Day, ensuring your celebrations are always infused with a touch of magic and flavor.
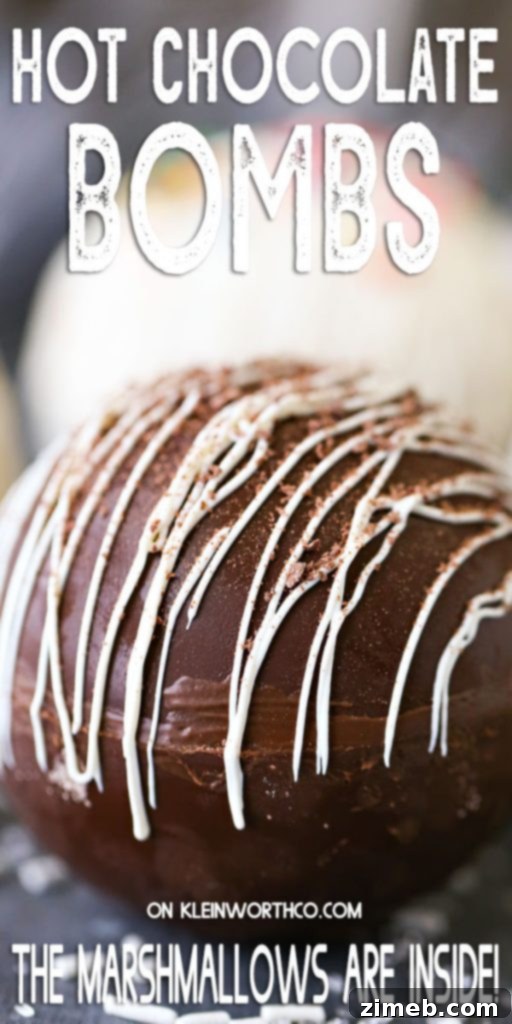
The Enchanting Appeal of Hot Chocolate Bombs
It’s no secret that hot chocolate bombs have captivated hearts across the internet, becoming a viral sensation that brings joy to both young and old. The moment I first saw a video of these delightful spheres dissolving into a steaming mug of milk, I was instantly inspired to create my own. There’s something inherently charming about the anticipation of the chocolate shell melting, slowly releasing its hidden treasures, and transforming simple hot milk into a rich, flavorful beverage.
At their core, hot chocolate bombs are ingenious chocolate shells designed to hold all your favorite hot cocoa add-ins. When bathed in hot milk, the chocolate elegantly melts, causing the sphere to burst open and unleash a cascade of cocoa powder, mini marshmallows, and any other delightful fillings you’ve chosen. This interactive experience isn’t just about taste; it’s a spectacle that adds an element of fun and surprise to your daily warm drink ritual or any special occasion.
While the original concept is fantastic, I envisioned expanding the flavor horizons significantly. Why settle for just one type of hot chocolate when the possibilities for flavor combinations are virtually limitless? My passion for diverse hot chocolate flavors naturally extended to these innovative bombs, leading me on a journey to craft a wide range of exciting variations. Join me as we explore how to make these delightful treats in an abundance of captivating flavors.
A Spectrum of Flavors: Beyond the Classic Hot Cocoa
The beauty of hot chocolate bombs lies in their versatility. While a classic milk chocolate bomb filled with cocoa and marshmallows is always a winner, imagine elevating this experience with an array of unique and seasonal flavors. This is where the true fun begins – transforming simple ingredients into gourmet experiences right in your mug.
Sweet Indulgence: Sugar Cookie Hot Chocolate Bombs
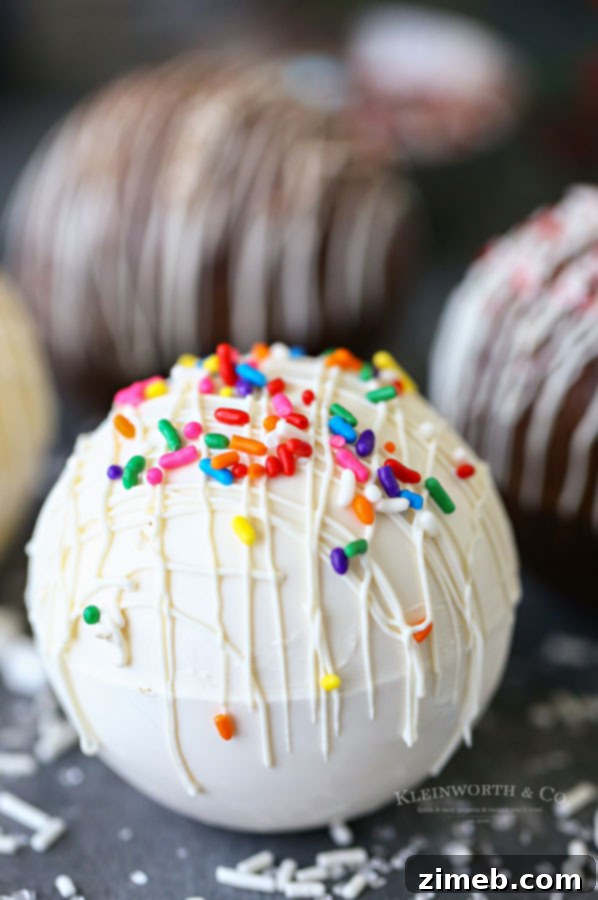
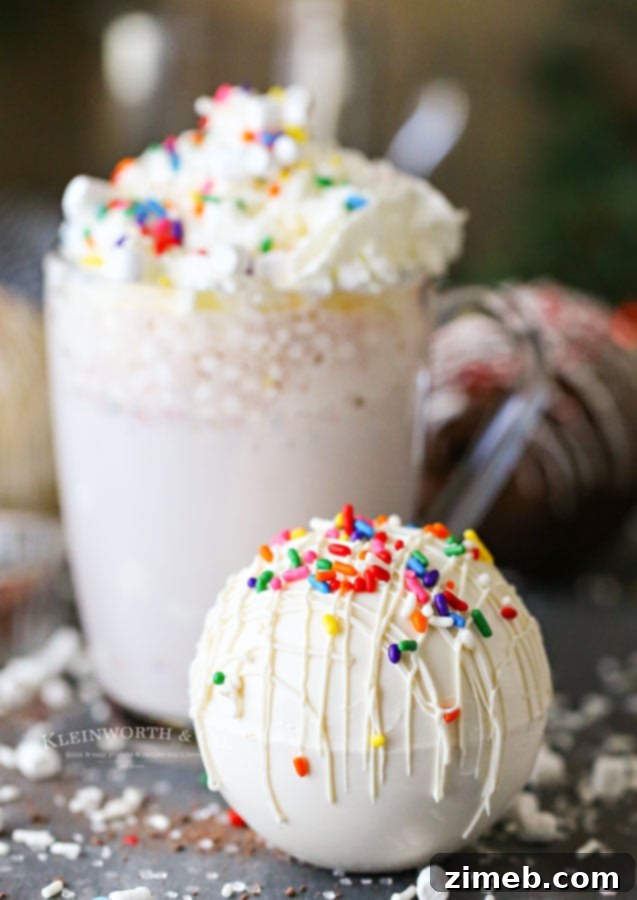
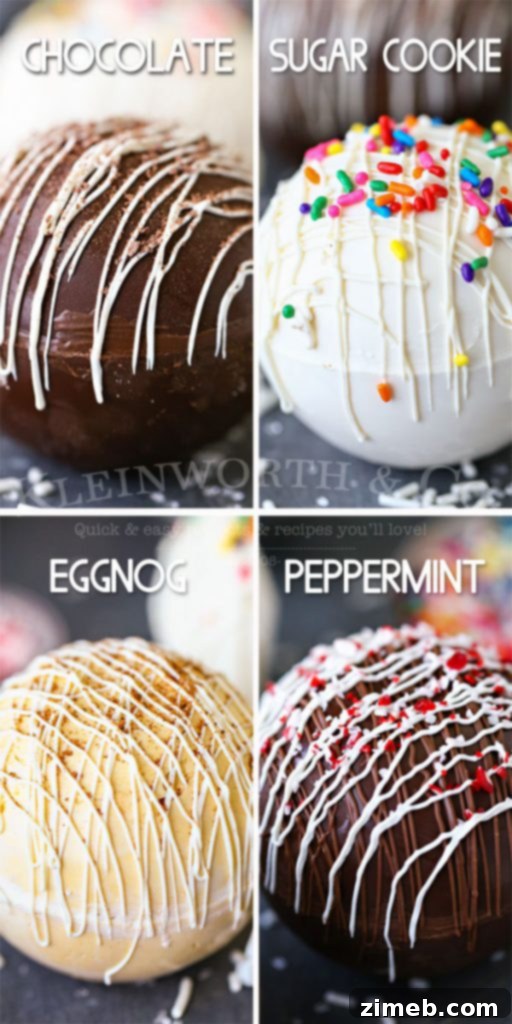
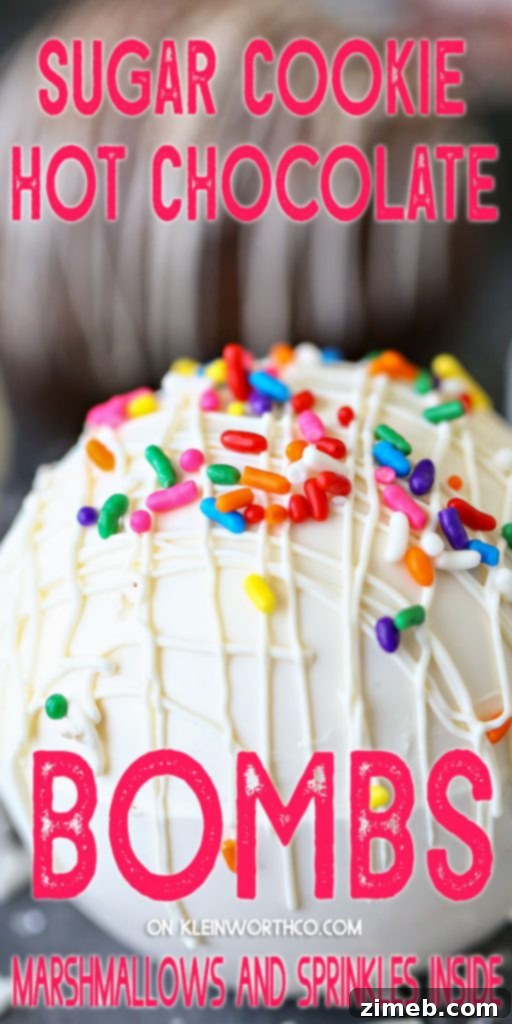
One of my absolute favorite creations is the Sugar Cookie Hot Chocolate Bomb. The comforting, buttery flavor of sugar cookies perfectly complements the richness of hot chocolate, creating a nostalgic taste that warms the soul. And let’s be honest, those vibrant rainbow sprinkles aren’t just for show; they add a playful burst of color and a touch of whimsy that makes these bombs irresistible. They’re a delightful twist that feels both familiar and exciting, making them perfect for any gathering or a cozy night in.
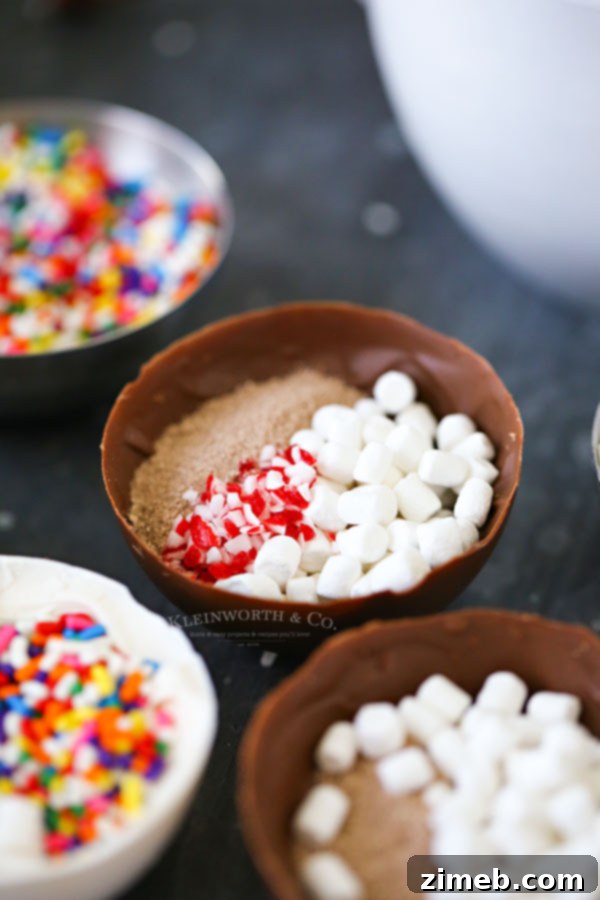
Creating these bombs allows for incredible customization. Here, you can get a peek at the magic happening inside, where the cocoa mix, marshmallows, and other chosen add-ins are carefully placed within the chocolate shell, ready to be unveiled with a splash of hot milk. The visual appeal of these treats, even before they melt, is part of their charm.
Festive & Romantic: Holiday Hot Chocolate Bombs
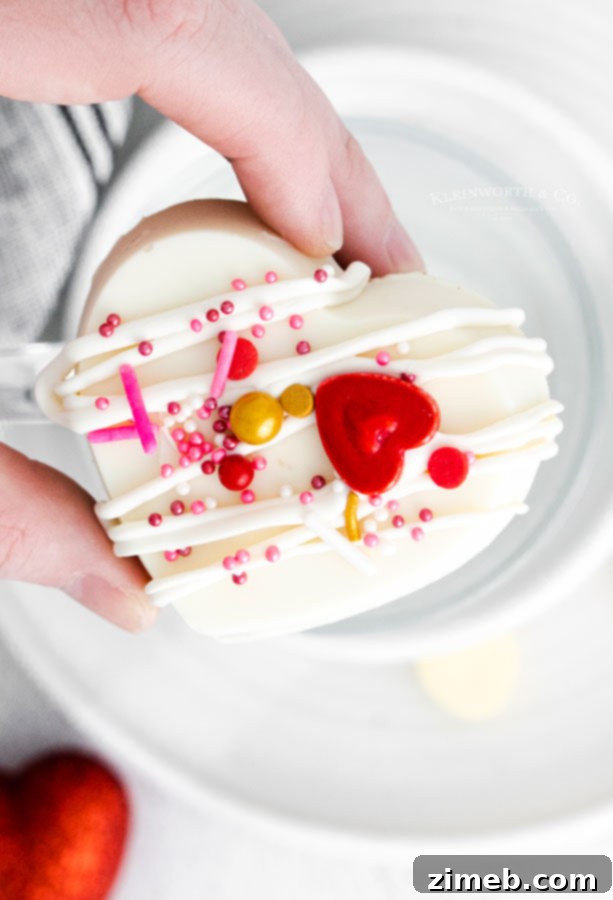
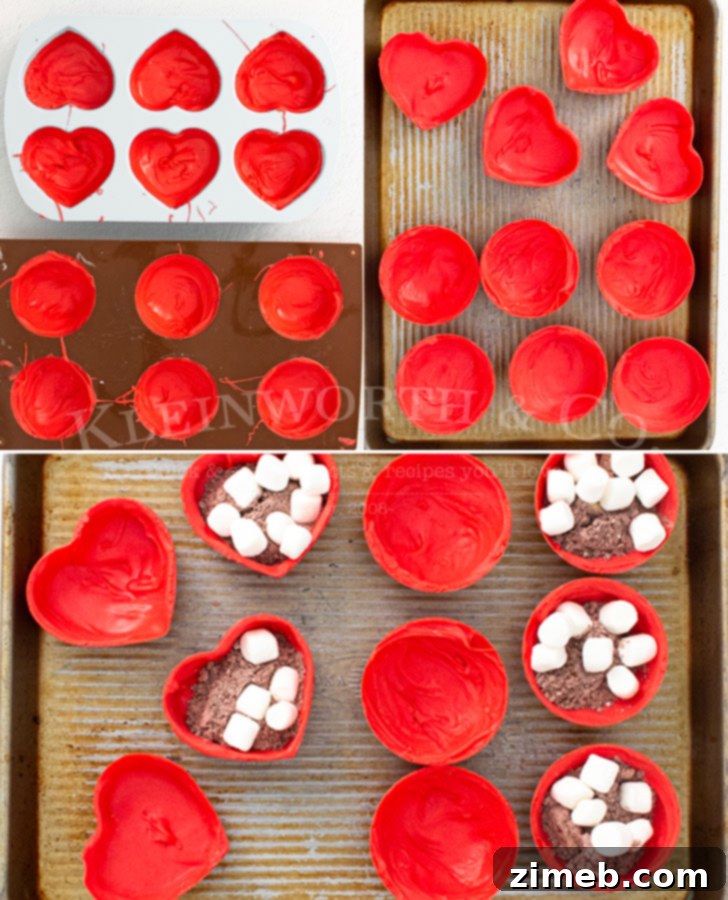
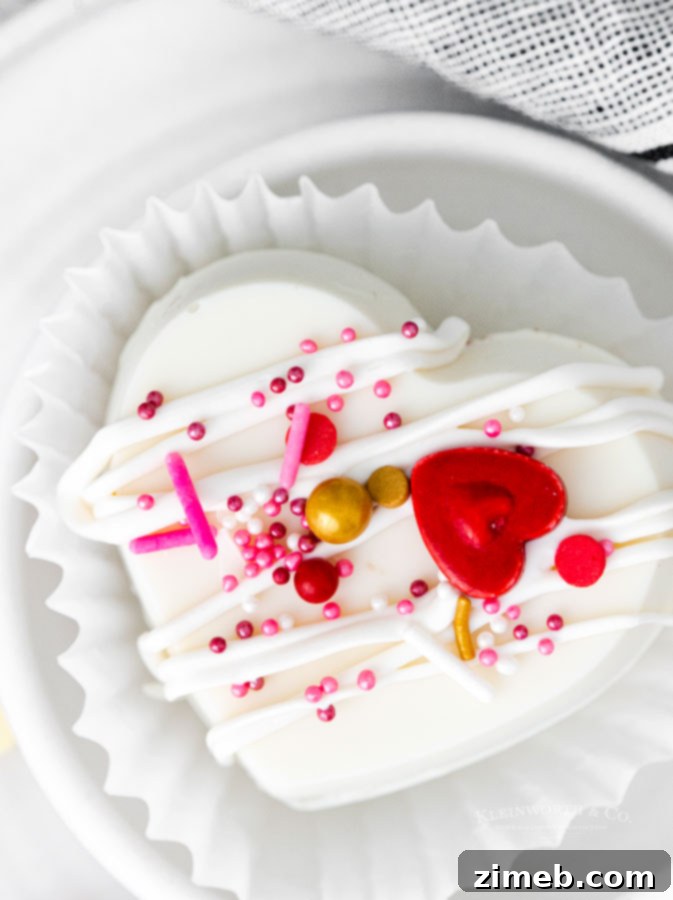
Beyond everyday indulgence, hot chocolate bombs are fantastic for seasonal celebrations. Imagine these adorable heart-shaped bombs, crafted using a special silicone mold, adding a romantic touch to your Valentine’s Day celebrations. The thoughtfulness of a homemade gift, combined with the delightful surprise, makes them truly special. The link to these heart-shaped molds can be found below in our recommended products section, making it easy for you to recreate this magic.
The versatility extends to practically any ingredient you can dream of adding to your hot chocolate. From mini chocolate chips to crushed candies, flavored extracts, or even a dash of cayenne for a Mexican hot chocolate twist – if you can imagine it in your mug, you can likely incorporate it into a bomb. This allows for endless creativity and personalized gifts that truly stand out.
Decadent Red Velvet Hot Chocolate Bombs
For a truly luxurious treat, consider making Red Velvet Hot Chocolate Bombs. These visually stunning bombs combine the rich cocoa flavor of red velvet with the creamy indulgence of hot chocolate, often enhanced with a hint of cream cheese frosting flavor (achieved through specific extracts or mixes). They are perfect for special occasions or when you want to impress with a sophisticated and delicious beverage.
Refreshing Peppermint Hot Chocolate Bombs
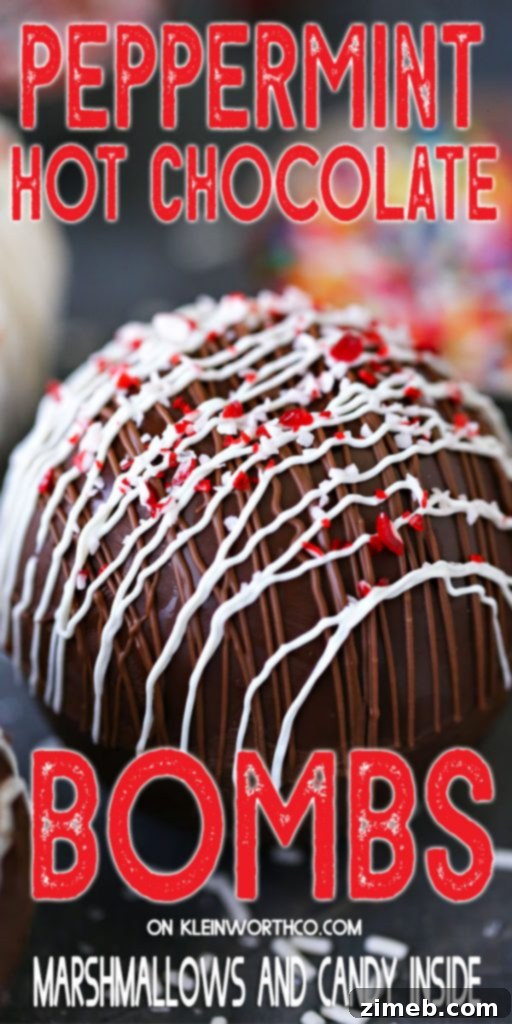
As the colder months approach, a Peppermint Hot Chocolate Bomb is an absolute must-have. The cooling sensation of peppermint perfectly cuts through the richness of chocolate, creating a balanced and incredibly satisfying drink. Crushed peppermint candies add not only flavor but also a delightful crunch and festive visual appeal. These are a quintessential holiday treat, ideal for warming up after a day of winter activities or as a charming gift.
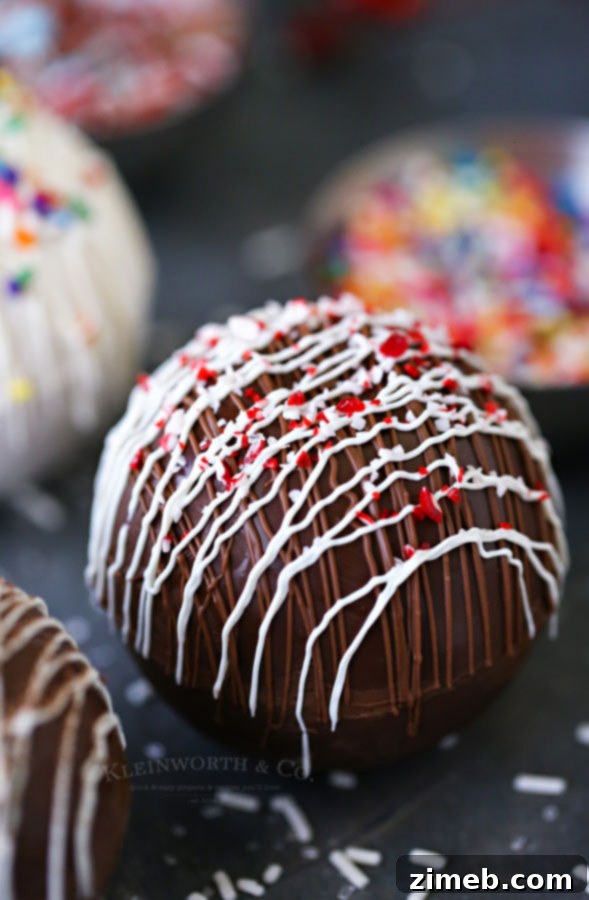
Frequently Asked Questions About Hot Chocolate Bombs
What is the best way to store hot chocolate bombs?
Proper storage is key to maintaining the integrity and freshness of your hot chocolate bombs. Always use an airtight container to prevent moisture absorption and protect them from external odors. I personally prefer to store mine in the freezer, as it significantly extends their shelf life and helps them retain their shape, especially in warmer environments. Alternatively, they can be stored in the refrigerator. If you’re planning to gift them to friends and neighbors, room temperature storage is acceptable for a shorter period, but be mindful of handling them. The warmth from your fingers can quickly cause the chocolate to melt or smudge, so try to touch them as little as possible, or consider wearing gloves during assembly and packaging.
Crafting Your Own: The Hot Chocolate Bomb Recipe
How do you make homemade hot chocolate powder for the filling?
Making your own hot chocolate powder is incredibly simple and allows you to control the quality and flavor profile. It’s also a fantastic way to customize your bombs even further. Here’s how:
- Combine all of the ingredients – typically superfine sugar, unsweetened cocoa powder, finely chopped white chocolate (for creaminess), and powdered milk – in a small bowl.
- Stir thoroughly until all ingredients are well combined and there are no lumps.
- Set aside until you’re ready to fill your chocolate bomb shells.
This homemade mix ensures a rich, flavorful hot chocolate every time and avoids artificial ingredients often found in store-bought versions.
Elevating Your Bombs: Luxury Hot Chocolate Bombs
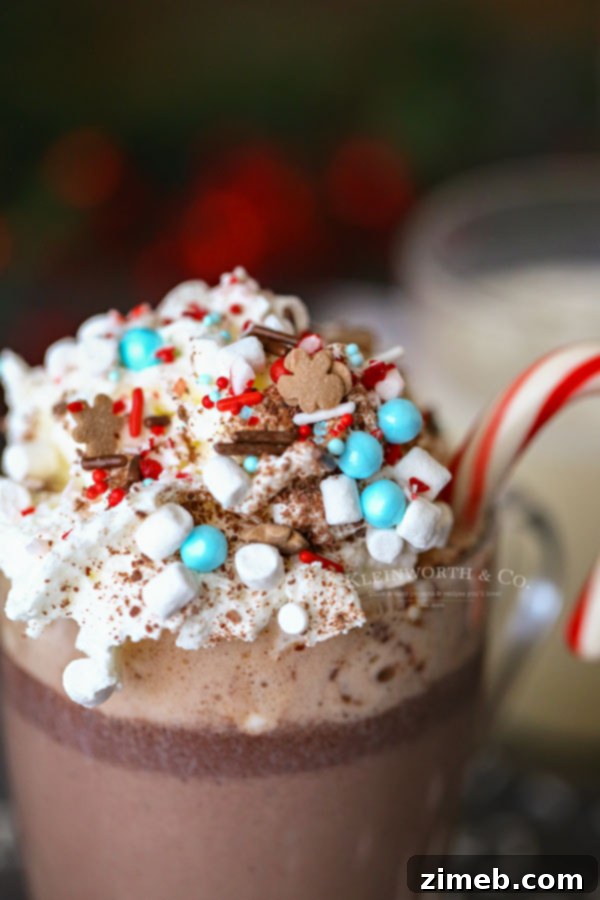
Want to make your hot chocolate bombs truly stand out? Consider adding unique and adorable decorations! For a touch of festive charm, I recently used delightful gingerbread man sprinkles. These small details can transform a simple hot chocolate bomb into a luxurious, artisanal treat that’s perfect for gifting or impressing guests. The possibilities for customization are vast – think edible glitter, custom colored candy melts, or intricate piping designs to match any theme or holiday.
Can this recipe be doubled?
Absolutely, this recipe can easily be doubled or even tripled, provided you have enough silicone molds and sufficient freezer space. I often prepare these in large batches by working efficiently: as soon as one batch of chocolate shells is removed from the molds and placed on a tray, I immediately refill the molds to create more. This continuous process allows for a higher yield in a shorter amount of time, making it perfect for preparing gifts or for larger gatherings.
When doubling the recipe, keep in mind that the melting time for the chocolate may increase slightly due to the larger volume. It’s often advisable to heat the chocolate in batches rather than all at once, even if you’re making a larger quantity. This prevents the chocolate from overheating and potentially seizing, ensuring a smooth and workable consistency throughout the process.

By carefully managing the melting process, you can successfully create a plentiful supply of these festive treats without compromising on quality or appearance. Batch work ensures even melting and reduces the risk of common chocolate mishaps, making your hot chocolate bomb production smooth and enjoyable.
Seasonal Delight: Eggnog Hot Chocolate Bombs
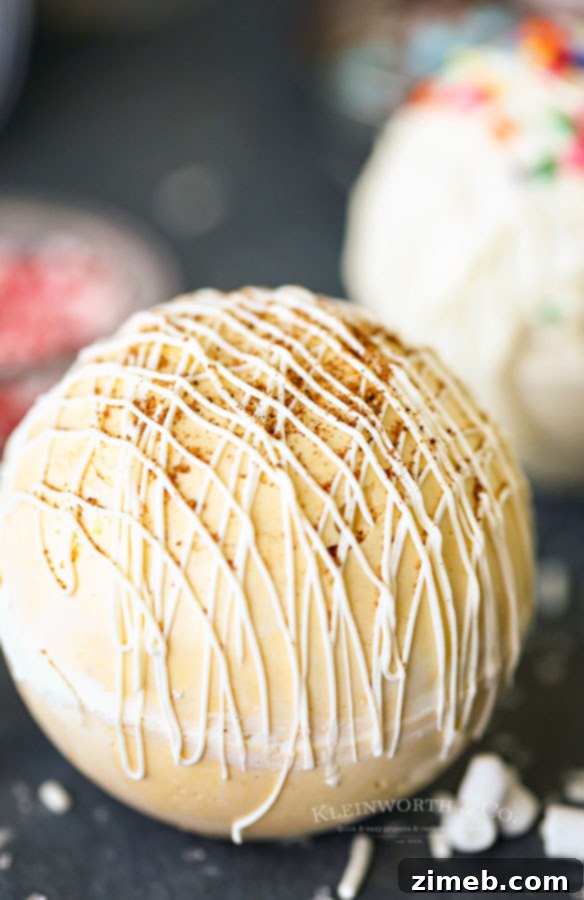
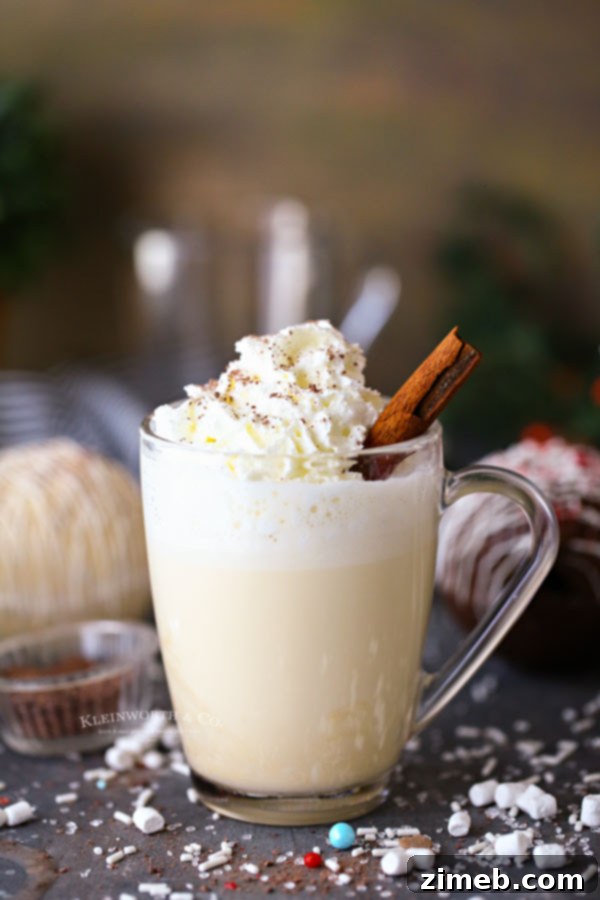
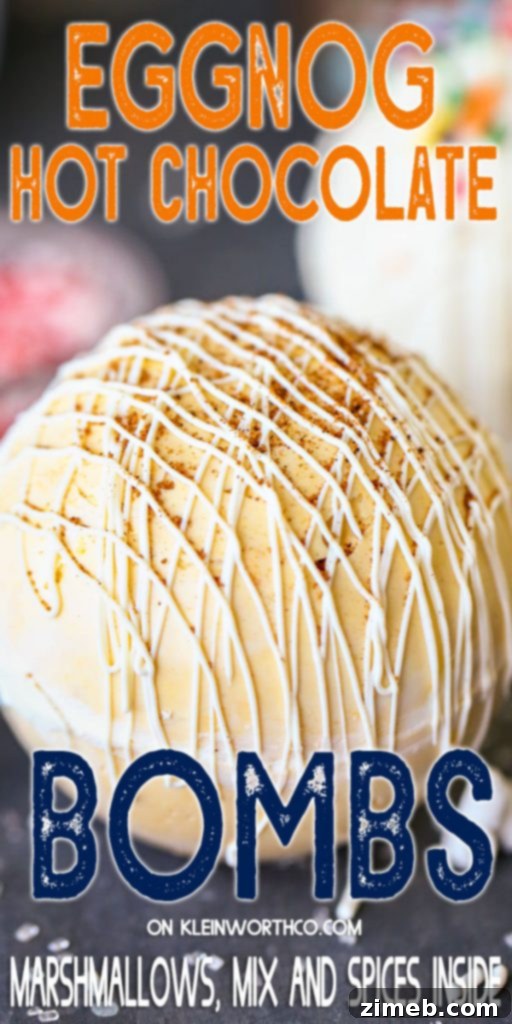
For the ultimate holiday treat, look no further than Eggnog Hot Chocolate Bombs. Infused with the rich, creamy flavor of eggnog and a hint of warming nutmeg, these bombs are guaranteed to be the star of all your holiday gatherings. They offer a unique twist on the traditional hot chocolate, perfectly capturing the festive spirit and delighting guests with their comforting, seasonal taste.
Creamy White Chocolate Cocoa Bombs
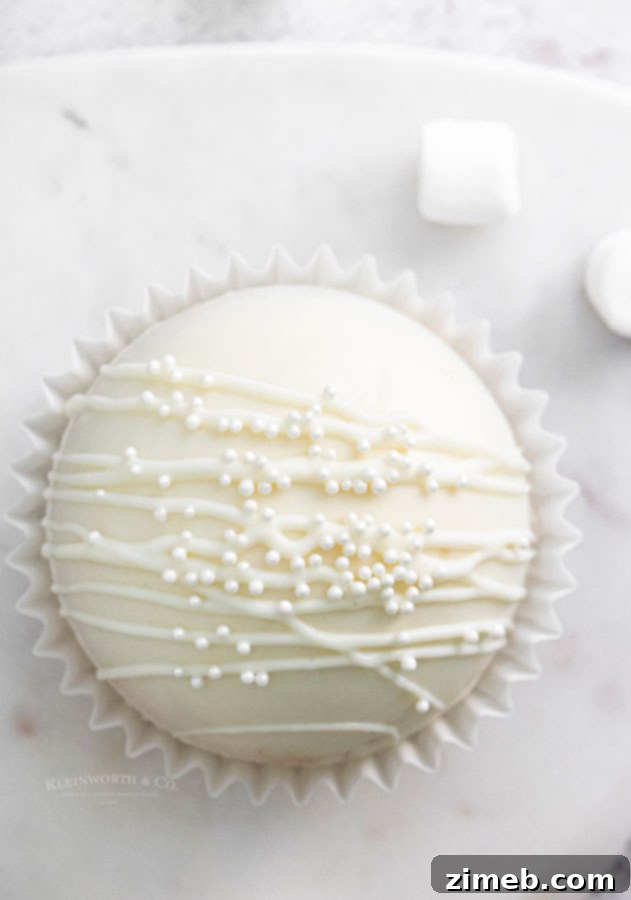
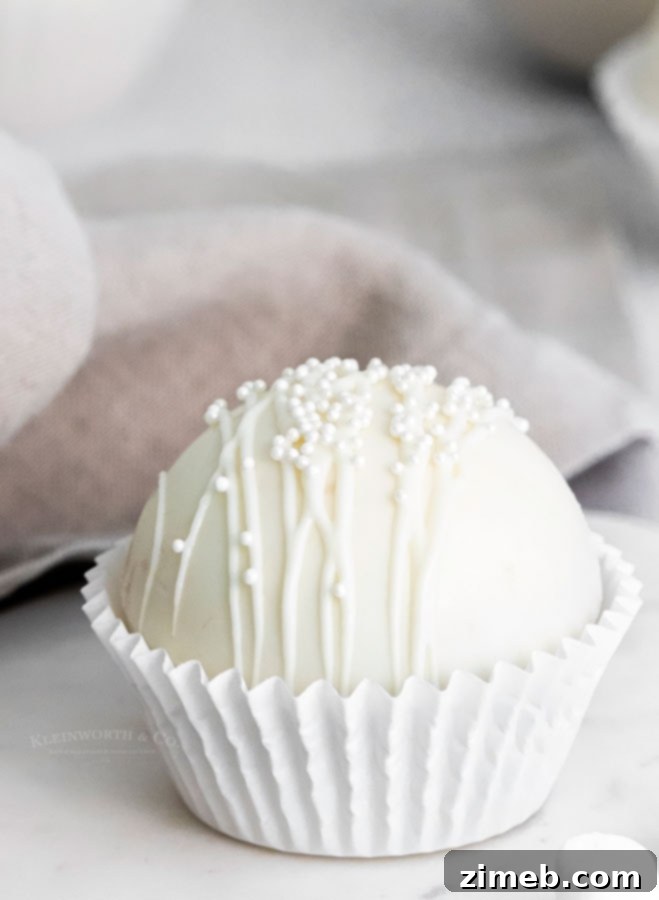
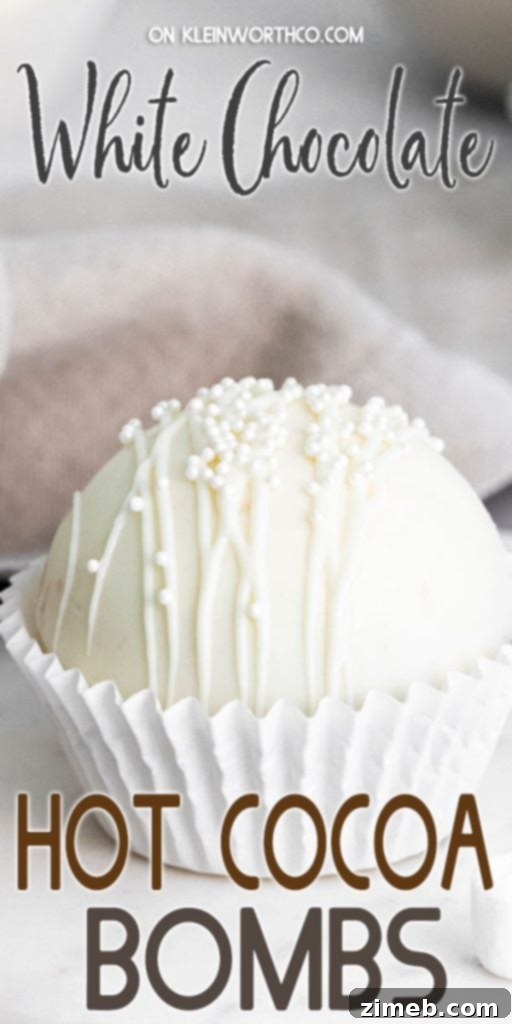
For those who prefer a lighter, sweeter hot chocolate, white chocolate cocoa bombs are an exquisite choice. These bombs offer a creamy, vanilla-infused hot chocolate experience that is equally delightful. They can be filled with white hot chocolate mix, mini marshmallows, and garnished with white chocolate shavings or festive sprinkles for an elegant presentation. White chocolate bombs provide a beautiful contrast to their dark chocolate counterparts and are wonderfully versatile for decorating.
Step-by-Step Guide: How to Make Hot Chocolate Bombs
Crafting Your Hot Chocolate Bombs: A Detailed Method
- **Prepare Your Workspace:** Begin by placing your silicone mold (any shape you prefer, typically 2-inch half-sphere molds work best) on a flat, easily movable surface, such as a baking tray or cutting board. This allows for easy transfer to the freezer.
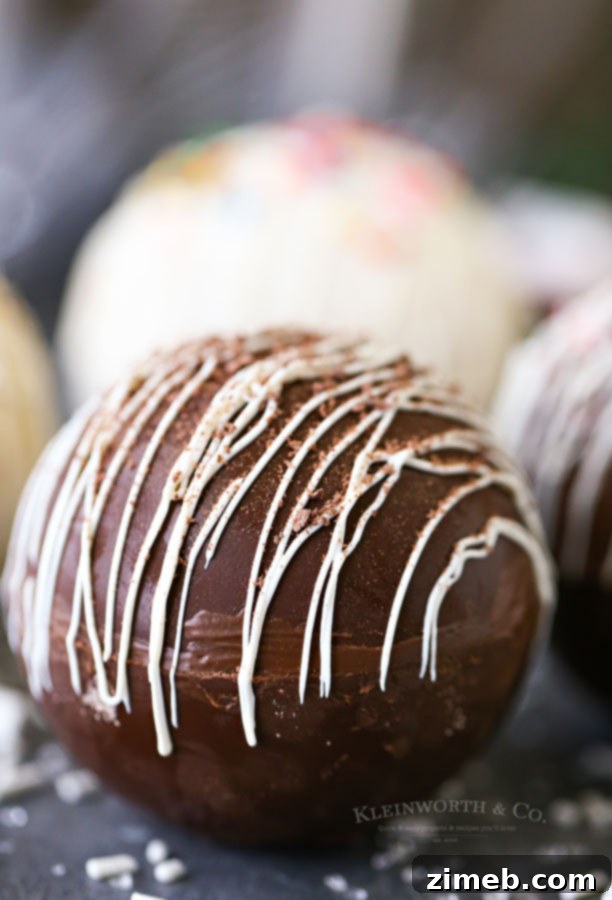
- **Melt the Chocolate:** Place your chosen chocolate (chips or candy melts) in a microwave-safe container, like a glass measuring cup. Microwave at 50% power in 30-second intervals, stirring thoroughly between each interval. Continue until the chocolate is smooth and fully melted; this usually takes about 2 minutes total, but times may vary based on your microwave and chocolate type.
- **First Chocolate Layer:** Spoon a generous tablespoon of the melted chocolate into each well of your silicone mold.
- **Coat the Molds:** Using a small rubber spatula, an offset spatula, or the back of a spoon, carefully spread the melted chocolate up the sides of each mold well, ensuring the entire surface is evenly and completely coated.
- **Thicken the Shells:** Allow the chocolate to cool slightly for about 5 minutes. Then, divide any remaining melted chocolate evenly among the wells and spread it around to create a thicker, more durable chocolate shell. Pay extra attention to the top edges, as a thicker rim will make sealing the bombs easier and more robust.
- **Chill to Set:** Carefully transfer the mold (still on its tray) to the freezer. Allow the chocolate to set completely for at least 30 minutes. This ensures the shells are firm and easy to handle.
- **Release the Shells:** Once the chocolate shells are fully set, remove the mold from the freezer. Gently tug around the edges of the silicone mold to help release the chocolate, then carefully use your fingers to push each chocolate cup out. Place the individual chocolate cups on a clean plate.
- **Fill the Bombs:** Take half of your chocolate cups and fill each with your desired hot cocoa powder mix, a generous amount of mini marshmallows, and any other exciting add-ins you’ve chosen (e.g., sprinkles, crushed candies, flavored extracts).
- **Seal the Bombs:** Working quickly to prevent your fingers from melting the chocolate, gently warm the rim of an empty chocolate cup. You can do this by placing it open-side down on a hot plate (heated by running under hot water or briefly in the microwave) for a few seconds. Immediately press this warmed rim onto a filled chocolate half, pressing lightly to seal the two halves together, forming a complete sphere.
- **Prepare for Decoration:** Melt a small amount of decorating chocolate (candy melts work great) using the same microwave method as before. Transfer this melted chocolate to a piping bag fitted with a small piping tip or a decorating squeeze bottle.
- **Decorate the Seams:** Pipe a thin, elegant ribbon of melted chocolate around the seam where the two halves of each bomb meet. You can then smooth it out gently with your finger for a polished finish, or leave the ribbon for a decorative touch.
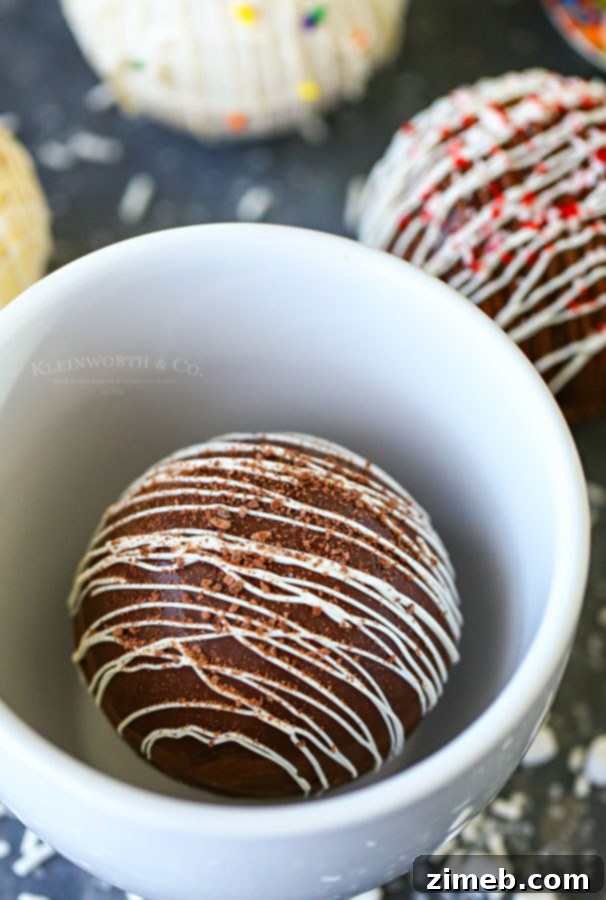
- **Final Touches:** Drizzle additional melted chocolate over the tops of your hot chocolate bombs and immediately sprinkle with your chosen decorations – be it rainbow sprinkles, crushed peppermint, or shaved chocolate.
- **Final Set:** Allow all the decorating chocolate to set completely before handling or moving the bombs.
- **Store:** Keep your finished hot chocolate bombs refrigerated or frozen in an airtight container until you’re ready to enjoy their magic!
Why didn’t my chocolate melt correctly? (Understanding Chocolate Seizing)
One of the most common frustrations when working with chocolate is “seizing,” where your beautifully smooth chocolate suddenly becomes chunky, stiff, and unworkable instead of creamy. This phenomenon typically occurs due to two main reasons: **overheating** or **contact with water/steam.**
- **Overheating:** When chocolate is exposed to excessive heat, the cocoa solids can burn, causing the chocolate to seize and become gritty. This is why low and slow melting methods are crucial.
- **Contact with Water or Steam:** Chocolate is hydrophobic, meaning its natural oils repel water. Even a tiny drop of water or a bit of steam introduced during the melting process can cause the sugar and cocoa solids in the chocolate to clump together, separating from the oils and resulting in a thick, unmanageable mass.
To prevent this, always refer to the package directions for your specific chocolate, as different types (e.g., chips, bar chocolate, candy melts) may have varying melting requirements. However, as a general rule, especially when using a microwave, I highly recommend heating your chocolate at **50% power in short, 30-second intervals**, stirring diligently after each interval until it’s smooth. For a double boiler method, ensure no steam or water splashes into the chocolate. By following these precautions, you can achieve perfectly melted, creamy chocolate every time, essential for flawless hot chocolate bombs.
Hot Chocolate Bombs: The Perfect Gift Idea
Hot chocolate bombs make for truly thoughtful and impressive gifts, especially during the holiday season or for any special occasion. Package them in decorative boxes or cellophane bags tied with a festive ribbon for a personalized touch. They are ideal for teachers, neighbors, friends, or as delightful party favors. Imagine the joy on someone’s face as they discover these charming spheres, ready to transform into a delicious, warming beverage. Customizing flavors and decorations makes each gift unique and memorable.
Ingredients for Seasonal Delights: Pumpkin Spice Hot Chocolate Bombs
For a taste of autumn, these Pumpkin Spice Hot Chocolate Bombs are a must-try. The earthy warmth of pumpkin spice perfectly complements the chocolate, creating a cozy and inviting beverage. Here’s what you’ll need:
For the Homemade Pumpkin Spice Hot Chocolate Powder:
- Confectioner’s sugar
- Unsweetened cocoa powder
- Chopped milk chocolate
- Mini marshmallows
- Pumpkin pie spice (the star ingredient!)
For the Hot Chocolate Bomb Shells:
● White chocolate bark (or candy melts)
● Your freshly made Pumpkin Spice Hot Chocolate Powder (from above)
These ingredients combine to create a deeply flavorful and aromatic hot chocolate bomb that truly embodies the essence of the fall season. Garnish with a sprinkle of extra pumpkin pie spice or a dollop of whipped cream for an extra touch of indulgence.
How many servings does this recipe make?
Using a standard 2-inch silicone mold, which typically yields 6 half-sphere shells, this base recipe produces 3 complete hot chocolate bombs. This amount is perfect for a small gathering, a few personal treats, or as a practice batch before scaling up. Remember that each finished bomb makes one generous serving of hot chocolate.
Can I use sugar-free chocolate?
While I haven’t personally experimented with sugar-free chocolate for these bombs, in theory, it should work perfectly fine for creating the chocolate shells. Sugar-free chocolates are designed to melt and set similarly to their sugar-containing counterparts. However, always check the specific melting instructions on the sugar-free chocolate package, as some may behave slightly differently. If you decide to give it a try, I’d love to hear about your results and any tips you discover!
Eggnog Hot Chocolate Bombs: A Holiday Must-Have
Hot Chocolate Bombs with Marshmallows: The Ultimate Comfort
To make Homemade Hot Cocoa Powder, you will need…
Creating your own hot cocoa powder mix for the bomb filling is not only simple but also allows for complete control over the ingredients and flavor. For a rich and creamy powder, gather these essentials:
- Superfine or confectioner’s sugar (for smooth dissolution)
- Unsweetened cocoa powder (specifically *not* Dutch-processed, as explained below, for optimal flavor balance)
- Finely chopped white chocolate (adds richness and helps create a creamy texture)
- Powdered milk (optional, but highly recommended for an extra creamy consistency and body in your hot chocolate)
Combine these ingredients well, and you’ll have a superior hot cocoa mix ready for your bombs.
Essential Tools and Ingredients for Crafting Hot Chocolate Bombs
To embark on your hot chocolate bomb making adventure, ensure you have the following tools and ingredients:
- 2-inch silicone mold (or any desired shape for your bombs)
- Milk or semi-sweet chocolate chips, or chocolate candy melts
- Hot cocoa powder mix (homemade or store-bought)
- White chocolate hot chocolate mix (for white chocolate variations)
- Mini dehydrated marshmallows and/or regular mini marshmallows
- Rainbow marshmallows (great for themed bombs like St. Patrick’s Day)
- White chocolate candy melts for decoration and specific flavors
- Shaved chocolate for garnish
- Crushed peppermint candies (for peppermint bombs)
- Rainbow sprinkles (for sugar cookie and festive bombs)
- Powdered vanilla extract and/or powdered almond extract (for flavor enhancements)
- Yellow chocolate candy melts (for eggnog bombs, or white chocolate with yellow food coloring)
- Eggnog powder mix and nutmeg (for eggnog bombs)
- Piping bag and small piping tip (for precise decorating)
Peppermint Hot Chocolate Bombs: A Winter Favorite
Recommended Products for Your Hot Chocolate Bomb Creations
Making hot chocolate bombs is a truly enjoyable and delicious process! Whether you’re a seasoned crafter or new to working with chocolate molds, having the right tools makes all the difference. Here’s a list of products I personally love and can’t do without when creating these fun, customizable beverage gifts. These items will help ensure your hot chocolate bombs turn out beautifully every time.
- 2″ silicone mold (essential for classic spheres)
- Heart-shaped silicone mold (perfect for Valentine’s Day or sweet gestures)
- Milk chocolate chips or semi-sweet chocolate chips (for classic bombs)
- Chocolate candy melts (for easy melting and vibrant colors)
- Hot cocoa powder mix (the core of your beverage)
- White chocolate hot chocolate mix (for creamy white chocolate bombs)
- Mini dehydrated marshmallows (for that nostalgic hot cocoa look)
- Mini marshmallows (classic and always a hit)
- Rainbow Lucky Charm marshmallows (fantastic for St. Patrick’s Day or whimsical designs)
- White chocolate candy melts (versatile for decorating and white chocolate shells)
- Red candy melts (for vibrant red velvet bombs)
- Green candy melts (for St. Patrick’s Day creations)
- White chocolate chips (alternative for white chocolate shells)
- Shaved chocolate (for elegant garnishes)
- Crushed peppermint candies (for that refreshing minty kick)
- Rainbow sprinkles (adds color and fun to any bomb)
- Valentine Sprinkles (themed decorations for romantic occasions)
- Powdered vanilla extract (for intense vanilla flavor without liquid)
- Powdered almond extract (for a nutty, aromatic hint)
- Yellow chocolate candy melts (for vibrant eggnog bombs)
- Yellow food color (if using white chocolate for eggnog bombs)
- Eggnog powder mix (for authentic eggnog flavor)
- Nutmeg (the classic spice for eggnog)
- Baking sheet (for transporting molds to the freezer)
- Measuring cups and spoons (for accurate measurements)
- Rubber spatula and offset spatula (for spreading chocolate)
- Small plate (for warming rims for sealing)
- Piping bag and small piping tip or piping squeeze bottle (for decorating)
- Cellophane bags (for elegant gifting) and mugs (for enjoying!)
Understanding Cocoa Powder: Dutch-Process vs. Regular
When it comes to baking and making delicious hot chocolate, not all cocoa powders are created equal. The distinction between Dutch-process cocoa powder and regular (natural) cocoa powder is significant, as it affects both flavor and how ingredients react in a recipe. Understanding this difference is crucial for achieving the desired results in your hot chocolate bombs, particularly when making your own cocoa mix.
- **Dutch-Process Cocoa Powder (Alkalized Cocoa):** This cocoa powder is made from cocoa beans that have been washed in an alkaline solution, typically potassium carbonate. This process neutralizes the natural acidity of the cocoa beans, resulting in a darker color, a milder, less bitter flavor, and a smoother taste. Because it’s neutral, Dutch-process cocoa does *not* react with baking soda (which requires an acid to activate). Instead, it’s typically paired with **baking powder** in recipes, as baking powder contains its own acidic components.
- **Regular (Natural) Cocoa Powder:** This cocoa powder is made from cocoa beans that have not undergone the alkalization process. It retains its natural acidity, which gives it a sharper, more intense chocolate flavor and a lighter reddish-brown color. Its acidity makes it reactive with **baking soda**, which is an alkaline ingredient. When combined, they produce carbon dioxide, creating lift and airiness in baked goods.
So, why does this matter for hot chocolate bombs? While you’re not typically baking with leavening agents *inside* the bombs, the acidity can impact the overall flavor profile of your hot cocoa mix. When making homemade hot cocoa powder, if a recipe specifies “unsweetened cocoa powder (not Dutch-processed),” it’s often to ensure a specific flavor balance and richness. Sticking to the type of cocoa powder recommended in a recipe is highly recommended to achieve the intended taste and texture for your hot chocolate.
If you’ve enjoyed crafting and savoring this Hot Chocolate Bomb recipe, I invite you to explore more delightful treats. These related recipes are sure to bring warmth and joy to your kitchen. Please click each link below to find the easy, printable recipe!
Hot Chocolate Mix
This Hot Chocolate Mix takes just 3 ingredients and is incredibly easy to make. It’s the perfect homemade holiday gift for teachers, neighbors, and friends, and a wonderful way to warm up on chilly winter days.
Check out this recipe
Best Homemade Caramel Candy
This Best Homemade Caramel Candy recipe is perfect for making caramel apples and all your favorite fall treats and desserts. It’s incredibly easy to make and ready in about 30 minutes. It truly is THE BEST homemade caramel recipe around!
Check out this recipe
Eggnog Hot Chocolate
Eggnog Hot Chocolate is an easy non-alcoholic eggnog recipe that the little ones love. But it’s so good that even the kids at heart will want some too. Perfect for the holidays, making Thanksgiving and Christmas even more special with this easy drink recipe.
Check out this recipe
Sugar Cookie Truffles
Sugar Cookie Truffles are the perfect no-bake holiday treat. With only 4 ingredients, this easy dessert is perfect for parties, food gifts, and more!
Check out this recipe
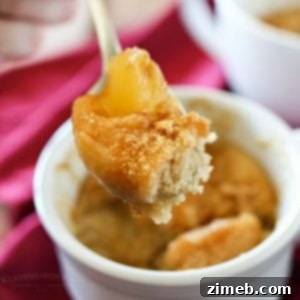
Apple Pie Mug Cake
Apple Pie Mug Cake offers everything you love about cinnamon and apple pie in an easy 3-minute mug cake. Quick and easy desserts don’t get any better than this comforting treat.
Check out this recipe
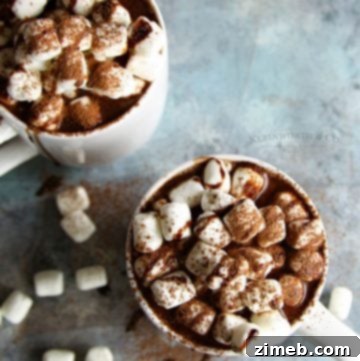
Peanut Butter Cup Slow Cooker Hot Chocolate
Peanut Butter Cup Slow Cooker Hot Chocolate is so simple and perfect for those who LOVE the combination of peanut butter and chocolate. It’s the ideal way to warm up on a chilly day.
Check out this recipe
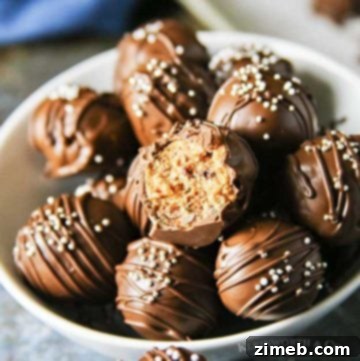
Chocolate Chip Cookie Truffles
Chocolate Chip Cookie Truffles are an easy 4-ingredient chocolate dessert made with crushed chocolate chip cookies. Perfect for holidays, gifts, and parties!
Check out this recipe
Choosing the Best Chocolate for Hot Chocolate Bombs
The type of chocolate you choose significantly impacts the success and quality of your hot chocolate bombs. While it might be tempting to use regular chocolate chips, I’ve found that they often require the addition of a small amount of coconut oil or shortening to achieve the ideal melting consistency and a smooth, hard shell. Without this, chocolate chips can be too thick or prone to blooming (white streaks) once set.
For consistently perfect results, I highly recommend using **chocolate candy melts** or **chocolate bark** (also sometimes called almond bark or candy coating). These products are specifically formulated to melt smoothly, coat molds evenly, and re-harden beautifully with a glossy finish, without the need for tempering. Candy melts come in an incredible array of colors and flavors, offering endless creative possibilities for your hot chocolate bombs. Whether you’re aiming for a vibrant red velvet bomb or a subtle white chocolate shell, candy melts make the process far simpler and more reliable, ensuring your bombs look and taste professional.
St. Patrick’s Day Cocoa Bombs: A Splash of Green
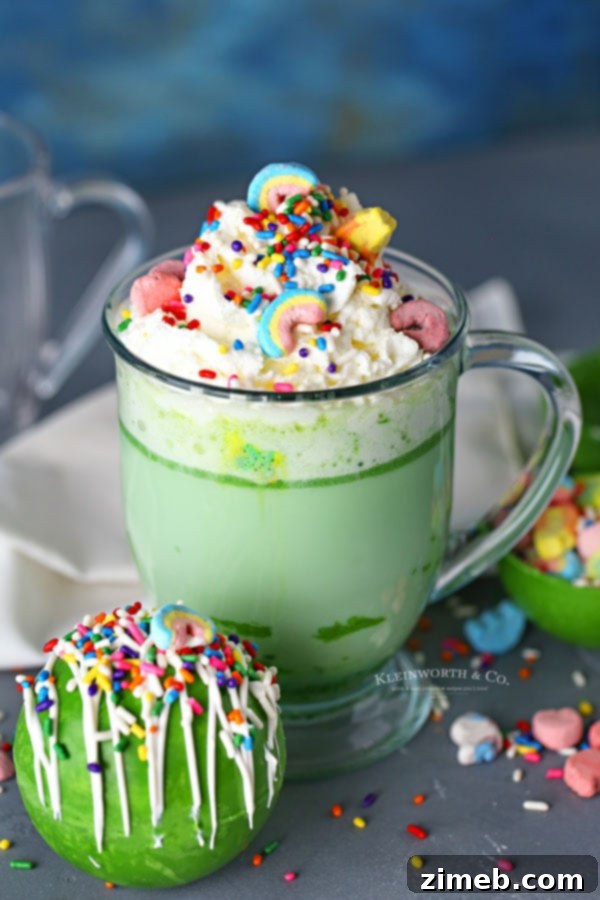
Hot Chocolate Balls: A Delightful Culinary Trend
I hope this extensive guide inspires you to create your own marvelous hot chocolate bombs! Whether for personal enjoyment, holiday gifting, or simply to add a touch of magic to your day, these delightful chocolate spheres are sure to bring smiles. If you love this comprehensive recipe and guide for Hot Chocolate Bombs as much as I do, please consider leaving a five-star review below. Your feedback helps others discover these wonderful treats. Also, be sure to share your creations and this guide on Facebook and Pinterest to spread the joy!

CONNECT WITH YUMMI HAUS!
Be sure to follow me on my social media, so you never miss a post!
Substack, FB, Pinterest, IG, Email Subscription
Rate this Recipe
Hot Chocolate Bombs – Numerous Flavors
Course: Beverage, Dessert, Snack
Servings: 3 bombs
Hot Chocolate Bombs are chocolate spheres in numerous flavors full of cocoa mix, marshmallows, sprinkles & more! They open in hot milk making for a fun surprise inside! Check out these with chocolate, peppermint, sugar cookie, pumpkin spice, white chocolate, red velvet and eggnog flavors! PLUS heart-shaped ones for Valentine’s Day & rainbow marshmallows for St. Patrick’s Day!
Pin Recipe
Save Recipe
Prep Time: 30 mins
Chill Time: 30 mins
Total Time: 1 hr
Ingredients
Standard Hot Chocolate Bomb
- 1 cup milk or semi-sweet chocolate chips (or 1¼ cup chocolate candy melts)
- 3 tbsp hot cocoa powder mix (divided – 1 tbsp each)
- 3 tbsp mini dehydrated marshmallows (divided – 1 tbsp each)
- ¼ cup white chocolate candy melts for decoration
- Pinch shaved chocolate for decoration (each bomb)
Peppermint Hot Chocolate Bomb
- 1 cup milk or semi-sweet chocolate chips (or 1¼ cup chocolate candy melts)
- 3 tbsp hot cocoa powder mix (divided – 1 tbsp each)
- 3 tbsp mini dehydrated marshmallows (divided – 1 tbsp each)
- 2 tsp crushed peppermint candies (each bomb)
- ¼ cup milk chocolate candy melts for decoration
- ¼ cup white chocolate candy melts for decoration
- Pinch crushed peppermint candies for decoration (each bomb)
Sugar Cookie Hot Chocolate Bomb
- 1 cup white chocolate chips (or 1¼ cup white chocolate candy melts)
- 3 tbsp white hot chocolate powder mix (divided – 1 tbsp each)
- 3 tbsp mini dehydrated marshmallows (divided – 1 tbsp each)
- 1 tsp rainbow sprinkles (each bomb)
- ½ tsp powder vanilla extract (each bomb)
- ½ tsp powder almond extract (each bomb)
- ¼ cup white chocolate candy melts for decoration
- Pinch rainbow sprinkles for decoration (each bomb)
Eggnog Hot Chocolate Bomb
- 1¼ cup yellow chocolate candy melts (or white chocolate candy melts + several drops of yellow food color)
- 3 tbsp eggnog powder mix (divided – 1 tbsp each)
- 3 tbsp mini dehydrated marshmallows (divided – 1 tbsp each)
- ⅛ tsp nutmeg (each bomb)
- ¼ cup white chocolate candy melts for decoration
- Pinch of nutmeg for decoration (each bomb)
White Chocolate Hot Cocoa Bombs & Valentine Hot Cocoa Bombs
- 16 ounces white chocolate bark
- 2 tbsp white chocolate hot cocoa powder (per bomb)
- ¼ cup mini marshmallows (per bomb)
- Sprinkles, for garnish
Red Velvet Hot Cocoa Bombs
- 1¼ cup red chocolate candy melts (or white chocolate candy melts + several drops of red food color)
- 2 tbsp hot chocolate powder (per bomb)
- ¼ cup mini marshmallows (per bomb)
- Valentine sprinkles for garnish
Pumpkin Spice Hot Chocolate Bombs
- ½ cup confectioner’s sugar
- ¼ cup cocoa powder
- ¼ cup chopped chocolate
- ½ cup mini marshmallows
- 1 tsp pumpkin pie spice
St. Patrick’s Day Cocoa Bombs
- 1¼ cup green chocolate candy melts (or white chocolate candy melts + several drops of green food color)
- 2 tbsp white chocolate hot cocoa powder (per bomb)
- ¼ cup Lucky Charm Marshmallows (per bomb)
- ¼ cup white chocolate candy melts for decoration
- Rainbow sprinkles for decoration
Homemade Hot Chocolate Powder
- ½ cup superfine or confectioner’s sugar
- ¼ cup unsweetened cocoa powder (not Dutch-processed)
- 2 tbsp chopped white chocolate
- 2 tbsp powdered milk (see notes)
Instructions
To make Hot Chocolate Bombs:
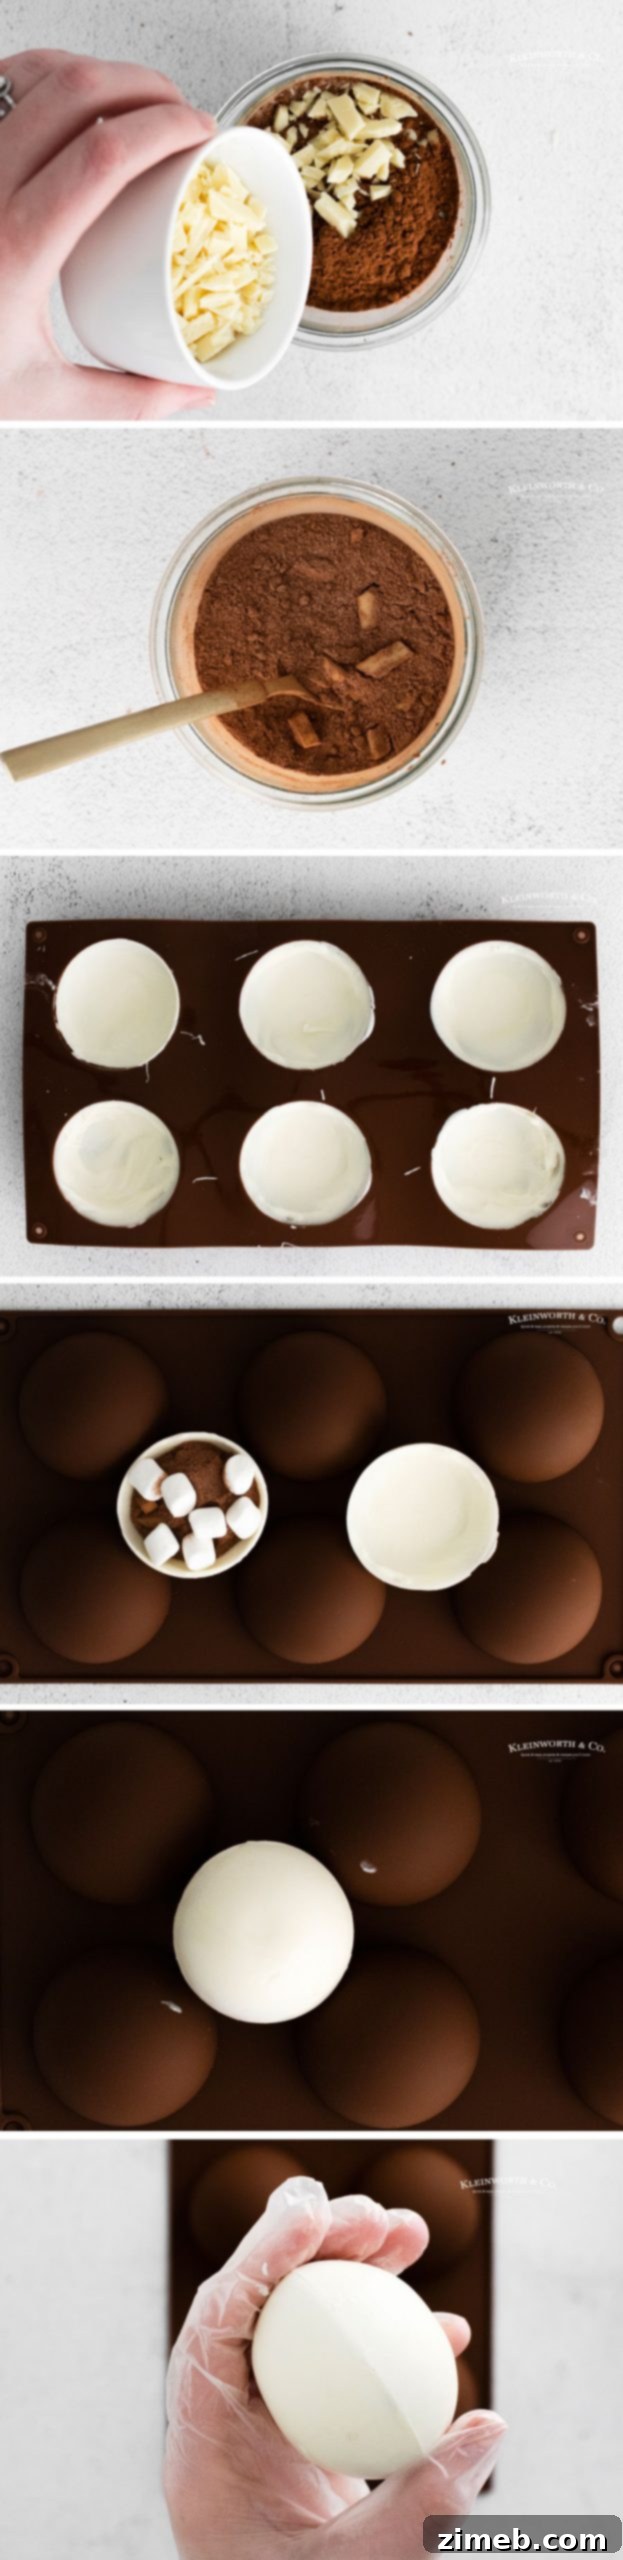
- Place the silicone mold on a flat, moveable surface like a tray or cutting board.
- Place the chocolate in a microwave-safe container like a glass measuring cup and microwave at 50% power in 30-second intervals, stirring in between each time. Mine took about 2 full minutes total.
- Add a heaping tablespoon of melted chocolate to each well of the silicone mold.
- Using a small rubber spatula, offset spatula, or back of a spoon, spread the chocolate up the sides of the mold until completely coated.
- Wait about 5 minutes for the chocolate to cool a bit and then divide the remaining chocolate between all of the wells and spread it around to give each of them a thicker coat. You want the chocolate to be thick, especially around the top edges.
- Place the mold, while on the tray in the freezer for the chocolate to set for at least 30 minutes.
- Once the chocolate has set, remove from the freezer. Give a little tug around the silicone mold to help release the chocolate. Then carefully use your fingers to push the chocolate cup out of the mold. Place the chocolate cups on a plate.
- Place the drink mix, marshmallows, and any other add-ins you are including in 3 of the chocolate cups.
- Working quickly (so your fingers don’t melt the chocolate), place one of the empty cups open-side down on a hot plate to melt the edges a bit. Then place it on the filled half of the sphere and press lightly.
- Melt the decorating chocolate the same way you melted the chocolate for the spheres and then transfer it to a piping bag or decorating squeeze bottle.
- Pipe a thin ribbon of chocolate around the seam of the spheres and then smooth it out with your finger.
- Then drizzle the melted chocolate over the tops of the bombs and sprinkle with decorations.
- Allow the chocolate to set before moving.
- Keep refrigerated or frozen until ready to use.
To make the hot chocolate:
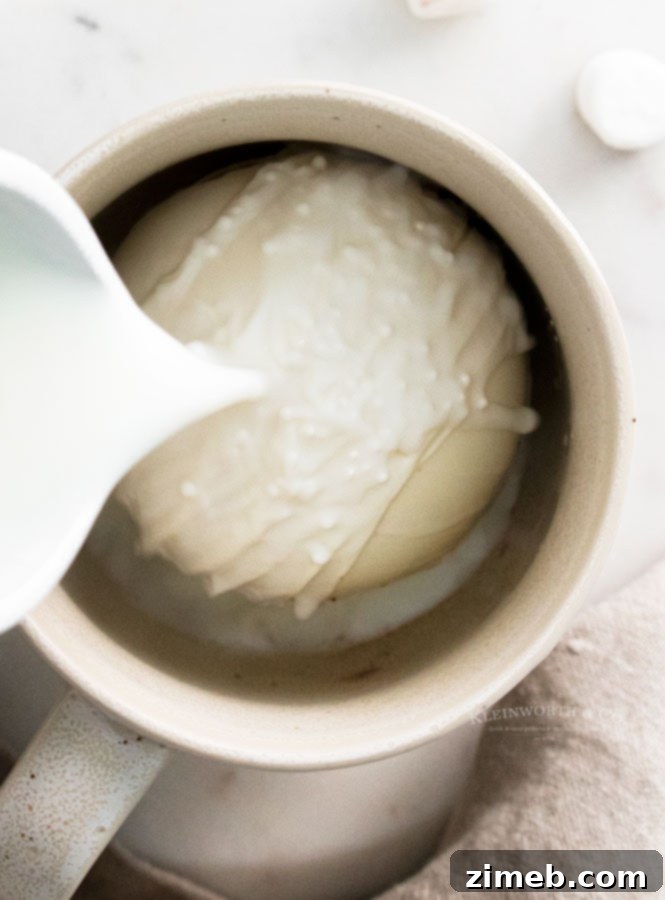
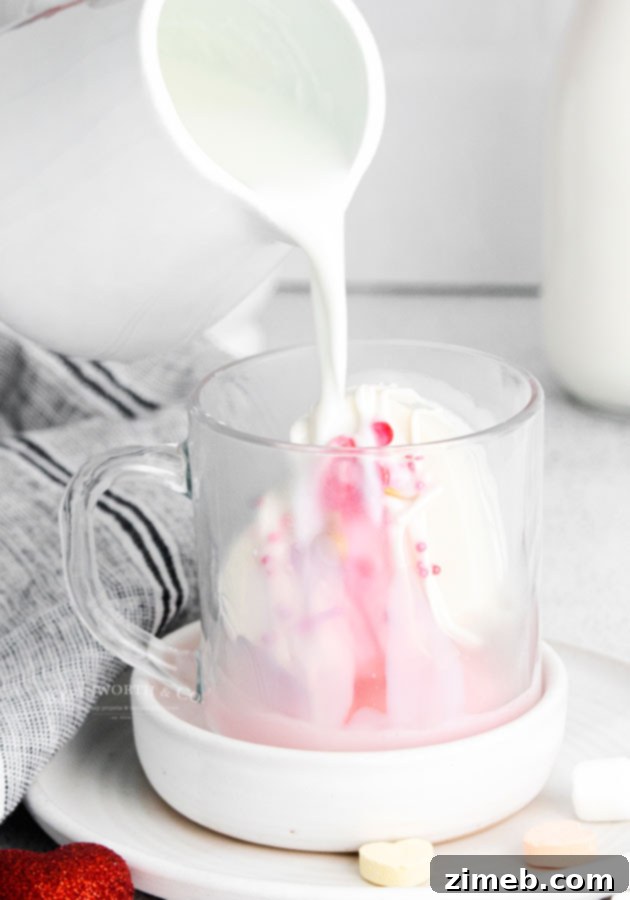
- Place the bomb in an empty mug and top with 8 ounces of hot milk. Stir well before enjoying it.
To make homemade hot chocolate powder:
- Combine all of the ingredients (sugar, cocoa powder, white chocolate, and powdered milk) in a small bowl. Stir to combine.
- Set aside until ready to use.
Notes
*The easiest way to heat the plate is to run it under hot water.
*If the chocolate isn’t melting well, add about 1 tsp of coconut oil and stir.
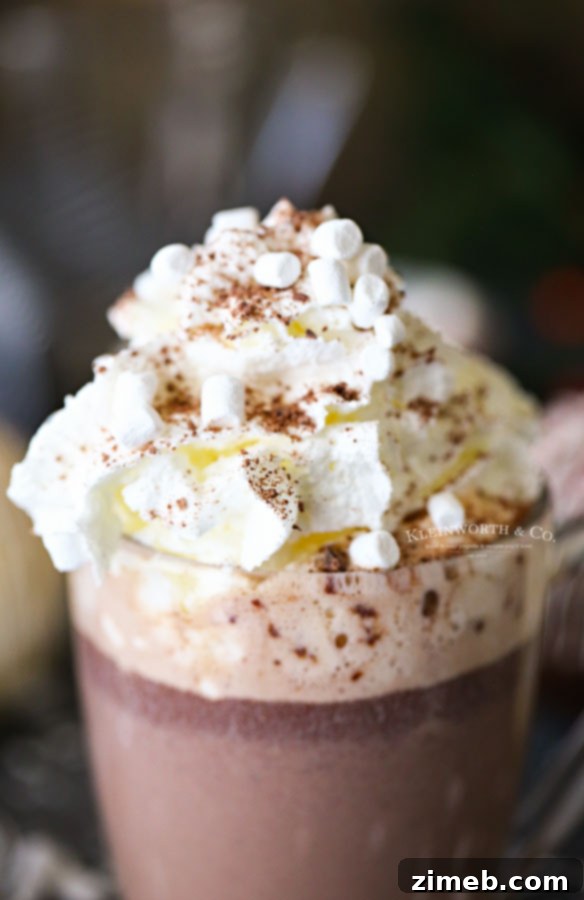
*You can add additional toppings like whipped cream, additional marshmallows, and sprinkles if desired.
**If you don’t have superfine or powdered sugar, you can place granulated sugar in a blender or food processor and pulse it until it becomes a fine, powdery consistency.
**Powdered milk is optional in this recipe but it helps add a nice creaminess to the hot chocolate– and it’s available in most grocery stores.
**I highly recommend using chocolate bark (also known as candy coating or almond bark) because it melts and rehardens easily and smoothly. If you don’t have chocolate bark, you can use tempered chocolate. Melted chocolate that has not been tempered is not recommended in this recipe.
**I wear gloves when making the hot chocolate bombs so I don’t leave any fingerprints on the outside.
Nutritional information for the recipe is provided as a courtesy and is approximate. Please double-check with your own dietary calculator for the best accuracy. We at Yummi Haus cannot guarantee the accuracy of the nutritional information given for any recipe on this site.
Love this recipe?
Follow @KleinworthCo for even more tasty recipes!