
*Disclosure: Sponsored Post – I have been compensated for this post either monetarily or with product. All opinions are truthful & my own.
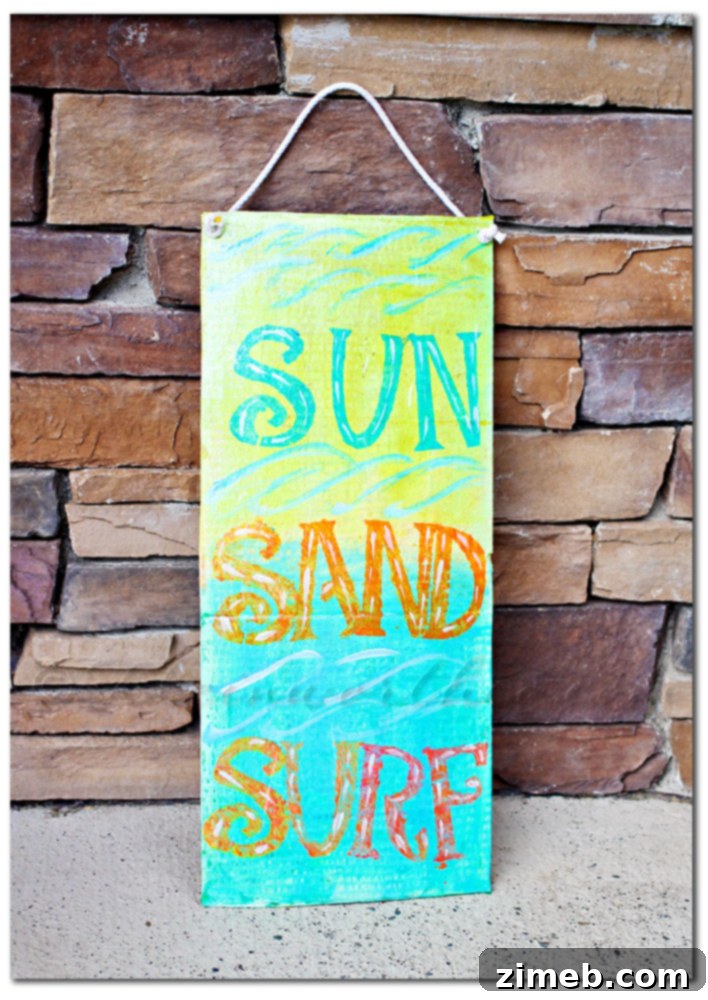
Transforming Kids’ Rooms: An Easy DIY Beach-Themed Wall Art Project
Hello everyone! It’s wonderful to connect with you today. For the past week or so, I’ve been completely immersed in a series of creative projects, primarily focused on giving my daughters’ room a much-needed refresh. Ever since we moved into our new home, their room, particularly one large blank wall, has been a source of constant irritation. The situation became even more pressing when the largest frame on that prominent wall unexpectedly broke, leaving a vast, empty space that just begged for a vibrant transformation. Finally, the urge to do something about it became irresistible, and I’m thrilled to share the exciting journey we embarked on.
My enthusiasm soared when I was offered the incredible opportunity to join the Summer Kids’ Crafting Street Team for July. Summer, with its relaxed pace and longer days, truly is the perfect season for engaging in creative activities with children. The girls and I had an absolute blast brainstorming ideas for their room, drawing immense inspiration from the fantastic resources available at Plaid Kid Crafts. Their innovative ideas ignited our imaginations, and we quickly decided that tackling that daunting blank wall would be our first mission, letting our creativity guide us from there.
Easy Kids Crafts: Creating Beachy Room Decor
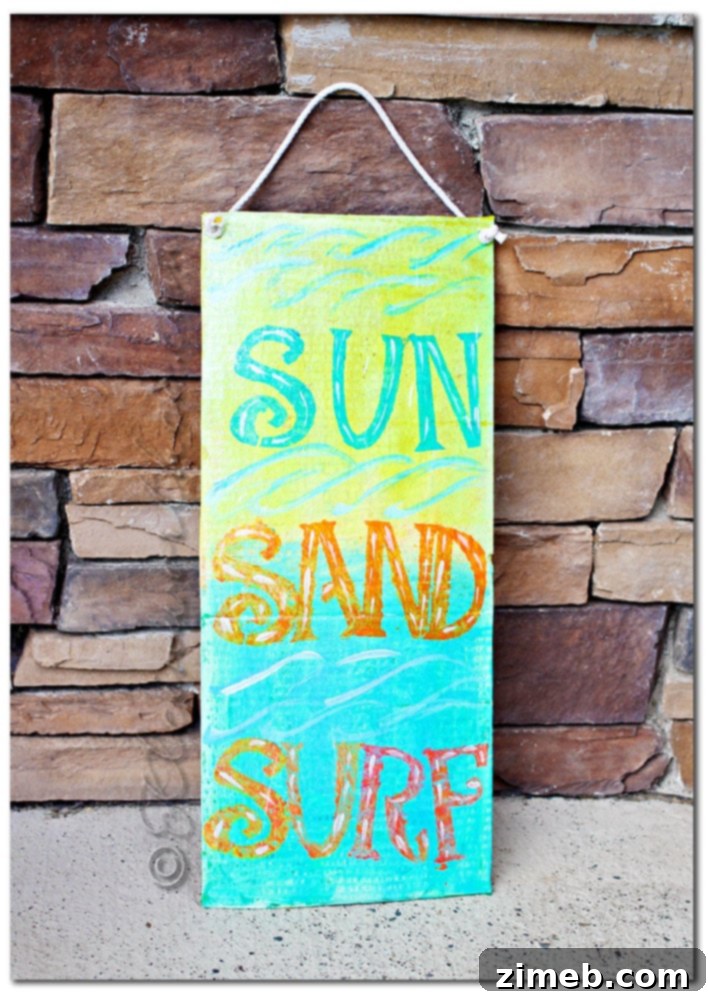
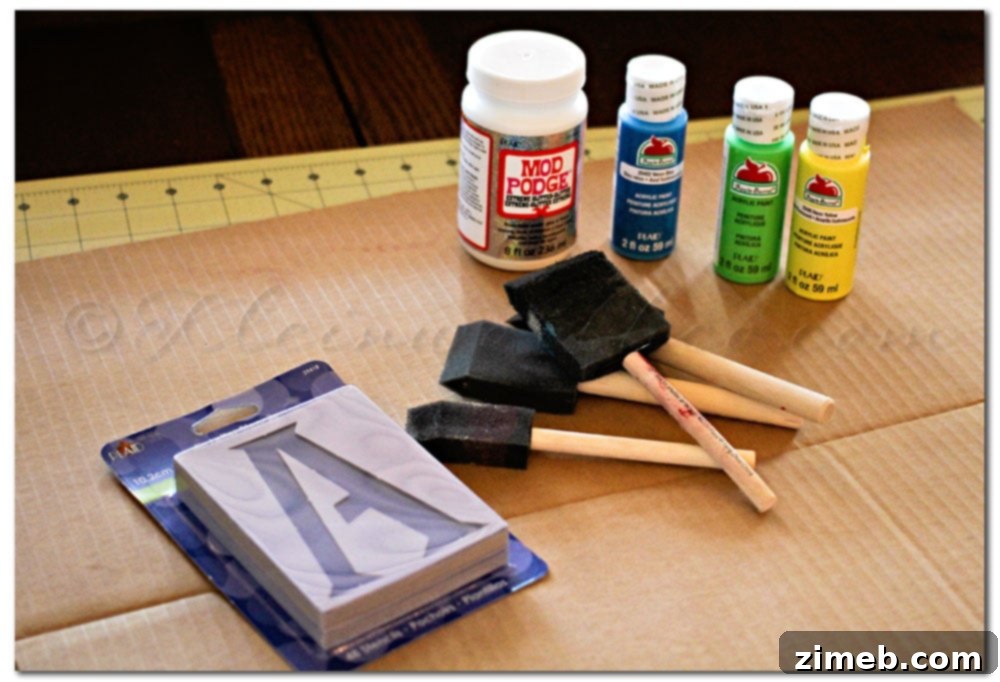
Crafting Essentials: What You’ll Need for Your Beach-Themed Art
I began this exciting project with a fantastic selection of items generously provided in my Plaid kit. To complement these, I incorporated a few additional supplies I already had on hand. As a long-time admirer and frequent user of Plaid products, I was absolutely thrilled to collaborate with them on a project that truly showcased their versatile and high-quality crafting materials.
Product List:
Mod Podge Extreme Glitter: This magical adhesive and sealer adds a dazzling sparkle that perfectly captures the essence of a sunny, sparkling beach.
Plaid Stencils: Essential for crisp, professional-looking lettering and designs, making intricate patterns easy for all skill levels.
Plaid Apple Barrel Paints: We used a vibrant palette including 20492 Neon Blue, 20487 Neon Pink, 20489 Neon Orange, 20491 Neon Green, 20408 Gloss White, and 22814 Tropical Blue. These acrylic paints offer excellent coverage and come in a wide array of colors perfect for any creative vision.
Cardboard: A sturdy and accessible base for our artwork, offering a lightweight yet durable surface.
Rope: Used to create a rustic, nautical hanging mechanism, enhancing the beachy aesthetic.
Painting sponges: Ideal for applying paint smoothly and evenly, especially when working with stencils, for a consistent finish.
Step-by-Step Guide: Creating Your Own Beach-Inspired Artwork
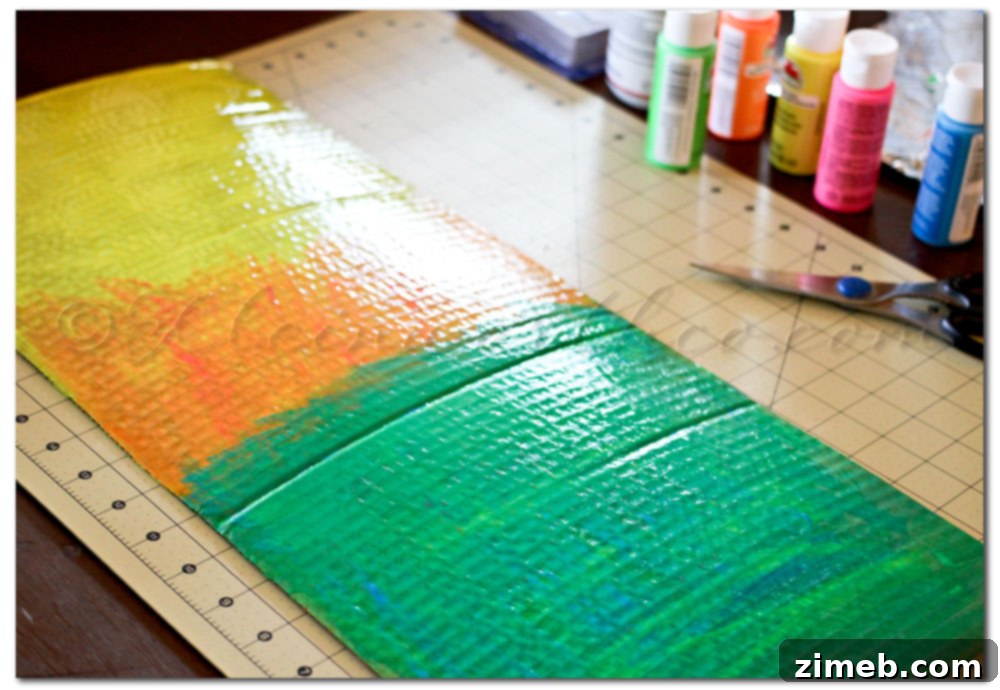
Step 1: Laying Down the Sunset Base Colors
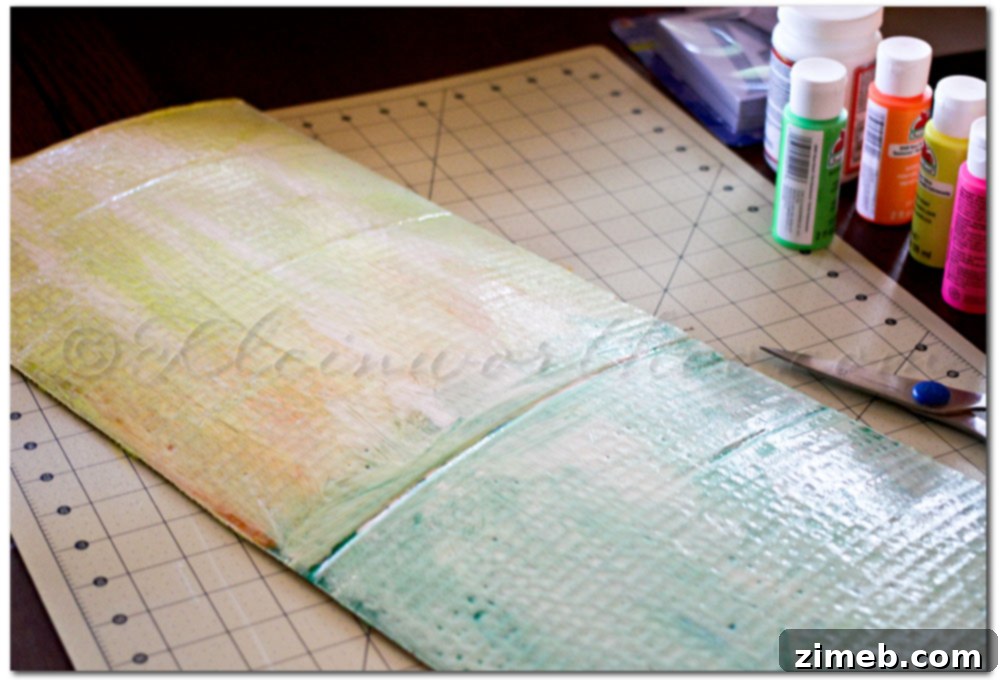
To create a beautiful gradient reminiscent of a sunset over the ocean, I first applied the yellow paint across the top section of the cardboard. Next, I blended the orange and pink paints in the middle, allowing them to transition softly. Finally, I mixed the green and neon blue at the bottom to represent the vibrant sea. It’s important to ensure each section flows smoothly into the next for a cohesive look. After applying the initial colors, we let them dry completely. This step sets the foundation for the beach scene, capturing the natural beauty of coastal hues.
Step 2: Achieving a Distressed, Weathered Look
Once the base colors were dry, I applied a coat of gloss white paint over the entire surface. The trick here is not to let it fully cover the vibrant colors underneath. While the white paint was still slightly wet, I gently rubbed some of it off with a paper towel. This technique allows the underlying colors to peek through, creating a charmingly distressed, weathered effect that adds depth and character to the artwork, mimicking the sun-bleached look often found in beach house decor. This step adds a layer of authenticity to our beach-themed art.
Step 3: Deepening the Ocean’s Hue and Adding Details
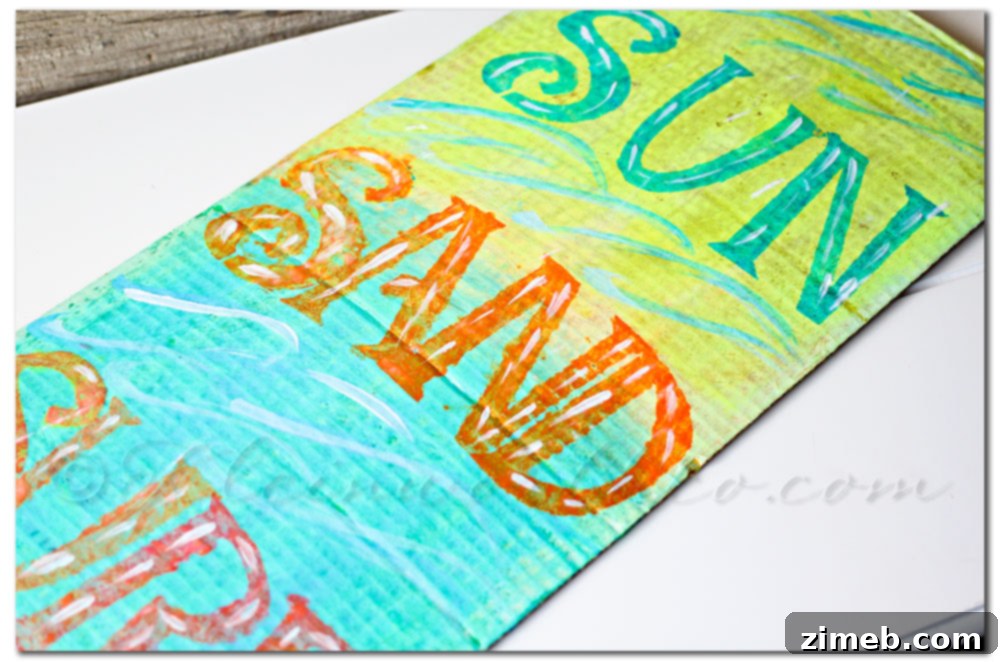
To truly enhance the ocean feel of the piece, I added a layer of Tropical Blue paint specifically to the bottom blue/green section. This deeper shade provides a more realistic and inviting representation of the sea. After letting this layer dry, it was time for the personalized touches. I carefully stenciled on our chosen letters, ensuring they were perfectly aligned. Then, with a little creative freedom, I freehanded some ocean waves, adding a dynamic and playful element to the artwork. Allowing each layer to dry completely before proceeding is crucial for a clean and professional finish.
Step 4: The Ultimate Sparkle with Mod Podge Extreme Glitter
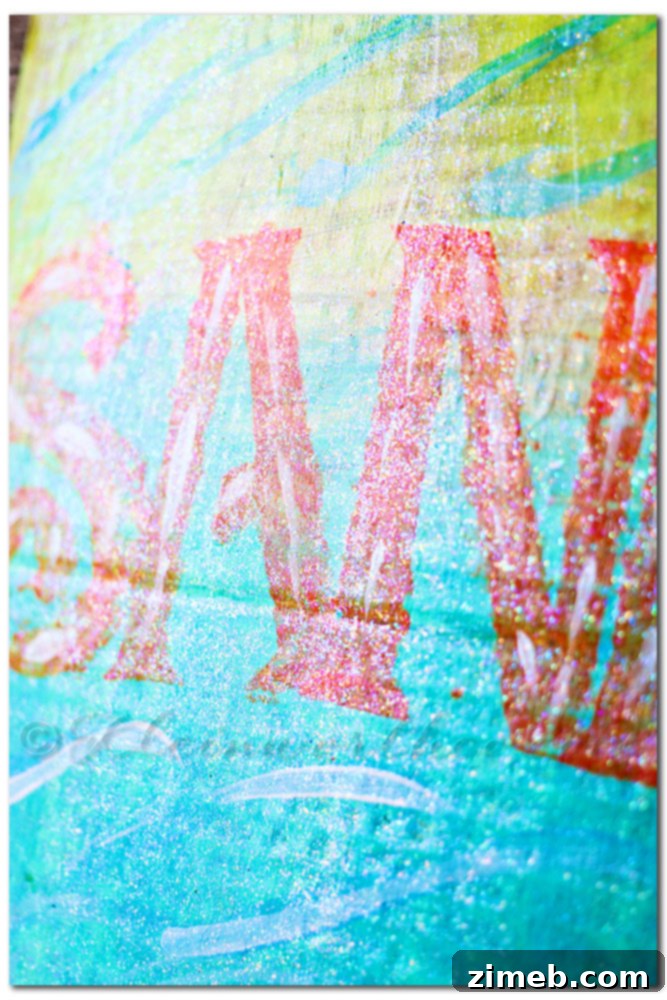
Now for the truly magical part—the moment that brings the whole project to life! Once all the paint layers were thoroughly dry, I applied two to three generous coats of Mod Podge Extreme Glitter. Oh my gosh, I simply cannot express how much I adore this product! Can I share a little secret with you? Before my Plaid box arrived, I had never actually used Mod Podge before. *GASP!* I know, right?! It’s baffling, but for some reason, I just hadn’t. However, I can now confidently say that I am absolutely, totally hooked! Prepare yourselves, because you’re going to see a whole lot more projects featuring various formulations of Mod Podge from me. Yes, it has officially become my new favorite crafting tool. The Extreme Glitter version provides an incredible sparkle that catches the light beautifully, perfect for adding that extra ‘wow’ factor to any kids’ room decor. It dries incredibly fast, which is a huge plus, allowing you to build up layers of shimmer with ease.
Step 5: Finishing Touches and Display
I made sure to allow ample drying time between each coat of Mod Podge, though it dried remarkably fast. Once the final glitter coat was completely set, I carefully punched holes in the top corners of the cardboard. Through these holes, I threaded our chosen rope and tied it securely, creating a charming, nautical-inspired hanger. This entire project was incredibly simple, taking only a couple of hours from start to finish, and the girls had an absolute blast helping me every step of the way. They are completely in love with their new sparkling artwork, and it has already begun to transform their room. With this vibrant piece as a focal point, we’re now excited to incorporate these same cheerful colors with their existing neutral decor to truly punch up the fun and personality in their space.
Why DIY Kids’ Room Decor? The Benefits of Crafting with Children
Engaging in DIY projects with your children, especially for their own room decor, offers a multitude of benefits beyond just creating a beautiful space. It fosters creativity, allowing kids to express their unique ideas and preferences. Crafting together improves fine motor skills, teaches patience, and provides a wonderful opportunity for bonding. When children actively participate in decorating their room, they develop a sense of ownership and pride in their environment. This beach-themed board wasn’t just a craft; it was a shared experience, a lesson in color mixing, stenciling, and the joy of seeing an idea come to fruition. It also allowed us to bring a meaningful memory into their everyday lives, connecting them to our cherished So Cal roots.
Discover More from Plaid: Inspire Your Next Craft!
Are you eager to explore more about Plaid and their fantastic range of crafting products? They are truly a leader in the crafting world, offering everything from paints and stencils to glues and specialty finishes, all designed to inspire creativity in crafters of all ages. Their commitment to quality and innovation makes them a go-to brand for countless DIY enthusiasts. Follow them on social media and check out their blog for endless inspiration, tips, and project ideas that can transform your home and spark joy in your family’s crafting adventures.
-
Facebook: https://www.facebook.com/InspiredByPlaid
-
Twitter: https://twitter.com/PlaidCrafts
-
Pinterest: https://pinterest.com/plaidcrafts/
-
Blog: https://paintmeplaid.com/
Don’t forget to come back and join me on Mondays for Project 52, where we explore a new creative challenge each week!
To see where I am linking today, be sure to visit HERE for more inspiring ideas and collaborations.
Looking for More Plaid Kids Crafts Inspiration?
If this project has sparked your imagination, you’ll be delighted to know there’s a treasure trove of other Plaid Kids Crafts projects waiting to be discovered. From seasonal decorations to everyday fun, Plaid offers a wealth of ideas to keep little hands busy and creative minds engaged. Explore their vast collection to find your next family crafting adventure and continue transforming your home with handmade charm.