
*Disclosure: Sponsored Post – I have been compensated for this post either monetarily or with product. All opinions are truthful & my own.
Craft Your Style: Easy DIY Neon Tie-Dye Fringe Scarf with Kids
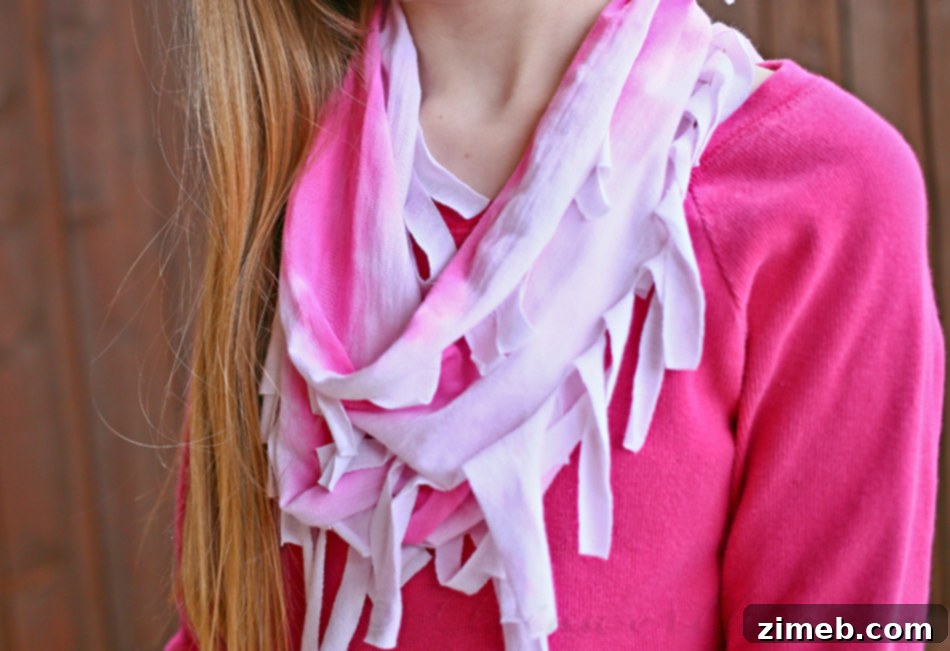
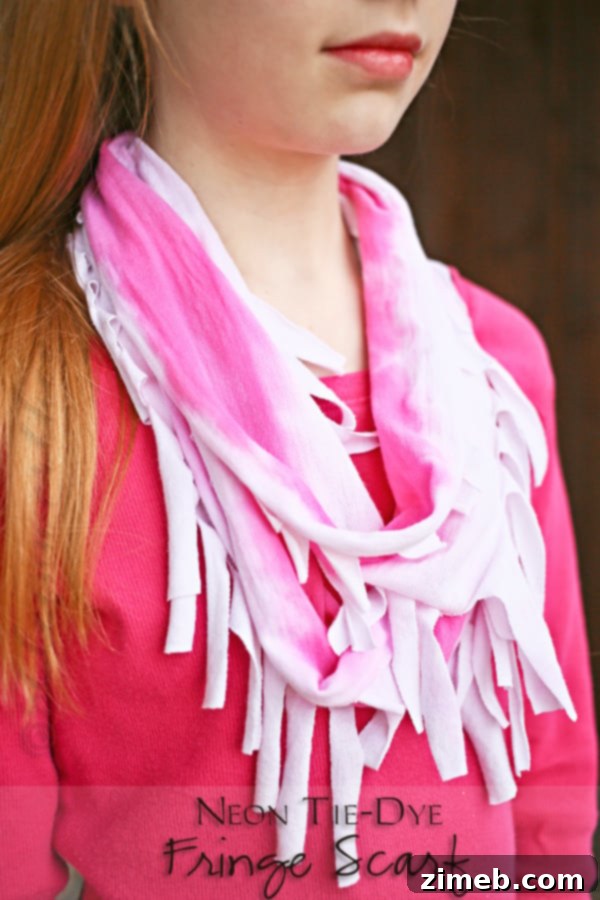
As a passionate crafter, nothing brings me more joy than diving into fun, creative projects with my kids. There’s a special magic in watching their imaginations spark and their little hands help bring an idea to life. Crafting together is not just about making something beautiful; it’s about creating lasting memories, fostering learning, and encouraging self-expression. Recently, we received some fantastic products from Tulip, and my daughters were instantly buzzing with exciting ideas for new accessories to add to their ever-growing collection. Our first pick? A vibrant **Neon Tie-Dye Fringe Scarf**, perfect for brightening up any outfit!
Neon colors are incredibly popular right now, and for good reason. They exude energy, happiness, and a sense of playful style. Just last weekend, while shopping for new gym clothes and accessories, we noticed neon accents everywhere. I absolutely adore this trend; it has a way of lifting spirits and adding a cheerful pop, especially during the darker, colder months of winter. Crafting our own neon accessories allows us to embrace this trend in a personal, sustainable way.
Why Choose a DIY Tie-Dye Scarf?
Making your own accessories is incredibly rewarding. Not only do you get a unique, personalized item that perfectly matches your style, but you also experience the satisfaction of creating it with your own hands. This project is particularly special because it allows us to re-purpose old, outgrown t-shirts, transforming them into something stylish and new. This sustainable approach to fashion is something I love to teach my kids – that creativity can extend the life of items and reduce waste.
This project is designed to be simple and enjoyable for crafters of all ages, making it an ideal family activity. The Tulip One-Step Tie-Dye Kit simplifies the process, making it accessible even for beginners. The ombre effect we achieve adds a touch of artistic flair, elevating a basic t-shirt into a chic fashion statement. Let’s gather our materials and get started on this exciting transformation!
Materials You’ll Need for Your Neon Tie-Dye Scarf
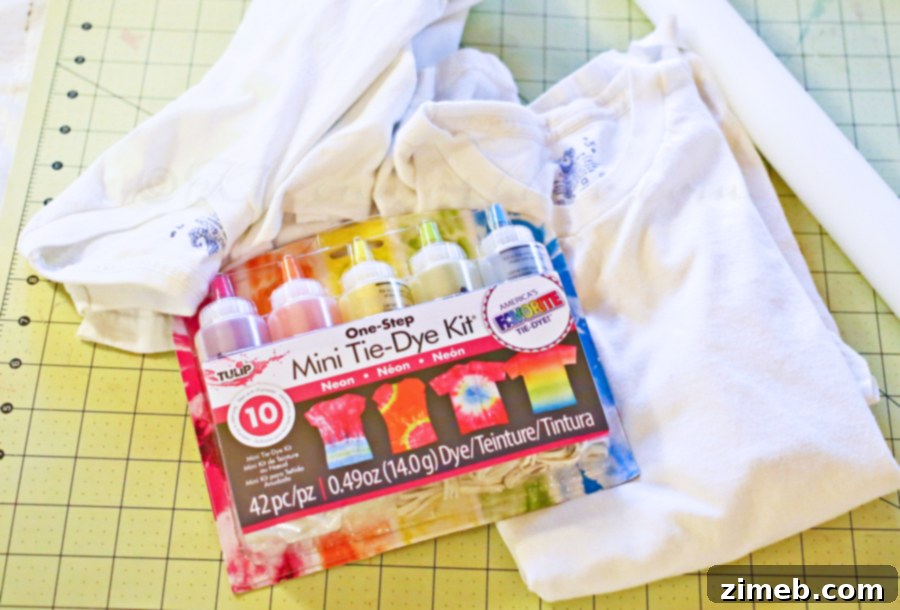
- One white t-shirt (100% cotton works best for dye absorption)
- Tulip One-Step Mini Tie-Dye Kit (We used a neon kit for vibrant results!)
- An old shower curtain or plastic tablecloth (for surface protection)
- A cutting mat (optional, but recommended for protecting your work surface)
- Gloves (usually included in the tie-dye kit)
- Rubber bands (also often included)
- Plastic wrap
- Paintbrush
- Large bucket
- Laundry soap
- Scissors
Before you begin, always ensure your workspace is well-protected. Tie-dye can be messy, but with proper precautions, it’s an absolute blast! Lay down an old shower curtain or a thick plastic sheet to cover your table completely. I also like to use a cutting mat on top for an extra layer of protection, especially when I know I’ll be pressing down on the fabric. Now, let’s dive into the creative process!
Step-by-Step Guide to Your Ombre Tie-Dye Fringe Scarf
Preparation & Dye Application
Step 1: Prepare Your T-Shirt for Dyeing
Lay your white t-shirt flat and smooth out any wrinkles. Carefully fold the bottom hem of the shirt upwards, aligning it with the bottom of the sleeves. This will create a horizontal crease right in the middle of your shirt, which will serve as our guide for dye application. This method helps achieve a symmetrical ombre effect.
Step 2: Activate Your Tulip One-Step Tie-Dye
Put on the gloves provided in your kit to protect your hands. Fill your Tulip One-Step Mini Tie-Dye bottle with water up to the indicated fill line. Secure the cap tightly and give the bottle a good, vigorous shake for about 30 seconds to fully dissolve and activate the dye powder. The dye is now ready to be applied!
Step 3: Apply Dye to the Crease
Begin carefully applying the dye directly onto the horizontal crease you created in Step 1. Apply generously, allowing the fabric to become well-saturated with the vibrant neon color. Focus the initial application along this central line, as this will be the most intense part of your ombre effect. Don’t worry if it looks a bit strong; we’ll blend it next!
Step 4: Create the Ombre Effect with Water
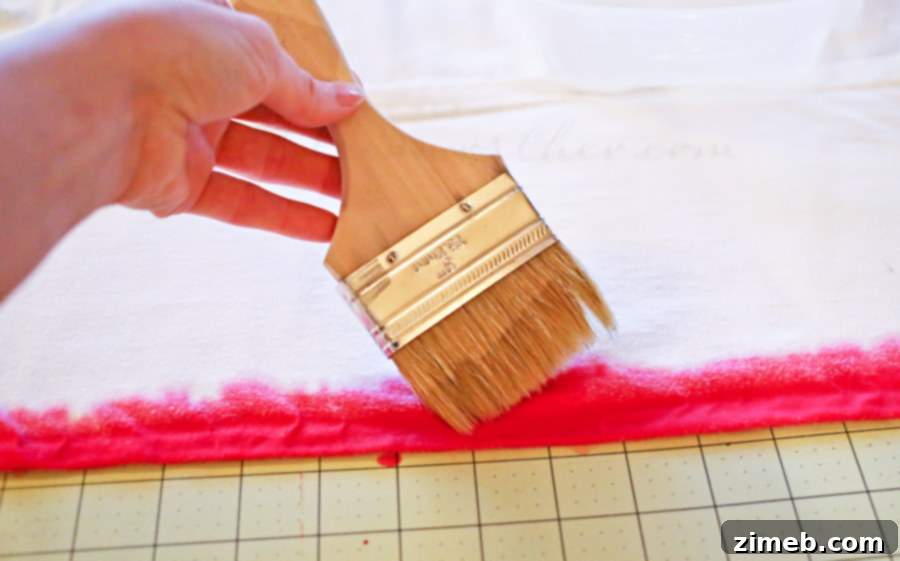
This is where the magic happens! Take a clean paintbrush and dip it in plain water. Starting from the dyed area, gently brush the water upwards and outwards towards the white, undyed sections of the t-shirt. The water will help distribute the dye, creating a beautiful gradient where the color gradually fades from intense neon to a lighter tint, eventually blending into the white fabric. Continue wetting your brush and blending the dye until you achieve your desired ombre transition. Remember, the more you brush, the softer the transition will be.
Curing & Washing
Step 5: Cure the Dye for Optimal Color
Once you’re happy with your dye application, carefully wrap your t-shirt in plastic wrap. Ensure it’s sealed snugly to keep the fabric moist. Let it sit for a minimum of 2 hours. While the kit packaging often suggests 6-8 hours for maximum color intensity, for this particular project, I opted for a shorter curing time to achieve a slightly lighter, more ethereal ombre effect. Experimentation is key to finding your perfect shade!
Step 6: Initial Rinse
After the curing time, unwrap your t-shirt. Rinse it under hot running water until the water coming off the fabric runs almost clear. This step is crucial for removing excess dye and preventing it from bleeding onto other parts of the fabric or other garments.
Step 7: Soaking for Colorfastness
Fill a large bucket with very hot water and add a small amount of laundry soap. Submerge your rinsed t-shirt in this soapy water and let it soak for approximately 1 hour. This helps to further set the dye and ensures better colorfastness, so your vibrant neon scarf stays bright wash after wash.
Step 8: Final Rinse & Dry
Remove the t-shirt from the soapy water, rinse it thoroughly under clean water, and wring it out well to remove as much water as possible. For optimal results and to lock in the color, place the t-shirt in a dryer on high heat for at least 30 minutes. This heat-setting helps bond the dye to the fabric fibers.
Creating the Fringe Scarf
Step 9: Prepare for Cutting
Once your t-shirt is completely dry, lay it flat again. Using sharp scissors, cut horizontally across the t-shirt just below the sleeves. Then, make another horizontal cut at the bottom hem. You should now have a “tube” of fabric with raw, open edges on both sides. Discard the sleeves and the top and bottom hems.
Step 10: Cut the Fringe
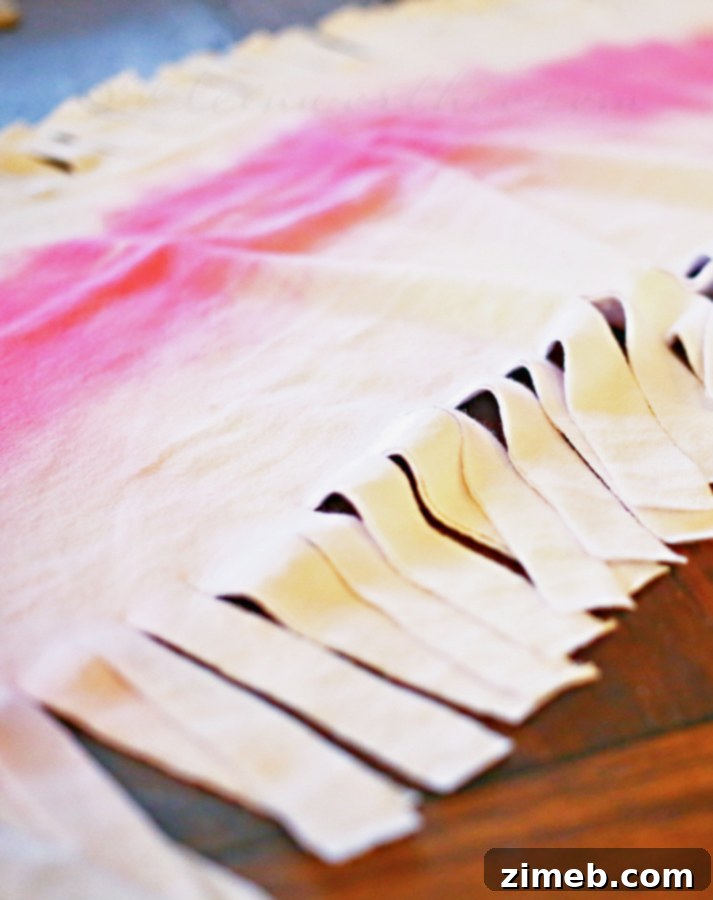
Now for the fun part that gives your scarf its unique texture! Along both raw edges of your fabric tube, begin cutting vertical strips about 1/2 to 1 inch wide and several inches deep. You can vary the depth of your cuts for a more organic look, or keep them consistent. These strips will form the fringe of your scarf. Be careful not to cut all the way through to the other side of the fabric tube.
Step 11: Stretch to Lengthen & Curl Fringe
To transform your fabric tube into a long, loopable scarf with beautifully curled fringe, you’ll need to stretch it. Place one foot inside the fabric tube and hold the top edge firmly with both hands. Pull upwards with significant force, stretching the fabric as much as you can. You’ll notice the fabric lengthening considerably, and the raw-cut fringe strips will naturally curl and roll, creating that classic t-shirt fringe look. Continue stretching until you achieve your desired scarf length and the fringe has nicely curled. This technique works best with jersey knit fabrics, like t-shirts, as they have natural stretch.
Styling Your New Neon Fringe Scarf
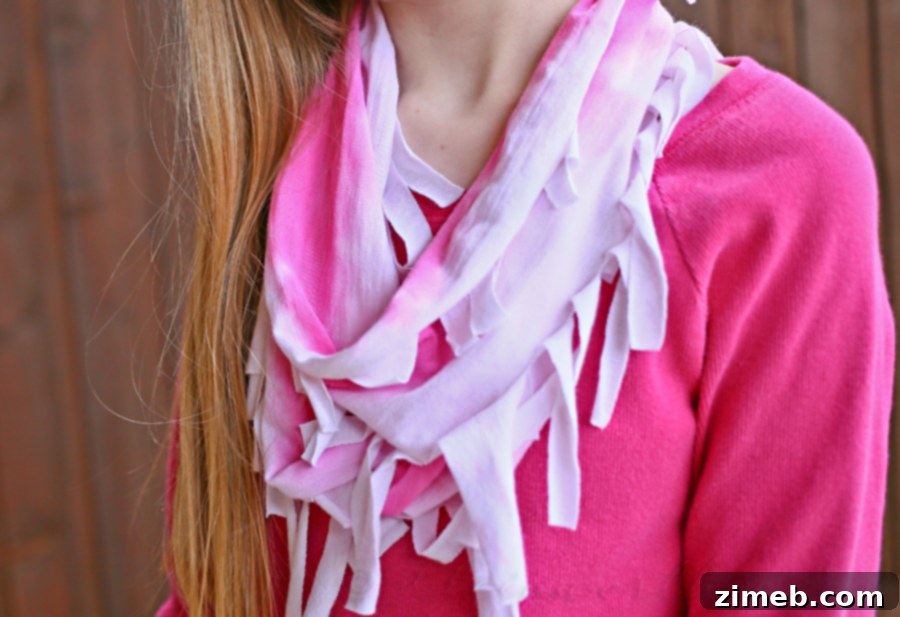
At this point, your stunning Neon Tie-Dye Fringe Scarf is complete! The beauty of this design is its versatility. You can wear it as a traditional loop scarf, doubling it up for a cozier, infinity scarf look. Loop it once for a long, flowing statement, or wrap it multiple times for added warmth and texture. The neon colors are perfect for adding a pop to a monochromatic outfit, accessorizing your gym wear, or simply brightening up a casual everyday look. My girls absolutely adore their new scarves and are already planning their next creations with all the other fantastic colors from our Tulip kit!
More Tulip Fun & Where to Buy
*Thank you, Tulip, for sending us these amazing Neon kits to test & try. All opinions expressed are truthful & entirely my own.
In my package, I also received Tulip Dimensional Mini 3 Packs and Tulip Fabric Markers, which I’m incredibly excited to use on upcoming creative projects. These products open up a world of possibilities for customizing clothes, bags, and other fabric items, adding unique textures and designs.
You can find these exclusive Tulip products at your local Michaels Arts & Crafts store. If you don’t have a Michaels store nearby, don’t worry! You can easily order these fantastic crafting supplies online at iLoveToCreate.com. For the month of February, iLoveToCreate.com is offering free shipping on any neon Tulip product when you use the coupon code NeonFEB (offer ends February 28th). It’s the perfect opportunity to stock up and unleash your creativity!
Connect with Tulip & Discover More Inspiration
Stay inspired and connected with Tulip’s vibrant crafting community. Follow them on their social channels for endless ideas, tips, and project showcases:
Facebook: facebook.com/lovetocreate
Twitter: twitter.com/ilovetocreate
Pinterest: pinterest.com/ilovetocreate
Blog: https://ilovetocreateblog.blogspot.com
Be sure to check out all the other incredible Tulip Neon projects that fellow bloggers are creating. You’ll find a wealth of inspiration and new techniques to try!
Looking for More Fun DIY Projects for Your Home?
If you enjoyed this crafting adventure, you might love some of our other creative home projects:

Easy DIY Picnic Table

Industrial Cart Coffee Table

DIY Pallet Console Table
To see where I am linking today, visit HERE.