
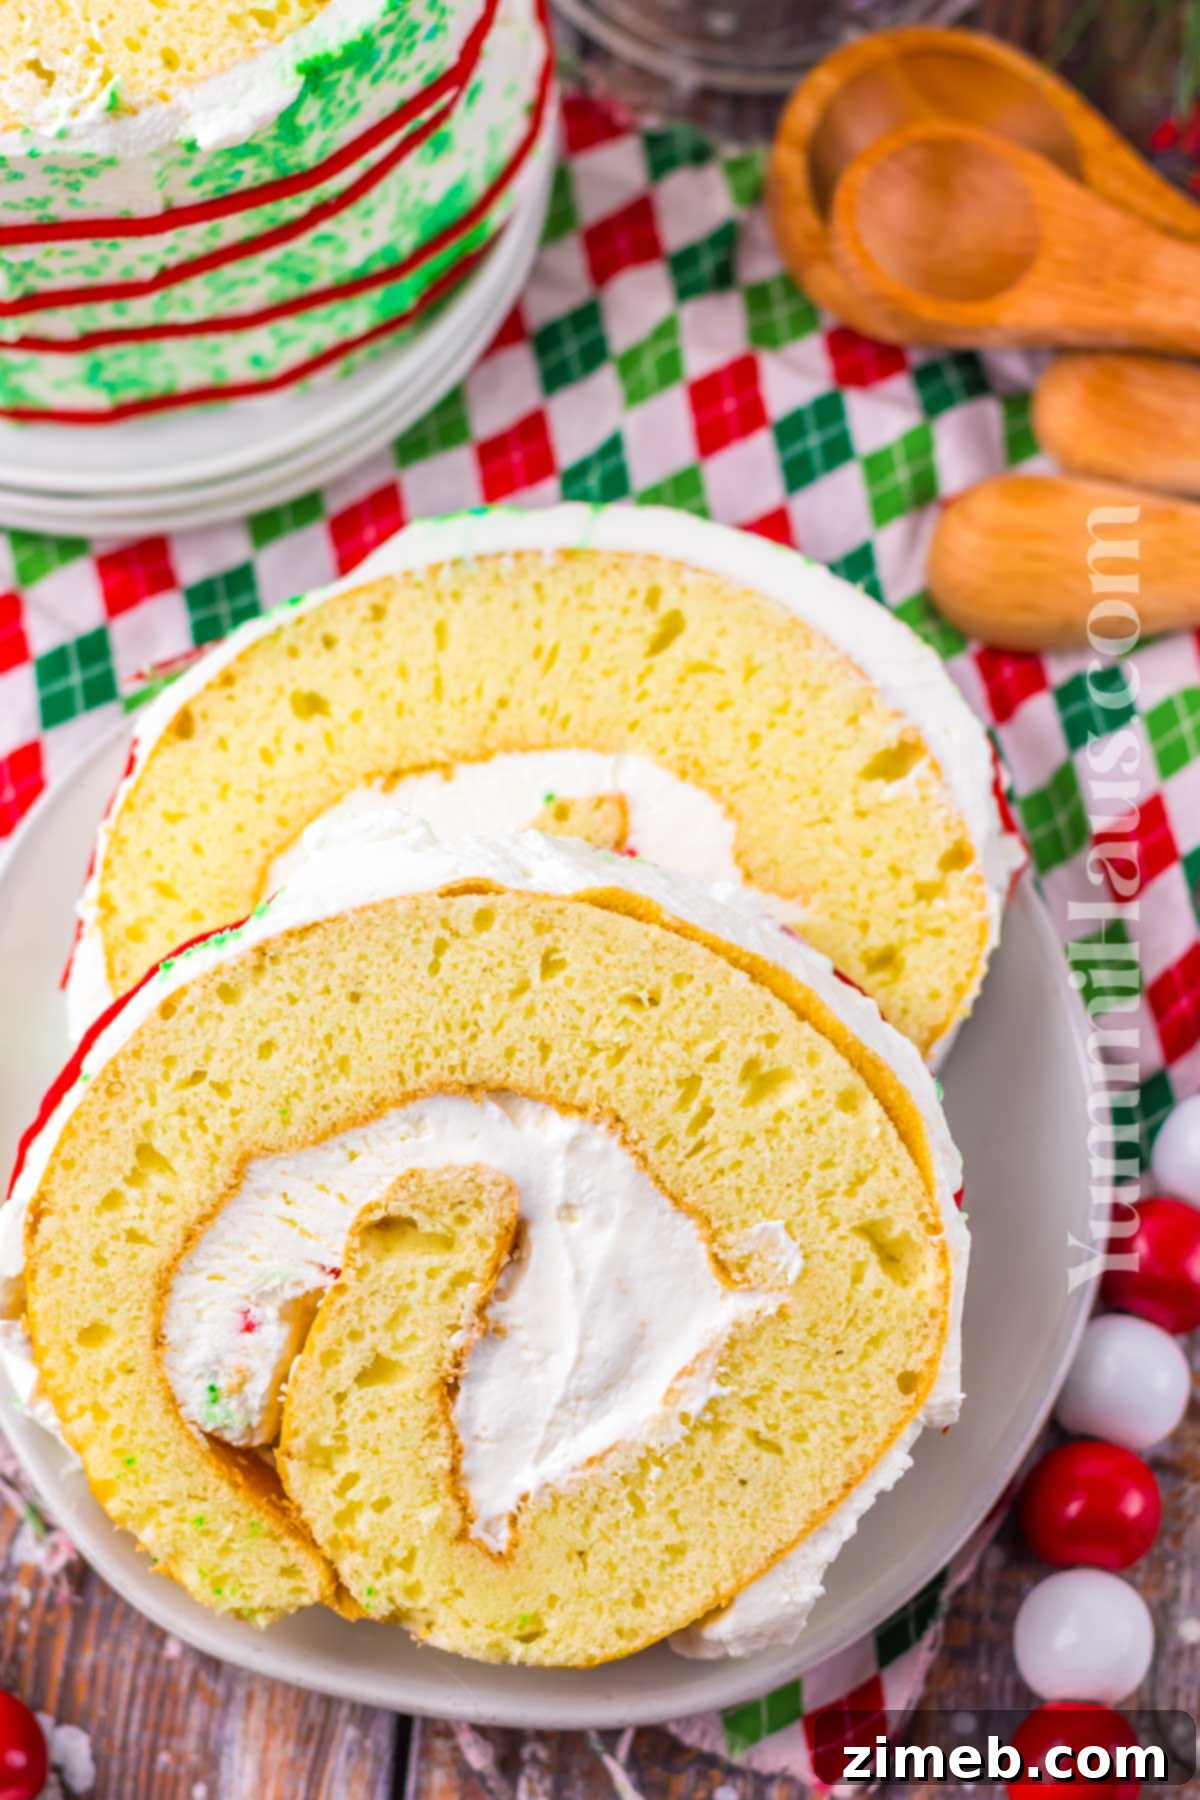
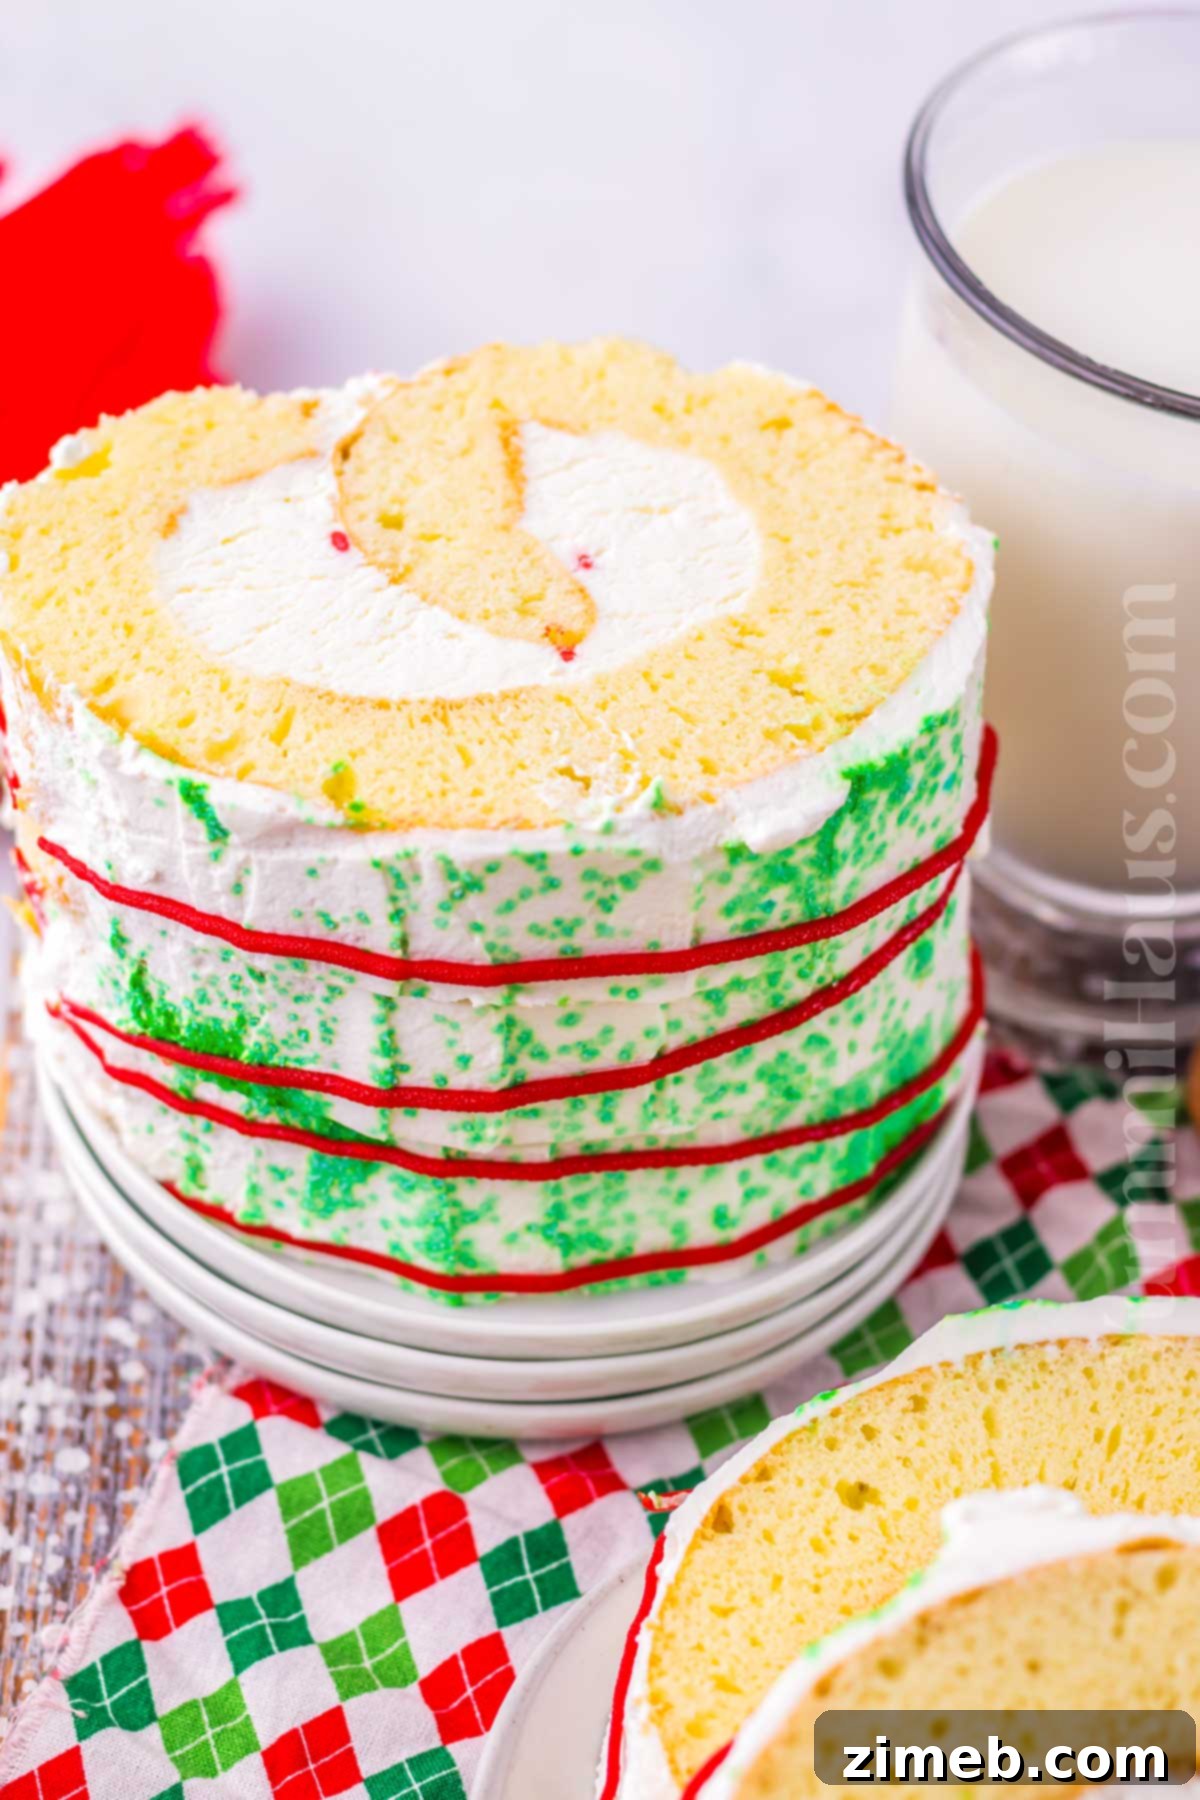
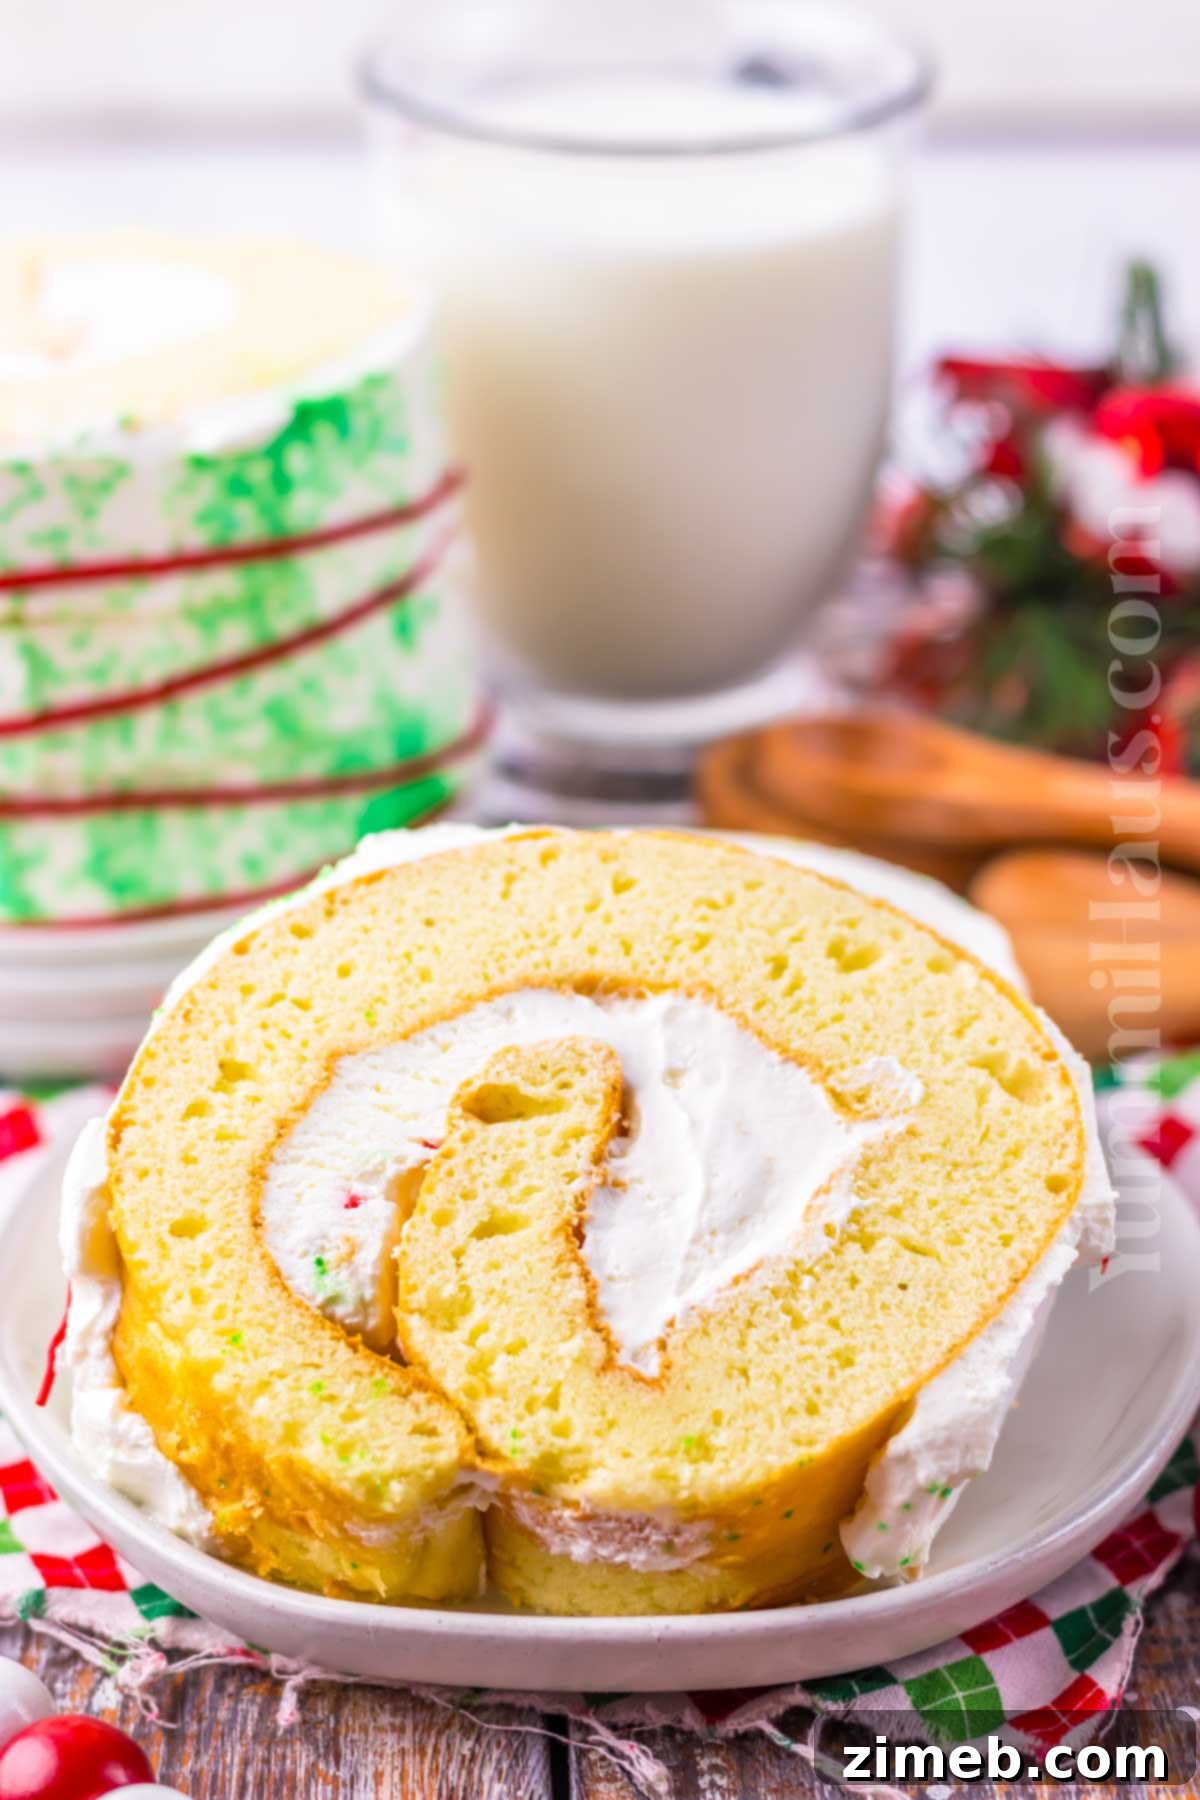
Welcome to the festive season, where every dessert tells a story and brings joy to the table! Our Christmas Cake Roll is a delightful masterpiece designed to capture the spirit of the holidays with its soft, moist sponge cake, luscious whipped cream filling, and a charming drizzle of red candy melts and green sprinkles. This recipe is your ticket to creating a show-stopping dessert that’s both easy to make and incredibly delicious, making it perfect for your holiday celebrations. Inspired by classic Swiss roll cakes but with a unique Christmas twist, it’s bound to become a new family favorite.
The magic of the holiday season often revolves around creating cherished memories, and what better way to do that than with a freshly baked, beautifully decorated Christmas roll cake? Forget complex baking techniques and long ingredient lists; this recipe simplifies the process without compromising on flavor or visual appeal. Whether you’re a seasoned baker or just starting your culinary adventures, you’ll find this Christmas Cake Roll recipe approachable and rewarding. We’ll guide you through each step, ensuring you achieve a perfectly rolled cake with an irresistible texture and festive flair.
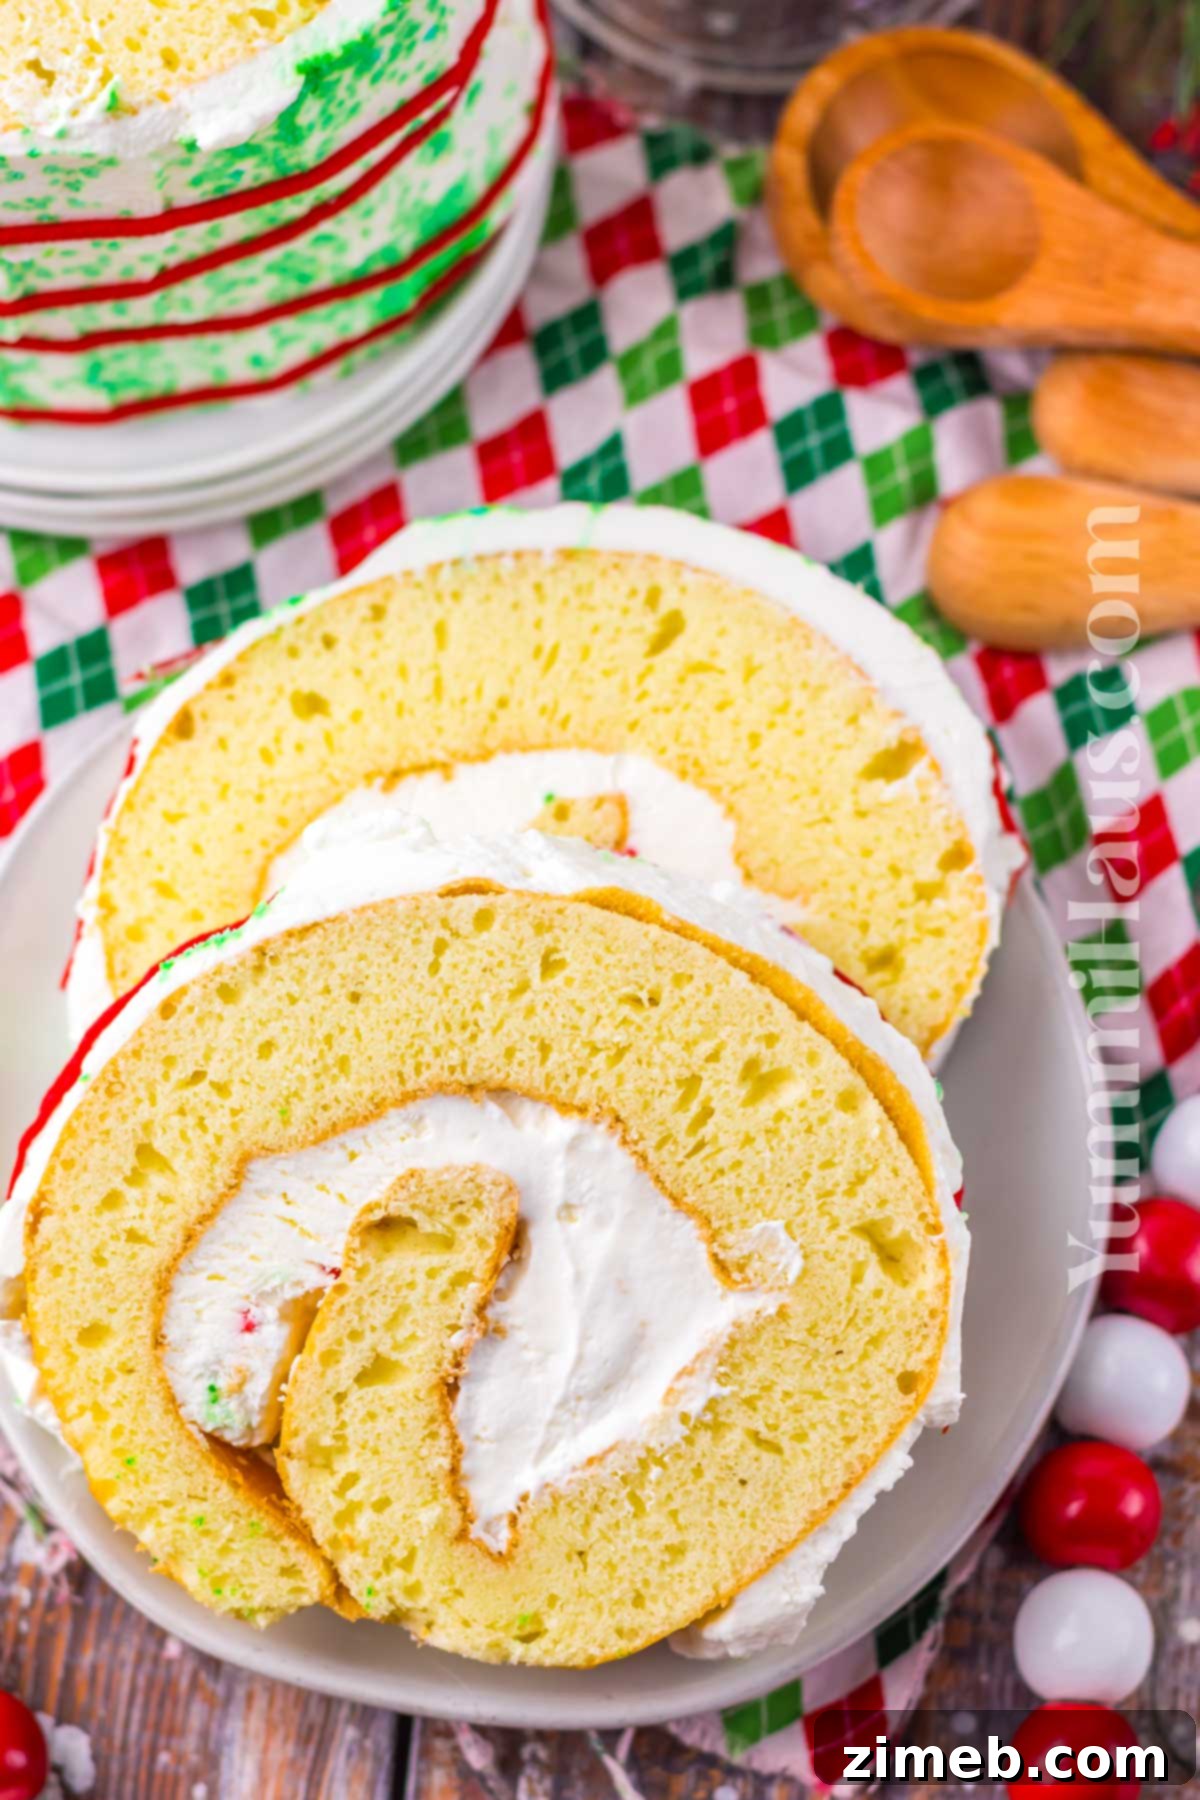
Easy & Festive Christmas Cake Roll Recipe
While traditional fruitcakes and simple vanilla cakes are cherished holiday classics, this Christmas Cake Roll offers a refreshing twist on popular rolled desserts. We’ve taken the beloved concept of a Swiss cake roll and infused it with vibrant Christmas colors and flavors, offering options for both classic whipped cream and a rich cream cheese filling. This versatility ensures that you can tailor this festive treat to your exact preferences, making it an ideal centerpiece for any holiday gathering, from an intimate family dinner to a grand Christmas Eve feast.
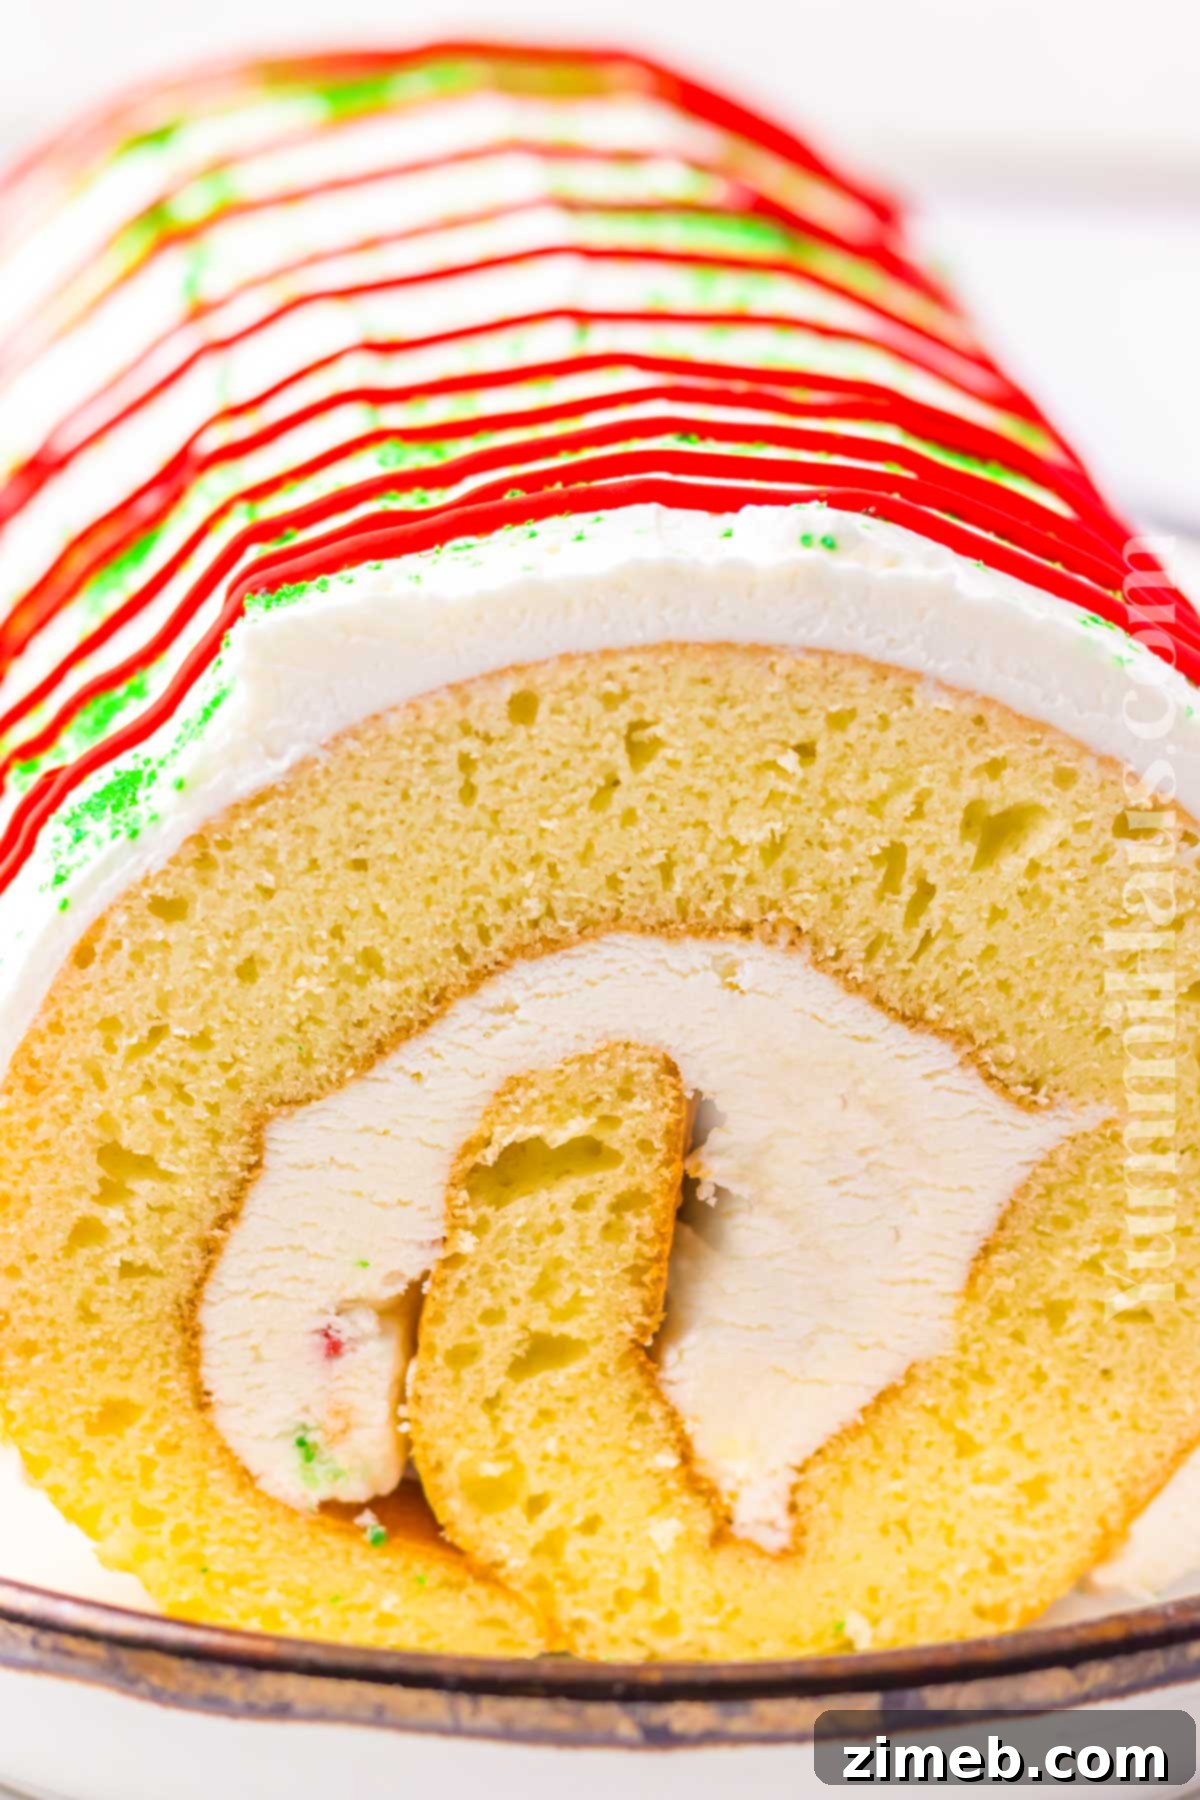
Why You’ll Adore This Christmas Cake Roll Recipe
This isn’t just another dessert; it’s a celebration in itself. Here’s why this Christmas Cake Roll will quickly become a cherished part of your holiday traditions:
- **The Ultimate Holiday Dessert:** Imagine slicing into a beautiful cake roll to reveal a vibrant, colorful swirl of cake and cream, dotted with festive sprinkles. It’s a visually stunning dessert that screams “Merry Christmas!” and is perfect for Christmas Eve dinner, holiday parties, or any festive occasion. The anticipation of that first slice, showcasing the spiral of fluffy cake and creamy filling, is part of its charm.
- **Effortless Baking for Everyone:** This is an incredibly easy rolled cake recipe that comes together in approximately 45 minutes, including baking time! We’ve streamlined the process by utilizing a cake mix, which means no fussing with precise measurements of cake flour, baking powder, or baking soda. You also won’t need to separate egg yolks or stress over achieving perfect whipped egg whites from scratch, saving you valuable time during the busy holiday season.
- **Infinitely Customizable:** While our original recipe features a delightfully simple and beloved whipped cream filling, it’s designed for versatility. You can easily adapt it to include a popular cream cheese filling for an extra layer of indulgence. Beyond Christmas, this base recipe is fantastic for other holidays; think of a delicious pumpkin roll cake for Thanksgiving, or even a spring-themed roll cake for Easter by simply adjusting the colors and flavors. The possibilities are truly endless, allowing you to personalize it for any event or taste preference.
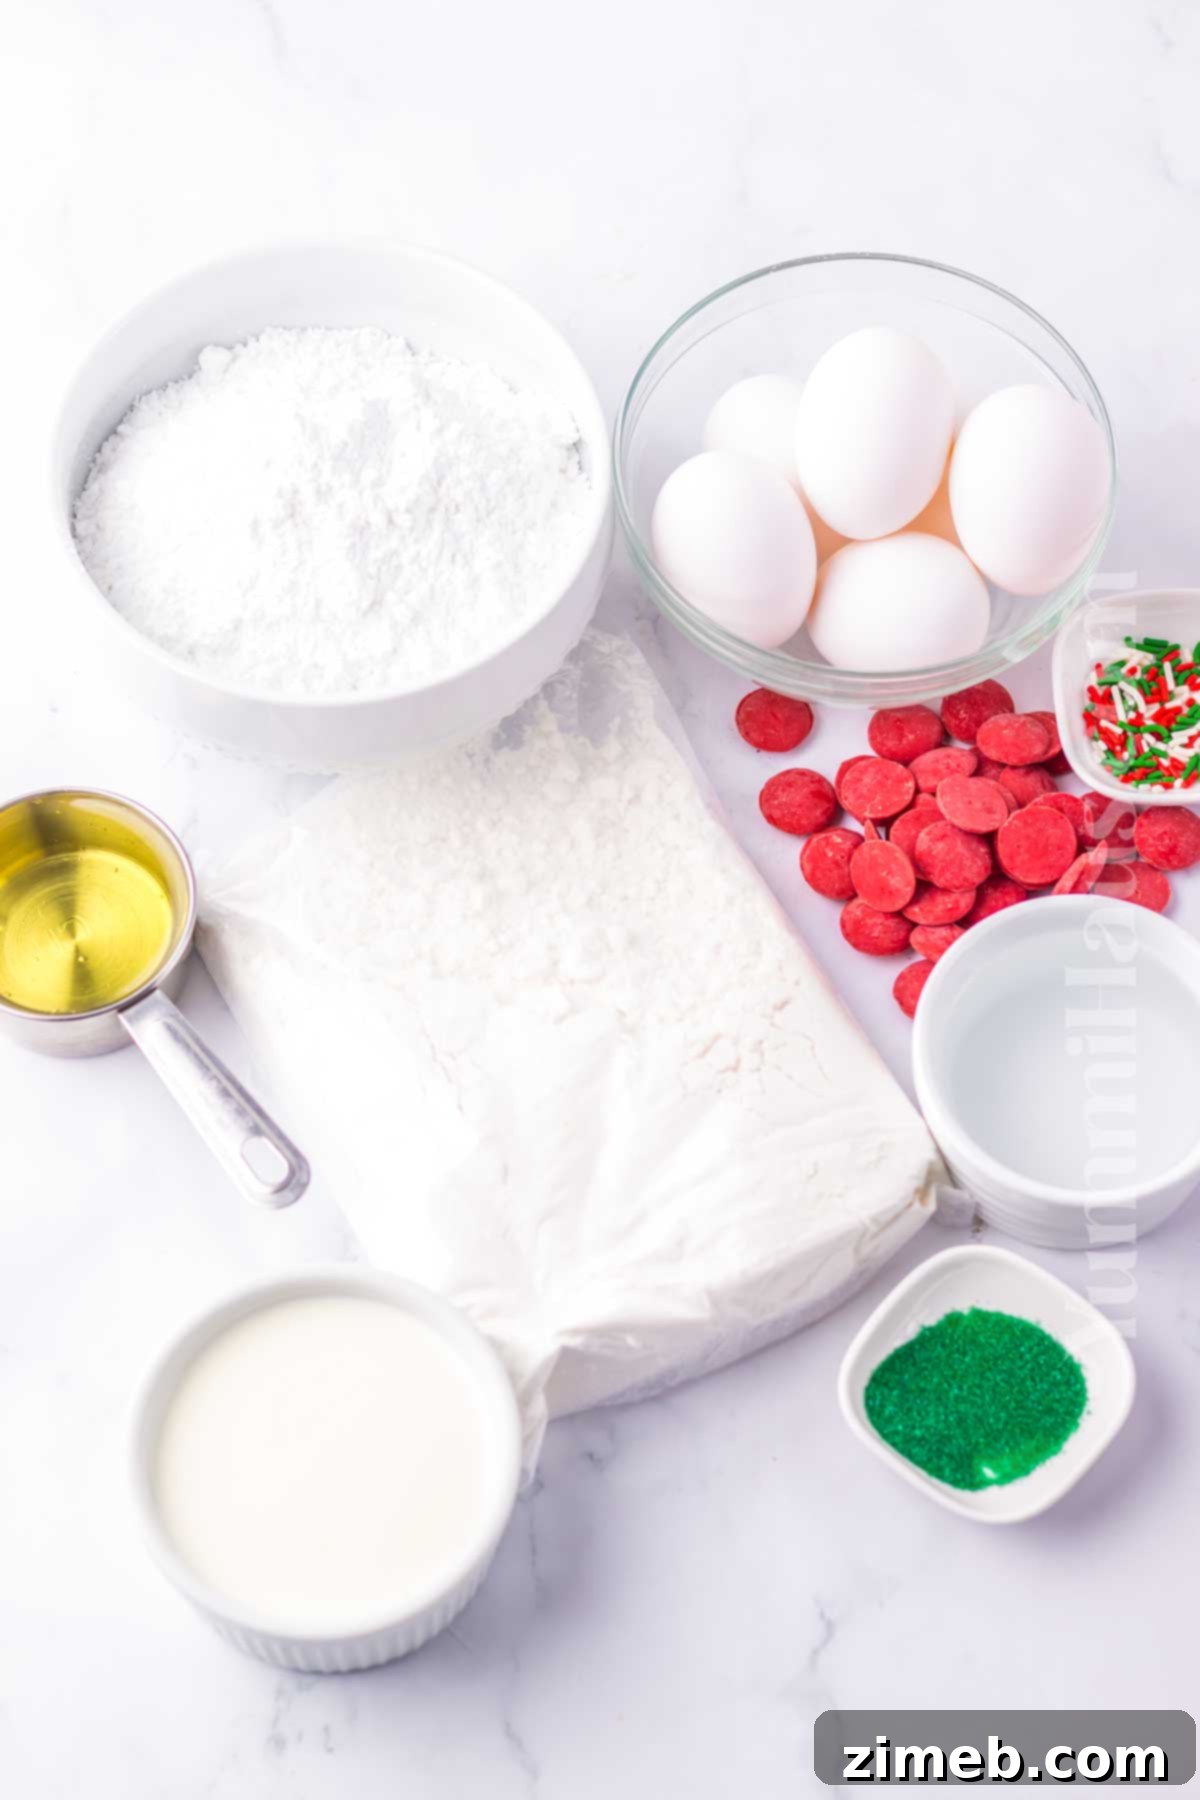
Ingredients You’ll Need for Your Festive Christmas Cake Roll
Creating this delicious Christmas Cake Roll requires surprisingly few and simple ingredients. Most of these items are likely staples in your pantry, with perhaps just the festive sprinkles and colored candy melts being special holiday purchases. Using a cake mix as the base streamlines the process, making this recipe accessible and quick.
For the Perfect Sponge Cake Layer:
- **White Cake Mix:** This is our secret weapon for an easy, consistently delicious cake. For a richer, more pronounced flavor, opt for a vanilla cake mix or simply enhance a standard white cake mix with a splash of pure vanilla extract. The beauty of this recipe is its adaptability; feel free to experiment with any flavor of cake mix you prefer to create unique variations of this holiday treat.
- **Vegetable Oil and Eggs:** These are standard additions to prepare the cake mix, ensuring a moist and tender crumb that’s crucial for rolling without cracks.
For the Creamy & Festive Filling and Decoration:
- **Heavy Whipping Cream:** The foundation of our light and airy whipped cream filling, providing a rich, smooth texture that complements the sponge cake beautifully.
- **Confectioners Sugar (Powdered Sugar):** Essential for sweetening the whipped cream and also used for dusting the towel before rolling the warm cake. You can use either confectioners sugar or powdered sugar interchangeably.
- **Green Sugar Sprinkles:** These add a lovely crunch and a pop of festive color both inside the filling and as a decorative garnish on top.
- **Red Candy Melts:** Perfect for creating a vibrant, festive drizzle over the finished cake roll, adding a touch of elegance and Christmas cheer.
- **Christmas Red and Green Sprinkles (Optional):** For an extra dose of holiday sparkle, consider adding a mix of red and green sprinkles to the filling or as a final decorative flourish.
Essential Kitchen Equipment for Your Christmas Cake Roll
Having the right tools makes baking this Christmas Cake Roll a breeze. Here’s what you’ll need to gather:
- **16×12 Rimmed Baking Pan:** This specific size is ideal for achieving the perfect thickness for your cake layer, ensuring it’s pliable enough to roll without cracking. Line it with parchment paper for easy removal. A half-sheet pan (18×13 inches) or a dedicated jelly roll pan can also work.
- **Microwave-Safe Bowl:** Necessary for melting the candy melts for decoration.
- **Mixing Bowls:** You’ll need various sizes (small, medium, large) for preparing the batter and the filling.
- **Flour-Sack Towel (or Tea Towel/Large Cloth):** A lint-free kitchen towel is crucial for rolling the warm cake. Alternatively, a large sheet of parchment paper can be used.
- **Offset Spatula:** This tool is incredibly useful for evenly spreading the cake batter in the pan and, later, for smoothly applying the filling and frosting.
- **Wire Rack:** For cooling the cake, allowing air circulation on all sides to prevent it from becoming soggy.
- **Hand Mixer or Stand Mixer:** Essential for whipping the eggs for the cake batter and for creating stiff peaks for the whipped cream filling.
- **Pastry Bag or Ziplock Bags:** Useful for piping the remaining filling for decoration or for neatly drizzling the melted candy.
- **Baking Paper or Parchment Paper:** Indispensable for lining the baking pan and for helping with the rolling process.
- **Cookie Scoop (Optional):** While not strictly necessary, a cookie scoop can help you portion the filling evenly across the cake.
Step-by-Step Guide: How to Craft Your Christmas Cake Roll
1: Preparing the Fluffy Cake Batter
- **Preheat Oven:** Begin by preheating your oven to 350 degrees F (175 degrees C). This ensures the oven is at the correct temperature for even baking.
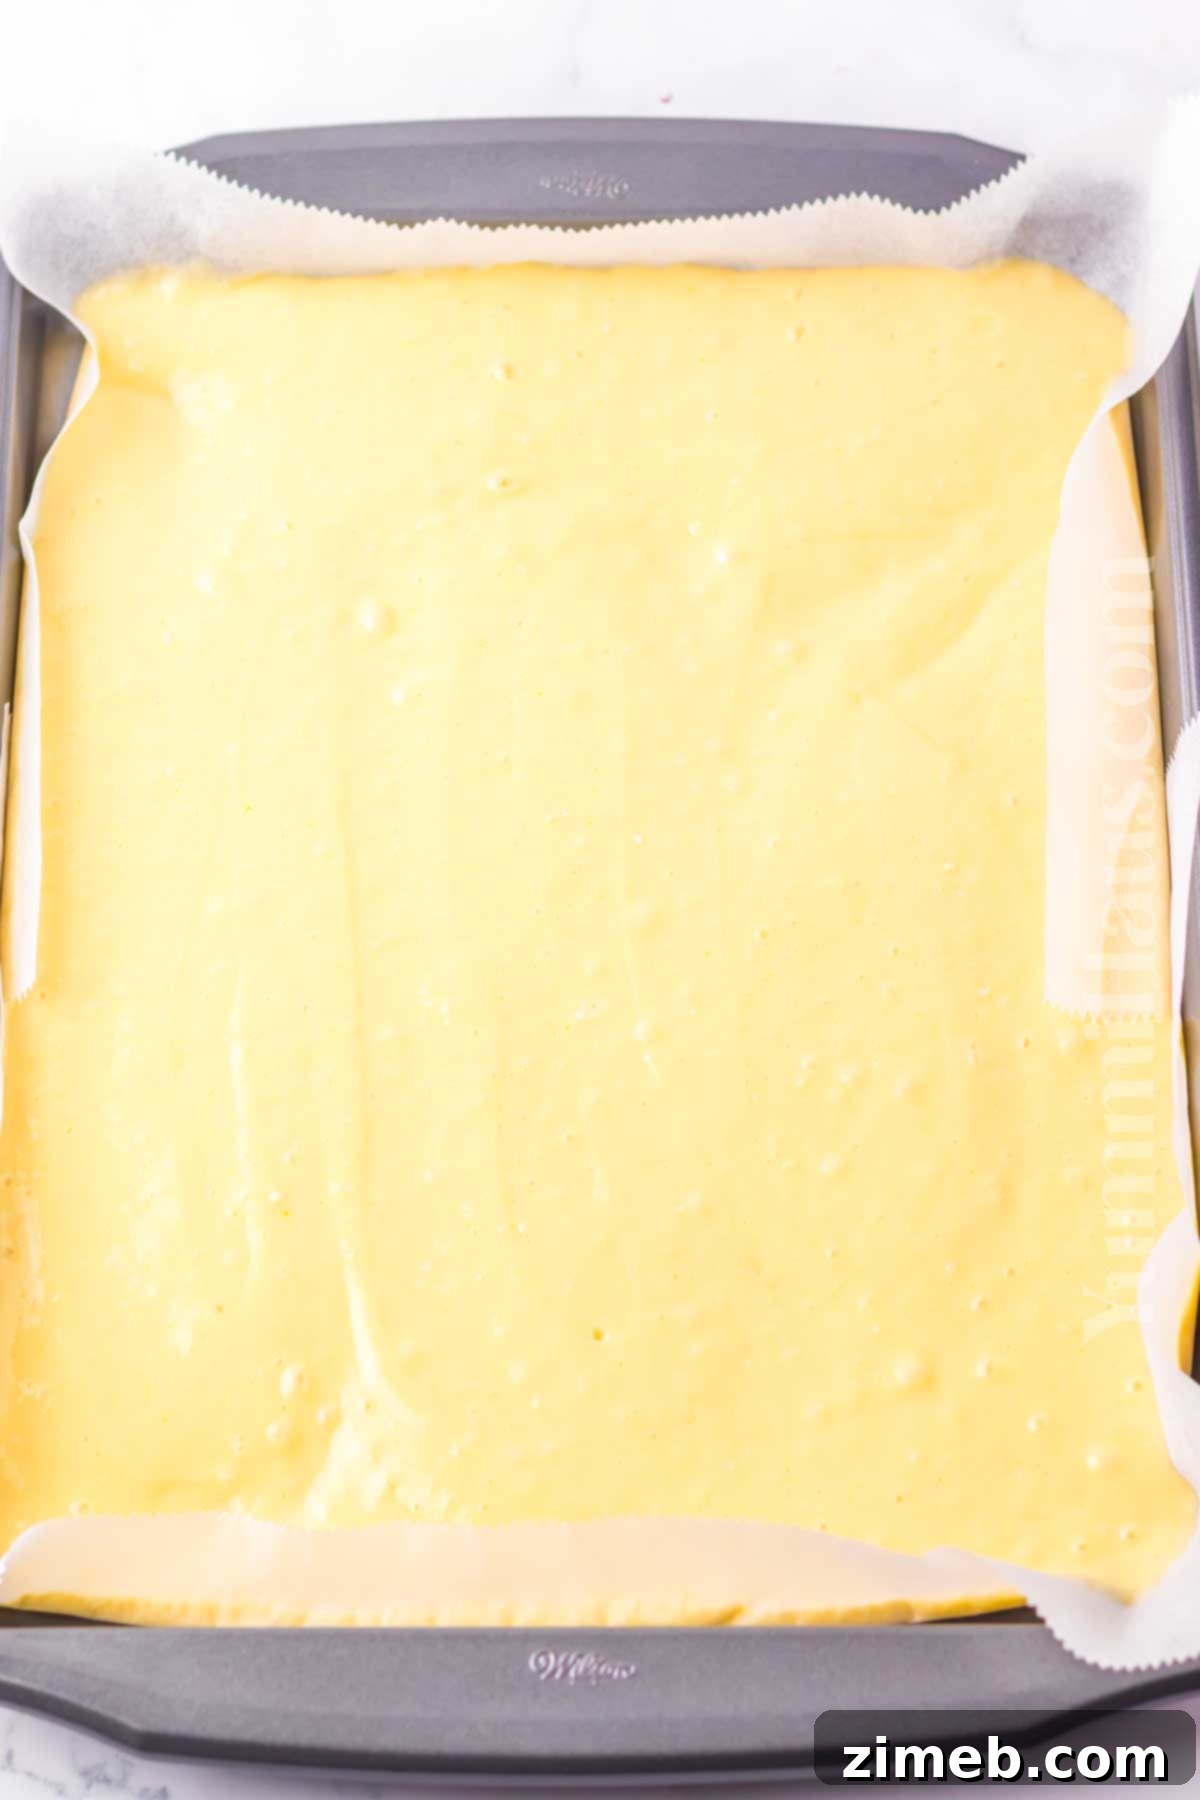
- **Prepare Pan:** Line a 16×12 inch rimmed baking sheet with parchment paper, leaving a slight overhang on the sides to easily lift the cake later. This prevents sticking and makes transfer a breeze.
- **Whip Eggs:** In a large bowl, add the eggs. Using an electric mixer or a stand mixer fitted with the whisk attachment, whip the eggs for precisely 6 minutes. This step is critical; whipping for exactly this duration creates an incredibly light and airy base for your cake, preventing it from crumbling when rolled. The eggs will become pale yellow and significantly increased in volume.
- **Combine Ingredients:** Once the eggs are perfectly whipped, slowly and gently fold in the white cake mix, vegetable oil, and water. Mix until just combined, being careful not to overmix, which can deflate the airy egg mixture.
2: Baking the Sponge Cake to Perfection
- **Spread Batter:** Carefully transfer the prepared batter to your lined baking sheet, spreading it into an even layer using an offset spatula. Ensure the batter is distributed uniformly for consistent baking.
- **Bake:** Bake for about 15 minutes, or until the cake is a light golden brown and feels springy to the touch. When gently pressed, the baked cake should bounce back, indicating it’s cooked through but still moist.
3: The Crucial Flip for Easy Rolling
- **Prepare Rolling Surface:** Immediately after removing the cake from the oven, dust a clean, lint-free kitchen towel (like a flour-sack towel) generously with confectioner’s sugar (also known as powdered sugar). This dusting prevents the cake from sticking to the towel. Place this sugared towel directly on top of the hot cake in the pan.
- **Invert Cake:** VERY CAREFULLY, as the baking pan will be hot, hold the towel securely against the pan and swiftly invert the cake out of the pan and onto the prepared towel. This motion helps to release the cake from the pan while it’s still warm and pliable.
- **Remove Parchment:** Gently peel off the parchment paper layer from the back of the cake. Do this slowly to avoid tearing the delicate cake.
4: Rolling the Warm Cake for a Perfect Spiral
- **Gentle Rolling:** Starting from one of the shorter ends of the cake, gently and carefully roll the warm cake along with the sugared towel. The warmth is essential here, as it allows the cake to retain its shape without cracking. Roll it gently but firmly enough to create a tight spiral. Rolling too tightly or too loosely can lead to cracks or an uneven finished product.
- **Cool Completely:** Place the rolled cake, still encased in the towel, seam-side down on a wire rack. Allow it to cool completely at room temperature. This slow cooling process in its rolled form helps the cake “remember” its shape, making it easy to unroll and fill later without breaking.
5: Whipping Up the Dreamy Cream Filling
- **Combine Ingredients:** In the bowl of a stand mixer (or using a hand mixer), combine the cold heavy cream and confectioner’s sugar. Ensure your cream is very cold for the best whipping results.
- **Whip to Stiff Peaks:** Begin whisking slowly to incorporate the sugar, then gradually increase the speed. Whip until very stiff peaks form. The cream should hold its shape firmly, ready to be spread as a luscious filling.
Alternative: Indulgent Cream Cheese Filling
For those who adore a tangy, rich cream cheese flavor, this alternative filling is a fantastic choice. To make it, you will need to beat 4 ounces of softened cream cheese with half a cup of white sugar until smooth and creamy. Then, mix in a few drops of vanilla extract for a hint of warmth. Slowly add a full cup of cold heavy whipping cream, continuing to beat until the mixture is light, fluffy, and holds soft peaks. For an extra festive touch, you can even fold in some Christmas sprinkles at the end.
6: Filling the Cooled Cake Roll
- **Unroll Gently:** Once the cake roll has completely cooled, gently unroll it from the towel. It should maintain its rolled shape, making it easy to work with.
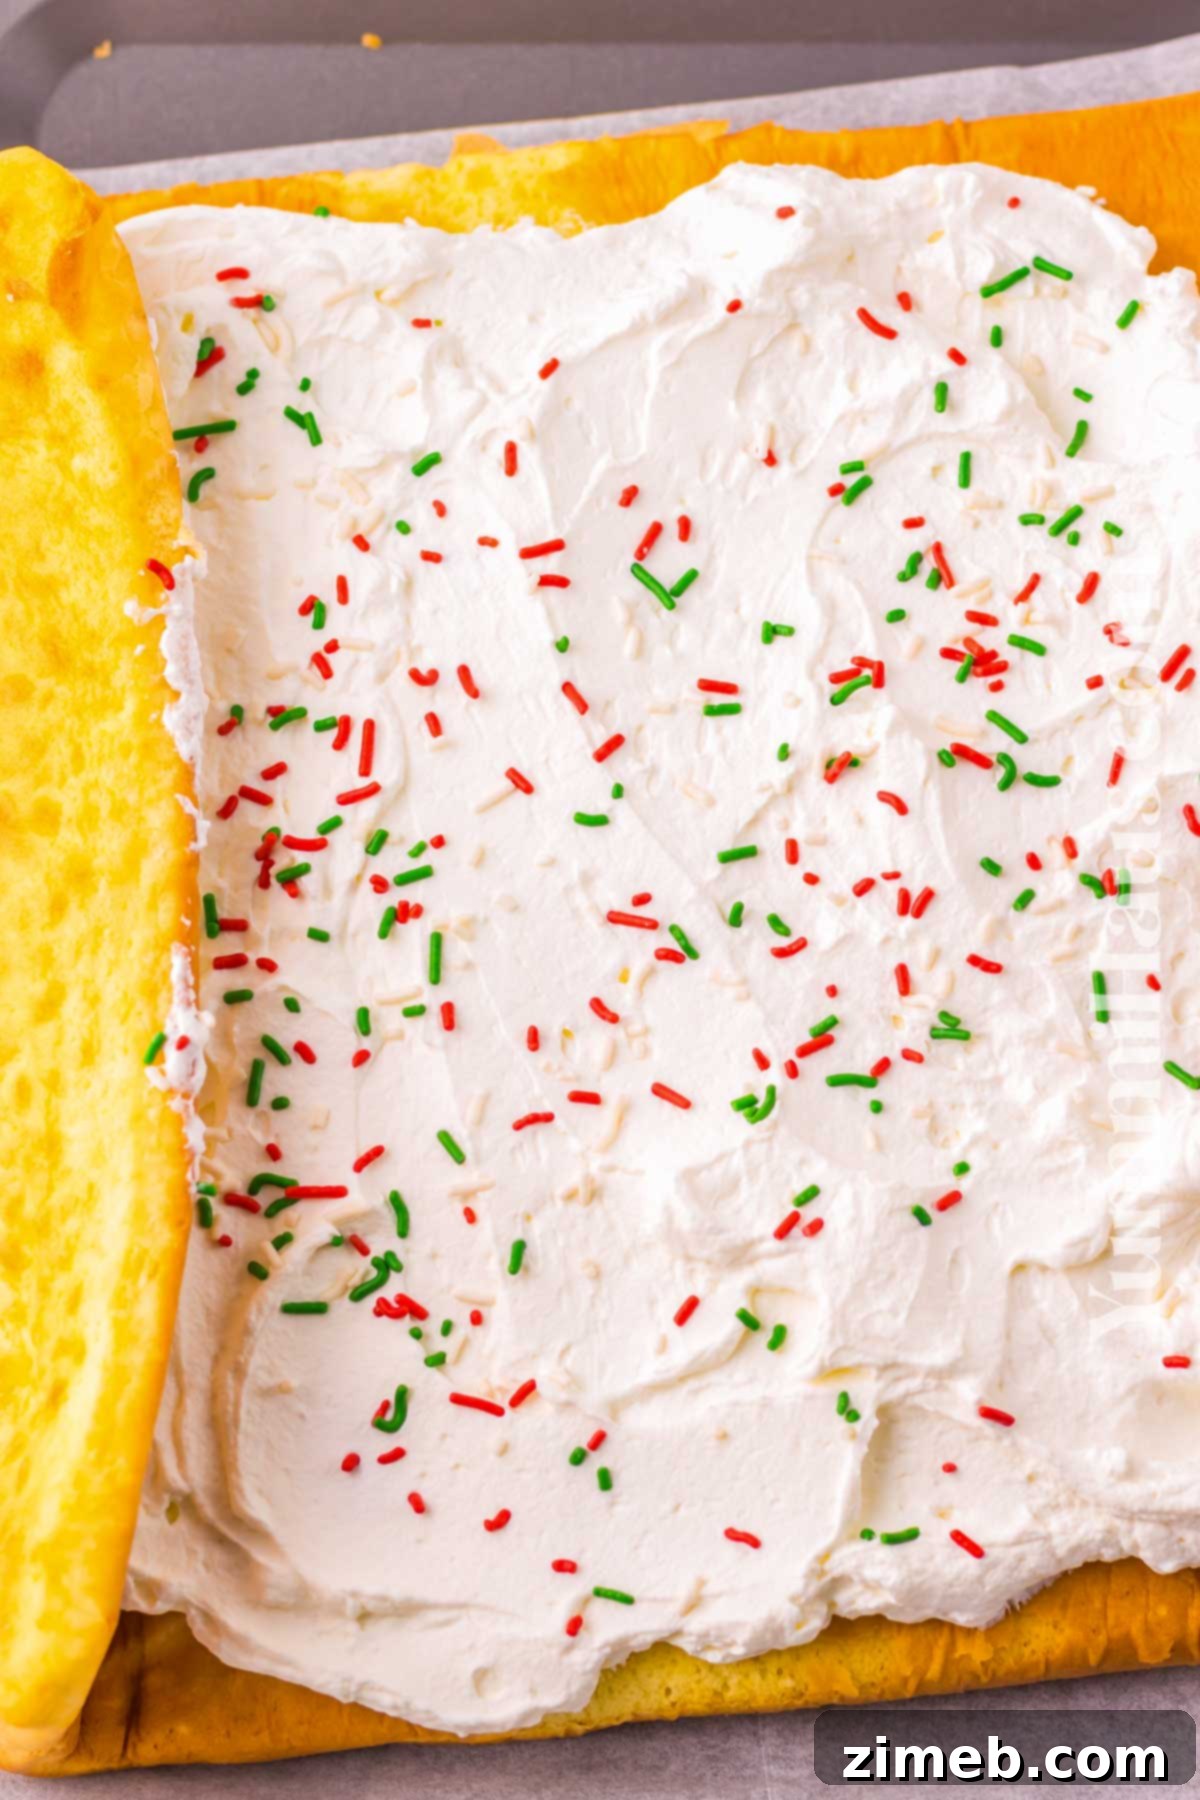
- **Spread Filling:** Evenly spread about three-quarters of your prepared whipped cream (or cream cheese) filling over the entire inside surface of the cake, leaving a small border around the edges.
- **Add Sprinkles (Optional):** If you’re using Christmas sprinkles for the interior, now is the time to scatter them generously over the filling. This creates a delightful surprise when the cake is sliced.
- **Roll & Seal:** Carefully roll the cake back up, starting from the short end, as tightly as possible without causing cracks. Use the parchment paper to help guide it. Once rolled, ensure the seam is on the bottom.
7: Arranging & Decorating Your Masterpiece
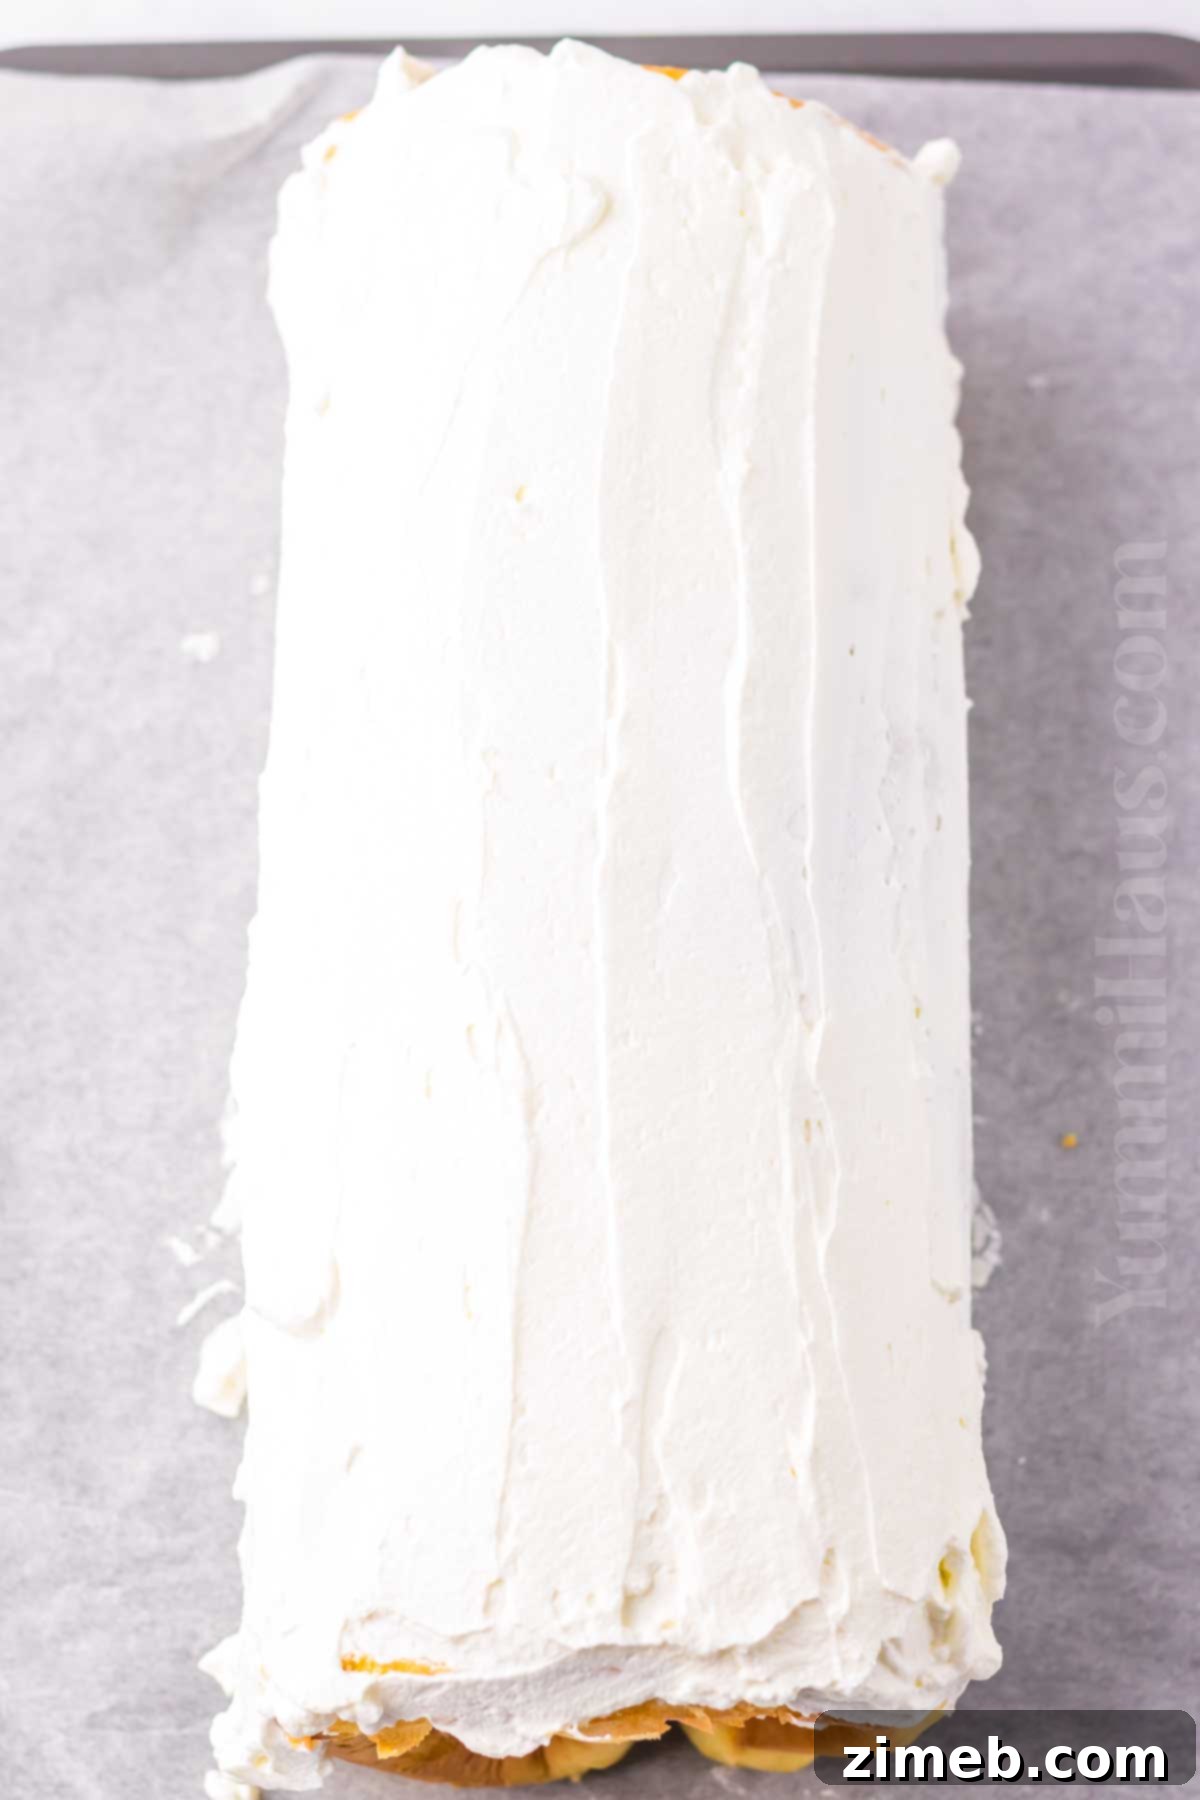
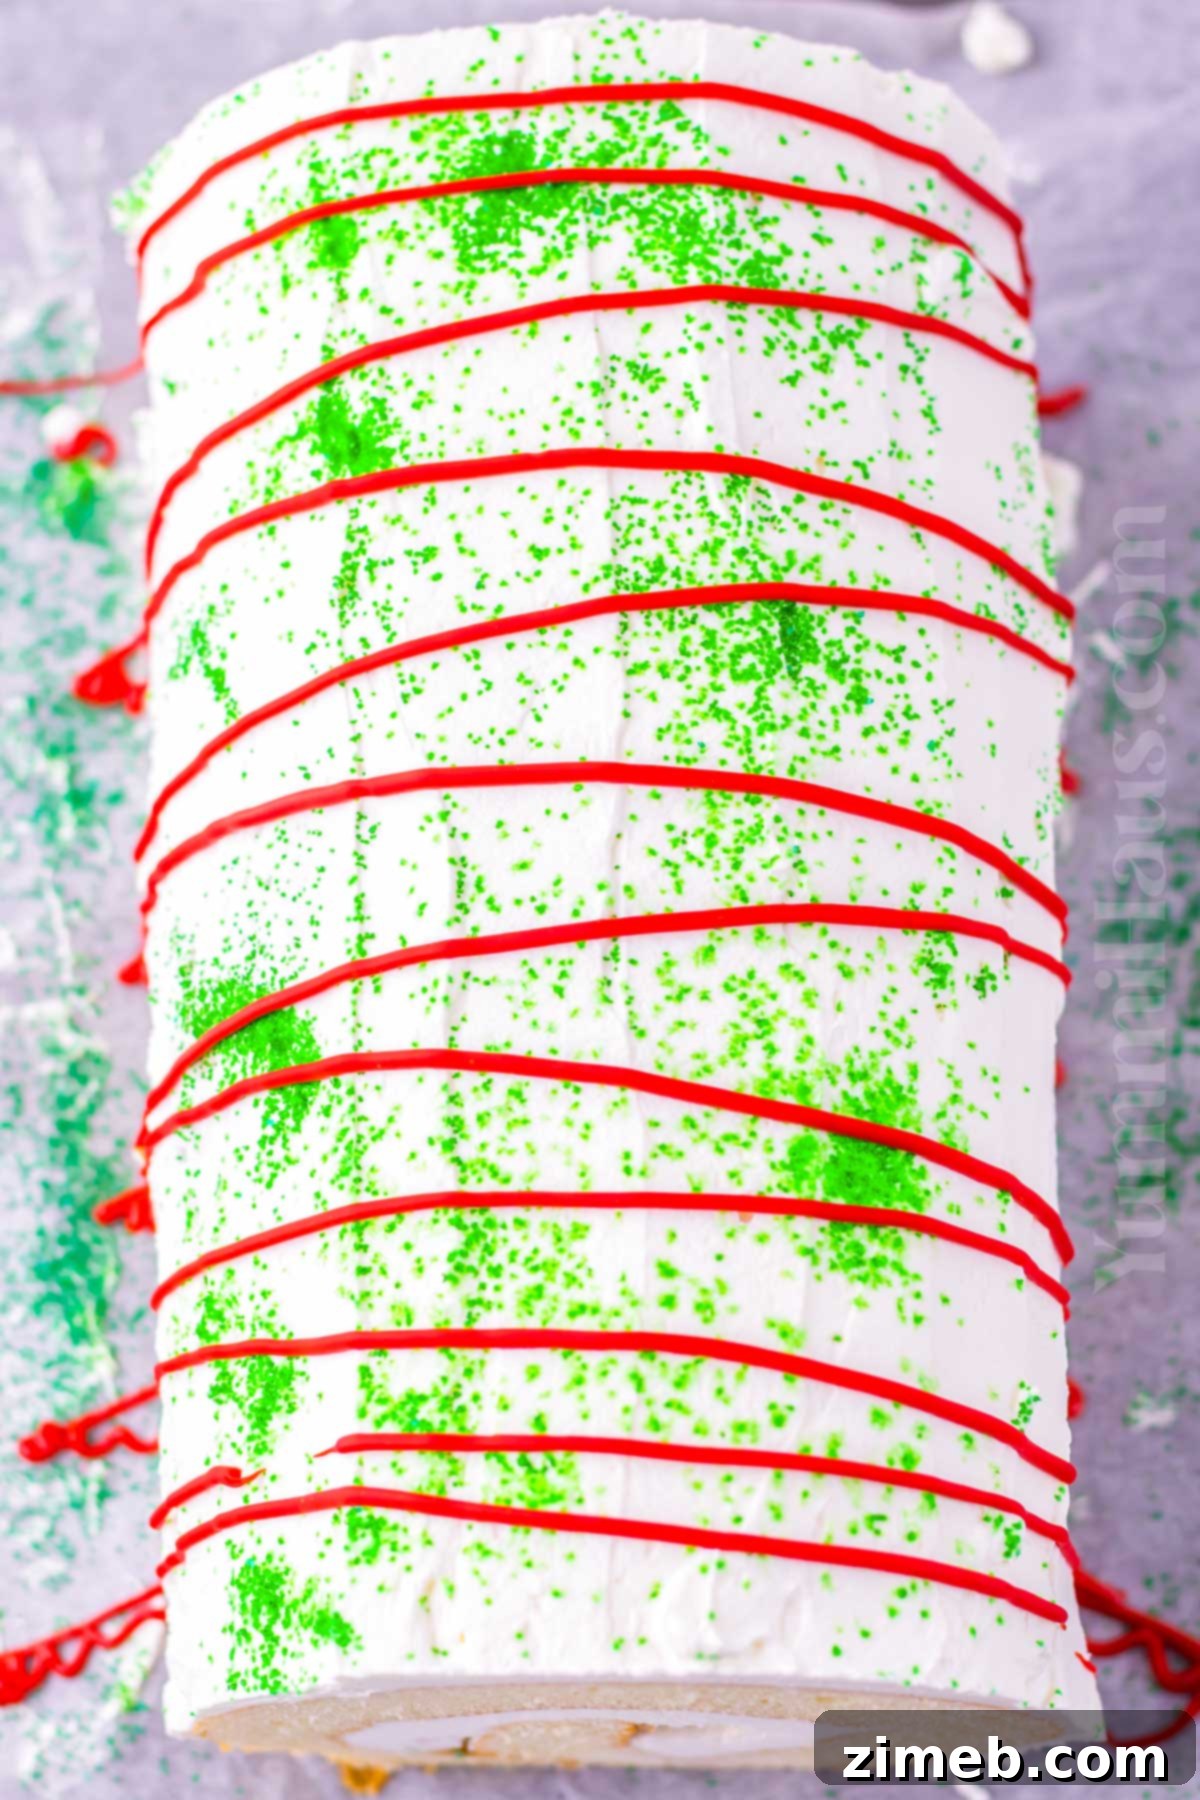
- **Exterior Decoration:** Carefully transfer the cake roll, seam-side down, to your chosen cake platter or serving dish. Use the remaining filling to decorate the outside of the cake as desired. An offset spatula works wonderfully for smoothing out the frosting to create a clean, elegant finish. Once smoothed, adorn with green sugar sprinkles for a classic festive look.
- **Melt Candy Melts:** Melt the red candy melts according to the package directions. Typically, this involves microwaving them in a microwave-safe bowl in 30-second intervals, stirring thoroughly in between each interval until completely smooth and fluid.
- **Drizzle:** Once melted, transfer the warm, melted candy to a decorating bottle or a small piping bag with a fine tip. Drizzle the festive red chocolate over the top of the cake roll in an artistic pattern. This adds a beautiful contrast and a touch of sweetness.
- **Chill:** For the cleanest slices and best serving experience, wrap the finished cake roll loosely in plastic wrap and chill it in the refrigerator for at least one hour before slicing and serving. This allows the filling to firm up and the cake to set.
Storage Tips for Your Christmas Cake Roll
To keep your Christmas Cake Roll fresh and delicious, store any leftovers in an airtight container in the refrigerator. It will maintain its wonderful taste and texture for up to 3 days. For longer storage, this festive cake roll also freezes beautifully! Simply wrap individual slices or the entire roll tightly in plastic wrap, then again in aluminum foil, and store in the freezer for up to 1-2 months. Thaw in the refrigerator overnight before serving.
Creative Substitutions & Delicious Variations
This Christmas Cake Roll recipe is incredibly versatile, allowing you to get creative with flavors and decorations:
- **Explore Filling Flavors:** Easily change the flavor profile of your whipped cream filling by adding different extracts. Beyond classic vanilla extract, consider almond, coconut, lemon, peppermint, or even a touch of rum extract for a more adult holiday treat.
- **Vanilla Buttercream Indulgence:** For a richer, more stable filling and frosting, opt for a simple vanilla buttercream. Beat softened butter with vanilla extract until creamy, then gradually add milk and powdered sugar, mixing until it’s smooth and spreadable. This provides a beautiful canvas for decorations.
- **Diverse Toppings Galore:** Unleash your creativity with toppings! Try a glossy chocolate ganache, a zesty ginger cream cheese icing, or fresh sliced strawberries for a burst of fruitiness. Pipe intricate frosting designs with more sprinkles, create charming meringue mushrooms, or mix melted chocolate chips directly into your frosting for a subtle chocolate swirl. Of course, sometimes simplicity is best, and “nothing” is a perfectly valid and delicious option too!
- **Elaborate Meringue Mushroom Decorations:** If you’re looking for a show-stopping decoration, meringue mushrooms are adorable, albeit a bit challenging. You’ll need a double boiler to gently warm 5 oz of powdered sugar and 3 egg whites, stirring constantly until the sugar dissolves and the mixture is warm to the touch (around 120°F). Transfer to a stand mixer and whisk for 1 minute, then add a quarter teaspoon of cream of tartar, a splash of vanilla extract, and a pinch of salt. Beat until very stiff, glossy peaks form. Using an 804 piping tip, pipe mushroom hats and stems separately onto parchment-lined baking sheets. Bake at a very low temperature (around 200°F) for 1-2 hours until crisp. Once cooled, melt white chocolate and use it as “glue” to attach the hats to the stems. Dust with cocoa powder for a rustic forest look.
- **Color the Cake Batter:** For an even more festive internal swirl, divide your prepared cake batter into two bowls. Add red food coloring or food gel to one bowl and green food coloring or food gel to the other. You can then pipe alternating stripes onto your baking sheet for a truly unique look.
Expert Tips for Crafting the Best Christmas Cake Roll
Achieving a perfect, crack-free cake roll might seem daunting, but with these expert tips, you’ll master it in no time:
- **Vibrant Colored Cake Layers:** To create stunning green and red colored cake layers for a truly festive internal pattern, prepare your colored batter as described in the variations section. Load one piping bag with green batter and another with red. On your parchment-lined baking sheet, alternate piping diagonal lines of red and green batter. This creates a beautiful striped effect that will swirl wonderfully when rolled.
- **Check for Doneness:** When the cake is baked, it should feel light and springy to the touch. Gently press the center; if it springs back, it’s done. If it doesn’t, it likely needs a few more minutes. Start checking for doneness around the 10-12 minute mark to avoid overbaking.
- **Roll While Hot is Key:** This is perhaps the most crucial tip! You MUST roll the cake while it is still hot, immediately after removing it from the oven. If you wait for the cake to cool, it will stiffen and dry, inevitably leading to cracks and breakage when you attempt to roll it. The residual heat makes the cake pliable and flexible.
- **Achieving Clean Slices:** For beautifully presented, clean slices that impress, pop the filled and decorated cake roll into the fridge or even the freezer for about 15-30 minutes before cutting. Chilling the cake helps the filling and frosting firm up, allowing your knife to glide through without smearing or tearing the delicate cake layers.
- **Even Batter Spread:** Ensure your cake batter is spread very evenly in the baking pan. An uneven thickness can result in parts of the cake cooking faster or becoming too thin, leading to cracks during rolling.
We hope you enjoy creating and sharing this wonderful Christmas Cake Roll with your loved ones. It’s a delightful dessert that embodies the joy and warmth of the holiday season, promising smiles with every delicious bite. Happy baking and Merry Christmas!
If you love this holiday cake recipe, you’re going to love these other Christmas recipes too. Please click each link below to find the easy, printable recipe!
Check out this recipe
Check out this recipe
Check out this recipe
Check out this recipe

Check out this recipe
Discover More Favorite Christmas Recipes
Keep the festive spirit alive with these other cherished holiday recipes:
Wreath Charcuterie Board – A stunning and delicious appetizer for any holiday gathering.
Reindeer Chow – A fun, easy, and addictive snack perfect for kids and adults alike.
Christmas Cookie Fudge – A rich and creamy fudge packed with holiday cookie flavor.
Christmas Popcorn – A sweet and salty treat, ideal for movie nights or party favors.
CONNECT WITH YUMMI HAUS!
Be sure to follow me on my social media, so you never miss a post!
Substack, FB, Pinterest, IG, Email Subscription
Rate this Recipe
Christmas Cake Roll
Ingredients
- 6 large eggs
- 15.25 ounces white cake mix
- ¼ cup vegetable oil
- ¼ cup water
- 3 cups cold heavy whipping cream
- 2 cups confectioner’s sugar (plus extra for dusting)
For Decoration (Optional)
- ¼ cup green sugar sprinkles
- 1 cup red candy melts
- Christmas red and green sprinkles
Instructions
For the Cake Roll
-
Preheat your oven to 350 degrees F (175°C).
-
Line a 16×12 inch rimmed baking sheet (or half-sheet pan 18×13) with parchment paper, allowing an overhang on the sides.
-
In a large mixing bowl, whip the eggs using an electric or stand mixer for precisely 6 minutes. This step is crucial for preventing the cake from crumbling when rolled.
-
Slowly fold in the white cake mix, vegetable oil, and water until just combined. Be careful not to overmix.
-
Transfer the batter to the prepared pan, spreading it into an even layer with an offset spatula.
-
Bake for 15 minutes, or until the cake is light, golden, and springs back when gently pressed.
-
Immediately remove the cake from the oven. Dust a lint-free kitchen towel (or flour-sack towel) generously with confectioner’s sugar and place it on top of the hot cake.
-
VERY CAREFULLY, hold the towel and pan, then invert the cake out of the pan and onto the sugared towel.
-
Gently peel off the parchment paper from the cake.
-
Starting from the short end of the cake, gently roll the warm cake up into the towel. Roll it carefully to prevent cracks.
-
Place the rolled cake, seam-side down, in a cool, dry place and let it cool completely while rolled up.
Prepare the Filling & Decorate
-
In the bowl of a stand mixer, combine the cold heavy cream and confectioner’s sugar. Whisk slowly to incorporate, then increase speed and whip until very stiff peaks form.
-
Gently unroll the cooled cake from the towel.
-
Spread ¾ of the prepared filling evenly over the inside of the cake.
-
If desired, sprinkle Christmas sprinkles over the filling. Then, gently roll the cake back up as tightly as possible without cracking.
-
Arrange the cake, seam-side down, on a serving platter. Use the remaining filling to decorate the outside as desired, smoothing with an offset spatula, and adding green sprinkles.
-
Melt the red candy melts according to package directions (typically in 30-second intervals in a microwave-safe bowl, stirring between each).
-
Transfer the melted candy to a decorating bottle and drizzle artistically over the top of the cake.
-
For best results and clean slices, chill the cake roll in the fridge for at least one hour before serving.
Notes
- Store any leftover Christmas Cake Roll in an airtight container in the refrigerator for up to 3 days to maintain freshness.
- This versatile recipe can be made with any flavor of cake mix you prefer, allowing for endless creative variations.
- Easily change the filling flavor by adding your desired extracts (e.g., almond, lemon, peppermint) to the heavy cream during the mixing process.
- Remember to roll the cake while it’s still warm to prevent cracking.
- For super clean slices, chill the cake thoroughly before cutting.
Nutrition
Nutritional information for the recipe is provided as a courtesy and is approximate. Please double-check with your own dietary calculator for the best accuracy. We at Yummi Haus cannot guarantee the accuracy of the nutritional information given for any recipe on this site.