
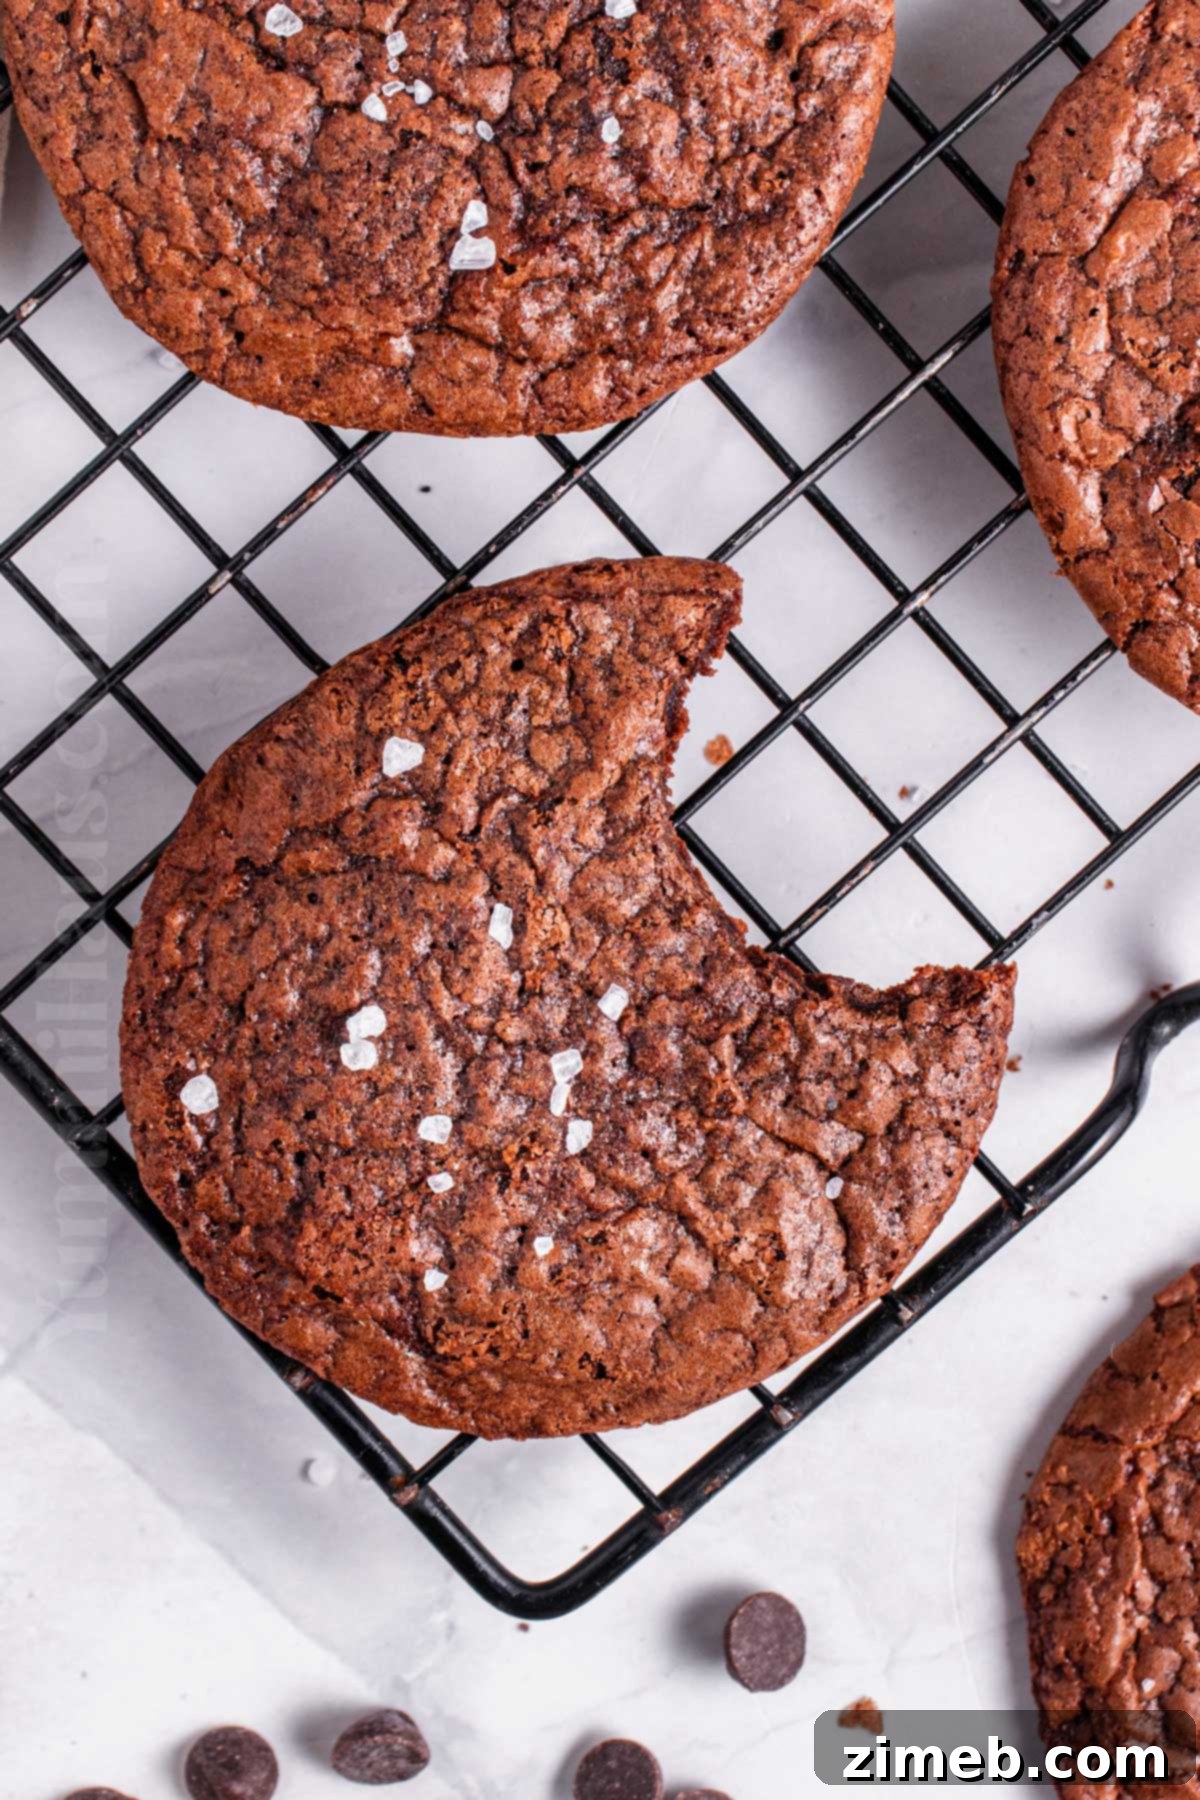
Welcome to the ultimate guide for crafting the most decadent and irresistible **Brownie Cookies**! These delectable treats perfectly marry the rich, fudgy intensity of a classic brownie with the satisfying chewiness and crisp edges of your favorite chocolate chip cookie. Prepare to indulge in a double chocolate delight, infused with warm vanilla and boasting a luxuriously thick, buttery texture that will leave you craving more with every bite.
Achieving that unparalleled deep chocolate flavor and a truly fudgy texture comes down to a few expert techniques. My top two recommendations are: first, always opt for high-quality **chocolate bars** over standard chocolate chips. Chocolate bars melt more smoothly and distribute their rich cocoa butter content throughout the batter, leading to a superior flavor and melt-in-your-mouth experience. Second, use **melted butter** instead of oil in your brownie cookie batter. Butter not only enhances the flavor but also contributes significantly to that coveted fudgy consistency, making these cookies truly exceptional.
Gina’s Recipe Rundown: A Snapshot of Perfection
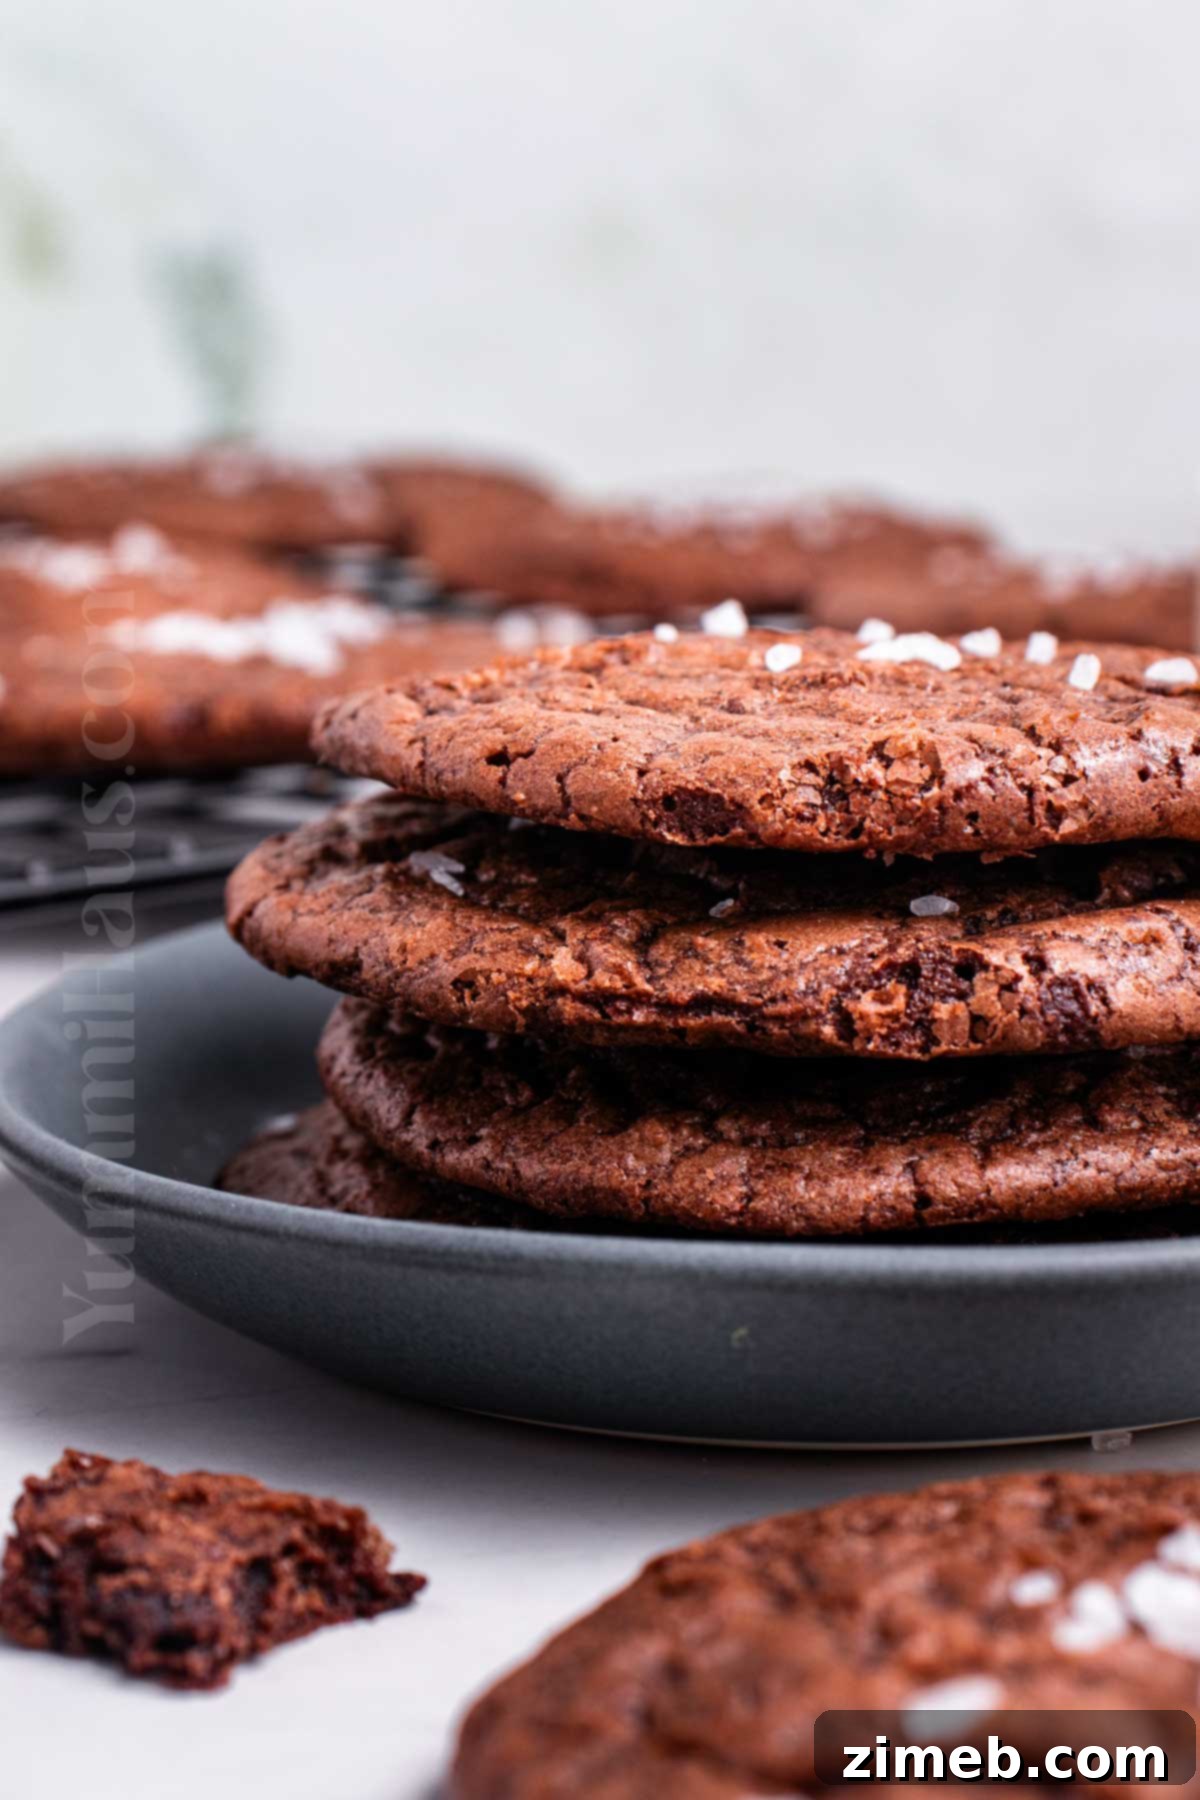
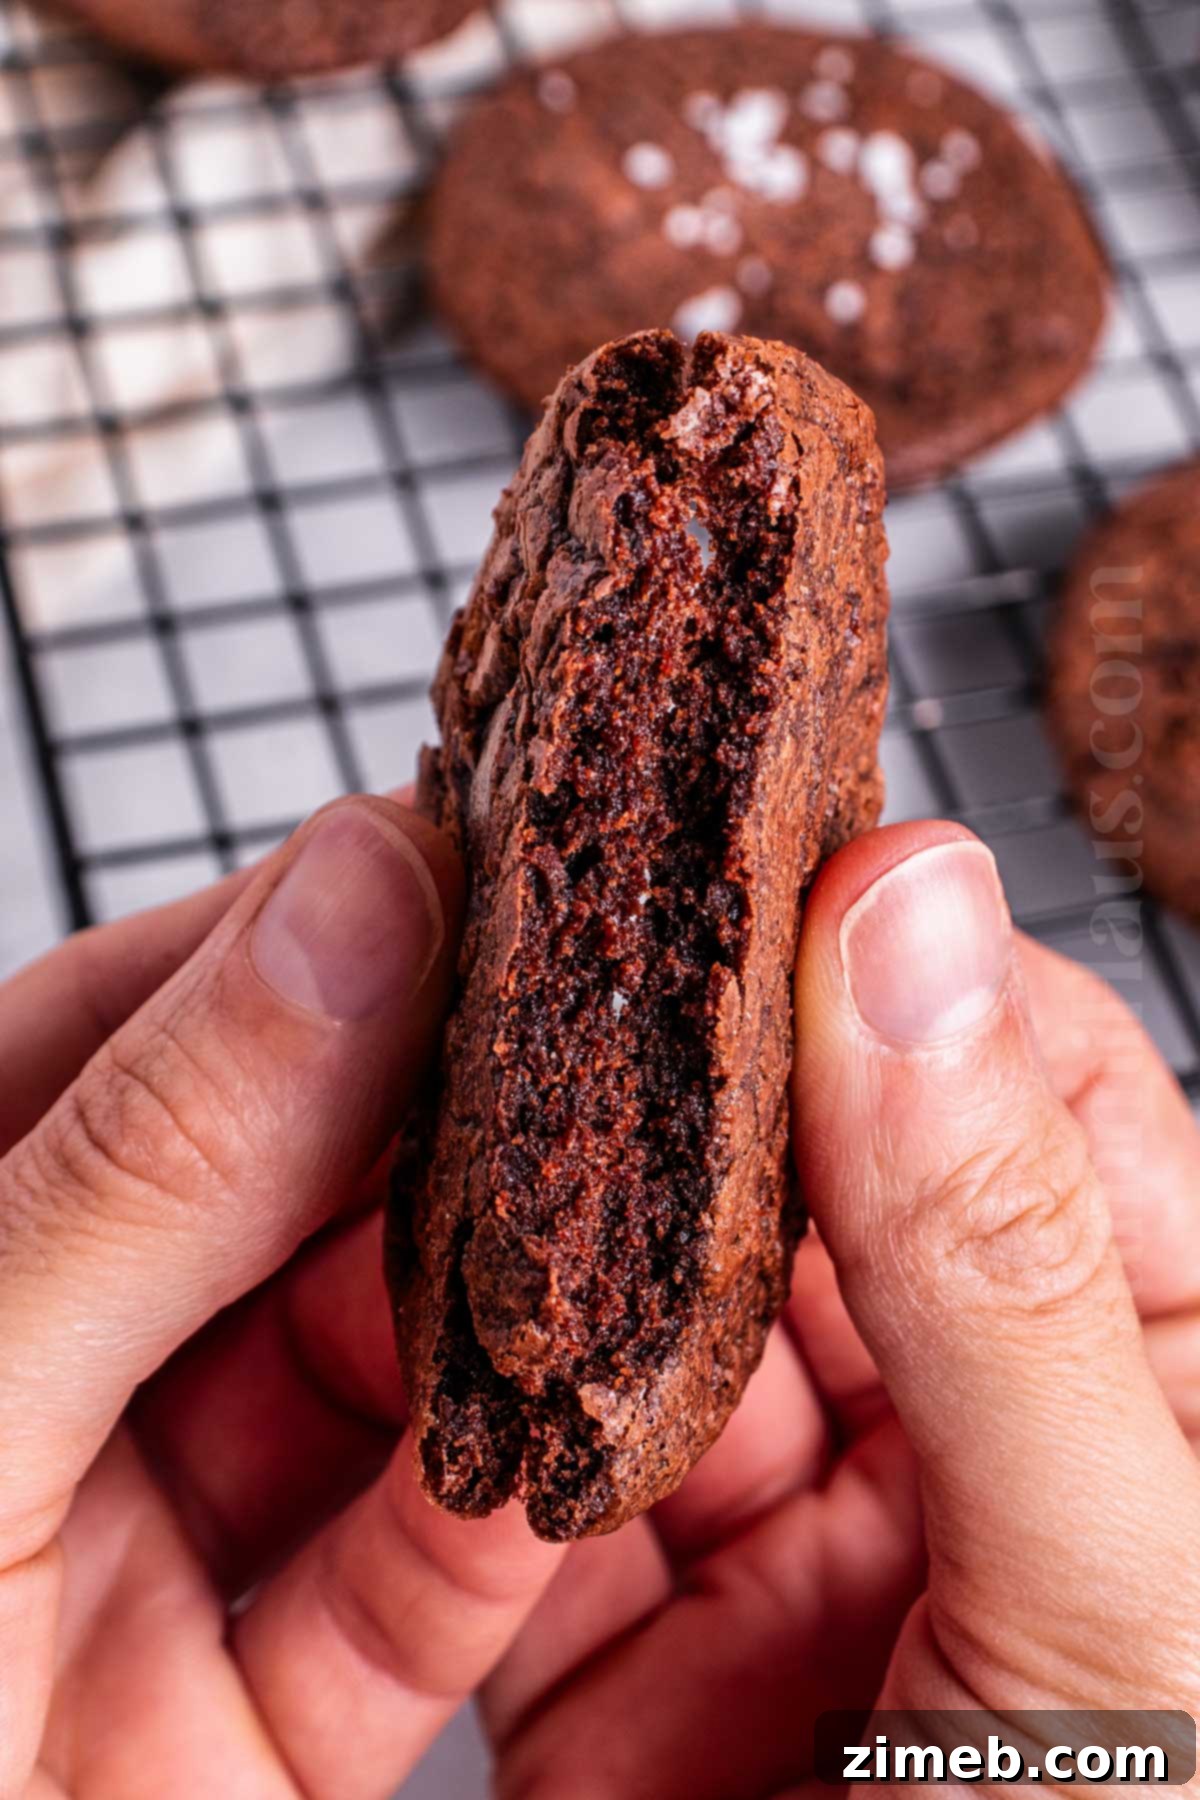
Texture: Prepare for a sensory experience like no other. These brownie cookies deliver the best of both worlds: a wonderfully fudgy and rich brownie interior, encased within a thick, chewy cookie framework that boasts perfectly crisp, buttery edges and delightful soft insides. Each bite offers a harmonious contrast that defines true indulgence.
Taste: Imagine your favorite rich, intensely chocolatey brownie, but in a convenient, handheld cookie form. That’s precisely what these are. They are a pure chocolate lover’s dream, a heavenly creation that encapsulates the essence of deep cocoa and sweet indulgence.
Ease: Despite their gourmet appeal, this recipe is surprisingly straightforward and easy to follow. You won’t need to chill the dough, saving you valuable time. While it does involve a few simple steps like sifting dry ingredients and using a mixer for optimal texture, the process is manageable for bakers of all skill levels, culminating in a big batch of exquisite cookies.
Why I love it: I adore these Brownie Cookies for their consistently rich, melt-in-your-mouth fudgy centers and distinctive crisp edges. The intense chocolate flavor, derived from quality ingredients, creates a perfect fusion of classic brownies and traditional cookies in every single bite. They satisfy any chocolate craving with an elegant yet comforting charm that’s hard to resist.
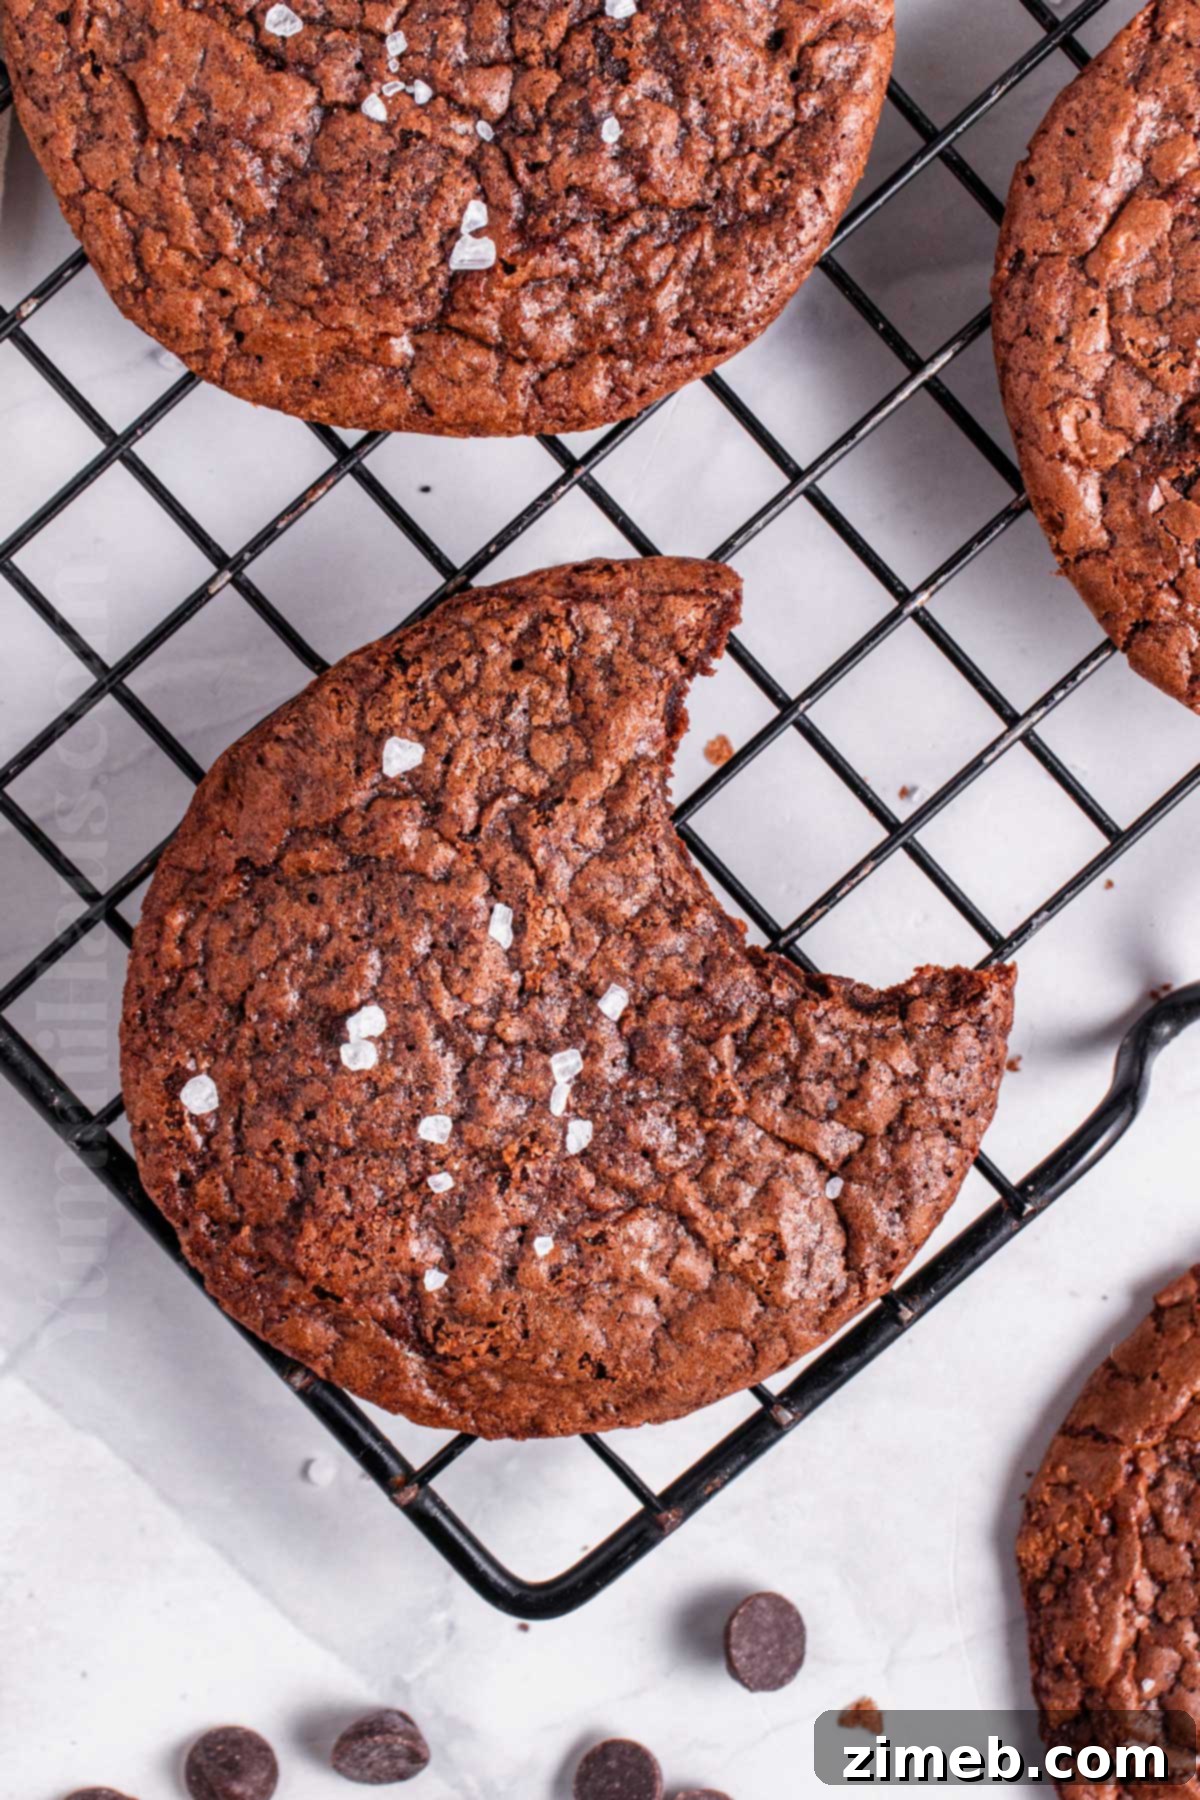
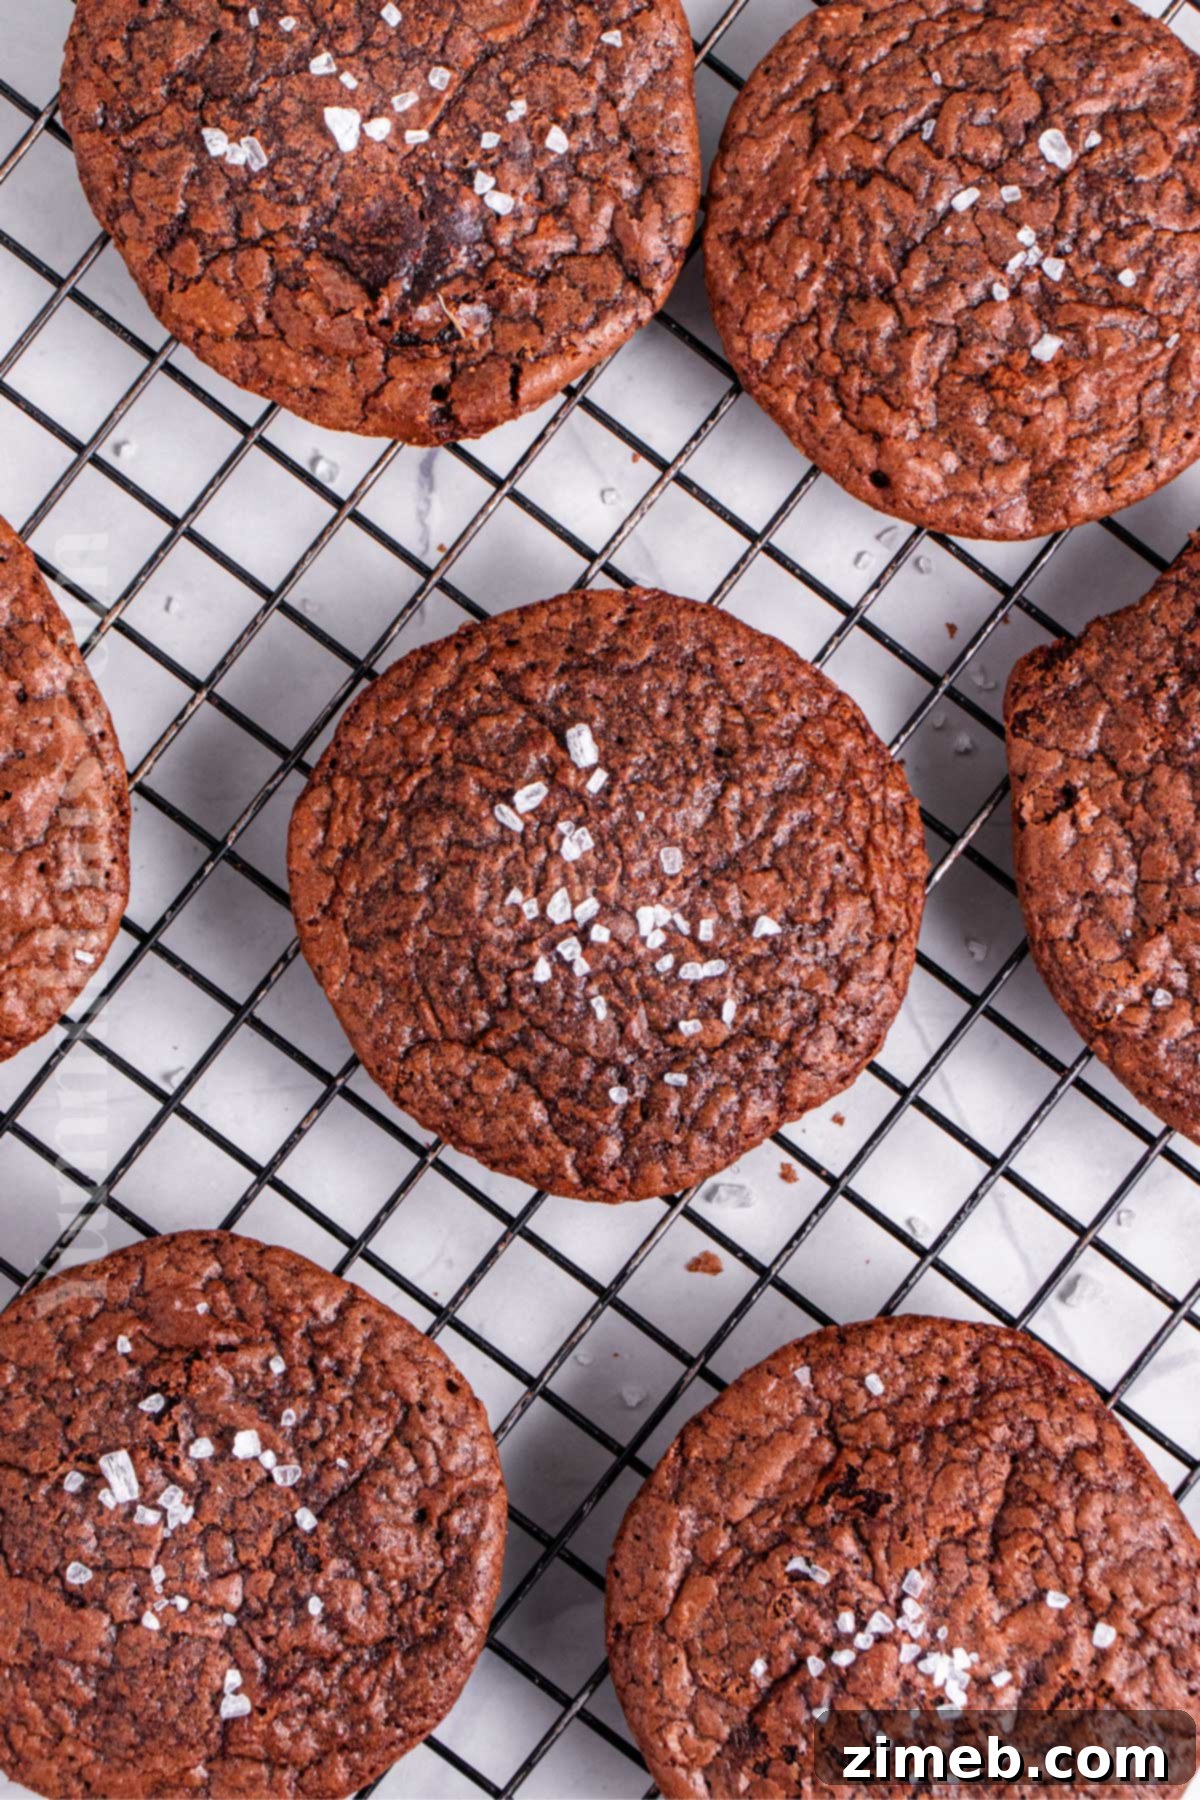
When the irresistible allure of a rich chocolate cookie perfectly converges with the dense, decadent charm of a brownie, the result is a culinary masterpiece we affectionately call a “brookie.” These individual delights are characterized by their beautifully crinkled, slightly crisp tops, which elegantly give way to an incredibly fudgy interior. Each brookie is perfectly rounded, mirroring the soft, inviting shape of a traditional cookie, yet offering an elevated chocolate experience. This recipe is your go-to solution for satisfying any intense cookie craving, providing a sophisticated twist on a beloved classic that promises both comfort and gourmet indulgence.
- Gina’s Recipe Rundown: A Snapshot of Perfection
- Why You’ll Adore These Fudgy Brownie Cookies
- Essential Ingredients for Perfect Brownie Cookies
- Key Kitchen Equipment for Brownie Cookies
- Mastering the Art of Brownie Cookies: Step-by-Step Guide
- Storing Your Delicious Brownie Cookies
- Creative Substitutions & Flavorful Variations
- Expert Tips for Baking the Best Brownie Cookies
- Troubleshooting Common Brownie Cookie Problems
Why You’ll Adore These Fudgy Brownie Cookies
- A Chocolate Lover’s Dream Come True: This recipe is a true ode to chocolate, allowing you to tailor the intensity to your preference. Whether you’re a fan of the mellow sweetness of semi-sweet, the profound depth of dark chocolate, or the creamy notes of milk chocolate, you can use any variety to create your perfect cookie. The double dose of chocolate from both cocoa powder and chocolate bars ensures an incredibly rich and satisfying experience for even the most discerning chocoholic.
- Perfect for Any Crowd or Occasion: With this recipe, you’ll yield a generous batch of approximately 22 delectable chocolate brownie cookies. This makes it an ideal choice for larger gatherings, school events, office potlucks, or simply ensuring you have plenty of treats on hand for family and friends. It’s an effortless way to spread joy and deliciousness.
- Quick, Convenient, and Surprisingly Fast: Don’t let the gourmet taste fool you; these cookies come together quickly. The baking time is incredibly short, typically just 6-8 minutes, meaning you can go from dough to warm, fresh cookies in under 40 minutes total. The prep work primarily involves combining ingredients properly, making this a fantastic option when you need a speedy dessert without compromising on quality or flavor.
- Versatile for Seasonal Treats and Gifting: Beyond everyday indulgence, these brownie cookies offer fantastic versatility. In the warmer months, transform them into luxurious ice cream sandwiches for a cooling, decadent dessert. They also make an exquisite homemade gift, perfect for holidays, birthdays, or as a thoughtful gesture for loved ones. Their stunning appearance and irresistible taste are sure to impress.
Essential Ingredients for Perfect Brownie Cookies
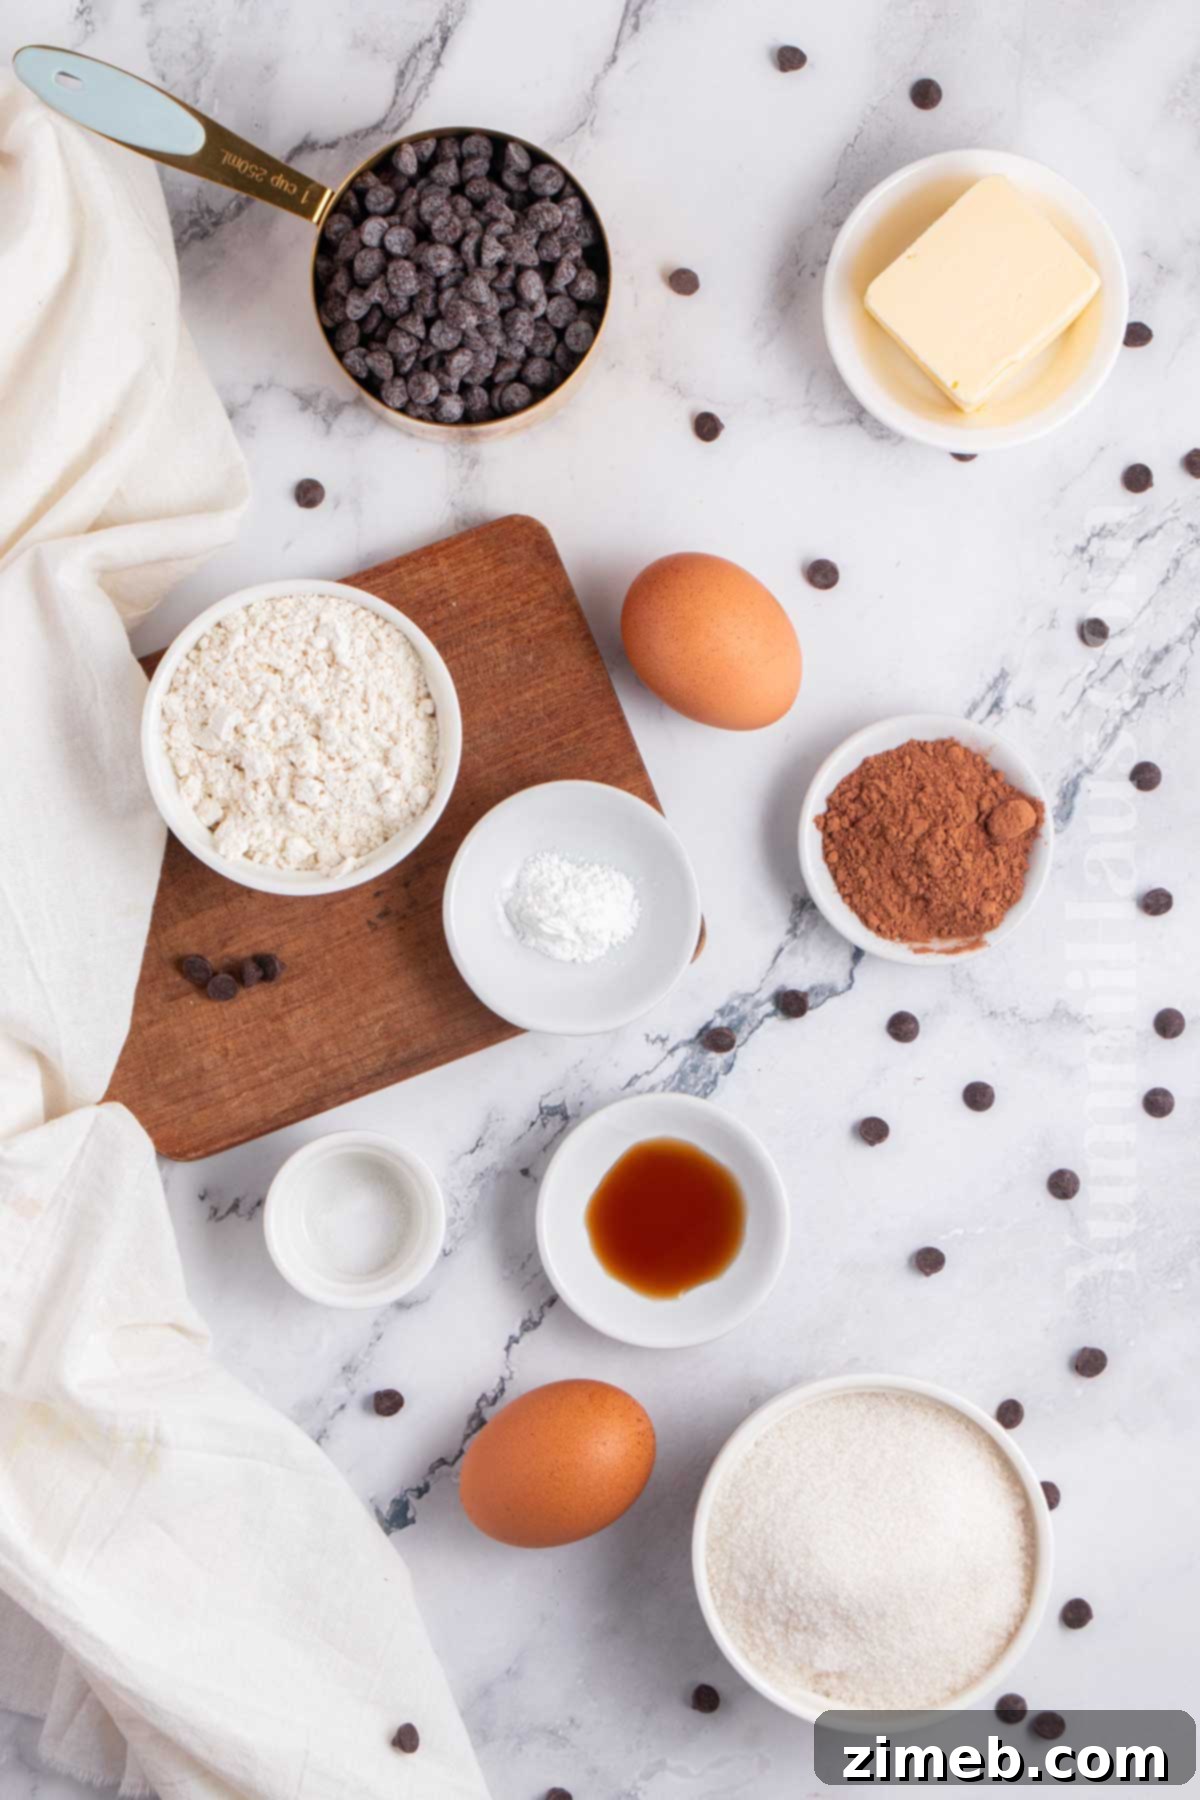
Crafting the perfect brownie cookie starts with understanding the role each ingredient plays. This section provides an overview of the key components; for precise measurements and detailed step-by-step instructions, please refer to the comprehensive recipe card located at the end of this article.
- High-Quality Semi-Sweet Chocolate Bar: This is arguably the most crucial ingredient for achieving a rich, complex chocolate flavor. Resist the urge to substitute with standard chocolate chips; baking chocolate bars contain more cocoa butter, which melts smoothly and contributes to a superior fudgy texture and intense flavor profile. You can also opt for other high-quality baking chocolates, such as dark chocolate for a bolder taste or milk chocolate for a sweeter, creamier result. The better the chocolate, the better your cookies will taste.
- Unsalted Butter: Butter is fundamental for the fudginess and luscious texture of these cookies. Using unsalted butter gives you complete control over the salt content in your recipe. If only salted butter is available, be sure to adjust the amount of added salt accordingly to prevent your cookies from becoming too salty. Butter also contributes to the rich, buttery flavor that complements the chocolate so beautifully.
- Flour Mixture (All-Purpose Flour + Baking Powder + Salt):
- All-Purpose Flour: This provides the primary structure for your cookies. Ensure it’s spooned and leveled for accuracy.
- Baking Powder: This is your leavening agent, responsible for giving the cookies a slight lift and contributing to their soft, chewy texture while maintaining a dense, brownie-like feel.
- Salt: A pinch of salt is essential to balance the sweetness and enhance the depth of the chocolate flavor. It brightens all the other ingredients.
For those with dietary restrictions, a good quality gluten-free all-purpose flour blend can often be substituted successfully.
- Unsweetened Cocoa Powder: This ingredient provides a second layer of profound chocolate flavor. While natural cocoa powder can be used in some recipes, for these brownie cookies, I highly recommend using Dutch-processed cocoa powder. Dutch-processed cocoa is darker, less acidic, and delivers a smoother, richer chocolate taste that truly elevates the overall profile. My baking tests showed natural cocoa powder didn’t yield the same depth of flavor or desirable texture.
- White Granulated Sugar: Beyond simply adding sweetness, granulated sugar plays a critical role in the texture of these cookies. It helps create those delightful crisp edges and contributes to the signature crackly tops that are so characteristic of a perfect brownie cookie.
- Large Eggs (at room temperature): Room temperature eggs are vital for creating a smooth, emulsified batter. Eggs act as a binder, provide moisture, and contribute to the cookie’s structure. Using eggs at room temperature ensures they incorporate more evenly with the other ingredients, leading to a more consistent and appealing texture in your final product.
- Pure Vanilla Extract: A touch of high-quality vanilla extract is crucial for enhancing and rounding out the chocolate flavors. It adds a subtle aromatic warmth and depth, preventing the chocolate from tasting flat and creating a more complex and inviting taste profile. Don’t skip this essential flavoring!
Key Kitchen Equipment for Brownie Cookies
Having the right tools on hand can significantly streamline your baking process and help you achieve perfectly consistent results every time. Here’s the essential equipment you’ll need for making these delightful brownie cookies:
- Cookie Sheet or Large Baking Sheets: You’ll need at least one, ideally two, large baking sheets. Lining them with parchment paper or silicone baking mats is crucial. This prevents sticking, ensures even baking, and makes for easy cleanup. Parchment paper also helps the cookies spread slightly less and achieve those crisp edges.
- Microwave-Safe Bowl: Essential for safely and efficiently melting the chocolate and butter mixture. Choose a bowl that can withstand heat and is large enough to comfortably stir the ingredients.
- Large Mixing Bowl: You’ll need a spacious bowl for combining the dry ingredients and later, for mixing the wet and dry components. A larger bowl allows for easier sifting and prevents flour from scattering everywhere.
- Stand Mixer with Paddle Attachment: While mixing by hand is possible, a stand mixer is highly recommended for achieving the desired creamy consistency when beating the eggs and sugar. The paddle attachment is key here, as it incorporates air without over-developing gluten, leading to those signature crinkly tops. A whisk attachment might incorporate too much air, resulting in a cakier texture, so stick with the paddle. If you don’t have a stand mixer, a hand mixer will also work, but be prepared for a slightly longer mixing time.
- Medium Cookie Scoop: This is a secret weapon for consistent cookie size and even baking. A scoop ensures each cookie is uniformly portioned, preventing some from burning while others are underbaked. Alternatively, a piping bag can be used for a more uniform and elegant shape, but a scoop is simpler and perfectly effective.
- Fine-Mesh Sieve: Although not listed, a sieve is highly recommended for sifting your flour and cocoa powder. This step is vital for removing lumps and aerating the dry ingredients, resulting in a smoother batter and a more tender, even-textured cookie.
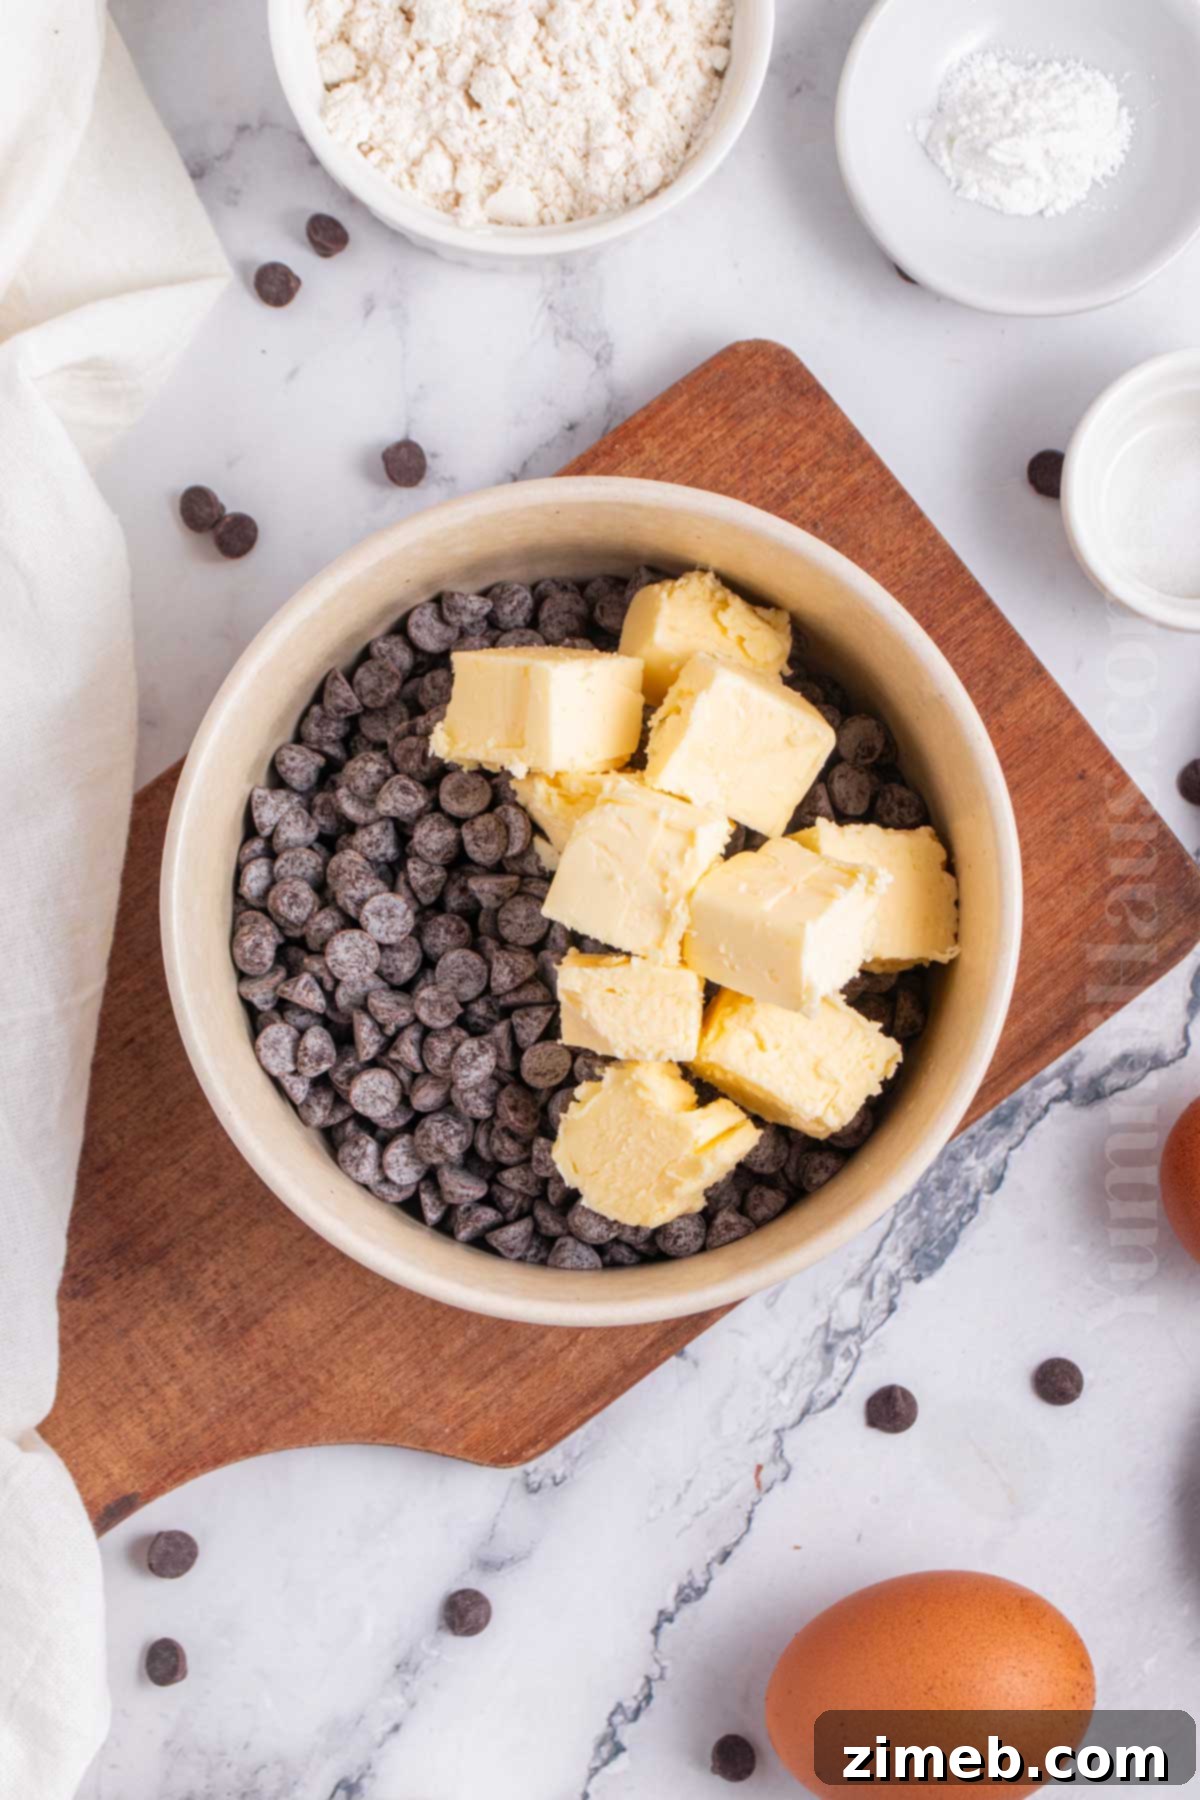
Mastering the Art of Brownie Cookies: Step-by-Step Guide
Creating these delightful brownie cookies is a straightforward process, broken down into a few key stages. You’ll begin by gently melting the chocolate and butter, then preparing your dry ingredients in a separate bowl. The magic truly happens when you whip the eggs and sugar to a creamy consistency, incorporate the vanilla, and then carefully combine everything to form your rich cookie batter. Finally, portion and bake to perfection.
1: Melt The Chocolate and Butter
This initial step is crucial for establishing the rich, fudgy foundation of your brownie cookies. Proper melting ensures a smooth, homogeneous chocolate mixture that will seamlessly integrate into the batter.
- Preheat your oven and prepare your baking sheets: Begin by preheating your oven to 350°F (175°C). While the oven heats, line one or more cookie sheets with parchment paper or silicone baking mats. This step is essential for preventing sticking and ensuring even baking, as well as easy removal of your finished cookies. Set the prepared sheets aside.
- Combine and melt chocolate and butter: In a microwave-safe bowl, combine your chopped semi-sweet chocolate bar with the unsalted butter. For the best results and to prevent scorching, microwave the mixture in short bursts, typically 30-second increments. After each increment, remove the bowl and stir the mixture thoroughly. Continue this process until the chocolate is fully melted and smoothly combined with the butter, creating a glossy, uniform mixture. Chopping the butter into smaller cubes will help it melt faster and more evenly.
- Alternative Melting Method (Double-Boiler): If you prefer, or if you don’t have a microwave, you can use a double-boiler method. Place the chocolate and butter in a heatproof bowl set over a saucepan of simmering water, ensuring the bottom of the bowl does not touch the water. Stir gently until melted and smooth. This method offers very gentle, controlled melting.
- Cool the mixture: Once melted, set the chocolate and butter mixture aside to cool slightly. It’s important that this mixture isn’t too hot when you incorporate it with the eggs in a later step, as excessive heat can scramble the eggs. Allow it to cool to just warm, or even room temperature if time permits, but ensure it doesn’t solidify.
2: Prepare the Brownie Cookie Dough (Batter)
The creation of the dough is where the texture of your brownie cookies truly takes shape. Precision in mixing will ensure that desirable fudgy center and crinkly top.
- Sift dry ingredients: In a large separate bowl, sift together the all-purpose flour, unsweetened cocoa powder, baking powder, and salt. Sifting is a critical step as it removes any lumps, aerates the ingredients, and ensures they are evenly distributed, contributing to a lighter, more uniform cookie texture. Once sifted, set this bowl aside.
- Cream eggs and sugar: In the bowl of a stand mixer fitted with the paddle attachment, or using a hand mixer, beat the room temperature eggs with the granulated sugar. Beat on medium-high speed for a surprisingly long time – about 5-7 minutes. This extended beating time is essential; it incorporates a significant amount of air into the mixture, which is key to achieving that beautiful, shiny, crackly top on your brownie cookies and contributes to their overall chewiness. The mixture should become very light, pale, and creamy, almost like a thick mousse.
- Mix in vanilla extract: Once the egg and sugar mixture is light and fluffy, reduce the mixer speed to low and add the vanilla extract. Mix just until it’s fully incorporated.
- Slowly incorporate cooled chocolate mixture: With the mixer still on low speed, gradually pour the cooled (but still liquid) chocolate and butter mixture into the egg mixture. Stream it in slowly and steadily. Be extremely careful to ensure the chocolate mixture is not too hot, as adding hot liquid to the beaten eggs can cause them to scramble, which will ruin the texture of your cookies. Mix until just combined and streak-free.
- Add dry ingredients: Turn the mixer off. Add the sifted dry ingredients to the bowl with the wet mixture. Mix on the lowest speed possible, or even by hand, until the dry ingredients are *just* incorporated. Do not overmix! Overmixing can develop the gluten in the flour too much, leading to tough, cakey cookies instead of fudgy ones. Mix until no streaks of flour are visible, and then stop.
- Ensure proper mixing for texture: While the instruction states to mix until just combined, the original also mentions “Proper mixing is the key to getting airy, soft cookies, so mix for a bit longer if you usually would.” This might seem contradictory to the “do not overmix” advice. The nuance is in the *initial* beating of eggs and sugar (where you beat for a long time) versus *after* adding flour (where you mix minimally). For the best results, beat eggs/sugar thoroughly, then gently fold in flour until just combined.
3: Portion Cookies & Bake to Perfection
The final steps involve preparing your cookie dough for baking and ensuring they are cooked just right to achieve that ideal fudgy center and crisp edge.
- Portion the dough: Using a medium cookie scoop (about 1.5-2 tablespoons), scoop even portions of the brownie cookie dough onto your prepared baking sheet. It’s important to space the dough mounds approximately 1 ½ inches apart to allow for proper spreading during baking without the cookies merging into one another.
- Bake to a fudgy perfection: Transfer the baking sheet to your preheated oven. Bake the brownie cookies for 6-8 minutes. The key sign of readiness is when you see distinct cracks appearing on their tops. At this point, the cookies will still appear very soft and slightly underbaked in the center – this is exactly what you want for that coveted fudgy interior. If you prefer a slightly cakier cookie, you can extend the baking time by an additional 2-4 minutes, but be very cautious not to overbake. Overbaking will result in dry, hard cookies that lose their fudginess.
- Cool completely: Once baked, remove the cookie sheet from the oven. Resist the temptation to move them immediately. Allow the cookies to cool completely on the baking sheet or transfer them gently to a wire rack. They will be very delicate and soft when hot, but as they cool, they will firm up and develop their characteristic chewy texture and crisp edges.
- Serve and enjoy: These brownie cookies are best enjoyed slightly warm with a tall glass of cold milk. For an extra indulgent treat, serve them with a scoop of your favorite vanilla bean ice cream, allowing the warmth of the cookie to slightly melt the ice cream for a heavenly experience.
Storing Your Delicious Brownie Cookies
Proper storage ensures your homemade brownie cookies remain fresh and delightful for as long as possible. Here are the best ways to keep them tasting their best:
- At Room Temperature: To maintain their optimal texture and prevent them from drying out, store leftover baked brownie cookies in an airtight container at room temperature for up to 3 days. A clever trick to keep them extra soft and moist is to place a half-slice of white bread inside the container with the cookies. The bread will absorb any excess moisture, keeping the cookies perfectly chewy.
- In the Refrigerator: For extended freshness, transfer your cooled brownie cookies to an airtight container and store them in the refrigerator. They will remain delicious for up to 1 week. Note that refrigeration can slightly alter their texture, making them a bit firmer, but warming them gently in the microwave for a few seconds can bring back some of their original fudginess.
- Freezing Baked Brownie Cookies: Brownie cookies freeze exceptionally well! Once completely cooled, place them in a single layer on a baking sheet and freeze until solid (about 1-2 hours). Then, transfer the frozen cookies to a freezer-safe airtight container or heavy-duty freezer bag, separating layers with parchment paper to prevent sticking. They can be frozen for up to 1 month. Thaw them at room temperature or warm gently in the microwave.
- Freezing Unbaked Dough: For ultimate convenience, you can prepare the dough ahead of time and freeze it. Scoop the cookie dough into individual balls using your cookie scoop, then place them on a parchment-lined baking sheet. Freeze the dough balls until solid. Once firm, transfer them to a freezer-safe bag or container. This frozen dough can be stored for up to 3 months. When ready to bake, simply place the frozen dough balls on a prepared baking sheet and bake as directed, adding a minute or two to the baking time if necessary. This is perfect for fresh-baked cookies on demand!
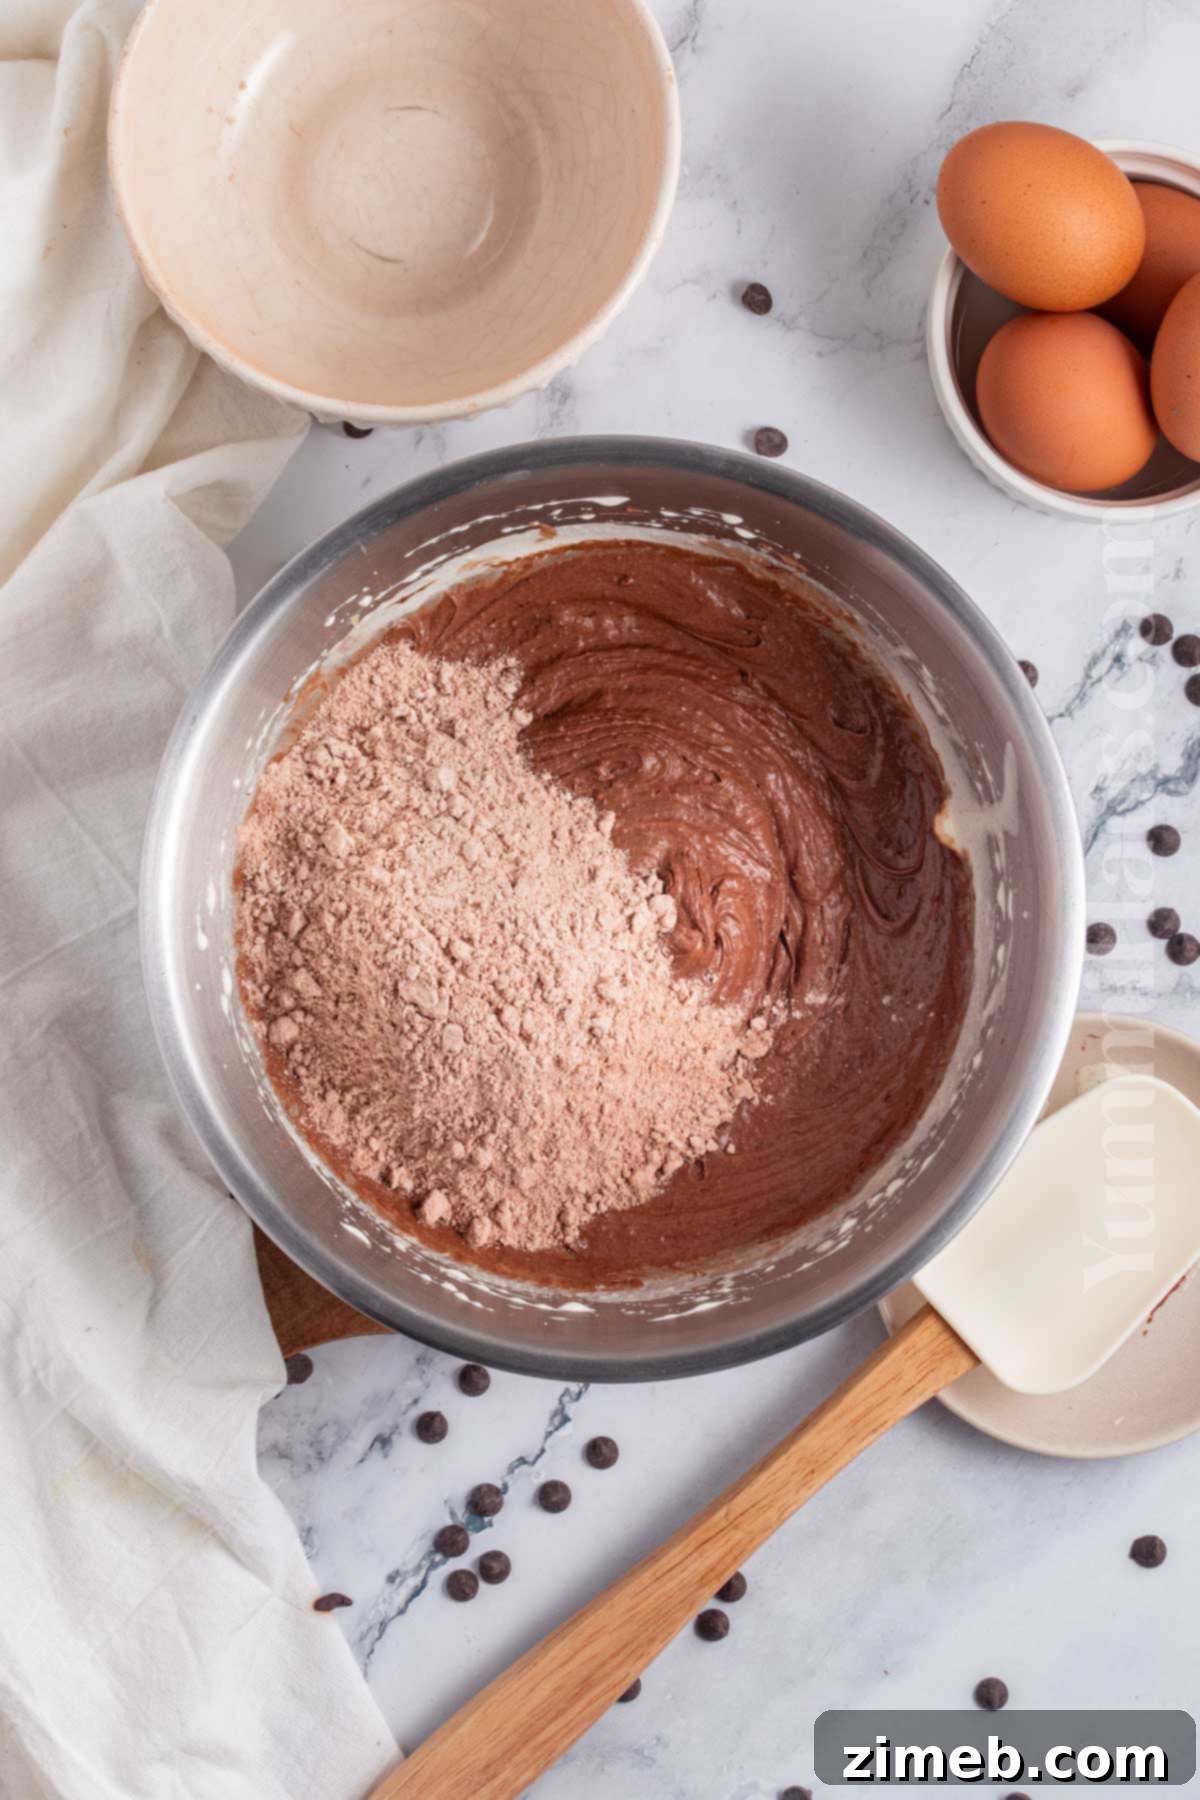
Creative Substitutions & Flavorful Variations
While the classic brownie cookie is a masterpiece on its own, don’t hesitate to experiment with these creative substitutions and delightful variations to customize them to your taste and elevate your baking game:
- Time-Saving Shortcut: Use a Brownie Mix: If you’re short on time but still crave that brownie cookie goodness, a high-quality boxed brownie mix can be a convenient shortcut. Follow the package directions for making brownies, but adjust the liquid slightly to achieve a cookie-dough consistency. You might need to add a bit more flour to make it scoopable. Then, proceed with portioning and baking as per this recipe’s instructions.
- For an Even Deeper Chocolate Flavor: To intensify the chocolate experience, consider adding 1-2 teaspoons of instant espresso powder or strong coffee powder to your dry ingredients. Coffee acts as a flavor enhancer for chocolate, making it taste even more profound without imparting a coffee flavor itself. Alternatively, swap out some or all of the semi-sweet chocolate for high-quality dark chocolate chips or a chopped dark chocolate bar.
- A Touch of Elegance: Flaky Sea Salt: A sprinkle of flaky sea salt on top of your brownie cookies just before baking or immediately after they come out of the oven can transform them. The salt crystals provide a delightful textural contrast and perfectly balance the sweetness of the chocolate, enhancing its depth and creating a gourmet finish.
- Exciting Add-ins for Texture and Flavor: Get creative with additions to your cookie dough!
- M&Ms: Add a colorful crunch and extra chocolate with your favorite M&Ms.
- Chopped Nuts: Walnuts, pecans, or almonds provide a lovely nutty flavor and satisfying crunch.
- Butterscotch Chips: For a different kind of sweet, creamy note.
- Coconut Extract and Flakes: Introduce a tropical twist by adding a teaspoon of coconut extract and ½ cup of shredded coconut flakes.
- Oatmeal: For a heartier texture and subtle chew, add ½ cup of quick-cooking oats.
- White Chocolate Chips: A classic pairing with dark chocolate, adding creamy sweetness.
- Peanut Butter Chips: For a delicious chocolate-peanut butter combination.
Aim for about ½ to ¾ cup of total add-ins to avoid overwhelming the cookie.
- Decadent Toppings: Elevate your baked brownie cookies with these delicious finishing touches:
- Powdered Sugar: A simple dusting of powdered sugar adds a delicate sweetness and a beautiful visual appeal.
- Chocolate Glaze Topping: Drizzle with a homemade chocolate ganache or a simple glaze made from melted chocolate and a touch of cream or milk.
- Mini Chocolate Chips: Press a few mini chocolate chips onto the tops of the warm cookies immediately after baking for an extra chocolatey look.
- Adjusting for Desired Texture: You can subtly alter the texture of your brownie cookies:
- Crispier Edges: A tiny pinch (about ¼ teaspoon) of baking soda can help create crispier edges by promoting more spread.
- Chewier Cookies: Substituting a portion of the granulated sugar (e.g., ¼ cup) with brown sugar will introduce molasses, resulting in a moister, chewier cookie thanks to its hygroscopic properties.
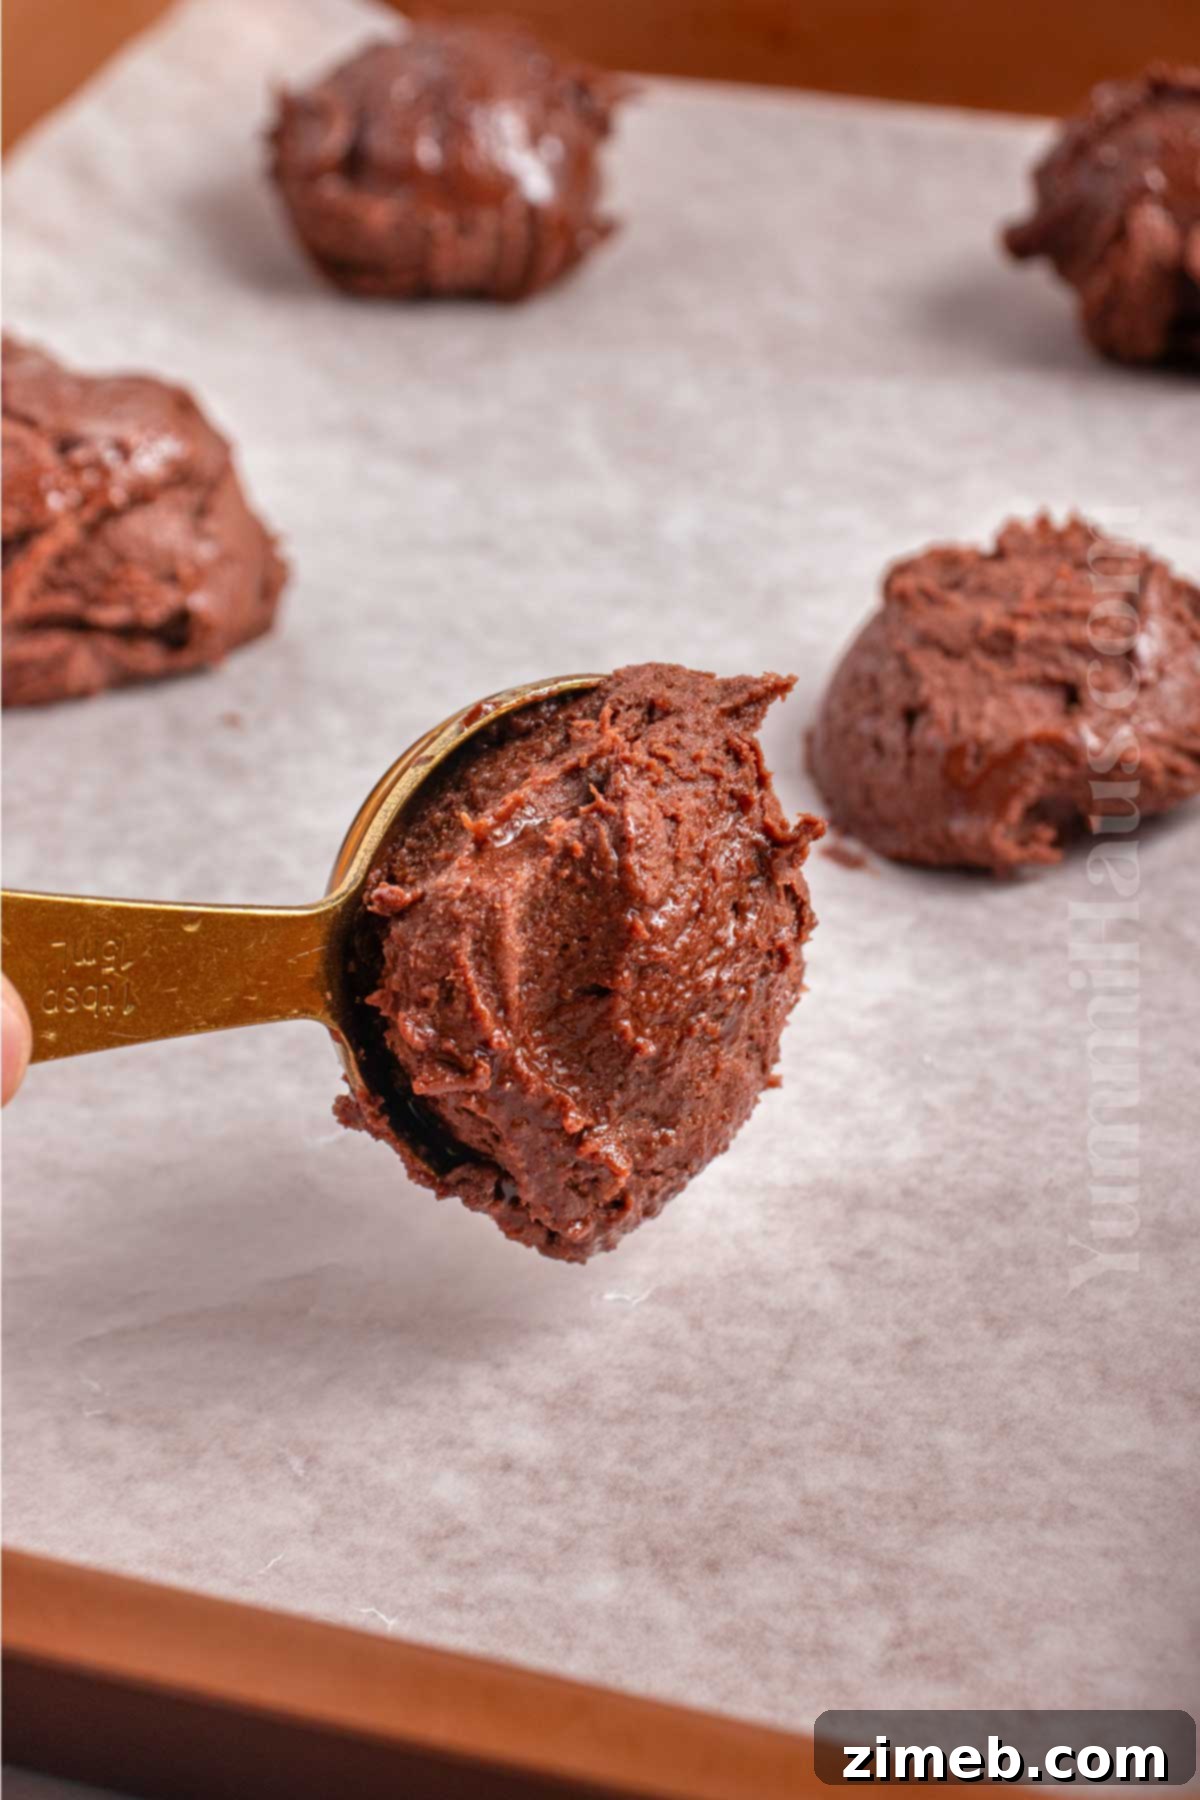
Expert Tips for Baking the Best Brownie Cookies
Achieving bakery-quality brownie cookies at home is entirely possible with these essential expert tips. Pay close attention to these details for truly exceptional results:
- Accurate Flour Measurement is Key: Always measure your flour by spooning it into your measuring cup and then leveling it off with the back of a knife. Never scoop flour directly from the bag, as this compacts it, leading to too much flour and a dry, dense cookie. Precise measurement ensures the perfect texture.
- Room Temperature Eggs for Superior Batter: Ensure your eggs are at room temperature before you begin. Room temperature eggs emulsify much better with other ingredients, especially fats like butter and melted chocolate. This creates a smoother, more uniform batter and ultimately contributes to an even texture throughout your baked cookies, preventing a crumbly or inconsistent result.
- Gentle Chocolate Melting Prevents Disaster: When melting chocolate (and butter) in the microwave, always keep the temperature low and use short intervals (e.g., 30 seconds at a time). Overheating chocolate can cause it to “seize” – becoming thick, grainy, and unusable – or even burn, imparting a bitter taste. Stir thoroughly after each interval. If using a double boiler, ensure the water is simmering gently and does not touch the bottom of the bowl.
- Cool Chocolate Before Combining with Eggs: After melting, allow the chocolate and butter mixture to cool slightly. It should be warm to the touch, but not hot. Adding hot chocolate to your beaten egg and sugar mixture can cook the eggs, resulting in scrambled egg bits in your batter and a ruined texture. Patience here is paramount.
- Avoid Over-Chilling the Melted Chocolate: While you want the melted chocolate to cool, don’t let it sit too long until it becomes completely cold or solidifies. If it becomes too firm, it won’t mix smoothly into the batter, negatively affecting the consistency and potentially leading to lumps. Aim for a warm-to-the-touch, still liquid state.
- The Power of Chilling Dough (Optional but Recommended): Although this recipe doesn’t strictly require chilling the cookie dough, a brief chill of 15-20 minutes in the refrigerator can be beneficial. Chilling allows the butter to re-solidify slightly and the flour to fully hydrate, which helps the cookies hold their shape better during baking and can lead to thicker cookies. It also gives the chocolate and butter flavors a little more time to meld and deepen.
- Don’t Overmix the Flour: Once you add the dry ingredients to the wet mixture, mix only until they are just combined and no streaks of flour remain. Overmixing develops gluten, which can lead to tough, chewy (in a bad way) or cakey cookies rather than the desired fudgy texture.
- Achieving the Crinkly Tops: The key to those beautiful, shiny, crinkly tops is the vigorous beating of eggs and sugar in the initial steps. This incorporates air, which then escapes during baking, causing the surface to crackle. Using good quality chocolate and not overbaking also contribute to this effect.
Troubleshooting Common Brownie Cookie Problems
Even with a great recipe, baking can sometimes present unexpected challenges. Here are some common issues you might encounter with brownie cookies and how to fix them:
- My cookies are too flat and spread too much. This can happen if your butter was too warm when added, or if your oven temperature is too low. Ensure your butter is just melted and cooled slightly, not hot. Also, make sure your oven thermometer is accurate. Chilling the dough for 15-30 minutes before baking can also help them hold their shape.
- My cookies are too cakey, not fudgy. Overmixing the flour is a common culprit here, as it develops too much gluten. Ensure you mix only until the flour streaks disappear. Also, overbaking can dry them out, making them cakey. Pull them out of the oven when they still look slightly underbaked in the center. Using high-quality chocolate bars (not chips) and butter (not oil) also contributes to fudginess.
- My cookies don’t have crinkly tops. The characteristic crinkly top comes from beating the eggs and sugar sufficiently to incorporate air, and from the sugar dissolving. If you didn’t beat the mixture long enough (5-7 minutes until pale and creamy), you might miss out on this. Also, some ovens or dough consistencies can affect the crackle.
- My cookies are too hard or dry. This is almost always a sign of overbaking. Brownie cookies should be removed from the oven when they look soft in the middle. They will continue to set as they cool on the baking sheet. A little bit of brown sugar in the dough (as a variation) can also help retain moisture.
- The chocolate seized when melting. This occurs when chocolate comes into contact with even a tiny amount of water or is overheated. Ensure your bowl and utensils are completely dry. When melting, go slowly in short bursts (microwave) or ensure no steam/water gets into the bowl (double boiler). If it seizes, sometimes adding a teaspoon of hot oil or melted butter can rescue it, but often it’s best to start over.
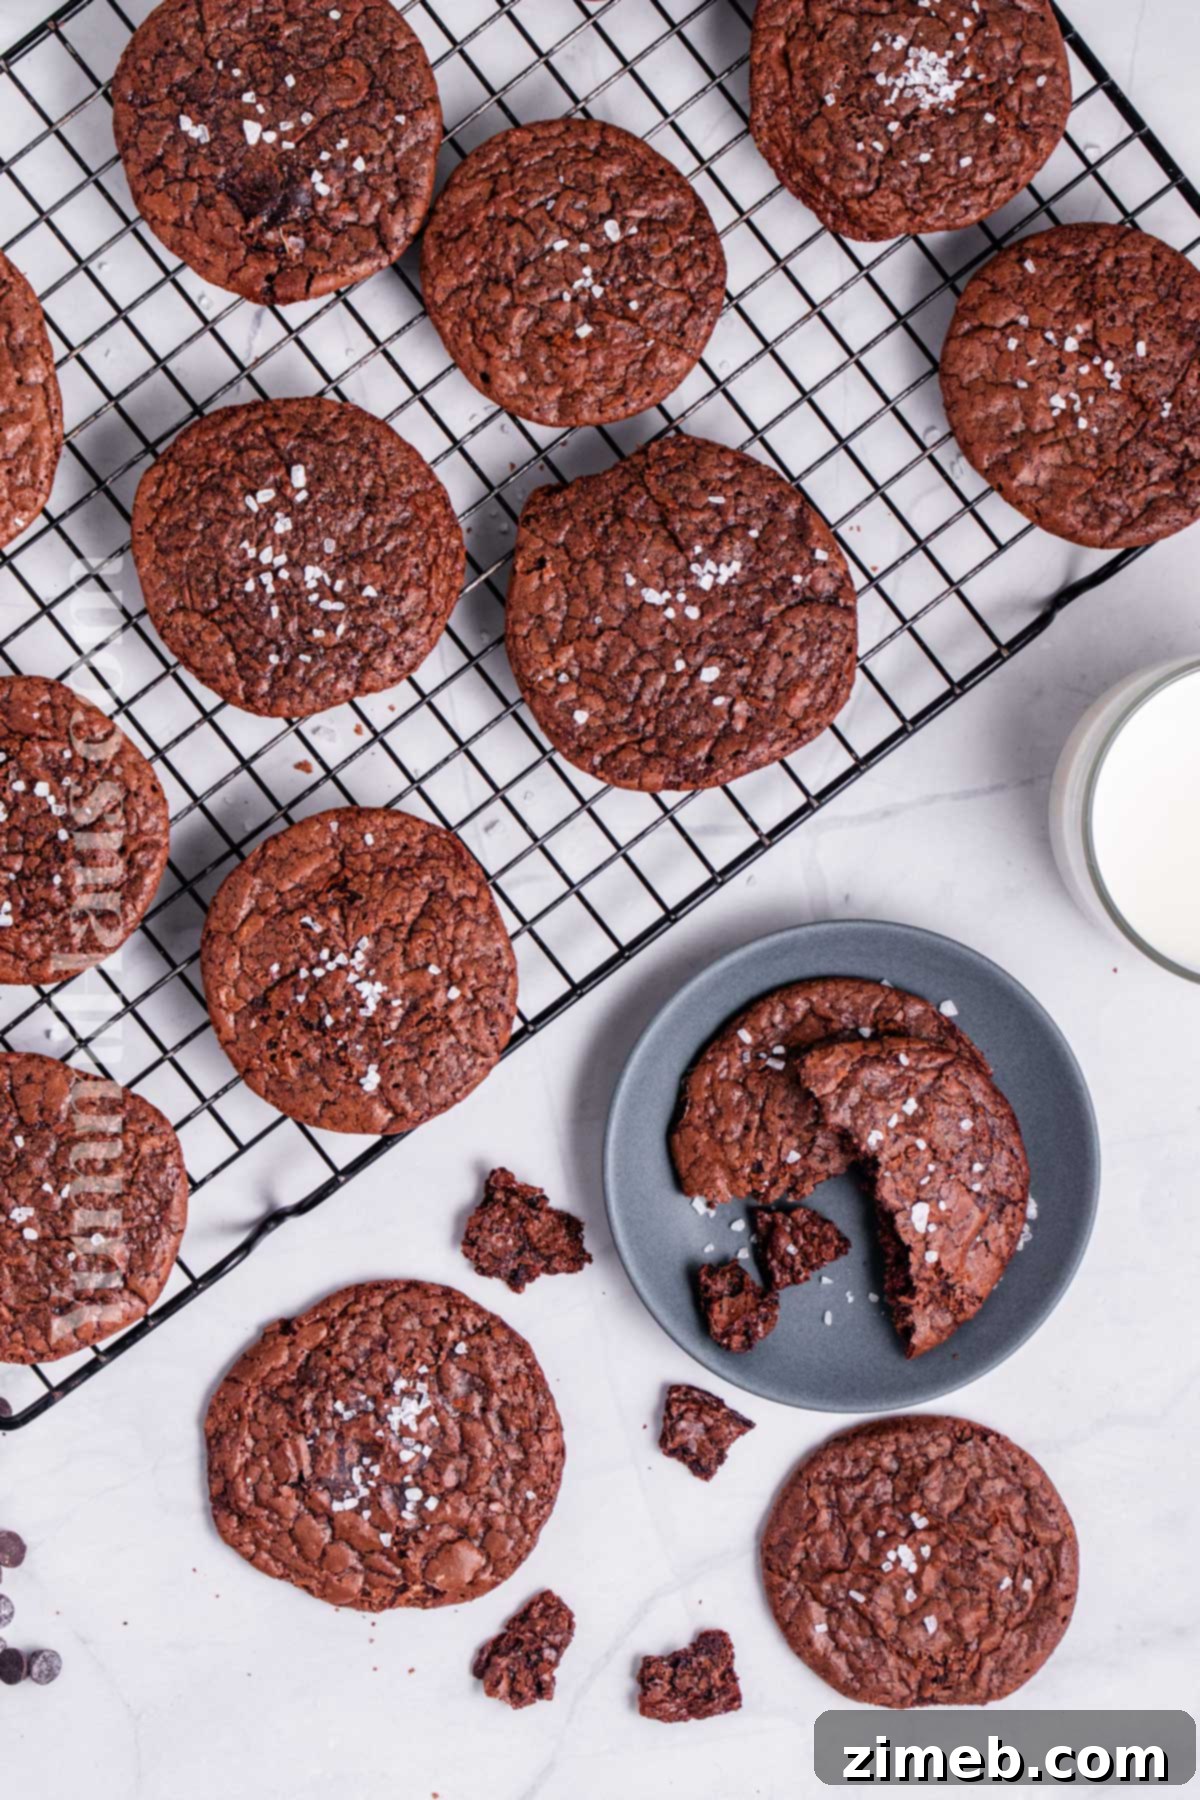
If you love this fantastic brownie cookie recipe, you’re definitely going to love these other delicious cookie recipes too. Each offers a unique twist on classic favorites, promising more delightful baking adventures. Please click each link below to find the easy, printable recipe!
Check out this recipe

Check out this recipe
Check out this recipe

Check out this recipe

Check out this recipe

More Irresistible Brownie & Cookie Inspired Recipes
If you can’t get enough of the rich, chocolatey goodness, explore these other fantastic brownie and cookie-inspired recipes that promise even more indulgence:
- Cosmic Brownie Cookies: A nostalgic treat reminiscent of childhood favorites, with colorful candies on top.
- Chewy Patriotic Brownie Cookies: Festive and delicious, perfect for national holidays with their red, white, and blue flair.
- Chocolate Pretzel Brownie Cookies: The ultimate sweet and salty combination, offering a delightful crunch with every bite.
- Fudgy Brownie Cookies: For those who crave maximum fudginess, these cookies deliver an extra dose of gooey chocolate bliss.
CONNECT WITH YUMMI HAUS!
Be sure to follow me on my social media, so you never miss a post!
Substack, FB, Pinterest, IG, Email Subscription

Rate this Recipe
Brownie Cookies
Ingredients
- 8 oz semi-sweet chocolate bar chopped
- ⅓ cup butter – unsalted
- ¾ cup all-purpose flour + ⅛ cup – spooned and leveled
- ⅛ cup all-purpose flour
- 2 tbsp cocoa powder
- ½ tsp baking powder
- ¼ tsp salt
- 1 cup granulated sugar
- 2 eggs at room temperature
- 1 tsp vanilla extract
Instructions
-
Preheat the oven to 350F (175°C).
-
Line a baking sheet with parchment paper or a silicone mat. Set aside.
-
Combine the chopped chocolate and butter in a microwave-safe bowl. Microwave in 30-second increments, stirring after each, until fully melted and smooth. Alternatively, use a double-boiler. Allow the mixture to cool slightly until just warm, ensuring it’s not hot enough to scramble eggs.
-
In a separate large bowl, sift together the all-purpose flour, cocoa powder, baking powder, and salt. Set aside.
-
In the bowl of a stand mixer with the paddle attachment (or using a hand mixer), beat the room temperature eggs with the granulated sugar on medium-high speed for 5-7 minutes, until the mixture is very light, pale, and creamy. This is crucial for the crinkly tops.
-
Reduce mixer speed to low and mix in the vanilla extract until just combined.
-
Slowly pour the cooled melted chocolate mixture into the egg mixture on low speed, mixing until just combined and smooth. Be sure the chocolate isn’t too hot.
-
Add the sifted dry ingredients to the wet mixture. Mix on the lowest speed until just combined and no streaks of flour remain. Do not overmix.
-
Using a medium cookie scoop, drop portions of dough onto the prepared baking sheet, spacing them 1 ½ inches apart.
-
Bake for 6-8 minutes, or until you see cracks forming on top. The centers should still appear soft and slightly underbaked for a fudgy texture. For cakier cookies, bake an additional 2-4 minutes, but be careful not to overbake.
-
Let the cookies cool completely on the baking sheet before transferring. They will firm up significantly as they cool.
Notes
When melting chocolate in the microwave, always maintain a low temperature and use short intervals. This method is essential to prevent the chocolate from seizing (becoming stiff and grainy) or burning, which can impart a bitter taste. Furthermore, ensure the melted chocolate cools slightly before you add it to the egg mixture. This precaution is vital to avoid scrambling the eggs, which would compromise the cookie’s texture.
Nutrition
Nutritional information for the recipe is provided as a courtesy and is approximate. Please double-check with your own dietary calculator for the best accuracy. We at Yummi Haus cannot guarantee the accuracy of the nutritional information given for any recipe on this site.