
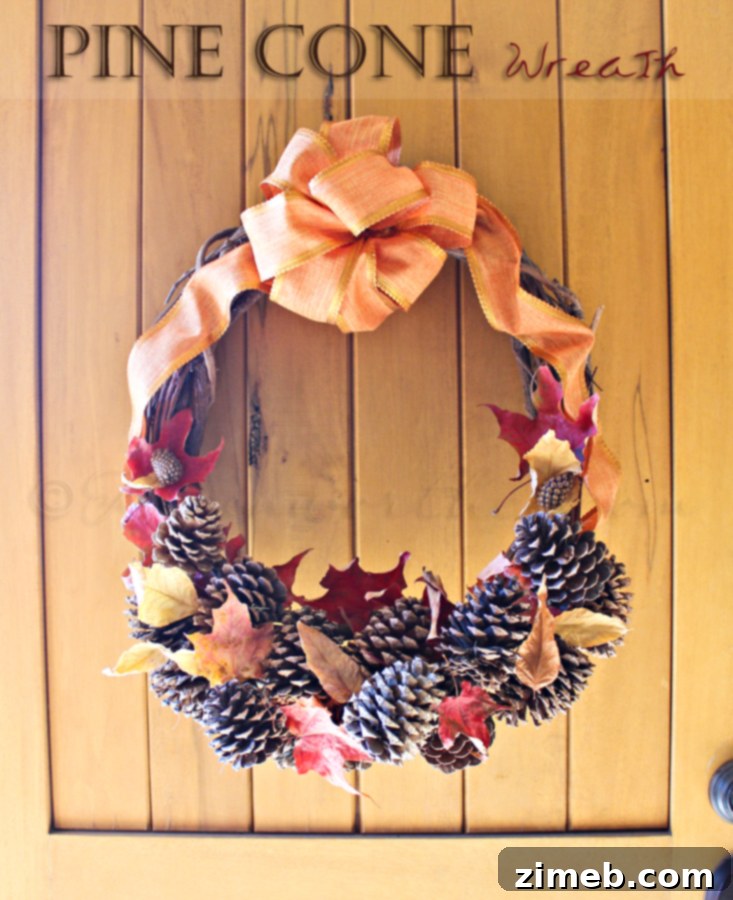
Embracing Autumn’s Bounty: Crafting a Stunning DIY Pine Cone & Fall Leaf Wreath
The crisp air, the vibrant hues of crimson and gold, and the unmistakable scent of fallen leaves – autumn is truly a magical season, especially here in North Idaho. This past week, we fully immersed ourselves in its splendor, venturing out to witness the breathtaking display of fall colors that our surroundings generously offer. It wasn’t just a feast for the eyes; it was an opportunity to connect with nature, gather its treasures, and bring a piece of that beauty home. We collected an abundance of colorful leaves and sturdy pine cones, each one a testament to the season’s charm. For those of you who have followed my journey for a while, you’ll remember the longing I felt last year when fall colors were scarce in my location. My wonderful blogging friends even had to mail me boxes of leaves to fulfill my autumn decorating desires! What a difference a year makes; I’m incredibly thrilled to say that I no longer have to resort to such measures. My home is now surrounded by the very elements I cherish. My husband, ever curious, kept asking what grand plan I had for all these natural treasures once they filled our baskets. My answer was simple and immediate: a beautiful, handcrafted fall wreath, of course!
DIY Pine Cone & Fall Leaf Wreath: A Timeless Autumn Project
Creating your own fall decor is not only deeply satisfying but also allows you to infuse your home with a personal touch that store-bought items simply can’t replicate. This pine cone and fall leaf wreath project is surprisingly simple, requiring just a few basic materials and a dash of creativity. It’s an ideal project for a cozy afternoon, allowing you to reminisce about your nature walk while transforming your collected bounty into a welcoming display for your front door. This wreath will become a cherished part of your seasonal decor, bringing the rustic elegance of the outdoors inside.

The sun was absolutely gorgeous during our crafting session, casting intentional flares that added a magical glow to the entire process. It’s these small, perfect moments that truly make DIY projects special and memorable, infusing each creation with a bit of nature’s own sparkle.
Essential Materials for Your Fall Wreath:
- Grapevine Wreath Base: A sturdy foundation is key. You can purchase a new one or repurpose an unused grapevine wreath you might already have.
- Collected Fall Leaves: Aim for a variety of colors and sizes. Ensure they are dried but still flexible enough to be manipulated without crumbling.
- Assorted Pine Cones: Large, small, open, or closed – a mix adds wonderful texture.
- Fall-Themed Ribbon: Burlap, plaid, deep red, burnt orange, or forest green ribbons work beautifully. Choose a wired ribbon for easy shaping.
- Hot Glue Gun & Glue Sticks: Your essential tools for secure attachment.
- Scissors: For cutting ribbon and any other minor adjustments.
- Optional: Berries, small twigs, acorns, or other natural accents for added flair.
Crafting Your Autumn Masterpiece: A Simple Step-by-Step Guide
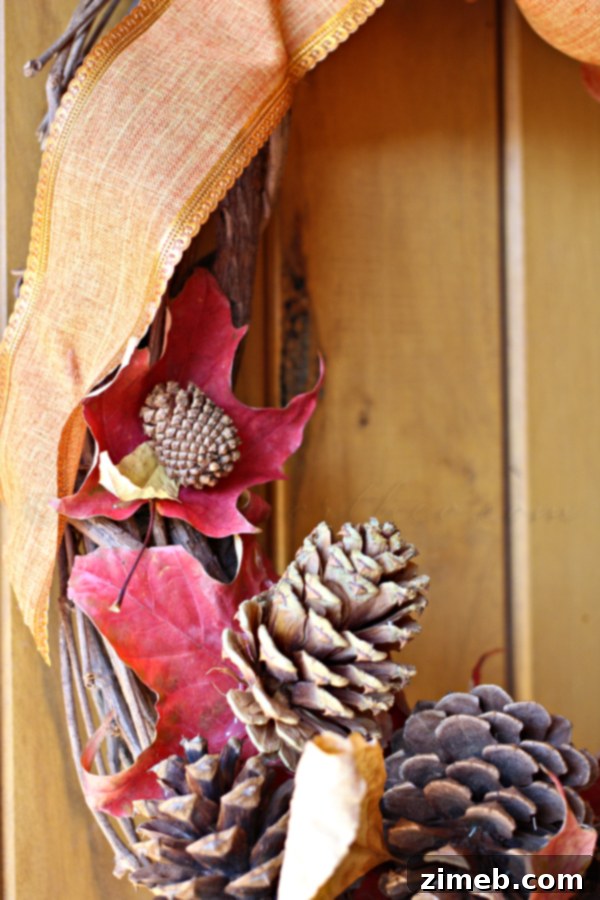
To begin this delightful project, I simply gathered all my natural treasures: the vibrant assortment of leaves and varied pine cones, along with a roll of rustic ribbon and my trusty hot glue gun. For the base, I repurposed an unused grapevine wreath that I already had on hand. This is the inherent beauty and sustainability of DIY – often, you can breathe new life into existing items, making the project even more economical and environmentally conscious.
- Prepare Your Workspace and Visualize: Lay your grapevine wreath on a clean, flat surface, preferably covered to protect it from glue drips. Take a moment to arrange your collected leaves and pine cones around the wreath base. This pre-planning helps you visualize your design and decide on the density and pattern you desire. Do you want a full, lush wreath, or a sparser, more minimalist look? Consider where you want clusters of color or texture.
- Layering the Fall Leaves: This step can be the most delicate, as you want to integrate the beautiful fall leaves without crunching or damaging their fragile structures. Start by applying a small dot of hot glue to the stem or base of each leaf. Gently tuck and press the leaves onto the grapevine wreath, following its natural curve. Overlap them slightly to create a fuller, more organic appearance, ensuring the hot glue secures them firmly. Experiment with different leaf sizes, shapes, and colors to add dynamic depth and visual interest. The vibrant pops of color from the leaves are what truly bring the wreath to life, celebrating autumn’s diverse palette.
- Incorporating the Pine Cones: Once you have a good base of leaves established, it’s time to strategically place your pine cones. These natural elements add wonderful texture, dimension, and a quintessential rustic charm to your wreath. Apply a generous amount of hot glue to the base of each pine cone and press it firmly into position on the grapevine wreath, holding it in place for a few seconds until the glue cools and sets. Distribute them evenly, or cluster them in groups of two or three for visual impact. Don’t be afraid to tuck some deeper into the leaf layers for a more natural, embedded look.
- Adding Festive Ribbon Embellishments: After securing your leaves and pine cones, consider adding a festive ribbon to complete your autumn creation. You can craft a large, elaborate bow and attach it prominently at the top or bottom of the wreath, or weave smaller strips of ribbon subtly throughout the natural elements for delicate accents. Choose a ribbon that beautifully complements the fall colors you’ve used, perhaps a deep burgundy, a rich pumpkin orange, a classic plaid pattern, or a shimmering gold. The ribbon provides a lovely finishing touch and can be easily changed out for future seasons.
- Final Review and Touches: Step back and admire your handcrafted masterpiece! Rotate the wreath to ensure all elements are securely attached and that the design is balanced from all angles. Fill in any sparse areas with additional leaves, smaller acorns, or tiny berries if you wish to add more detail. Make any final adjustments to leaves or pine cones, pressing them down firmly to ensure they will withstand display.
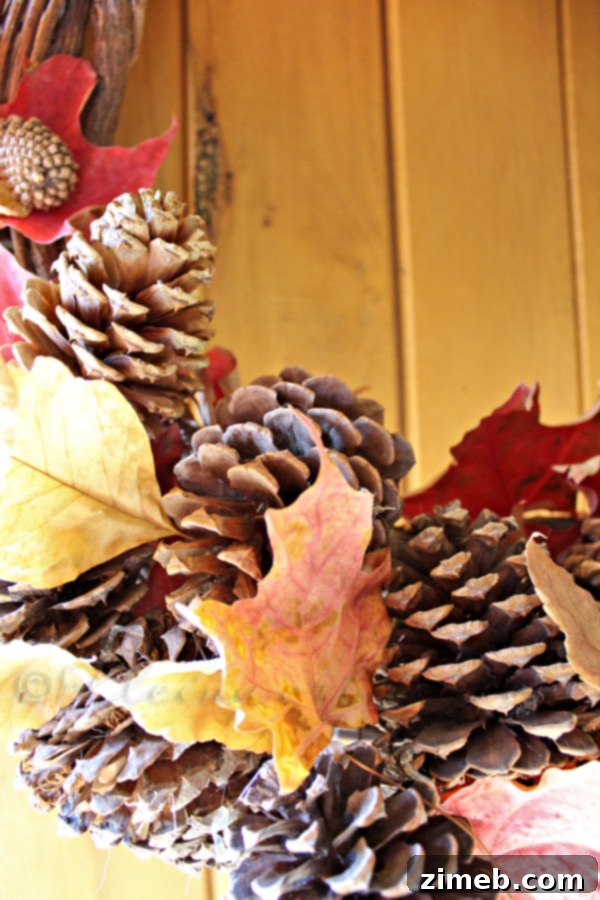
Integrating the leaves was indeed the trickiest part, as I aimed to preserve their natural shape and vibrant colors without crushing them. But the patience and effort were well worth it! I absolutely adore the lively pops of color they contribute, transforming a simple grapevine wreath into a dynamic display of autumnal beauty. Each carefully placed leaf tells a story of the season, creating a truly unique piece.
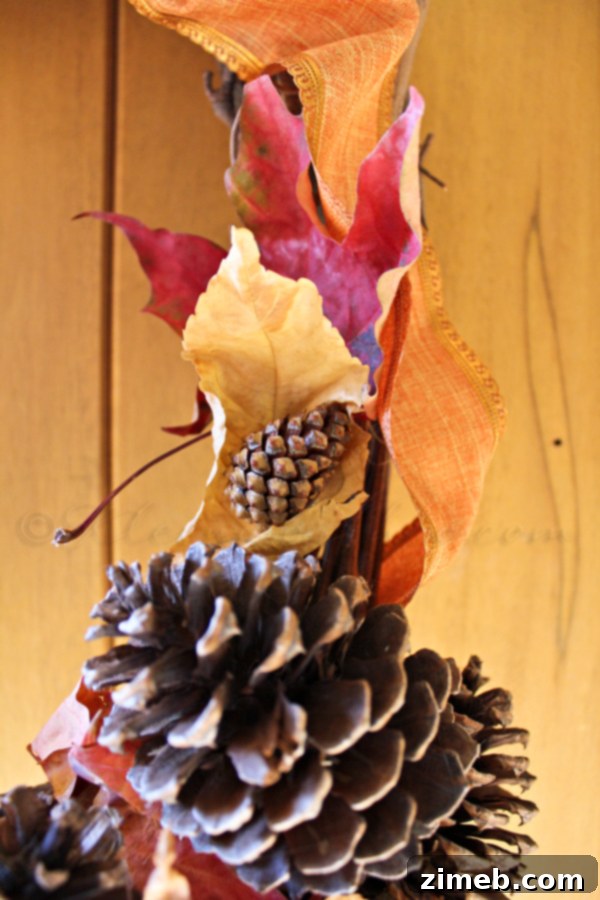
It fills me with such joy and a profound sense of accomplishment to know that I was able to take these simple, yet profoundly beautiful, abundant elements from my own backyard here in North Idaho and transform them into something so decorative and personal. This project truly embodies the spirit of local crafting and appreciating the natural world around us, turning common findings into cherished art.
Why a Fall Wreath is Essential for Your Thanksgiving Decor
As the autumn season deepens and the air grows cooler, our thoughts naturally turn to warmth, family, and gratitude. Thanksgiving is just around the corner, and nothing says “welcome home” quite like a festive wreath adorning your front door. It serves as a beautiful introduction to your home’s interior, setting a warm and inviting tone, and celebrating the abundance of the harvest season. This specific pine cone and leaf wreath, with its rich, natural textures and authentic fall colors, is the perfect accent to greet your Thanksgiving visitors, offering a heartfelt and homemade touch that speaks volumes.
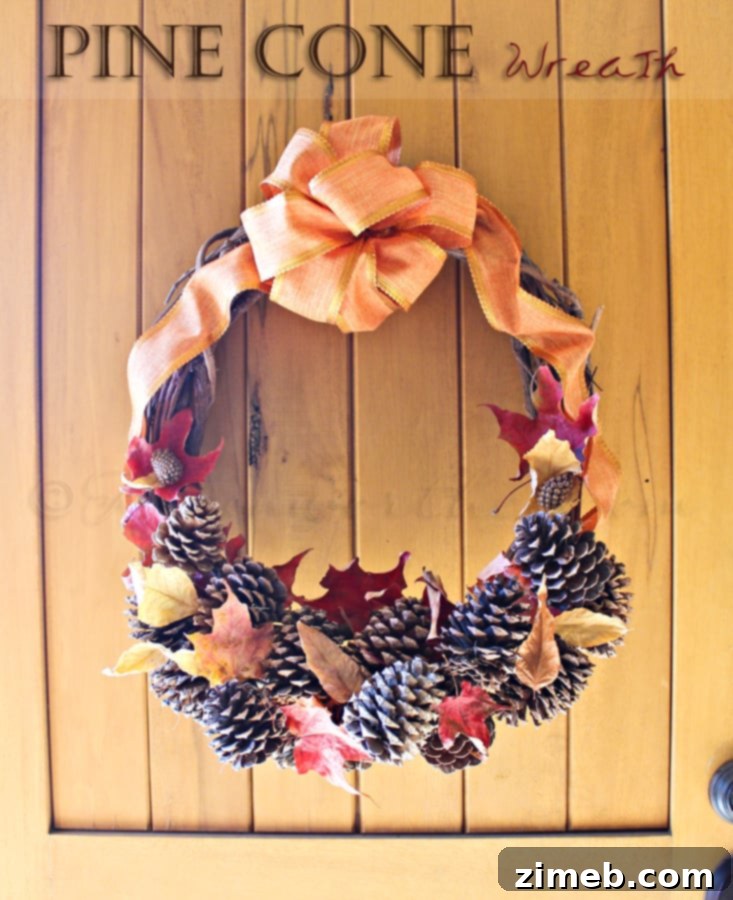
I absolutely love how this wreath encapsulates everything I adore about fall. It brings together the rustic charm of pine cones with the delicate beauty of vibrant leaves, creating a focal point that makes my front door truly pop with seasonal cheer. It’s more than just decor; it’s a heartfelt expression of the season’s magic and a warm invitation to all who approach.
Explore More DIY Fall Wreath Inspiration!
If you’re anything like me, one successful DIY project often sparks inspiration for another! If you’ve enjoyed crafting this pine cone and leaf wreath, you might be looking for more ways to bring autumn’s charm into your home. Wreaths are incredibly versatile and can be made from a myriad of natural and repurposed materials, offering endless creative possibilities. Here are a couple more unique fall wreath ideas from my collection that you might find equally delightful and inspiring for your next crafting adventure:
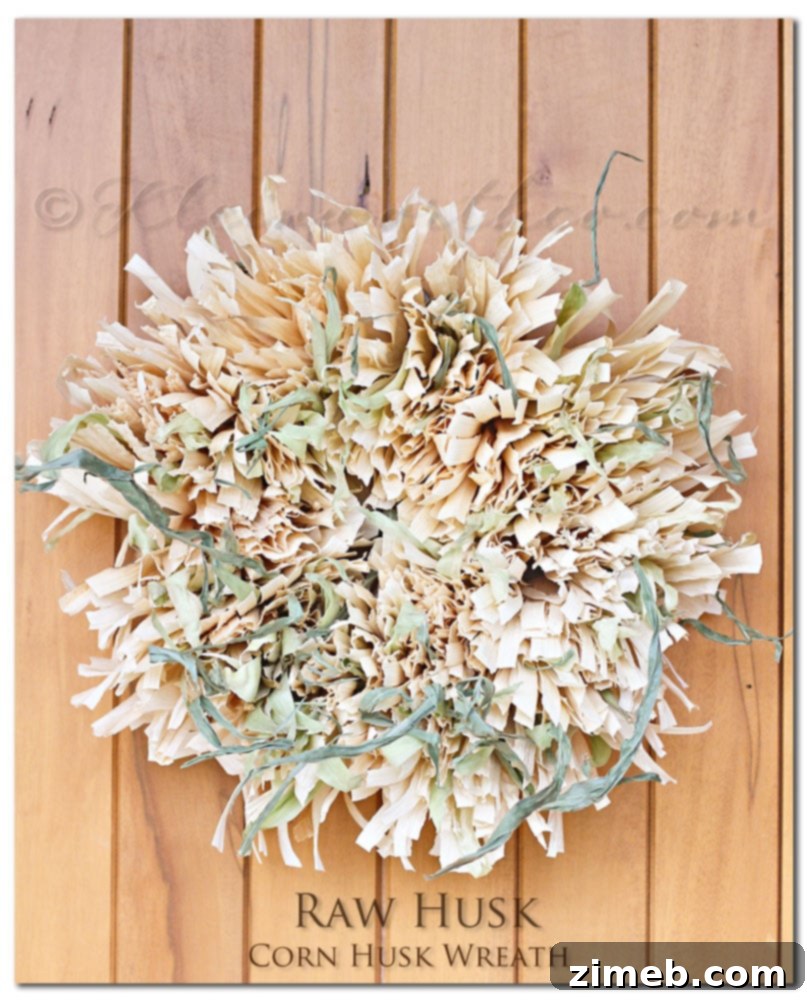
Crafting a Unique Raw Husk Corn Husk Wreath
For a truly rustic and organic look, this raw husk corn husk wreath is a fantastic and sustainable option. It cleverly utilizes a material often discarded, transforming it into a piece of art that speaks volumes about eco-friendly crafting. The natural textures and earthy, muted tones of corn husks create an understated elegance that complements any fall decor theme, adding a touch of farmhouse chic to your entryway.
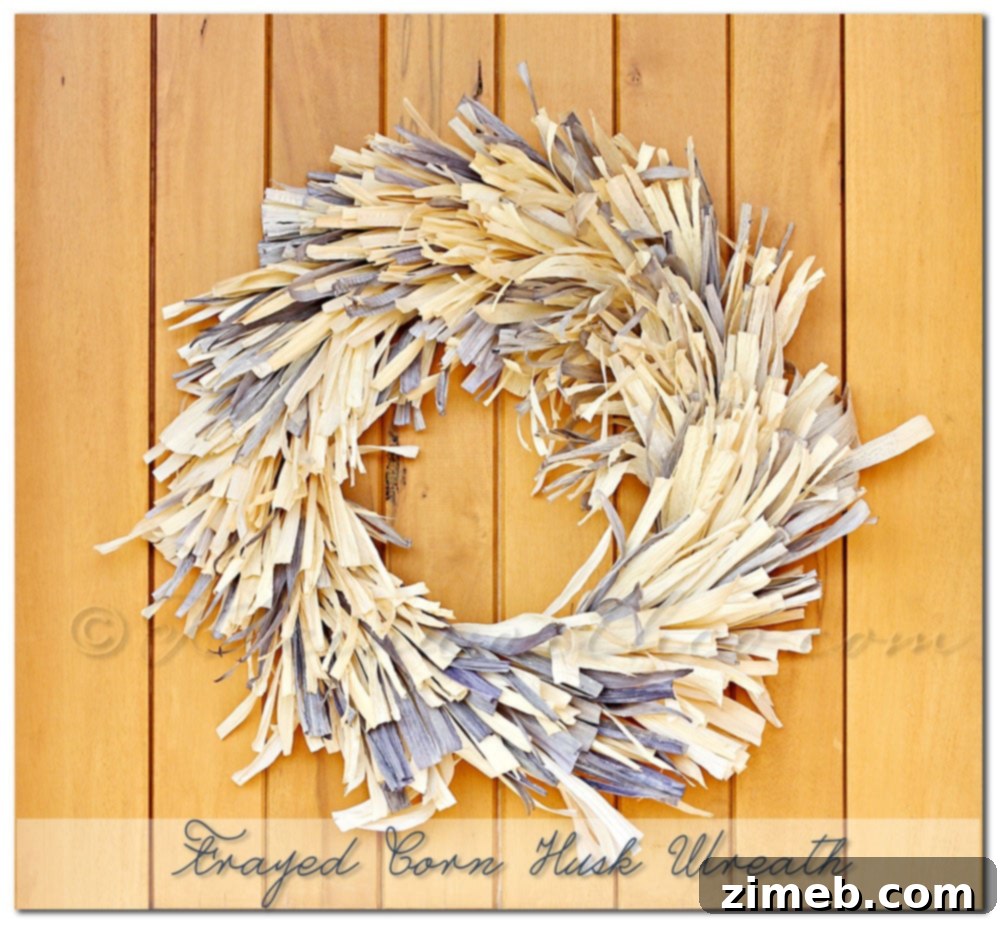
Discover the Beauty of a Frayed Corn Husk Wreath
Taking the corn husk concept a step further, the frayed corn husk wreath offers a distinct texture and visual appeal. By carefully fraying the husks, you achieve a softer, almost feathery look that adds beautiful depth and subtle movement to your wreath. This method creates a more refined yet still wonderfully natural aesthetic, perfect for those seeking a unique twist on traditional fall decor with an artistic edge.
Join Our Creative Community: The Weekly Photo Challenge – Project 52!
Now that you’ve seen what we’ve been up to with our autumnal crafts, I’d absolutely love to hear from you! What creative projects or memorable moments defined your past week? Did you embark on a rejuvenating nature walk, try a delightful new recipe, or perhaps craft something beautiful that brings joy to your home? Sharing our experiences enriches our community and inspires us all to explore new avenues of creativity. That’s why I’m excited to invite you to participate in our ongoing “Project 52” weekly photo challenge, a delightful way to connect and share!
Project 52 is a wonderful initiative designed to encourage mindful observation, consistent creativity, and community engagement throughout the year. It’s a simple concept that yields profound results: every week, we invite you to share a photograph (or a small collection of photos) that encapsulates a significant moment, a completed project, or an inspiring sight from your week. It’s a fantastic opportunity to showcase your unique perspective, find fresh ideas, and become a valued part of a supportive and encouraging network of creators.
How to Participate in Project 52:
- Share Your Weekly Moments: Post at least one photo (or as many as you like!) each week, typically on Mondays. These photos should capture something significant, beautiful, or inspiring from your past week – it could be a craft, a landscape, a delicious meal, or a moment of reflection.
- Include Our Link (Optional but Encouraged): While not strictly necessary for participation, including our Project 52 button or a simple text link in your blog post helps spread the word about our challenge and makes it easier for others to discover our vibrant community.
- Engage and Inspire Others: The heart and soul of Project 52 lie in community interaction! Please make an effort to visit some of the other participating blogs. Leave encouraging comments, offer constructive feedback, and share some love. It’s a fantastic way to discover new blogs, make creative connections, and grow your own network.
- Submit Your Direct URL: When you share your post, submit the direct URL of your specific blog post for the week – not just your homepage. This ensures that everyone can easily navigate directly to your unique contribution for that week’s challenge.
You can grab the Project 52 button HERE to proudly display on your post!
Don’t forget to come back and join us every Monday for Project 52. We eagerly await to see what wonderful creations and moments you’ve been capturing!
To see where I am linking today and explore more inspiration, you can visit HERE.
Stay Connected: Join Our Creative Community!
Enjoying our DIY projects, seasonal inspiration, and community challenges? Don’t miss out on future tutorials, exclusive crafting tips, and exciting community updates! Join our mailing list today to receive all the latest creative content directly in your inbox. We promise to share only inspiring ideas, helpful resources, and heartwarming stories, ensuring your inbox remains clutter-free and brimming with crafting joy.
Thank you for joining me on this creative journey today. I truly hope this DIY pine cone and fall leaf wreath tutorial has inspired you to gather nature’s treasures and infuse your home with the warmth, beauty, and heartfelt charm of autumn. Whether you’re diligently preparing for Thanksgiving celebrations or simply embracing the serene magic of the season, a handmade wreath is a wonderful and personal way to express your creativity and welcome the changing landscape. Happy crafting, and may your home be filled with autumnal delights!