
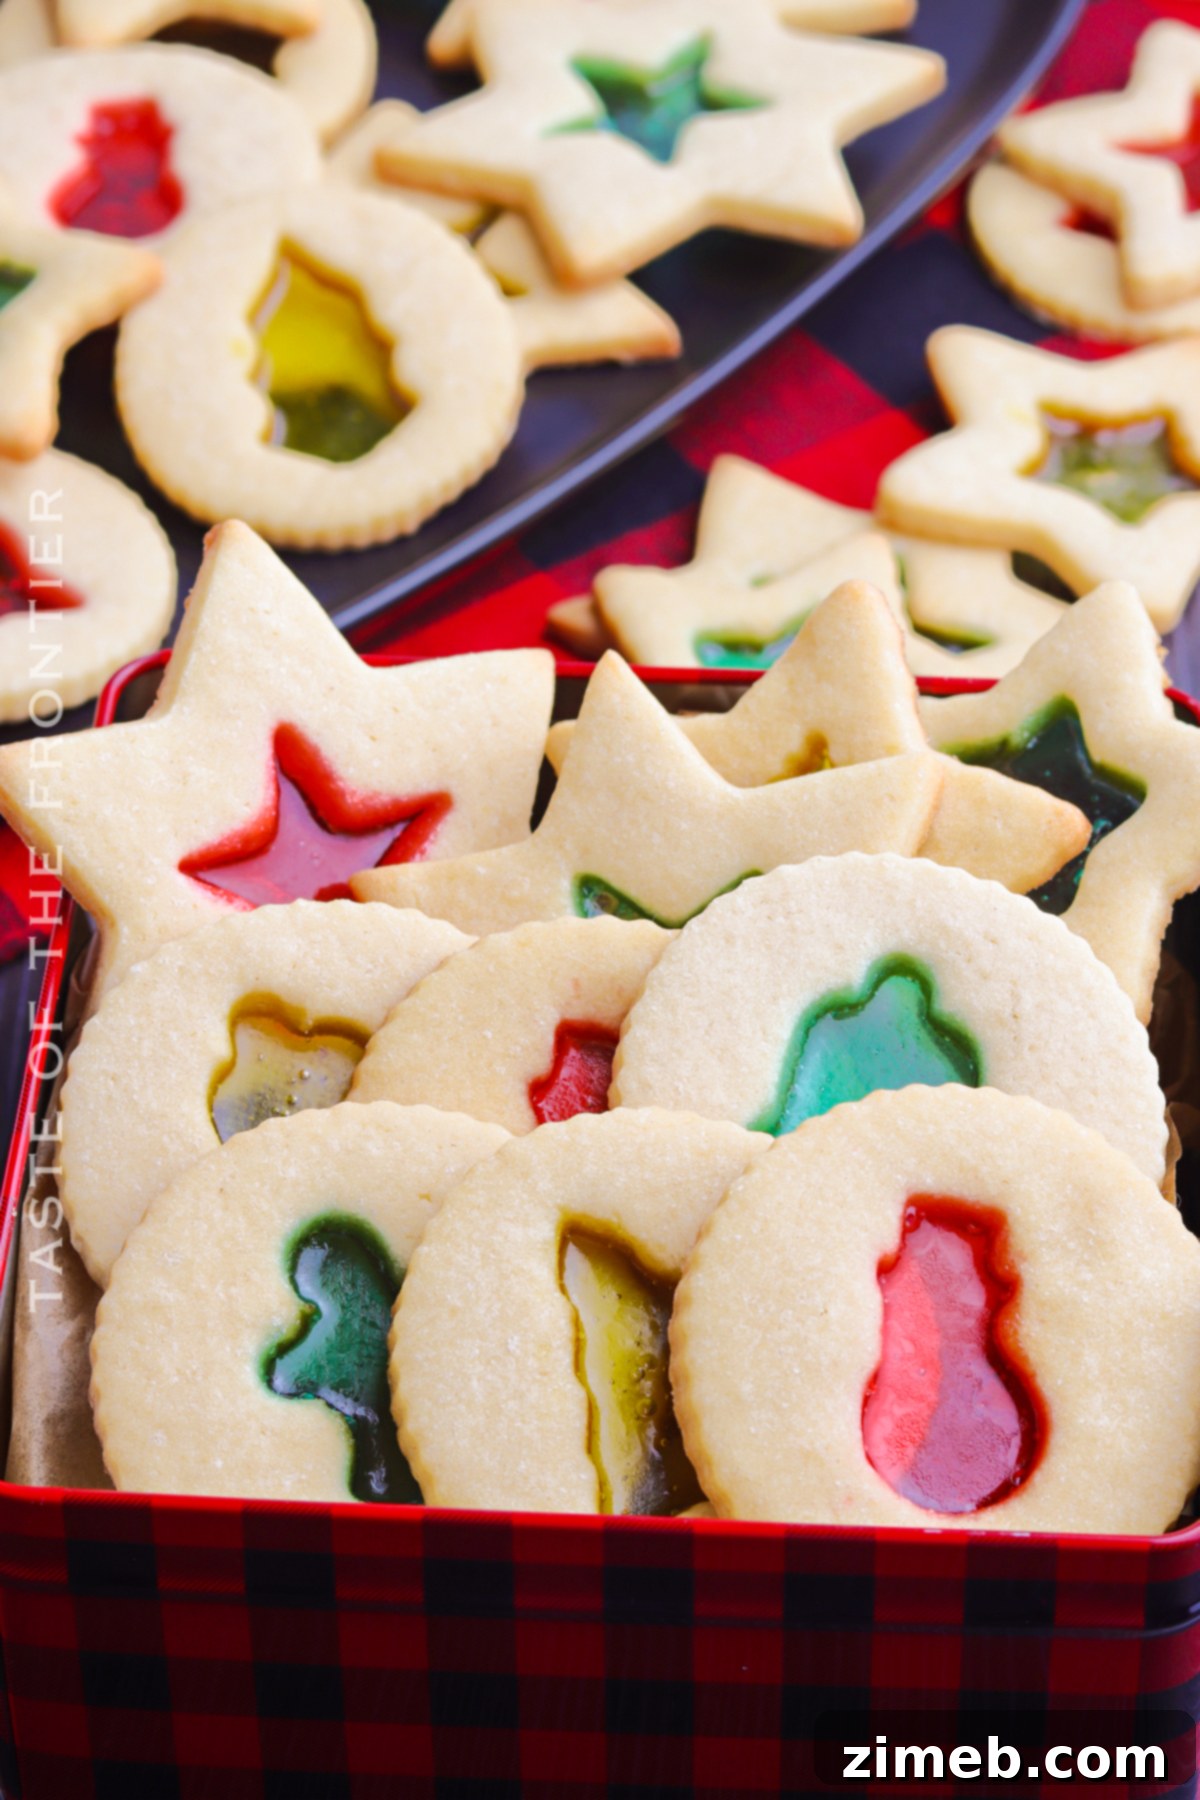
Dazzling Stained Glass Cookies: A Festive Holiday Baking Masterpiece
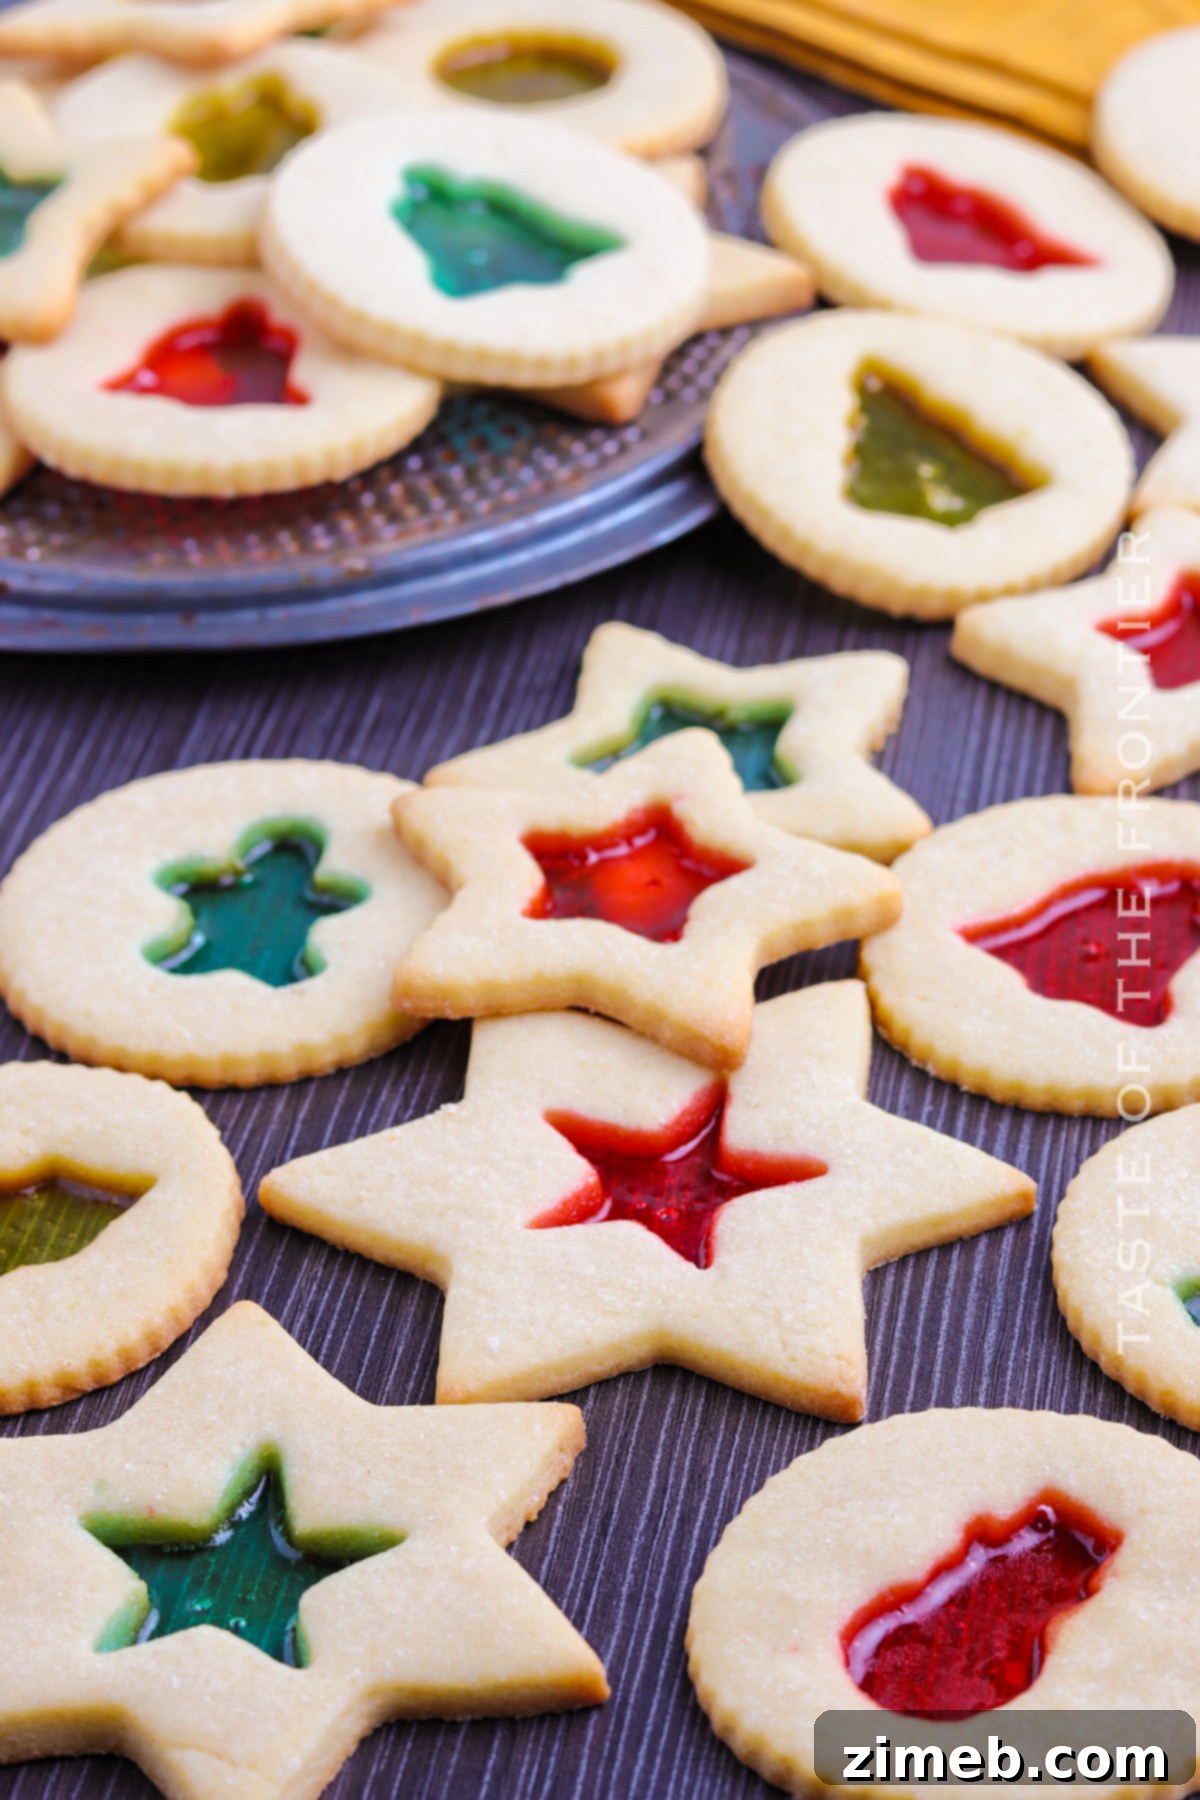
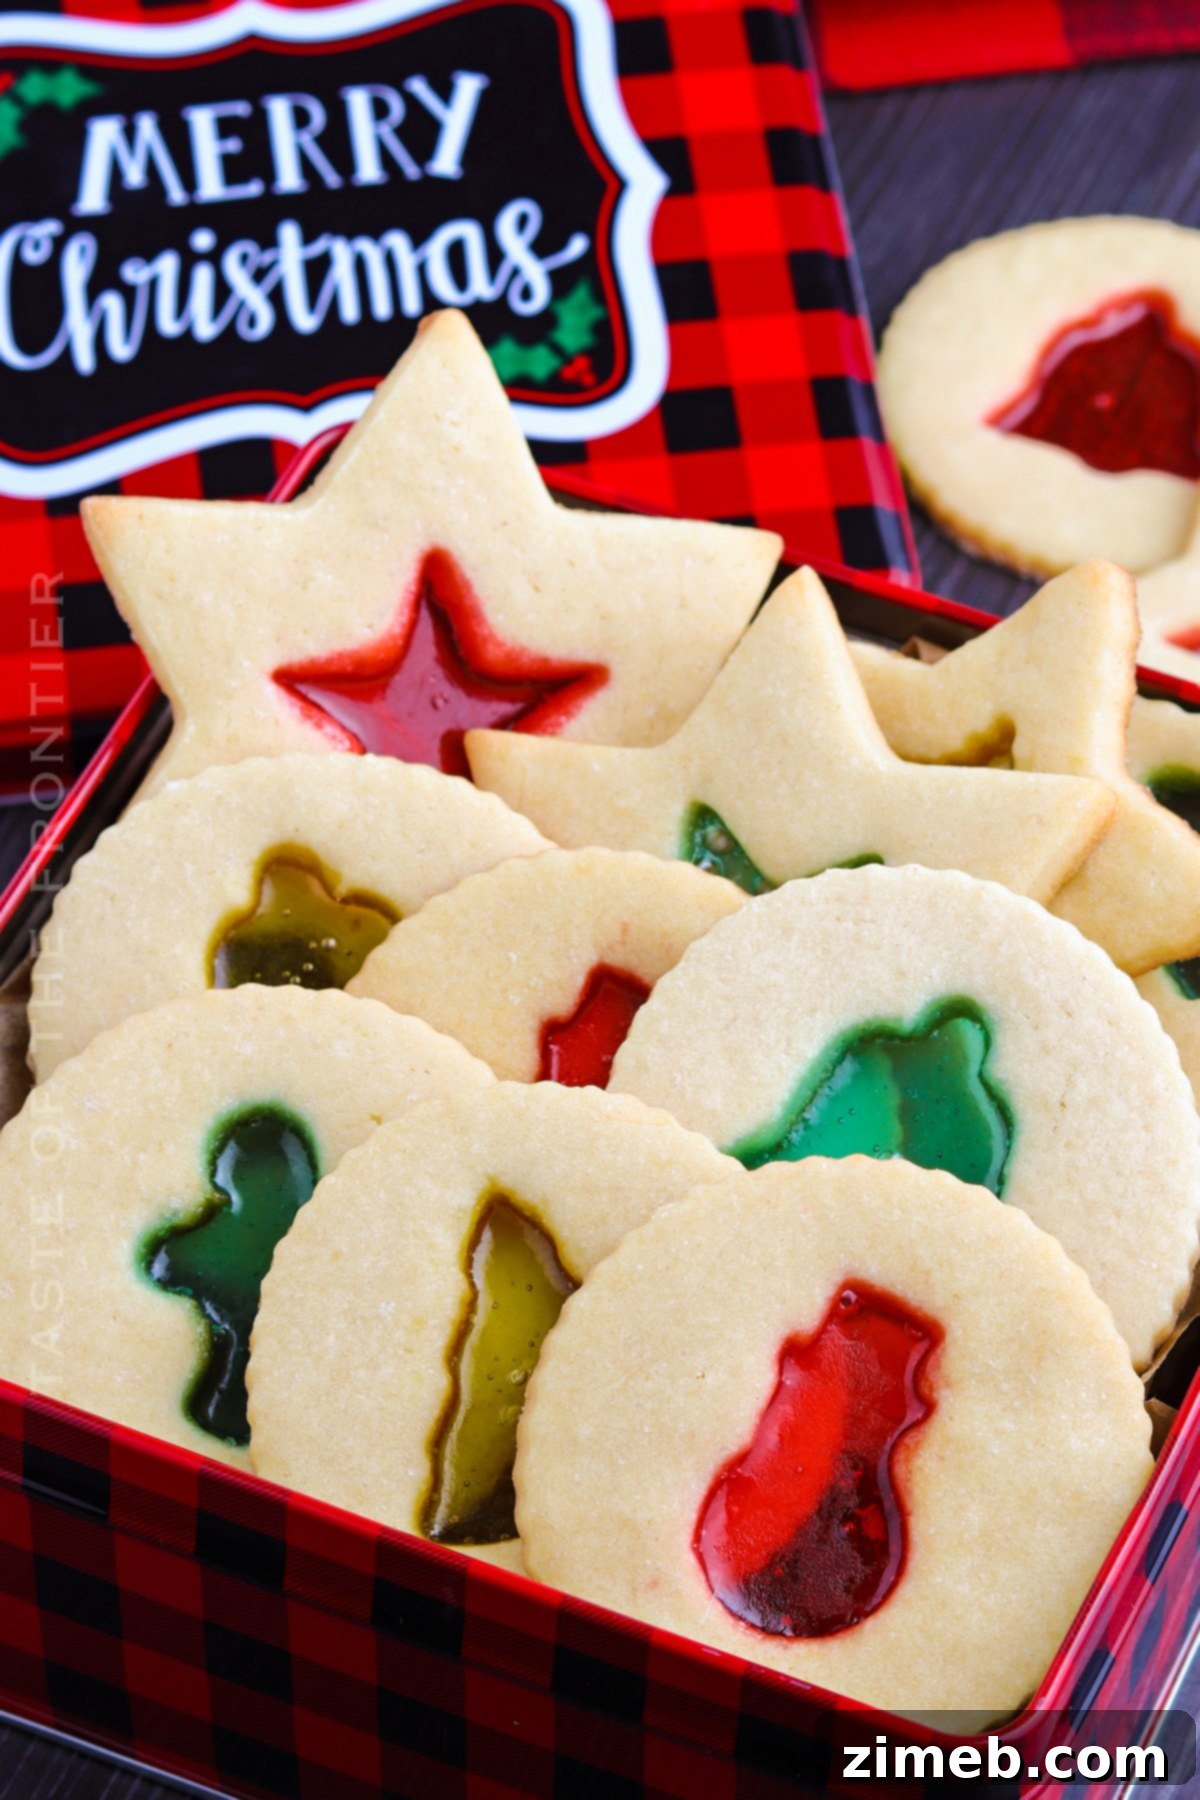
As the holiday season draws near, the joy of baking fills our kitchens with warmth and delightful aromas. Among the myriad of traditional treats, there’s one cookie that consistently captures hearts and lights up any festive platter: the exquisite stained glass cookie. These aren’t just cookies; they’re edible works of art, sparkling with vibrant colors and a magical charm that truly embodies the spirit of the season.
While their intricate appearance might suggest hours of painstaking effort, these gorgeous stained glass cookies are surprisingly simple to create. Don’t let their show-stopping beauty intimidate you; with a straightforward recipe and a little creative flair, you can craft a batch that looks like it came straight from a gourmet bakery, impressing everyone with your holiday baking prowess.
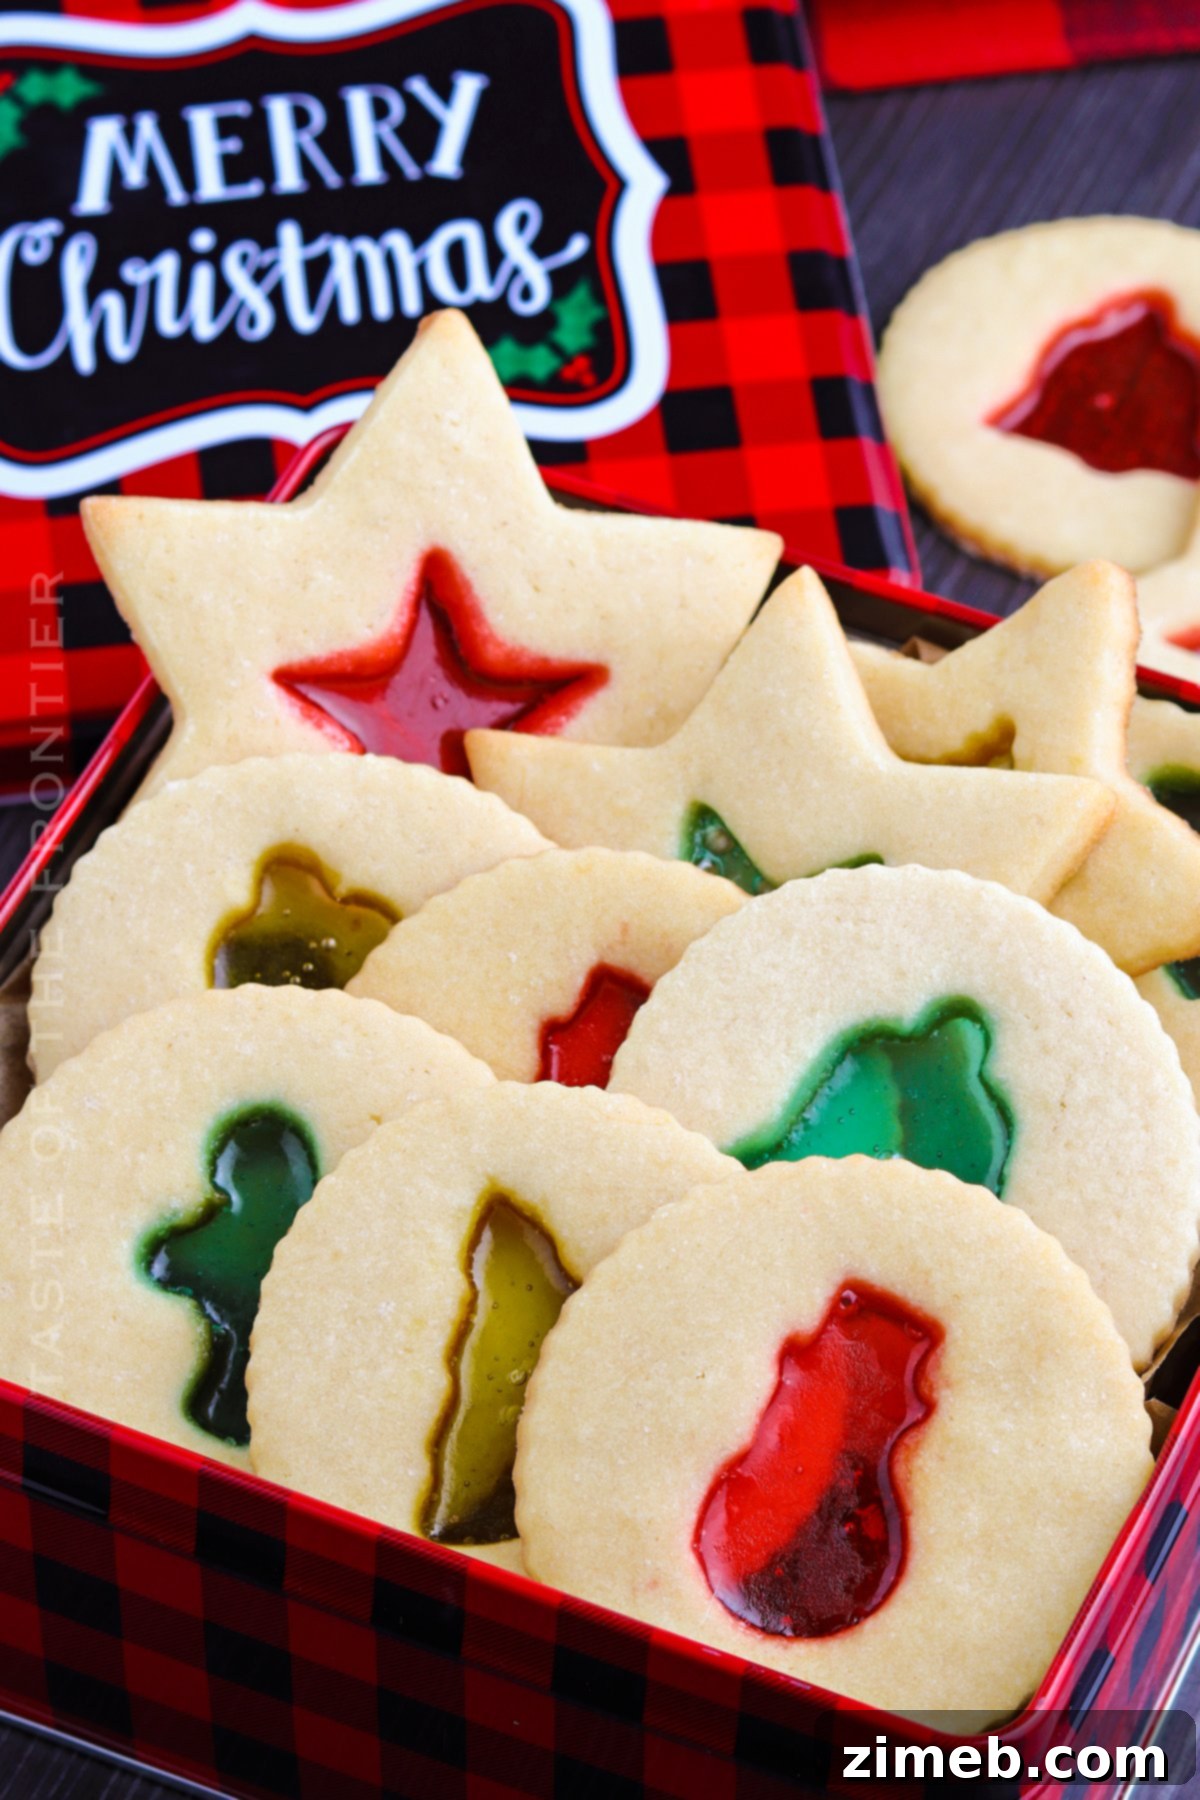
The beauty of this recipe lies in its versatility. While the core technique is simple, you’re encouraged to unleash your creativity and customize every aspect. Imagine a dazzling array of shapes and colors, each cookie a tiny masterpiece. This makes them not only a joy to bake but also a fantastic way to express your unique holiday style.
From whimsical large stars to classic gingerbread men, playful candy canes, or elegant Christmas trees, your cookie cutters are your artistic tools. You can choose any shapes that resonate with your holiday theme or simply use whatever festive cutters you have on hand. The smaller cookie cutters for the centers allow for even more customization, letting you create intricate patterns within the “stained glass” window. Whether you’re aiming to wow guests at your annual holiday party, contribute to a school bake sale, or simply create cherished memories with family, these cookies are undeniably the perfect choice.
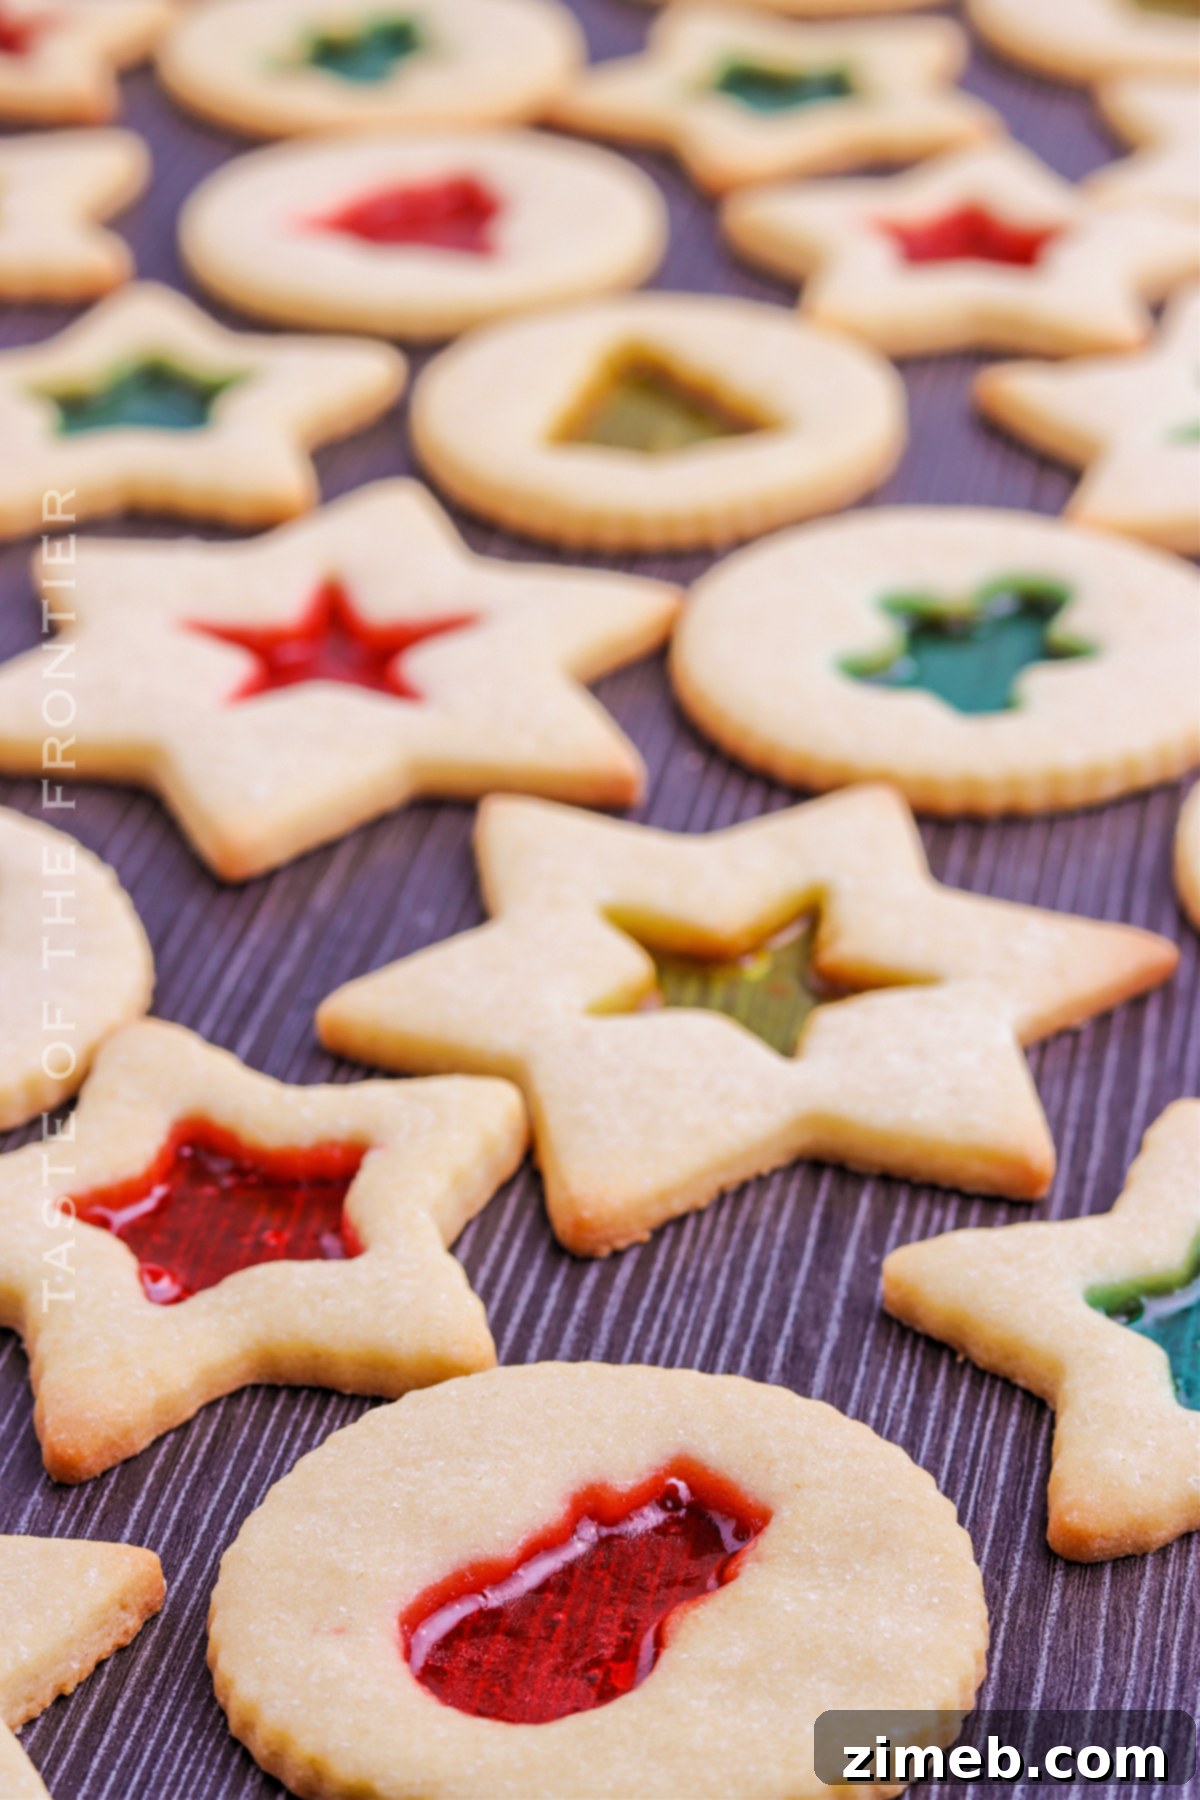
The Magic Behind Stained Glass Cookies
What Are Stained Glass Cookies?
Stained glass cookies fall into the delightful category of “rolled cookies,” characterized by a stiff dough that can be rolled flat and cut into various shapes. This type of dough is similar to sugar cookie dough, providing a perfect, sturdy canvas for the colorful candy centers. The magic truly happens when hard candies are crushed and melted within the cookie’s cutout center, creating a translucent, jewel-like effect reminiscent of intricate stained glass windows. These cookies are particularly popular during festive seasons like Christmas, adding a touch of elegance and whimsy to any holiday dessert spread.
A Glimpse into Cookie History
The history of cookies is surprisingly rich and spans across millennia. Many culinary historians point to ancient Persia, modern-day Iran, as the birthplace of these sweet delights. It’s believed that early cookies weren’t originally intended as desserts in their own right, but rather served a practical purpose: they were “test cakes.” Bakers would use small portions of cake batter to test the temperature of their ovens before baking larger cakes. These small, quickly baked samples evolved into the diverse world of cookies we know and love today. From these humble origins, cookies spread globally, adapting to local ingredients and culinary traditions, eventually leading to the creation of unique confections like our festive stained glass cookies.
Why These Cookies are a Holiday Must-Have
There are countless reasons to add stained glass cookies to your holiday baking repertoire. Firstly, their undeniable visual appeal makes them a showstopper. The vibrant, translucent centers catch the light beautifully, making them truly eye-catching on any cookie platter. Secondly, they are incredibly versatile. Whether you’re baking for children or adults, their unique look and sweet taste appeal to everyone. They’re perfect for holiday parties, cookie exchanges, or as thoughtful homemade gifts. Lastly, despite their impressive appearance, they are surprisingly affordable to make. Utilizing common pantry staples and readily available hard candies, you can produce a large batch without breaking the bank, ensuring you have plenty to share and enjoy throughout the festive season.
Mastering Your Stained Glass Cookie Creation
Essential Tips for Perfect Stained Glass Cookies
- Room Temperature Ingredients are Key: This isn’t just a suggestion; it’s a golden rule for baking success. When butter and eggs are at room temperature, they emulsify much more easily, resulting in a smoother, more uniform dough. This leads to a better texture in your final cookies, ensuring they are tender and melt-in-your-mouth delicious. Plan ahead by taking these ingredients out of the fridge at least an hour before you start baking.
- Simplify with Unwrapped Candies: To save precious holiday time and minimize effort, opt for hard candies that are already unwrapped. Brands like Jolly Ranchers or Lifesavers are often available in bulk or in bags with individually wrapped pieces that can be quickly unwrapped. This small step can significantly speed up the candy crushing process, letting you get to the fun part faster!
- Mind Your Dough Thickness: Rolling the dough to an even ¼-inch thickness is crucial. If the dough is too thin, your cookies might become brittle or burn easily, and the candy might run over the edges. If it’s too thick, the cookies might be undercooked, or the “stained glass” effect won’t be as prominent. Consistency ensures even baking and a beautiful result.
- Patience During Cooling: It’s tempting to move your beautiful cookies immediately, but allowing them to cool on the baking sheet for a few minutes before transferring them to a wire rack is essential. The melted candy needs time to solidify and set properly. Moving them too soon could cause the candy to warp or crack, or the delicate cookie itself to break.
Preparing Ahead: Dough and Candy Storage
The holiday season is busy, so any recipe that allows for make-ahead prep is a lifesaver. This stained glass cookie dough is perfect for preparing in advance. You can make the dough up to three days before you plan to bake and store it tightly wrapped in plastic wrap in the refrigerator. This chilling period is actually beneficial as it allows the flavors to meld and makes the dough easier to handle and roll. You can also crush your hard candies ahead of time, separating them by color into individual resealable bags. Store these crushed candies in a cool, dry place until you’re ready to sprinkle them into your cookie cutouts.
Proper Storage for Freshness
Once baked, store your stained glass cookies in a single layer in an airtight container at room temperature. If you need to stack them, place a piece of wax paper or parchment paper between each layer to prevent sticking and preserve their delicate appearance. They will stay fresh and delicious for up to three days. While you might be tempted to refrigerate or freeze them, it is generally not recommended. Refrigeration can cause the candy centers to become sticky or cloudy due to condensation, and freezing can alter the texture of both the cookie and the candy, detracting from their unique charm. For the best enjoyment, serve them at room temperature shortly after baking.
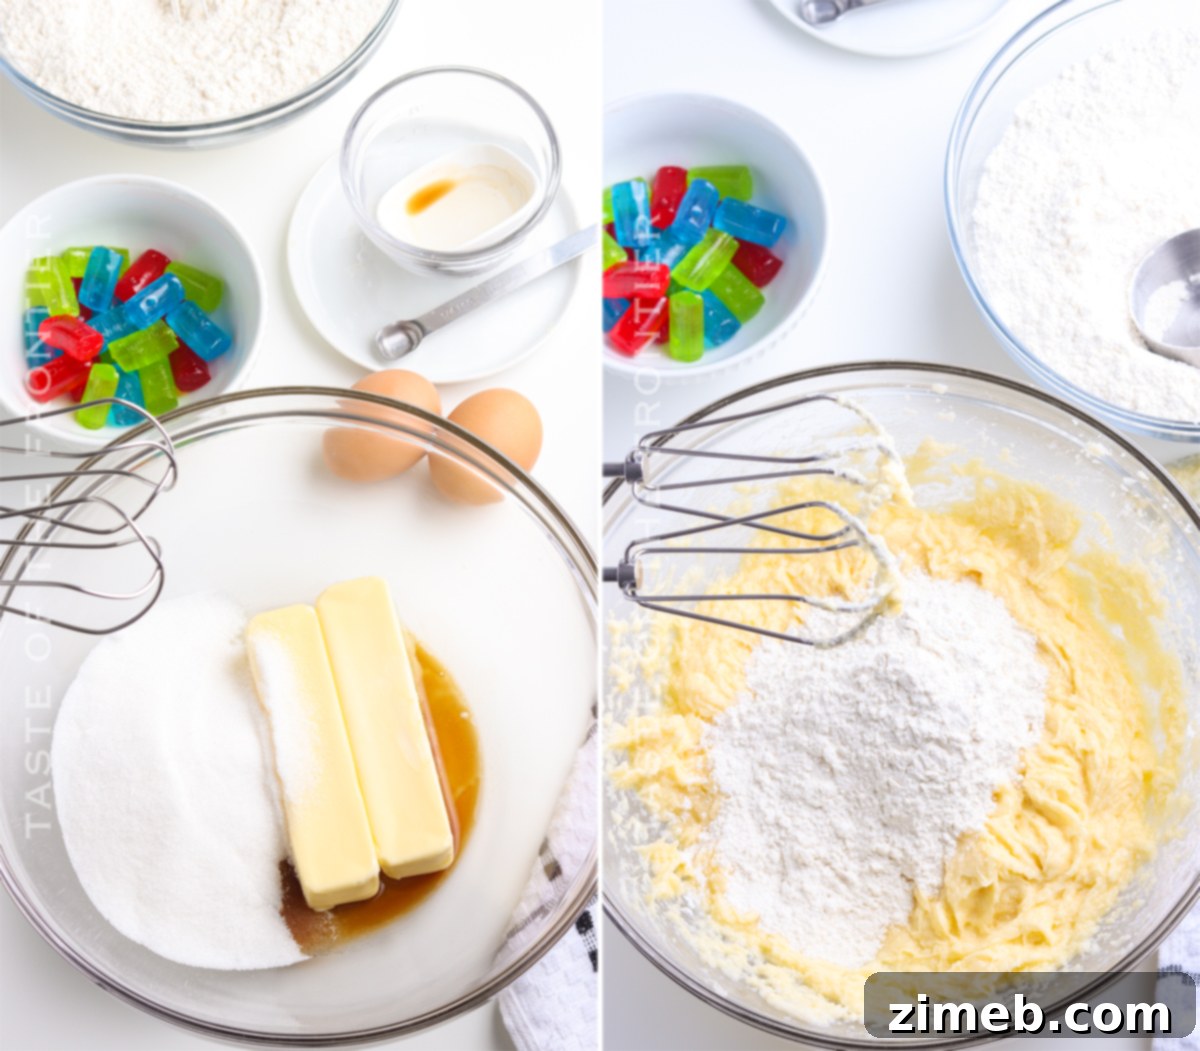
Gathering Your Ingredients & Kitchen Essentials
High-Quality Ingredients Make a Difference
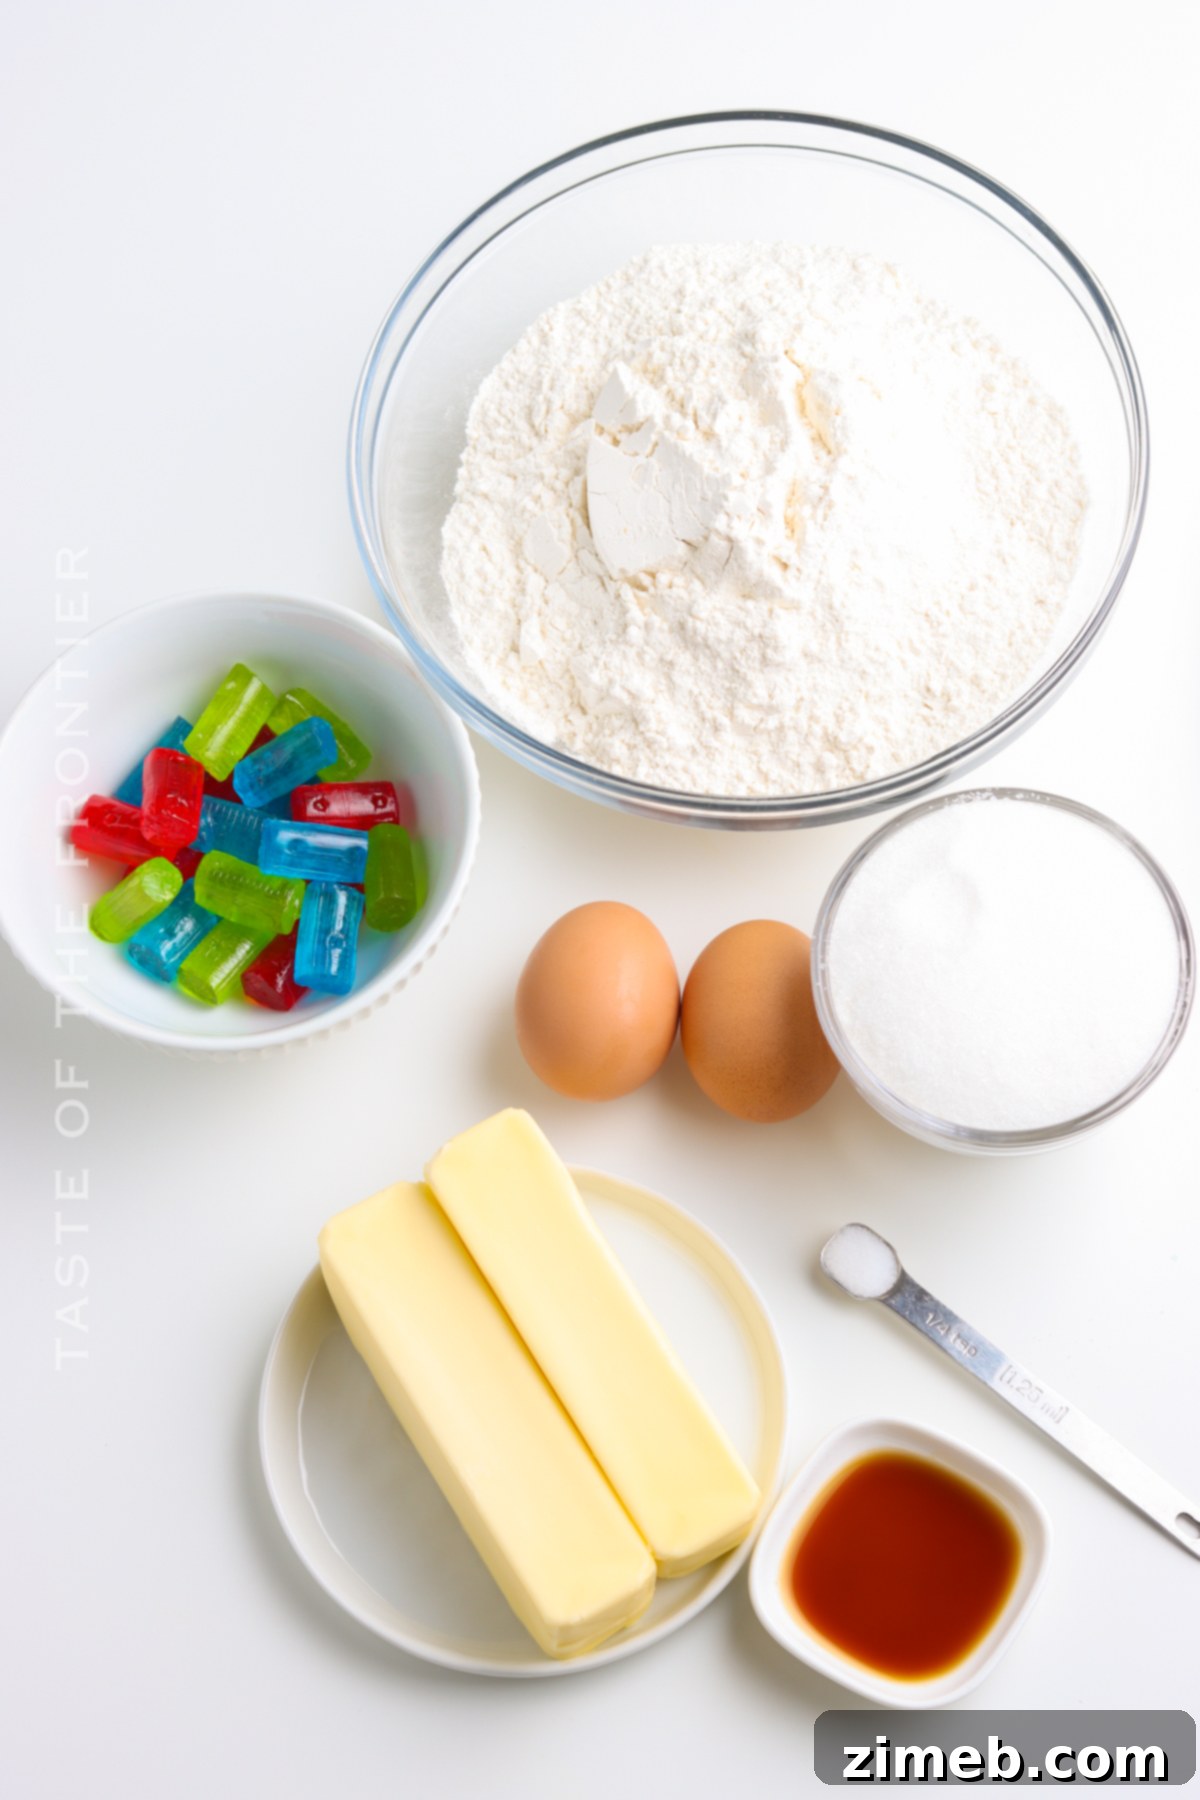
With a relatively short ingredient list, the quality of each component truly shines in this recipe. Opting for the best quality ingredients will elevate your stained glass cookies from good to absolutely phenomenal. For instance, using pure vanilla extract instead of imitation vanilla will impart a richer, more authentic flavor to your cookie dough. Similarly, using good quality unsalted butter and fresh, room-temperature eggs contributes to the cookie’s tender texture and delicious taste. Each ingredient plays a crucial role in creating a balanced and flavorful cookie base that beautifully complements the sweet, fruity notes of the hard candy centers.
- Unsalted butter (softened)
- Granulated sugar
- Pure vanilla extract
- Large eggs (room temperature)
- All-purpose flour
- Salt
- 25 hard candies (such as Jolly Rancher candies, Lifesavers, or your favorite brightly colored hard candy)
Must-Have Kitchen Supplies
Having the right tools makes any baking project smoother and more enjoyable. For these stained glass cookies, a few essential kitchen supplies will ensure a seamless process. A stand mixer with a paddle attachment (or a reliable hand mixer) is invaluable for creaming butter and sugar until light and fluffy. Resealable bags are perfect for crushing candies cleanly and separating colors. A sturdy rolling pin (or even a meat mallet for crushing candies) is crucial for both rolling out dough evenly and pulverizing hard candies. Baking sheets lined with parchment paper or silicone baking mats are non-negotiable for preventing sticking and ensuring easy cleanup. Lastly, various cookie cutters, both large for the cookie shape and small for the “window” cutout, allow for endless creative possibilities.
- Large bowl
- Medium bowl
- Small bowl
- Stand mixer with a paddle attachment (or hand mixer)
- Resealable bags
- Rolling pin (or meat mallet)
- Baking sheets
- Parchment paper (or a silicone baking mat)
- Plastic wrap
- Wire racks
- Large cookie cutter and small cookie cutter (in festive shapes)
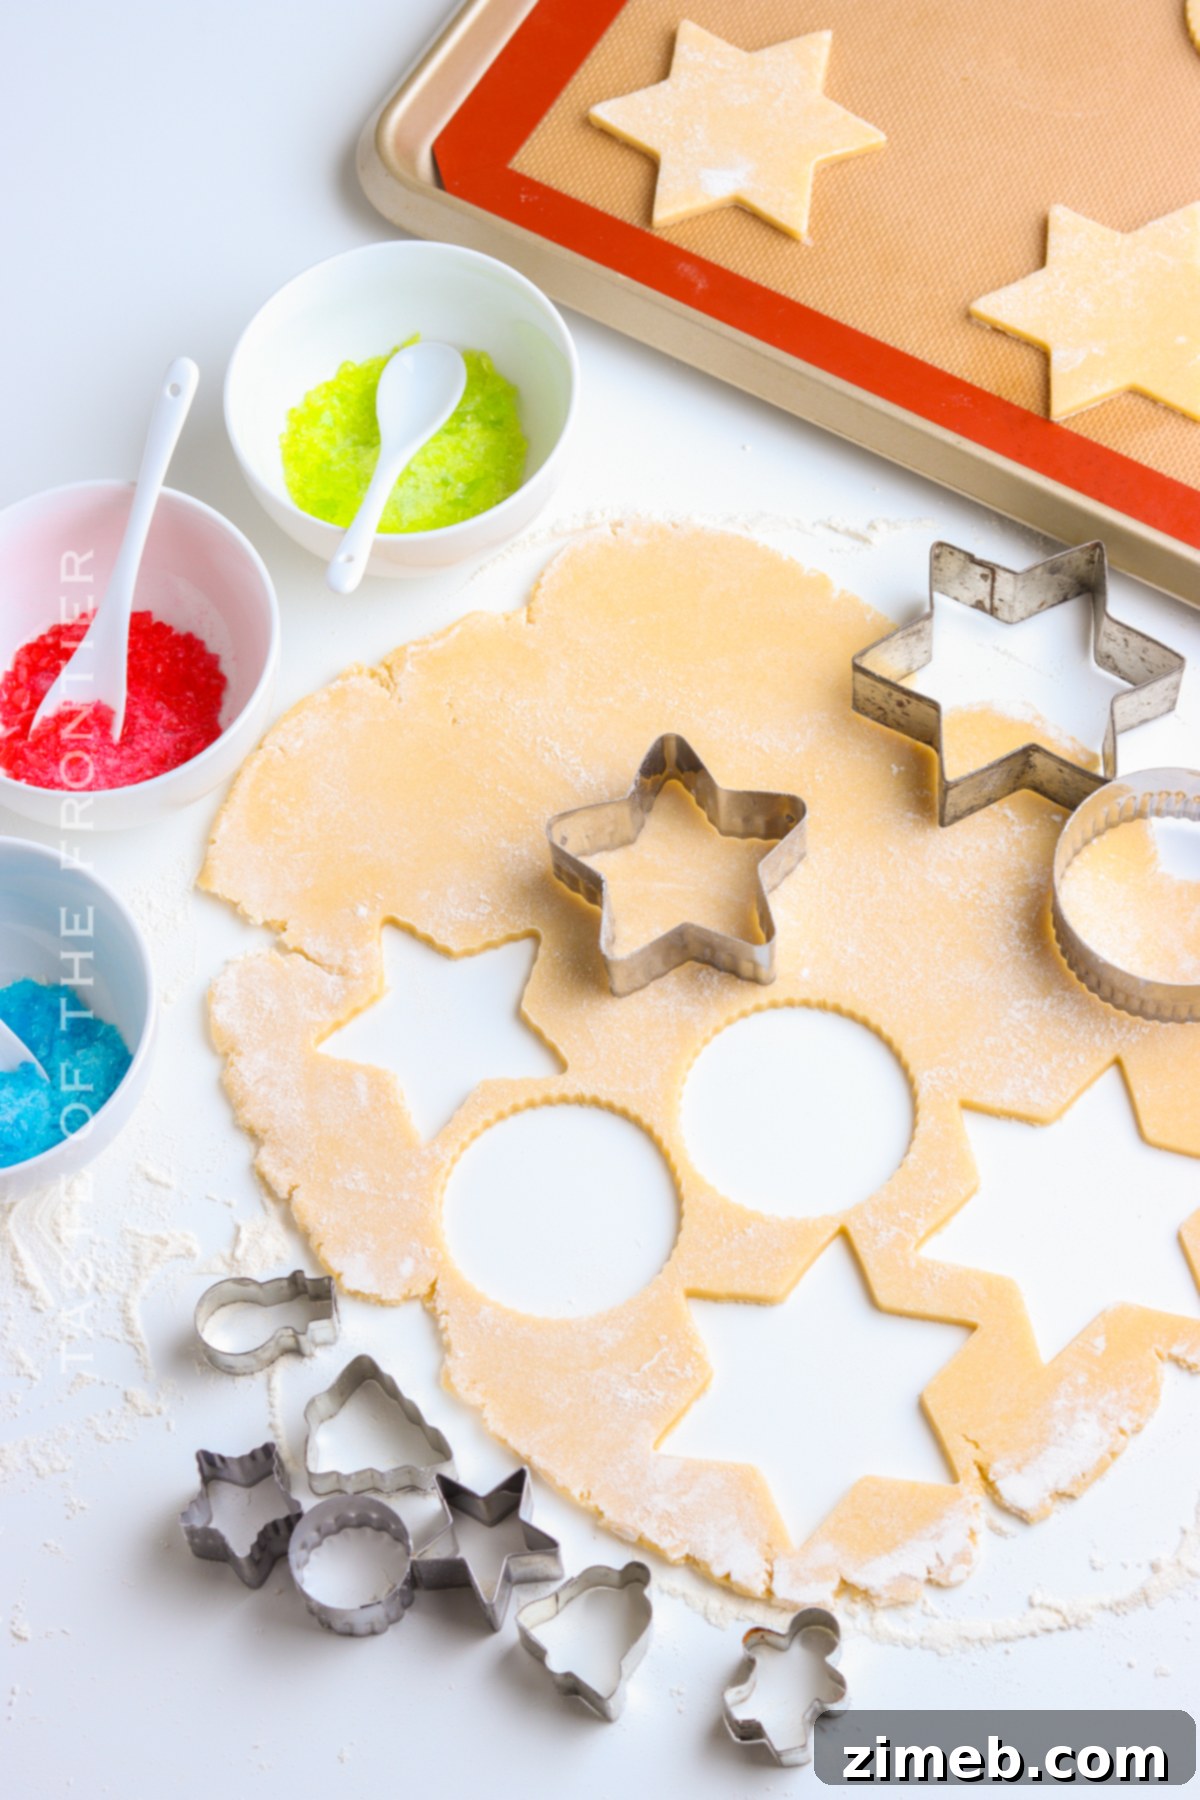
Step-by-Step Guide to Baking Stained Glass Cookies
Crafting the Perfect Cookie Dough
- In a large mixing bowl, combine the softened unsalted butter, granulated sugar, and pure vanilla extract.
- Using a stand mixer fitted with a paddle attachment (or a hand mixer), beat the ingredients on high speed until the mixture is light, fluffy, and well combined. This usually takes about 2-3 minutes.
- Reduce the mixer speed to medium-high. Add the large room-temperature eggs one at a time, beating well after each addition until fully incorporated into the butter mixture.
- Once the eggs are combined, set this wet mixture aside.
- In a separate medium bowl, whisk together the all-purpose flour and salt until they are evenly dispersed. This ensures the salt is distributed throughout the dough for balanced flavor.
- Gradually add the dry ingredients to the wet butter mixture, mixing on low speed until just combined. Be careful not to overmix, as this can lead to tough cookies.
- Gather the dough into a ball and place it in a small bowl. Cover the bowl tightly with plastic wrap to prevent it from drying out.
- Refrigerate the dough for at least one hour, or preferably overnight. Chilling is essential as it firms up the dough, making it much easier to roll out and cut without sticking.
Crushing the Candy for Vibrant “Stained Glass”
- While the dough is chilling, prepare your “stained glass.” Separate your chosen hard candies by color. Place each color into its own separate resealable plastic bag. This prevents colors from mixing and allows for more artistic control.
- Lay the bags of candy on a sturdy, flat surface. Using a rolling pin, a meat mallet, or the flat side of a heavy pan, carefully but firmly crush the candies until they are broken into fine, sand-like pieces. Avoid large chunks, as these may not melt smoothly. Ensure no sharp edges poke through the bags.
- Set the bags of crushed candy aside in a cool, dry place until you are ready to use them.
Assembling and Baking Your Edible Art
- When you’re ready to bake, preheat your oven to 350°F (175°C). Line 1-2 baking sheets with parchment paper or a silicone baking mat.
- Lightly dust your work surface with a small amount of all-purpose flour.
- Remove the chilled dough from the refrigerator. Take out about one-third of the dough to work with at a time, keeping the remaining portion refrigerated to maintain its chill.
- Place the dough on the floured surface and, using a rolling pin, roll it out to an even thickness of approximately ¼ inch.
- Use your large cookie cutters to cut out desired shapes from the rolled dough. Carefully transfer these cut-out dough shapes onto the prepared baking sheets, leaving about an inch between each cookie.
- Next, take a smaller cookie cutter and gently cut out the center of each large cookie. Carefully remove the center dough pieces; these can be re-rolled with scraps.
- Continue this process with the remaining dough, rolling out portions, cutting shapes, and creating the centers until all the dough has been used.
- Just before placing the cookies in the oven, carefully sprinkle the crushed hard candy into the cut-out centers of each cookie. Be precise: avoid getting candy pieces on the cookie dough itself, as they can burn. Also, do not overfill the centers; a level amount is usually sufficient to create a smooth glass effect.
- Bake the cookies for 10-12 minutes, or until the edges are lightly golden brown and the candy in the centers has melted and appears glassy. For even baking, rotate the baking sheet halfway through the cooking time.
- Once baked, remove the cookies from the oven. Let them cool on the baking sheet (placed on a wire rack) for at least 5 minutes. This crucial step allows the melted candy to cool and harden completely.
- After 5 minutes, carefully transfer the cookies from the baking sheet to a wire rack to cool completely. Once fully cooled, the candy centers will be firm and shiny, resembling stained glass.
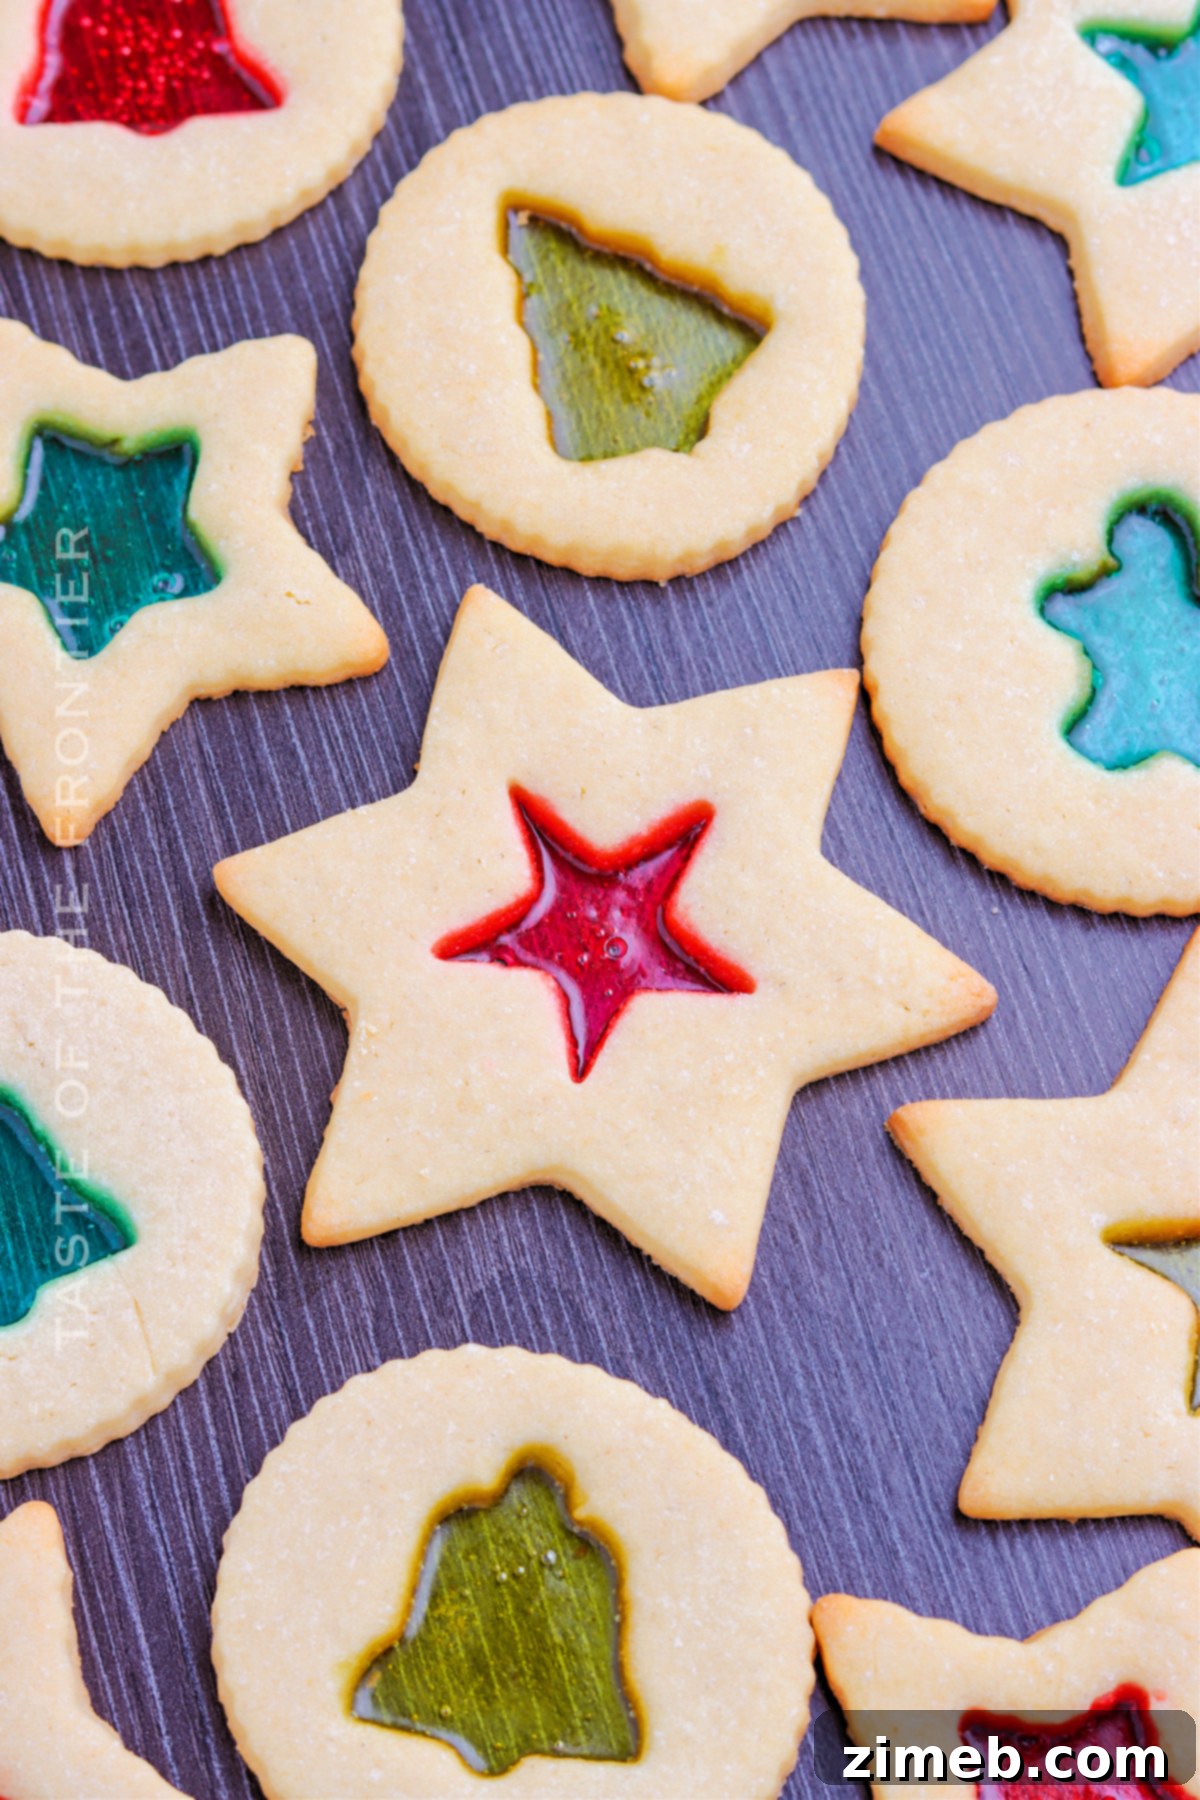
Serving Suggestions: Elevate Your Stained Glass Cookie Experience
These beautiful stained glass cookies are wonderful on their own, but they also pair splendidly with a variety of accompaniments. Their delicate flavor and vibrant appearance make them versatile enough to be served in many creative ways throughout the holiday season.
- Frozen Treats: For an unexpected delight, use these colorful cookies as a stunning garnish for a scoop of vanilla ice cream, rich gelato, or a refreshing sorbet. You can even get creative and make miniature ice cream sandwiches by pressing two cookies around a small dollop of your favorite ice cream.
- Coffee: A warm cup of coffee is a classic companion for almost any dessert, and these cookies are no exception. The rich, slightly bitter notes of coffee provide a beautiful contrast to the sweet, fruity candy and buttery cookie.
- Tea: Whether it’s a robust black tea, an earthy green tea, or a calming herbal infusion, these cookies make for a perfect pairing. They’re ideal for an afternoon pick-me-up, a cozy evening snack, or an elegant addition to a holiday tea party.
- Preserves: A thin layer of your favorite fruit preserves, such as raspberry or apricot, spread onto the plain cookie edges (avoiding the candy center) can add an extra layer of fruity flavor and texture, enhancing the cookie’s appeal.
- Whipped Cream: A dollop of fresh, homemade whipped cream offers a light and creamy accompaniment. Try dipping the cookies into a bit of whipped cream for a luxurious bite. For an even more festive presentation, serve them alongside a spread of freshly sliced seasonal fruits to complement the colorful “glass” centers.
- Cocktails: For an adult gathering, these cookies can be surprisingly sophisticated partners for certain cocktails. Their sweet profile pairs wonderfully with creamy holiday drinks like a classic eggnog or coffee mixed with Bailey’s. For those who prefer something fruitier, they also complement bright cocktails such as a festive Cosmopolitan or a cranberry spritzer.
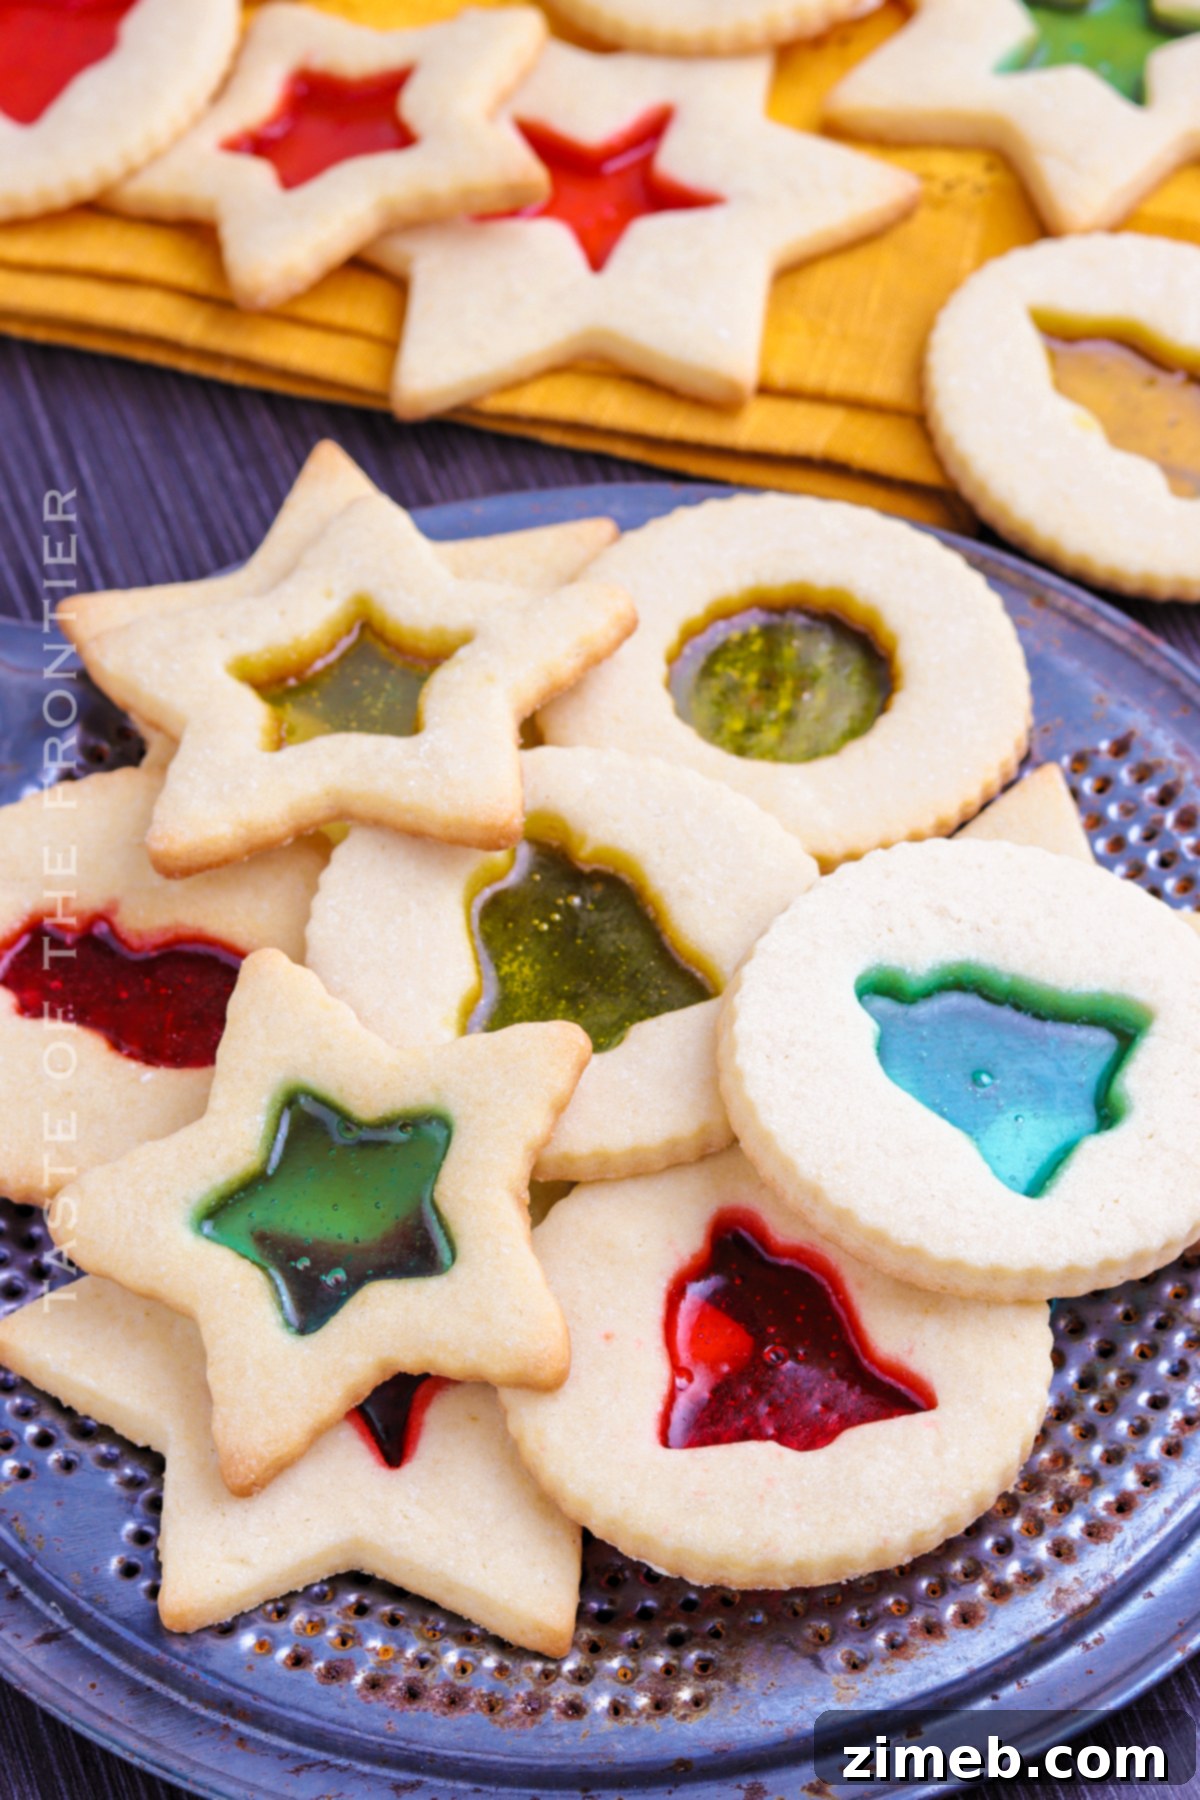
Unleash Your Creativity: Variations and Add-ins
While these stained glass cookies are undeniably beautiful on their own, a few simple additions or twists can further customize them to your taste or holiday theme. Get creative and make each batch uniquely yours!
- Decorator’s Sugar: Before baking, sprinkle a bit of sparkling decorator’s sugar around the edges of the cookie dough, in any shade you prefer. This adds an extra layer of shimmer and color, making the cookies even more festive and eye-catching.
- Food Dye: For an extra pop of color, gently mix a few drops of food coloring into your cookie dough. Imagine vibrant red or green dough framing your sparkling candy centers, perfectly matching your holiday decor. You can also explore natural food coloring alternatives for a more wholesome option.
- Sugar Pearls: After baking, while the cookies are still slightly warm (but the candy has set), you can carefully press tiny edible sugar pearls onto the cookie dough edges for an elegant, pearlescent sparkle. These little gems truly elevate the presentation.
- Confectioner’s Sugar Dusting: For a simple yet stunning finish that evokes the magic of winter, lightly dust the completely cooled cookies with confectioner’s sugar (also known as powdered sugar). This creates a delicate “snow-kissed” aesthetic that is particularly charming for Christmas.
- Flavor Extracts: Don’t limit yourself to vanilla! Experiment with different extracts to change the flavor profile of the cookie dough. Almond extract is a fantastic alternative that offers a slightly nutty, sophisticated twist, while a hint of lemon or orange extract could brighten the overall taste.
Explore More Festive Baking Ideas
If you enjoyed crafting these beautiful stained glass cookies, you’ll love exploring other holiday treats that add joy to your season. Here are some wonderful recipes to try next:
Church Window Cookies
4-Ingredient Sugar Cookies
Chocolate Marshmallow Cookies
Hot Chocolate Spoons
3-Ingredient Peanut Butter Cookies
No-Bake Chocolate Haystacks
No-Bake Peppermint Cheesecake
Other Creative Cookie Recipes
Beyond the festive favorites, delve into these creative cookie recipes that are perfect for any occasion, offering unique flavors and textures:
Cornflake Wreath Cookies
Pistachio Cookies
Grinch Christmas Cookies
Rudolph Gingerbread Cookies
Include these cookies in a beautiful Christmas Cookie Board
DON’T MISS MY HOLIDAY E-BOOK!

If you love this Stained Glass Cookies recipe, you’re going to love these other holiday cookies too. Please click each link below to find the easy, printable recipe!
Check out this recipe
Check out this recipe
Check out this recipe
Check out this recipe

Check out this recipe
If you love this recipe for Stained Glass Cookies as much as I do, please write a five-star review, and be sure to help me share on Facebook and Pinterest!
CONNECT WITH YUMMI HAUS!
Be sure to follow me on my social media, so you never miss a post!
Substack, FB, Pinterest, IG, Email Subscription
PIN NOW TO SAVE FOR LATER
Rate this Recipe
Stained Glass Cookies
If you’re looking for holiday cookies that are pretty and impressive, look no further than these easy stained glass cookies.
Pin
Save
Ingredients
- 1 cup butter softened (2 sticks) unsalted
- 1 cup granulated sugar
- 1 teaspoon vanilla extract
- 2 large eggs room temperature
- 3 cups all-purpose flour plus some for rolling
- ¼ teaspoon salt
- 25 hard candies such as Jolly Ranchers or Lifesavers
Instructions
-
In a large bowl, cream together the butter, sugar and vanilla until fluffy.
-
Add the eggs and beat until well combined.
-
In a medium bowl, whisk together the flour and salt.
-
Gradually add that dry ingredient mixture to the butter mixture and stir until well combined.
-
Transfer the dough to a smaller bowl and cover it with plastic wrap.
-
Chill for at least 1 hour or overnight.
-
While the dough is chilling, crush the hard candies by separating the colors and placing them in a resealable bag. Strike them with a rolling pin or flat end of a meat mallet until they are fine crushed.
-
Line 1-2 baking sheets with parchment paper or a silicone baking mat.
-
Remove the dough from the refrigerator and work with about ⅓ of it at a time. Keep the portion you aren’t working with in the refrigerator until you are ready to use it.
-
Cover the work area with a dusting of additional flour.
-
Roll the dough to about ¼” thick.
-
Cut the dough with cookie cutters in the desired shapes.
-
Transfer the cut-out dough to the prepared baking sheets.
-
Cut the center of each cookie with smaller cookie cutter in the desired shapes.
-
Repeat with the remaining dough until it is all used.
-
Preheat the oven to 350 degrees F.
-
Fill the center cut out with the crushed candies, being careful to not overfill it or get the small pieces of crushed candies on the cookie dough.
-
Bake for 10-12 minutes, or until lightly golden brown, rotating the baking sheet about half way through for even baking.
-
Remove the cookies from oven and let them cool on wire rack ON THE BAKING SHEET for 5 minutes before removing them from the baking sheet and letting them cool completely on the wire rack before storing.
-
Store in airtight container in a single layer.
Notes
Nutrition
Serving: 1g | Calories: 67kcal | Carbohydrates: 12g | Protein: 1g | Fat: 2g | Saturated Fat: 0.01g | Cholesterol: 5mg | Sodium: 27mg | Potassium: 8mg | Fiber: 0.2g | Sugar: 5g | Calcium: 1mg | Iron: 0.3mg | Net Carbohydrates: 9g
Nutritional information for the recipe is provided as a courtesy and is approximate. Please double-check with your own dietary calculator for the best accuracy. We at Yummi Haus cannot guarantee the accuracy of the nutritional information given for any recipe on this site.
Love this recipe?
Follow @KleinworthCo for even more tasty recipes!