
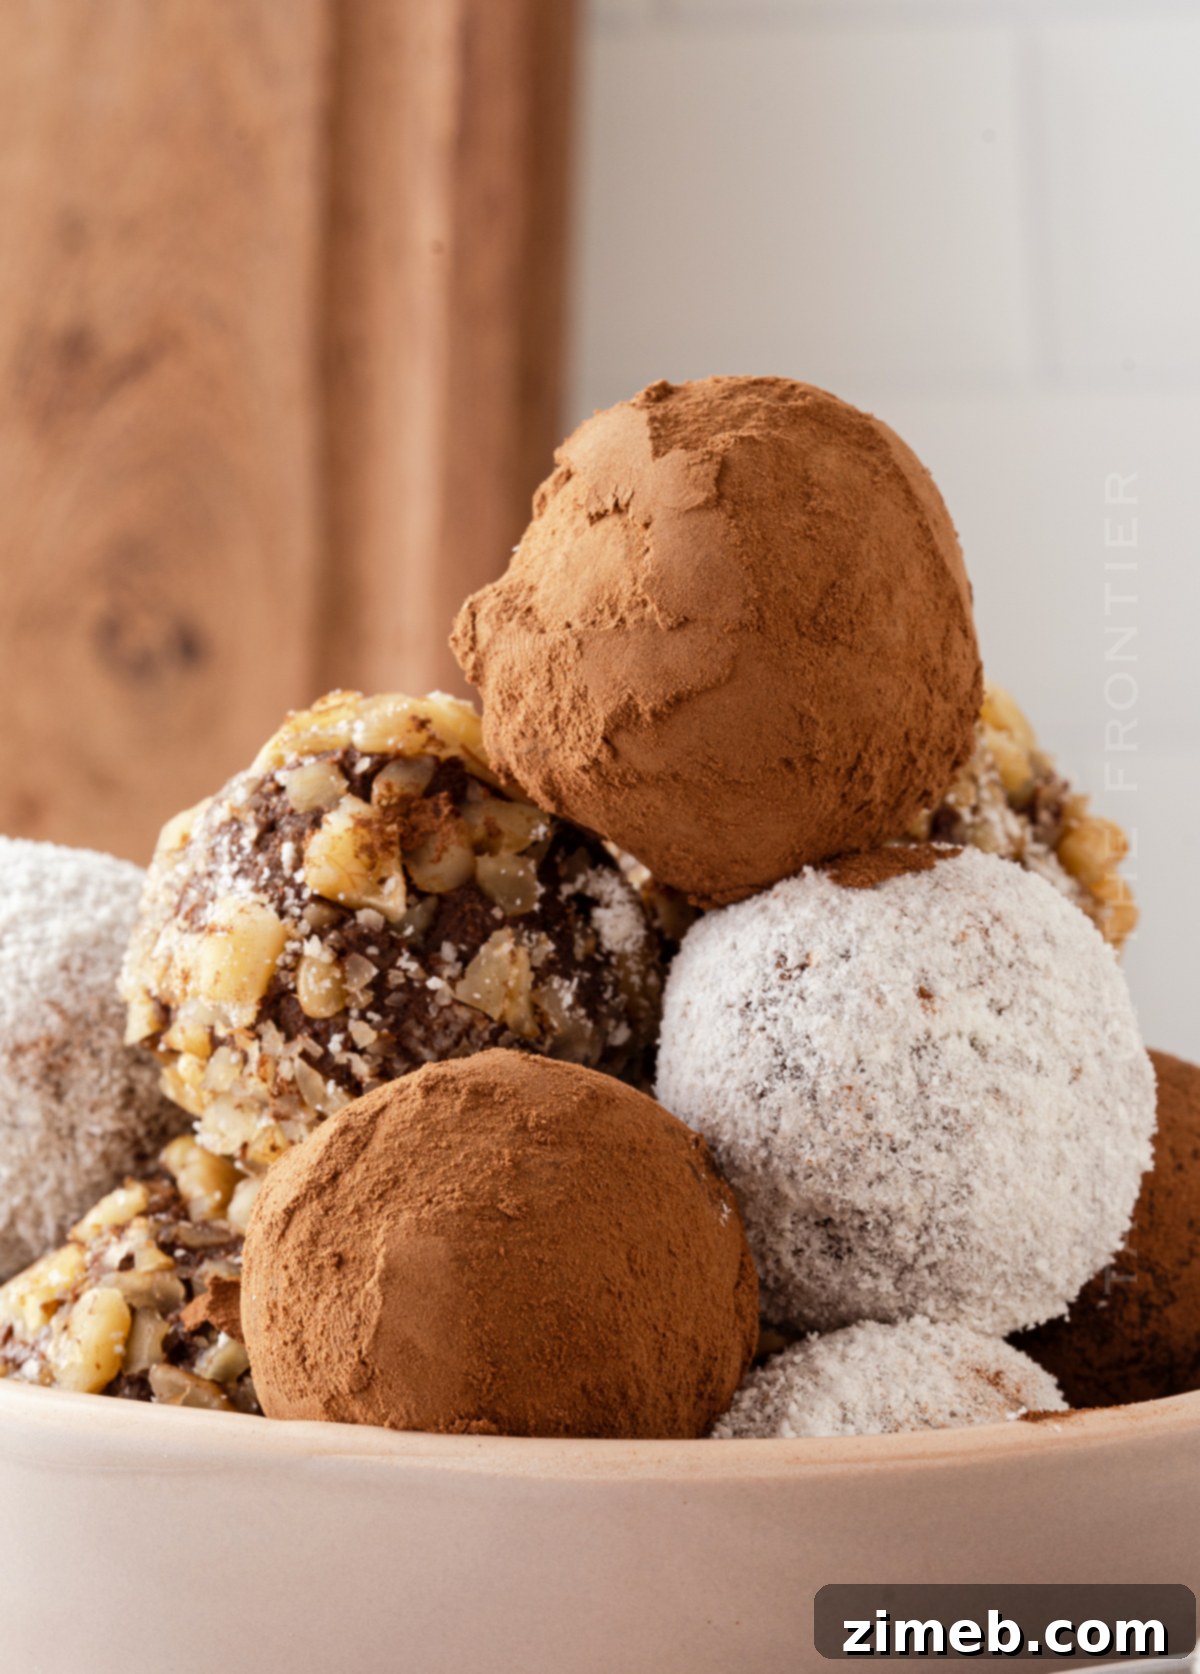
This comprehensive guide to crafting easy chocolate truffles unveils a rich, decadent, and utterly delicious dessert, requiring only a handful of readily available ingredients. Whether you’re celebrating a special holiday, a friend’s birthday, or simply indulging in a spontaneous craving, these homemade chocolate truffles are the perfect treat for any occasion. Prepare to impress with minimal effort!
Are you searching for an effortlessly elegant dessert that doubles as an exquisite gift? Look no further! These incredibly simple truffles can be whipped up in remarkably little time, promising to bring immense joy and big smiles to anyone who tastes them. Their deceptive simplicity is part of their charm; they appear sophisticated and complex, making them ideal for any special event, yet only you will know just how quickly they came together. In my experience, these delightful confections are always the first to vanish from any party spread, a testament to their irresistible appeal.
There’s a unique satisfaction that comes with creating something truly gourmet in your own kitchen, especially when it’s as impressive as homemade chocolate truffles. Gone are the days when such delicacies were reserved for high-end chocolatiers. This recipe empowers you to create luxurious, rich, and intensely flavored truffles that rival any professional creation, all while being surprisingly budget-friendly. Imagine the delight of presenting a beautifully boxed assortment of these handcrafted treats, knowing each one was made with love and superior ingredients, without the hefty price tag. They’re not just a dessert; they’re an experience.
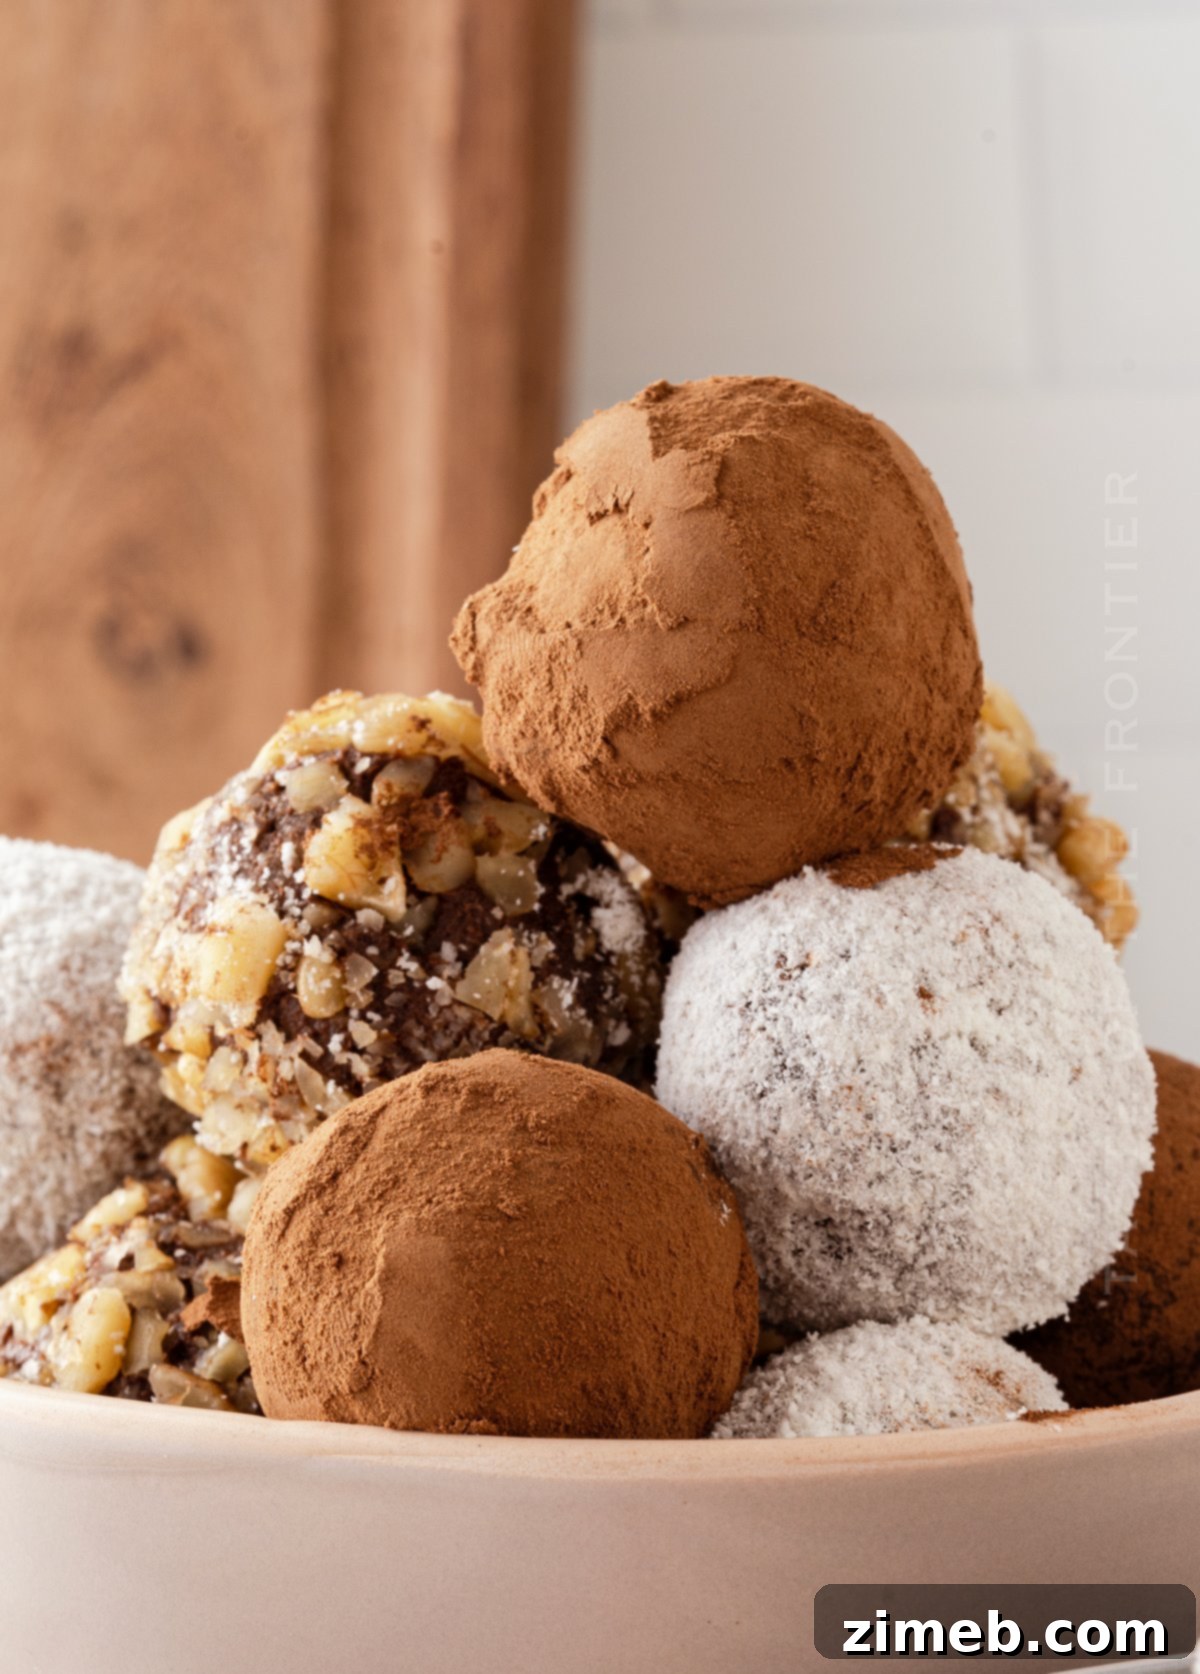
Growing up, the mention of chocolate truffles always signaled that something truly special was on the horizon. Whether it was a significant holiday or a momentous family event, a trip to the local chocolatier to select a carefully curated box of these exquisite treats was a cherished tradition. It always struck me as peculiar, given my mother’s exceptional talent for crafting delectable homemade desserts. She possessed an uncanny ability to create magic in the kitchen, and I often wonder why she didn’t simply whip up a batch of these remarkable truffles herself. With this incredibly easy chocolate truffle recipe, you can recreate that same sense of occasion and luxury right in your own home, astounding your guests for just a fraction of the cost. No need for a special trip to an expensive shop; simply gather a few ingredients and prepare for an explosion of flavor. Trust me, these are DELICIOUS!
Beyond their delightful taste, these homemade truffles offer a unique opportunity for personalization. From selecting your favorite type of chocolate to experimenting with various coatings and flavor infusions, this recipe serves as a versatile canvas for your culinary creativity. It transforms the act of dessert-making into an enjoyable and rewarding experience, allowing you to tailor each truffle to your exact preferences or those of your lucky recipients. The convenience, customizability, and sheer joy of biting into a truffle crafted with your own hands make this recipe an absolute staple for anyone who appreciates fine chocolate and easy-to-follow instructions.
Crafting the Perfect Easy Truffle Recipe at Home
The journey to creating the perfect easy chocolate truffle begins with understanding the core components and techniques. Our simple truffle recipe focuses on maximizing flavor and texture with minimal fuss, ensuring that even novice bakers can achieve spectacular results. We’ll delve into everything from selecting the right chocolate to achieving that ideal creamy consistency, guaranteeing a foolproof experience from start to finish. Get ready to transform basic ingredients into a gourmet delight!
Frequently Asked Questions About Homemade Truffles
To help you master the art of making these delightful chocolate truffles, we’ve compiled answers to some of the most commonly asked questions. Understanding these nuances will ensure your truffles turn out perfectly rich, smooth, and utterly delicious every single time. From ingredient choices to troubleshooting melting issues, we’ve got you covered.
Why is Using Premium Chocolate Essential for the Best Truffles?
When embarking on any chocolate-based creation, especially a decadent chocolate truffle recipe, the quality of your chocolate is paramount. Always opt for the finest quality chocolate you can reasonably afford, as this single ingredient dictates the overall flavor, texture, and melting properties of your finished truffles. Less expensive chocolates often contain a higher percentage of fillers, such as vegetable oils, artificial flavorings, and emulsifiers like parabens, which can negatively impact both the taste and the workability of the chocolate.
High-quality chocolate, particularly dark chocolate, boasts a higher cocoa butter content. Cocoa butter is a natural fat that provides that luxurious, smooth melt-in-your-mouth texture and rich flavor we associate with gourmet chocolate. Inferior chocolates, with their added fillers, tend to melt unevenly, creating a grainy or greasy consistency rather than a silky-smooth ganache. This is especially noticeable in recipes where chocolate is the star, like homemade truffles. Investing in good quality chocolate ensures easier melting, superior emulsification with other ingredients, and ultimately, a more refined and intensely flavorful final product that truly shines.
What Premium Chocolate Brands Do You Recommend for Truffles?
For consistently excellent results in your easy chocolate truffles, I highly recommend sourcing high-quality chocolate. My personal favorites, known for their superior taste and melting characteristics, include Ghirardelli and Lindt. These brands offer a wonderful balance of accessibility and quality, making them perfect for home bakers. Additionally, I frequently use Guittard, which consistently delivers a fantastic flavor profile and smooth melt. Look for baking bars or high-quality chocolate chips with a clear percentage of cacao for the best flavor and performance.
Explore More Delectable Truffle Creations
If you’ve fallen in love with the simplicity and richness of this easy chocolate truffle recipe, you’re in for a treat! The world of truffles is vast and exciting, offering endless possibilities for flavor exploration. Here are some other fantastic truffle recipes to inspire your next culinary adventure, ranging from classic combinations to inventive seasonal delights:
- Oreo Balls / Oreo Truffles
- Rainbow Truffles Recipe
- Chocolate Chip Cookie Truffles
- Pumpkin Spice Truffles
- Sugar Cookie Truffles
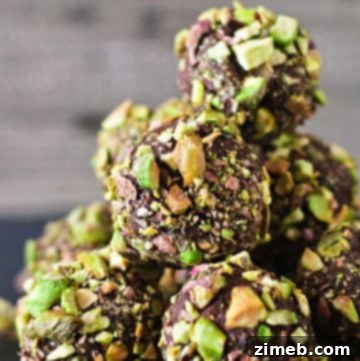
- Dark Chocolate Pistachio Truffles
- 4th of July Truffles
- Valentine Oreo Truffles
- Rainbow Mint Oreo Truffles
- Halloween Oreo Balls
- Chocolate Truffles with Holiday Sprinkles
- Holiday Nutella Bites
- Buckeyes
- Peppermint Oreo Balls
- Grinch Truffles
- Christmas Truffles
- Red Velvet Truffles
Irresistible Coconut Truffles: A Tropical Twist on a Classic
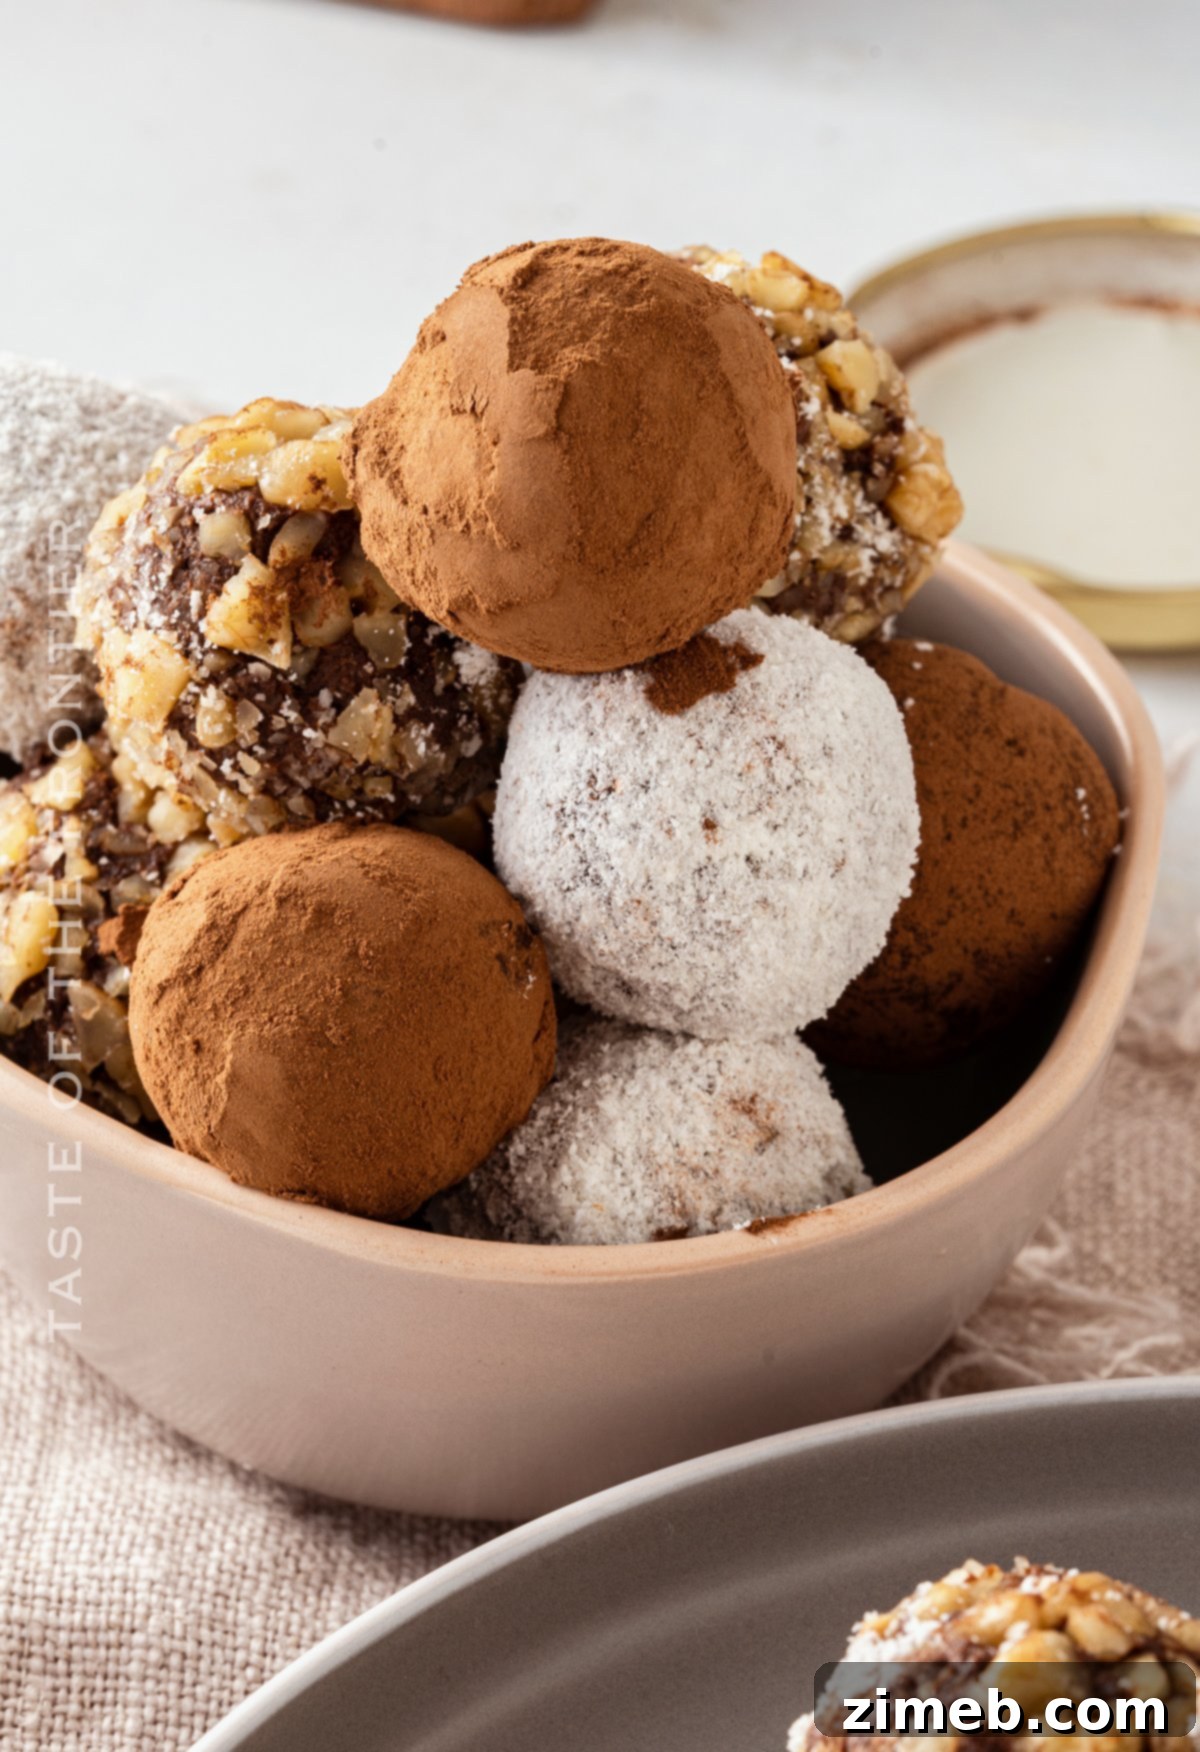
While this recipe focuses on classic chocolate truffles, the creamy base lends itself beautifully to various flavor additions, including a delightful coconut infusion. Imagine the rich chocolate combined with the tropical sweetness of coconut – it’s a match made in heaven! You can easily adapt this base to create luscious coconut truffles by incorporating finely shredded coconut into the mixture before chilling, or by using coconut flakes as a luxurious outer coating. The subtle texture and distinctive flavor of coconut add another layer of complexity and appeal to these already fantastic treats, perfect for those who enjoy a hint of the exotic in their desserts.
Troubleshooting: Why Didn’t My Chocolate Melt Correctly?
One of the most common challenges home bakers face when working with chocolate is improper melting. If your chocolate transforms into a lumpy, grainy mess rather than a smooth, creamy liquid, it’s said to have “seized.” This frustrating phenomenon typically occurs due to two primary reasons: overheating or, paradoxically, contact with even a minuscule amount of water or steam.
In the case of **overheating**, the chocolate’s delicate cocoa solids can burn, causing them to clump together and separate from the cocoa butter. This results in a thick, unworkable paste. To prevent this, always melt chocolate slowly and gently, whether using a microwave or a double boiler, and never expose it to direct, high heat.
**Water contamination** is another major culprit. Chocolate is primarily composed of fat (cocoa butter), which is hydrophobic, meaning it “fears” water. When water comes into contact with melted chocolate, the sugar particles in the chocolate absorb the water and begin to crystalize. The fat can no longer coat these sugar crystals smoothly, causing the chocolate components to separate and form a stiff, chunky, unappetizing texture. Even a drop of steam from a double boiler can cause seizing. Therefore, extreme care must be taken to ensure your melting equipment is completely dry and no steam escapes into the chocolate. Always refer to the package directions for your specific type of chocolate, as melting temperatures and methods can vary. Patience and attention to detail are key to achieving perfectly melted, silky chocolate for your truffles.
Elevate Your Truffles: Can They Be Coated in More Chocolate?
Absolutely! Coating your truffles in an additional layer of chocolate takes them from delightful to truly decadent, adding a satisfying snap and another dimension of flavor. This professional touch elevates the humble homemade truffle into a gourmet confection. To achieve this exquisite finish, follow these simple steps:
- First, melt an appropriate amount of your chosen chocolate, following the precise melting instructions provided in the main recipe or on the chocolate’s packaging. Ensure it’s perfectly smooth and free of any lumps.
- Once your truffles are rolled and thoroughly chilled (this is crucial for maintaining their shape and preventing them from melting when dipped), carefully dip each one into the melted chocolate. Use a fork or a specialized dipping tool to fully submerge and evenly coat the truffle.
- Gently lift the truffle out of the melted chocolate, allowing any excess to drip off back into the bowl. A slight tap on the side of the bowl can help remove drips.
- If you plan to add sprinkles, chopped nuts, cocoa powder, or any other decorative elements, apply them immediately after dipping, while the chocolate coating is still wet. This ensures they adhere beautifully.
- Carefully place the coated truffles onto a sheet of parchment paper or a wire rack set over parchment paper (to catch drips).
- Repeat this process for all remaining truffles. Allow them to set completely, either at room temperature if cool enough, or by chilling them in the refrigerator until the chocolate shell is firm.
The Ultimate Chocolate Truffles Recipe: Simple & Decadent
Prepare to create the most exquisite chocolate truffles right in your own kitchen. This ultimate chocolate truffles recipe is designed for ease and guaranteed decadence, bringing together rich flavors and smooth textures to create a truly memorable dessert. We’ve streamlined the process without compromising on taste, ensuring that every bite is a luxurious experience. Gather your ingredients, and let’s make some magic!
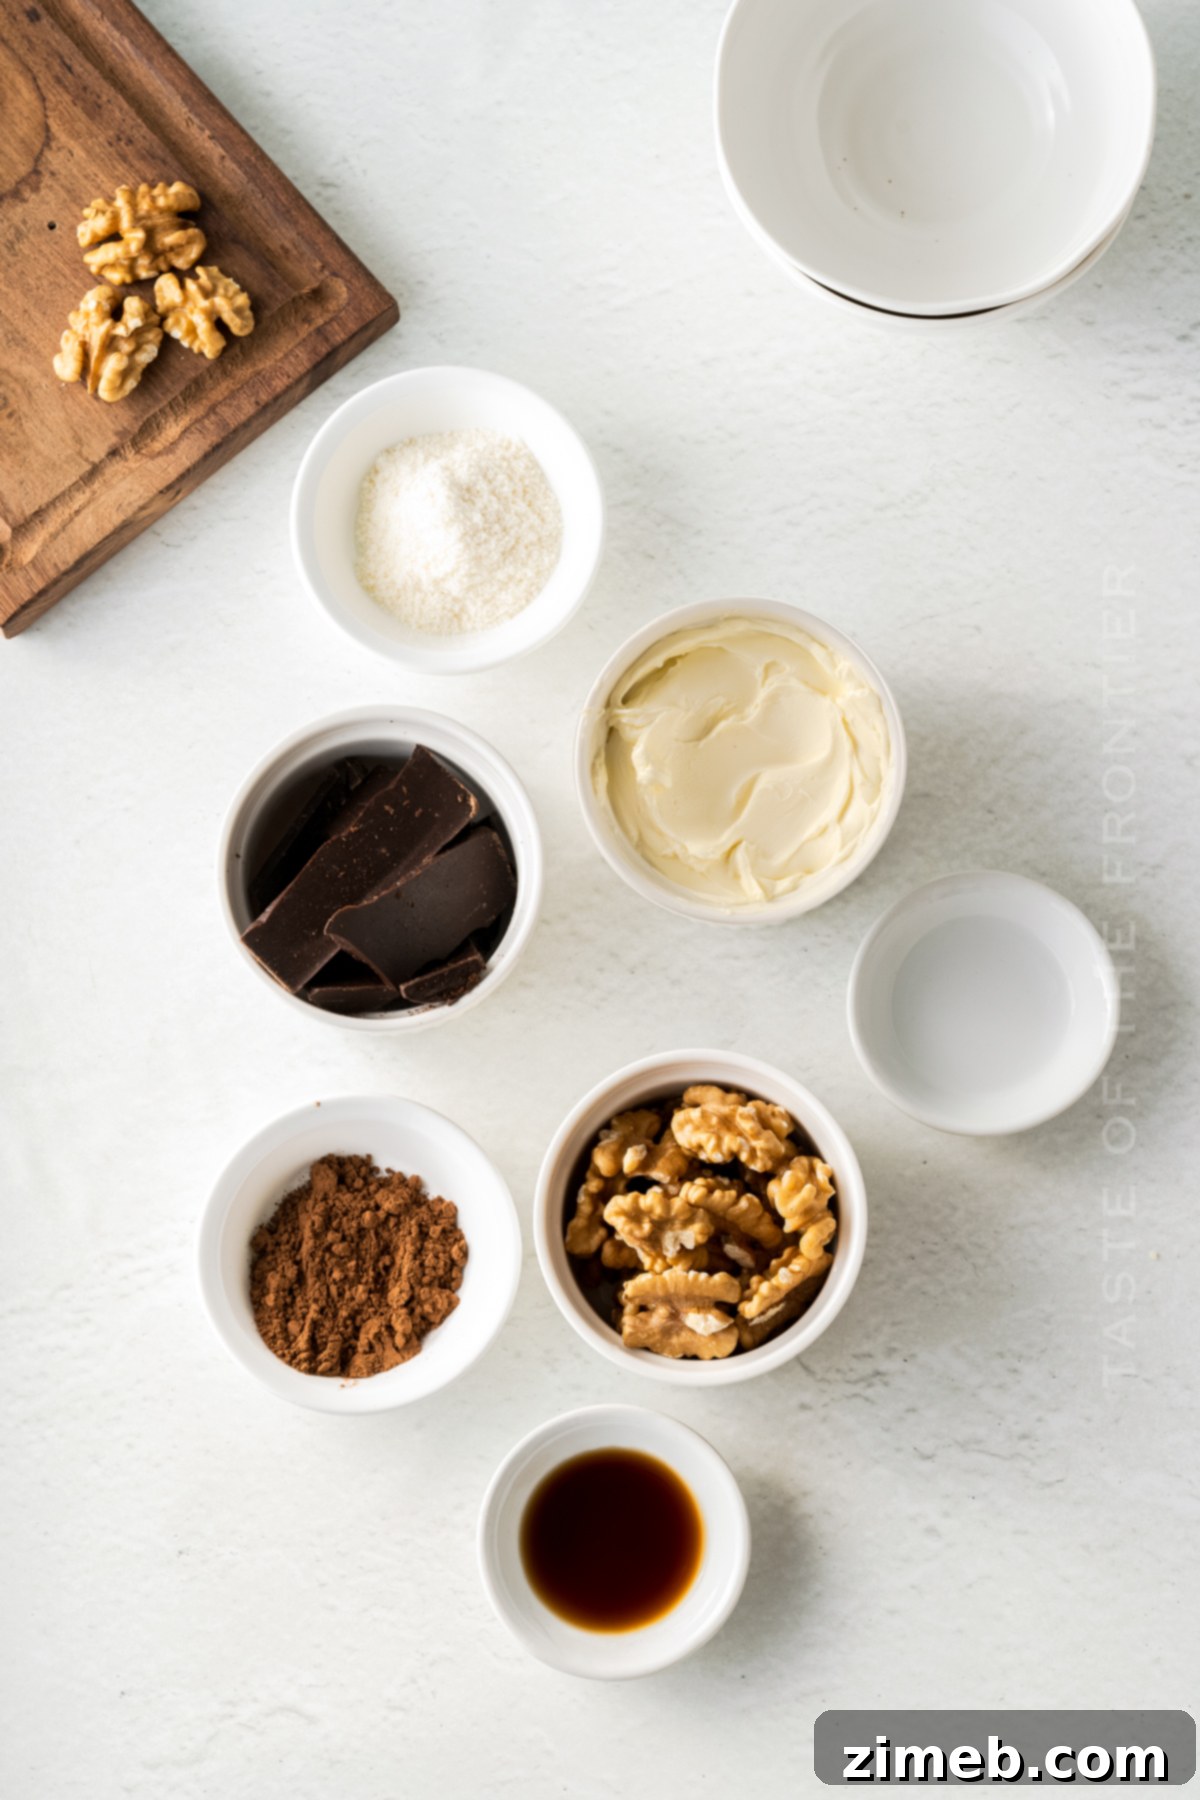
Essential Ingredients for Decadent Chocolate Truffles – QUICK LOOK
Crafting these rich and satisfying chocolate truffles requires just a few key ingredients. The simplicity of the list belies the depth of flavor they create when combined correctly. Here’s a quick overview of what you’ll need to begin your truffle-making journey:
- Cream cheese: Ensure it’s at room temperature for optimal blending and a super creamy texture.
- Confectioner’s sugar: Also known as powdered sugar, this provides sweetness and a smooth consistency without graininess.
- Chocolate chips: Your choice of semi-sweet, milk, or dark chocolate chips will define the primary flavor profile of your truffles.
- Vanilla extract: A touch of pure vanilla enhances the chocolate flavor beautifully.
Optional Garnishes to Elevate Your Truffles
While the truffles are delicious on their own, a simple garnish can add both visual appeal and an extra layer of texture and flavor. Consider these options:
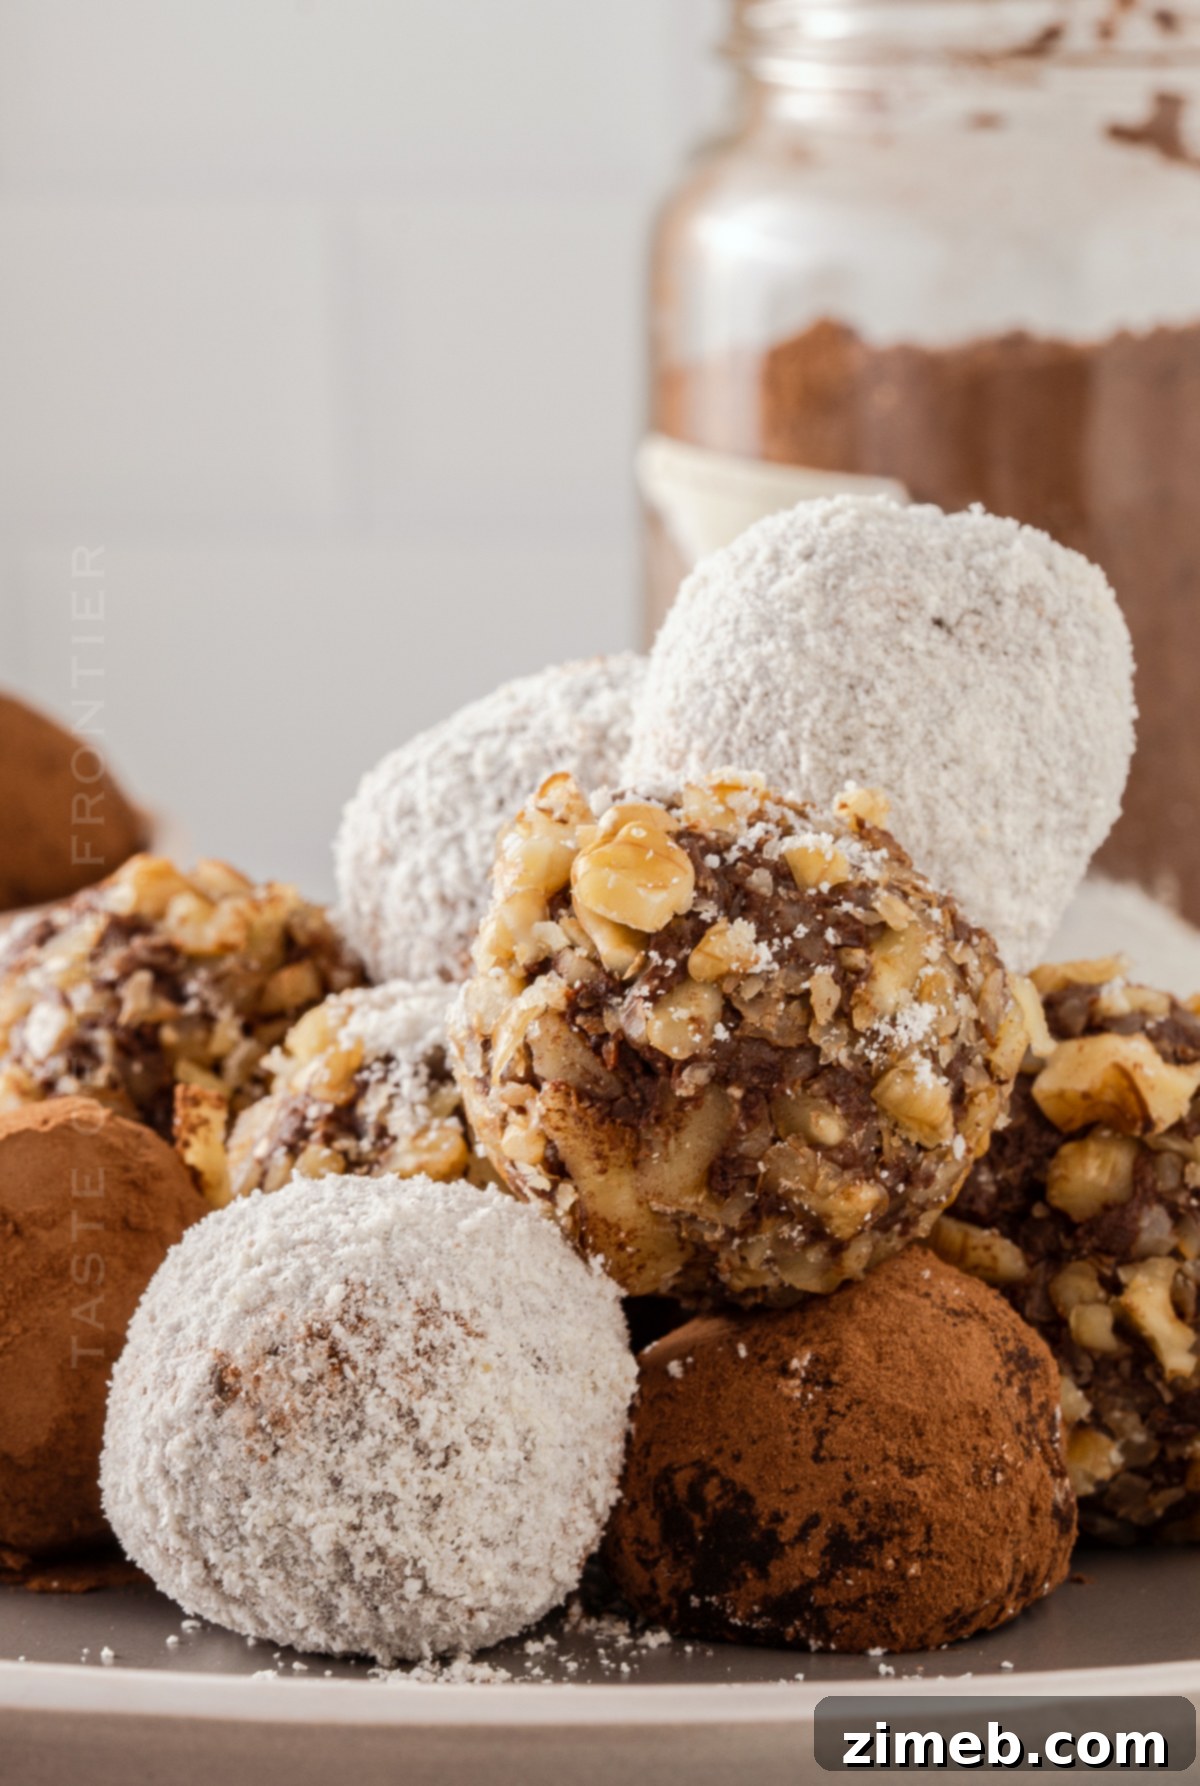
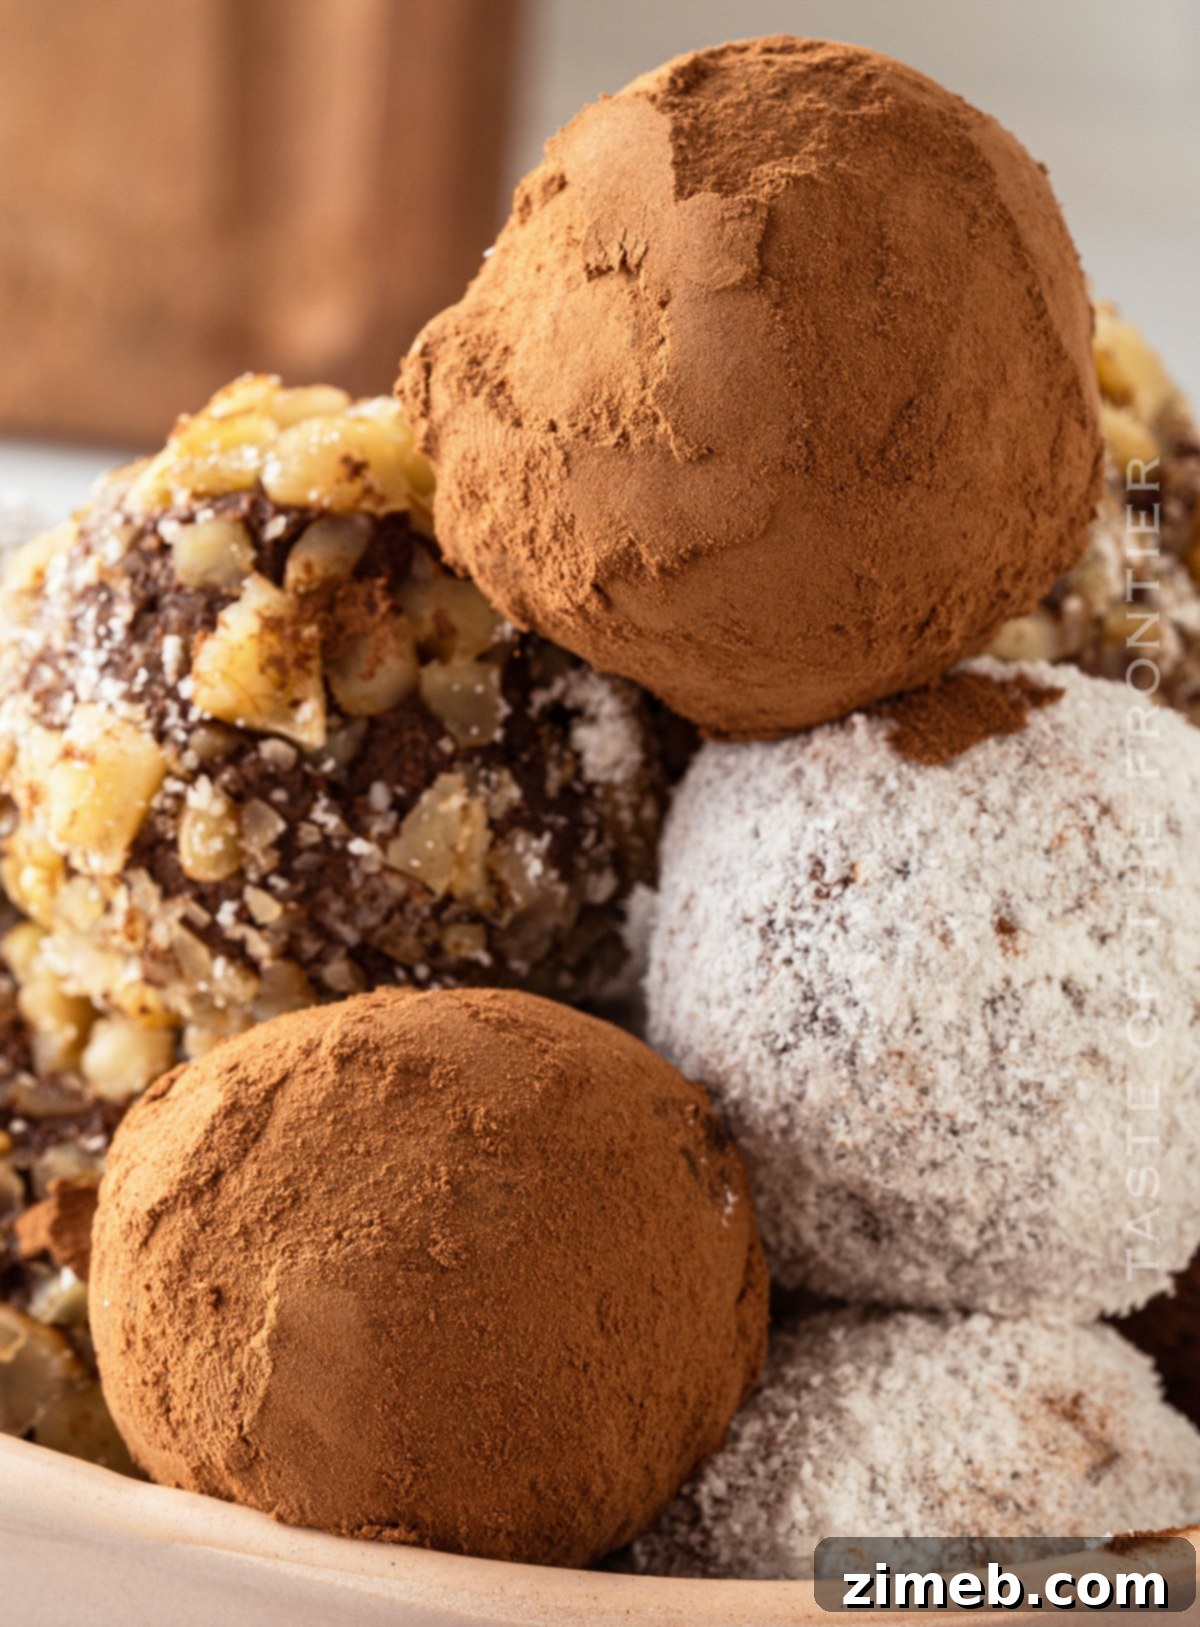
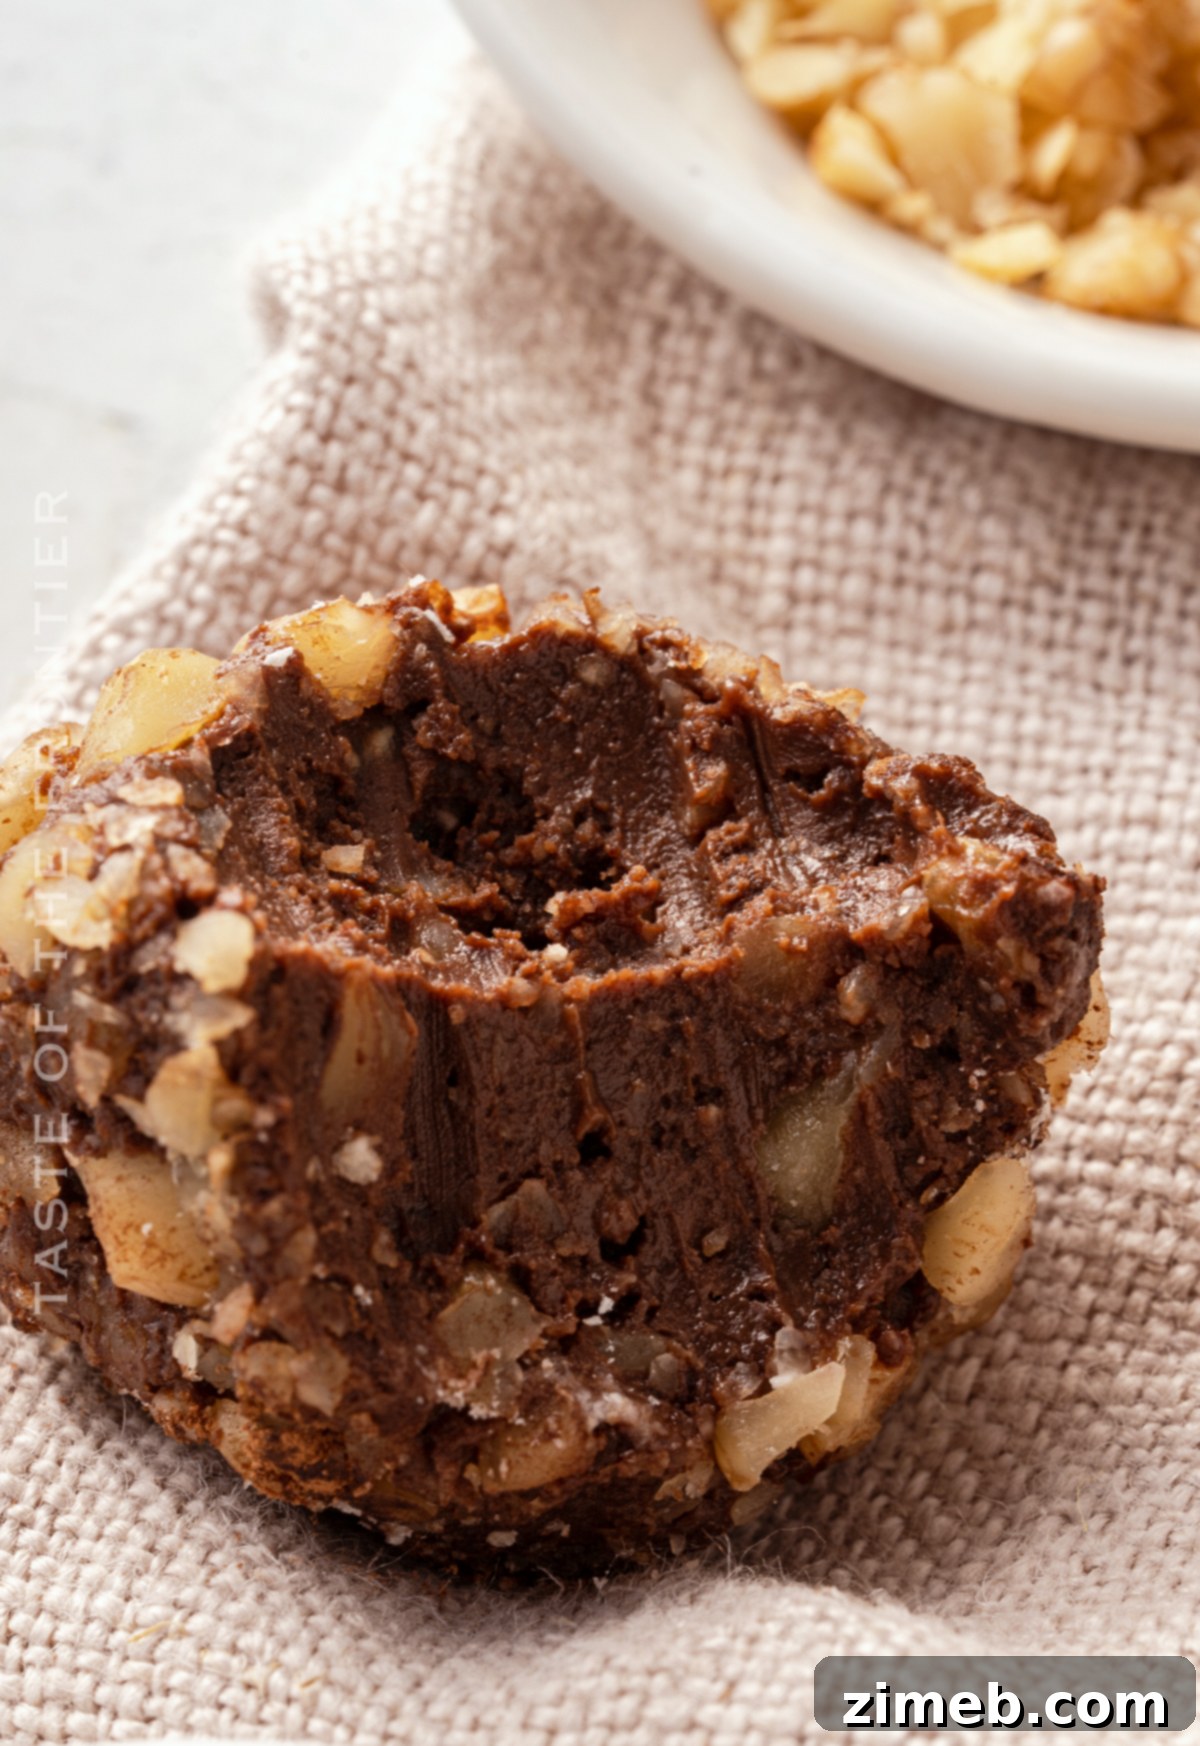
- Walnuts: Finely chopped walnuts (divided for mixing and coating) provide a delightful crunch and nutty flavor. *Optional
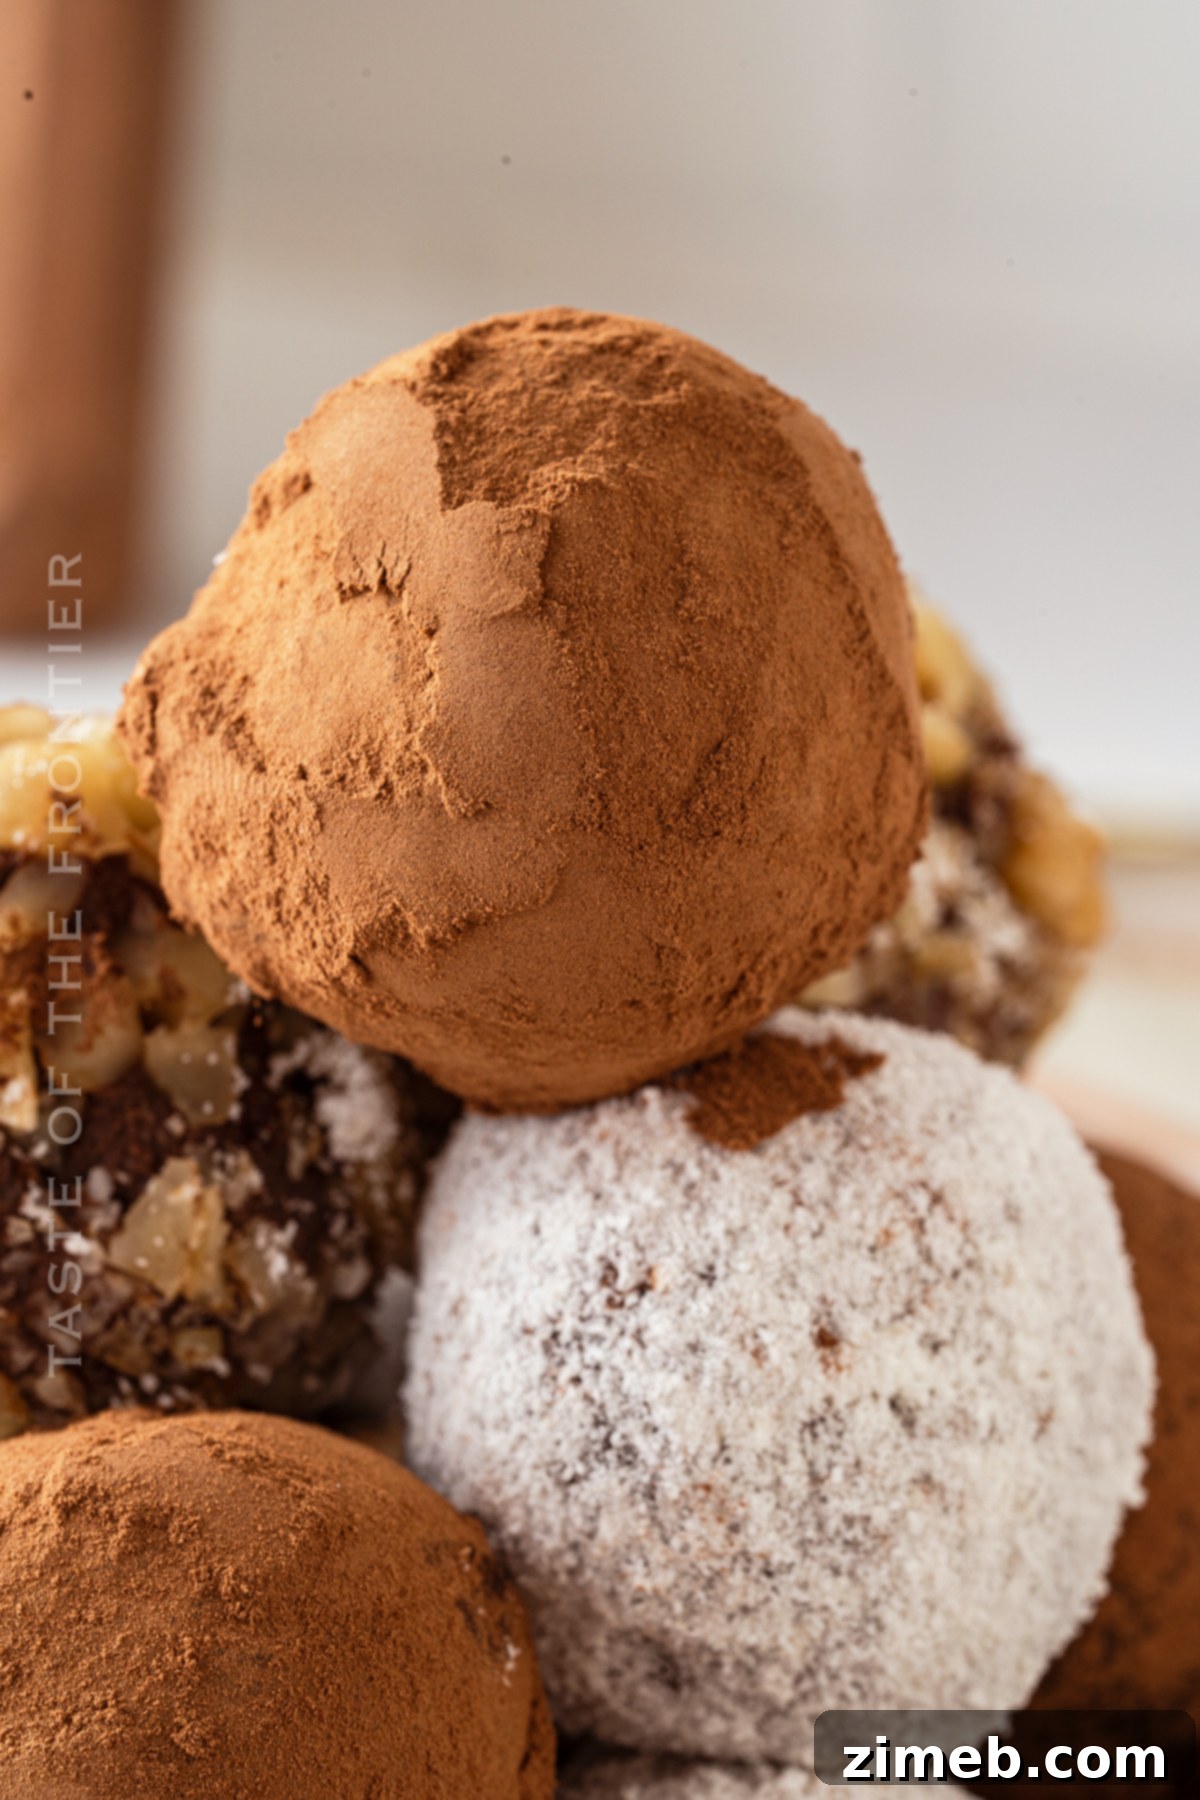
- Cacao powder: A dusting of unsweetened cacao powder offers a classic, sophisticated finish and a hint of bitterness to balance the sweetness. *Optional
- Unsweetened or sweetened shredded coconut: For a tropical twist, roll your truffles in shredded coconut. *Optional
Optimal Storage for Leftover Chocolate Truffles
Proper storage is key to maintaining the freshness, texture, and flavor of your homemade chocolate truffles. Any extra truffles can be effectively refrigerated for up to two weeks when stored in a sealed, airtight container. This prevents them from drying out, absorbing refrigerator odors, or developing unwanted textures. While refrigeration extends their shelf life, it’s important to note that truffles can become quite firm when chilled. For the absolute best eating experience, I highly recommend allowing them to sit out at room temperature for approximately 15 to 20 minutes before serving them again. This brief period allows the cream cheese and chocolate to soften slightly, restoring their signature creamy, melt-in-your-mouth decadence. You can also freeze truffles for longer storage (up to 3 months) in a freezer-safe airtight container, thawing them in the refrigerator before bringing them to room temperature to serve.
Decadent Chocolate Truffles: A Step-by-Step Guide
Making these gourmet chocolate truffles is a surprisingly simple process that yields incredibly impressive results. Follow these detailed steps to create perfectly smooth, rich, and irresistible treats that will delight everyone.
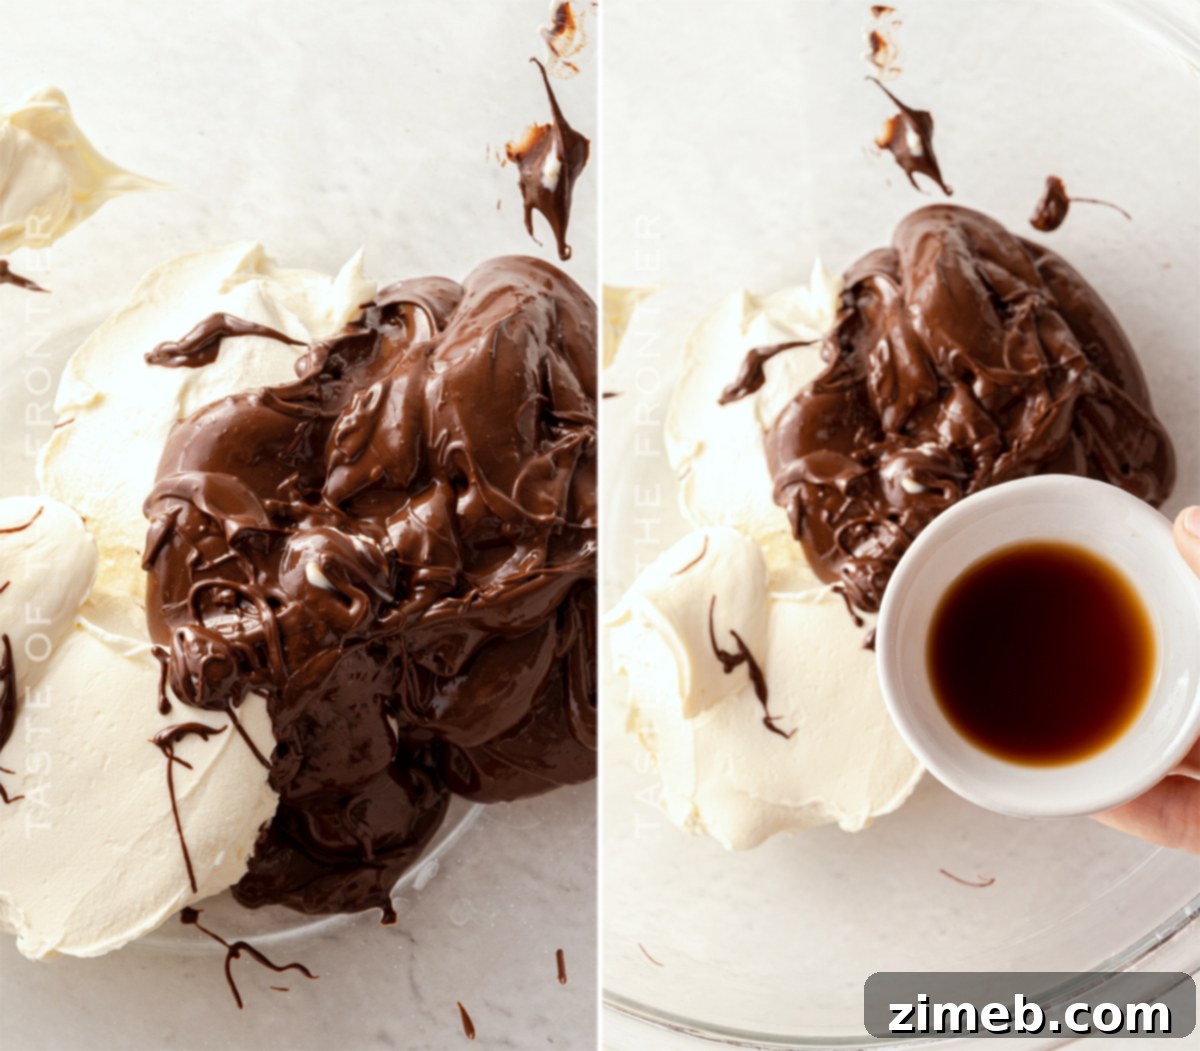
Simplified Instructions: How to Make Chocolate Truffles
- Begin by placing the room temperature cream cheese into a medium-sized mixing bowl. Using a stand mixer or a hand mixer, beat the cream cheese on medium speed until it becomes light, smooth, and achieves a beautifully whipped consistency. This aeration is crucial for a fluffy texture.
- Next, gradually incorporate the confectioner’s sugar into the whipped cream cheese. Continue blending until the mixture is thoroughly combined, light, and wonderfully fluffy. Scrape down the sides of the bowl as needed to ensure everything is fully integrated.
- Carefully melt your chosen chocolate chips. You can do this using a double boiler on the stovetop or in a microwave-safe bowl. Refer to our “Notes for Melting Chocolate” section below for detailed instructions to prevent seizing. Once melted, allow the chocolate to cool slightly to a lukewarm temperature before proceeding. This prevents it from firming up the cream cheese mixture too quickly.
- With the mixer on low speed, slowly fold the slightly cooled melted chocolate into the cream cheese mixture, along with the vanilla extract. Mix until just combined and uniformly colored. This is also the ideal moment to introduce any other desired extracts (like almond or mint) or finely chopped nuts into the truffle base.
- Once mixed, cover the bowl and chill the truffle mixture in the refrigerator for a minimum of 1 hour. This crucial step allows the mixture to firm up, making it much easier to handle and roll.
- After adequate chilling, the mixture should have a stiff, scoopable consistency, indicating it’s ready for shaping.
- Using a small cookie scoop (approximately 3/4-inch to 1-inch in diameter) for uniform portions, scoop out the truffle mixture. Then, gently roll each portion between your palms to form perfectly round balls.
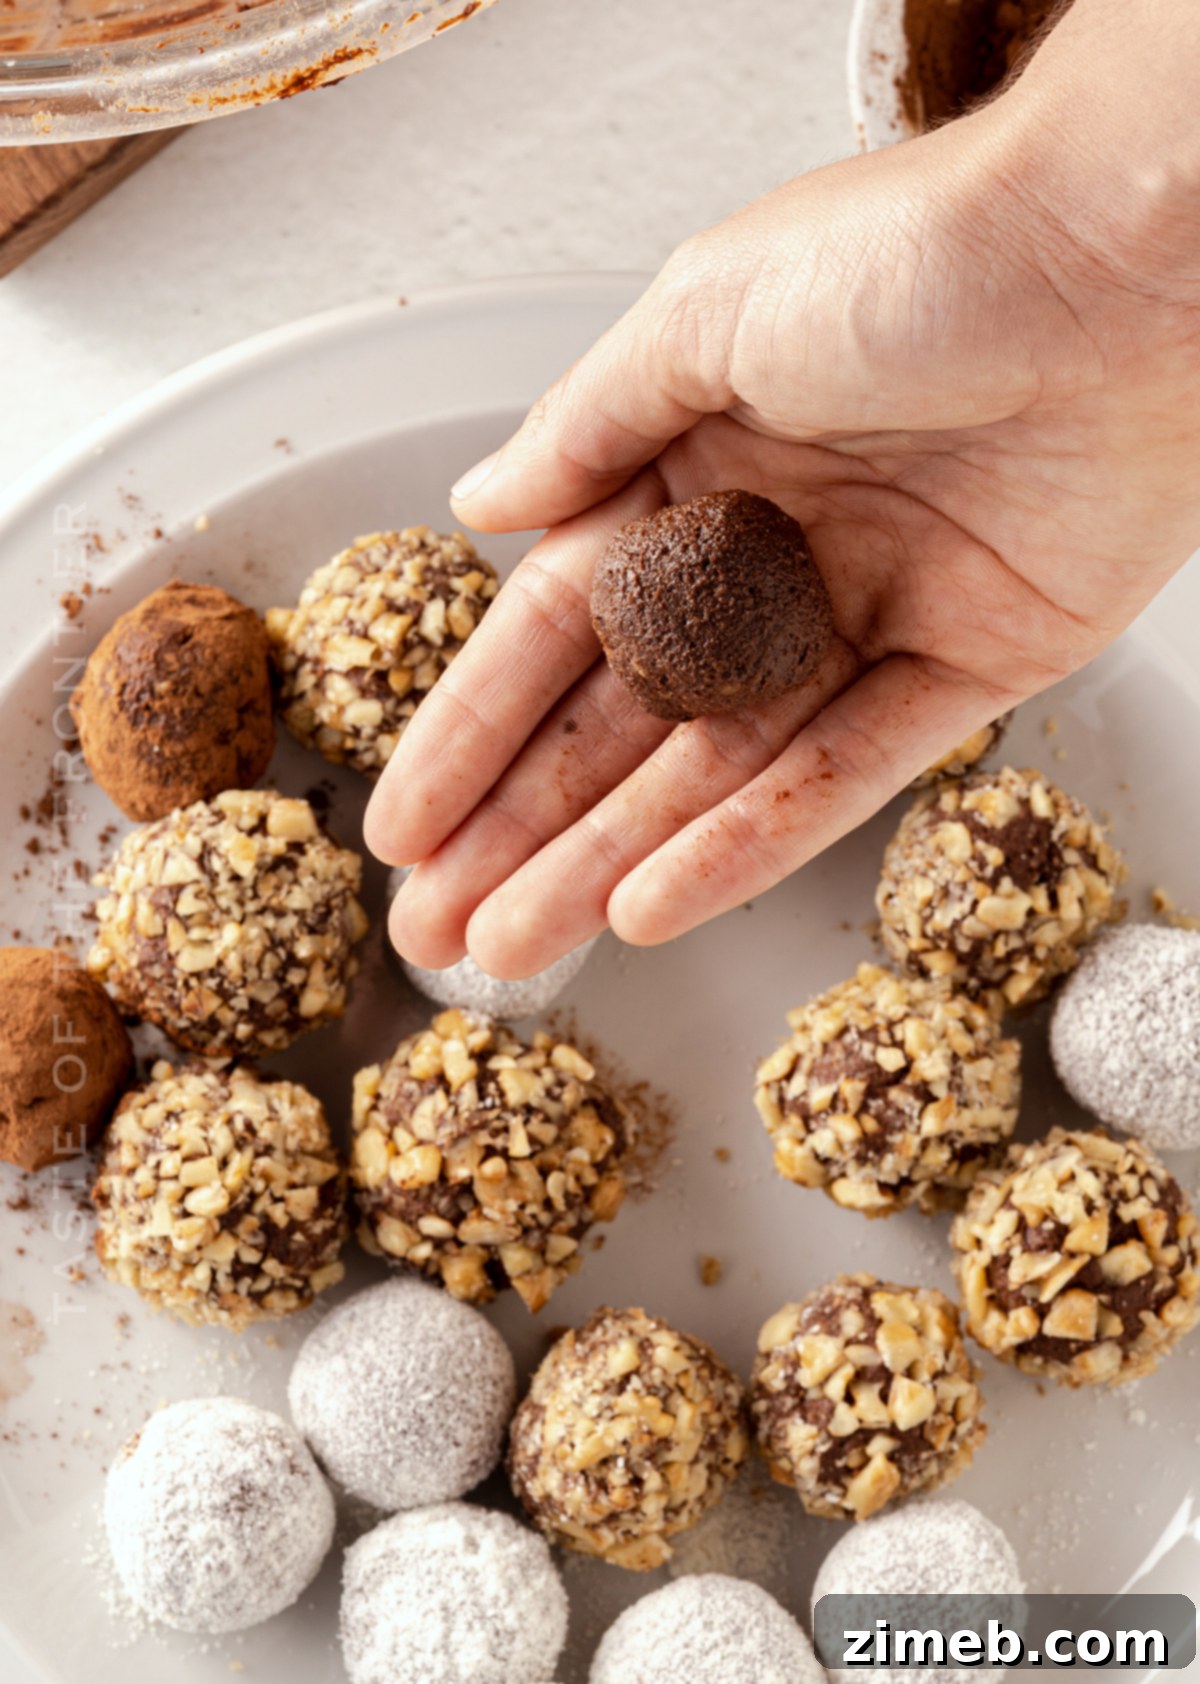
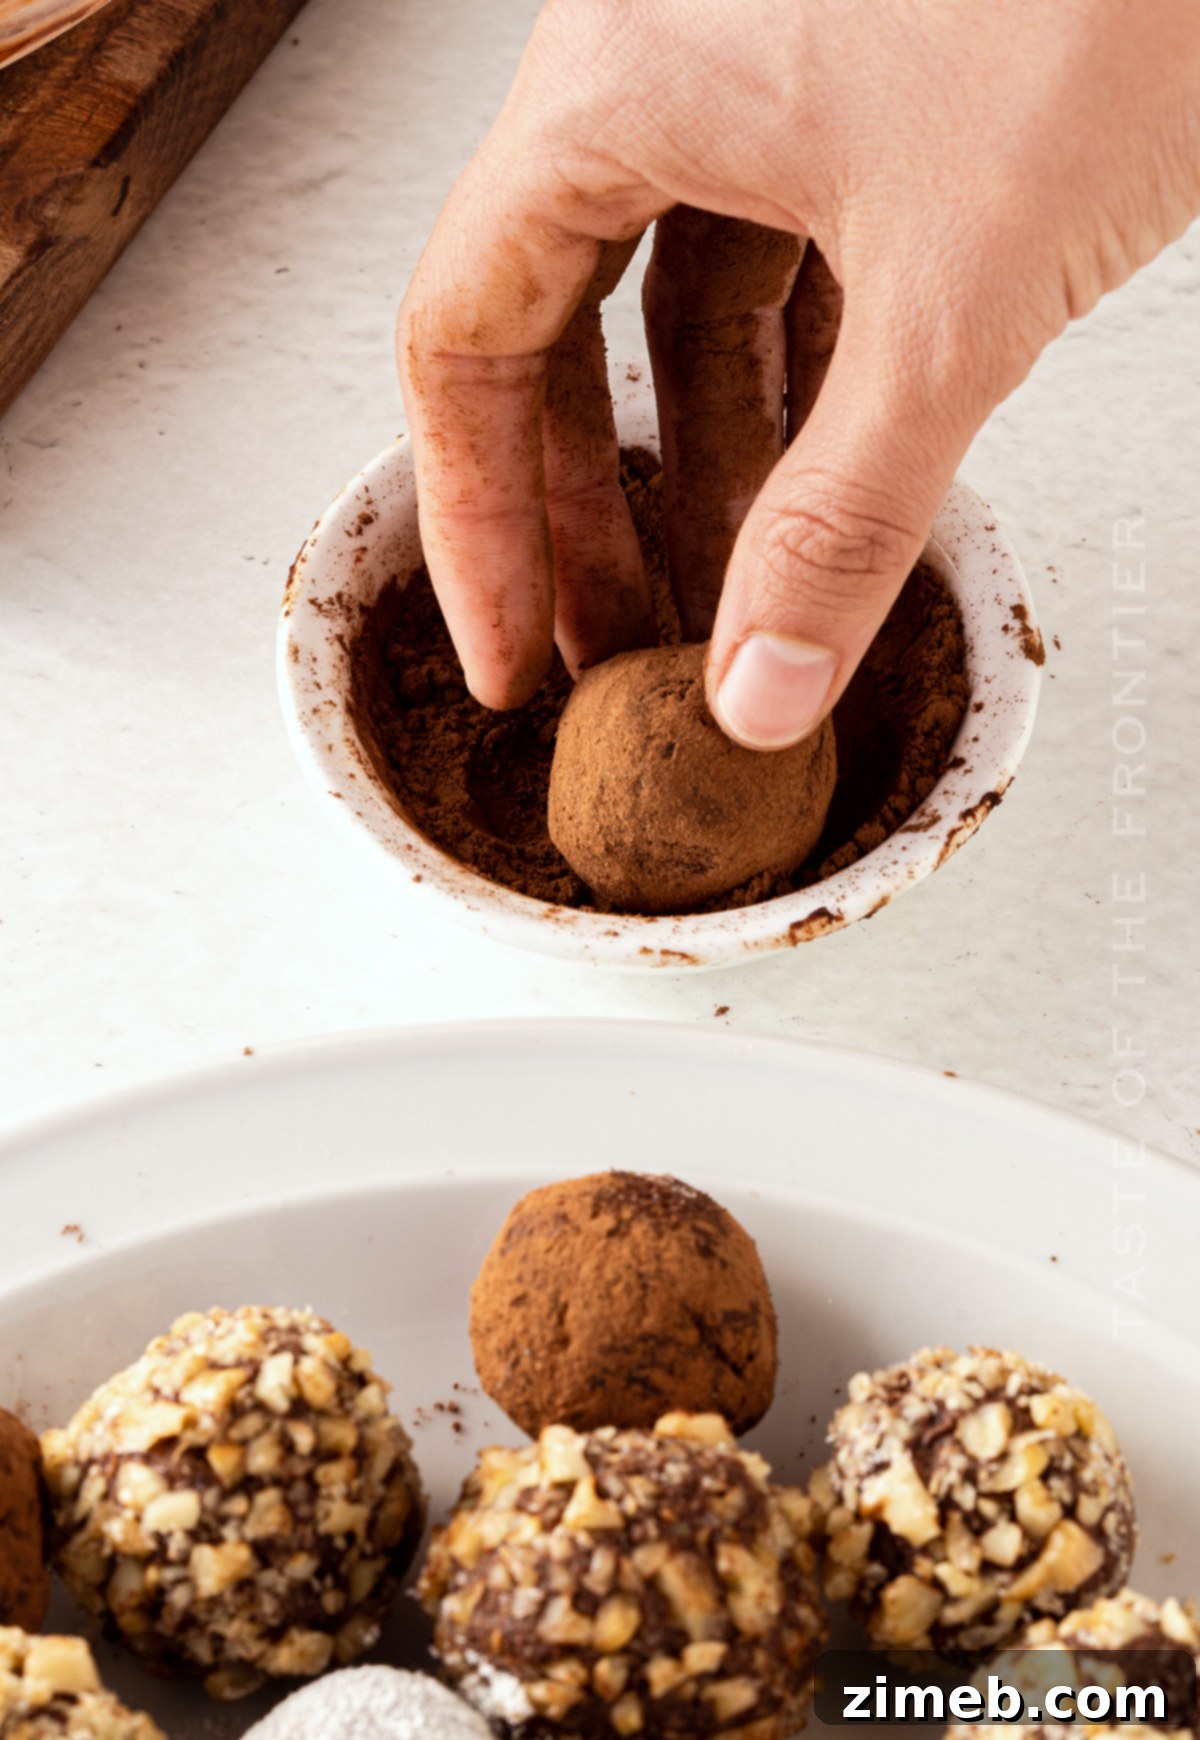
- Immediately roll the shaped truffles in your desired coating. Popular choices include finely chopped nuts, shredded coconut, or unsweetened cocoa powder. Ensure they are fully covered for a beautiful finish.
- Place the coated truffles on a parchment-lined tray and refrigerate until they are firm and ready to be served.
- Any leftover truffles should be returned to an airtight container and refrigerated. They will stay fresh and delicious for up to 2 weeks.
Exploring Alternatives: Can I Use Low-Fat Cream Cheese in Truffles?
While these decadent chocolate truffles can indeed be made with low-fat cream cheese, it’s important to set appropriate expectations regarding the final texture. Low-fat cream cheese contains a significantly reduced amount of fat compared to its full-fat counterpart, and fat is a crucial component in achieving that signature luxurious, creamy, and melt-in-your-mouth truffle consistency. Consequently, when using low-fat cream cheese, the resulting truffles will not be quite as rich or as smooth. They may possess a slightly firmer, less velvety texture. If you’re looking to reduce calories or fat, it’s a viable option, but be prepared for a subtle difference in the overall mouthfeel. For the most indulgent and authentic truffle experience, full-fat cream cheese is always the recommended choice.
Mastering Your Truffle Recipe: Tools and Tips
Creating a truly remarkable truffle recipe often comes down to precise execution and the right tools. While many recipes can be adapted, certain steps benefit greatly from specific equipment. We’ll explore why a mixer is recommended and how different chocolate types can influence your final product, ensuring your homemade truffles are nothing short of perfect.
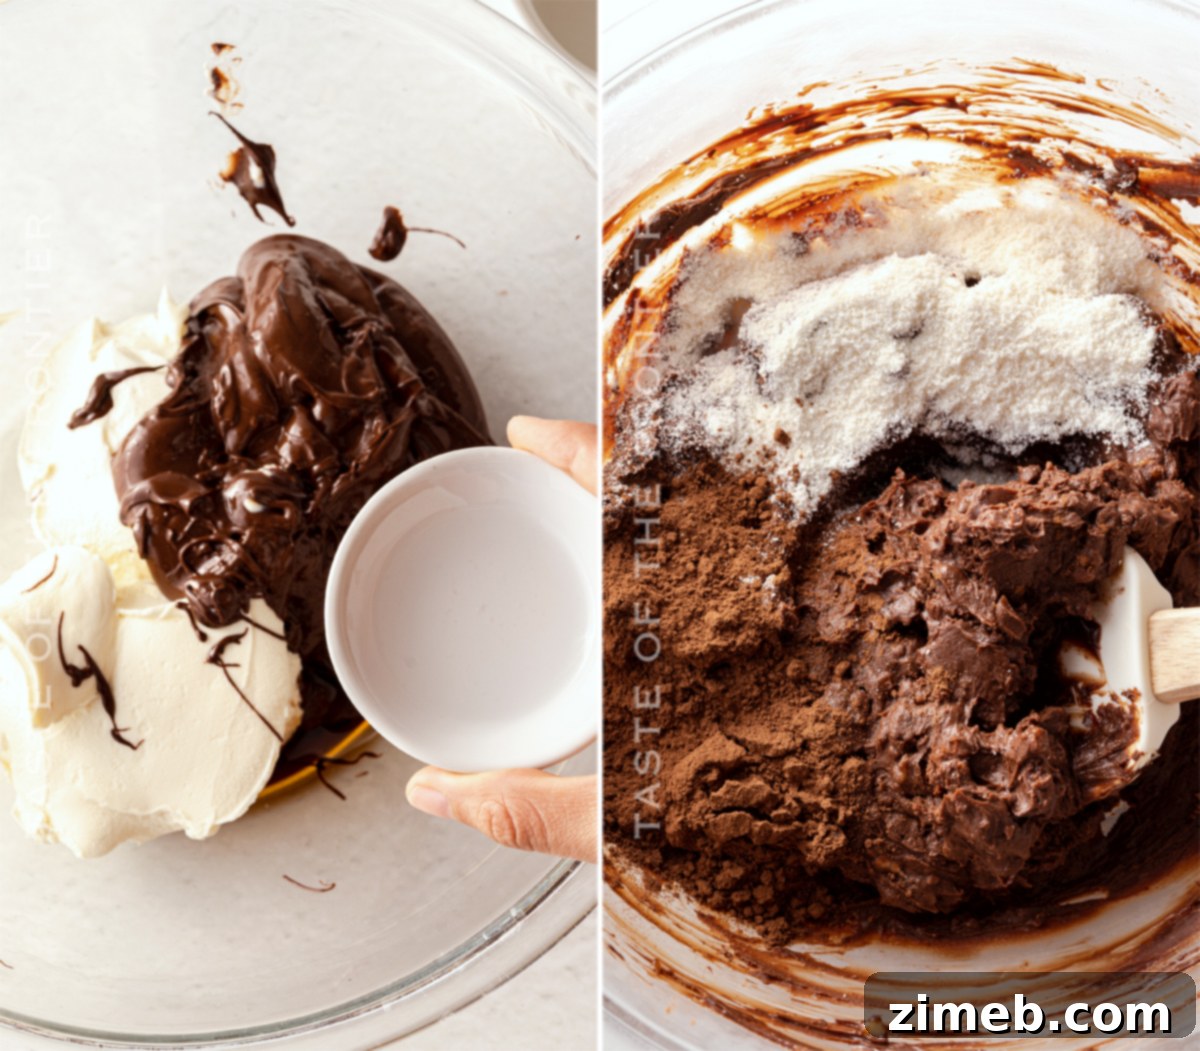
The Importance of a Mixer for Perfect Truffle Consistency
For this chocolate truffle recipe, which relies heavily on achieving a perfectly smooth and light base, I strongly advise using a mechanical mixer. A stand mixer, with its powerful motor and paddle attachment, is ideal, but a good quality hand mixer will also yield excellent results. The reason a mixer is so beneficial is that the cream cheese needs to be thoroughly beaten and aerated to a whipped consistency before the sugar is added, and then the chocolate needs to be perfectly incorporated without overworking. Attempting this with a whisk by hand, while technically possible, would require considerable arm strength and patience, and you might struggle to achieve the desired light and fluffy texture, which is crucial for creamy truffles. The mixer ensures consistent blending, preventing lumps and creating that wonderfully smooth truffle base that melts beautifully in your mouth.
Can I Use a Different Type of Chocolate for These Truffles?
Absolutely, experimenting with different types of chocolate is a fantastic way to personalize your homemade truffles and discover new flavor profiles! This recipe is incredibly versatile and works exceptionally well with various chocolate varieties. You can confidently use **dark chocolate** for a more intense, less sweet truffle, **milk chocolate** for a sweeter, creamier, and more familiar flavor, or **semi-sweet chocolate** for a balanced richness that appeals to most palates. Each type will impart its unique characteristics to the final product, allowing you to tailor the truffles to your preference.
Regarding **white chocolate**, I haven’t personally tested this specific recipe with it due to white chocolate’s different melting properties and composition (it doesn’t contain cocoa solids, only cocoa butter, milk solids, and sugar). White chocolate can be more temperamental to melt and might alter the texture significantly in this cream cheese-based truffle. However, I am eager to give it a try in the future and will certainly update you once I’ve experimented and confirmed successful results. For now, stick with dark, milk, or semi-sweet for reliable and delicious outcomes.
Crafting Perfect Chocolate Truffle Balls: Key Insights
The secret to perfectly smooth and uniformly shaped chocolate truffle balls lies not just in the ingredients, but in understanding how they interact, particularly at different temperatures. Each step, from conditioning your cream cheese to the final chill, contributes to the luscious texture and ease of handling that defines a truly exceptional homemade truffle. Let’s explore the critical role of temperature and ingredient preparation.
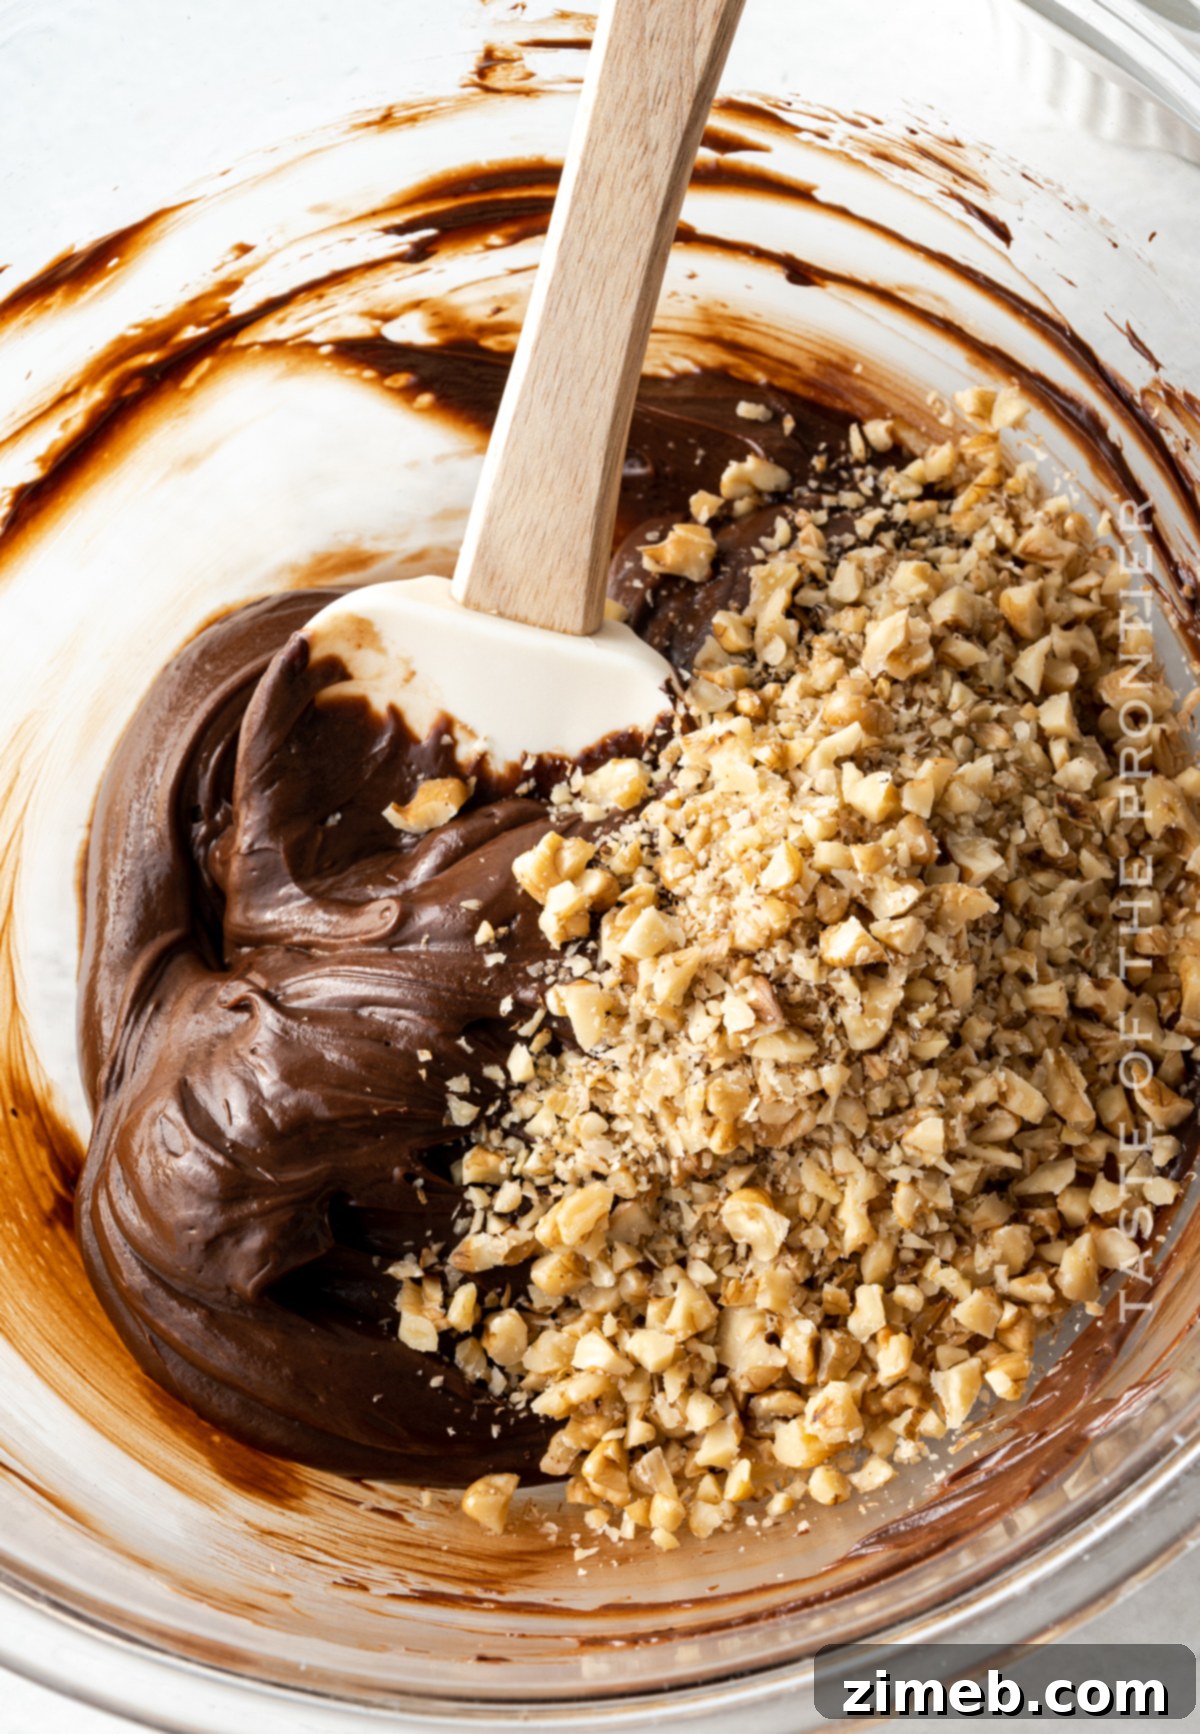
The Critical Role of Room Temperature Cream Cheese
This detail is not just a suggestion; it’s genuinely important for the success of your easy chocolate truffles. If you attempt to blend melted chocolate into cold cream cheese, you will undoubtedly encounter a host of issues. The most common problem is that the cold cream cheese will immediately seize the melted chocolate, causing it to harden and form stubborn streaks and lumps throughout what should be a smooth mixture. Instead of a uniform, beautifully blended base, you’ll end up with an unappealing, semi-brown, chunky consistency that is impossible to roll into smooth truffle balls.
For the chocolate to seamlessly blend into the cream cheese, and equally important, for the cream cheese itself to whip into that desirable super creamy, airy texture, it must be completely at room temperature. This means taking it out of the refrigerator at least an hour or two before you plan to start your truffle making. Room temperature cream cheese is soft and pliable, allowing it to incorporate air when beaten and to emulsify effortlessly with the melted chocolate, creating that luxurious, homogenous base that is the hallmark of a perfect truffle.
Expert Notes for Flawless Chocolate Melting
Mastering the art of melting chocolate is crucial for a smooth truffle base. Here are detailed methods to ensure your chocolate melts perfectly every time:
To melt chocolate using a Microwave:
- Place your chocolate chips or finely chopped chocolate bar into a clean, dry, microwave-safe container.
- Microwave for 1-2 minutes at 50% POWER, stopping and stirring thoroughly every 60 seconds. Lowering the power level is critically important, as it prevents the chocolate from heating too quickly and unevenly, which is the primary cause of seizing. Continue this process until the chocolate is mostly melted but still has a few small lumps. Remove it from the microwave and stir continuously; the residual heat will melt the remaining lumps, resulting in a perfectly smooth consistency.
To use a Double Boiler method:
- Fill the bottom pan of a double boiler with about an inch or two of water, ensuring the water level does not touch the bottom of the top pan when it’s placed on top. Bring the water to a gentle simmer over low to medium heat.
- Place your chocolate in the top pan of the double boiler. Crucially, take extreme care to prevent any water or steam from entering the chocolate. Even a single drop of water can cause the chocolate to seize.
- Cook over low heat, stirring the chocolate frequently and gently with a dry spatula. Continue stirring until the chocolate is completely melted and beautifully smooth. This method offers more controlled, even heating, reducing the risk of overheating.
The Importance of Chilling: Why Firming Up Your Truffle Mixture is Essential
The chilling phase after mixing your chocolate truffle ingredients is a non-negotiable step that plays a pivotal role in the success of your homemade truffles. This period in the refrigerator allows the fat content in the cream cheese and chocolate to solidify, transforming the soft, pliable mixture into a firm, workable consistency. Without adequate chilling, attempting to scoop and roll the mixture would be an exercise in frustration. The unchilled mixture would be too soft and sticky, akin to a thick dip rather than a firm substance capable of holding its shape. It wouldn’t form neat balls, would be difficult to coat, and would melt rapidly in your hands. Chilling ensures that your truffles maintain their spherical form, develop that characteristic dense yet creamy bite, and are easy to handle and decorate. It’s the secret to achieving perfectly shaped, stable truffles every single time.
Unleash Your Creativity: Crafting Delicious Homemade Truffles
The beauty of homemade truffles lies in their versatility and the endless possibilities for customization. Once you’ve mastered the basic technique, you can easily adapt this easy chocolate truffle recipe to suit any taste or occasion. From incorporating unique flavor extracts to adding a variety of crunchy mix-ins and decorative coatings, crafting your own truffles allows for a truly personalized and delightful culinary experience. Let your imagination guide you as you transform simple ingredients into gourmet creations.
Chocolate Choice: Can I Use a Chocolate Bar Instead of Chocolate Chips?
Yes, absolutely! Using a high-quality chocolate bar instead of chocolate chips is an excellent choice for this easy chocolate truffle recipe and can often yield an even smoother melt and richer flavor, especially if you opt for a premium baking bar. When using a chocolate bar, you will need approximately 6 ounces by weight, or roughly 2 cups of rough-chopped chocolate, to substitute for the chocolate chips in this recipe. The key is to chop the bar into small, uniform pieces. This ensures that the chocolate melts evenly and consistently, preventing any scorching or seizing. Just remember to follow the melting instructions carefully, whether using a microwave or a double boiler, to achieve that perfect, silky-smooth consistency required for the truffle base.
Creative Optional Variations for Making These Truffles
Unleash your inner chocolatier by experimenting with these fantastic variations to customize your easy chocolate truffles. Each addition can transform the flavor and texture, making every batch a unique creation:
- **Sprinkles:** Add a festive touch with colorful sprinkles, perfect for holidays or celebrations.
- **Raw Sugar:** A coarse raw sugar coating provides a delightful textural contrast and a hint of extra sweetness.
- **Crushed Candy:** Incorporate crushed peppermints, toffee bits, or other favorite candies for a fun flavor and crunch.
- **Dehydrated Fruit Powder:** Roll truffles in raspberry, strawberry, or other fruit powders for a tangy, fruity burst of flavor.
- **Almond Extract:** A few drops of almond extract will give your truffles a sophisticated, nutty aroma.
- **Mint Extract:** Introduce a refreshing kick with a dash of mint extract, creating classic mint chocolate truffles.
- **Rum or Liqueur:** Infuse an adult flavor by adding a tablespoon or two of rum, Kahlúa, Grand Marnier, or your favorite liqueur.
- **Espresso Powder:** A teaspoon of finely ground espresso powder enhances the chocolate flavor and adds a subtle coffee note.
- **Peanut Butter:** Swirl in a couple of tablespoons of creamy peanut butter for a delicious peanut butter chocolate truffle.
- **Macadamia Nuts:** Mix in or coat with chopped macadamia nuts for a buttery, tropical crunch.
- **Mini-Chocolate Chips:** Integrate mini chocolate chips into the mixture for extra pockets of chocolatey goodness.
Serving a Delightful Truffle Dessert: Presentation and Pairing
Once you’ve meticulously crafted your chocolate truffle dessert, the presentation is the final flourish that elevates the entire experience. Whether you’re arranging them on a platter for a gathering, boxing them up as a thoughtful gift, or simply savoring them yourself, a little attention to detail goes a long way. Consider pairing these rich truffles with a strong espresso, a glass of red wine, or even a sparkling rosé to complement their deep chocolate notes. For gifting, place them in mini cupcake liners within a decorative box. For serving, arrange them artfully on a dessert tray, perhaps with a dusting of cocoa powder or a few fresh berries for color. Each truffle is a tiny piece of culinary art, ready to be enjoyed.
My Favorite Products for Making Perfect Truffles…
This chocolate truffle recipe is incredibly easy and undeniably delicious, making it a perfect project for any home baker. If you’re like me, you might already have some of these essential items tucked away in your kitchen. However, if you’re new to the wonderful world of homemade truffles and feeling a bit nervous, rest assured – you are going to love the process and the results! I’ve curated a list below of the specific tools and products that I absolutely rely on when crafting this chocolate truffle recipe, ensuring consistent success and enjoyment. (You can also SHOP MY FAVORITES directly in my online store for convenience).
- Spatulas: Essential for gently folding ingredients and scraping bowls clean.
- Measuring Spoons: For accurate measurement of vanilla extract and any additional flavorings.
- Mixer: A stand mixer or hand mixer is highly recommended for achieving that perfectly whipped cream cheese base.
- Cookie Scoop: Ideal for portioning out uniform truffle balls, ensuring an even size and professional appearance.
If you adore this chocolate truffle recipe and enjoy effortless indulgence, you’re absolutely going to love these other fantastic no-bake treats as well. Each recipe is designed for ease and maximum flavor, making them perfect for any occasion. Please click on each link below to discover the simple, printable recipe and expand your repertoire of delicious, fuss-free desserts!
Check out this recipe
Check out this recipe
Check out this recipe
Check out this recipe

Check out this recipe
Check out this recipe
Check out this recipe
Check out this recipe
Check out this recipe
Other Decadent Chocolatey Desserts to Explore
If your love for chocolate extends beyond these delightful truffles, then you’re in for a treat! Our collection of chocolatey desserts offers a range of rich and satisfying options that are perfect for any chocolate enthusiast. Dive into these irresistible recipes:
Decadent Chocolate Cheesecake: A velvety smooth cheesecake with an intense chocolate flavor, perfect for special occasions.
Rich Chocolate Ganache Tart: An elegant and incredibly rich tart featuring a silky-smooth chocolate ganache filling in a crisp crust.
Easy Chocolate Covered Strawberries: A classic, simple, yet sophisticated dessert that pairs juicy strawberries with luscious chocolate coating.
Exquisite Chocolate Raspberry Cake: A harmonious blend of rich chocolate cake and tart raspberries, creating a beautifully balanced and indulgent dessert.
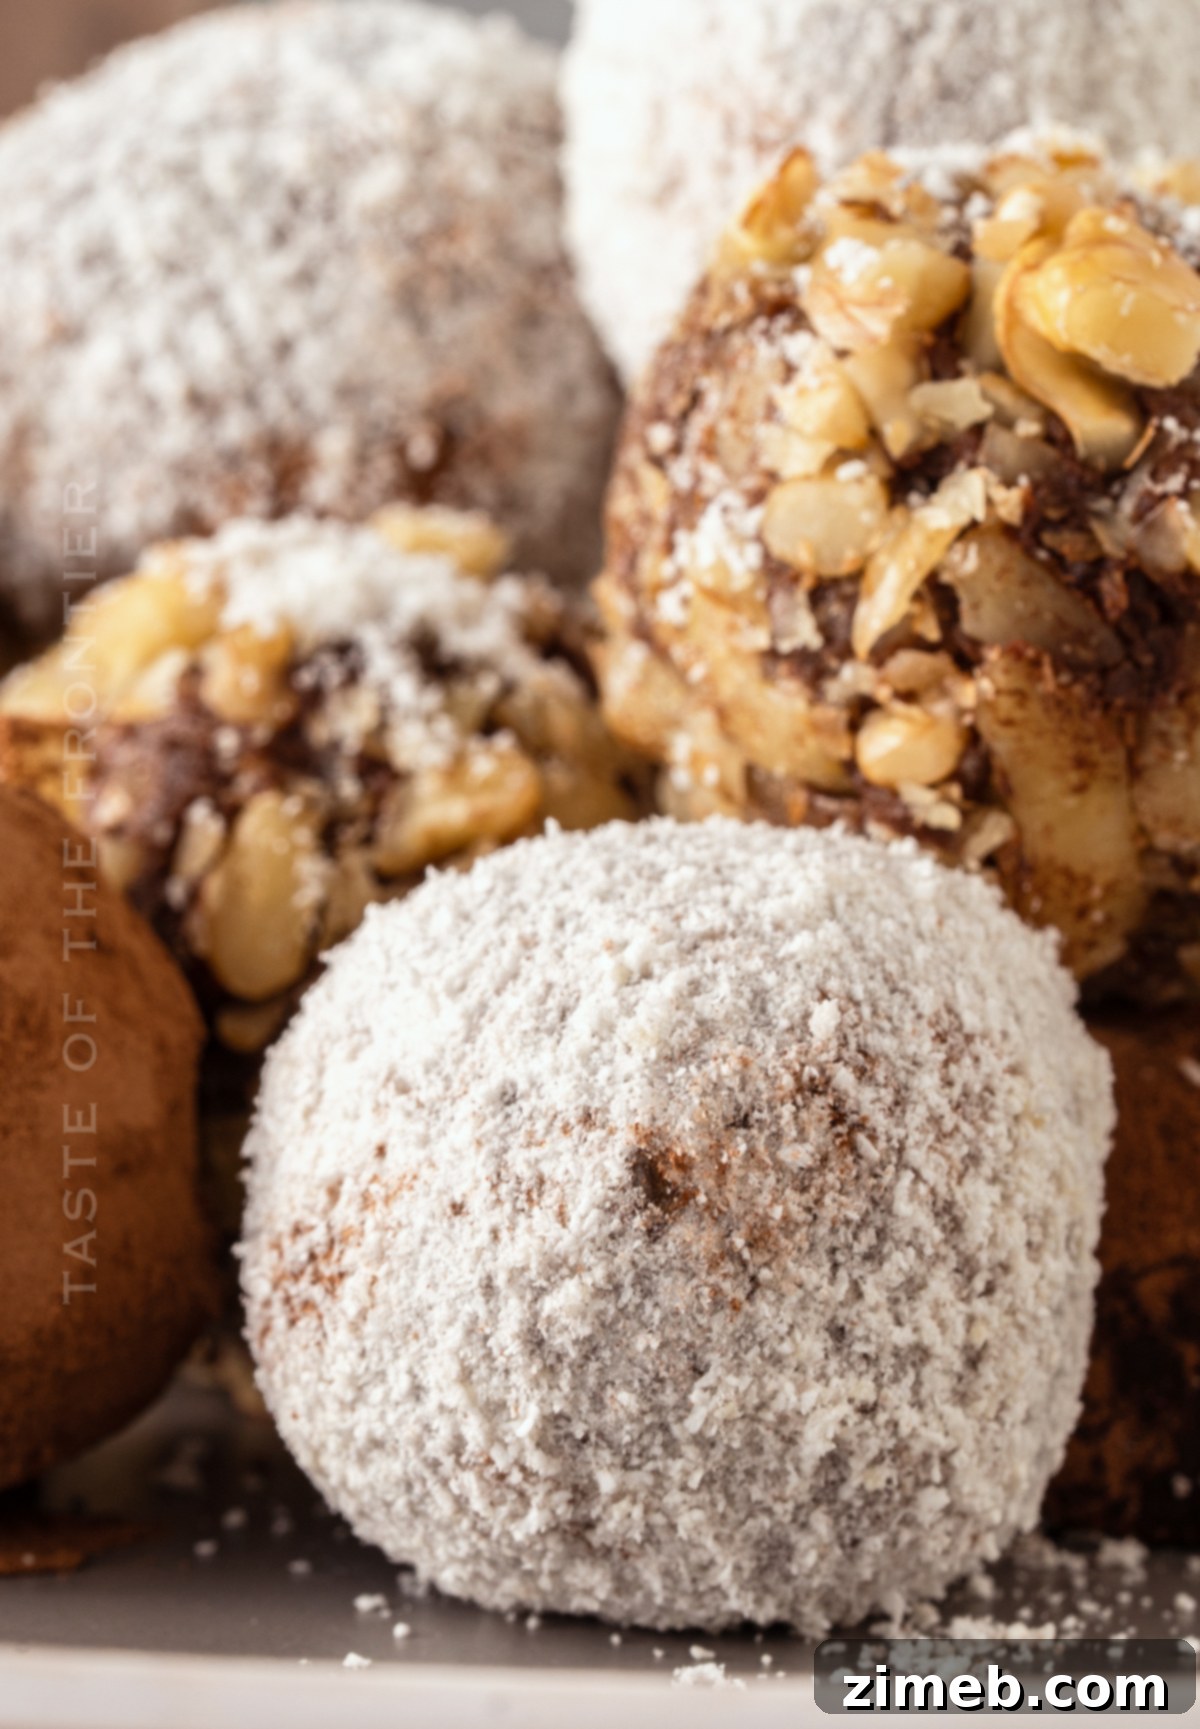
If you’ve enjoyed creating and tasting this amazing recipe for Easy Chocolate Truffles as much as I do, please consider leaving a five-star review below. Your feedback helps others discover and enjoy this delightful treat! Also, be sure to help me spread the word by sharing this recipe on your favorite social media platforms like Facebook and Pinterest!
CONNECT WITH YUMMI HAUS!
Be sure to follow me on my social media channels, so you never miss a delicious post or a new recipe! Stay updated with the latest culinary delights and inspiration.
Substack, Facebook, Pinterest, Instagram, Email Subscription
Rate this Recipe
Easy Chocolate Truffles
Ingredients
- 8 oz cream cheese – room temperature
- 2 cups confectioner’s sugar
- 2 cups chocolate chips – semi-sweet, milk or dark chocolate
- 1 tsp vanilla extract
To garnish
- 1 cup walnuts chopped – divided *opt
- 2 tbsp cacao powder *opt
- 2 tbsp unsweetened or sweetened shredded coconut *opt
Instructions
-
Beat the cream cheese in a medium mixing bowl until it achieves a whipped consistency.
-
Blend in the confectioner’s sugar until light and fluffy.
-
In a double boiler or microwave-safe bowl – melt the chocolate chips. Allow to cool slightly before adding to the crema cheese mixture. *see notes
-
Slowly fold in the melted chocolate along with the vanilla until combined. This is also the time to add any other extracts or the chopped nuts – if desired.
-
Chill in the refrigerator for at least 1 hour.
-
Once the mixture has chilled and has a stiff consistency, it is ready to move on to rolling.
-
Use a small cookie scoop to portion out 3/4 -1″ sized scoops and then roll between your hands to round it out.
-
Roll in desired coating – nuts, coconut or cocoa powder.
-
Refrigerate until ready to serve.
-
Return any leftovers to the refrigerator for up to 2 weeks.
Notes
Microwave
- Place the chocolate chips in a microwave-safe container.
- Microwave for 1-2 minutes on 50% POWER, stirring every 60 seconds until melted. Lowering the power level is very important so the chocolate doesn’t heat too quickly, causing it to seize instead of melt.
To use a double boiler –
- Place the chocolate in the top pan with water in the bottom pan. Take care to not get water in the chocolate as it can cause it to seize when melting.
- Cook over low heat, stirring frequently until the chocolate is melted and smooth.
Nutritional information for the recipe is provided as a courtesy and is approximate. Please double-check with your own dietary calculator for the best accuracy. We at Yummi Haus cannot guarantee the accuracy of the nutritional information given for any recipe on this site.