
For as long as I can remember, I’ve harbored a secret dream of crafting the perfect, enchanting Christmas tree. My vision has always gravitated towards the warm, inviting palette of creams, rich browns, and shimmering golds – colors that epitomize the cozy elegance of rustic Christmas tree decorations. Year after year, I’d resolve to transform our holiday centerpiece, promising myself a beautifully curated display. Yet, as the festive season inevitably approached, time would slip through my fingers, and we’d find ourselves dusting off the same eclectic, somewhat random assortment of ornaments we’d accumulated over the years. This year, however, things are different. This year, procrastination is not on the agenda.
I’m embracing a proactive approach, beginning my holiday preparations well in advance. And here’s the most delightful part: I’m committed to utilizing items I already possess. This means embracing the art of repurposing and upcycling, transforming everyday objects into stunning festive adornments without breaking the bank. My investment will be minimal – perhaps a few tubes of paint, some twine, and a deep dive into my crafting stash. This budget-friendly aspect is crucial, as my husband’s first (and often only) question regarding my “bright ideas” is invariably, “How much is this going to cost us?” This time, the answer is “nearly free,” and the reward is a truly magnificent, personalized Christmas tree.
Crafting Your Dream Rustic Christmas Tree: DIY Decor on a Budget
The allure of a rustic Christmas tree lies in its ability to evoke a sense of timeless warmth and natural beauty. It’s an aesthetic that speaks to cozy evenings by the fireplace, the earthy scent of pine, and the simple joy of handmade treasures. The combination of creams, browns, and golds creates a sophisticated yet grounded look, infusing your home with an inviting glow that feels both traditional and uniquely personal. Think ivory and champagne tones for brightness, deep espresso and caramel for warmth, and antique gold for that subtle sparkle. By focusing on natural materials and textures, we can achieve this coveted style effortlessly and economically.
The Charm of DIY Christmas Decor: Why Go Handmade?
Choosing to craft your own Christmas decorations offers a myriad of benefits beyond just saving money. It’s an opportunity for deep personalization, allowing your tree to tell a unique story that reflects your family’s style and values. Handmade ornaments often carry a sentimental value that mass-produced items simply cannot match. Moreover, it’s an incredibly sustainable approach, reducing waste by giving new life to forgotten items. Engaging in DIY projects can also be a wonderful family activity, creating cherished memories as you gather to paint, tie, and adorn. The sense of accomplishment derived from seeing your vision come to life through your own hands is truly unparalleled, making the holiday season even more special and meaningful.
Our First Step: Enchanting Pine Cone Ornaments
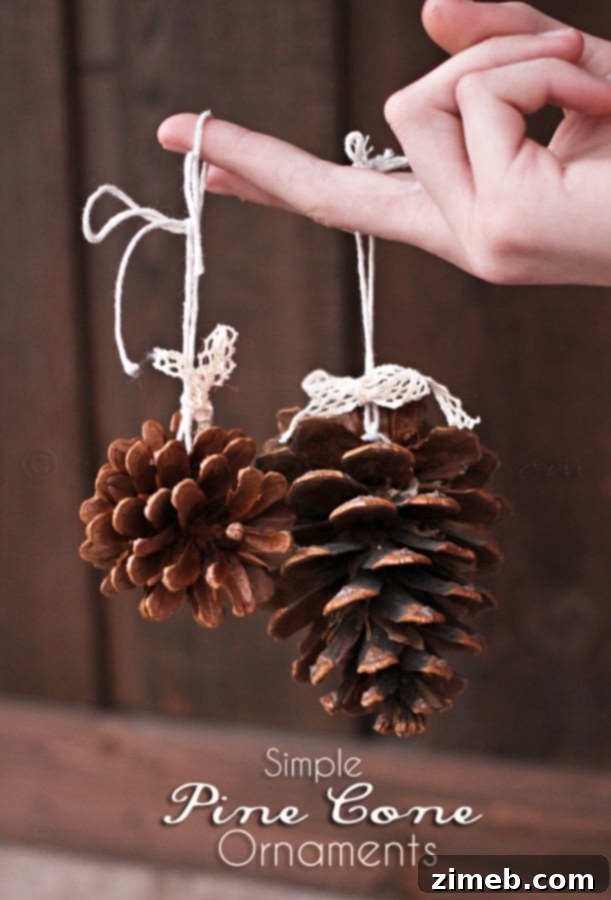
One of the very first elements I envisioned for my rustic tree was pine cones. Their natural beauty, varied textures, and organic shapes make them the quintessential rustic decoration. They are readily available, often free for the gathering, and incredibly versatile. I enlisted the children to help collect what they could find in our yard – a delightful outdoor adventure that quickly yielded a bountiful harvest. We’ll continue to add to our collection as more fall from the trees, ensuring a steady supply of these natural beauties. To begin, we transformed a handful of these natural treasures into charming, rustic ornaments that perfectly bridge the gap between the outdoors and our cozy indoor space.
Simple Pine Cone Ornaments
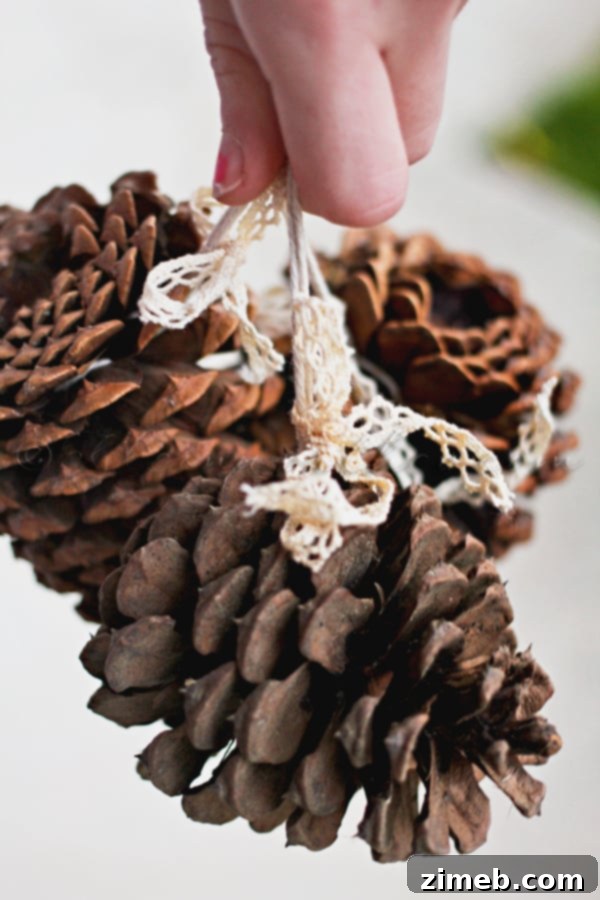
Super simple – just take your pine cone and intertwine your string around the base.
Tie a secure knot, and then tie another knot at the ends to create your hanging loop.
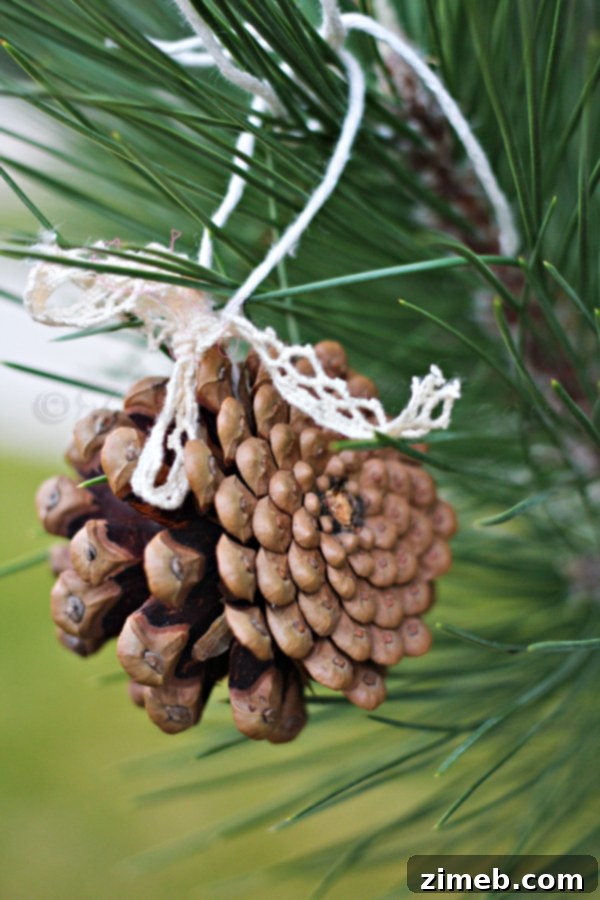
To add an extra touch of brightness and softness, I tied a delicate cream lace bow around the base of the pine cone. This simple addition beautifully contrasts with the natural texture of the cone, enhancing its rustic charm once it’s nestled among the branches of the tree.
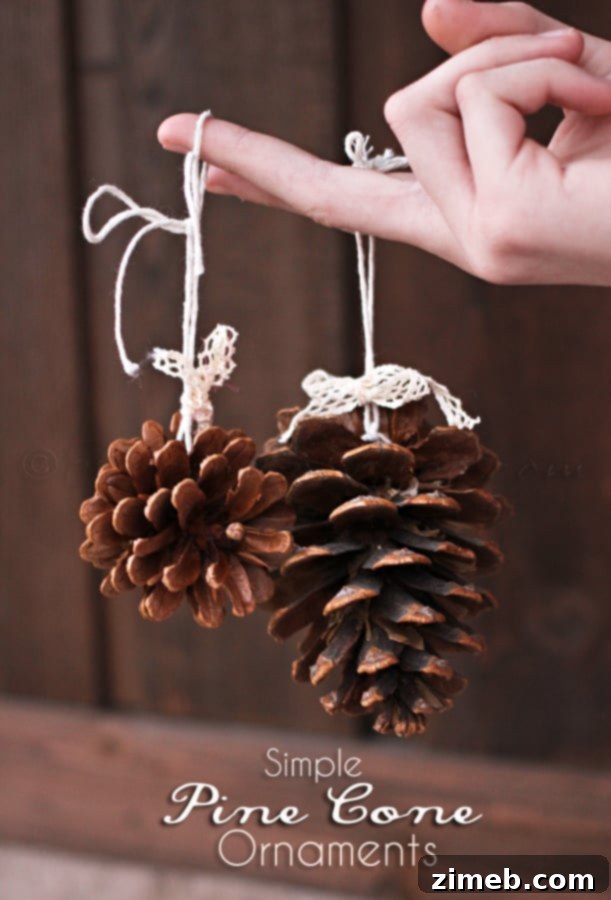
It’s truly that simple to create these captivating decorations. I can hardly wait to get our tree up so I can proudly display them!
Step-by-Step Guide to Perfect Pine Cone Ornaments
Making these ornaments is a wonderful activity for all ages and requires minimal supplies. Here’s a slightly more detailed breakdown:
- Gather Your Pine Cones: Collect fallen pine cones from your yard, a local park, or a nature trail. Look for various sizes and shapes to add interest to your tree.
- Prepare and Clean (Optional but Recommended): To ensure your pine cones are bug-free and fully open, you can bake them. Preheat your oven to 200°F (90°C), line a baking sheet with foil or parchment paper, and bake the pine cones for about 30-60 minutes. Keep a close eye on them to prevent burning. This process also helps them open up beautifully.
- Select Your String: For a rustic look, opt for natural twine, jute string, or even thin hemp cord. Cut a piece about 8-10 inches long for each ornament.
- Attach the String: Carefully thread one end of your string in and out through the bottom layer of the pine cone scales, near the very base. You want it to be secure enough so the pine cone hangs upright. Bring both ends of the string together.
- Tie the Hanging Loop: Tie the two ends of the string together with a simple, secure knot directly above the pine cone. Then, approximately 2-3 inches higher, tie another knot to form a loop. This loop is what you’ll use to hang the ornament on your tree.
- Embellish (Optional): This is where creativity shines!
- Lace Bows: As pictured, a small cream or ivory lace bow tied around the base adds a delicate, elegant touch. You can secure it with a tiny dab of hot glue if needed.
- Painted Tips: Dip the tips of the pine cone scales in white paint for a “snow-kissed” effect, or use gold or bronze paint to enhance the metallic theme.
- Glitter: For a touch of sparkle, apply a thin layer of craft glue to the tips or edges of the scales and sprinkle with fine glitter in gold, silver, or iridescent white.
- Scented Pine Cones: Drop a few essential oils (like cinnamon, clove, or pine) onto the pine cone for a fragrant addition to your tree.
- Small Bells or Beads: Attach small jingle bells or wooden beads to the string above the pine cone for extra charm.
These versatile ornaments aren’t just for the tree. Arrange them in decorative bowls, incorporate them into garlands, or use them as unique place settings for your holiday table.
Beyond Pine Cones: More Repurposed Christmas Ornament Ideas
To truly achieve a lush and full rustic tree, we need more than just pine cones. Expanding our collection with other handmade, natural, and repurposed elements will add depth, variety, and an even greater sense of personalized charm. The beauty of these ideas is their simplicity and affordability, perfectly aligning with our budget-friendly goal.
Fragrant Dried Orange Slices and Cinnamon Sticks
These natural elements not only look beautiful but also fill your home with a wonderful, inviting aroma. Dried orange slices offer a pop of natural color and intricate patterns, while cinnamon sticks add a rich, warm brown texture. To make dried orange slices, simply cut oranges into 1/4-inch thick rounds, pat them dry, and bake at a low temperature (around 200°F or 90°C) for 3-4 hours, flipping occasionally, until dry and firm. Once cooled, thread twine through the center or tie a loop around them. For cinnamon sticks, simply bundle 2-3 sticks together with twine and tie a loop for hanging. You can even add a tiny sprig of dried greenery or a small berry pick for extra detail.
Charming Burlap and Jute Accents
Burlap and jute are incredibly versatile materials that instantly lend a rustic feel. You can cut strips of burlap to tie into simple bows and attach them to branches or existing plain ornaments. For a textured sphere, wrap plain Styrofoam balls (or even old, unwanted ornaments) with strips of burlap or jute twine, securing with hot glue. These provide a wonderful textural contrast to smoother ornaments and can fill out your tree beautifully. Consider cutting burlap into simple shapes like stars or hearts, stiffening them slightly with fabric starch, and adding a hanging loop.
Elegant Wood Slice Ornaments
Wood slices offer a beautifully raw and natural canvas for creativity. You can purchase pre-cut wood slices from craft stores or, if you’re handy, cut thin rounds from fallen branches (ensuring they are dried first to prevent cracking). These can be left natural or lightly sanded. Use a wood-burning tool to etch designs, paint them with white or gold acrylics for snow scenes or monograms, or simply write festive messages. Drill a small hole near the top for stringing, and you have a custom, handmade ornament that fits perfectly with the rustic theme.
Nostalgic Salt Dough Creations
Salt dough ornaments are a timeless classic, perfect for involving children in the crafting process. They are incredibly inexpensive to make (flour, salt, water), and the possibilities for customization are endless. Mix the dough, roll it out, and use cookie cutters to create festive shapes like stars, snowflakes, hearts, or even miniature versions of your favorite animals. Don’t forget to poke a hole for hanging before baking! Once baked and cooled, these can be painted white, gold, or brown, and sealed with a clear glaze for durability. Their slightly irregular, handmade appearance adds to their rustic appeal.
Harmonizing Your Rustic Christmas Tree Design
Bringing all these beautiful DIY elements together requires a thoughtful approach to tree design. The key is layering, balance, and maintaining your chosen color palette and texture theme.
Layering for Depth and Dimension
Start with your lights – warm white LED lights are perfect for a rustic aesthetic, casting a gentle, inviting glow. Next, place your larger, more foundational ornaments, such as the burlap-wrapped balls or larger pine cones, deeper within the branches. This creates depth. Then, progressively add your medium and smaller ornaments, like the dried orange slices, wood slices, and embellished pine cones, towards the outer tips of the branches. Ensure an even distribution of colors and textures throughout the tree, avoiding clumps of similar items.
The Perfect Color Palette and Texture Play
Stick to your core palette of creams, browns, and golds. Incorporate varying shades within these colors to add richness without introducing distracting hues. For instance, combine light beige burlap with darker brown pine cones and antique gold accents. Pay close attention to texture: the rough, organic feel of pine cones and burlap, the smooth elegance of painted wood, the delicate patterns of lace, and the subtle shimmer of glitter. This interplay of textures is what gives a rustic tree its captivating appeal.
The Perfect Tree Topper and Skirt
Complete your rustic masterpiece with a fitting tree topper and skirt. For a topper, consider a handmade star crafted from twigs or twine, a large burlap bow, or even a collection of oversized pine cones artfully arranged. For the skirt, a simple burlap fabric, a faux fur throw, or a quilted piece in natural tones will perfectly complement the theme, grounding your tree and adding another layer of cozy texture.
Extending the Rustic Theme Throughout Your Home
Don’t let the rustic charm stop at the tree! Extend this beautiful theme throughout your home to create a cohesive and inviting holiday atmosphere. Drape simple garlands made from evergreen cuttings, pine cones, and dried orange slices along your mantelpiece or staircase railing. Arrange pillar candles in varying heights on a rustic wooden tray, surrounded by small pine cones and cinnamon sticks. Fill glass jars or hurricane lanterns with twinkling fairy lights and natural elements like acorns, small branches, or even more pine cones for charming tabletop displays. A cozy throw blanket, some scattered accent pillows in cream or brown tones, and the soft glow of fairy lights will complete the look, transforming your home into a truly magical rustic winter wonderland.
This year, our Christmas tree will be a heartfelt testament to creativity, sustainability, and the enduring beauty of handmade decor. It’s a project born from a long-held dream, brought to life with intention and a little bit of resourceful magic. And the best part? The joy of creating these ornaments is almost as wonderful as the joy of admiring the finished tree.
Join Our Creative Community!
Stay tuned as we continue to share more of our repurposed and creative Christmas tree decoration ideas and DIY projects, including festive culinary creations!
Don’t forget to come back and join me on Mondays for Project 52, where we explore new crafts, home improvement ideas, and creative solutions to make your home more beautiful and functional year-round.
To discover even more inspiring DIY crafts, home decor tips, and upcycling adventures, visit our dedicated DIY Crafts & Upcycling category for a wealth of ideas!