
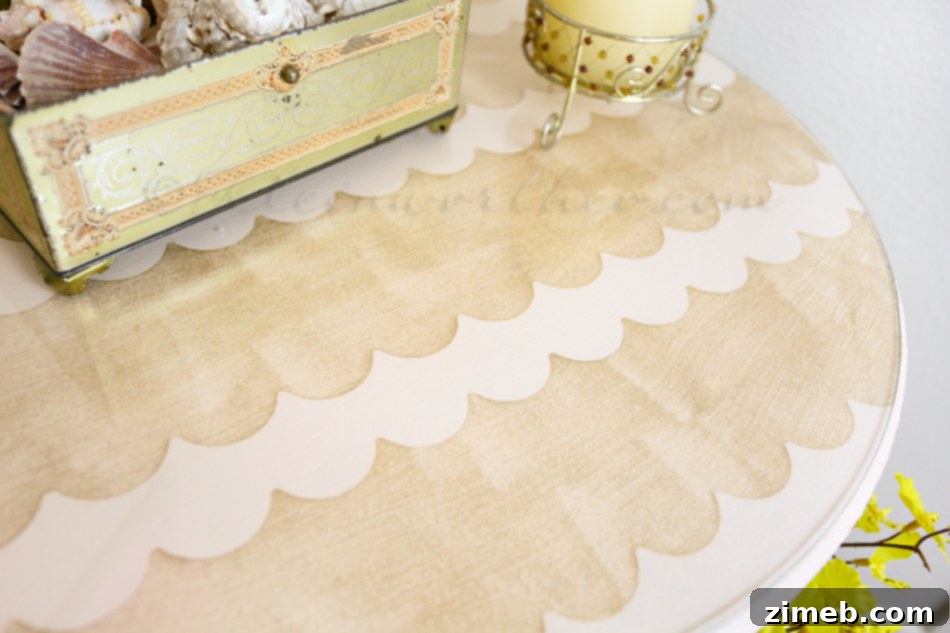
Glitter Wave Table Makeover: A Dazzling DIY Transformation for Your Home
As we embarked on the exciting journey of settling into our new house, I mentioned that the final touches of unpacking would have to pause. My priority shifted to completing a few crucial DIY projects, ensuring each piece of furniture and decor could finally settle into its permanent, thoughtfully designed space. Among these endeavors, one project truly sparkled – literally! This was the delightful Glitter Wave Table Makeover. This wasn’t just any accent table; it was a relic from my past, a humble piece I’d acquired for my very first apartment when I was just eighteen. Over the years, it had diligently served its purpose, typically concealed under a table skirt or tucked away in storage, its true potential waiting to be unveiled. However, a few months ago, inspiration struck when I saw someone else’s clever painted table transformation. A light bulb went off – a realization that felt both obvious and exhilarating! I absolutely adore breathing new life into old items with just a splash of paint. So, armed with a fresh vision and a palette chosen to perfectly complement our powder room, I dove in. What transpired was a surprisingly simple yet incredibly rewarding project. Let me show you just how easy it was to achieve this stunning glitter wave effect.
Unveiling the “Before”: A Humble Table’s Journey to Sparkle
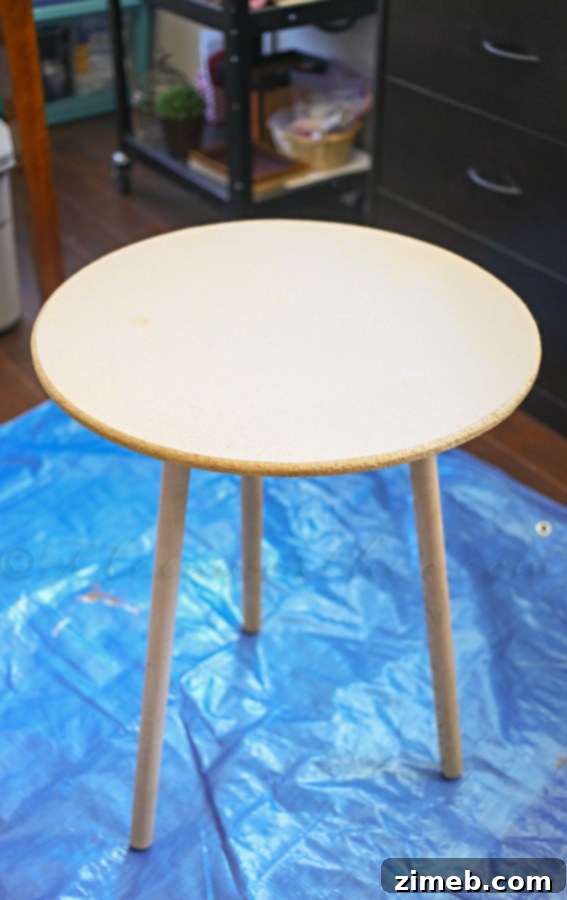
Here it is, in all its unassuming glory – or perhaps, its quiet sadness. This isn’t a rare vintage find; in fact, you can still purchase identical accent tables at retailers like Walmart today. It’s a testament to its widespread appeal and budget-friendly nature that when I bought mine, Walmart might not have even reached the West Coast yet! For decades, this little round table has been a household staple, primarily serving as a hidden support beneath decorative table skirts. This common practice often overlooks the inherent charm and versatile potential such simple furniture possesses. If you’re curious, you can see a similar one still available here. My table, though functional, lacked personality. It was a blank canvas, patiently awaiting an artistic touch that would transform it from a mere utility item into a decorative statement. This project was born from a desire to celebrate its enduring presence in my life, upgrading it rather than replacing it, and proving that even the most inexpensive piece can become a treasured, custom-designed element in your home decor.
Preparing for the Transformation: Gathering Your Creative Toolkit
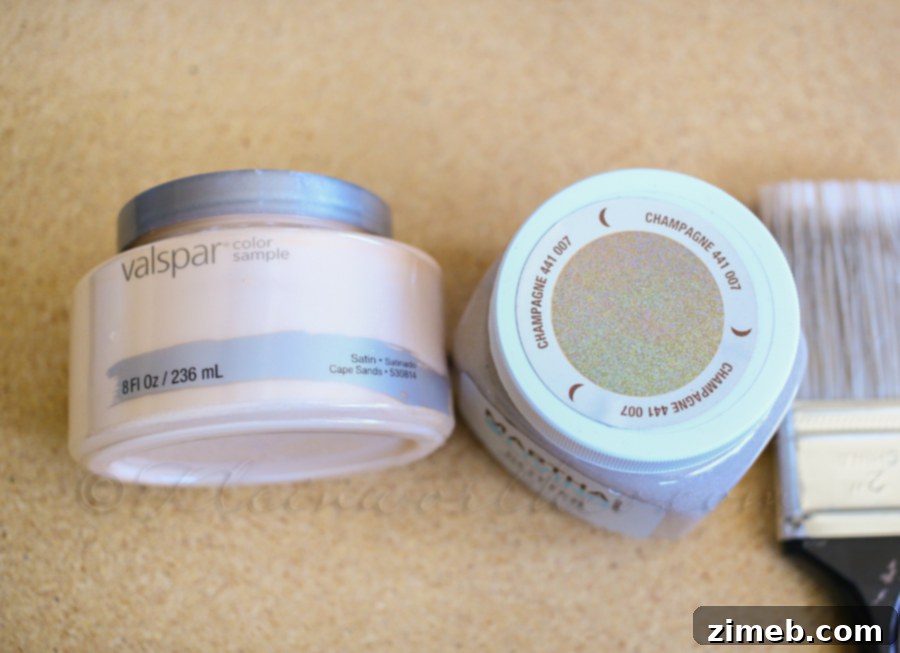
Every successful DIY project begins with thorough preparation and the right tools. For this Glitter Wave Table Makeover, my goal was to perfectly integrate the table into our powder room’s aesthetic while infusing it with a unique, eye-catching element. I envisioned a soft, feminine palette, choosing Valspar Cape Sands for the serene base and Martha Stewart Champagne for the delicate waves. The highlight, however, was discovering actual glitter paint during a casual weekend shopping trip – an exciting find that promised effortless sparkle and elevated the entire design concept. This selection ensured both color harmony and that desired touch of glam.
To replicate this dazzling transformation, here’s a detailed list of materials and tools you’ll want to have on hand:
- Accent Table: Any small, round table, whether new or an old favorite, will serve as your canvas.
- Paint:
- Base Coat: Valspar Cape Sands (a beautiful pale pink, or a neutral shade that complements your space).
- Wave Accent: Martha Stewart Champagne (or a metallic/shimmer paint in a contrasting or complementary hue).
- Glitter Paint/Topcoat: Look for a clear glitter topcoat or a paint with integrated glitter particles for that perfect sparkle.
- Painter’s Tape: Essential for creating crisp, clean lines. For the wavy pattern, a flexible painter’s tape designed for curves, or even repurposed “shape tape” as I used, will be incredibly helpful.
- Paint Brushes and Rollers: A small foam roller is ideal for smooth application of the base coat on flat surfaces, while smaller brushes will be useful for detailed work on legs and edges.
- Cleaning Supplies: A degreaser (like TSP substitute) or mild soap and water, along with clean rags, for preparing the table surface.
- Fine-Grit Sandpaper (220-grit): Recommended for a light scuff-sanding to improve paint adhesion, especially on slick surfaces.
- Primer (Optional): If your table has a glossy finish, is made of a difficult-to-paint material, or has existing stains, a good bonding primer will ensure optimal paint adherence and durability.
- Drop Cloths or Old Newspapers: To protect your work area from accidental drips and spills.
- Clear Topcoat/Sealer (Optional but Recommended): A protective topcoat can enhance durability and seal in the glitter for a lasting finish, especially if you’re using loose glitter rather than integrated glitter paint.
- Glass Table Top (Optional): A custom-cut glass top adds a polished, finished look and provides a durable, easy-to-clean surface.
Gathering all your supplies before you begin will streamline the entire process, allowing you to focus on the creative aspects without interruption. This mindful approach to preparation lays the groundwork for a truly professional-looking and long-lasting finish.
Step-by-Step Makeover: Bringing the Glitter Waves to Life
Step 1: The Essential Foundation – Cleaning and Preparation
Before applying any paint, a clean and well-prepared surface is non-negotiable for a professional and durable finish. Begin by thoroughly cleaning your accent table. Use a degreaser or a mixture of mild soap and water to remove any accumulated dust, dirt, grease, or grime. These residues can prevent paint from adhering properly, leading to peeling or an uneven finish later on. After cleaning, rinse the table thoroughly and allow it to dry completely. Although this particular table’s surface allowed me to skip heavy sanding, a light scuff-sanding with fine-grit sandpaper (around 220-grit) is generally recommended for better paint adhesion, especially on glossy or previously finished furniture. Always wipe away any sanding dust with a tack cloth or a slightly damp cloth before priming or painting.
Step 2: Laying the Groundwork with the Base Coat
With the table impeccably clean and dry, it was time to apply the initial layer of color. I chose Valspar Cape Sands, a beautiful, delicate pale pink, and applied it uniformly across the entire table. For the smoothest possible finish, a small foam roller works wonders on flat surfaces, while a quality brush can manage the legs and more intricate edges. The key is to apply thin, even coats to prevent unsightly drips and ensure efficient drying times. Patience is a virtue here; it’s always preferable to apply two or even three thin coats rather than attempting one thick, heavy layer. Each coat should be allowed to dry completely according to the paint manufacturer’s instructions before the next is applied. For my table, two well-applied coats provided ample coverage and a consistently rich, uniform color that truly set the stage for the wave design.
Step 3: Mastering the Waves – Taping for Precision
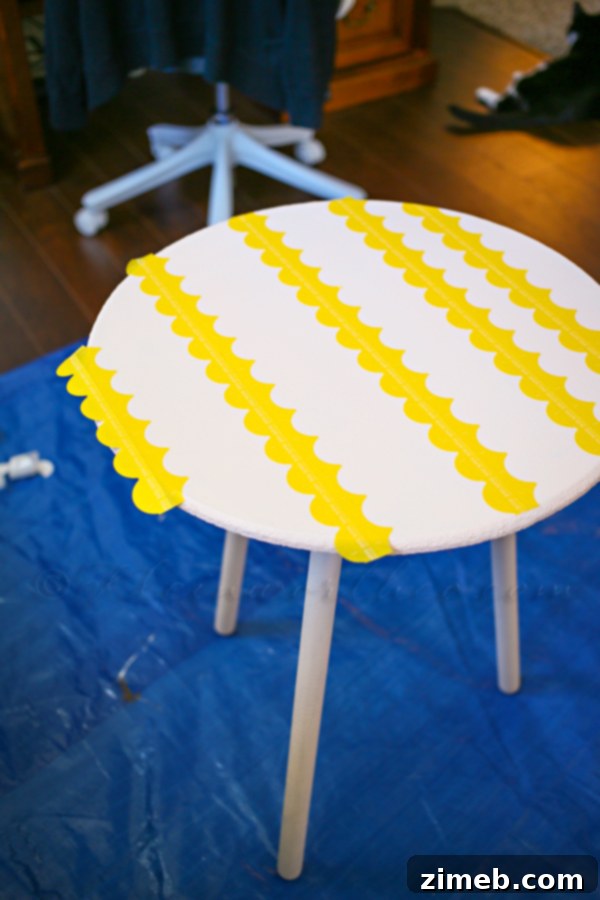
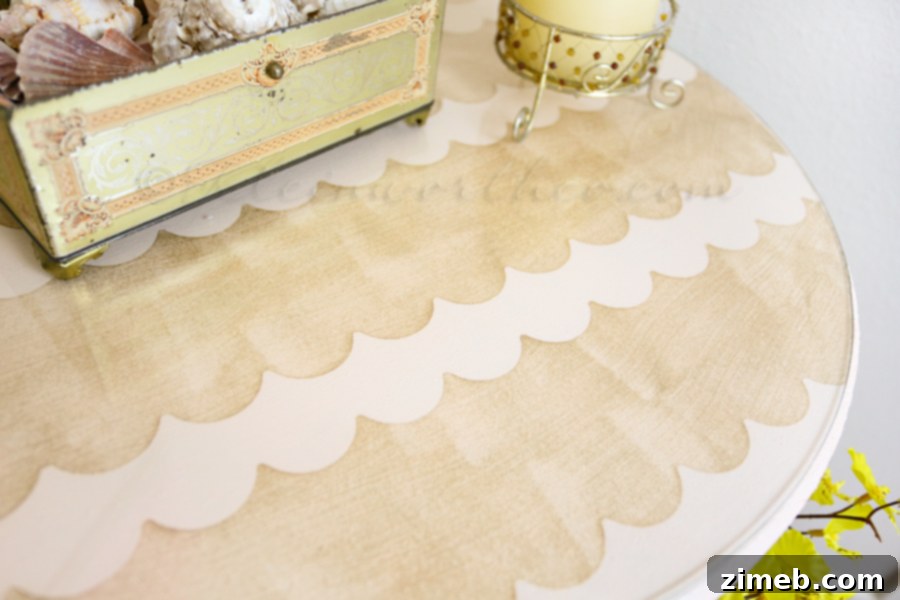
Once the base coat was thoroughly dry and cured, the exciting phase of creating the distinctive wave pattern began. For this, I repurposed some leftover shape tape from a previous project. However, you can achieve similar results by carefully cutting standard painter’s tape into desired curves, or by using a flexible painter’s tape specifically designed for intricate designs. The artistic choice here was to make the waves progressively larger from one side of the table to the other, creating a dynamic, flowing asymmetry that adds visual intrigue and prevents the design from looking too repetitive or static. As you apply the tape, ensure you press down firmly along all its edges. This crucial step creates a tight seal, which is vital for preventing paint bleed and guaranteeing those coveted crisp, clean lines that define a truly professional-looking finish. Take your time during this step, as the quality of your taping will directly impact the clarity of your wave pattern.
Step 4: Painting the Waves and Infusing Sparkle
With the wave pattern meticulously taped off, it was time to introduce the accent color and, of course, the glitter! I carefully brushed the Martha Stewart Champagne paint within the taped sections, a metallic shade that beautifully complements the pale pink base. The real magic happened next: immediately after applying the champagne paint, or while its second coat was still slightly tacky, I applied the glitter paint. If you’re using a separate clear glitter topcoat, apply it generously over the champagne sections. Since I was fortunate enough to find paint with integrated glitter, I simply applied it as directed, focusing on achieving the desired sparkle and depth. Often, multiple thin layers of glitter paint yield a more vibrant and evenly distributed sparkle than one thick application. For my project, a couple of coats were sufficient to create that captivating, shimmering effect.
Step 5: The Grand Unveiling and Patient Drying
This is often the most anticipated part of any painting project! Once the final coat of wave and glitter paint was applied, and while it was still slightly damp (but not wet enough to smudge), I carefully and slowly peeled off the painter’s tape. Removing the tape at this stage is a crucial trick; it helps ensure the cleanest possible lines and prevents the paint from curing onto the tape, which can lead to unsightly peeling or jagged edges when removed later. After all the tape was gently lifted away, the newly revealed glitter waves were left to dry completely overnight. This extended drying time is essential not just for the paint to feel dry to the touch, but for it to fully cure and harden. Proper curing significantly enhances the paint’s durability, making it more resistant to chips, scratches, and everyday wear, ensuring your beautiful makeover lasts for years to come.
Just a couple coats – pulled off the tape & let it dry overnight.
Step 6: The Finishing Touch – Glass Top and Placement
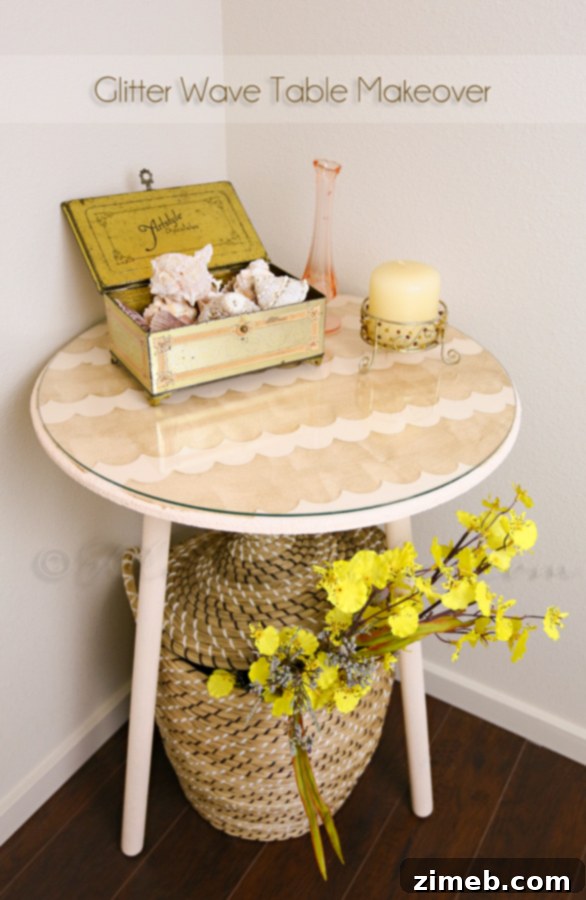
With the paint fully cured and gleaming, the final step was to add a protective and elegant touch: a custom-cut round glass piece for the tabletop. This addition not only provides a sophisticated, polished finish but also offers practical benefits, protecting the beautiful glittered surface from spills, scratches, and daily use, making the table much more functional as an accent piece. Finally, the transformed Glitter Wave Table found its perfect new home in our powder room. Its subtle sparkle, elegant wave design, and harmonious color palette now beautifully complement the room’s decor, adding a personalized charm and a focal point that was previously missing. This project truly transformed the entire ambiance of the room, illustrating that a small, thoughtful DIY endeavor can make a remarkably significant impact on your home’s aesthetic.
The Enduring Joy of DIY: Simple Projects, Grand Impact
Reflecting on this particular project, I’m consistently amazed by its simplicity and the stunning results it yielded. I genuinely wish all furniture makeover projects could be this straightforward, delivering such significant visual impact with minimal effort and cost. The transformation from a drab, often-hidden utilitarian piece to a sparkling, decorative accent is truly remarkable. I unequivocally prefer its new look over simply draping a table skirt over it. The customized wave pattern and the subtle shimmer of the glitter paint have elevated its aesthetic appeal dramatically, transforming it from an afterthought into a captivating focal point in our powder room. This project serves as a powerful reminder that you don’t need extensive DIY experience or a large budget to create beautiful, personalized pieces for your home. A little vision, some paint, and a dedicated weekend can go an incredibly long way in refreshing your living space and injecting your unique personality into every corner.
This Glitter Wave Table is merely one vibrant piece of the larger puzzle as we continue our journey of infusing our new home with character, warmth, and style. We’ve actually completed a couple more exciting projects specifically for this powder room, and many others throughout the house, so be sure to stay tuned for those upcoming reveals in the coming weeks. Each DIY endeavor brings us closer to making this house truly feel like our own, filled with bespoke pieces that tell a story and reflect our personal style. I hope this makeover inspires you to look at your own forgotten furniture with fresh eyes and discover the joy of transforming it!
Explore More Home Transformations and DIY Inspiration
Are you eager to delve deeper into our journey of transforming our new home? We’ve been tirelessly working to bring our vision to life, one thoughtful project at a time. From charming small decorative touches to more significant room reveals, there’s a wealth of inspiration waiting to be discovered. Dive into these related articles and projects to spark your next creative endeavor and see how we’re making our house a home:
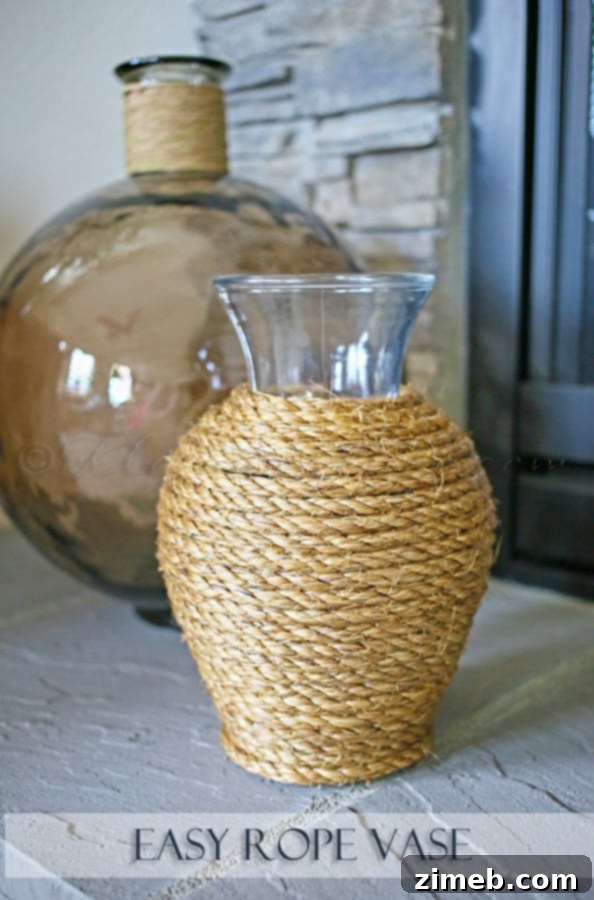
Discover how to effortlessly transform a simple, plain vase into a chic, coastal-inspired decorative piece with this quick and easy Easy Rope Vase tutorial. It’s perfect for adding a touch of texture and seaside charm to any room.
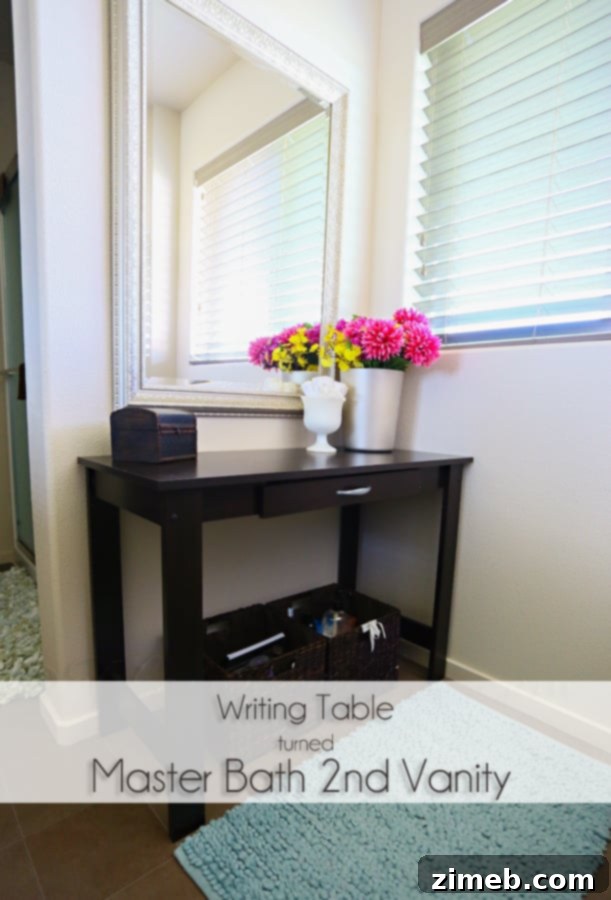
Explore the process of enhancing both the functionality and aesthetic appeal of our master bathroom with the strategic addition of a Master Bath 2nd Vanity. See how we created more space, storage, and a touch of refined elegance.
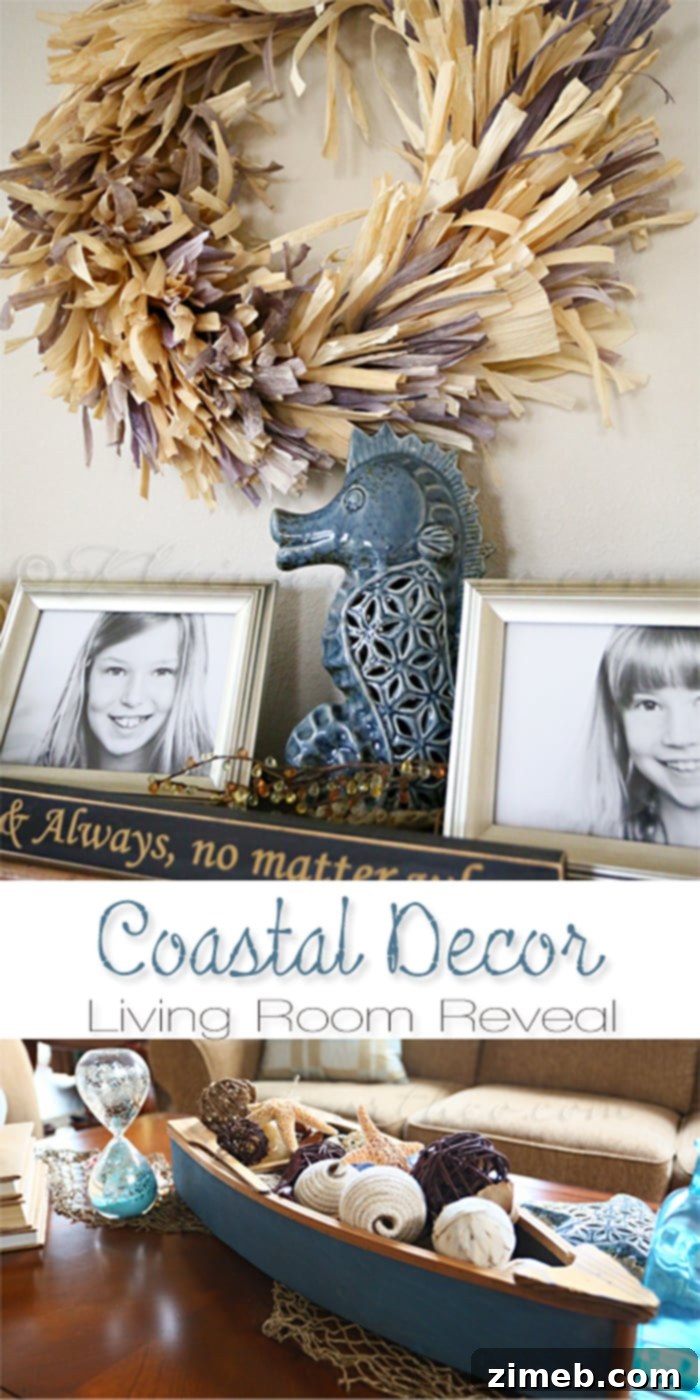
Immerse yourself in the serene and inviting atmosphere of our Coastal Decor {Living Room Reveal}. This extensive tour showcases how we infused our living space with tranquil blues, natural textures, and a relaxed seaside charm to create a truly peaceful oasis.