
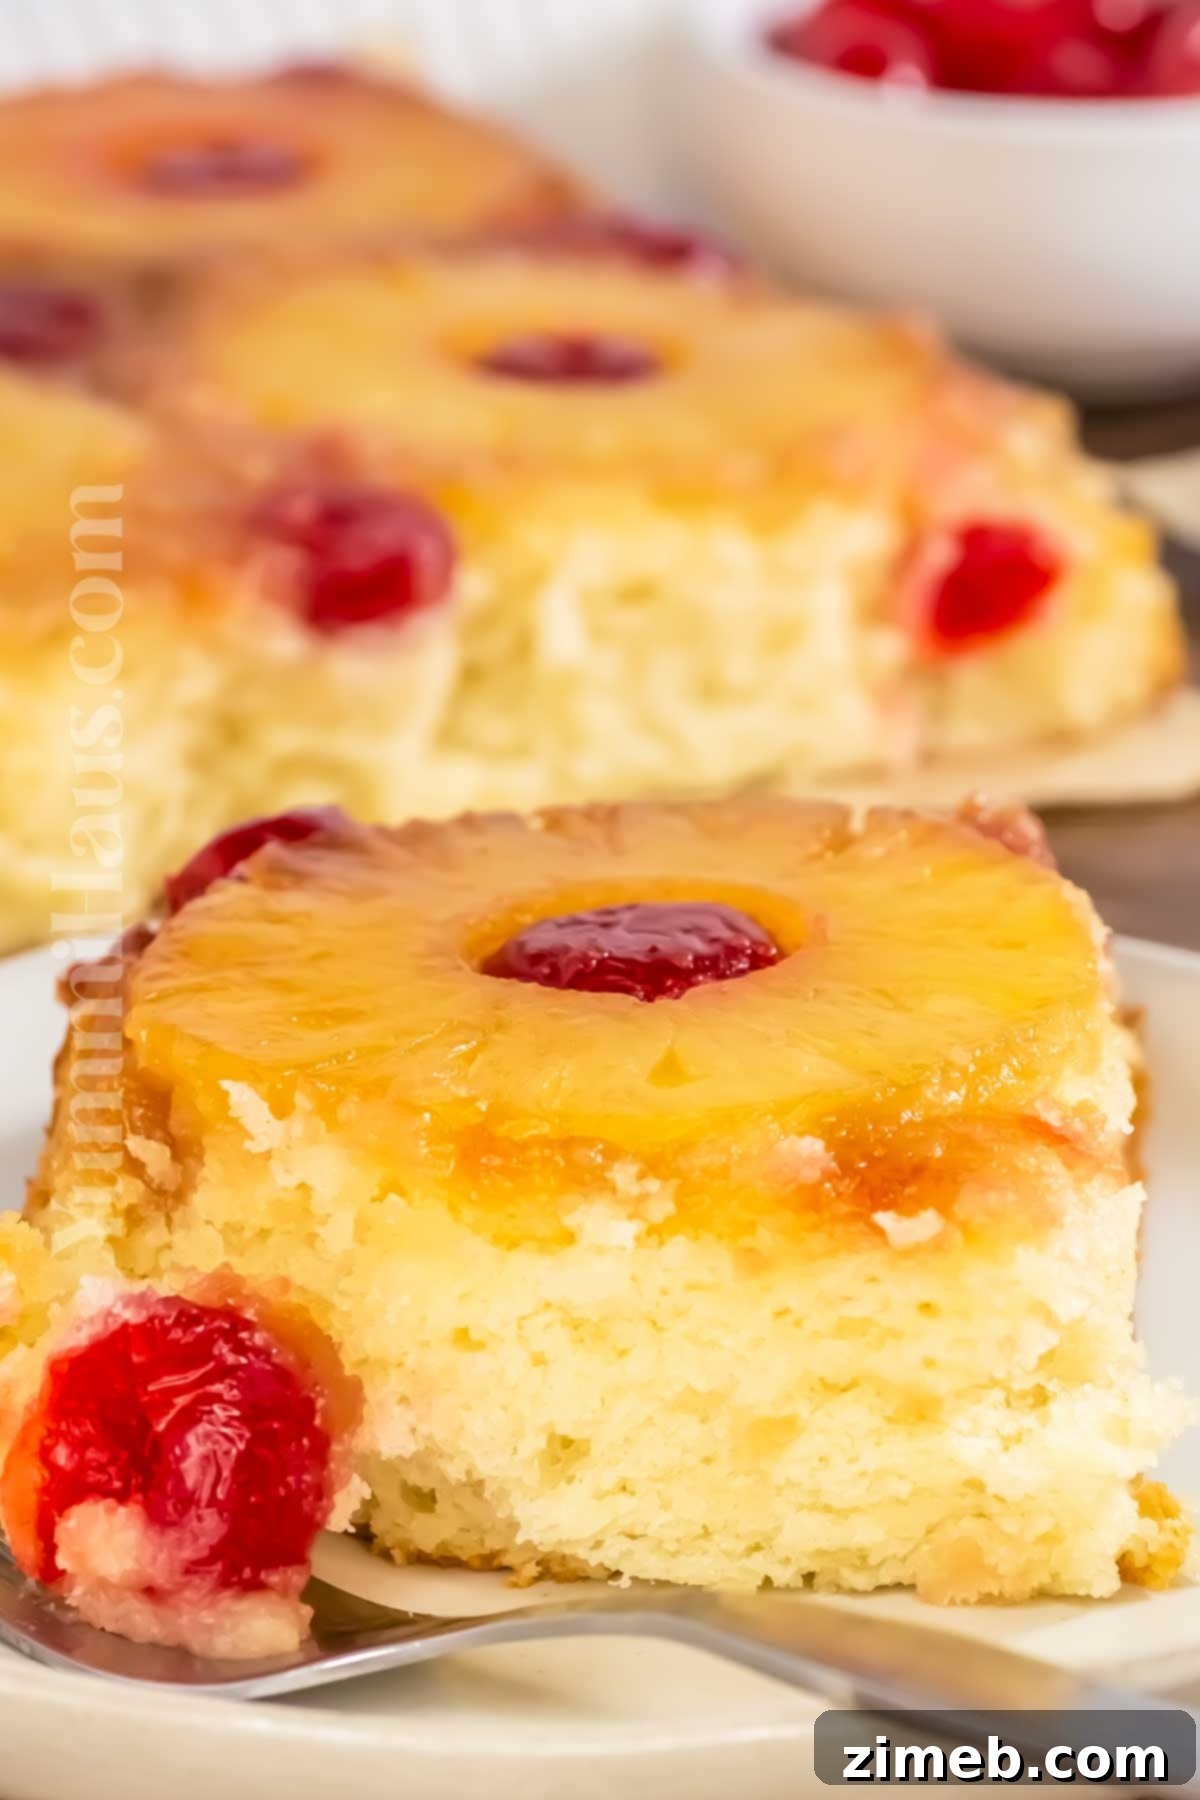
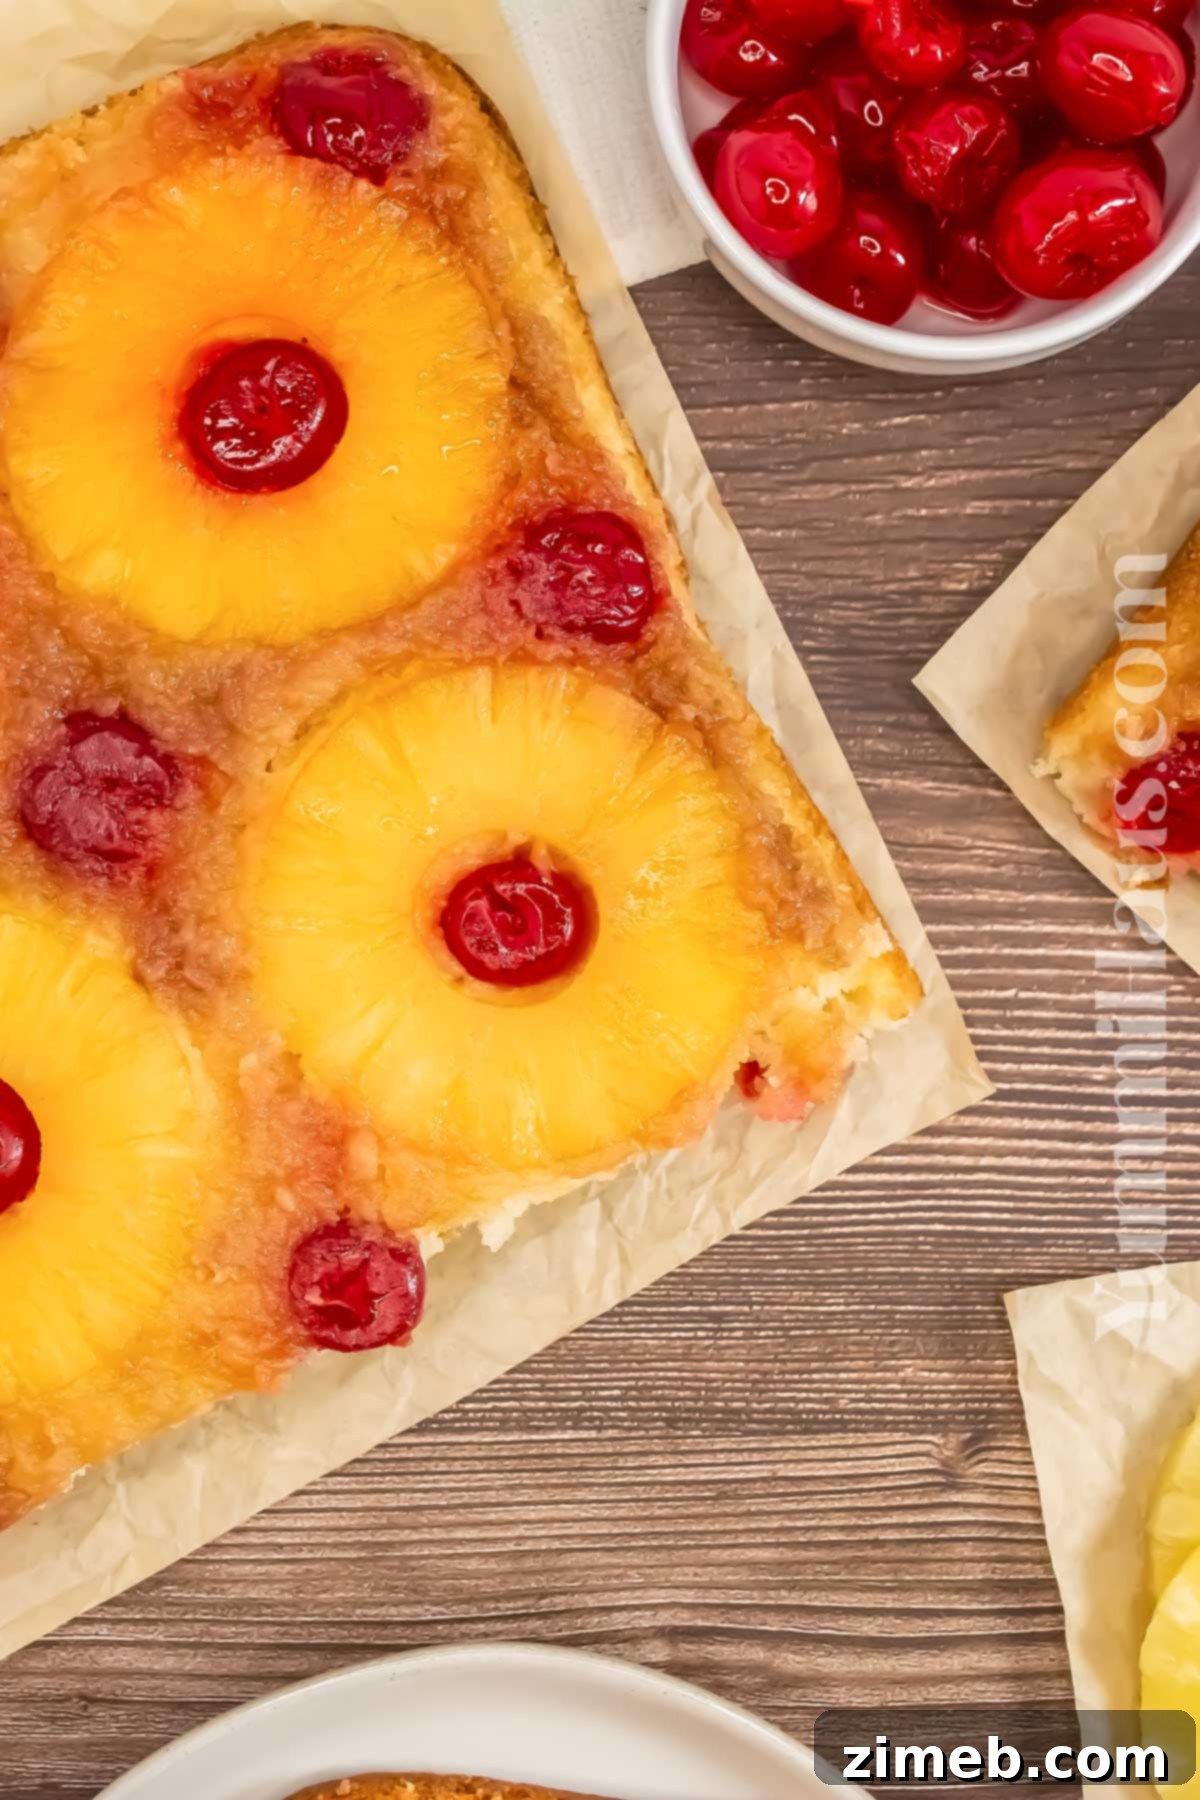
Indulge in the timeless charm of a homemade Pineapple Upside-Down Cake, a dessert that effortlessly combines rich buttery and vanilla flavors with a tender, moist crumb. Crowned with glistening caramelized pineapple slices and vibrant maraschino cherries, this cake is not just a treat for the taste buds but also a feast for the eyes. It’s an iconic dessert that evokes a sense of nostalgia, bringing back sweet, tart memories of childhood kitchens and family gatherings. Perfect for any occasion, from a casual weeknight treat to a show-stopping centerpiece for your next party, this recipe promises an easy baking experience with stunning results.
The magic of an upside-down cake lies in its unique construction. Unlike traditional cakes where toppings are added last, here we begin by layering the sweet, sticky fruit topping at the bottom of the pan. The rich, golden caramel forms as the cake bakes, infusing the pineapple and cherries with incredible flavor. Once baked to perfection, the cake is dramatically inverted, revealing its beautifully arranged, caramelized fruit top – a truly easy, stunning, and ingenious transformation!
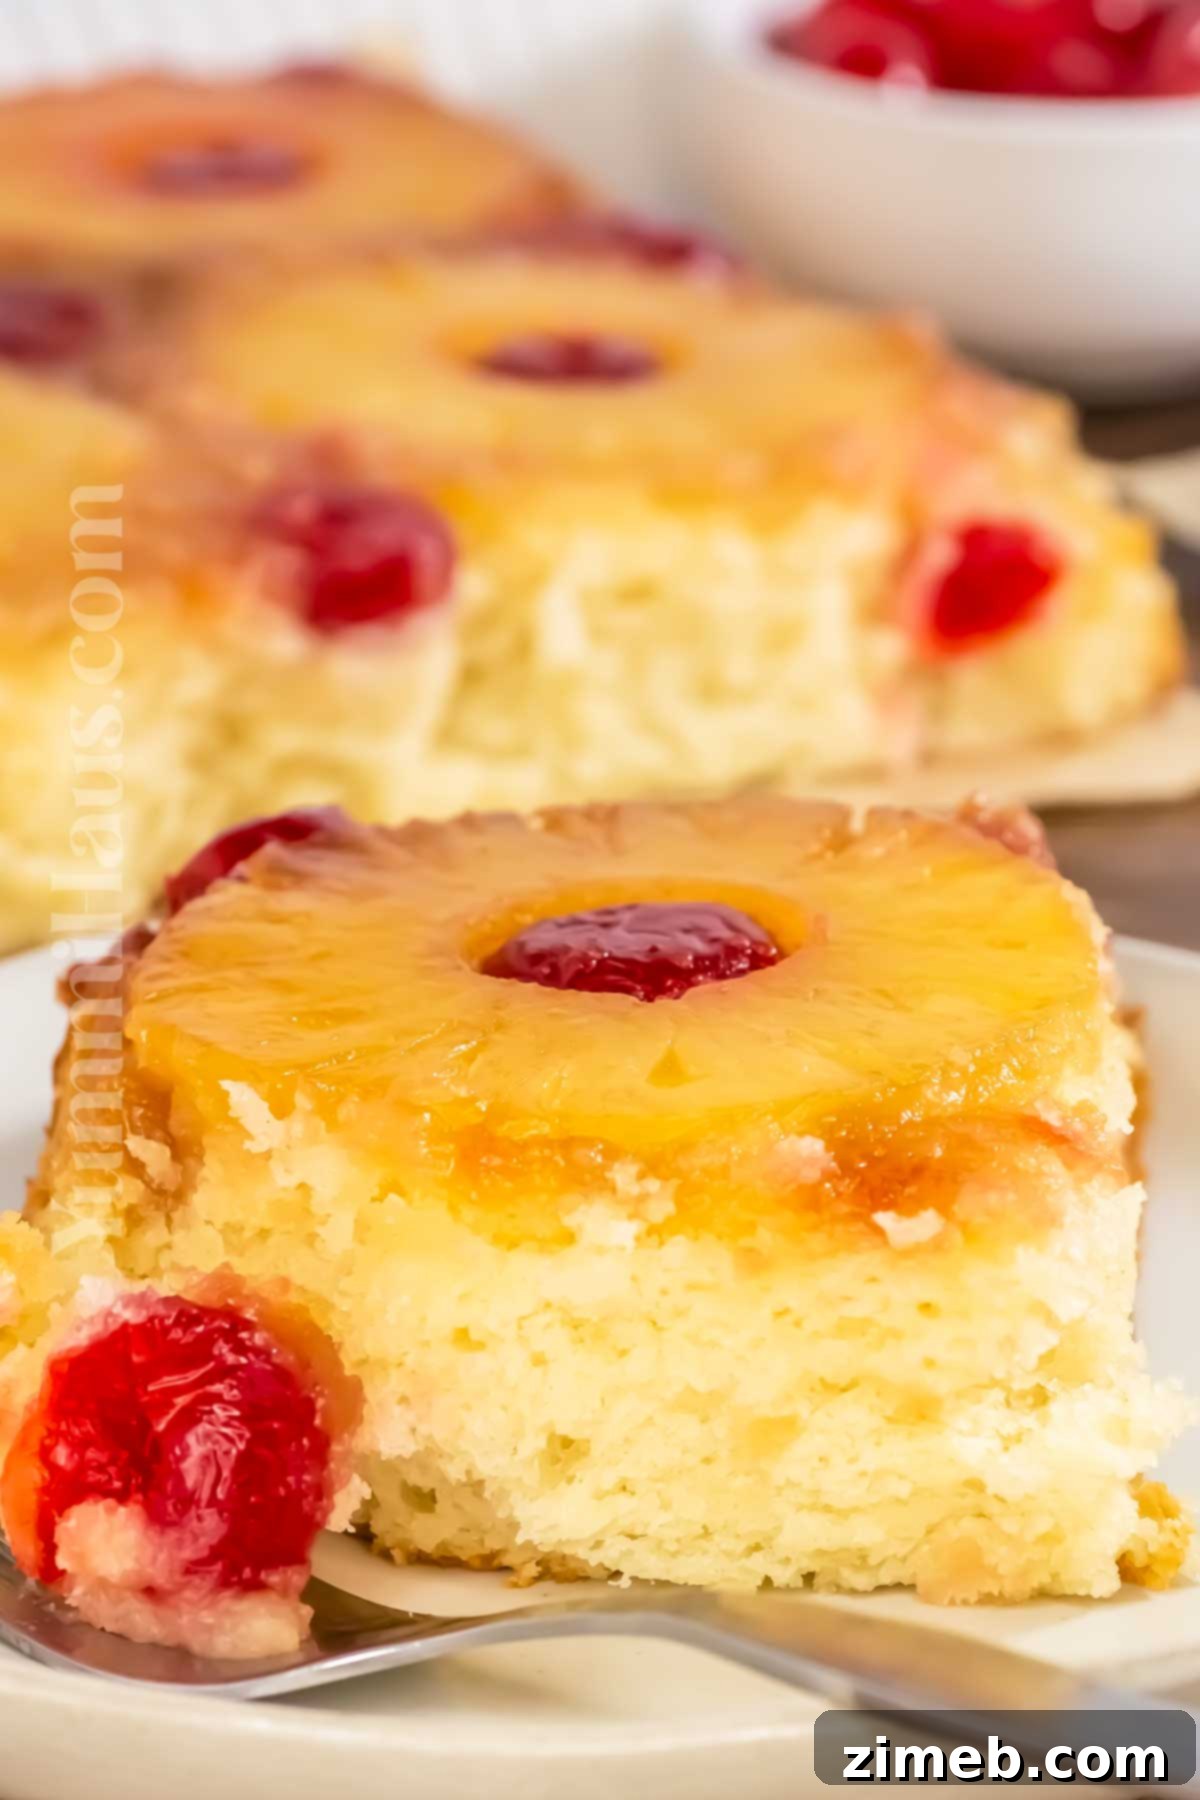
This classic pineapple cake recipe is a personal favorite, celebrated not only for its incredible taste but also for its naturally beautiful and colorful presentation. It’s a dessert that speaks of comfort and celebration, making it a wonderful addition to any dessert table.
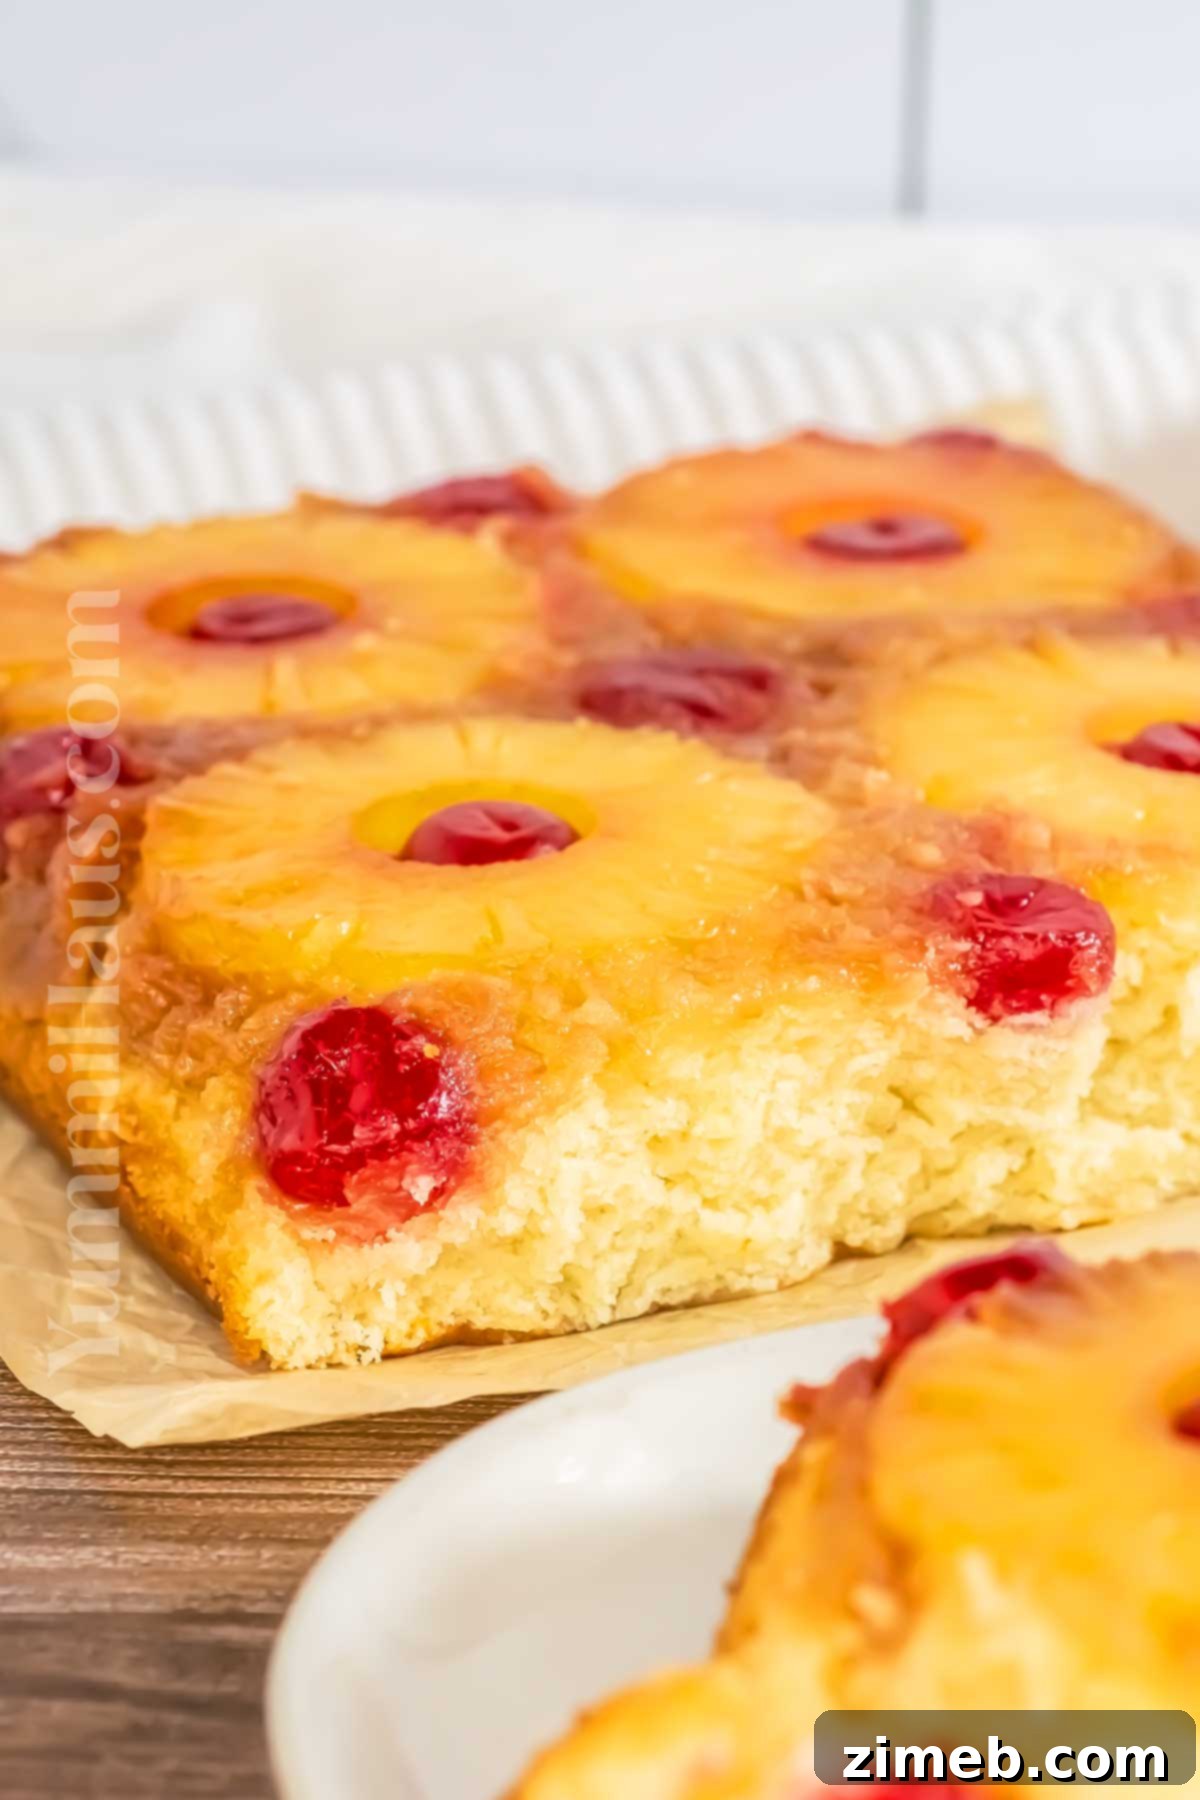
Why You’ll Adore This Easy Pineapple Upside-Down Cake
There are countless reasons why this Pineapple Upside-Down Cake will become a beloved staple in your baking repertoire. From its straightforward preparation to its irresistible flavors, this recipe delivers on all fronts:
- Effortless Elegance: This recipe is incredibly simple to follow, yielding a generous and impressive cake without the fuss of complicated decorations. The natural beauty of the caramelized pineapple and cherries eliminates the need for any additional frosting, glazes, or elaborate toppings, saving you time and effort while still achieving a show-stopping dessert.
- A Taste of Nostalgia: Featuring the traditional combination of canned pineapple rings and bright maraschino cherries, this is the quintessential classic pineapple upside-down cake. Each bite brings back fond memories and a comforting taste that many grew up with, making it a beloved choice for family gatherings and holiday meals.
- Unmatched Texture and Flavor: Prepare your palate for a truly delightful experience. The cake boasts a wonderfully dense yet moist texture, incredibly soft, buttery, and perfectly sweet. The caramelized pineapple rings are the star, bursting with tangy-sweet juices and creating a delightful contrast with the tender cake.
- Perfect for Any Gathering: Whether you’re hosting a small family dinner or a larger celebration, this delicious cake can be sliced into 6 to 12 servings, easily accommodating your guest list. A fantastic bonus is that it’s perfectly balanced in sweetness, appealing to a wide range of tastes without being overly saccharine.
- Beginner-Friendly: Even if you’re new to baking, this recipe is incredibly forgiving and designed for success. The step-by-step instructions ensure that anyone can achieve a beautifully baked, flavorful cake.
- Customizable Fun: While classic, this cake is also incredibly versatile. You can experiment with different fruits or spices to tailor it to your preferences, making it a truly personal dessert.
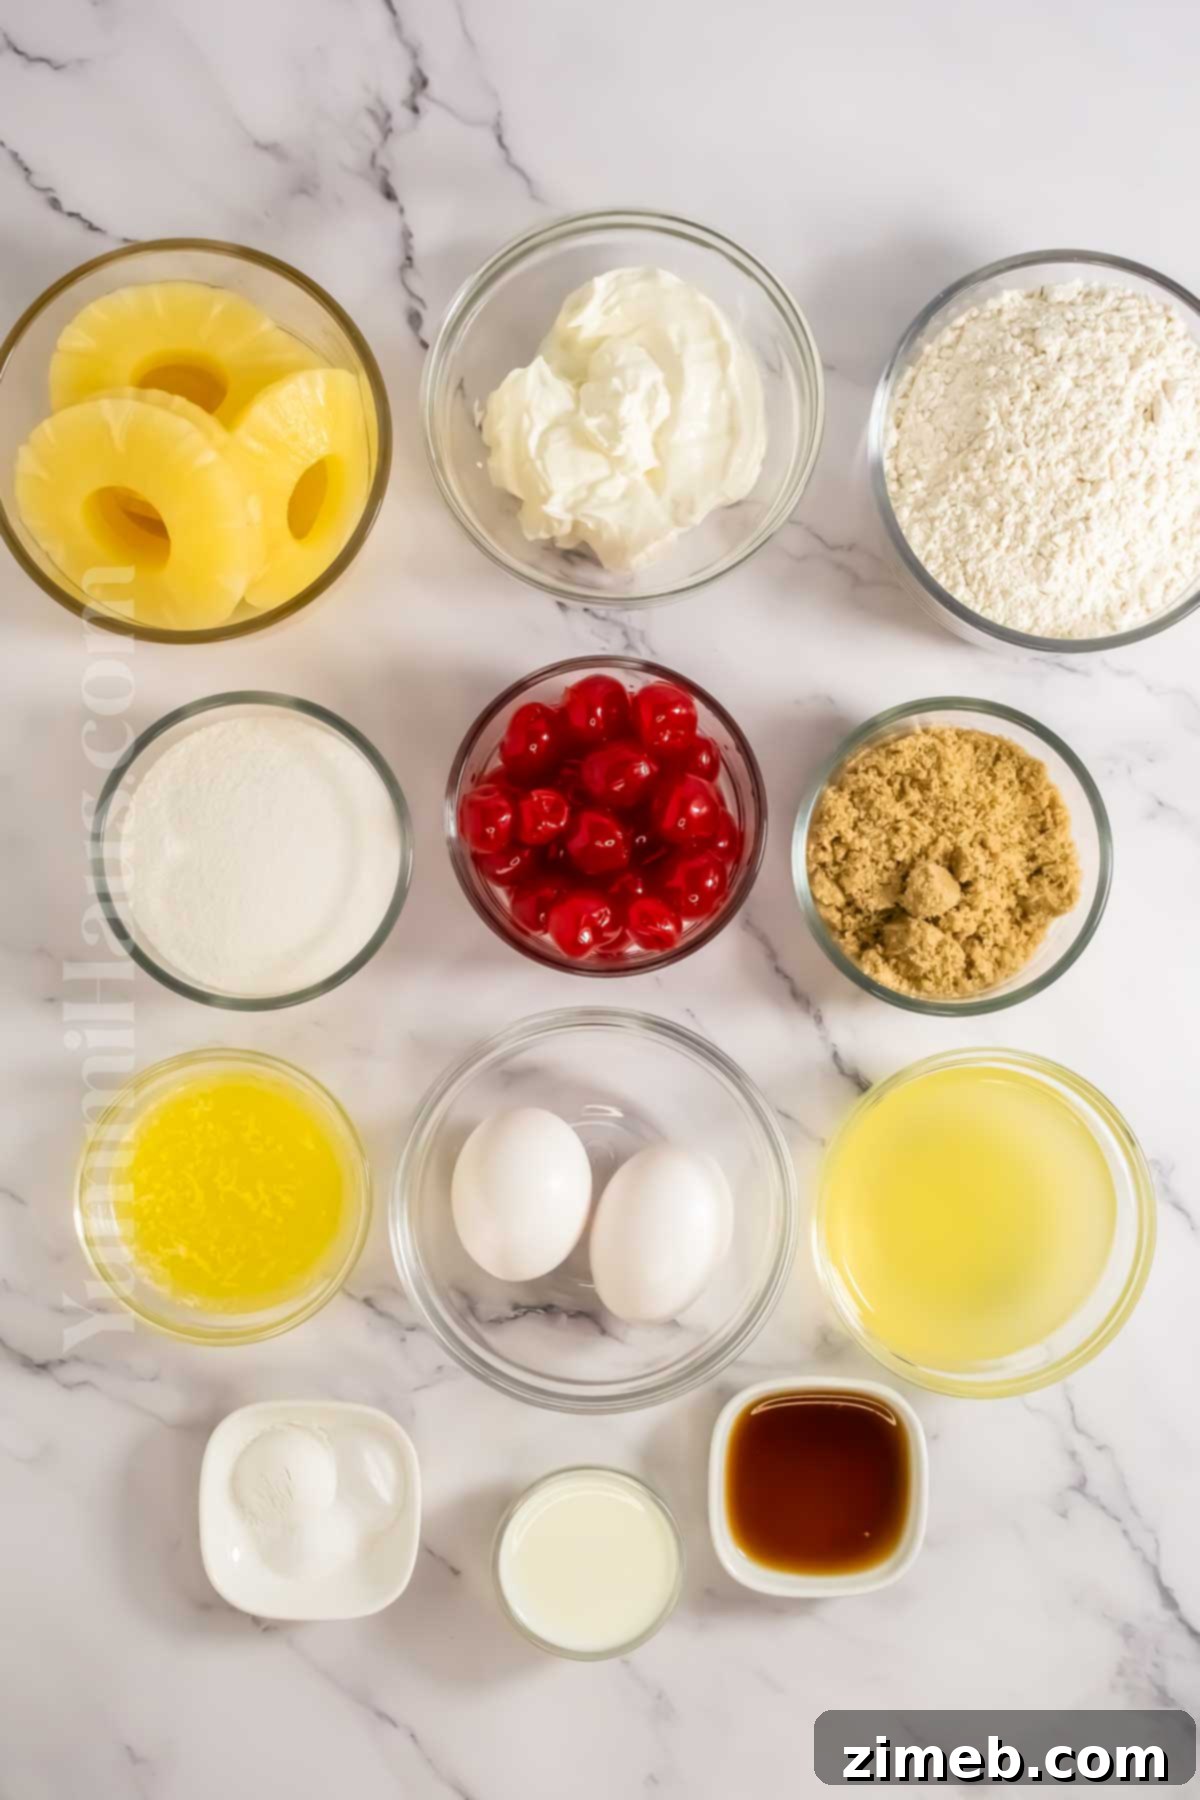
Essential Ingredients for Your Pineapple Upside-Down Cake
Crafting the perfect Pineapple Upside-Down Cake starts with understanding the role each ingredient plays. Here’s a detailed look at what you’ll need and why:
For the Irresistible Caramelized Topping
- Unsalted Butter: Melted butter forms the crucial first layer in your baking pan. As it cooks with brown sugar and pineapple, it creates that signature rich, golden caramel sauce that infuses the fruit and the bottom of the cake with incredible flavor. Using unsalted butter allows you to control the overall saltiness of the dish. Be mindful not to use excessive butter, as this can lead to a soggy cake.
- Brown Sugar: This is key for achieving that deep, luscious caramelization. Light brown sugar, with its milder molasses content, offers a subtle caramel note, while dark brown sugar will yield a more robust and intense caramel flavor, adding depth to your caramelized pineapple rings.
- Pineapple Slices: While fresh pineapple can be used, canned pineapple rings are the traditional choice for their convenience and consistent sweetness. It’s absolutely vital to pat each pineapple slice thoroughly dry before arranging them. Excess moisture is a common culprit for a soggy pineapple upside down cake. Remember to save the juice from the can; it’s a secret ingredient for adding moisture and flavor to the cake batter!
- Maraschino Cherries (or Glacé Cherries): These bright red cherries add a pop of color and a sweet, slightly tangy counterpoint to the pineapple. Like the pineapple, pat them dry to prevent extra moisture from seeping into the cake. We recommend maraschino cherries over fresh ones, as they maintain their vibrant color and shape much better during baking, offering a consistent sweetness from their syrup soak.
For the Moist and Flavorful Cake Batter
- All-Purpose Flour: The foundation of our tender cake. You can also opt for cake flour for an even finer, softer crumb.
- Baking Powder & Baking Soda: These leavening agents work together to give the cake its lift and light texture.
- Salt: A touch of salt enhances all the other flavors, balancing the sweetness and adding depth.
- Unsalted Butter (softened): Room temperature butter is crucial for creaming with sugar, creating a light and airy base for the batter.
- Granulated Sugar: Provides sweetness and contributes to the cake’s tender texture.
- Egg Whites: Using only egg whites results in a lighter, brighter colored cake compared to using whole eggs or just yolks, allowing the pineapple flavor to shine.
- Sour Cream: This ingredient is a game-changer for moisture and richness. Sour cream contributes to an incredibly moist and tender crumb. Plain yogurt, buttermilk, or even a vegan cream alternative can be used, but many bakers find sour cream delivers the best results.
- Pineapple Juice: Remember that juice saved from the canned pineapple slices? This is where it comes in! It adds a wonderful depth of pineapple flavor directly into the cake batter, enhancing the overall fruitiness. If you used fresh pineapple and don’t have enough juice, a small amount of store-bought natural pineapple juice can be used to make up the ¼ cup needed for the batter.
- Milk (or Coconut Milk for Dairy-Free): A splash of milk further contributes to a tender cake with moist crumbs and a rich, subtle flavor. For a dairy-free version, coconut milk works beautifully.
- Vanilla Extract: A classic flavor enhancer that complements the pineapple beautifully, adding warmth and depth to the cake.
Essential Kitchen Tools for Baking Success
Having the right tools makes all the difference in ensuring a smooth baking process and a perfect Pineapple Upside-Down Cake. Here’s what you’ll need:
- Baking Dish or Cake Pan: An 8×10 inch rectangular baking dish is ideal for this recipe. However, if you have a 9×13 inch pan, that will also work, though your cake might be slightly thinner. Alternatively, an 8 or 9-inch round cake pan is a classic choice. For a charmingly rustic presentation and potentially faster baking, a 9-10 inch cast iron skillet can be used.
- Microwave-Safe Bowl: Essential for quickly melting the butter for your topping.
- Stand Mixer (or Hand Mixer): While not strictly essential, a stand mixer greatly simplifies the creaming of butter and sugar, ensuring a smooth and airy batter. A hand mixer will also do the trick.
- Mixing Bowls: You’ll need at least two – one for wet ingredients and one for dry, and a larger one for combining them.
- Whisk and Spatula: For combining dry ingredients and scraping down the sides of your mixing bowl.
- Measuring Cups and Spoons: Accurate measurements are key for baking success.
- Serving Plate or Cake Stand (Optional): For an elegant presentation of your finished cake.
Crafting the Perfect Pineapple Upside-Down Cake: A Step-by-Step Guide
Follow these detailed steps to create a truly irresistible Pineapple Upside-Down Cake that will impress everyone.
Step 1: Preparing the Irresistible Topping Base
- Preheat Your Oven: Begin by preheating your oven to 350 degrees Fahrenheit (175°C). This ensures your oven is at the correct temperature for even baking.
- Prepare Your Pan: Generously grease an 8×10 inch baking dish (or your chosen pan size) with cooking oil or a non-stick cooking spray. This crucial step prevents sticking and ensures a clean flip.
- Melt the Butter: Add the melted unsalted butter to the bottom of your prepared cake pan, spreading it evenly across the base. This butter will create a rich, flavorful caramel.
- Sprinkle Brown Sugar: Evenly sprinkle the brown sugar over the melted butter in a thin, consistent layer. This combination forms the luscious caramel topping once baked.
Step 2: Arranging the Fruity Crown
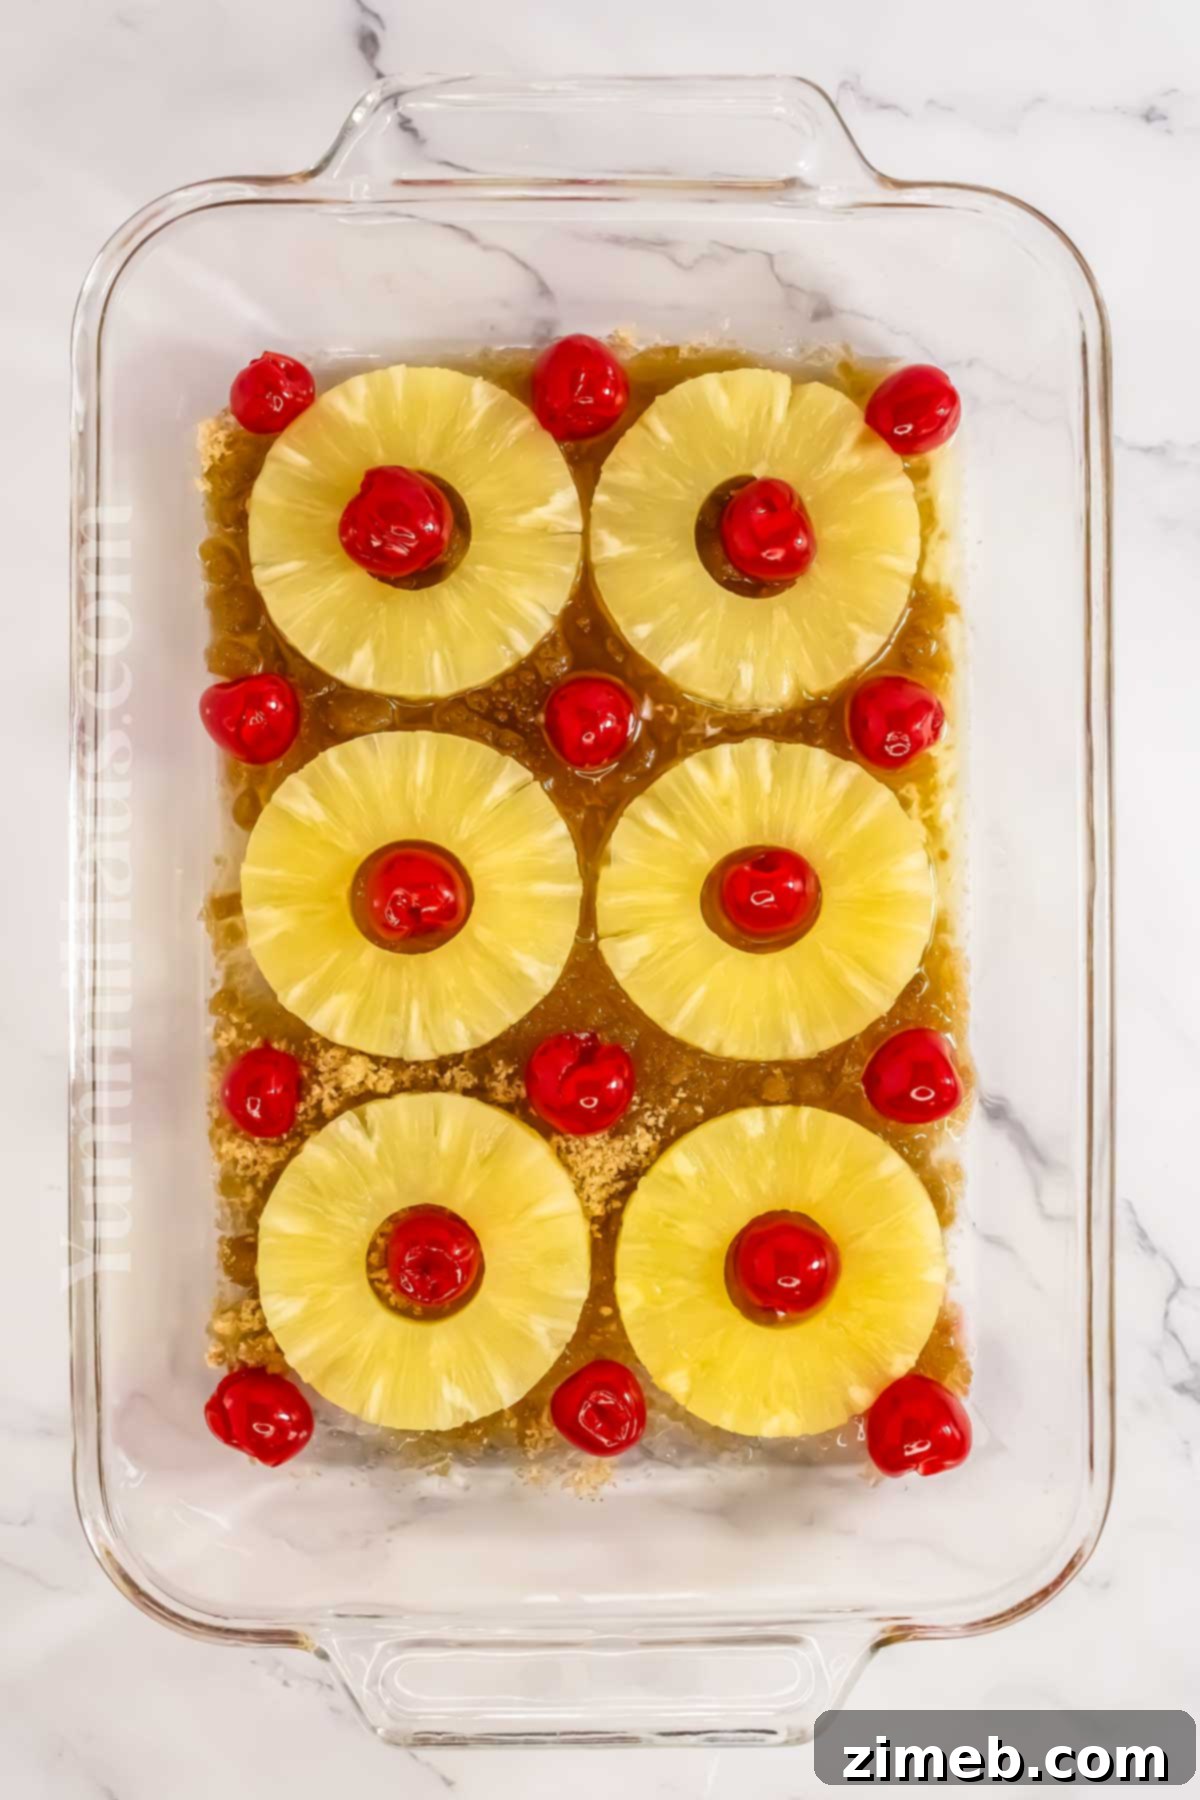
- Arrange Pineapple Slices: Carefully place the dried pineapple slices on top of the brown sugar layer. Arrange them in an even layer, ensuring they cover as much of the surface as possible. For a decorative touch, you can trim some slices in half to line the edges of the pan.
- Add Maraschino Cherries: Insert a maraschino cherry into the center of each pineapple ring. Fill any remaining open spaces between the pineapple slices with additional cherries. This creates a vibrant, colorful pattern that will be revealed when the cake is flipped.
- Set Aside: Once your topping is perfectly arranged, set the dish aside. You can even refrigerate it briefly while preparing the batter to help set the topping in place, preventing the fruit from shifting when the batter is added.
Step 3: Mixing the Moist Vanilla Cake Batter
- Cream Butter and Sugar: In the bowl of a stand mixer (or using a hand mixer), cream together the softened unsalted butter and granulated sugar until the mixture is light, fluffy, and well blended. This step incorporates air, contributing to a tender cake.
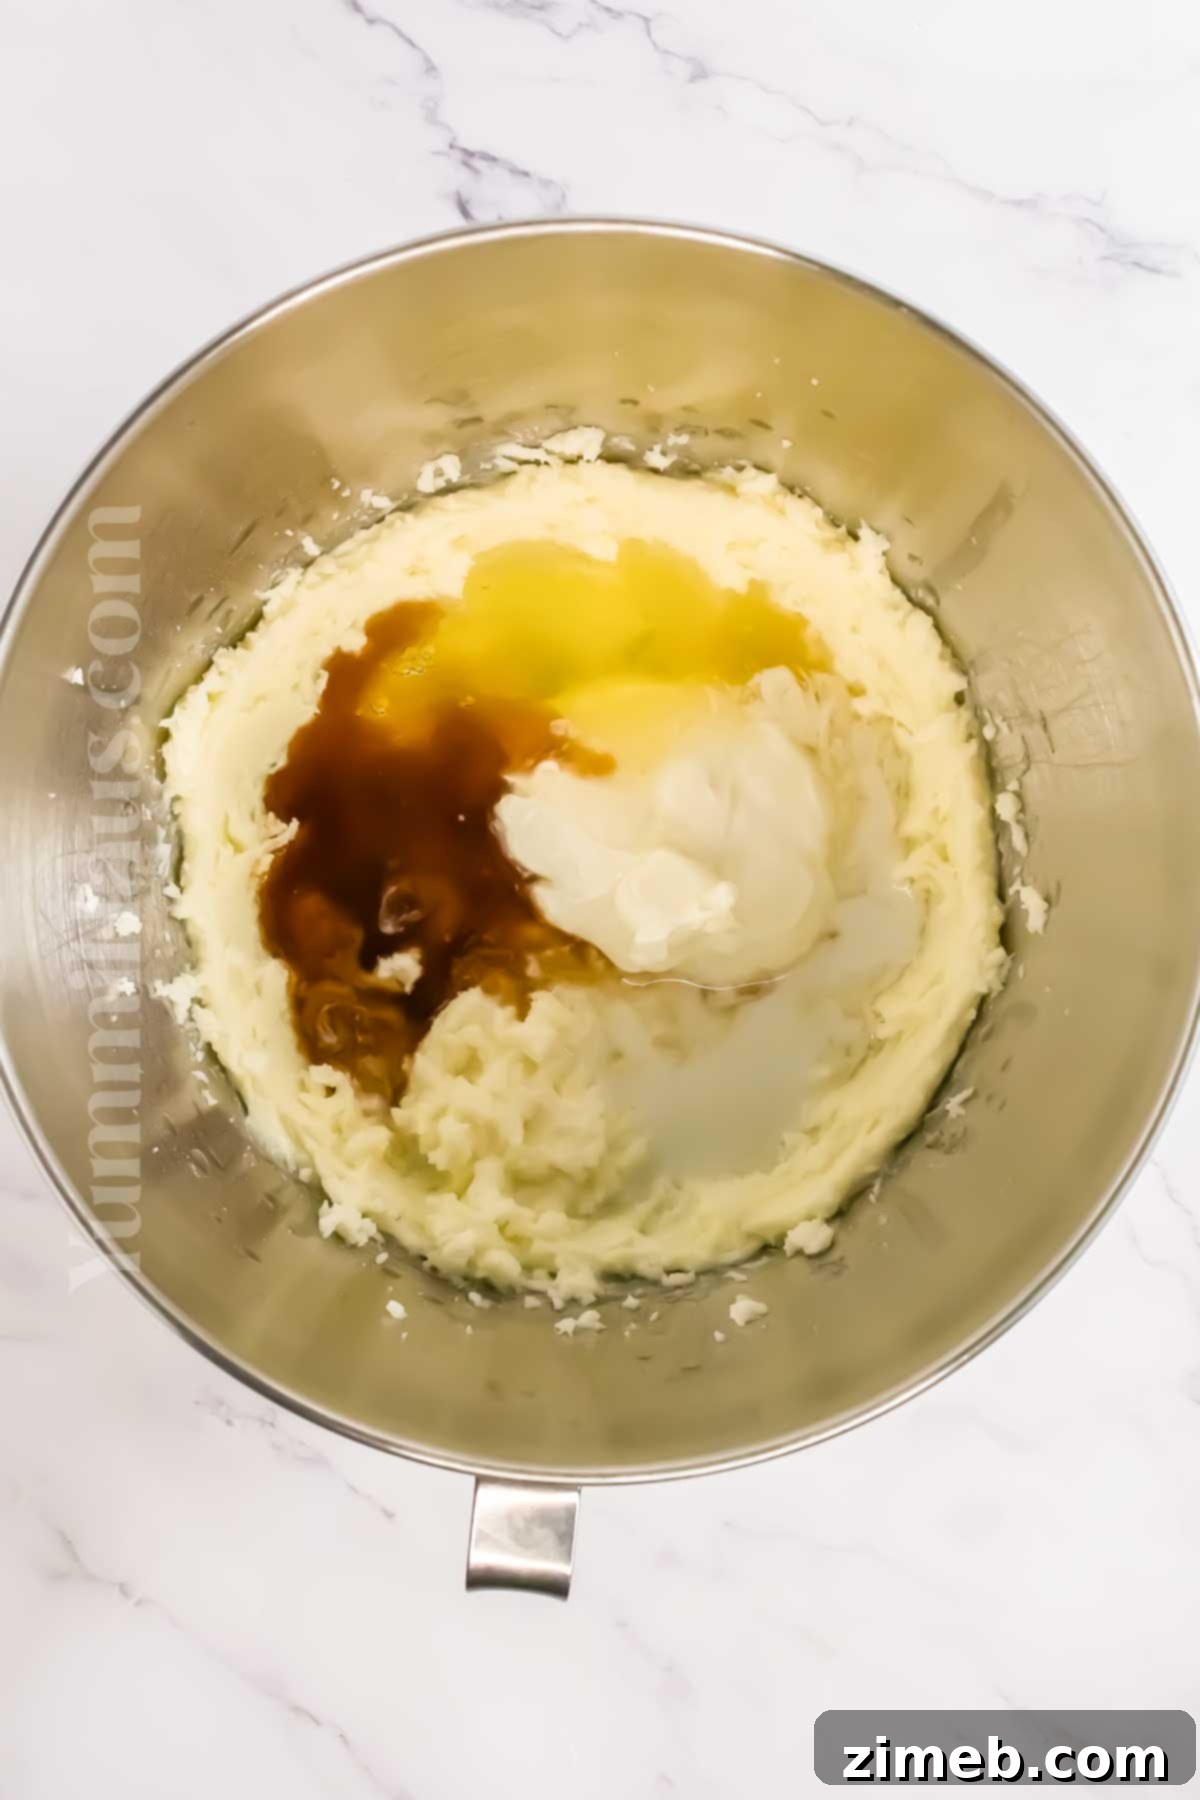
- Incorporate Wet Ingredients: Gradually mix in the egg whites, sour cream, reserved pineapple juice, milk, and vanilla extract. Beat until just combined. Be careful not to overmix at this stage.
- Add Dry Ingredients: In a separate bowl, whisk together the all-purpose flour, baking powder, baking soda, and salt. Slowly add the dry ingredients to the wet ingredients, mixing on low speed until just combined. Scrape down the sides of the bowl with a spatula, then briefly increase the speed and beat until the batter is smooth and well blended, being careful not to overmix. Overmixing can lead to a tough cake.
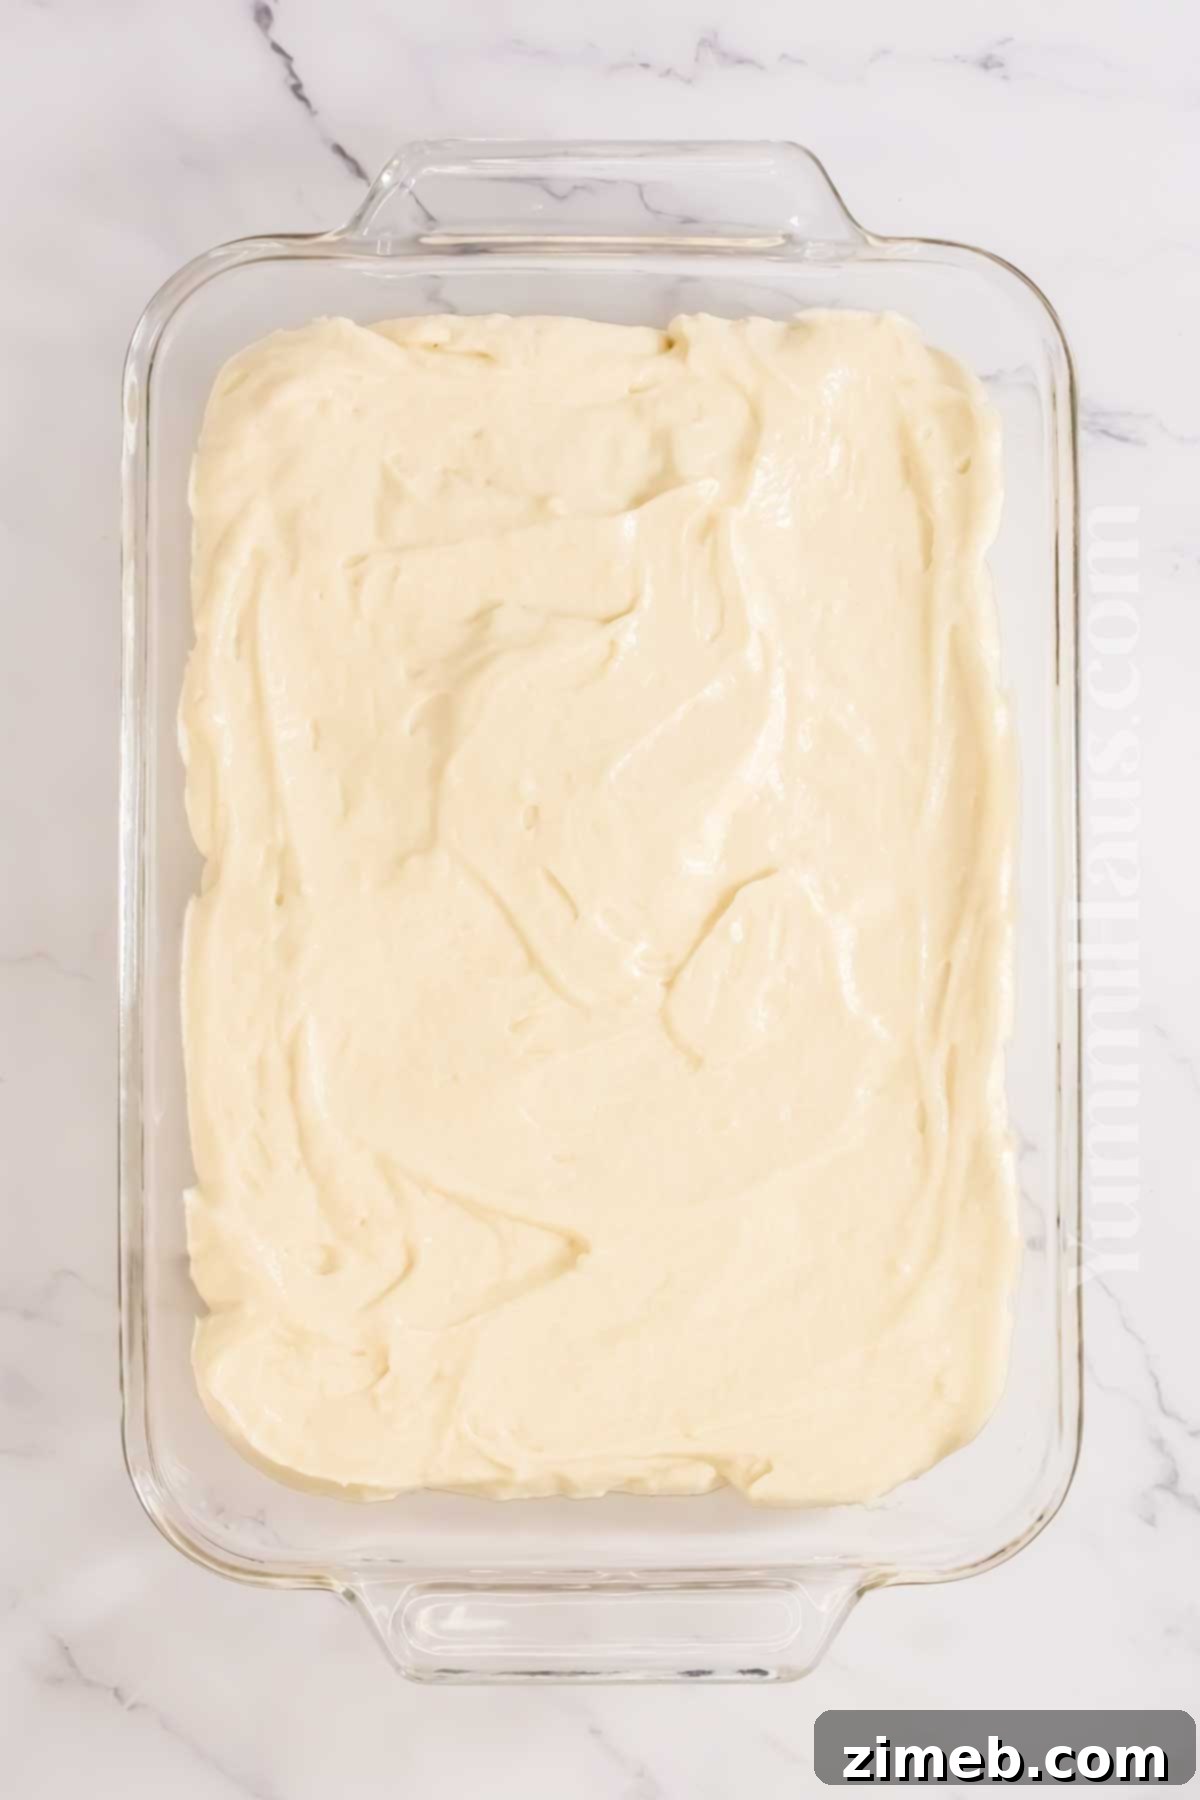
- Pour Batter: Gently and evenly pour the prepared cake batter over the pineapple and cherry topping in the baking dish. Use an offset spatula or the back of a spoon to spread the batter smoothly to the edges, ensuring the fruit remains undisturbed beneath.
Step 4: Baking and Serving Your Masterpiece
- Bake to Perfection: Place the baking dish in your preheated oven and bake for approximately 45 minutes. The cake is done when it’s golden brown, springs back lightly when gently pressed with your finger, and a toothpick inserted into the center comes out clean.
- Cooling Period: This step is critical! Let the cake cool in the pan on a wire rack for 10-20 minutes. Do not let it cool completely, as a slightly warm cake is easier to release and flip. Flipping too hot will make it fall apart, too cold and it might stick.
- Prepare for Flipping: While the cake is still warm, run a butter knife carefully along the edges of the cake to loosen it from the sides of the dish.
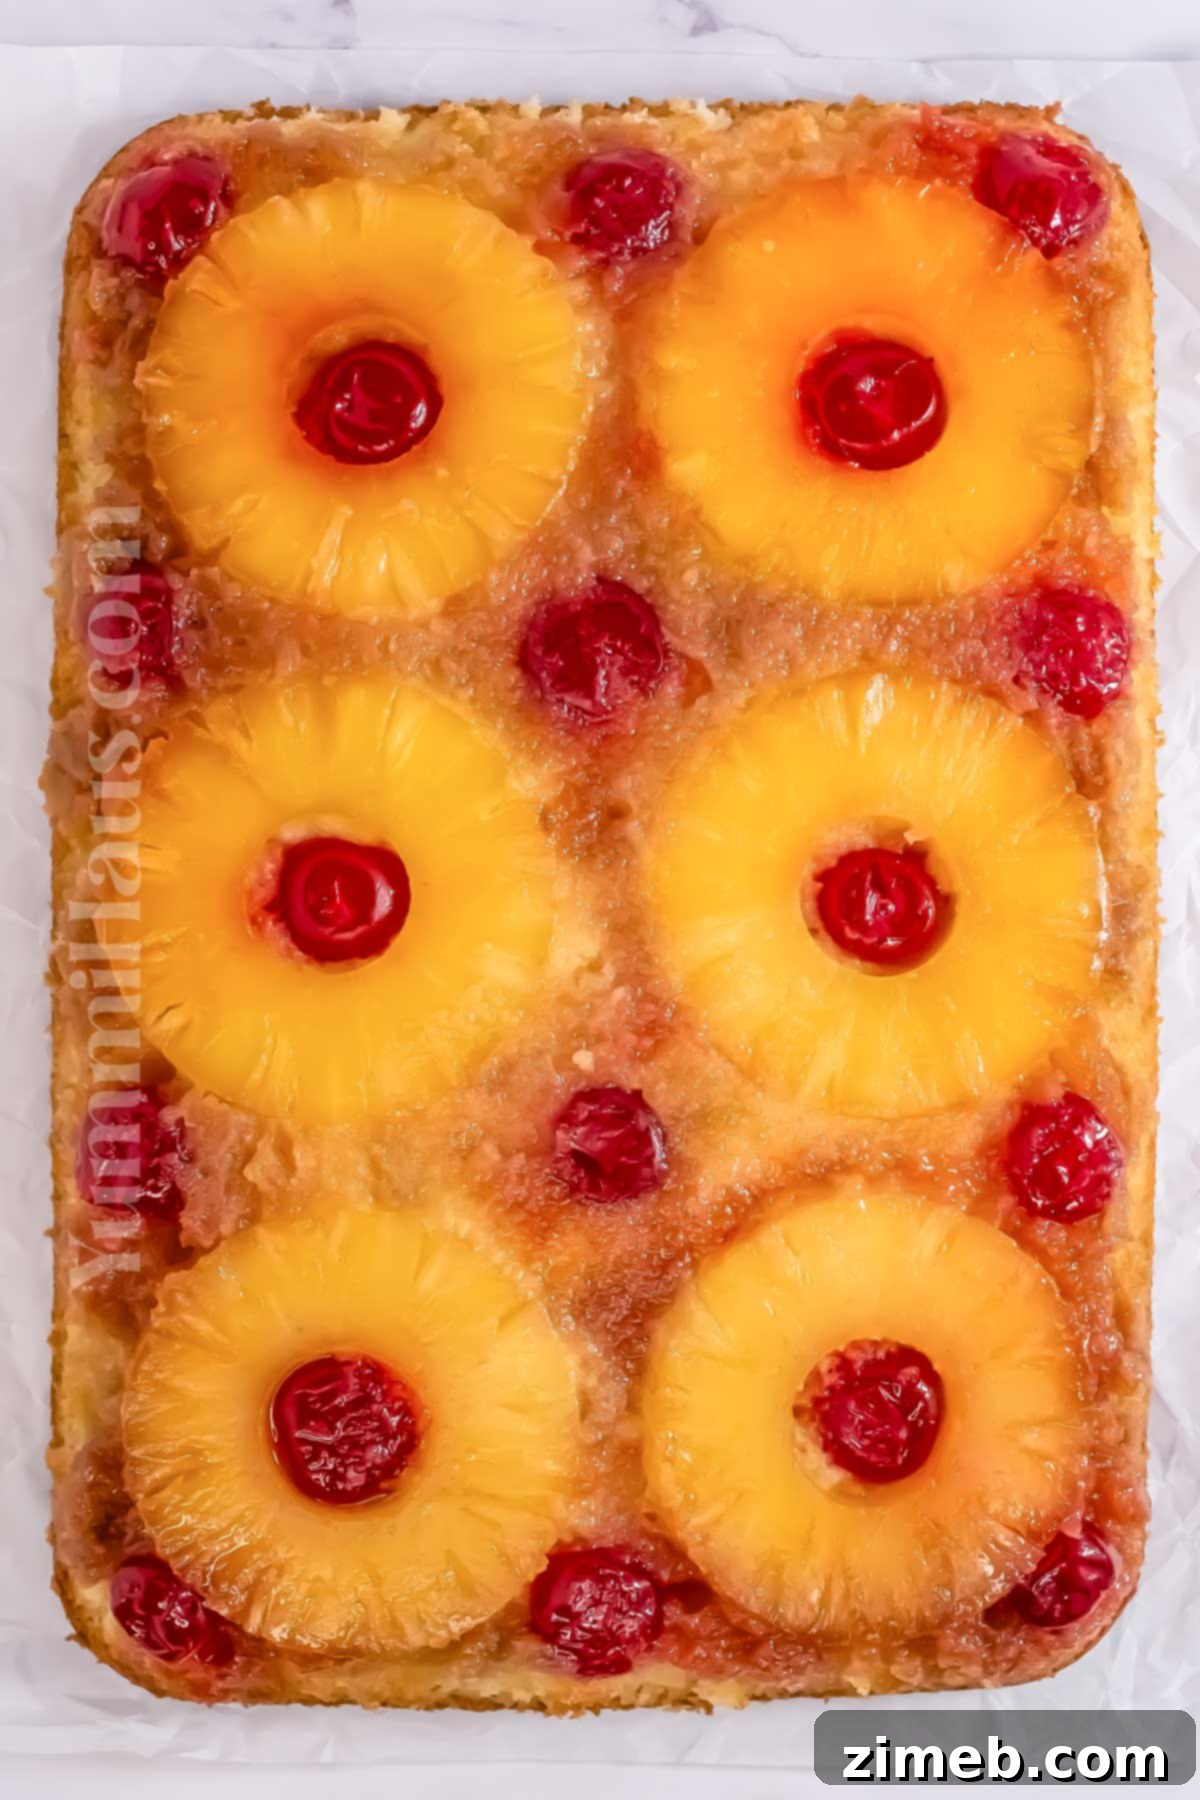
- The Grand Flip: Place your chosen serving plate (preferably one slightly larger than your baking dish) on top of the baking dish. Holding both the dish and the plate together firmly with oven mitts, swiftly and confidently invert them to flip the cake out of the baking dish and onto the serving plate. Gently tap the bottom of the pan a few times to encourage release, then carefully lift the pan away.
- Slice and Enjoy: Your beautiful Pineapple Upside-Down Cake is now ready! Slice it and serve warm for the best experience. A dollop of vanilla ice cream or a swirl of whipped cream on the side makes it even more decadent.
Storing Your Pineapple Upside-Down Cake
To ensure your delicious Pineapple Upside-Down Cake stays fresh and enjoyable, proper storage is key:
- Refrigeration: Leftover cake should be stored in an airtight container in the refrigerator for up to 2 days. This helps maintain its moisture and prevents spoilage.
- Freezing: For longer storage, you can freeze Pineapple Upside-Down Cake for up to 3 months. Allow the cake to cool completely before freezing. Tightly wrap individual slices or the entire cake (if fully cooled) with plastic wrap, then an additional layer of heavy-duty aluminum foil to prevent freezer burn and trap moisture. When ready to enjoy, thaw in the refrigerator overnight or at room temperature.
- Making Ahead: While it can be stored, this cake truly tastes best when enjoyed fresh and warm on the day it’s baked. The flavors are most vibrant, and the cake’s texture is at its peak immediately after baking. We generally do not recommend making it too far in advance if you want to experience it at its very best.
Exciting Substitutions & Creative Variations
One of the joys of baking is the freedom to customize. Here are some ideas to adapt your Pineapple Upside-Down Cake:
- Dietary Adaptations: This versatile recipe can easily be made vegan or gluten-free. Simply swap the all-purpose flour for a good quality gluten-free baking blend, and replace dairy products (butter, sour cream, milk) with plant-based alternatives like vegan butter, coconut yogurt, and coconut milk.
- Enhanced Fruit Coverage: For fruit in every bite, cut some pineapple rings in halves and arrange them along the sides and edges of your pan before adding the full rings to the center. This ensures no plain cake edges!
- Time-Saving Cake Mix: If you’re short on time, a boxed cake mix can be used instead of making the batter from scratch. A white or yellow cake mix works wonderfully. Just be aware that homemade cake batter is typically denser and richer than a boxed mix, so the texture might vary slightly.
- Serving Suggestions: The classic pairing for pineapple upside-down cake is a generous scoop of vanilla ice cream, or a cloud of homemade (or store-bought) whipped cream. The cool, creamy topping perfectly complements the warm, fruity cake.
- Fill the Gaps: While cherries add beautiful color, if you prefer an even more intense pineapple flavor, consider using crushed pineapple (well-drained and patted dry) to fill any gaps between the pineapple rings. This creates a solid layer of fruit topping.
- Warm Spices and Zest: Elevate the flavor profile by adding warm spices like a pinch of ground cinnamon or nutmeg to your cake batter. A little citrus zest (lemon or orange) can also brighten the flavors beautifully.
- Explore Other Fruits: The “upside-down” technique isn’t limited to pineapple! Experiment with other fruits such as thinly sliced apples, pears, peaches, plums, or even berries arranged at the bottom of the pan for a delightful twist.
Expert Tips for a Flawless Pineapple Upside-Down Cake
Achieve baking perfection with these valuable insights and tricks for your easy Pineapple Upside-Down Cake:
- Serving Temperature: This cake is delicious served warm or cold. To reheat a slice, simply pop it in the microwave for a few seconds until gently warmed. The warmth truly brings out the rich caramel and juicy pineapple flavors.
- Secure the Topping: If you’re worried about your pineapple slices and cherries shifting when you add the batter, consider refrigerating the pan with the arranged topping for 10-15 minutes before pouring over the cake batter. This helps to ‘lock’ the fruit in place.
- Prevent Oven Messes: Place a baking sheet on the rack underneath your cake pan while it bakes. This clever trick catches any juices from the caramel layer that might bubble up and overflow from the sides of the pan, keeping your oven clean.
- Room Temperature Ingredients: Ensure your butter, sour cream, and milk are at room temperature. This allows them to cream together more smoothly, incorporating more air into the batter for a lighter, more tender cake.
- Don’t Overmix: Mix the dry ingredients into the wet ingredients only until just combined. Overmixing develops the gluten in the flour too much, leading to a tough, dense cake.
- Patience with Cooling: Resist the urge to flip the cake immediately out of the oven. The short cooling period (10-20 minutes) is crucial for the cake to set and for the caramel to firm up slightly, ensuring a clean release from the pan.
Popular Questions & Troubleshooting for Pineapple Upside-Down Cake
Why Is My Pineapple Upside Down Cake Soggy?
A soggy pineapple upside-down cake is a common issue, often due to excess moisture. The most frequent culprits are pineapple slices that haven’t been adequately dried before being placed in the pan, or too much liquid added to the cake batter. Always ensure to thoroughly pat your pineapple slices dry with paper towels to remove as much juice as possible. Additionally, strictly adhere to the liquid measurements in the recipe. Another factor can be underbaking; a cake that isn’t fully cooked will retain too much moisture and feel soggy. Always bake until a toothpick inserted into the center of the cake comes out clean, indicating it’s cooked through.
When Is the Best Time to Flip a Pineapple Upside-Down Cake?
The ideal time to flip a pineapple upside-down cake is when it’s still warm, but not piping hot, typically after it has cooled on a wire rack for about 15-20 minutes. If you attempt to flip the cake when it’s too hot, it will be extremely moist and delicate, making it prone to breaking apart or sticking to the pan. Conversely, if you let it cool completely, the caramelized sugar topping can harden and adhere firmly to the pan, making it difficult to release cleanly. The slight warmth allows the caramel to remain pliable and the cake to set just enough for a successful inversion.
What Is the Trick to Flawlessly Flipping a Pineapple Upside Down Cake?
The trick to easily flipping and removing your pineapple upside-down cake from its pan lies in timing and technique. After baking, let the cake cool for 15-20 minutes. While it’s still warm, run a thin butter knife along the entire edge of the cake to loosen it from the sides of the pan. Next, select a serving plate that is at least 2 inches larger than your baking pan. Place this plate firmly on top of the baking dish. Holding both the pan and the plate together tightly with oven mitts, swiftly and confidently invert them. Once flipped, lightly tap the bottom of the pan a few times to ensure the cake isn’t sticking, then gently lift the pan straight up and off, revealing your beautifully topped cake.
Is It Better to Make Pineapple Upside Down Cake the Day Before?
While you certainly can make pineapple upside-down cake the day before, it truly tastes best on the same day it’s baked, especially when served warm. The cake is most moist and tender shortly after baking, and the caramel topping is at its most luscious. If made a day in advance, the cake can lose a bit of its fresh texture, and the fruit may release more moisture into the cake. However, if absolutely necessary, it will still be delicious if stored properly in the fridge for up to 2 days.
Should You Use Parchment Paper When Baking Pineapple Upside Down Cake?
Using parchment paper to line the bottom of your baking pan for pineapple upside-down cake is not strictly necessary, but it can be a helpful extra layer of insurance against sticking. Most recipes, including this one, primarily rely on generously greasing the pan (and adding butter and brown sugar to the bottom) to prevent the fruit and caramel from sticking. If you’re concerned about a clean release, you can absolutely line the bottom of the pan with parchment paper after greasing, then grease the parchment paper as well. This guarantees a non-stick surface, especially for cakes baked in a bundt pan or cast iron skillet where intricate shapes can sometimes stick.
What Kind of Pan Is Best for Upside-Down Cake?
The best pan for an upside-down cake depends on your desired shape and baking preferences. A classic choice is a round cake pan or a rectangular baking dish, both of which work perfectly for this recipe. For a more decorative presentation, a bundt pan can create a stunning fluted shape. If you’re looking for a rustic touch and a potentially faster baking time, a cast iron skillet (9-10 inches) is an excellent option, as cast iron heats very efficiently. Generally, pans without a dark non-stick coating tend to work better for upside-down cakes as they reflect heat more evenly, preventing the bottom (which becomes the top) from over-browning too quickly.
If you’re as passionate about easy and delicious cakes as we are, you’ll love exploring these other simple single-layer cake recipes. Each link below leads to another delightful, printable recipe to expand your baking repertoire!
Check out this recipe

Check out this recipe

Check out this recipe
Check out this recipe

Check out this recipe

More Delightful Pineapple Recipes to Try
If you’ve fallen in love with the sweet and tangy flavor of pineapple, here are more fantastic recipes featuring this tropical fruit:
Carrot Cake with Pineapple
Piña Colada Cupcakes
Punch Bowl Cake
Dirty Pineapple Whip Pops Recipe
CONNECT WITH YUMMI HAUS!
Be sure to follow me on my social media, so you never miss a post!
Substack, FB, Pinterest, IG, Email Subscription


Pineapple Upside Down Cake
Course: Dessert
Servings: 12 servings
Pineapple Upside Down Cake is a moist, buttery cake topped with caramelized pineapple rings and cherries. It is a timeless dessert that’s easy to make and perfect for any occasion.
Prep Time: 20 mins
Cook Time: 45 mins
Cool: 2 hrs
Total Time: 3 hrs 5 mins
Ingredients
Topping
- 4 tbsp butter (melted – unsalted)
- ½ cup brown sugar
- 8 pineapple slices (*save the juice for the cake – 6-8 slices)
- 20 maraschino cherries (15-20 cherries)
Cake
- 1 ½ cups all-purpose flour
- 1 tsp baking powder
- ¼ tsp baking soda
- ½ tsp salt
- 6 tbsp butter (softened – unsalted)
- ¾ cup granulated sugar
- 2 egg whites
- ⅓ cup sour cream
- ¼ cup pineapple juice (*saved from the can of slices)
- 2 tbsp milk
- 1 tsp vanilla extract
Instructions
-
Preheat the oven to 350 degrees F (175°C).
-
Grease an 8×10 baking dish with cooking oil or non-stick spray.
-
Starting with the “topping”, add the melted butter to the bottom of the dish.
-
Spread the brown sugar in an even layer on top of the melted butter.
-
Arrange the pineapple slices on top of the brown sugar in an even layer.
-
Insert a cherry into the center of each pineapple ring, and in all of the open spaces where the pineapple is not covering the brown sugar.
-
Set the dish aside to work on the cake batter.
-
Cream the butter and sugar together in the bowl of a stand mixer until it is well blended and smooth.
-
Mix in the egg whites, sour cream, pineapple juice, milk, and vanilla extract.
-
Slowly stir in the flour, baking powder, baking soda, and salt. Scrape down the sides and then increase the speed and beat until well blended.
-
Transfer the batter to the top of the pineapple in the baking dish.
-
Bake for 45 minutes or until golden brown and the cake springs back when gently pressed with your finger and a toothpick inserted comes out clean.
-
Let the cake cool for 10-20 minutes on a wire rack before attempting to flip.
-
To serve, run a butter knife along the edge of the cake to release it from the sides of the dish.
-
Place the serving plate on top of the baking dish, holding the two together firmly. Then invert to flip the cake out of the baking dish and onto the serving plate.
-
Slice and serve warm.
Notes
Nutrition
Serving: 1 serving | Calories: 280kcal | Carbohydrates: 44g | Protein: 2g | Fat: 12g | Saturated Fat: 7g | Cholesterol: 30mg | Sodium: 240mg | Potassium: 101mg | Fiber: 1g | Sugar: 31g | Vitamin C: 4mg | Calcium: 51mg | Iron: 1mg | Net Carbohydrates: 43g
Nutritional information for the recipe is provided as a courtesy and is approximate. Please double-check with your own dietary calculator for the best accuracy. We at Yummi Haus cannot guarantee the accuracy of the nutritional information given for any recipe on this site.
Love this recipe?
Follow @KleinworthCo for even more tasty recipes!