
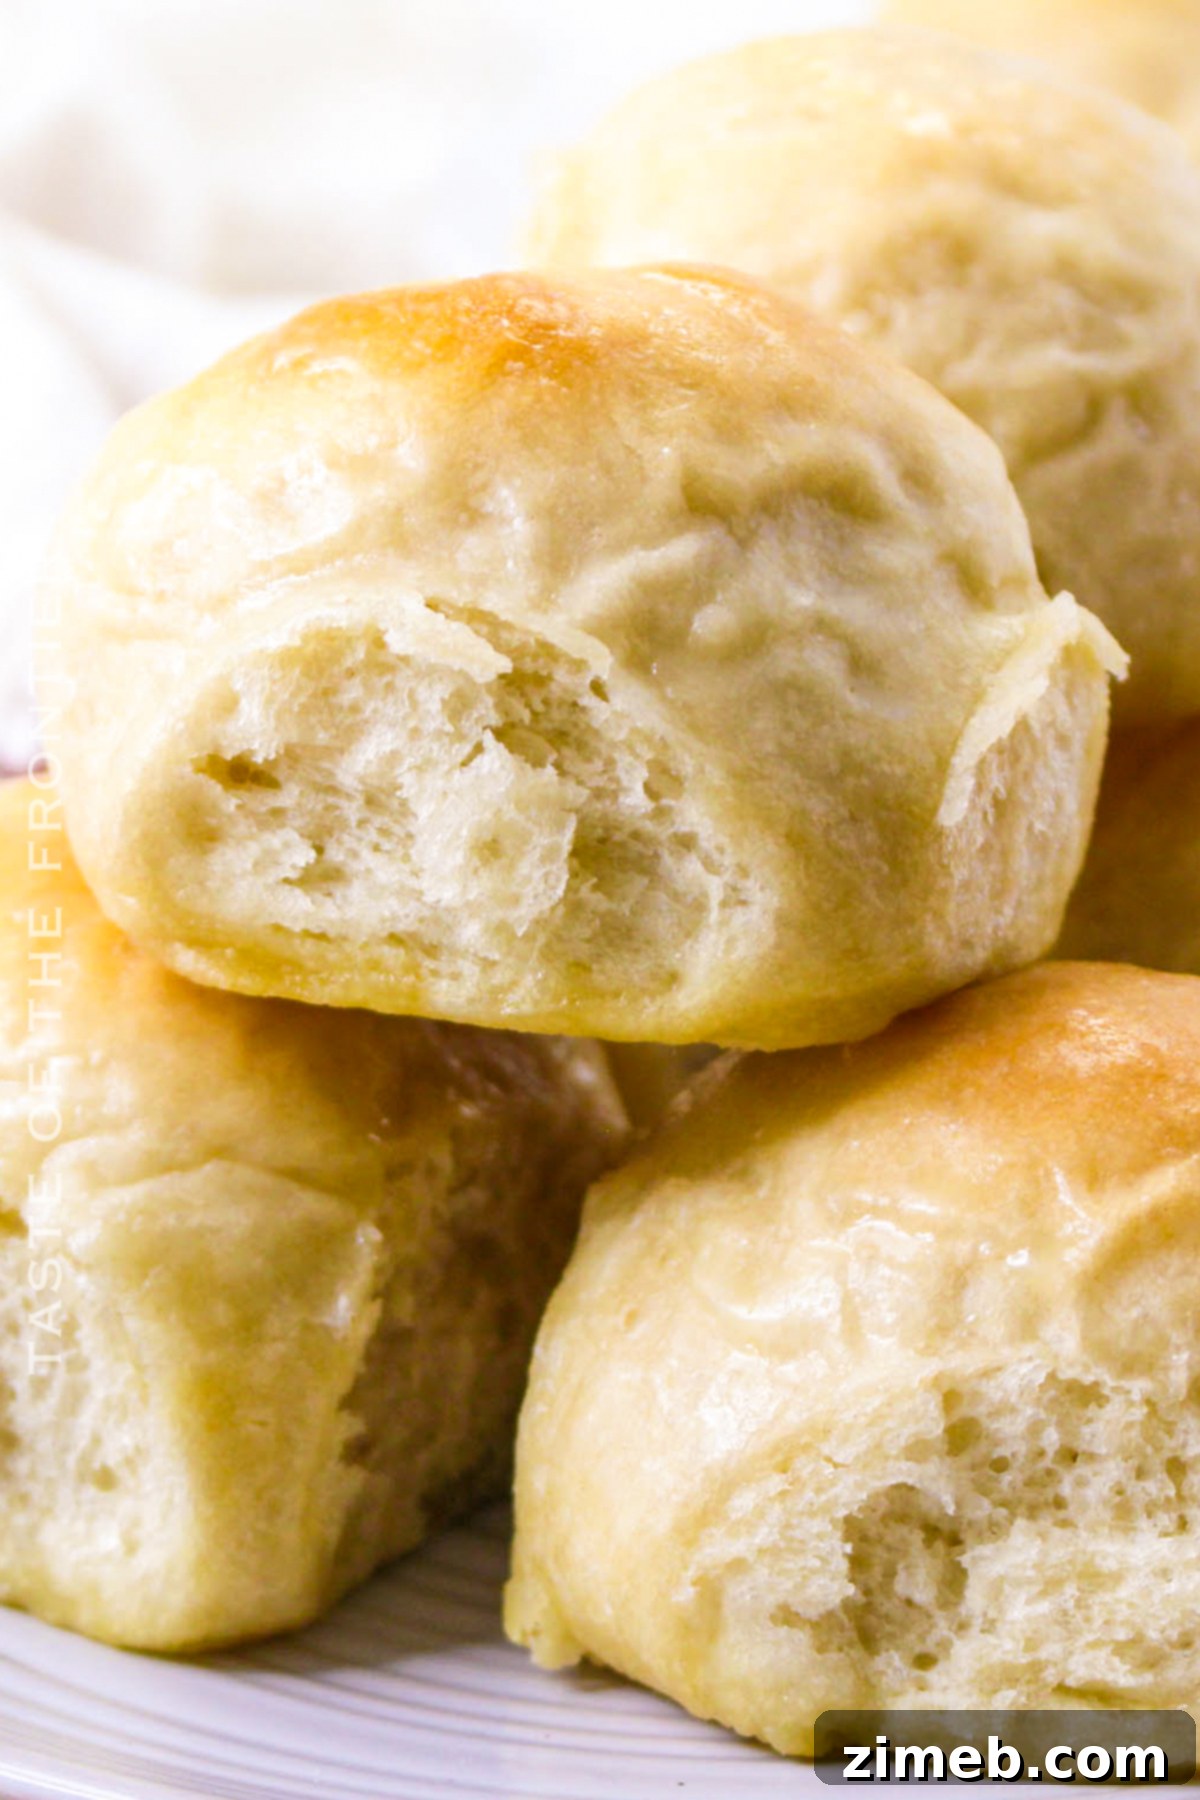
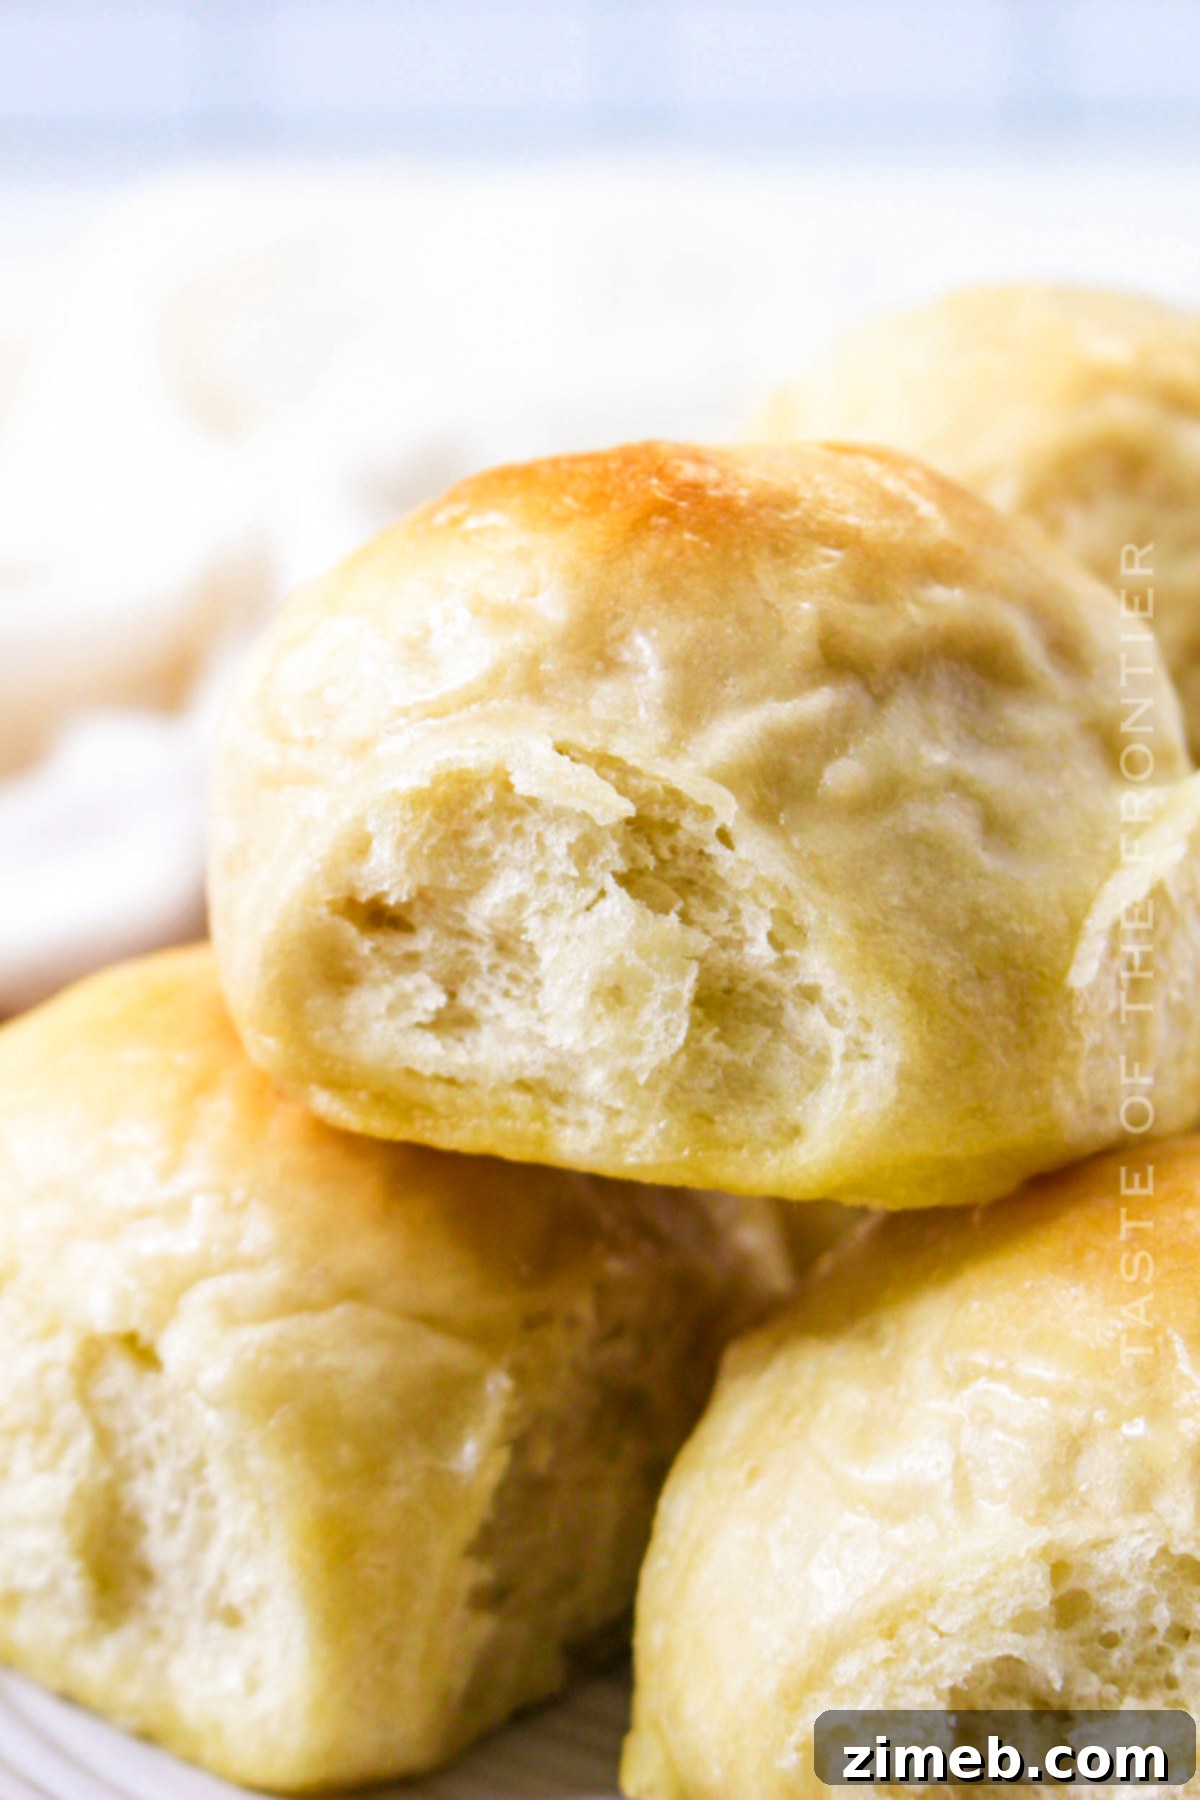
No-Knead Dinner Rolls are the ultimate easy homemade bread, delivering soft, fluffy results without the extensive work! These tender rolls are perfect for any occasion, especially cherished holiday meals like Thanksgiving or Christmas dinner.
Easy No-Knead Dinner Rolls: Your Guide to Fluffy Homemade Bread
Are you yearning for the comforting aroma of fresh, homemade dinner rolls but intimidated by the thought of kneading dough for endless minutes? Look no further! This no-knead dinner roll recipe is a game-changer, designed to bring the joy of baking into your kitchen with minimal effort. Imagine serving warm, buttery, melt-in-your-mouth rolls that taste like they came straight from a gourmet bakery, all thanks to a simple, hands-off method. Your family and guests will undoubtedly adore these tender and flavorful rolls, making them a staple at your dinner table.
The beauty of this recipe lies in its simplicity. With minimal hands-on time required, you’re freed up to focus on other aspects of your meal preparation or simply enjoy more precious moments with your loved ones. Whether you’re a seasoned baker or just starting your journey into the world of bread making, these no-knead dinner rolls offer a foolproof path to success. Give this incredibly easy and delicious recipe a try today and discover just how rewarding homemade bread can be!
The Magic Behind No-Knead Baking: Simplicity Meets Deliciousness
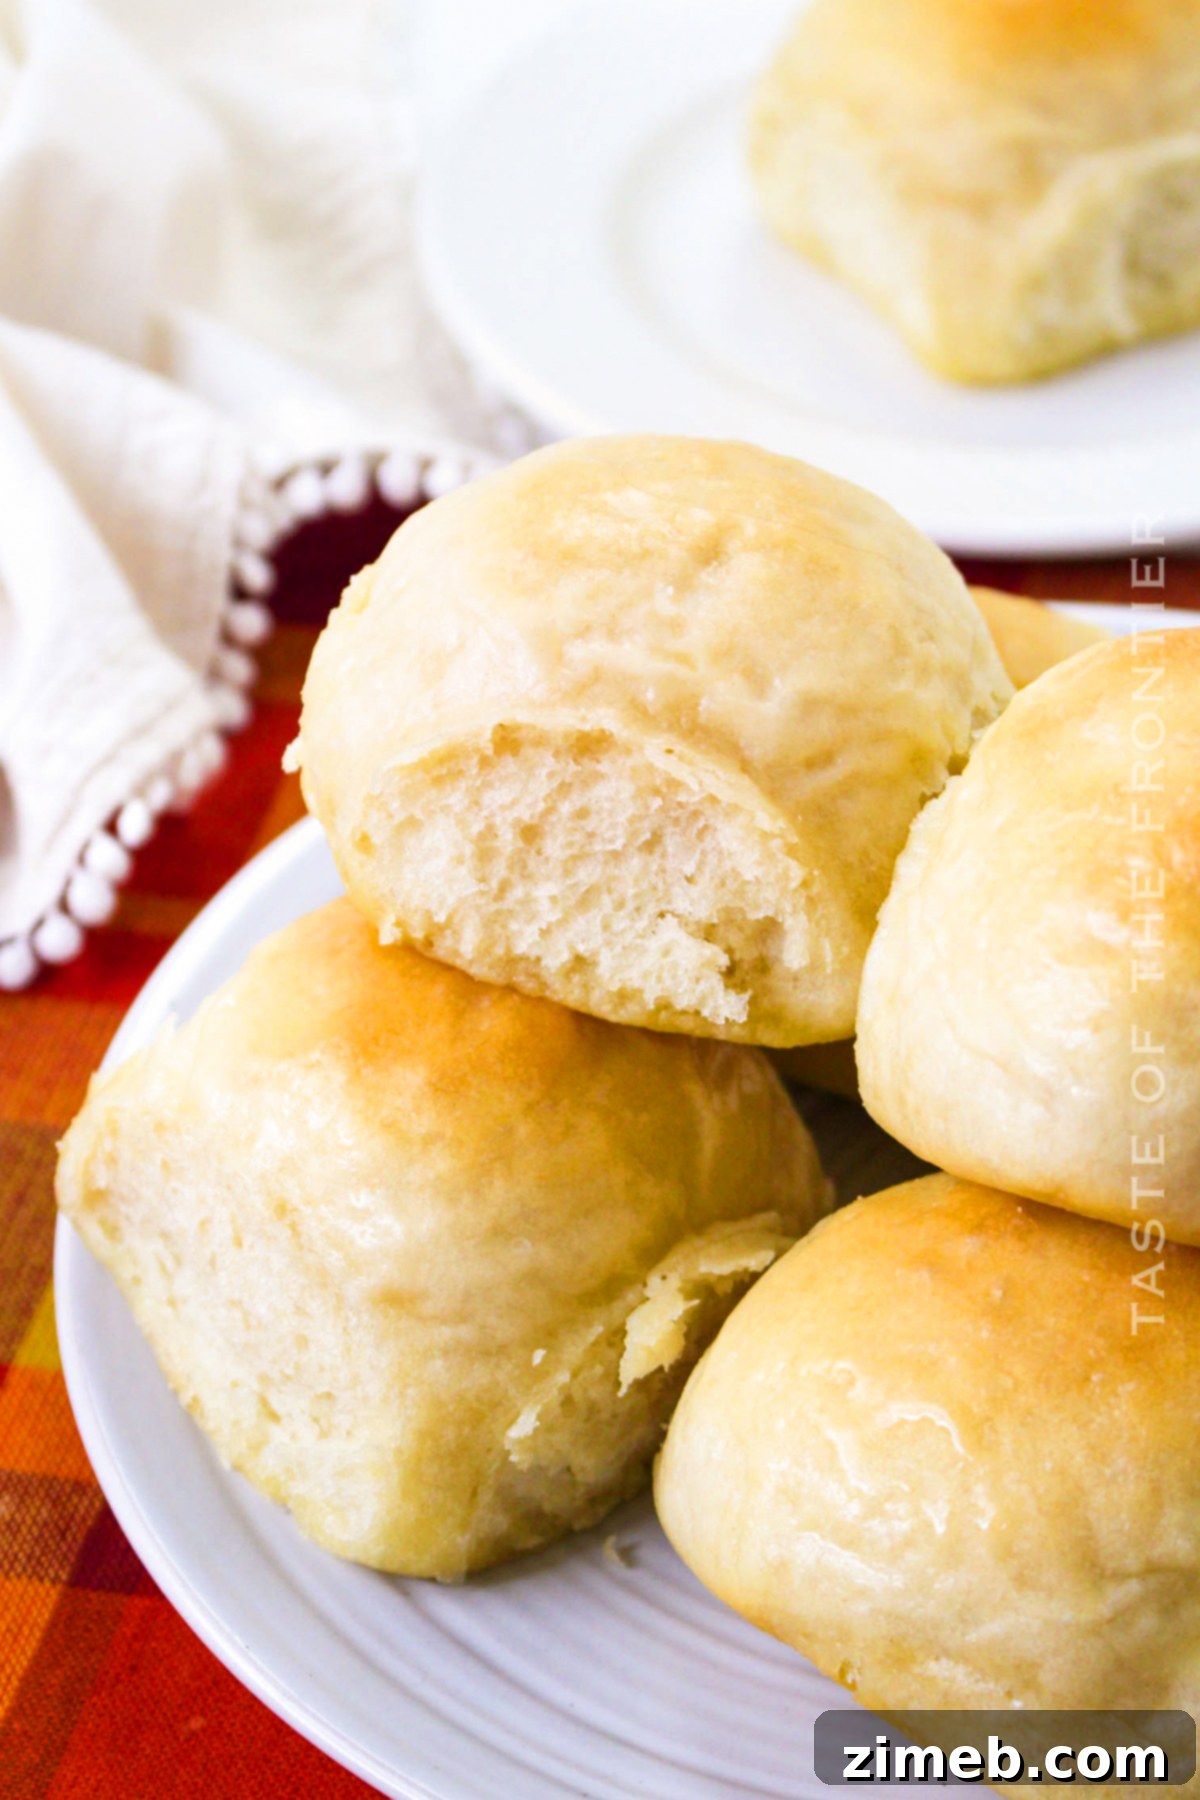
If you, like me, adore the taste of fresh, homemade dinner rolls but often lack the time or energy for traditional dough kneading, then this recipe is truly for you! These no-knead dinner rolls eliminate the most labor-intensive step of bread making while still delivering an incredibly soft, airy crumb and a beautiful golden crust.
The secret to no-knead bread lies in a longer fermentation period. Instead of vigorously working the dough to develop gluten, time does the work for you. By allowing the dough to rest and rise for an extended period, the gluten strands naturally develop, creating a strong yet elastic structure without any manual effort. This not only simplifies the process but often results in a more complex and satisfying flavor profile than quick-rise breads.
There’s no special equipment required for this recipe – just a mixing bowl and your hands (or a wooden spoon). You simply mix the ingredients together, let them rise, and then bake. The flexibility is another huge advantage: you can bake them on the same day after a few hours of rising, or opt for an overnight rise in the refrigerator, allowing you to wake up to ready-to-bake dough. This makes them perfect for busy mornings or streamlining your holiday cooking. Simply pop them in the oven, and in minutes, you’ll have warm, fragrant rolls ready to serve with your favorite meal. Prepare to be amazed by how effortless homemade bread can be!
Essential Ingredients for Perfect No-Knead Rolls
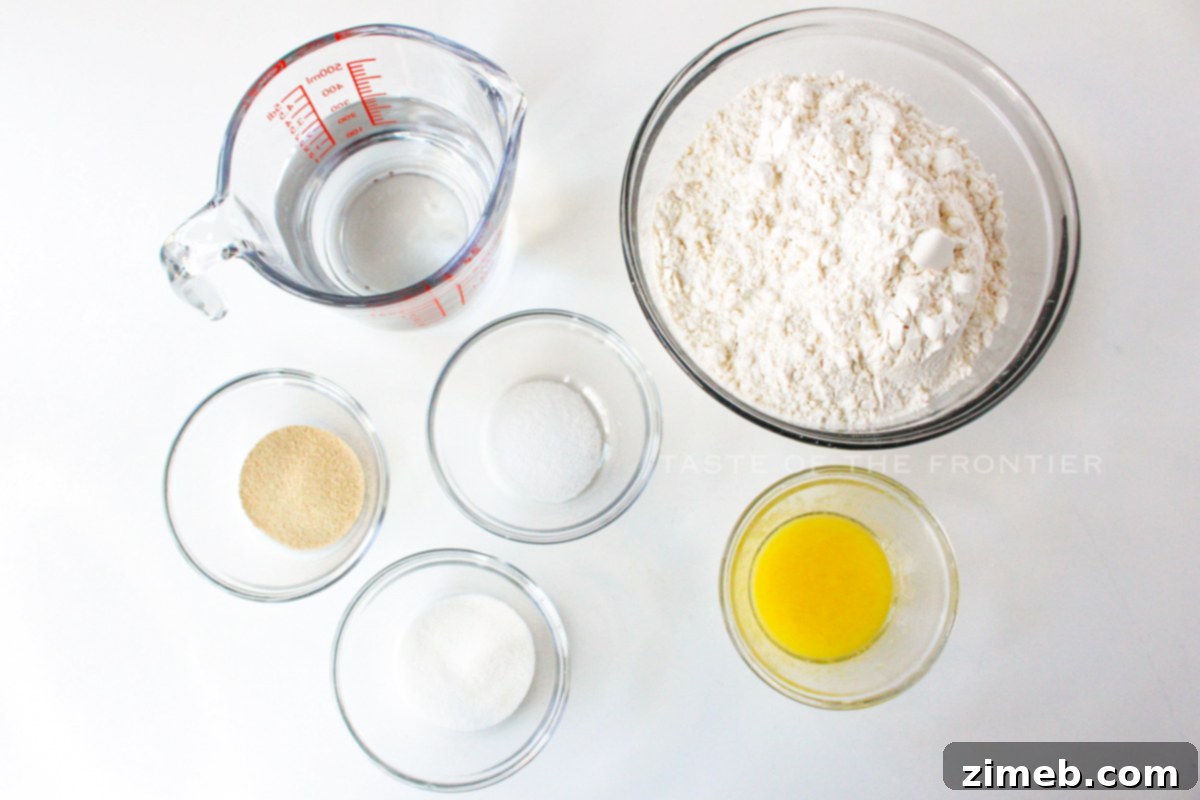
Crafting delicious no-knead dinner rolls starts with a few basic ingredients, each playing a vital role in achieving that perfect fluffy texture and rich flavor. Understanding these components will help ensure your success:
- Warm Water: The temperature of your water is crucial for activating the yeast. Aim for a range between 115-125 degrees Fahrenheit (46-52 degrees Celsius). Water that’s too hot will kill the yeast, preventing your dough from rising, while water that’s too cold won’t activate it effectively. An instant-read thermometer is your best friend here.
- Melted Butter: Butter adds incredible richness, flavor, and tenderness to the rolls. It’s incorporated into the dough and also used for brushing the rolls after baking, contributing to their soft crust and appealing sheen. For an extra layer of flavor, consider using salted butter.
- Granulated Sugar: Beyond sweetness, sugar serves as food for the yeast, helping it to activate and multiply, which in turn makes the dough rise. It also aids in browning the crust, giving your rolls a beautiful golden hue. Do not reduce the amount of sugar, as it is essential for the yeast’s activity.
- Salt: A fundamental ingredient in almost all bread recipes, salt enhances the flavor of the rolls and helps to control the yeast’s activity, ensuring a steady, even rise.
- Active Dry Yeast: This recipe calls for active dry yeast, which typically needs to be dissolved in warm liquid (water, in this case) with a little sugar to activate before being combined with the flour. You can use rapid rise or instant yeast as well; these varieties are often more forgiving and can sometimes be mixed directly with the dry ingredients.
- All-Purpose Flour: The backbone of these rolls. All-purpose flour provides the necessary structure. Ensure you measure your flour correctly to avoid overly dense or dry rolls. We recommend the “spoon and level” method: spoon flour into your measuring cup and then level it off with a straight edge, rather than scooping directly from the bag. This prevents packing too much flour into the cup.
Step-by-Step: How to Make No-Knead Dinner Rolls
Making these delightful no-knead dinner rolls is surprisingly simple and requires just a few straightforward steps. Follow these instructions closely for the best results:
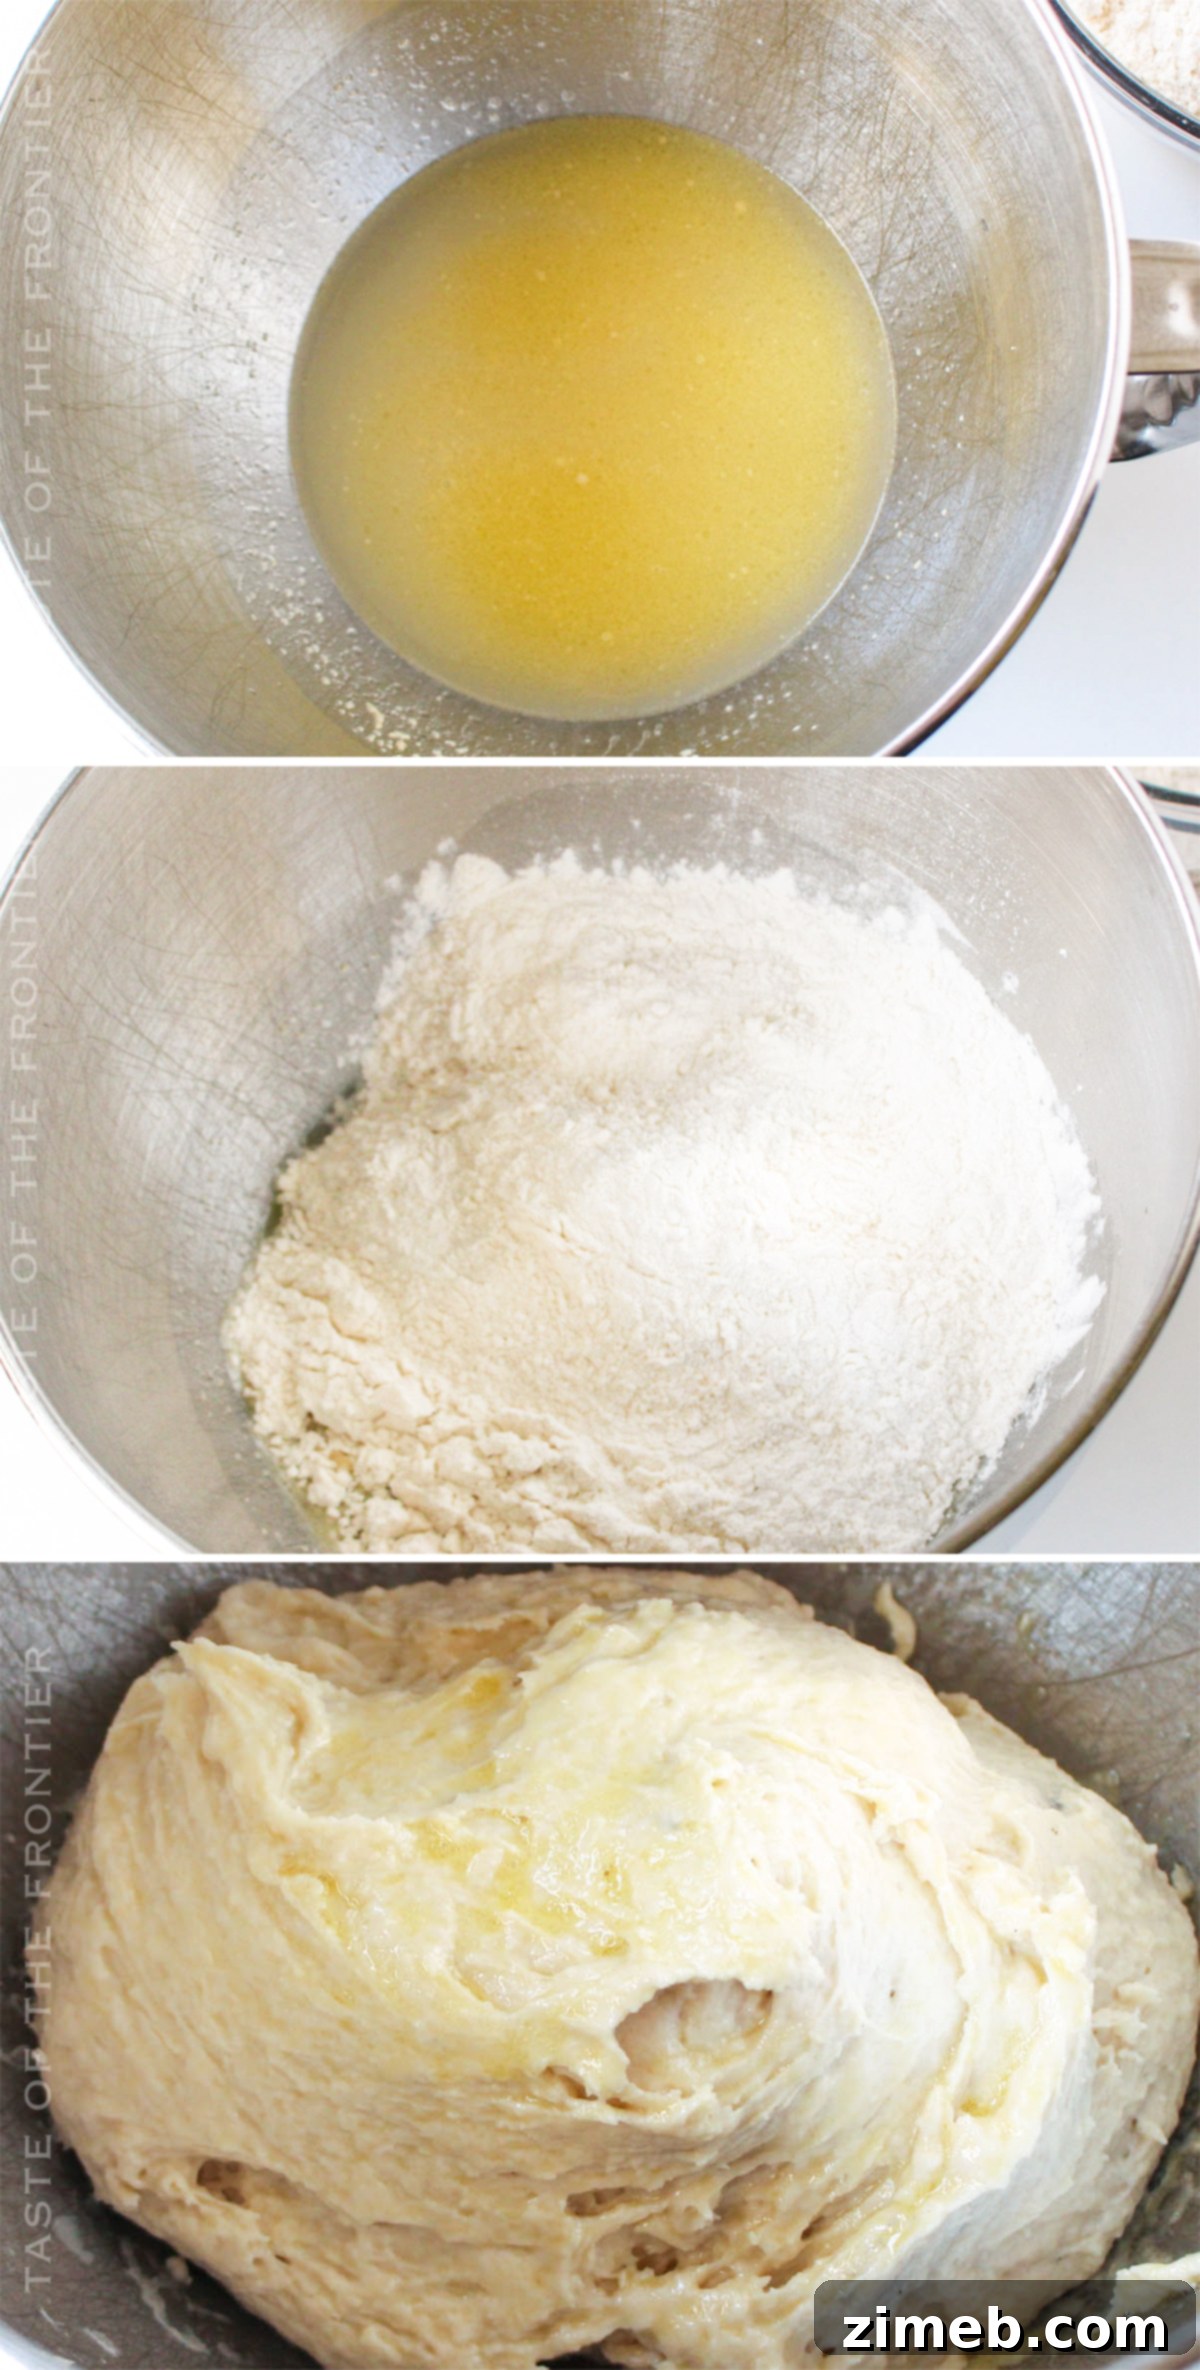
- Combine Wet and Sweet Ingredients: In a large mixing bowl, preferably in a warm room to encourage yeast activity, combine the warm water, 2 tablespoons of melted butter, granulated sugar, and salt. Stir these ingredients together until the sugar and salt are mostly dissolved.
- Activate the Yeast: Sprinkle the active dry yeast over the mixture. Give it a gentle stir to ensure it’s fully submerged and let it sit for about 5-10 minutes. You should see it become foamy, indicating the yeast is active and ready to work. If it doesn’t foam, your water might have been too hot or too cold, or your yeast may be old.
- Mix in the Flour: Gradually add the all-purpose flour to the wet ingredients. Using a sturdy wooden spoon or a stand mixer fitted with a dough hook, mix until the flour is fully incorporated and a shaggy, somewhat sticky dough forms. Scrape down the sides of the bowl as needed to ensure everything is well combined. Remember, no strenuous kneading is required here!
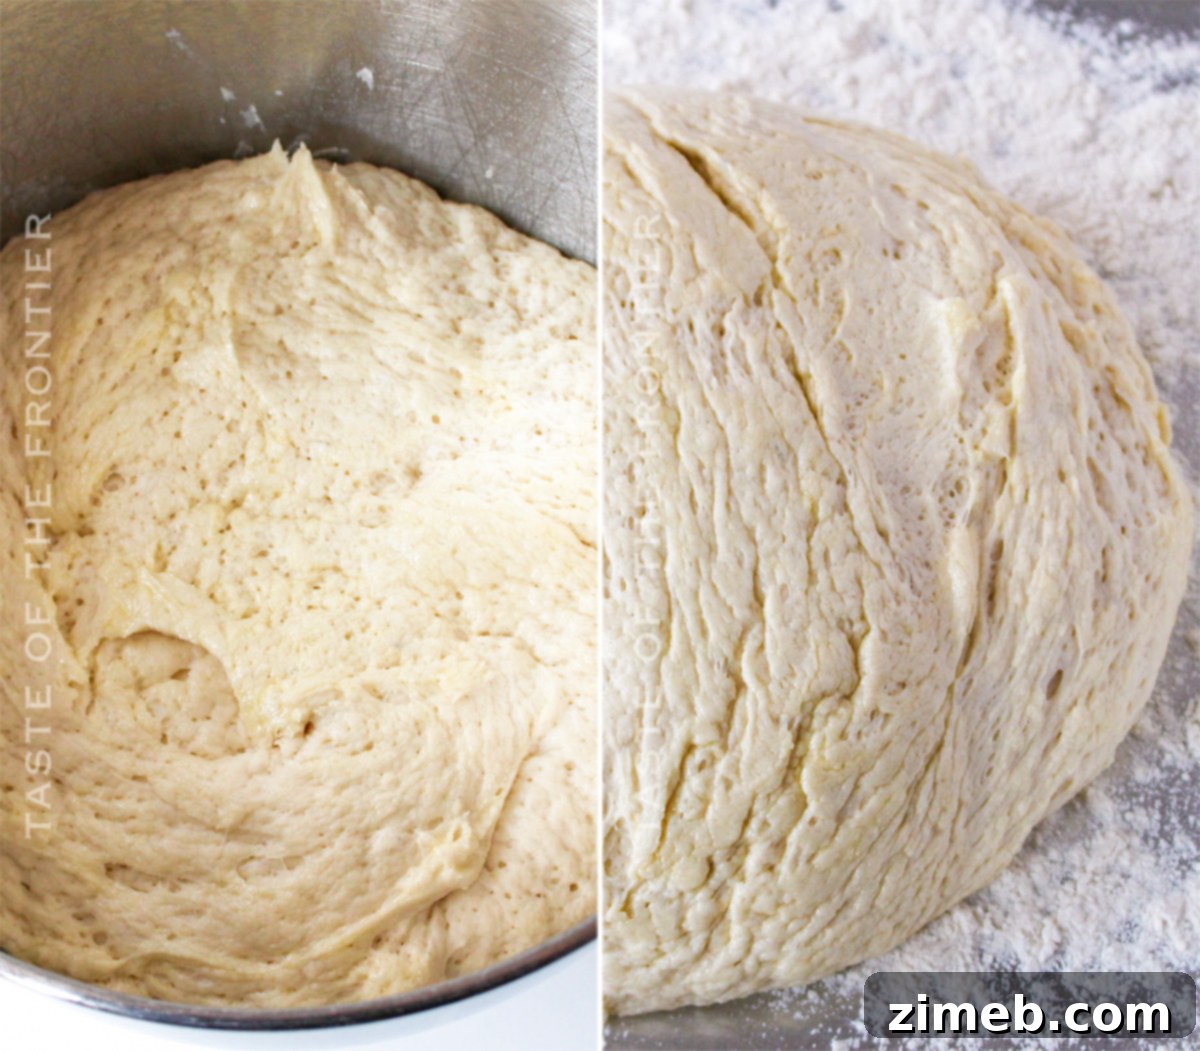
- First Rise (Bulk Fermentation): Cover the bowl loosely with plastic wrap or a clean kitchen towel. Place it in a warm, draft-free spot and allow the dough to rise at room temperature for approximately 45 minutes, or until it has noticeably increased in volume.
- Prepare Baking Dish: While the dough is on its first rise, prepare your baking dish. Lightly grease a standard 9×13 inch baking pan (or a similar size) with nonstick cooking spray or a thin layer of cooking oil. This prevents the rolls from sticking and helps them brown beautifully.
- Punch Down and Transfer: Once the dough has completed its first rise, gently punch it down to release the air. Transfer the dough onto a lightly floured, smooth surface (a clean countertop or large cutting board works well).
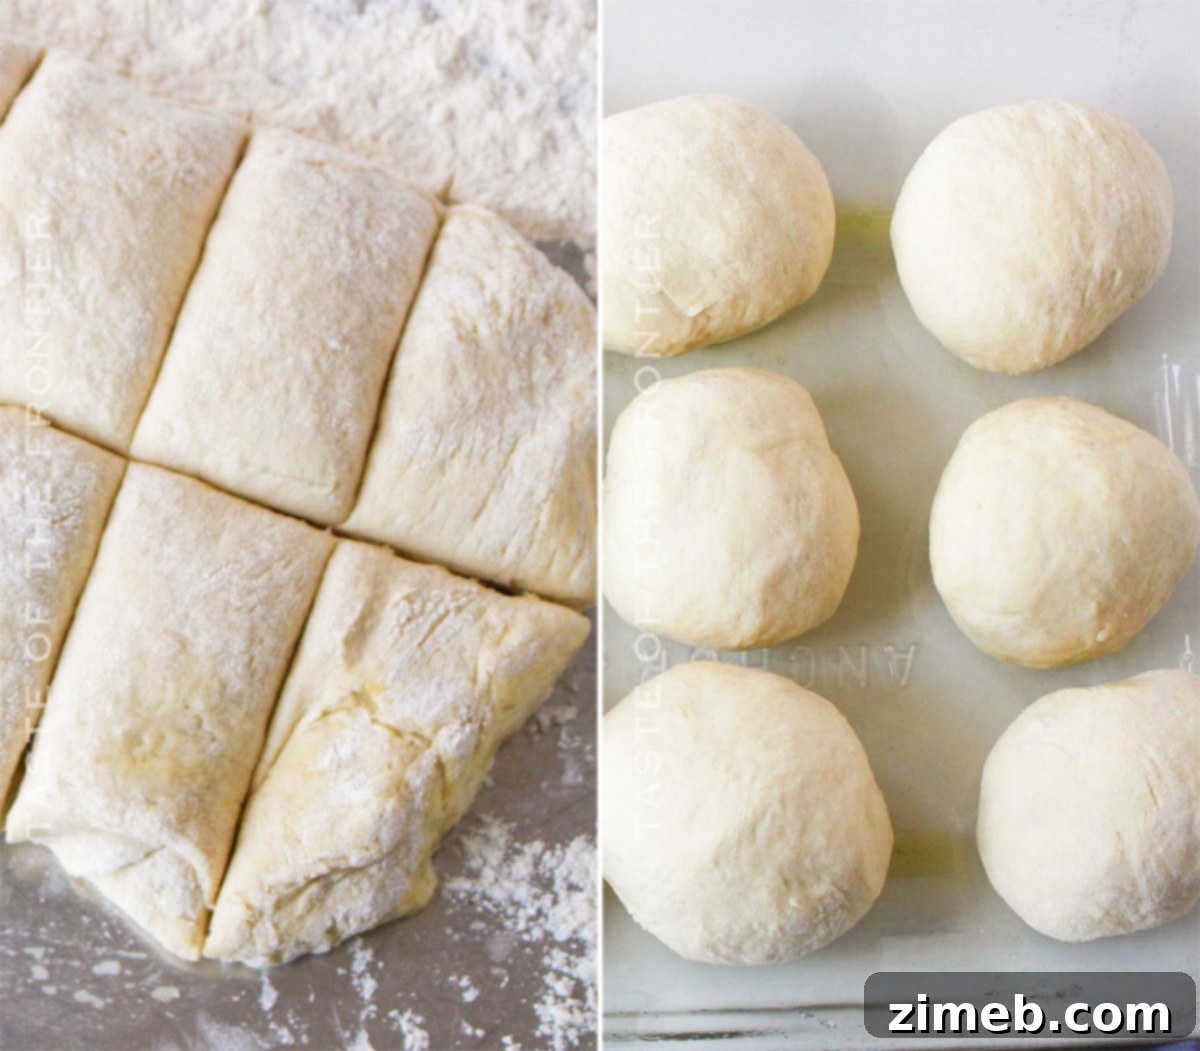
- Portion the Dough: Gently fold the dough into a rectangular shape. Using a sharp knife or a dough scraper, cut the dough into 12 equal portions. Aim for consistency in size to ensure even baking.
- Shape the Rolls: Take each portion of dough and gently shape it into a smooth ball. Place these balls into your prepared baking pan, leaving a small space between each one to allow for their final rise.
- Second Rise (Proofing): Cover the baking pan loosely with plastic wrap or a kitchen towel and let the rolls rise again in a warm place until they have doubled in size, which typically takes about 30 minutes. This final rise is crucial for light and airy rolls.
- Preheat Oven: During the last 10-15 minutes of the second rise, preheat your oven to 400 degrees Fahrenheit (200 degrees Celsius).
- Bake to Golden Perfection: Bake the rolls for 15 to 18 minutes, or until they are golden brown on top and sound hollow when tapped on the bottom. Keep an eye on them towards the end of baking to prevent over-browning.
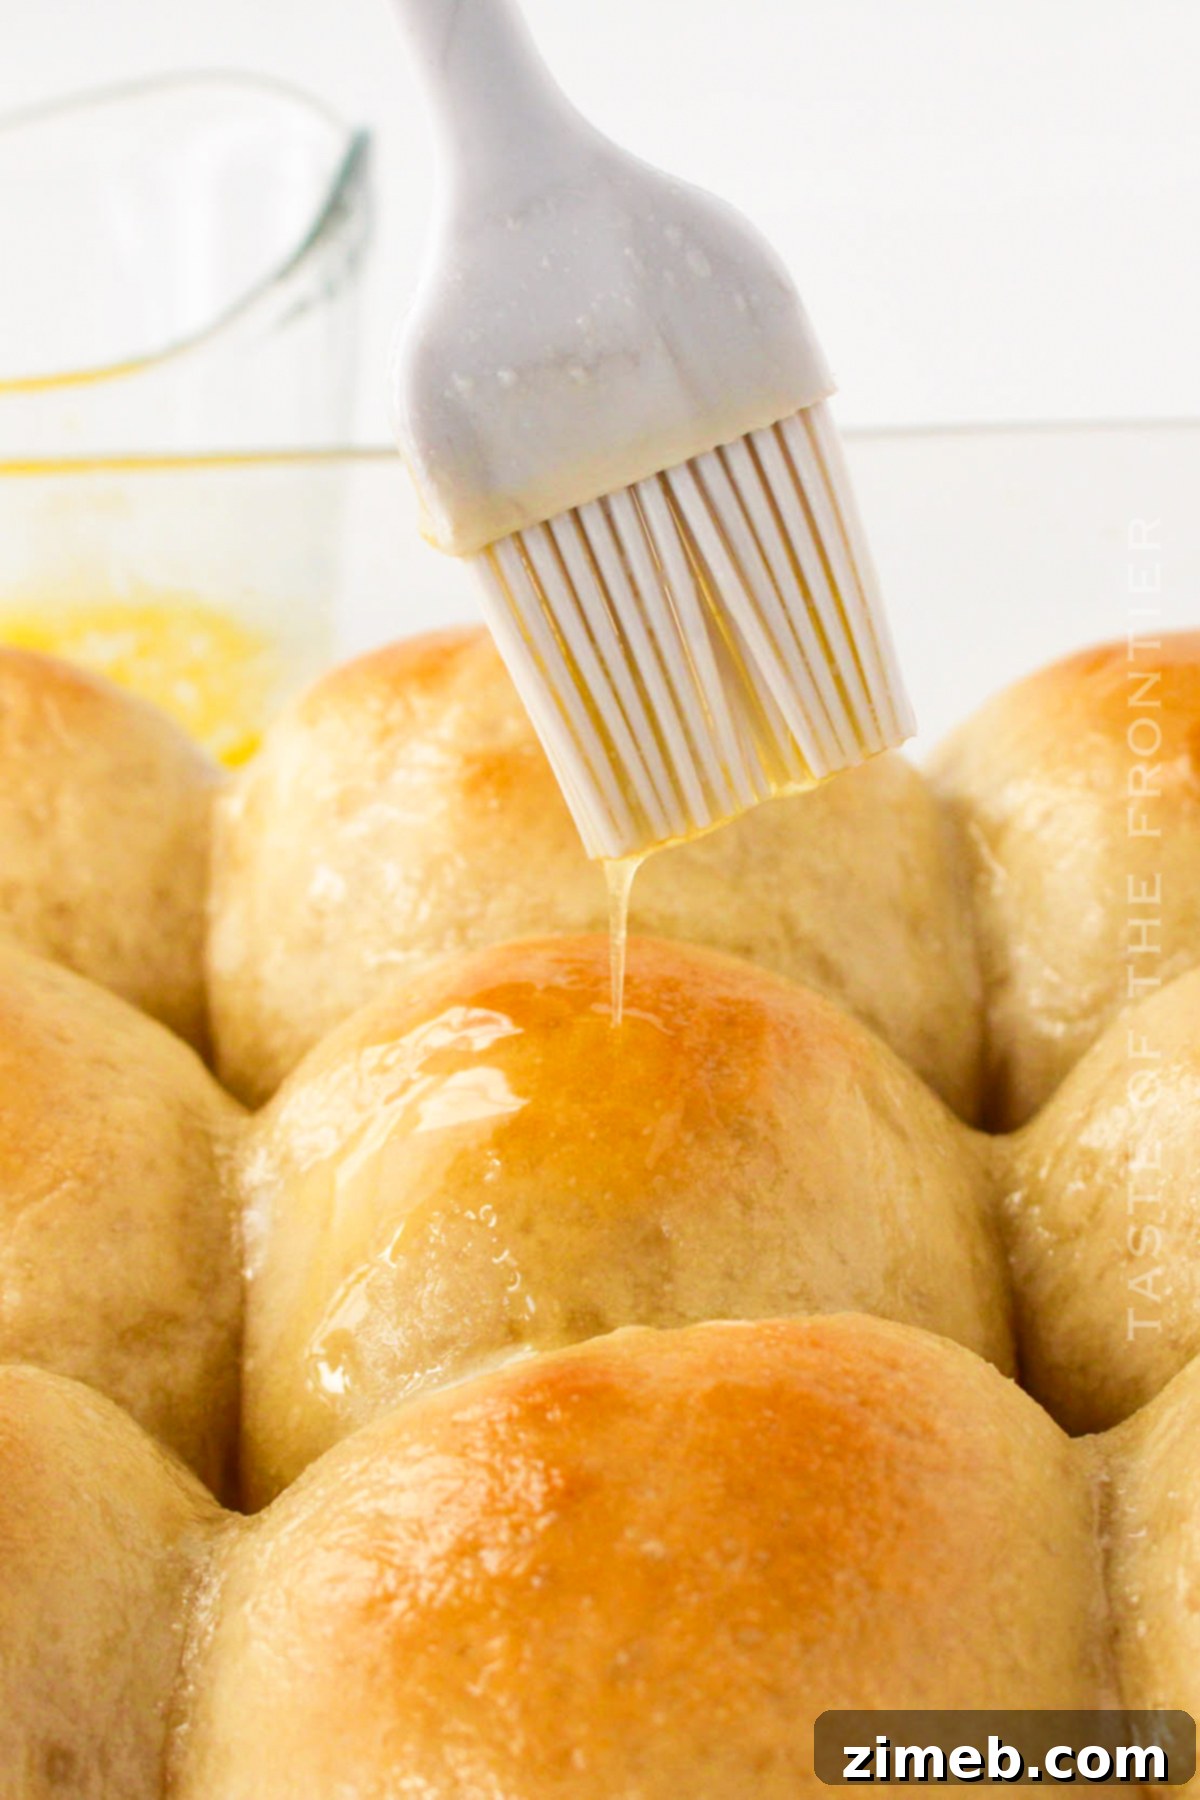
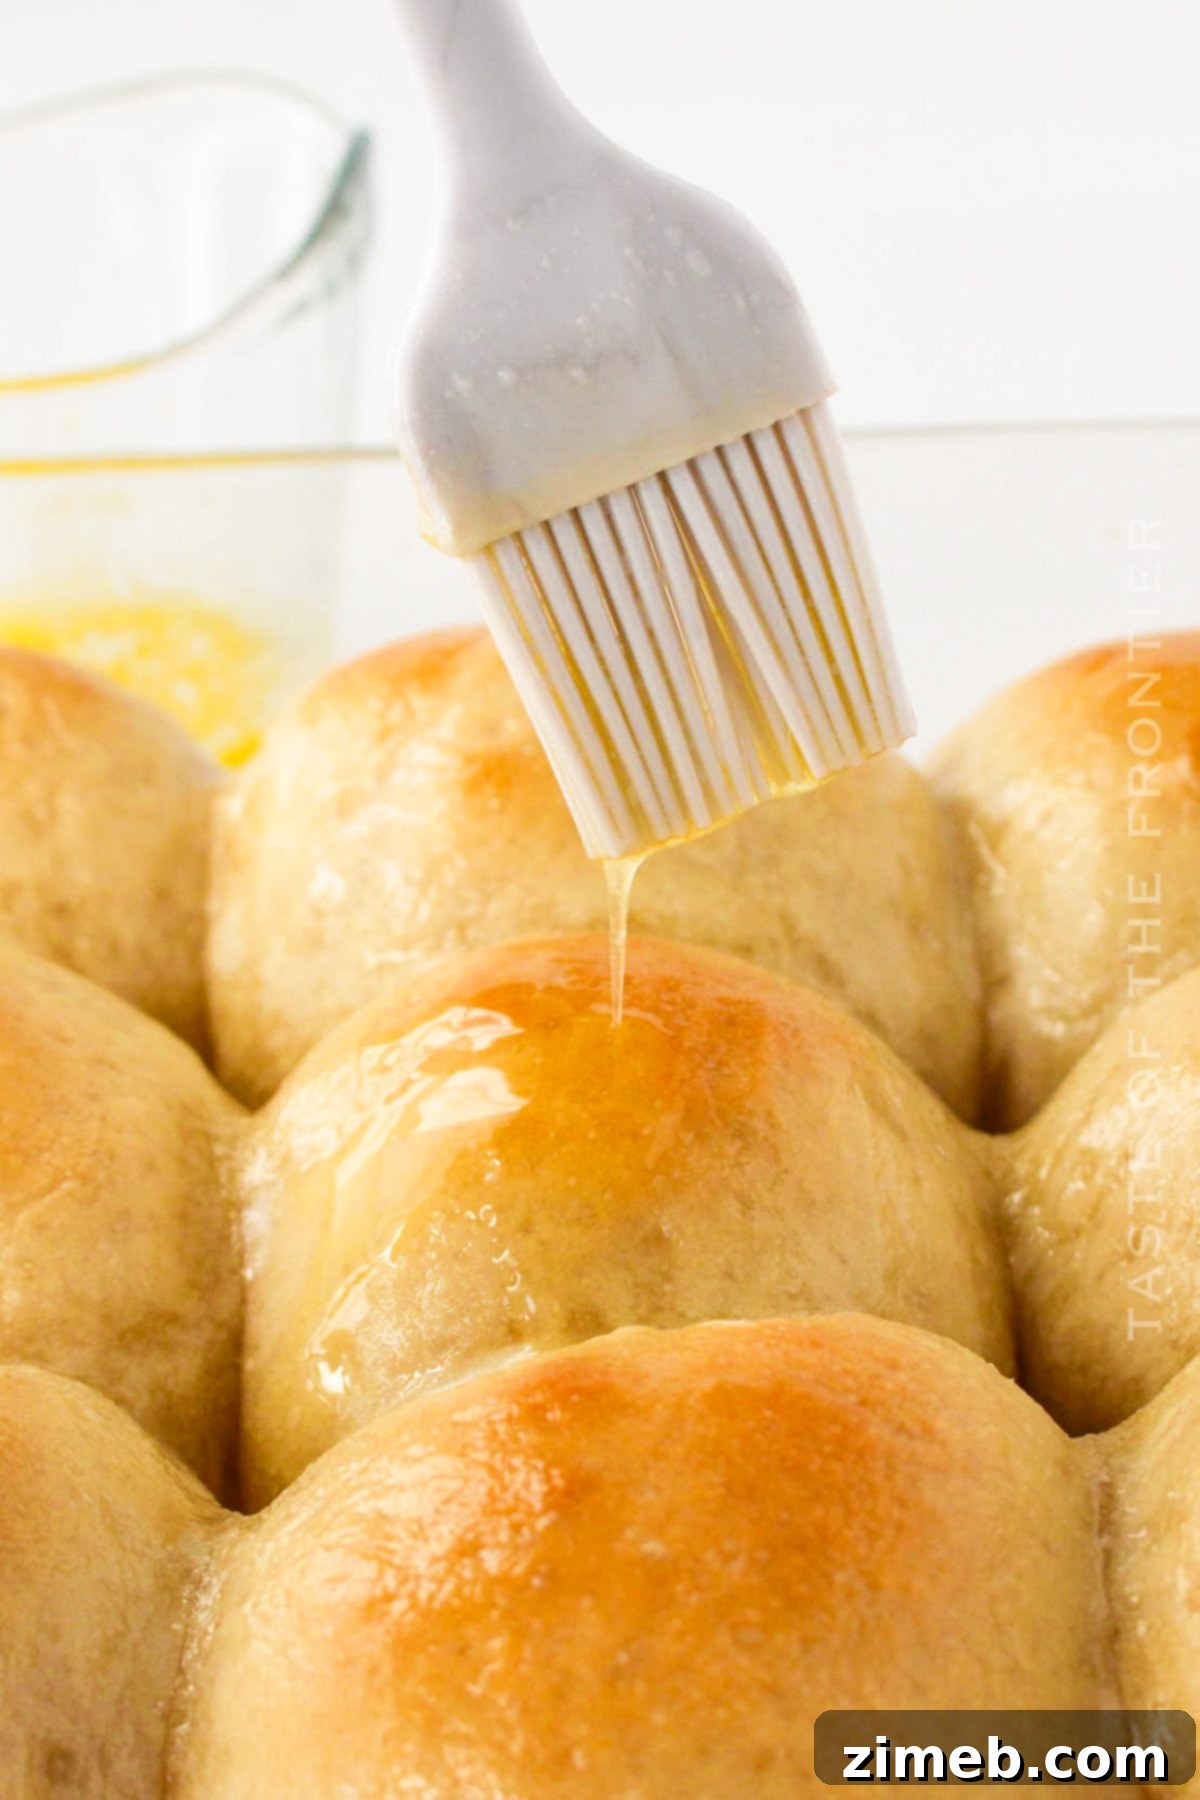
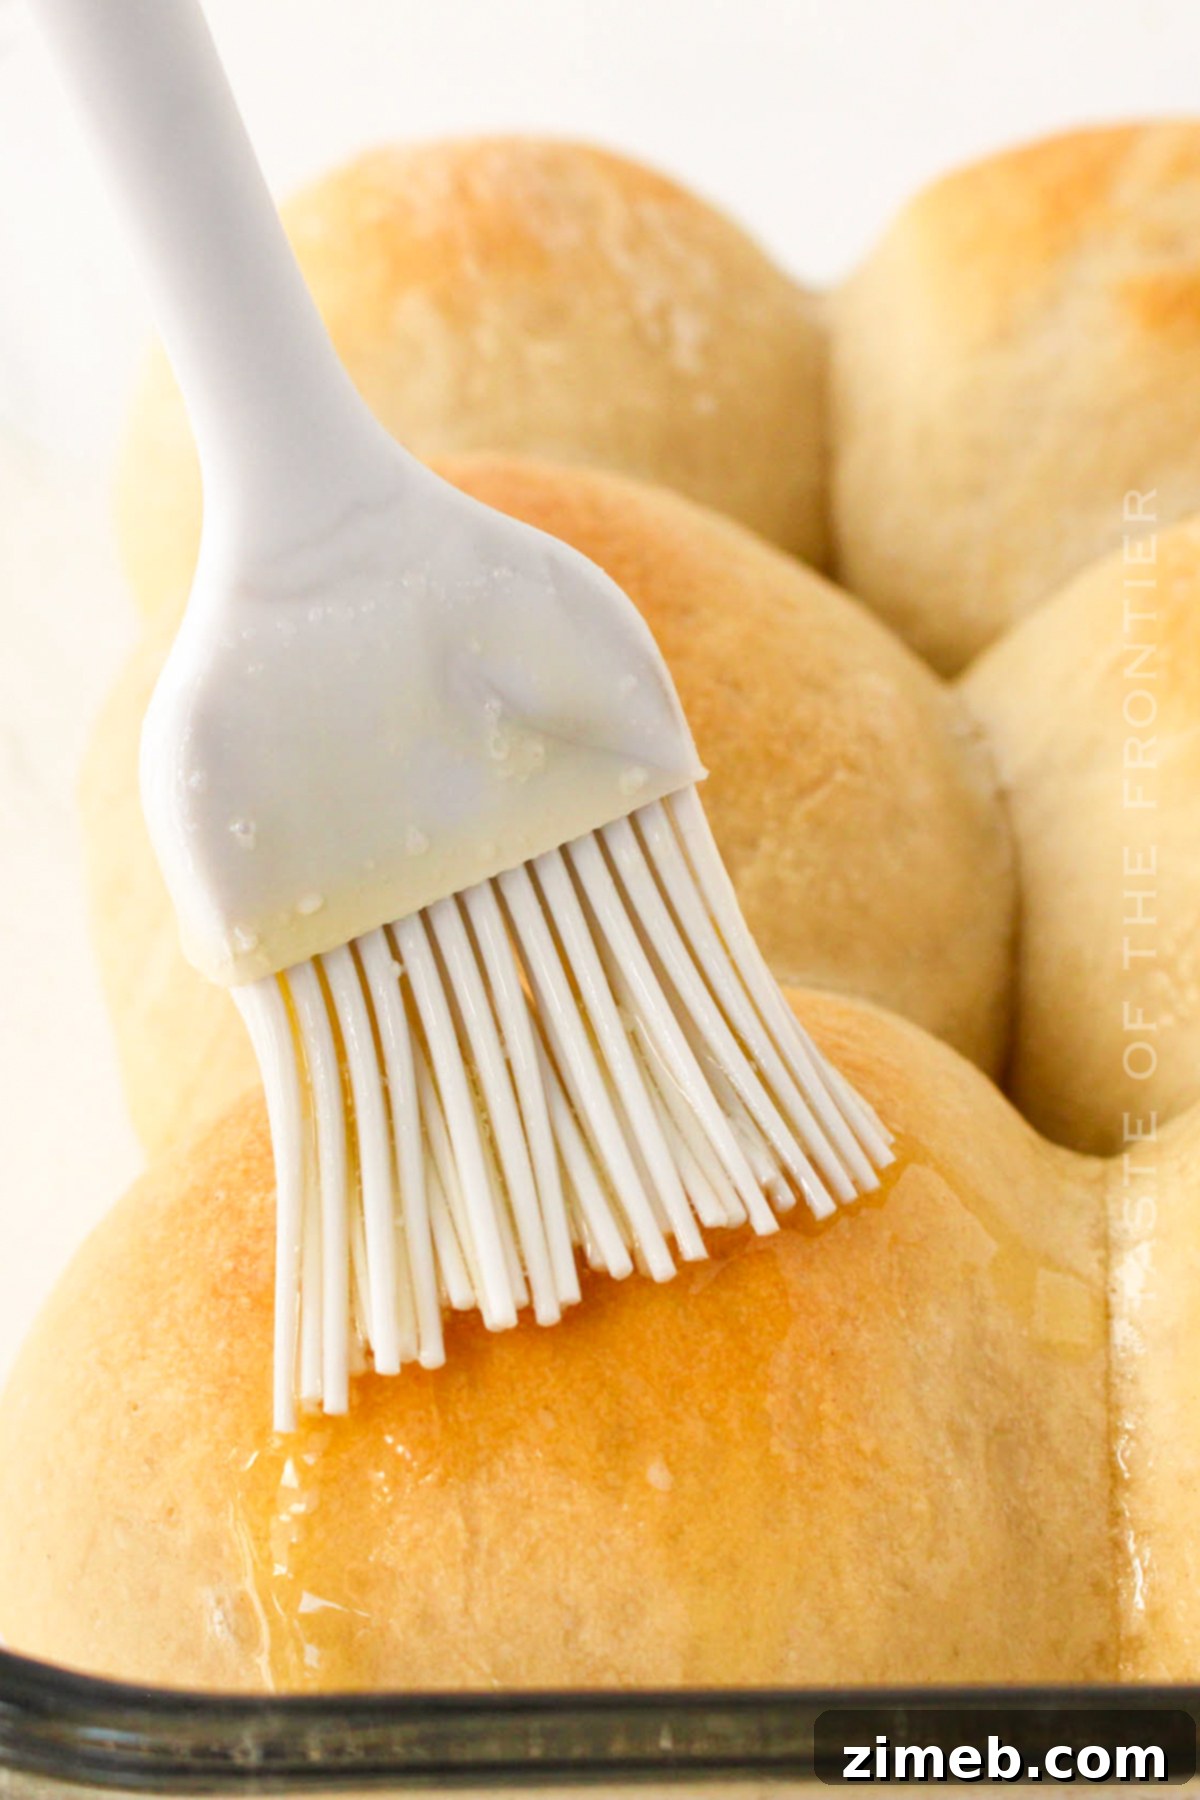
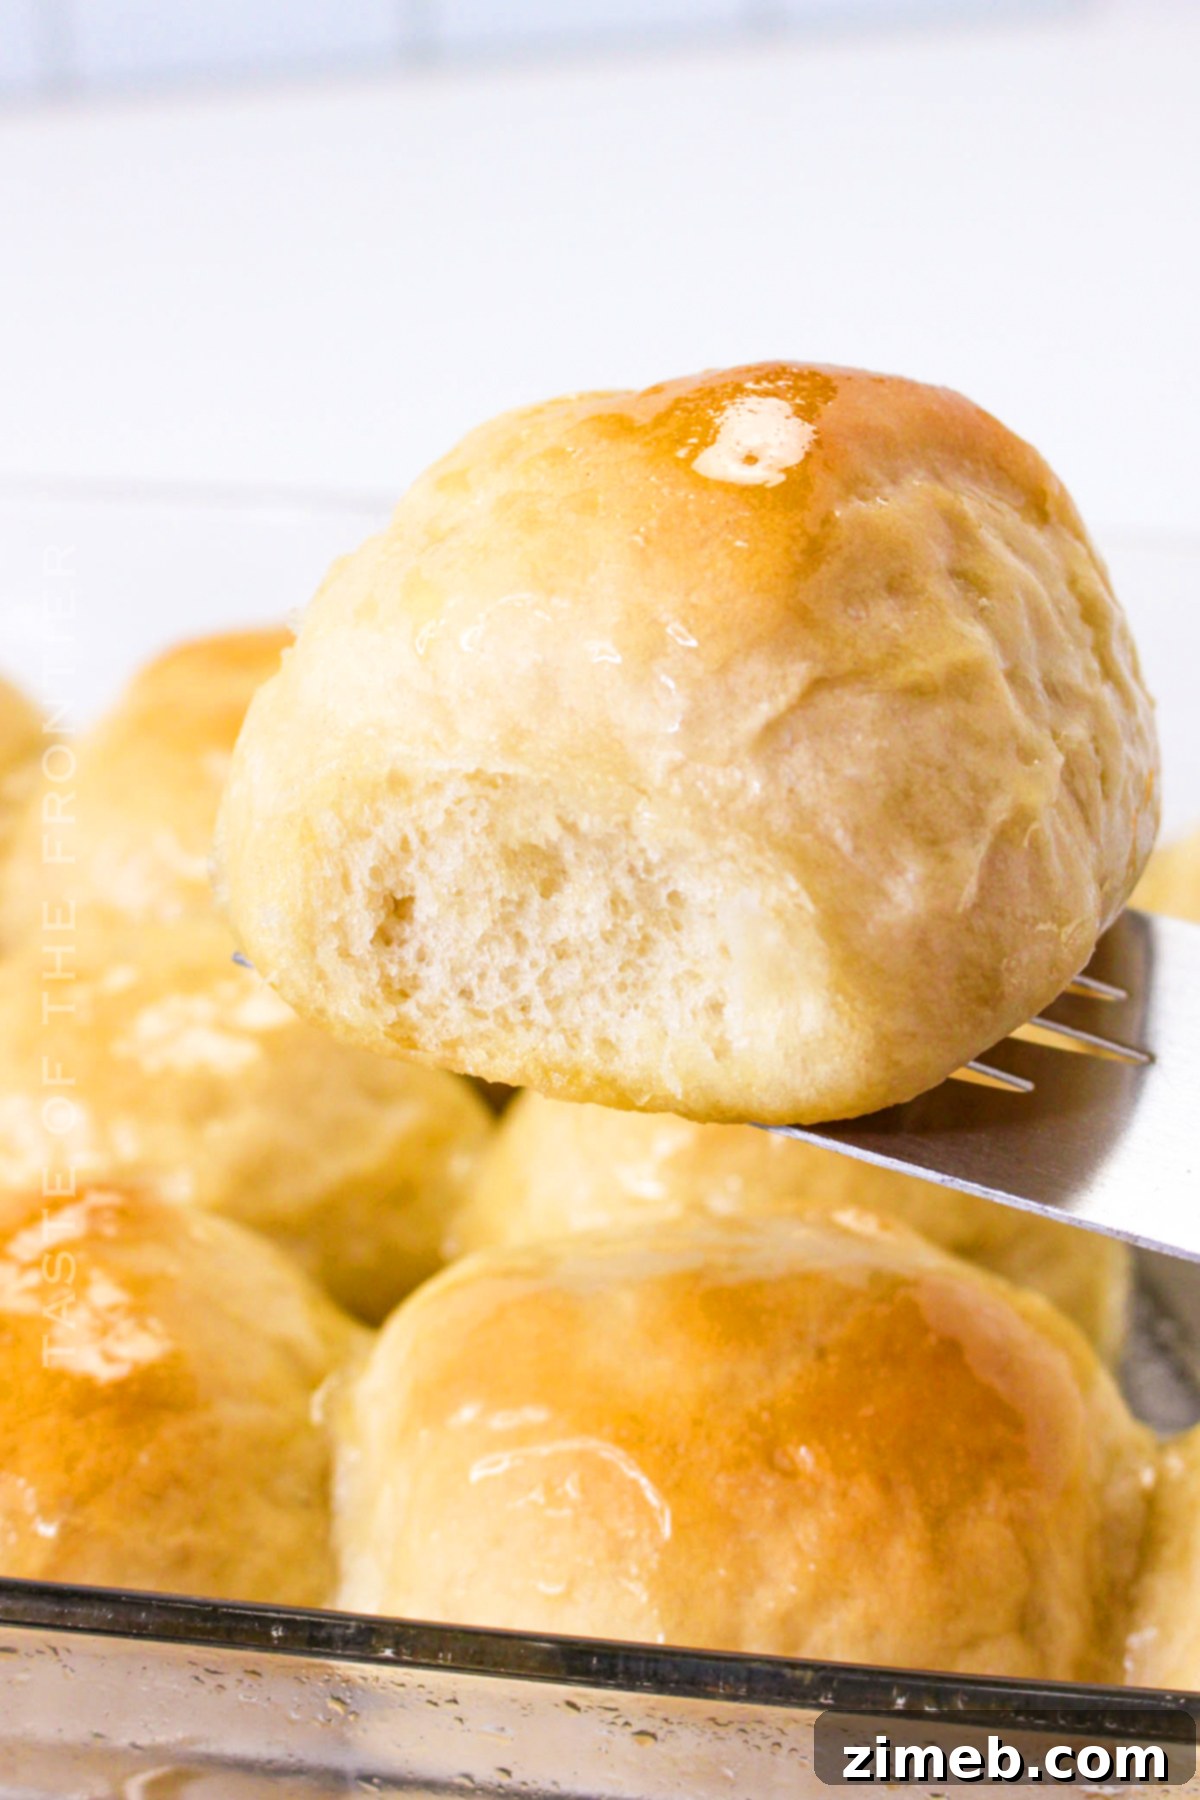
- Butter and Serve: Immediately after removing the rolls from the oven, brush the tops generously with the remaining melted butter. This step is essential for achieving a soft, tender crust and a beautiful shine. Serve your warm, fluffy no-knead dinner rolls and enjoy!
Frequently Asked Questions (FAQs) for No-Knead Rolls
Here are answers to some commonly asked questions to help you master your no-knead dinner rolls:
What is the best way to store no-knead dinner rolls?
Once your no-knead dinner rolls have cooled completely, store them in an airtight container or a large zip-top freezer bag at room temperature. This will help them retain their softness and freshness for up to 3 days. For longer storage, consider freezing them.
Can I freeze no-knead dinner rolls?
Absolutely! No-knead dinner rolls are excellent for freezing, allowing you to enjoy homemade bread anytime. You can freeze them for up to 3 months. To do so, ensure they are completely cooled, then wrap them tightly in freezer-safe plastic wrap or aluminum foil, or store them in a freezer-safe bag. When you’re ready to enjoy them, simply thaw the rolls at room temperature for a few hours. For best results and that fresh-baked warmth, reheat them in a 350-degree Fahrenheit (175 degrees Celsius) oven for about 10 minutes. Serve them warm with your favorite butter or spread!
Can these be made ahead of time?
Yes, these rolls are incredibly versatile and perfect for making ahead, especially when streamlining your holiday baking or preparing for a dinner party. You can prepare the dough the day before you plan to bake.
To make overnight: After shaping the rolls and placing them in the baking dish (prior to the final rise), cover the baking dish tightly with plastic wrap and refrigerate it overnight. The cold temperature will slow down the yeast activity, allowing for a long, slow proof. When you’re ready to bake, remove the dish from the refrigerator and let the rolls sit at room temperature for about 30-60 minutes while your oven preheats. This allows them to warm up slightly and finish their rise. Then, bake as directed in the recipe.
How long does it take to make no-knead dinner rolls?
From start to finish, including mixing and two rise times, these rolls come together in just under two hours. The hands-on time is minimal, with most of the duration dedicated to the dough rising. This makes it an ideal recipe for those who want homemade bread without hours of active involvement. If you’re in an even bigger rush, you might consider faster alternatives like our 30-Minute Garlic Parmesan Dinner Rolls or our One-Hour Dinner Rolls for those moments when time is truly of the essence.
My dough didn’t rise, what happened?
The most common reason for dough failing to rise is an issue with the yeast. This usually means your water temperature was either too hot or too cold. If the water is too hot (above 130°F/54°C), it will kill the yeast, rendering it inactive. If the water is too cold (below 105°F/40°C), the yeast won’t activate properly and will remain sluggish. Using a reliable thermometer to ensure your water is precisely between 115-125 degrees Fahrenheit (46-52 degrees Celsius) is key for optimal yeast activation. Additionally, ensure your yeast isn’t expired; old yeast loses its potency. A cold room can also inhibit rising, so find a warm spot for your dough.
What is the best yeast?
You can use rapid rise, premium, or any active dry yeast you have on hand. The exact brand often doesn’t make a significant difference for a recipe like this. I often purchase yeast in bulk from my local store, and it works perfectly well without being a fancy, brand-name product. The key is ensuring your yeast is fresh and properly activated with the right water temperature.
Expert Tips & Tricks for the Fluffiest Rolls
Achieving consistently soft, fluffy, and incredibly delicious no-knead dinner rolls is easy with these expert tips:
- Don’t Skimp on Sugar: Please don’t reduce the sugar content. The granulated sugar isn’t just for taste; it’s vital nourishment for the yeast, which drives the rising process. Sufficient sugar ensures your dough activates properly and delivers those coveted light and airy rolls.
- Measure Flour Accurately: Improper flour measurement is a common culprit for dense, dry rolls. Always use the “spoon and level” method: spoon flour into your measuring cup until it’s overflowing, then level it off with the straight edge of a knife. Avoid scooping directly from the bag, as this compacts the flour, adding too much to your recipe. You can always add a tiny bit more flour later if your dough is too sticky, but you can’t take it away once it’s incorporated.
- Elevate Flavor with Salted Butter: For an extra boost of savory richness, try using salted butter both in the dough and for brushing the baked rolls. The subtle saltiness perfectly complements the sweet bread.
- Ensure a Warm Rising Environment: Yeast loves warmth! If your kitchen is cool, finding a warm spot is crucial for proper rising. In colder climates, I often place the bowl near a woodstove or wrap it with an electric blanket. Specialized warming mats for bread are also available, but an electric blanket offers a cost-effective alternative that works wonderfully.
- Make Ahead Option: These rolls are fantastic for holiday meal prep. As mentioned, they can be prepared and refrigerated overnight for baking the next day, saving you valuable time on a busy occasion.
- No Parchment Paper Needed: While parchment paper is often useful, it’s not strictly necessary for this recipe if your baking pan is well-greased. The melted butter coating post-baking also helps prevent sticking.
- Uniform Roll Size: To ensure all your rolls bake evenly and finish at the same time, try to make the dough balls as uniform in size as possible when shaping them.
- Flour Alternatives: This recipe primarily uses all-purpose flour. While I haven’t tested it with bread flour, if you decide to experiment, please share your results! Bread flour has a higher protein content, which could yield a chewier texture.
- Stand Mixer vs. Hand Mixing: A stand mixer with a dough hook makes quick work of mixing, but it’s not essential. A large bowl and a sturdy wooden spoon are perfectly sufficient for combining the ingredients until fully incorporated.
- Instant Yeast for Extra Spring: If you’re looking for an even more vigorous rise and a wonderfully springy texture, consider using instant yeast. It tends to activate faster and more powerfully than active dry yeast.
- Milk for Added Richness: While water is specified, warm milk can be used as a substitute for the water to add an extra layer of richness and tenderness to the rolls. Just ensure the milk is at the optimal temperature (115-125°F or 46-52°C) to avoid killing the yeast. Hot water or milk will be detrimental to the yeast.
- Proper Cooling & Storage: After baking, let these easy yeast rolls cool slightly in the pan on a cooling rack before transferring them to a bread basket for serving. To keep these soft dinner rolls truly soft, store them in a freezer bag once completely cool to lock in moisture.
- Adjust Dough Consistency: If your dough appears too shaggy or excessively sticky after mixing, add additional all-purpose flour a tablespoon at a time until it reaches a manageable, slightly tacky consistency. Remember, it’s easier to add flour than to correct an overly dry dough.
- Respect the Rise Time: Don’t be tempted to cut short the rise times. These periods are crucial for the yeast to work its magic, developing flavor and creating the airy texture that makes these rolls so delightful. Patience is a virtue in baking!
The Secret to Soft & Fluffy Rolls: Post-Baking Butter Brush
Have you ever pulled beautiful, golden rolls from the oven only to find them firm or dry once cooled? The culprit is often the oven’s hot, dry environment, which can strip moisture from baked goods. This is where the crucial second brushing of melted butter comes in, a simple yet transformative step that guarantees soft, squishy, and utterly irresistible rolls.
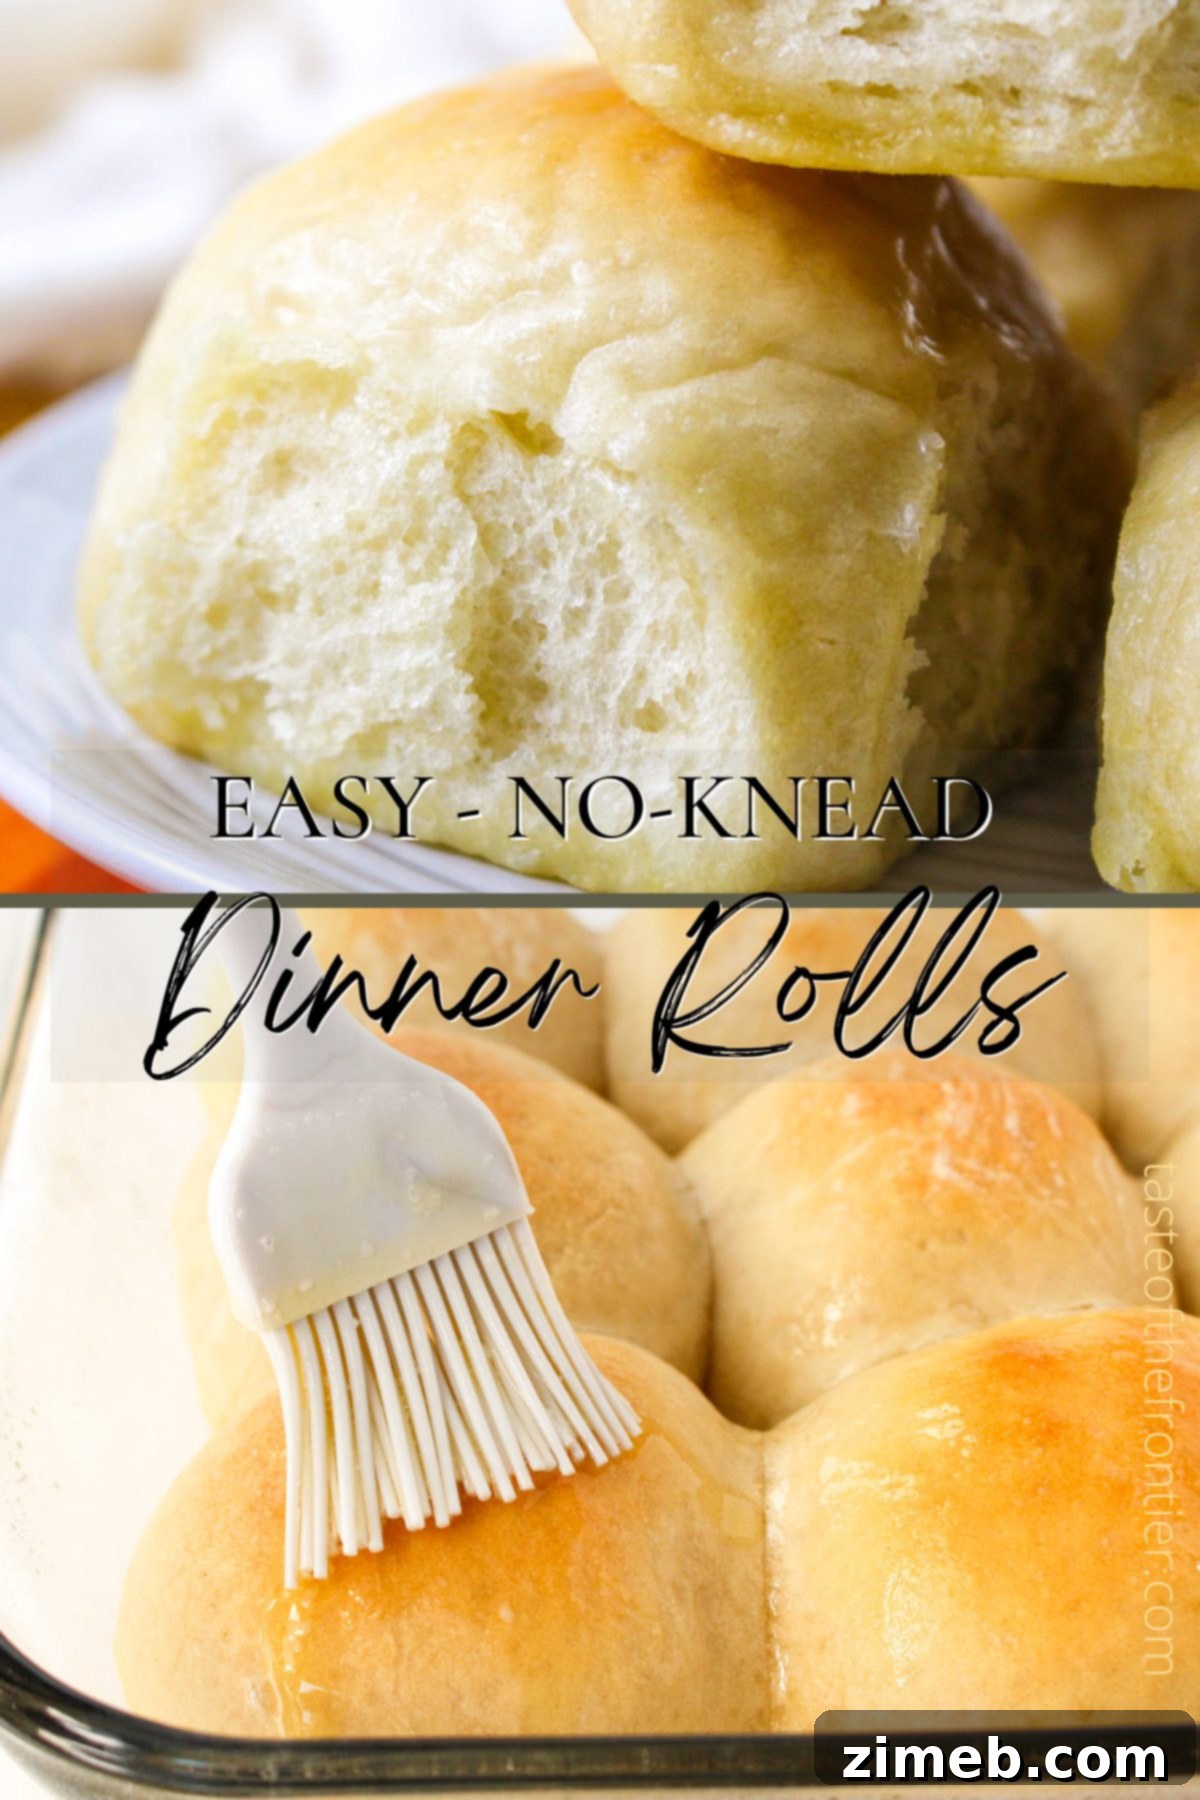
Immediately after removing your freshly baked rolls from the oven, liberally brush their tops with the remaining melted butter. The heat of the rolls will quickly absorb the butter, creating a protective, flavorful layer that locks in moisture. As the rolls cool, this butter infusion works its magic, ensuring they remain incredibly soft, tender, and everything you could possibly desire in a perfect dinner roll. Don’t skip this step – it’s the key to achieving that ultimate pillowy texture!
Serving Suggestions and Pairings
These versatile No-Knead Dinner Rolls are so delicious, they practically pair with anything! While they shine brightly during holiday feasts like Thanksgiving and Christmas, they are equally perfect for elevating everyday meals. Here are some ideas to inspire your serving:
- Holiday Feasts: They are a must-have alongside roasted turkey, ham, or prime rib, soaking up gravies and sauces beautifully.
- Soups and Stews: There’s nothing more comforting than a warm roll dipped into a hearty bowl of chili, beef stew, or a creamy tomato soup.
- Weeknight Dinners: Transform a simple chicken dinner, pasta dish, or even a casual salad into a complete meal with these rolls.
- Breakfast or Brunch: Serve them with butter, jam, honey, or a savory egg spread for a delightful start to your day.
- Sandwich Sliders: Their soft texture makes them ideal for small sandwiches, perfect for parties or lunchboxes.
- Garlic Herb Enhancement: Before baking, brush with garlic butter and sprinkle with dried herbs like parsley or oregano for a savory twist.
- Cheese-Stuffed: Gently flatten a dough portion, add a small cube of cheddar or mozzarella cheese in the center, and reshape into a ball before the second rise.
Whether you’re serving them up for a quick weeknight meal or a grand special occasion, these No-Knead Dinner Rolls are sure to be a hit and quickly become a favorite in your recipe repertoire!
DON’T MISS THESE HOLIDAY E-BOOKS!


Products I Love When Making These Incredible Dinner Rolls…
This dinner roll recipe is SUPER EASY and delicious – and if you’re like me, then you maybe already have some of these items on hand OR maybe you have never made homemade rolls before, & you might be a bit nervous – but you’re going to love these turn out. I have made a list below of the things I absolutely can’t live without when it comes to making this roll recipe.
- Mixer
- Casserole Dish
- Large Mixing Bowl
- Measuring Cups & Spoons
- Instant-Read Thermometer
- Clean Kitchen Towel or Plastic Wrap
If you love this easy dinner roll recipe, you’re going to love these other side dishes too. Please click each link below to find the easy, printable recipe!
More Delicious Bread & Roll Recipes to Try
Check out this recipe
Check out this recipe
Check out this recipe

Check out this recipe

Check out this recipe

Check out this recipe

Check out this recipe

- One-Hour Dinner Rolls
- 30-Minute Garlic Parmesan Dinner Rolls
- One-Hour Brown Bread Dinner Rolls
- Copycat Olive Garden Breadsticks
- Cheesy Spinach Crescents
- Heavenly One-Hour Dinner Rolls
- Sweet Potato Dinner Rolls
- Beer Bread Dinner Rolls
- One-Hour Disappearing Fat Rolls
- Texas Roadhouse Rolls
- Crazy Bread – Copycat Recipe
- Sour Cream Biscuits
More Great Bread Recipes
The BEST Brown Bread Recipe EVER!
Conclusion: Bake Your Way to Homemade Bread Bliss!
There you have it – the ultimate guide to making irresistible No-Knead Dinner Rolls. This recipe proves that you don’t need to be an experienced baker or spend hours kneading dough to achieve truly spectacular results. With minimal effort and a little patience during the rise times, you can create soft, fluffy, buttery rolls that will impress everyone at your table.
Whether you’re preparing for a festive holiday meal, a comforting family dinner, or simply craving the unparalleled taste of freshly baked bread, these no-knead rolls are your go-to solution. They’re quick enough for most occasions, flexible for make-ahead convenience, and wonderfully freezer-friendly. Embrace the simplicity and joy of homemade bread with this foolproof recipe. We encourage you to try it, savor every bite, and share your baking success!
If you love this recipe for Homemade No-Knead Dinner Rolls as much as I do, please write a five-star review, and be sure to help me share on Facebook and Pinterest!
CONNECT WITH YUMMI HAUS!
Be sure to follow me on my social media, so you never miss a post!
Substack, FB, Pinterest, IG, Email Subscription
PIN THIS TO SAVE FOR LATER

Rate this Recipe
No-Knead Dinner Rolls
Ingredients
- 1 ½ cups water warm – between 115-125 degrees
- 2 tablespoons butter melted
- 1 tablespoon granulated sugar
- 1 teaspoon salt
- 2 ¼ teaspoons active dry yeast (1 packet )
- 4 cups all-purpose flour
- ⅓ cup butter melted
Instructions
-
Working in a warm room, combine the warm water, and 2 tablespoons of melted butter, sugar, and salt in a mixing bowl. Stir to combine.
-
Add the yeast and stir until dissolved.
-
With a wooden spoon or with a mixer using the dough hook, mix in the flour, scraping down as needed, until fully incorporated.
-
Cover the bowl and allow it to rise at room temperature for 45 minutes.
-
Prepare a baking dish with nonstick cooking spray or lightly grease it with cooking oil.
-
Punch the dough down and transfer it to a lightly floured, smooth surface.
-
Form or fold the dough into a rectangle and cut it into 12 equal portions.
-
Shape each portion into a ball and place it into the prepared baking pan.
-
Cover loosely and allow to rise until doubled in size, about 30 minutes.
-
While the dough rises for the final time, preheat the oven to 400 degrees.
-
Bake for 15 to 18 minutes or until golden brown.
-
Brush the rolls with the remaining melted butter and serve.
Notes
Nutrition
Nutritional information for the recipe is provided as a courtesy and is approximate. Please double-check with your own dietary calculator for the best accuracy. We at Yummi Haus cannot guarantee the accuracy of the nutritional information given for any recipe on this site.