
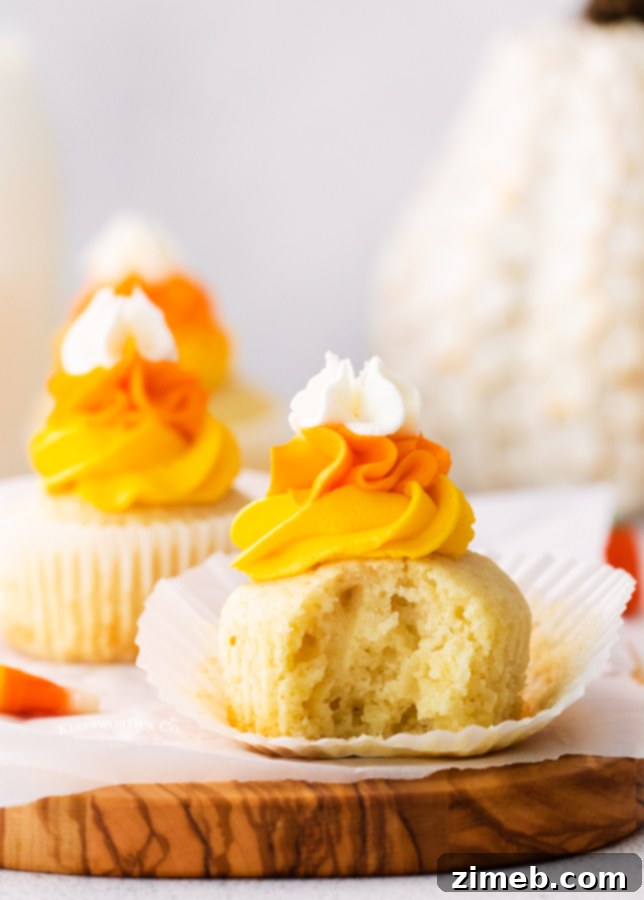
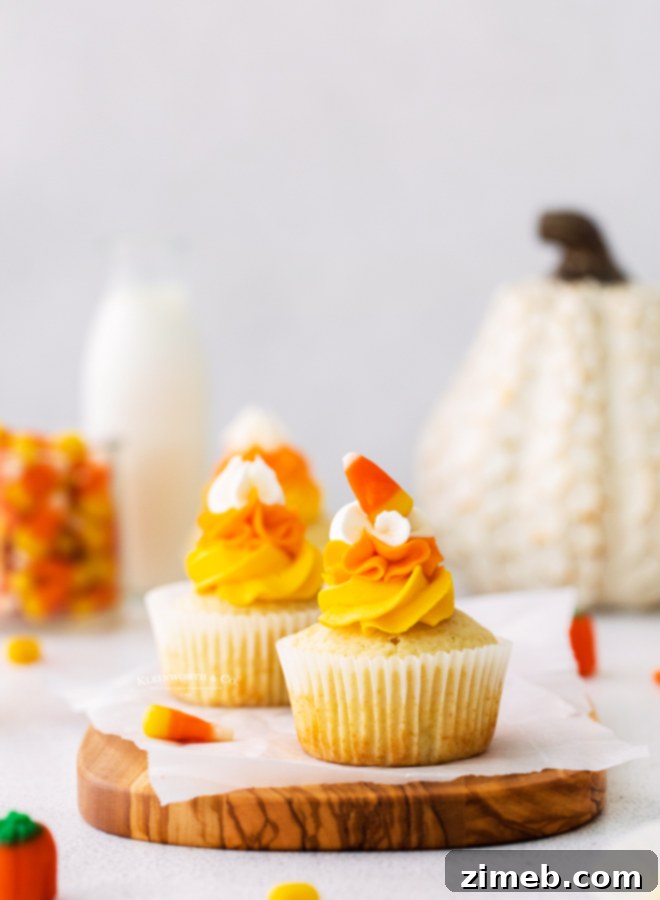
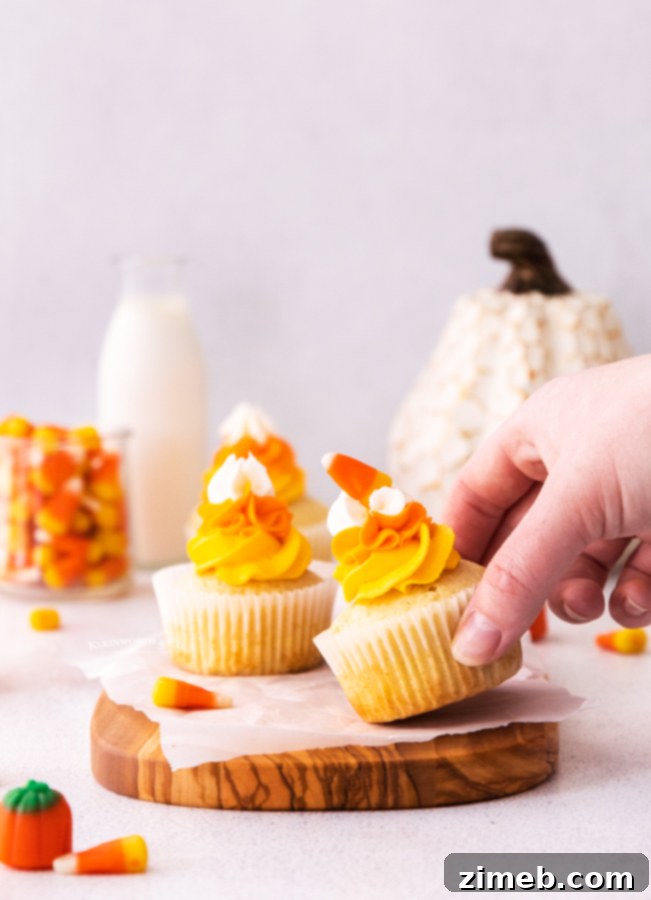
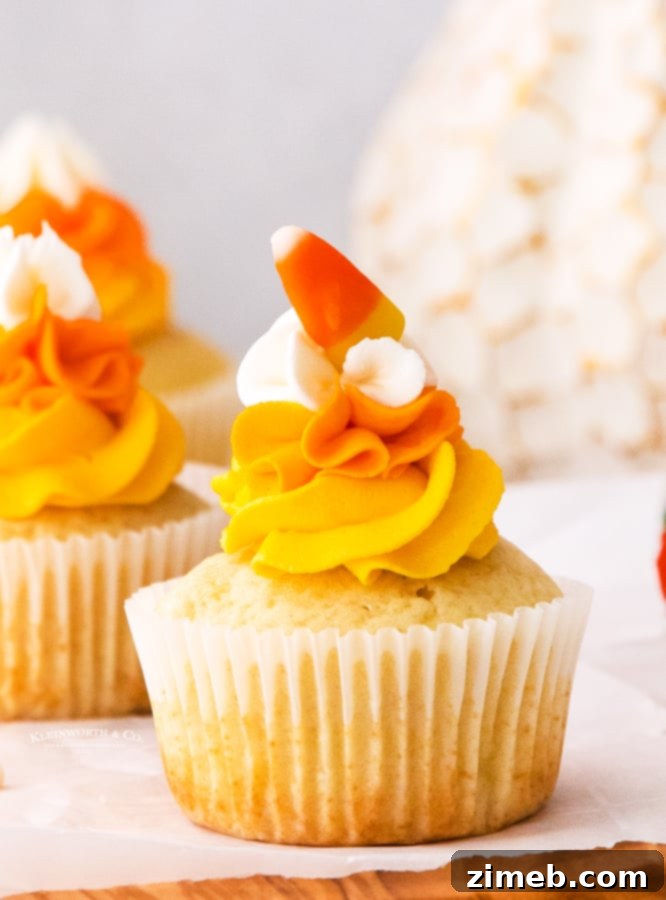
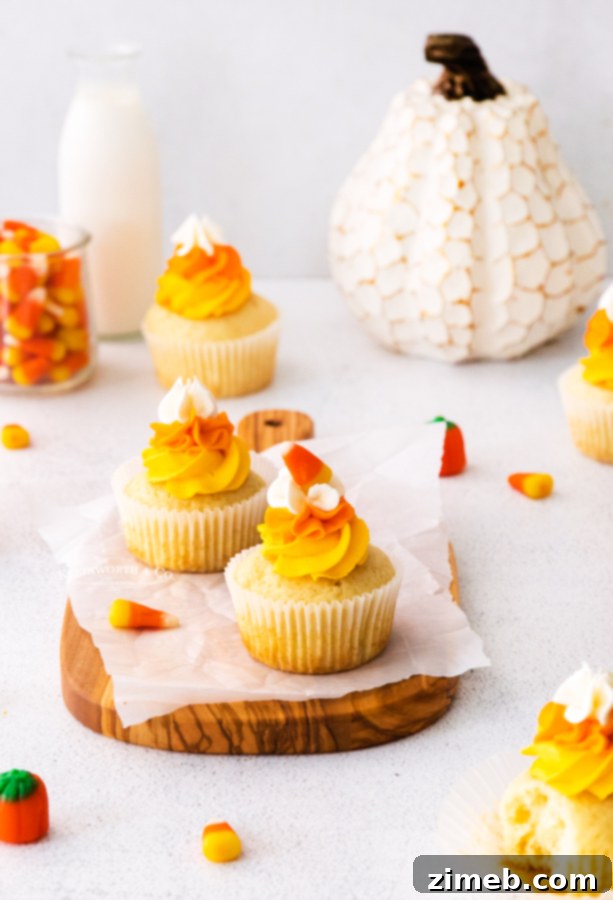
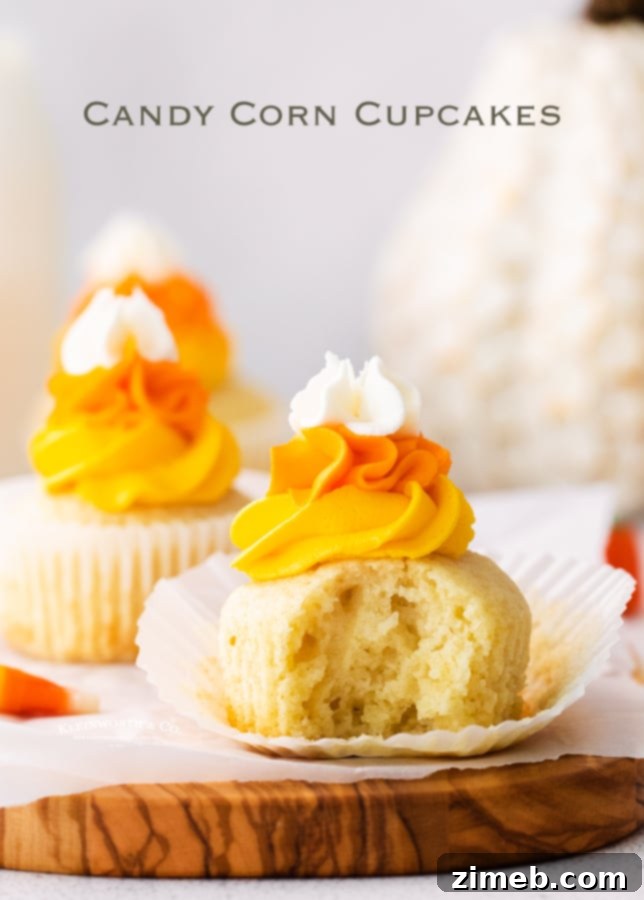
Indulge in the whimsical delight of these Festive Candy Corn Cupcakes! Crafted with a cherished homemade vanilla cupcake recipe and crowned with vibrant, tri-colored vanilla buttercream frosting, these treats are destined to be the star dessert at any Halloween gathering, enchanting both children and adults alike. Get ready to bake a batch of pure autumn joy that perfectly captures the spirit of the season.
Cupcakes hold a special place in our hearts as a versatile dessert, enjoyed year-round. However, when adorned with frosting inspired by the iconic candy corn, they transform into an absolute sensation, particularly popular throughout the crisp and colorful fall season. The magic lies in the irresistibly sweet, smooth vanilla buttercream, meticulously tinted to mirror the classic yellow, orange, and white hues that symbolize autumn fun. These delightful confections are more than just a dessert; they are edible art, evoking memories of hayrides, pumpkin patches, and spooky celebrations.
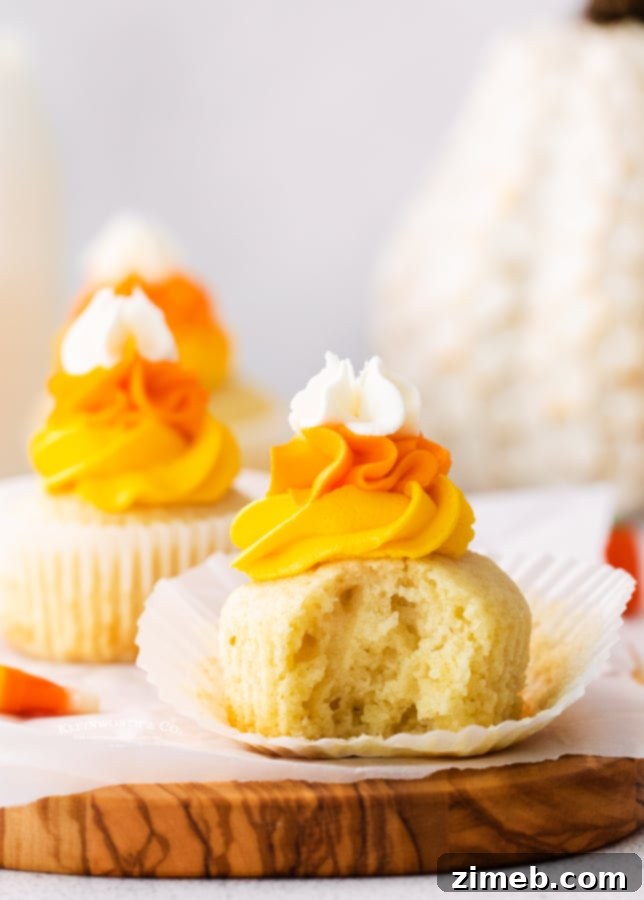
This recipe celebrates the delightful pairing of a light and fluffy vanilla cake with rich vanilla frosting. For those who prefer a deeper flavor profile, these cupcakes can also be made with a decadent chocolate cake base, providing a striking contrast to the bright candy corn-inspired topping. Whichever cake flavor you choose, the end result is a visually stunning and incredibly delicious treat that perfectly captures that iconic harvest candy corn aesthetic. The best part? Despite their impressive appearance, these festive cupcakes are surprisingly simple to create, making them an ideal project for bakers of all skill levels.
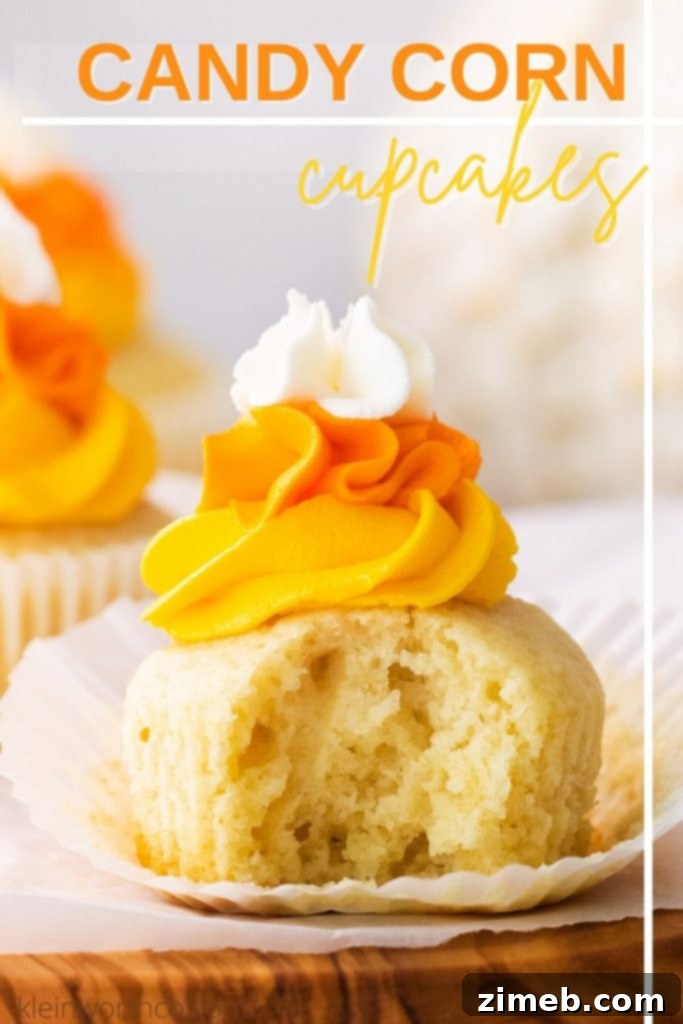
What makes these cupcakes truly special is their incredible versatility. While they are an absolute must-have for Halloween festivities, their charm extends far beyond just one night. You can proudly serve them throughout the entire fall season. Imagine capping off a fun-filled day of visiting the pumpkin patch with these sweet treats, or delighting guests at a cozy autumn gathering. They are perfect for school bake sales, fall festivals, or simply as a comforting homemade dessert on a chilly evening.
In our household, these candy corn cupcakes are such a hit that they’ll definitely be making another appearance as our Thanksgiving dessert this year. For those who might not be huge fans of traditional pie, these vibrant cupcakes offer a refreshing and equally festive alternative. Candy corn holds a special place in our family’s hearts, and transforming its iconic look into these adorable, bite-sized desserts is simply perfect. They bring a smile to everyone’s face and add a playful touch to any holiday table.
Crafting Your Own Candy Corn Inspired Masterpiece
Beyond cupcakes, the iconic candy corn design lends itself beautifully to various dessert applications, including cakes. A full-sized candy corn cake can be a show-stopping centerpiece for a larger gathering, echoing the same vibrant color scheme and sweet flavors. Whether in cupcake or cake form, the distinct layers of white, orange, and yellow buttercream bring a festive cheer that is instantly recognizable and universally loved during the autumn months. These treats are not just delicious; they are a celebration of fall itself, perfect for bringing warmth and joy to any occasion.
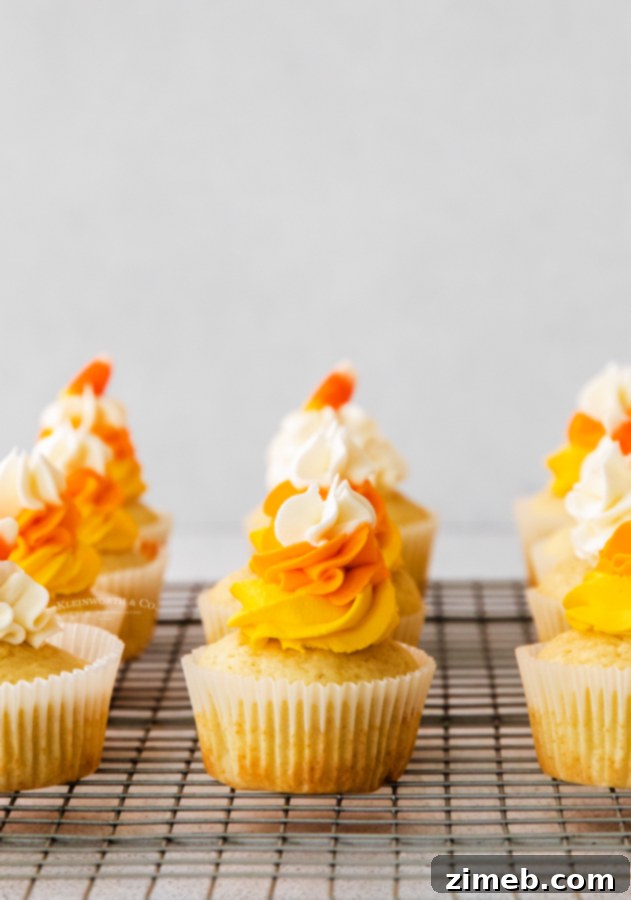
Frequently Asked Questions About Candy Corn Cupcakes
What exactly is Candy Corn?
Candy corn is a truly iconic American confectionery, renowned for its distinctive tri-color design and unique kernel shape. This popular hard, sugary candy mimics the appearance of a corn kernel, typically featuring a broad yellow base, an orange middle section, and a pointed white tip. Its visual appeal and sweet, waxy flavor have made it a staple of autumn and Halloween celebrations for over a century.
The fascinating history of candy corn dates back to the 1880s, when George Renninger, a talented candymaker working for the Wunderlee Candy Company in Philadelphia, first conceived of it. The company’s owner, William Wunderlee, sought to create a uniquely American candy for the 1876 Centennial International Exhibition in Philadelphia. Renninger’s ingenious response was what he affectionately called “American ears.” His innovative invention involved carefully pouring layers of sugar syrup into specialized molds. These molds were often lined with honey and vanilla-flavored rice paper, giving the candy its characteristic texture and a subtle hint of sweetness. The name “candy corn” itself arose from the candy’s unmistakable resemblance to an ear of sweet corn, cementing its place in American culinary history.
What’s the optimal way to store leftover Candy Corn Cupcakes?
To ensure your delicious candy corn cupcakes remain fresh and delightful, proper storage is key. The most crucial step is to keep them in an airtight container. This prevents them from drying out and helps preserve their delicate texture and flavor. I personally prefer to refrigerate them, which helps maintain the frosting’s integrity and prevents it from becoming too soft. When planning to serve them after dinner, I remove the desired quantity from the fridge as I start preparing the meal. This allows the cupcakes ample time to gradually come to room temperature, ensuring they are perfectly soft, moist, and ready to be enjoyed as a decadent dessert. Stored this way, they will stay fresh in the refrigerator for up to 4 days. For longer-term storage, these cupcakes can also be frozen for up to 3 months, making them a fantastic make-ahead option for future gatherings.
How do I correctly measure flour for baking?
Accurate flour measurement is a fundamental step in successful baking, preventing your cupcakes from becoming dense or dry. The official and most recommended method is known as the “spoon and level” technique. To do this, first, gently fluff the flour in its container with a spoon or whisk. Then, use a spoon to lightly scoop the flour into your dry measuring cup until it overflows slightly. Do not pack the flour down or tap the cup, as this can compress the flour and lead to an excessive amount. Finally, use the straight edge of a knife or a flat spatula to level off the top of the measuring cup, scraping away any excess flour. This ensures you’re adding just the right amount of flour, preventing a heavy, dry crumb and contributing to the light, airy texture we’re aiming for in these delicious cupcakes.
Colorful Candy Corn Cakes: A Visual Treat
Just like our vibrant cupcakes, larger candy corn cakes offer an equally enchanting and delicious experience, perfect for celebrating the fall harvest or Halloween. These festive cakes are typically adorned with the signature white, orange, and yellow frosting layers, creating a bold and cheerful visual that instantly evokes the spirit of the season. Whether presented as individual cupcakes or a grand layered cake, the combination of a moist cake base and sweet, colorful buttercream ensures a delightful dessert that is both a feast for the eyes and the palate. They are guaranteed to be a hit at any autumnal celebration.
Mastering the Art of Softening Butter to Room Temperature
Achieving perfectly softened butter is a critical step for many baking recipes, especially for cupcakes and buttercream frosting, as it significantly impacts the final texture and consistency. Here are a few reliable methods to bring your butter to the ideal room temperature:
Method One: The Patient Approach
The simplest method, requiring a bit of foresight, is to remove the butter (and any other ingredients that need to be at room temperature, like eggs or milk) from the refrigerator approximately 30 minutes to an hour before you plan to begin baking. Leave it on the kitchen counter in its original wrapping. This allows it to slowly and evenly warm up without melting, reaching a state where it’s soft enough to make a slight indentation with your finger, but still cool to the touch and holds its shape. I typically gather all my chilled ingredients and set them out on the counter before starting any prep work, ensuring everything is ready when I am and preventing any mid-recipe surprises.
However, especially during colder winter months, 30 minutes might not be enough time for ingredients to warm up adequately, or perhaps you, like many of us, sometimes aren’t quite that organized to plan so far ahead! When time is of the essence or planning goes awry, I have a couple of alternative tricks up my sleeve.
Method Two: The Microwave Quick Fix (Use with Caution!)
This method offers a quicker solution but requires careful attention to avoid over-softening. Place the butter, still wrapped in its paper (crucial: ensure it’s not wrapped in foil, which is unsafe for microwave use), into the microwave. Microwave it for just 2 seconds, then flip the stick over. Microwave for another 2 seconds, flip again, and continue this process, zapping for 2 seconds on each side. This gentle, incremental heating is usually sufficient to bring the butter to the perfect softness. Sometimes, you might even stop before completing all sides if it feels soft enough. **A word of strong caution:** Overly softened or melted butter from the microwave will dramatically alter the end result of your recipe, often leading to greasy, dense baked goods. It’s vital not to overdo it with this method; always err on the side of slightly firmer butter rather than melted.
Method Three: The Warm Water Bath
My third tried-and-true method is excellent for achieving consistent room temperature. Place the wrapped sticks of butter into a zip-top bag, ensuring it’s sealed tightly to prevent any water from seeping in. Then, submerge the sealed bag in a bowl of warm (not hot!) water. I often use this same technique for eggs as well. If the water is comfortably warm to the touch, this can be an absolutely perfect way to bring your ingredients to the ideal “room temperature” quickly and without the risk of uneven heating or melting.
Your Go-To Candy Corn Cupcake Recipe
This comprehensive guide will walk you through creating these delightful candy corn cupcakes, from gathering your ingredients to piping the signature frosting. Each step is designed to be clear and straightforward, ensuring a fun and rewarding baking experience. Get ready to transform simple ingredients into festive, flavorful treats that will brighten any fall celebration.
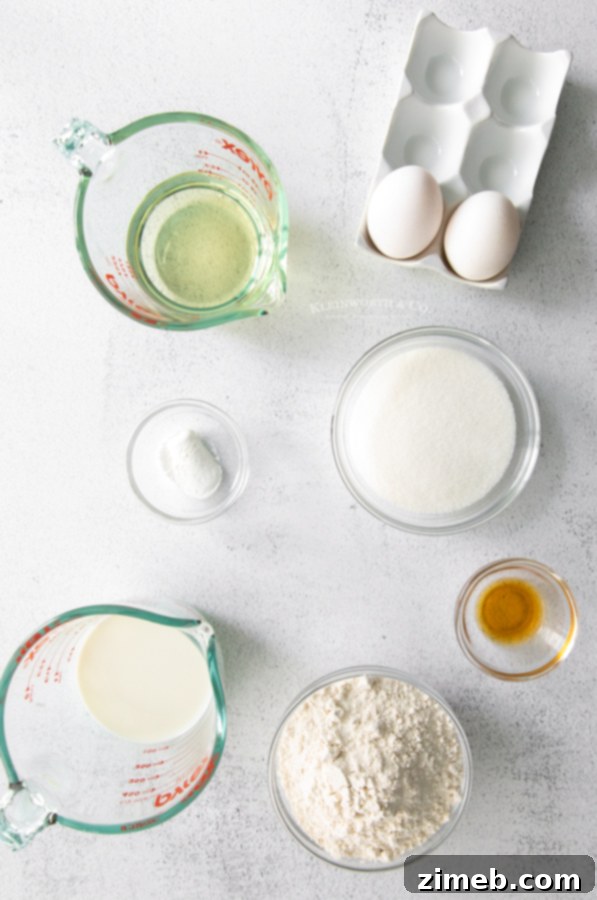
Ingredients for Irresistible Candy Corn Cupcakes
For the Fluffy Vanilla Cupcakes:
- **All-purpose flour:** The structural base for our cupcakes, providing tender crumb.
- **Granulated sugar:** Adds sweetness and moisture, contributing to a soft texture.
- **Baking powder:** Our primary leavening agent, ensuring the cupcakes rise beautifully and are light and airy.
- **Vegetable oil:** Contributes to a moist crumb and helps the cupcakes stay fresh longer.
- **Whole milk:** Adds richness and essential moisture for a tender cupcake.
- **Large eggs:** Act as a binder, providing structure and richness.
- **Pure vanilla extract:** Infuses the cupcakes with classic, aromatic vanilla flavor.
For the Colorful Vanilla Buttercream Frosting:
- **Unsalted butter:** Make sure it’s properly softened for a smooth, lump-free frosting base.
- **Pure vanilla extract:** Enhances the sweet flavor of the buttercream.
- **Confectioner’s sugar (powdered sugar):** Sweetens and gives the frosting its creamy, pipeable consistency.
- **Yellow food coloring:** Essential for achieving the vibrant yellow layer.
- **Orange food coloring:** To create the classic orange hue of candy corn.
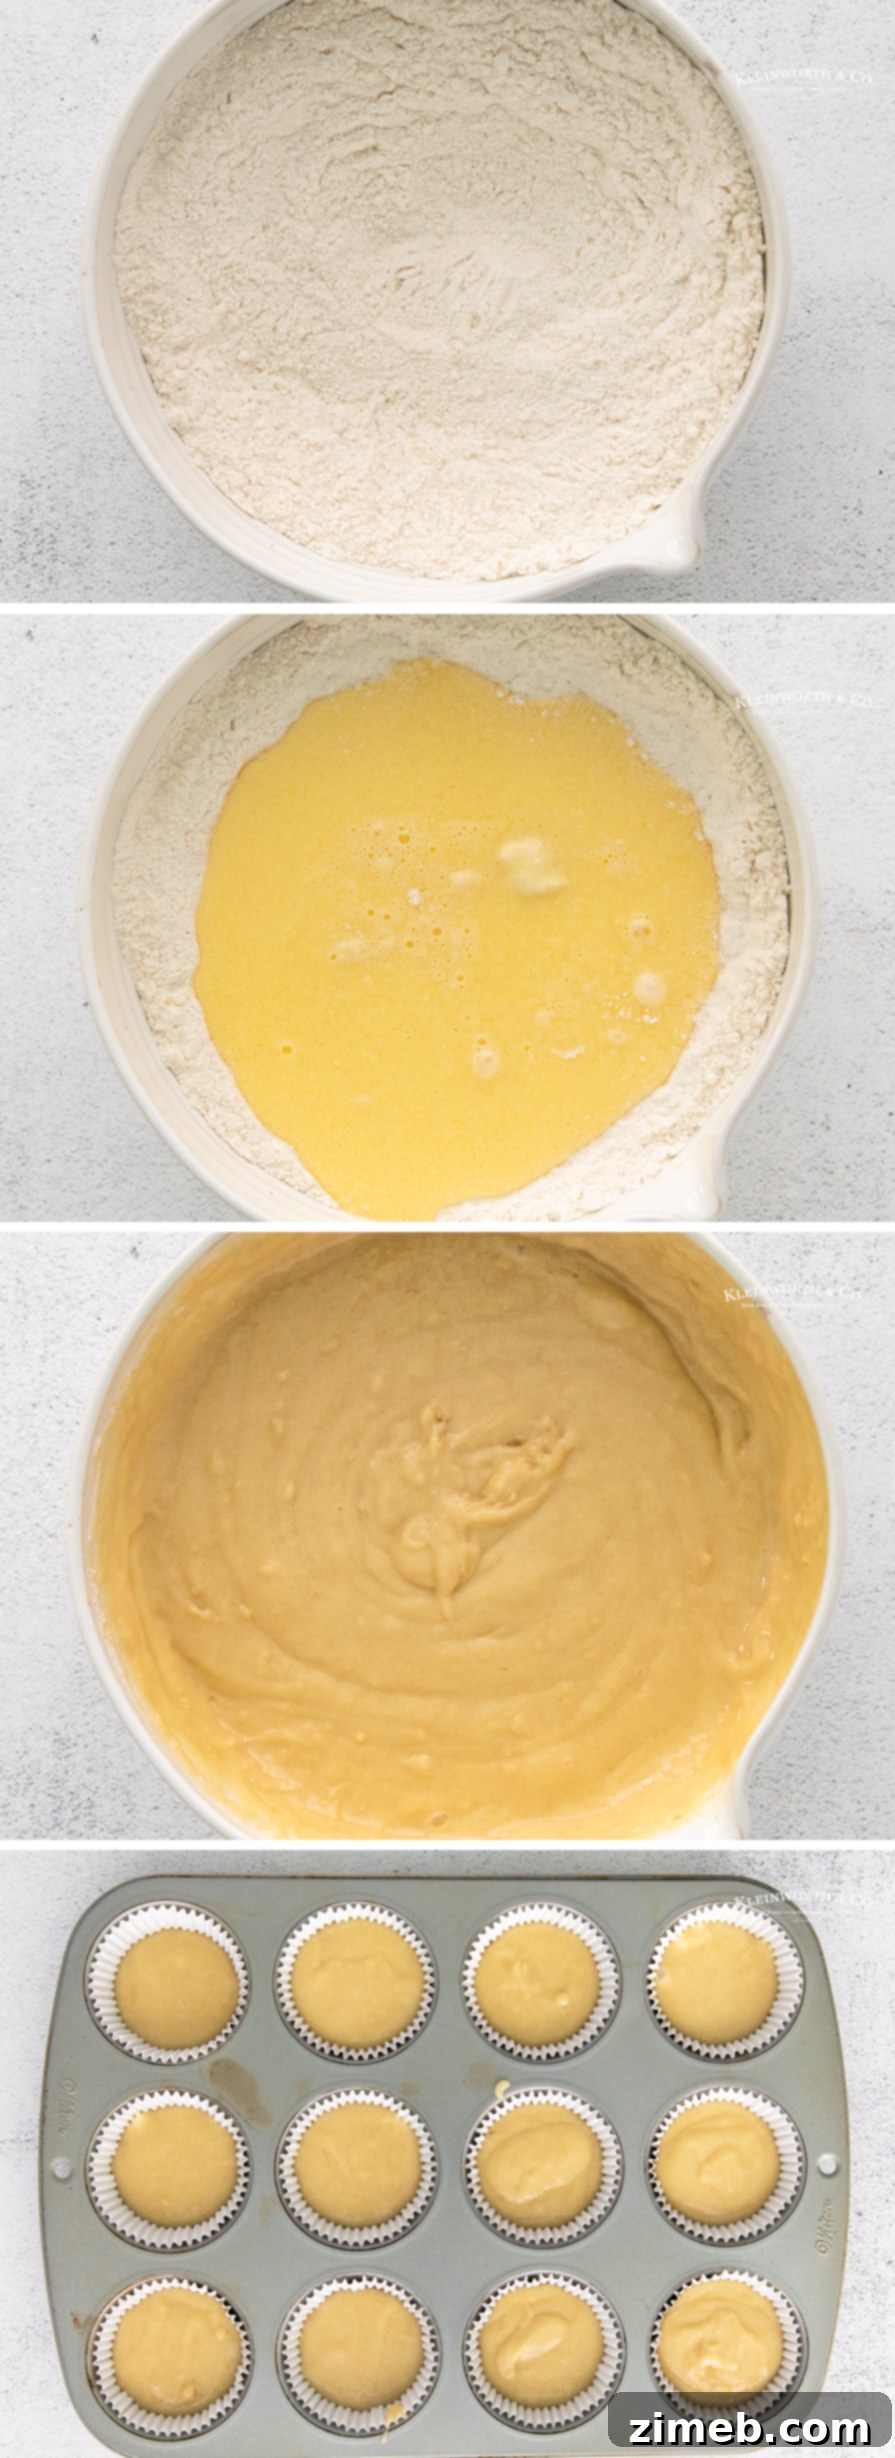
Simple Steps to Make Delightful Candy Corn Cupcakes
- **Prepare Your Baking Station:** Begin by preheating your oven to 350°F (175°C). Prepare a 12-cup muffin tin by either greasing each well thoroughly or lining them with festive paper liners. Set this aside, ready for the batter.
- **Combine Dry Ingredients:** In a large mixing bowl, whisk together the all-purpose flour, granulated sugar, and baking powder. Ensure they are well combined, eliminating any lumps, to create a uniform dry base for your cupcakes.
- **Mix Wet Ingredients:** In a separate medium-sized bowl, whisk together the vegetable oil, whole milk, large eggs, and pure vanilla extract until everything is thoroughly blended.
- **Integrate Wet and Dry:** Pour the wet ingredients into the bowl containing the dry ingredients. Whisk gently until just combined. It’s crucial not to over-mix; a few small lumps are perfectly fine. Over-mixing can develop gluten in the flour, resulting in dense, tough cupcakes instead of the desired light and fluffy texture.
- **Fill Cupcake Liners:** Divide the prepared batter evenly among the 12 cupcake wells. Fill each liner approximately ¾ of the way full. This allows enough room for the cupcakes to rise without overflowing.
- **Bake to Perfection:** Transfer the muffin tin to the preheated oven and bake for about 16 minutes. To check for doneness, insert a clean toothpick into the center of a cupcake. If it comes out clean, your cupcakes are ready.
- **Cool Completely:** Once baked, remove the cupcakes from the oven and carefully transfer them from the muffin pan to a wire rack. Allow them to cool completely at room temperature before you even think about frosting them. Frosting warm cupcakes will cause the buttercream to melt and slide right off.
For more autumnal inspiration, don’t miss these adorable owl cupcakes – another fall favorite!
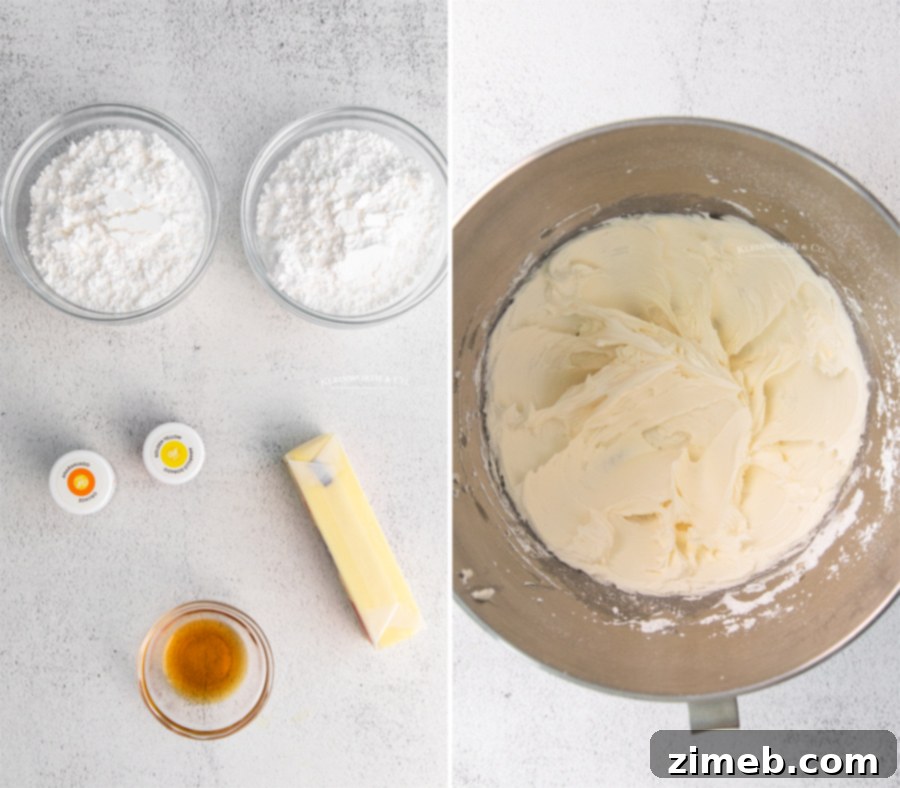
Crafting the Iconic Candy Corn Vanilla Buttercream Frosting
The signature look of these cupcakes comes from their vibrant, tri-colored buttercream frosting. Follow these steps to create a smooth, pipeable frosting that’s as delicious as it is visually appealing:
- **Cream the Butter:** Place the properly softened butter into the bowl of a stand mixer fitted with the paddle attachment. Beat on medium speed for about 1 minute, until the butter is noticeably smooth, creamy, and pale in color.
- **Add Vanilla:** Pour in the pure vanilla extract and continue to mix until it is fully incorporated into the butter.
- **Gradually Add Sugar:** With the mixer running on low speed, slowly begin to add the confectioner’s sugar, one cup at a time. This prevents a cloud of sugar from engulfing your kitchen. As needed, stop the mixer and scrape down the sides of the bowl to ensure all the sugar is thoroughly incorporated and there are no dry pockets.
- **Achieve Fluffy Buttercream:** Once all the sugar is added, increase the mixer speed to medium-high and beat the buttercream for approximately 2 minutes. This step is crucial for incorporating air, making the frosting light, fluffy, and perfectly pipeable.
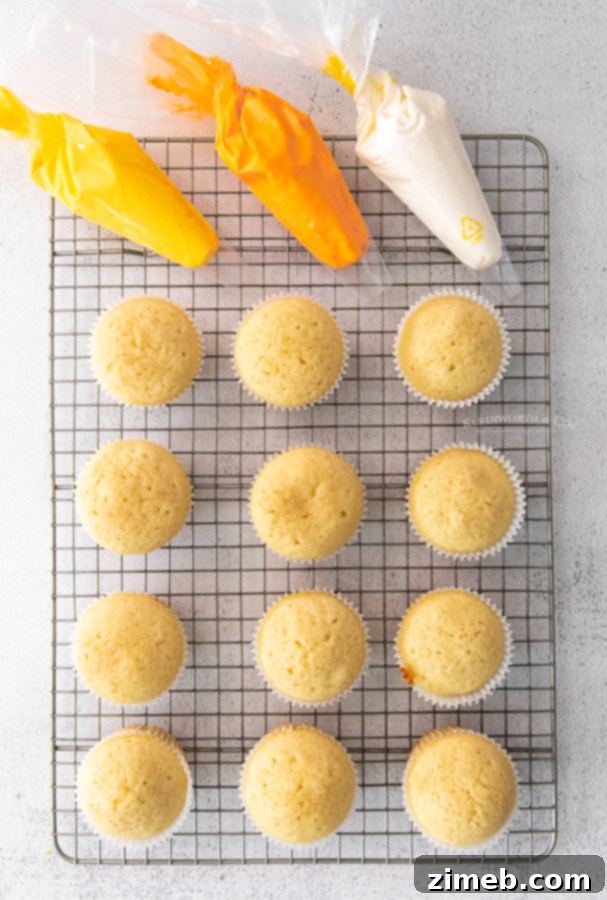
- **Divide and Prepare for Coloring:** Divide the luscious vanilla buttercream evenly into three separate bowls. Take one-third of the frosting and transfer it directly into a piping bag fitted with your chosen star tip (a Wilton 2A works wonderfully for creating defined peaks). This will be your white layer.
- **Color the Yellow Layer:** To the second bowl, add 2-3 drops of bright yellow food coloring. Mix thoroughly until the color is vibrant and uniform. Once achieved, transfer this yellow frosting into another piping bag, also fitted with a star tip.
- **Color the Orange Layer:** To the final bowl of frosting, add 2-3 drops of bright orange food coloring. Mix until the color is consistent and bright. Transfer this orange icing into a third piping bag, again fitted with a star tip.
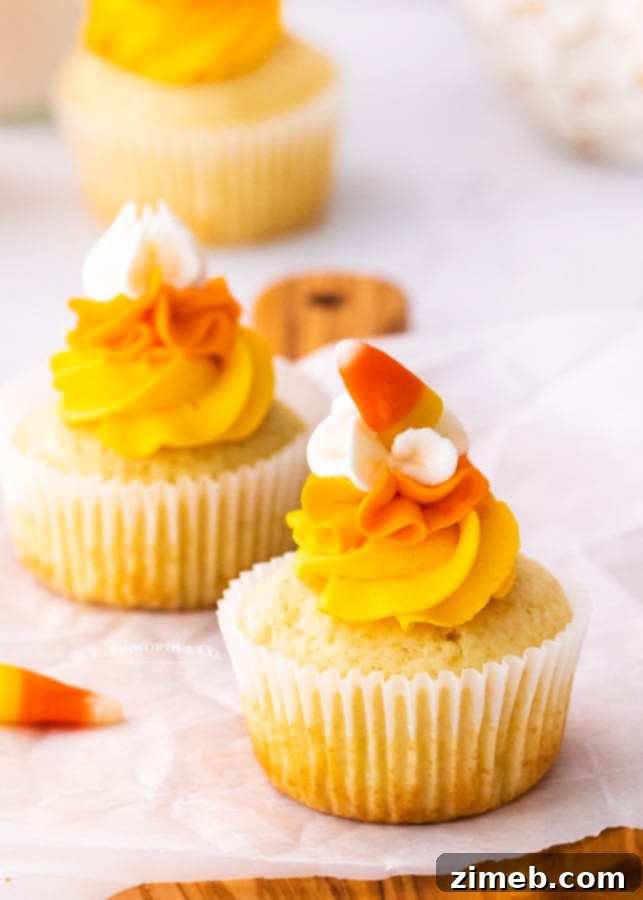
- **Pipe the Candy Corn Design:** Now for the fun part! Take a cooled cupcake. Begin by piping a small, even ring of yellow frosting around the outer edge of the cupcake top. Next, pipe a slightly smaller, concentric circle of orange frosting just inside the yellow ring. Finally, complete the candy corn look by piping a small peak or swirl of white frosting in the very center of the orange circle, creating that iconic triangular appearance.
- **Serve and Store:** Enjoy your beautifully decorated candy corn cupcakes immediately, or for optimal freshness, store them in an airtight container in the refrigerator for up to two days.
Halloween Candy Corn Cupcakes: The Ultimate Spooky Treat
These festive Halloween candy corn cupcakes are more than just a dessert; they are a delightful centerpiece, bringing a vibrant burst of color and a touch of seasonal magic to any spooky celebration. Their cheerful appearance and sweet, comforting flavor make them an instant hit, embodying the playful spirit of Halloween. From casual family gatherings to elaborate costume parties, these cupcakes are sure to be cherished by guests of all ages, leaving them with a sweet memory of your festive hospitality.
Essential Notes for Making Perfect Candy Corn Cupcakes
- **Flour Measurement is Key:** All-purpose flour forms the very foundation of our cupcakes. To ensure they turn out light and tender, always use the “spoon and level” method for measuring. Scooping directly from the bag can pack too much flour into your cup, resulting in dry, dense cupcakes.
- **Sweetness from Sugar:** Granulated sugar not only sweetens our cupcakes but also contributes to their moist texture and beautiful golden-brown crust.
- **Light and Airy with Baking Powder:** Baking powder is the secret weapon for light, fluffy cupcakes. It reacts with liquids and heat to create air bubbles, giving our cupcakes their delightful rise and tender crumb.
- **Richness from Vegetable Oil:** Vegetable oil plays a crucial role in adding richness and moisture to the cupcakes, helping them stay tender and fresher for a longer period compared to butter-based cakes.
- **Moisture from Milk:** Whole milk provides essential moisture and richness, contributing to a soft and palatable texture in every bite.
- **Structure from Eggs:** Large eggs act as binders, holding all the ingredients together and adding structure, richness, and additional moisture to the cupcake batter.
- **Vanilla for Flavor:** Pure vanilla extract is crucial for enhancing the overall sweetness of the cupcakes and infusing them with that classic, comforting vanilla flavor that everyone loves.
- **Butter for Creamy Icing:** Properly softened butter is the cornerstone of a smooth, lump-free buttercream frosting. Ensure it’s at room temperature before you begin mixing to achieve the ideal consistency.
- **Confectioner’s Sugar for Structure:** Confectioner’s sugar (also known as powdered sugar) sweetens the icing and provides the necessary structure, allowing us to pipe it into the distinct candy corn shape without it losing form.
The Science Behind Room Temperature Ingredients: Why It Matters
Understanding why ingredients need to be at room temperature is fundamental to successful baking. When dairy products like butter and eggs are at room temperature, they can create a stable emulsion with other ingredients more effectively. An emulsion is a smooth, homogenous mixture where fats and liquids are evenly dispersed.
This emulsification is critical because it allows air to be incorporated and trapped within the mixture as you cream butter and sugar. These tiny air pockets are what help leaven your baked goods, causing them to expand and become wonderfully fluffy and light as they bake in the oven. If your butter is too cold, it won’t cream properly with the sugar, leading to a crumbly mixture where air cannot be adequately incorporated. This can result in a dense, heavy product with uneven pockets of unblended butter. Conversely, if the butter is too warm or melted, the emulsion breaks, and the texture can become greasy and flat. Ensuring everything is at the right temperature guarantees that ingredients blend together perfectly, achieving a uniform texture and the most delicious results for your candy corn cupcakes.
More Creative Candy Corn Ideas for Fall
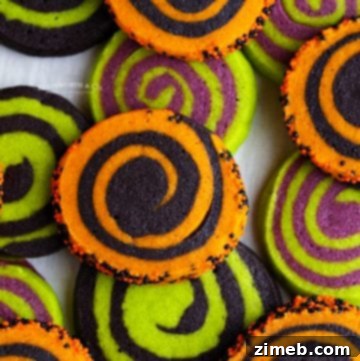
The iconic colors and festive spirit of candy corn can inspire a variety of delightful treats beyond cupcakes. Imagine candy corn themed cookies, parfaits, or even a simple yet elegant layered dessert that incorporates the distinct white, orange, and yellow hues. These vibrant desserts are perfect for adding a touch of autumn charm to any gathering, from casual get-togethers to more formal holiday celebrations. Let your creativity soar and bring the joy of candy corn to all your fall baking endeavors.
Can Candy Corn Cupcakes be frozen for later enjoyment?
Absolutely, these candy corn cupcakes are freezer-friendly, a trick I use quite often to prepare ahead or preserve leftovers! You can freeze these delicious treats at various stages of their creation. For ultimate convenience, I like to remove the freshly baked and completely cooled cupcakes from their pan, wrap each one tightly in plastic wrap to prevent freezer burn, and then freeze them. This method is incredibly handy for future use, especially when you might need a quick dessert or when working with cold cakes to prevent the frosting from getting too soft during decoration.
If you’ve already decorated your cupcakes, you can still freeze them! Gently wrap the completely decorated cupcakes individually in plastic wrap, being careful not to smudge the frosting. Then, place them in an airtight container or freezer-safe bag. It’s important to remember that the frosting won’t become completely rock-hard in the freezer, so exercise caution to avoid denting the delicate design if other items are placed against them. To enjoy, simply thaw them overnight in the refrigerator. For the best flavor and a wonderfully creamy frosting texture, I recommend letting them come to room temperature for 1-2 hours before serving. This ensures the cake is moist and the buttercream is perfectly soft and enjoyable, rather than stiff.
The Art of Candy Corn Frosting: A Detailed Look
Creating the signature candy corn frosting is where these cupcakes truly come to life. The process involves crafting a smooth, delicious vanilla buttercream and then carefully dividing and coloring it into the three iconic shades: white, orange, and yellow. Precision in coloring and a steady hand in piping are key to achieving the layered effect that makes these cupcakes so visually striking. This frosting isn’t just a topping; it’s an integral part of the candy corn experience, offering a sweet, creamy counterpoint to the tender vanilla cake beneath. Mastering this technique will allow you to create stunning desserts that are as much a feast for the eyes as for the palate.
DON’T MISS THESE HOLIDAY E-BOOKS!


Essential Baking Tools and Ingredients for Making Candy Corn Cupcakes
Creating this candy corn cupcake recipe is not only incredibly SUPER EASY but also yields unbelievably delicious results. If you’re anything like me during this wonderful time of year, you might already have most of these essential items readily available in your pantry or kitchen. However, if you’re new to the delightful world of homemade cupcakes and feeling a little nervous, rest assured – you are going to absolutely adore these! I’ve curated a comprehensive list below of the indispensable tools and ingredients that I simply cannot bake without when I embark on making this particular cupcake recipe. These items will help ensure your baking process is smooth and your final cupcakes are nothing short of spectacular.
- All-purpose flour: The cornerstone of many baking recipes, providing structure to our cupcakes.
- Granulated sugar: For essential sweetness and a tender crumb in the cupcakes.
- Baking powder: Our leavening agent, ensuring light and airy cupcakes.
- Vegetable oil: For moisture and a rich texture that keeps cupcakes fresh.
- Pure vanilla extract: To infuse both the cupcakes and frosting with delightful vanilla flavor.
- Confectioner’s sugar: For a smooth, sweet, and pipeable buttercream frosting.
- Electric yellow food coloring: To achieve the vibrant yellow layer of our candy corn frosting.
- Electric orange food coloring: For the classic bright orange middle layer of the frosting.
- Mixing bowls: Essential for separating wet and dry ingredients and mixing batters.
- Hand mixer: A versatile tool for quickly and efficiently creaming butter and making frosting.
- Stand mixer: For effortless and thorough mixing, especially useful for buttercream.
- Measuring cups: For accurate measurement of dry and wet ingredients.
- Measuring spoons: Crucial for precise quantities of baking powder and vanilla extract.
- Cupcake pan: The vessel for baking our delightful cupcakes.
- Cupcake liners: For easy cleanup and a professional presentation.
- Piping bags: Essential for creating the beautiful layered candy corn frosting design.
- Piping tip (e.g., Wilton 2A star tip): To achieve crisp, decorative frosting peaks and swirls.
If you adore this Easy Candy Corn Cupcakes recipe, you’re bound to fall in love with these other holiday treats as well. Click each link below to discover the simple, printable recipe and add more festive cheer to your baking repertoire!
Check out this recipe
Check out this recipe
Check out this recipe
Check out this recipe
Check out this recipe
Check out this recipe
Check out this recipe
Check out this recipe
Check out this recipe

Check out this recipe
If you genuinely love this recipe for Candy Corn Cupcakes as much as I do, please take a moment to leave a five-star review and help me spread the deliciousness by sharing it on Facebook and Pinterest! Your support means the world and helps others discover these wonderful treats.
CONNECT WITH YUMMI HAUS!
Be sure to follow me on my social media channels, so you never miss a post or a new delicious recipe!
Substack, FB, Pinterest, IG, Email Subscription
Rate this Recipe
Candy Corn Cupcakes
Ingredients
Cupcakes
- 1 ½ cups all-purpose flour
- ¾ cup granulated sugar
- 1 teaspoon baking powder
- ½ cup vegetable oil
- ½ cup whole milk
- 2 large eggs
- 1 teaspoon pure vanilla extract
Vanilla Buttercream
- ½ cup butter softened (1 stick)
- 1 teaspoon pure vanilla extract
- 2 cups confectioner’s sugar
- yellow and orange food coloring
Instructions
Cupcakes
-
Preheat the oven to 350F and grease 12 muffin tins or line with paper liners. Set aside.
-
In a large bowl, whisk together the flour, sugar, and baking powder.
-
In another bowl, whisk together vegetable oil, milk, eggs, and vanilla.
-
Add the wet ingredients to the dry and whisk until no large lumps remain– you don’t want to over-mix or you’ll end up with dense cupcakes.
-
Divide the batter between the prepared cupcake wells, filling each one about ¾ of the way full.
-
Bake for 16 minutes, or until a toothpick inserted into the center comes out clean.
-
Remove the cupcakes from the pan and allow them to cool on a wire rack and completely before frosting.
Vanilla Buttercream
-
Add the softened butter to the bowl of a stand mixer fitted with the paddle attachment. Beat on medium speed until it is smooth and creamy– about 1 minute.
-
Add the vanilla and mix to combine.
-
With the mixer on low, gradually add the confectioner’s sugar. Scrape down the sides of the bowl as necessary to make sure all of the sugar gets incorporated.
-
Turn the mixer to medium high speed and beat until the buttercream becomes light and fluffy– about 2 minutes.
-
Divide the frosting in thirds and place one third of the icing in a piping bag fitted with a star tip (I used a Wilton 2A).
-
Place another third of the frosting in a small bowl and add 2-3 drops of bright yellow food coloring. Mix to combine and transfer the frosting to a piping bag fitted with a star tip.
-
Add 2-3 drops of bright orange food coloring to the last third of frosting and mix to combine. Again, transfer the icing to a piping bag fitted with a star tip.
-
Pipe a small ring of yellow frosting around the top of each cupcake. Then top the yellow with a slightly smaller circle of orange. Finally, top each cupcake with a peak of white frosting to create a triangle shape.
-
Enjoy the cupcakes immediately or store them in an airtight container in the fridge for up to two days.
Notes
- Flour is the base of our cupcakes– make sure to measure using the spoon and level method so you don’t add too much (which can cause your cupcakes to be too dry).
- Granulated sugar sweetens our cupcakes!
- Baking powder helps the cupcakes rise and become light and airy.
- Vegetable oil adds richness to the cupcakes and helps them stay fresher longer.
- Milk adds moisture and richness to the cupcakes.
- Eggs bind the cupcakes together.
- Vanilla enhances the sweetness of the cupcakes and makes them vanilla flavored!
- Butter is the base of our icing– make sure it’s fully softened so you don’t end up with lumps.
- Confectioner’s sugar sweetens the icing and helps give it structure so we can pipe it into the shape we want.
Nutritional information for the recipe is provided as a courtesy and is approximate. Please double-check with your own dietary calculator for the best accuracy. We at Yummi Haus cannot guarantee the accuracy of the nutritional information given for any recipe on this site.