
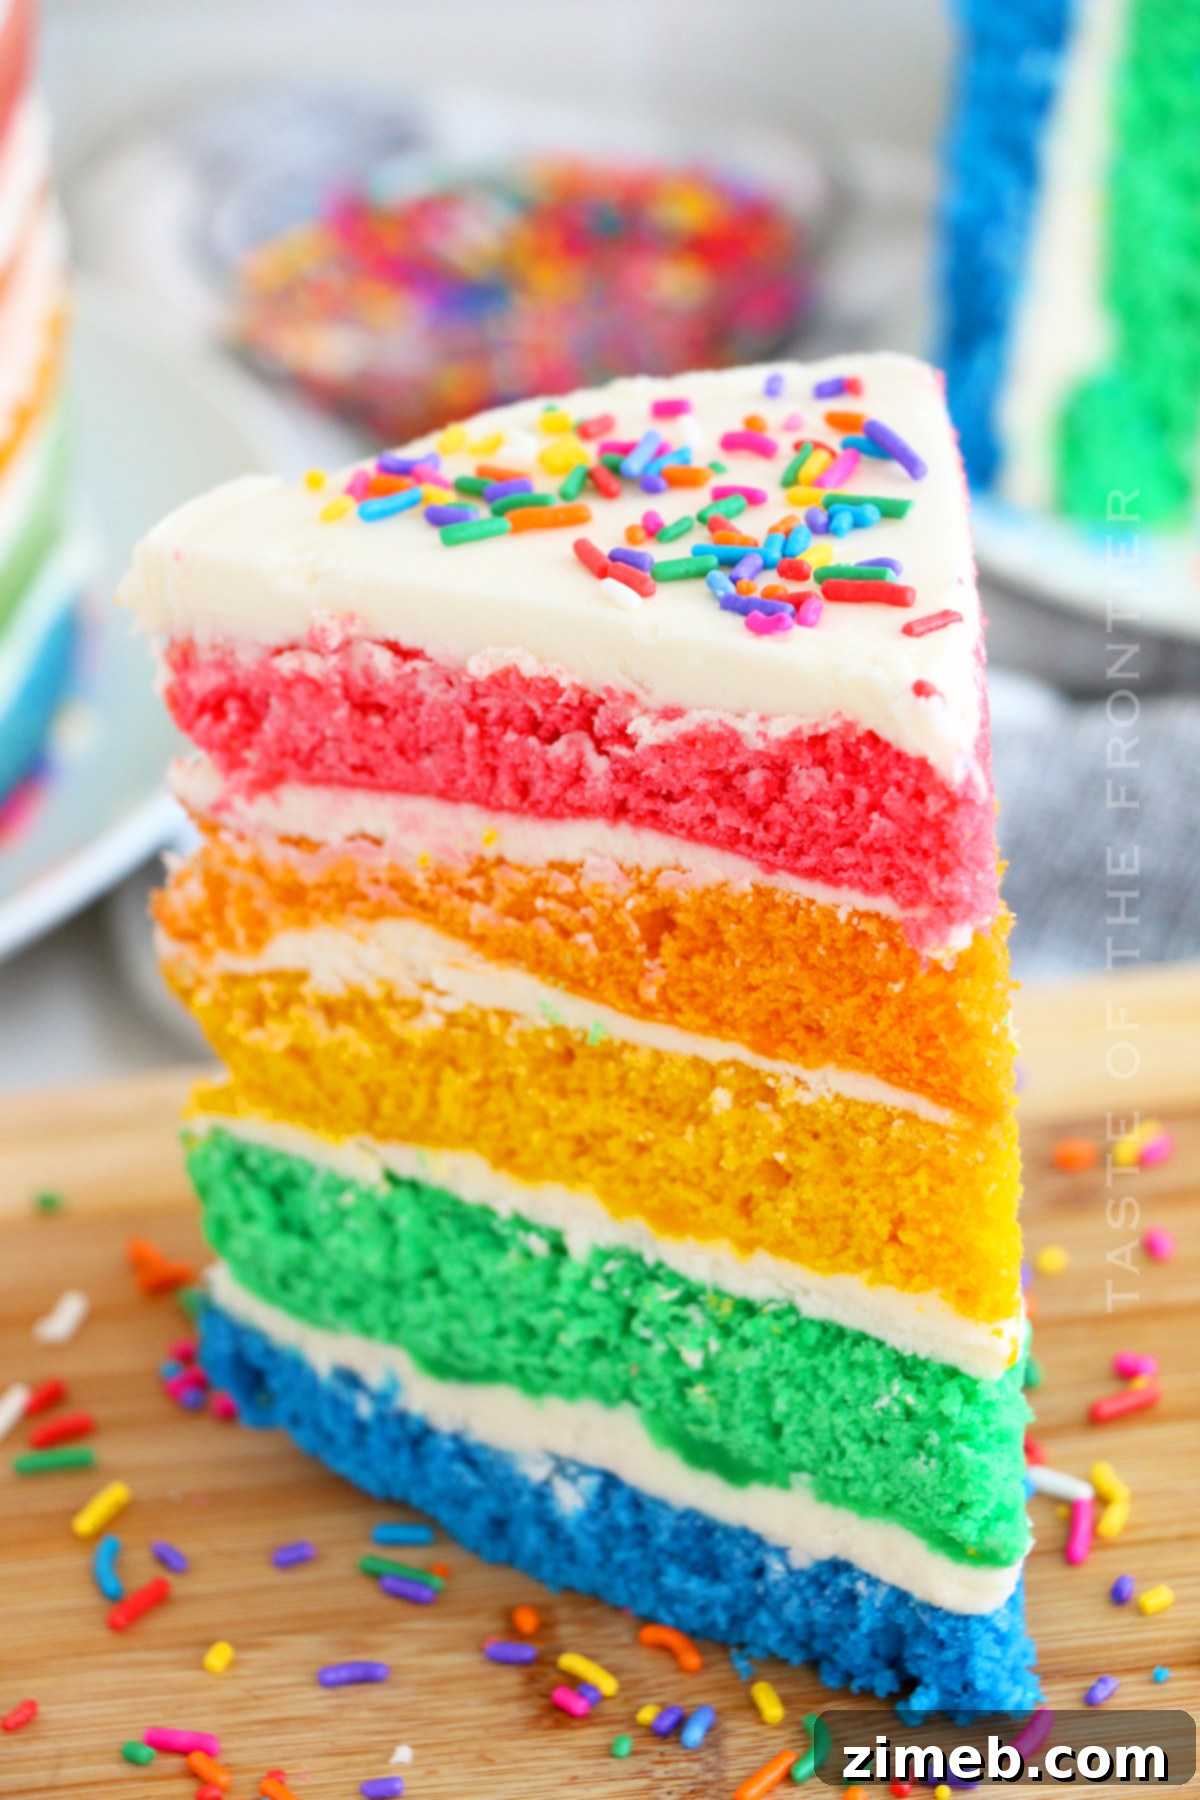
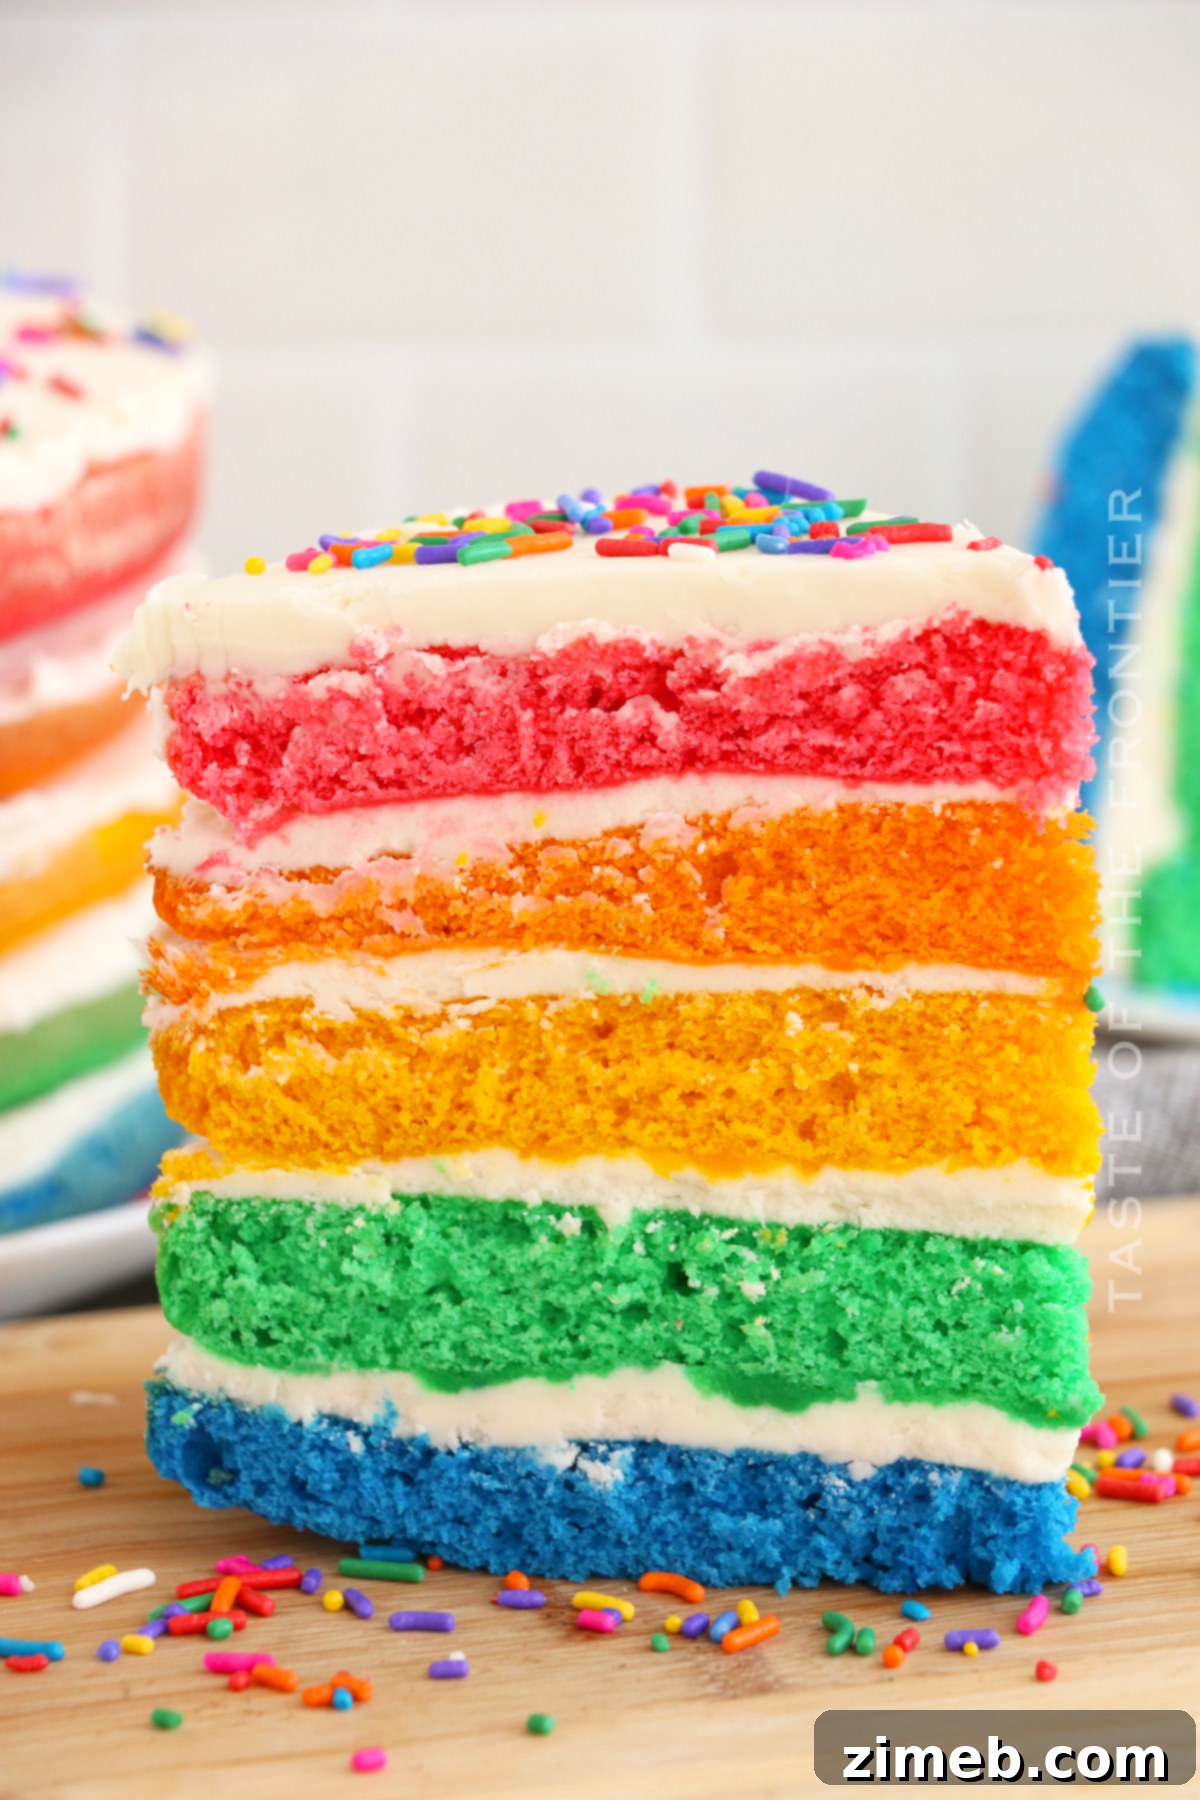
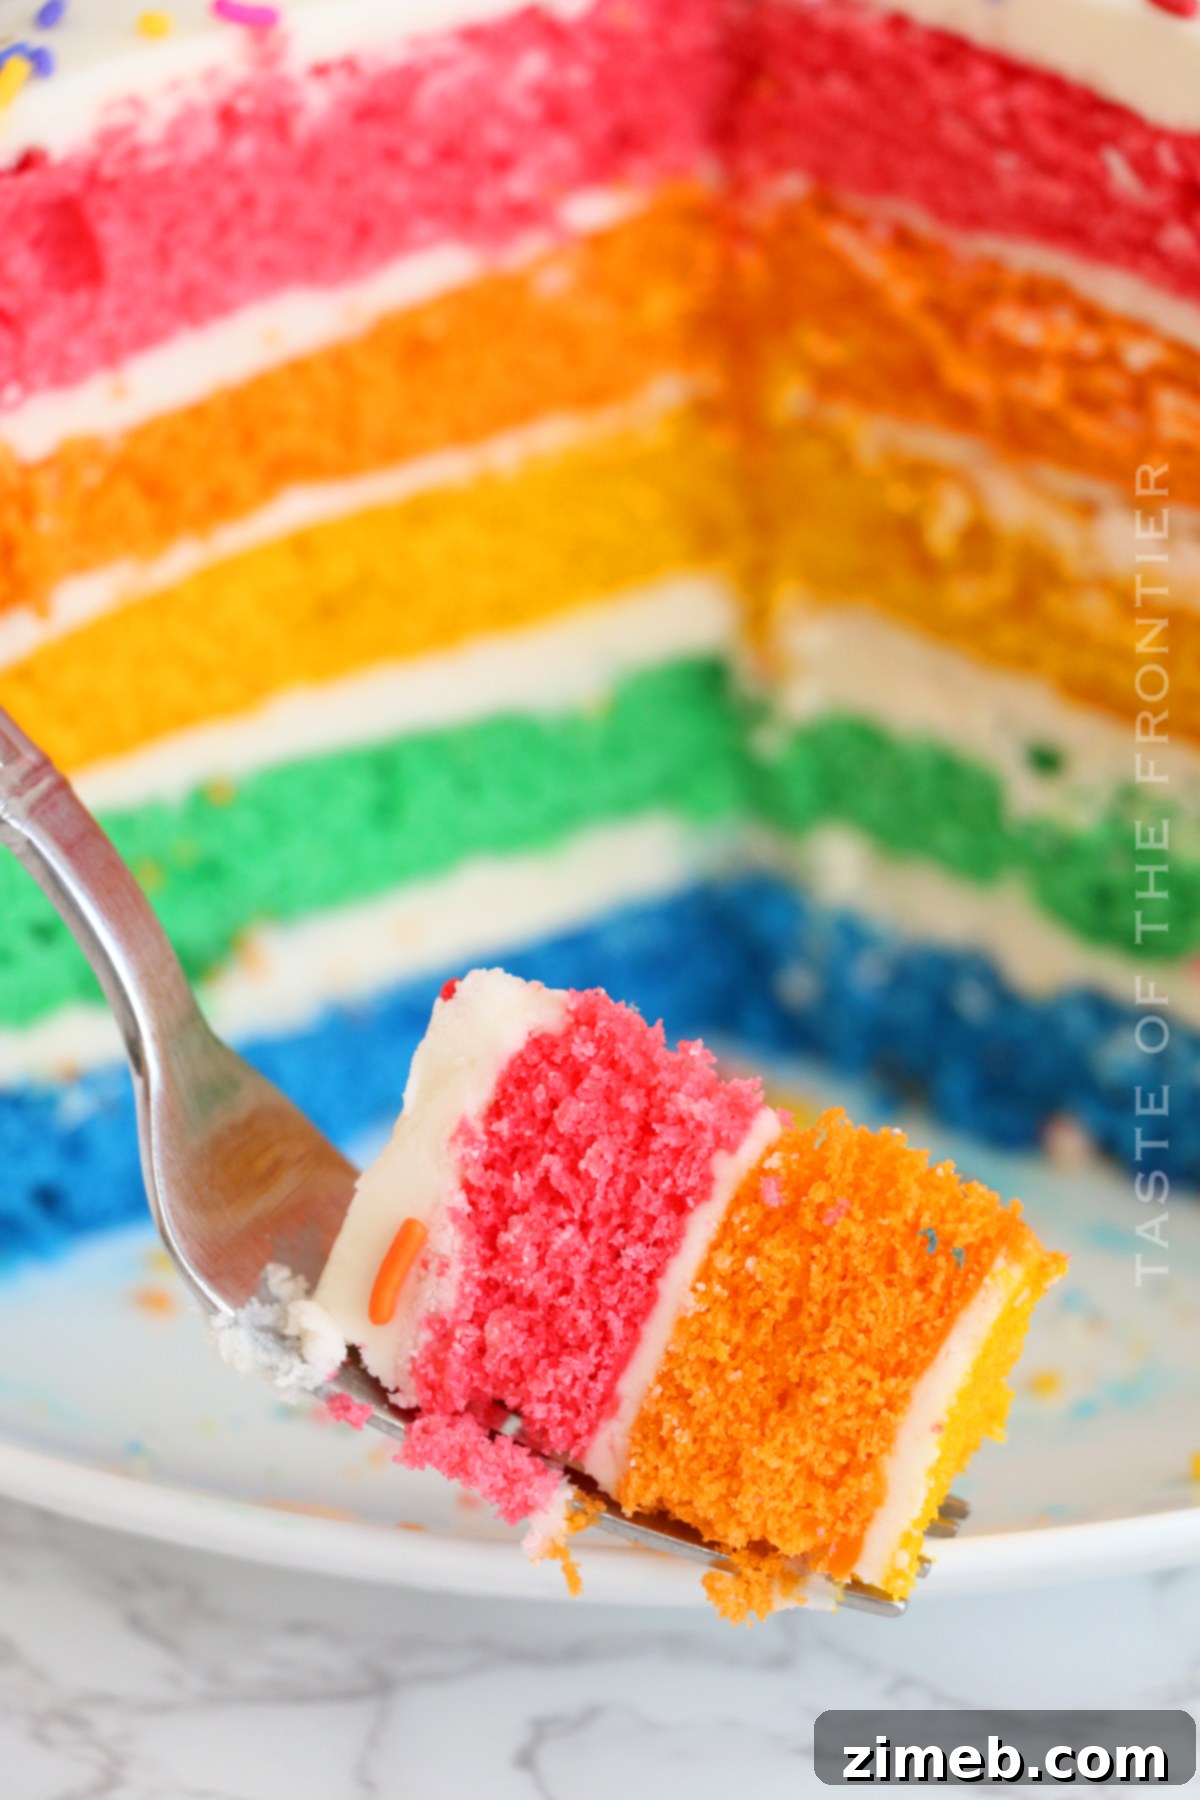
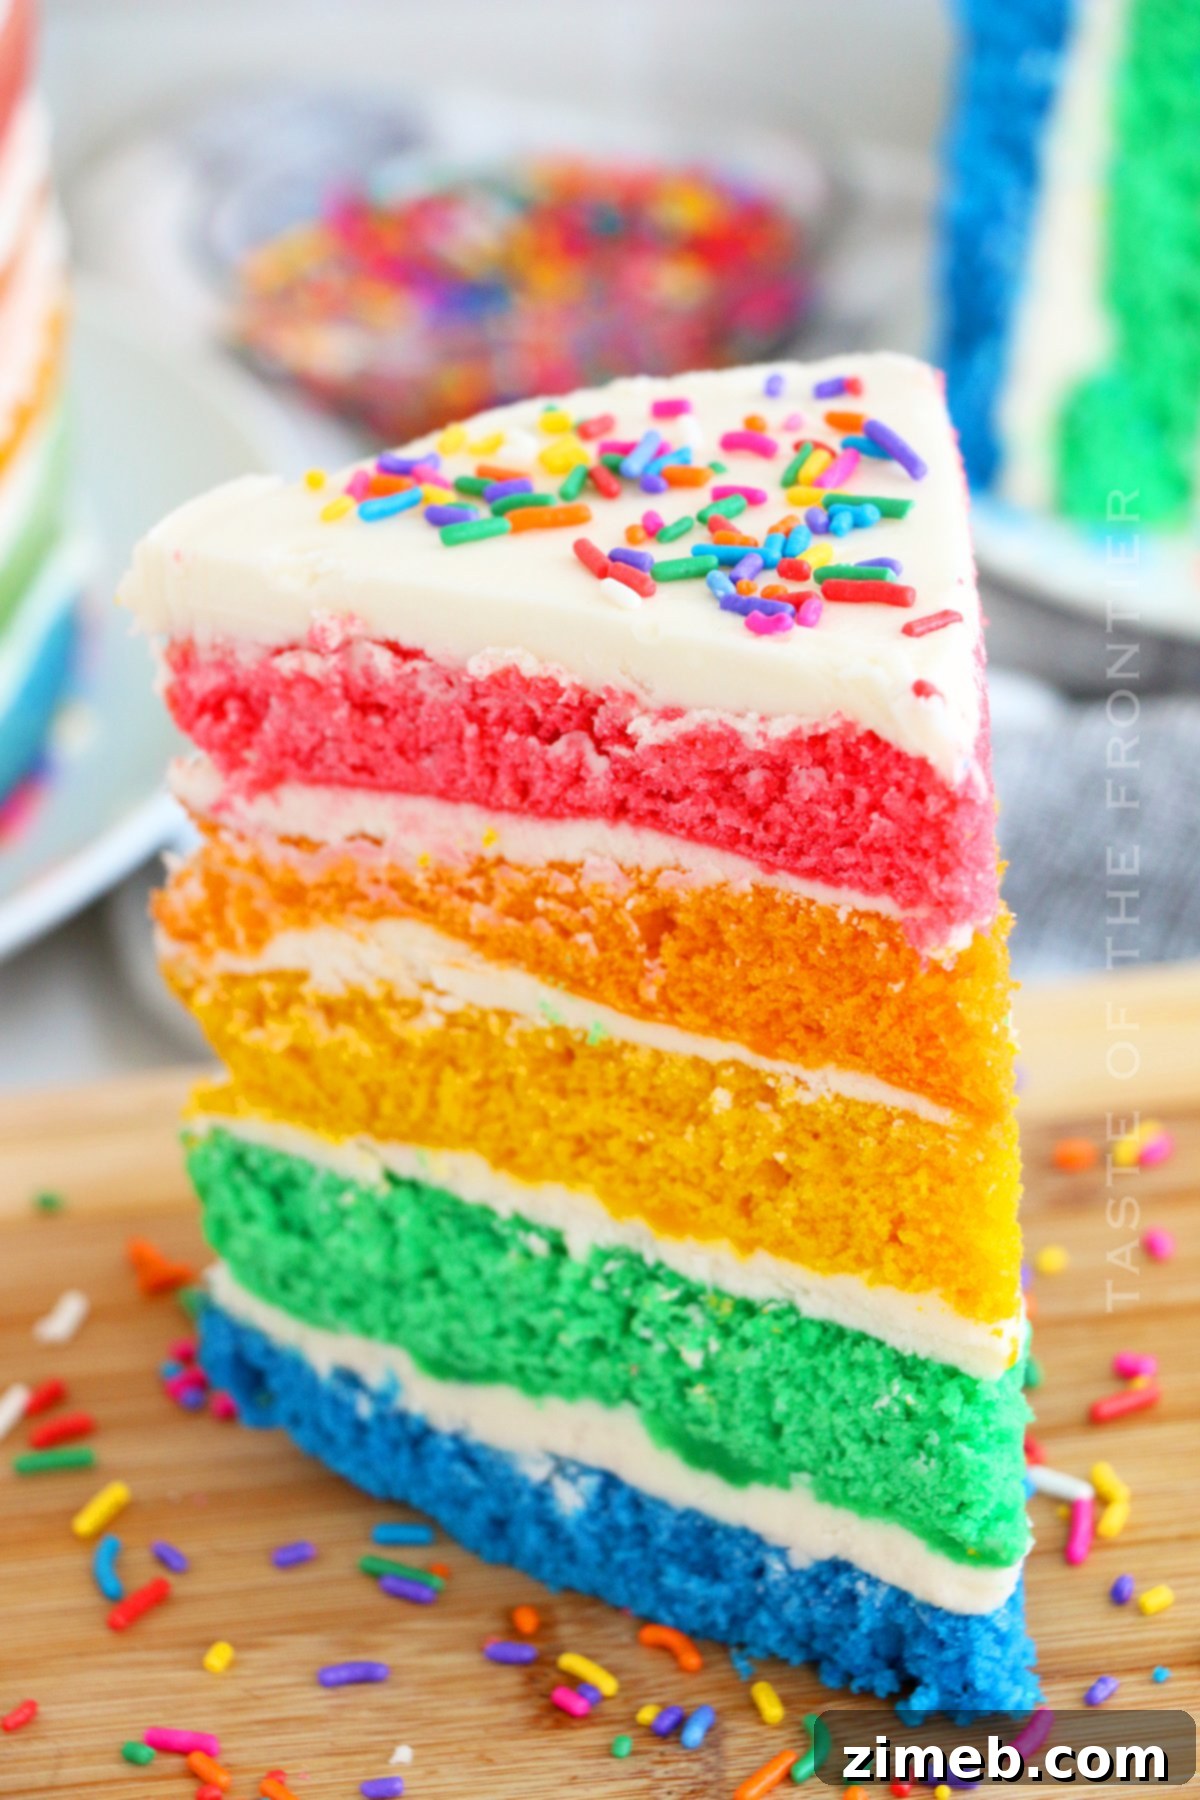
Welcome to the vibrant world of our Easy Rainbow Cake, a dessert that promises to transform any ordinary day into an extraordinary celebration! If you’re searching for a visually stunning, deliciously moist, and surprisingly simple cake, you’ve found your pot of gold. This spectacular creation isn’t just a cake; it’s an experience, unveiling a magnificent spectrum of colors with every slice. While the exterior can be frosted to your heart’s content, it’s the breathtaking layered interior that truly captivates and delights every guest.
There’s an undeniable charm to this rainbow layer cake that sets it apart. Its vibrant hues make it a perfect centerpiece for virtually any special occasion. Imagine the gasps of delight at a birthday party, the joyful smiles at a fun summer cookout, or the cheer it brings to a festive holiday gathering like St. Patrick’s Day. This cake transcends mere dessert; it becomes a memorable moment, a topic of conversation, and a testament to the joy of baking. It’s not just beautiful; it’s a showstopper, guaranteeing smiles and creating lasting memories.
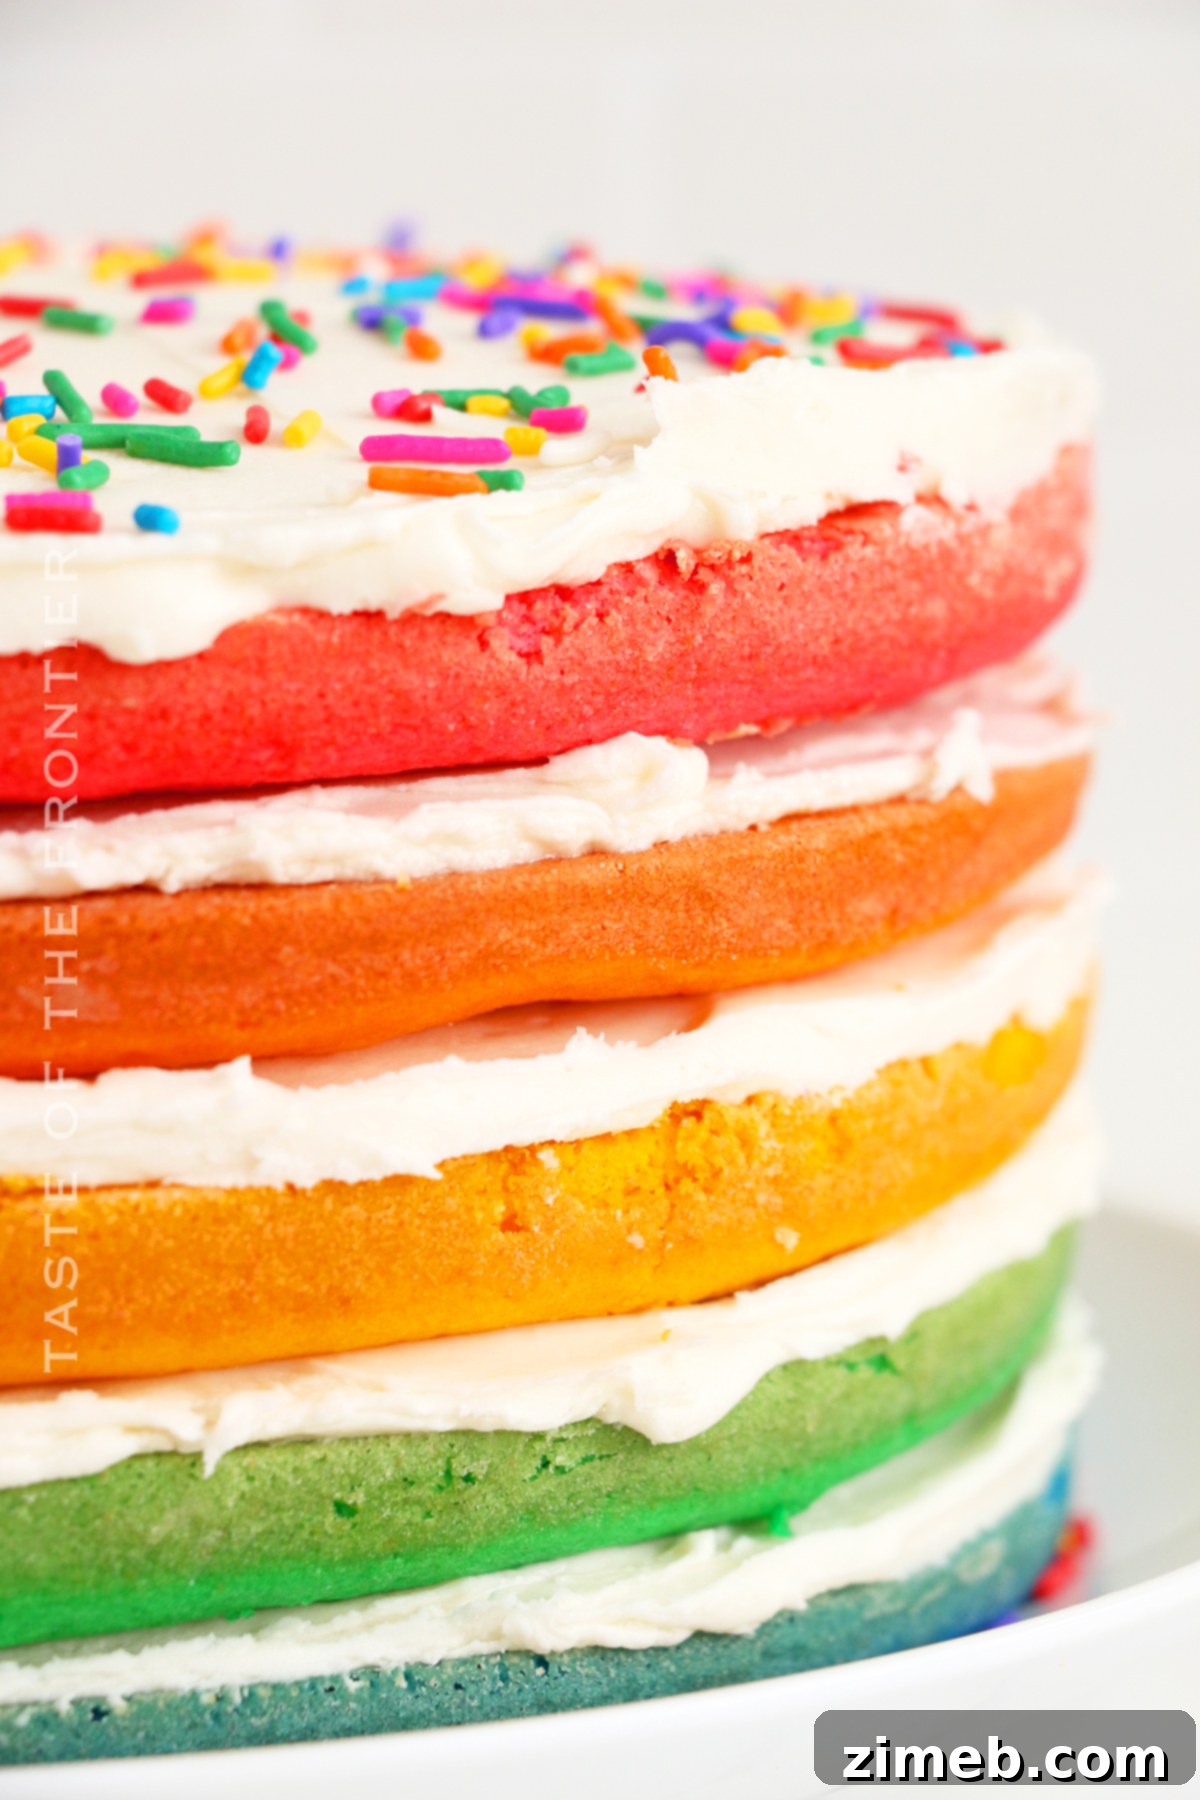
The next time you’re tasked with bringing a dessert to a party or hosting a gathering, consider this easy cake recipe. It strikes the perfect balance between impressive aesthetics and approachable preparation. Its unique appearance ensures it stands out, while its delightful flavor will earn you rave reviews. Whether you’re a seasoned baker or just starting your culinary journey, this rainbow cake offers a rewarding experience, culminating in a dessert that truly impresses.
Why Choose a Rainbow Dessert?
Beyond its obvious beauty, a rainbow dessert carries a unique symbolism of joy, hope, and inclusivity. It’s a universal symbol that resonates with people of all ages, making it incredibly versatile for various events. From children’s birthday parties brimming with cartoon characters and vibrant themes to more sophisticated adult celebrations looking for a touch of whimsy, a rainbow cake fits right in. It sparks conversation, encourages photographs, and contributes to an overall festive atmosphere. The layered colors aren’t just pretty; they signify creativity and thoughtful effort, elevating your dessert from simple treat to artistic masterpiece.
Common Questions About Rainbow Cake
What Does Rainbow Cake Taste Like?
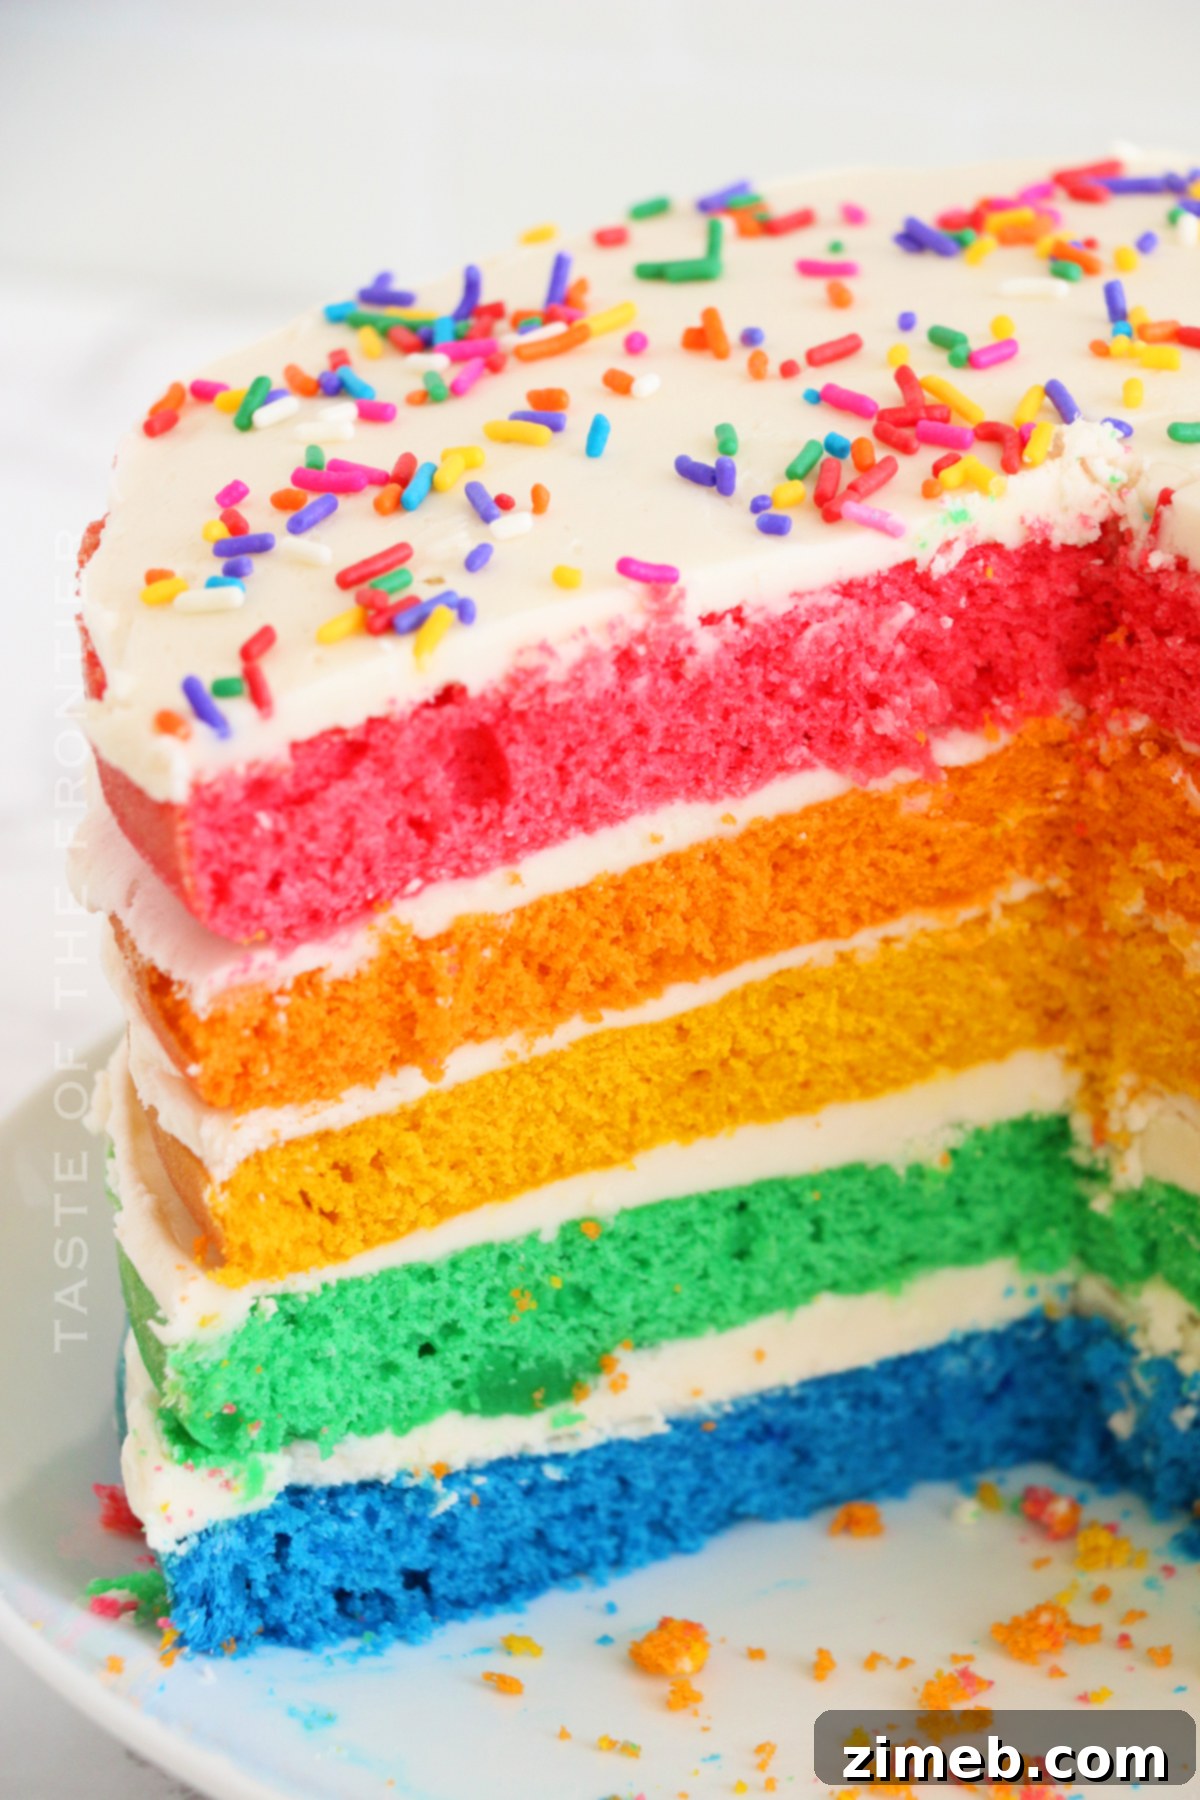
Our featured rainbow cake recipe boasts a classic vanilla flavor, complemented by a sweet and creamy vanilla buttercream frosting. This creates a universally appealing taste profile that’s comforting and familiar, ensuring it’s a hit with everyone. While this recipe leans into the beloved vanilla, the beauty of rainbow cakes lies in their adaptability. Many variations exist, incorporating different cake flavors such as lemon, almond, or even funfetti, and various frosting types like cream cheese, chocolate ganache, or fruit-flavored buttercreams. The choice is yours to customize and explore, but for a delightful and widely appreciated dessert, vanilla is always a winning base.
Why Are Rainbow Cakes Popular?
Rainbow cakes enjoy widespread popularity for several compelling reasons. Firstly, their striking visual appeal is undeniable. The moment a slice reveals those perfectly distinct, colorful layers, it’s bound to elicit exclamations of awe and delight. This “wow factor” makes them incredibly shareable, particularly on social media, contributing to their trendiness. Secondly, they are typically mildly flavored, often with vanilla, making them broadly appealing across different age groups and palates. This ensures that almost everyone will find them delicious. Lastly, their inherent versatility makes them suitable for a vast array of occasions. Whether it’s a birthday, an anniversary, a baby shower, a graduation, or a holiday like St. Patrick’s Day or even Pride celebrations, a rainbow cake adds an instant touch of festivity and joy. They aren’t just food; they are an edible spectacle that enhances any event.
Making Rainbow Cake Ahead of Time and Storage Solutions
Making Rainbow Cake Ahead of Time
One of the many conveniences of this rainbow cake recipe is the flexibility it offers for advanced preparation. You can easily bake the individual colored cake layers days before assembly. Once cooled completely, wrap each layer tightly in plastic wrap and store them at room temperature for up to two days, or in the refrigerator for up to a week. For longer storage, the wrapped cake layers can be frozen for up to a month. Thaw them in the refrigerator overnight before bringing them to room temperature for frosting. The frosting can also be prepared a few days in advance and stored in an airtight container in the refrigerator. Before using, allow it to come to room temperature and re-whip it briefly to restore its smooth consistency. This staggered approach to baking and assembly significantly reduces stress on the day of your event, allowing you to enjoy the celebration.
Storage Guidelines
Proper storage is crucial for maintaining the freshness and deliciousness of your rainbow cake. Luckily, this cake is quite forgiving and stores well under the right conditions.
- Refrigerator: Slices of the cake, or the entire assembled cake, can be stored for up to a week in the refrigerator. To prevent it from drying out or absorbing other odors, ensure it is wrapped tightly with plastic wrap or kept in an airtight cake container. Bringing it to room temperature for about 30 minutes before serving often enhances its flavor and texture.
- Freezing: For longer preservation, this cake freezes beautifully. For individual slices, wrap each piece tightly in plastic wrap, then place them in a freezer-safe container or a heavy-duty freezer bag. For a whole cake, you can freeze it frosted or unfrosted. If frosted, flash freeze it for an hour until the frosting is firm, then wrap it securely in multiple layers of plastic wrap followed by aluminum foil. It can be stored in the freezer for up to 3 months. Thaw frozen cake in the refrigerator overnight, then let it come to room temperature before serving for the best texture and taste.
Expert Tips for the Best Rainbow Cake
While this cake is wonderfully easy to make, a few expert tips can elevate your rainbow creation from great to absolutely phenomenal. These simple guidelines will ensure perfect layers, vibrant colors, and a smooth, delightful frosting every time.
- **Achieving Perfectly Cooled Cakes:** It is absolutely paramount to allow your cake layers to cool completely before attempting to frost them. Rushing this step is the most common mistake and will inevitably lead to melted, sliding frosting, resulting in a messy and disappointing cake. Patience is a virtue here; ensure your cakes are at room temperature, or even slightly chilled, for optimal frosting application.
- **The Art of Mixing:** Avoid overbeating the cake batter. While you want a smooth, well-combined mixture, over-mixing develops too much gluten, which can lead to a dense, tough final product rather than a light and fluffy one. Mix until just combined. Similarly, when preparing your buttercream frosting, keep your mixer on low to medium speed. High speeds, especially when adding powdered sugar, can create a cloud of sugar dust and often incorporate too much air, leading to a less stable frosting.
- **Even Layers for a Professional Look:** For a truly striking rainbow effect, aim for uniform cake layers. If your cakes dome during baking, use a serrated knife or a cake leveler to trim the tops flat once cooled. This ensures a stable cake structure and even layers when assembled.
- **Vibrant Food Coloring:** For the most brilliant rainbow hues, opt for gel food coloring over liquid. Gel colors are more concentrated, producing richer, deeper shades without altering the cake batter’s consistency. Start with a small amount and gradually add more until you achieve your desired intensity.
- **Crumb Coat for a Clean Finish:** Before applying your final layer of frosting, spread a very thin layer (a “crumb coat”) over the entire cake. This traps any loose crumbs, ensuring your final, decorative frosting layer is smooth and pristine. Chill the cake for 15-20 minutes after the crumb coat to set it.
Understanding Sprinkles: The Key to a Non-Bleeding Rainbow
Choosing the right sprinkles is crucial for maintaining the beauty of your rainbow cake, especially if it will be refrigerated. This is an important detail many bakers overlook.
Often, packages labeled “sprinkles” actually contain colored sanding sugar. While lovely on dry baked goods, sanding sugar is not ideal for moist cakes or items that will be refrigerated. When exposed to moisture, the color from sanding sugar will “sweat” and bleed, ruining the crisp, clean look of your rainbow frosting.
For this recipe, and any moist dessert, look for true sprinkles, often called “jimmies” or “nonpareils” (tiny balls). These are typically wax-based or coated, which prevents the colors from bleeding into your frosting. Confetti sprinkles also tend to hold their color well. Read the ingredient list carefully or choose reputable brands known for their non-bleeding sprinkles. This small detail makes a significant difference in the final presentation of your beautiful rainbow cake.
Ingredients for Your Colorful Creation
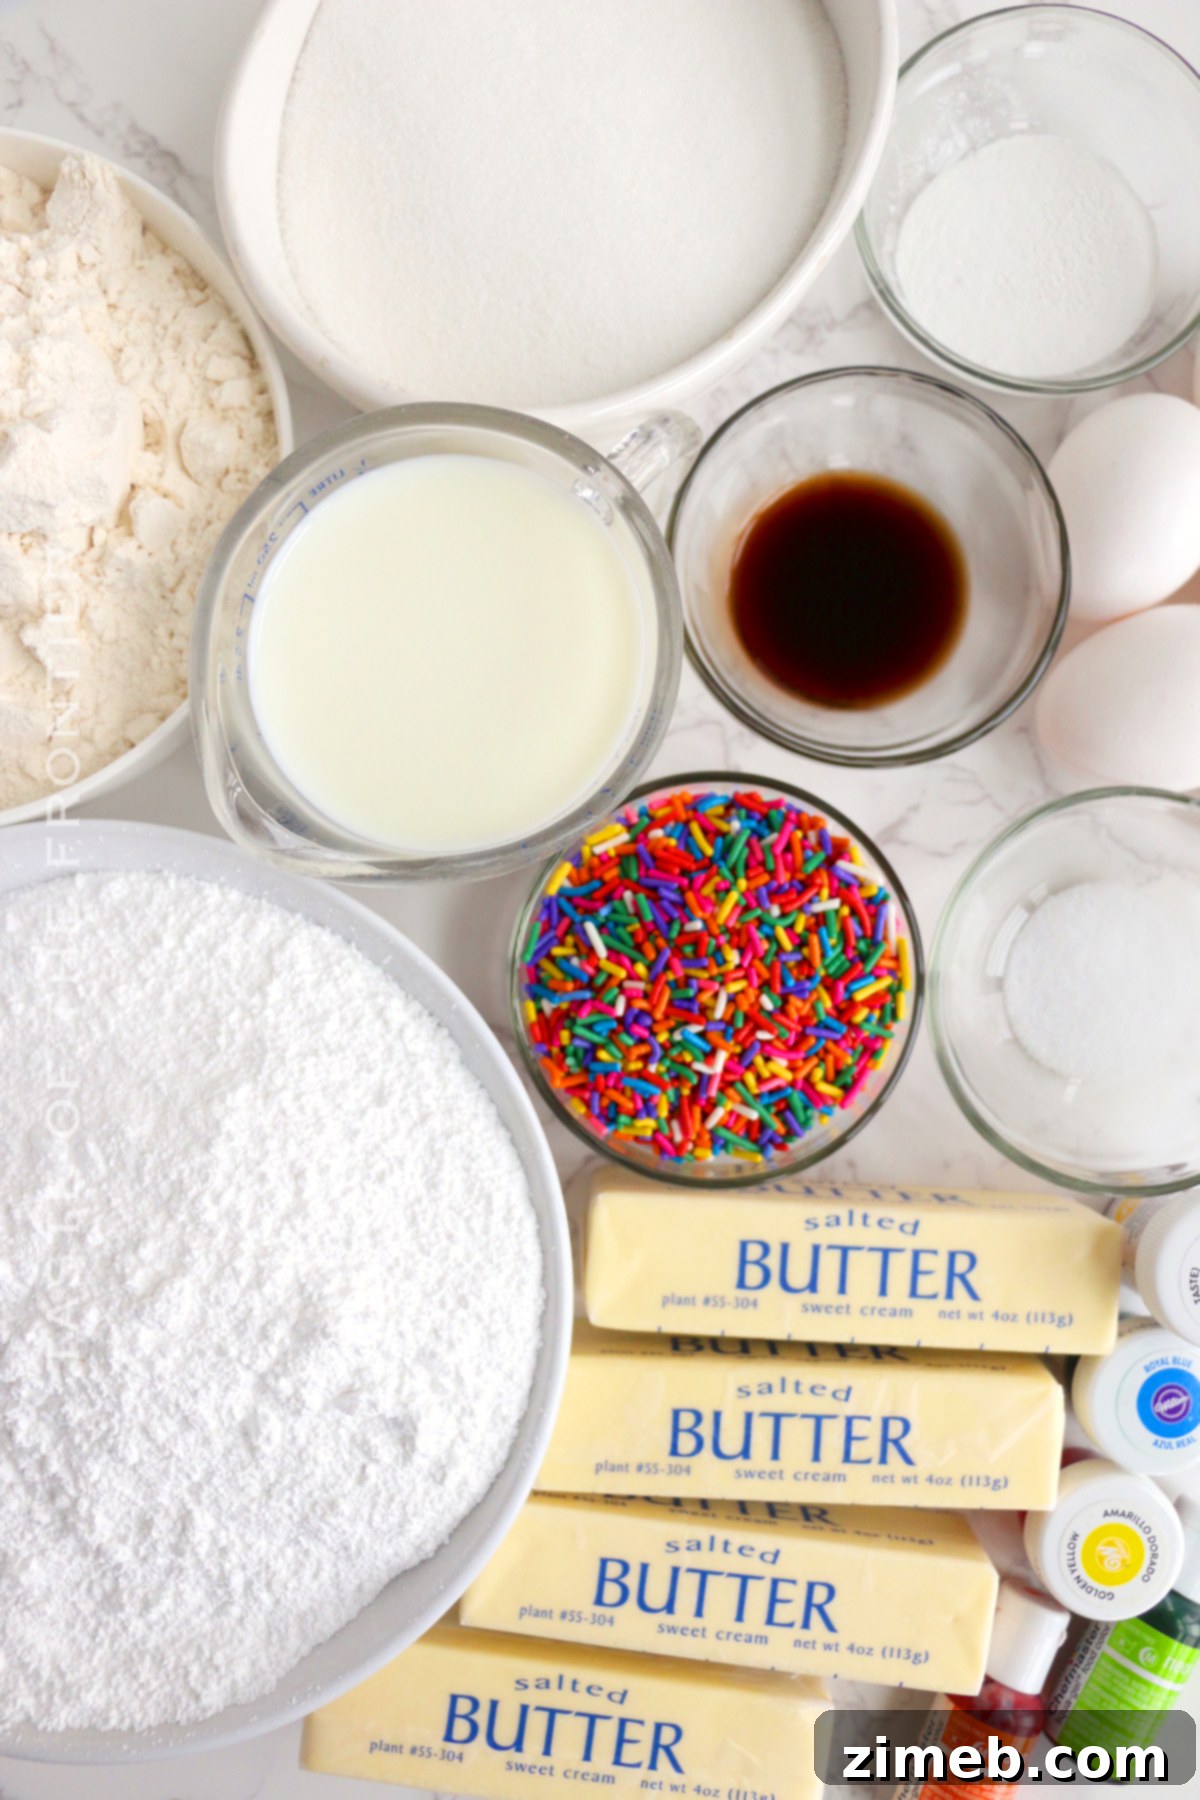
With just a few pantry staples, you can effortlessly whip up this vibrant, moist, and utterly delicious rainbow cake. The beauty of this recipe lies in its simplicity, proving that you don’t need exotic ingredients to create something truly spectacular.
Cake Ingredients
- Granulated Sugar: Provides sweetness and helps with moisture and tenderness.
- Butter (softened): Adds richness, flavor, and contributes to the cake’s tender crumb. Ensure it’s truly softened for proper creaming.
- Egg Whites: Give the cake a lighter, whiter crumb, allowing the food colors to truly pop without any yellow undertones from egg yolks.
- Vanilla Extract: Essential for that classic, comforting vanilla flavor that pairs perfectly with sweet frosting.
- All-Purpose Flour: The structural backbone of the cake. Measure it correctly for the best texture.
- Milk: Adds moisture and contributes to the tenderness of the cake. Any type of milk (whole, skim, non-dairy) will work.
- Baking Powder: The primary leavening agent, responsible for the cake’s rise and light texture.
- Salt: A small but mighty ingredient that balances the sweetness and enhances all the other flavors.
- Food Colors (rainbow colors – red, orange, yellow, green, and blue): The stars of the show! Use high-quality gel food coloring for the most vibrant, non-fading results.
Frosting Ingredients
- Confectioner’s Sugar: The base for our sweet, fluffy buttercream. Sift it for the smoothest frosting.
- Butter (softened): Provides the creamy, rich texture and flavor that makes buttercream so irresistible.
- Milk: Helps achieve the desired consistency for the frosting, making it smooth and spreadable.
- Vanilla: Enhances the sweet flavor of the frosting.
- Sprinkles of your choice (rainbow sprinkles work well): For that extra festive touch! Remember to choose non-bleeding sprinkles for best results.
Essential Kitchen Supplies You’ll Need
While making a rainbow cake looks elaborate, the necessary kitchen equipment is quite standard. You’ll primarily need multiple bowls for coloring the batter, but most other items are likely already in your kitchen.
- Large mixing bowl: For preparing the initial cake batter.
- Stand mixer with a paddle attachment (or electric mixer): Essential for thoroughly creaming butter and sugar and mixing the batter and frosting.
- Medium bowls (5): Crucial for dividing and coloring the cake batter into individual rainbow hues.
- Round cake pans (5): For baking each colorful layer. Five 8-inch pans are recommended for the signature rainbow height.
- Toothpicks: To test the doneness of your cake layers.
- Knife: For leveling cake layers and loosening edges from pans.
- Wire rack: For cooling your cake layers evenly and completely.
- Serving plate: To beautifully present your finished masterpiece.
What Can I Make with Rainbow Sprinkles?
If you find yourself with an abundance of rainbow sprinkles after making your cake, don’t let them go to waste! Their vibrant colors can elevate many other desserts and treats, adding a touch of fun to any occasion:
- St. Patrick’s Day Hot Chocolate Bombs: Add a festive touch to a warm drink.
- Funfetti Cake Batter Dip: A whimsical, no-bake dip perfect for parties.
- Edible Sugar Cookie Dough: Mix them in for a colorful, safe-to-eat treat.
- Frozen Bananas: Dip bananas in chocolate and coat with sprinkles for a fun snack.
- Lofthouse Sugar Cookies: Recreate these classic soft-baked cookies with colorful toppings.
- Cake Batter Frosting: Incorporate sprinkles directly into the frosting for a funfetti effect.
- Birthday Sugar Cookie Bars: Sprinkle generously over cookie bars for an instant party.
- Homemade Funfetti Cake: If you love sprinkles, why not bake them into another cake!
How to Make This Stunning Rainbow Cake
You’ll be amazed at how straightforward it is to create such an adorable and delicious cake that looks like it came from a professional bakery. The process is divided into three manageable sections: preparing the cake layers, making the frosting, and finally, assembling your vibrant masterpiece.
Cake Layers
- Preheat your oven to 350ºF (175ºC). Properly preparing your oven ensures even baking from the start.
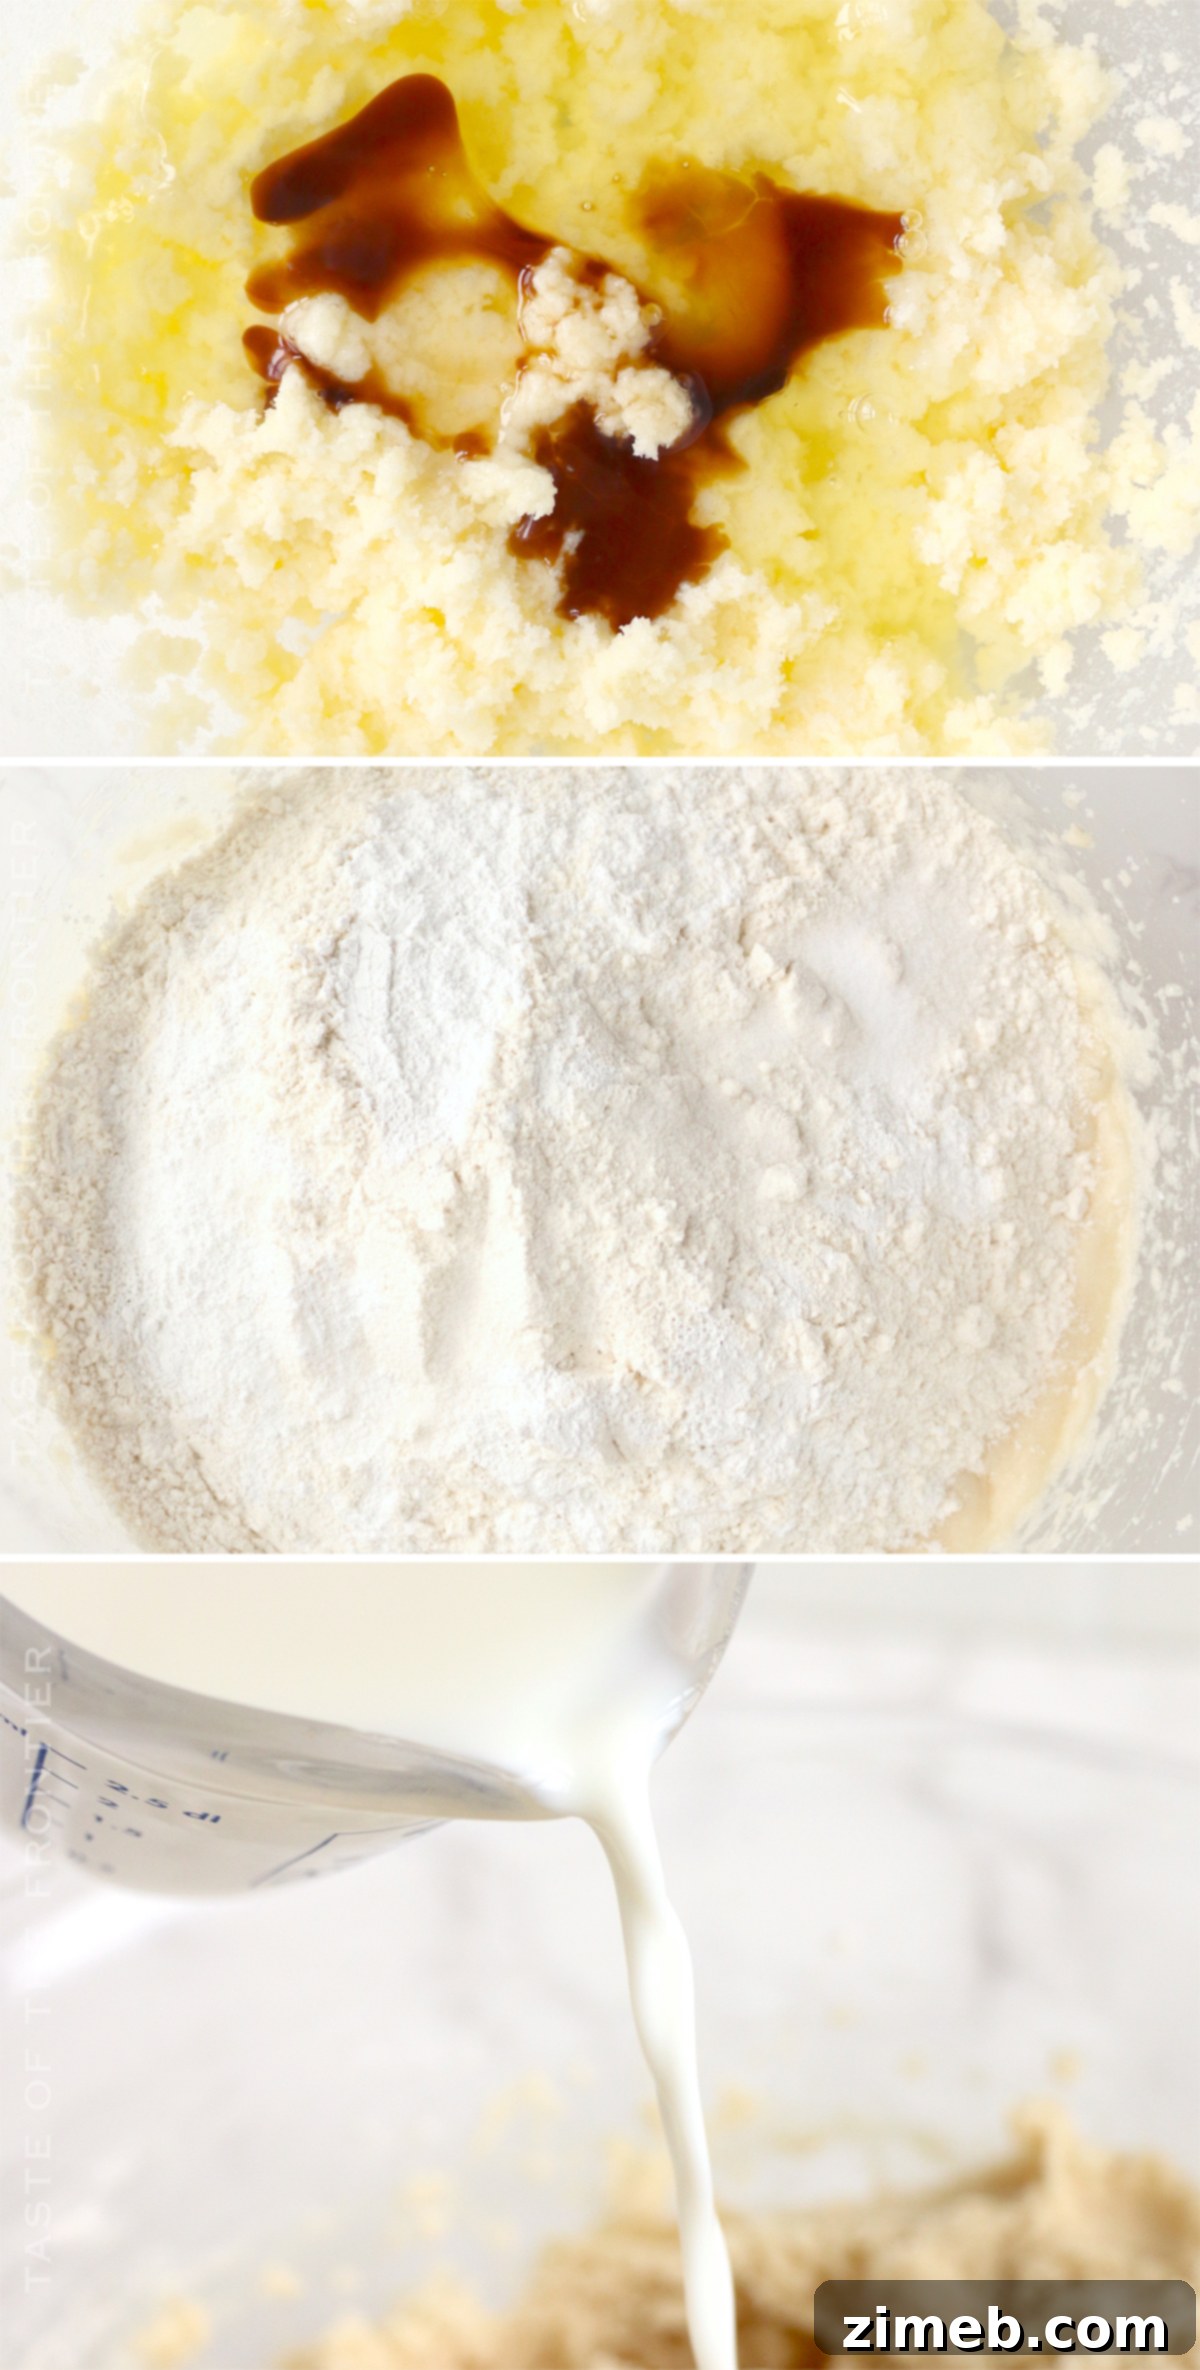
- In a large mixing bowl, combine the granulated sugar and softened butter. Cream them together using a stand mixer with a paddle attachment or an electric hand mixer until the mixture is light, fluffy, and pale in color. This step incorporates air, making the cake tender.
- Pour the egg whites and vanilla extract into the creamed sugar and butter mixture. Beat again until everything is smoothly combined, scraping down the sides of the bowl as needed to ensure all ingredients are incorporated.
- Gradually add the all-purpose flour, milk, baking powder, and salt to the wet ingredients. Continue to mix on low speed until the batter is just smooth. Be careful not to overbeat, as this can lead to a tough cake.
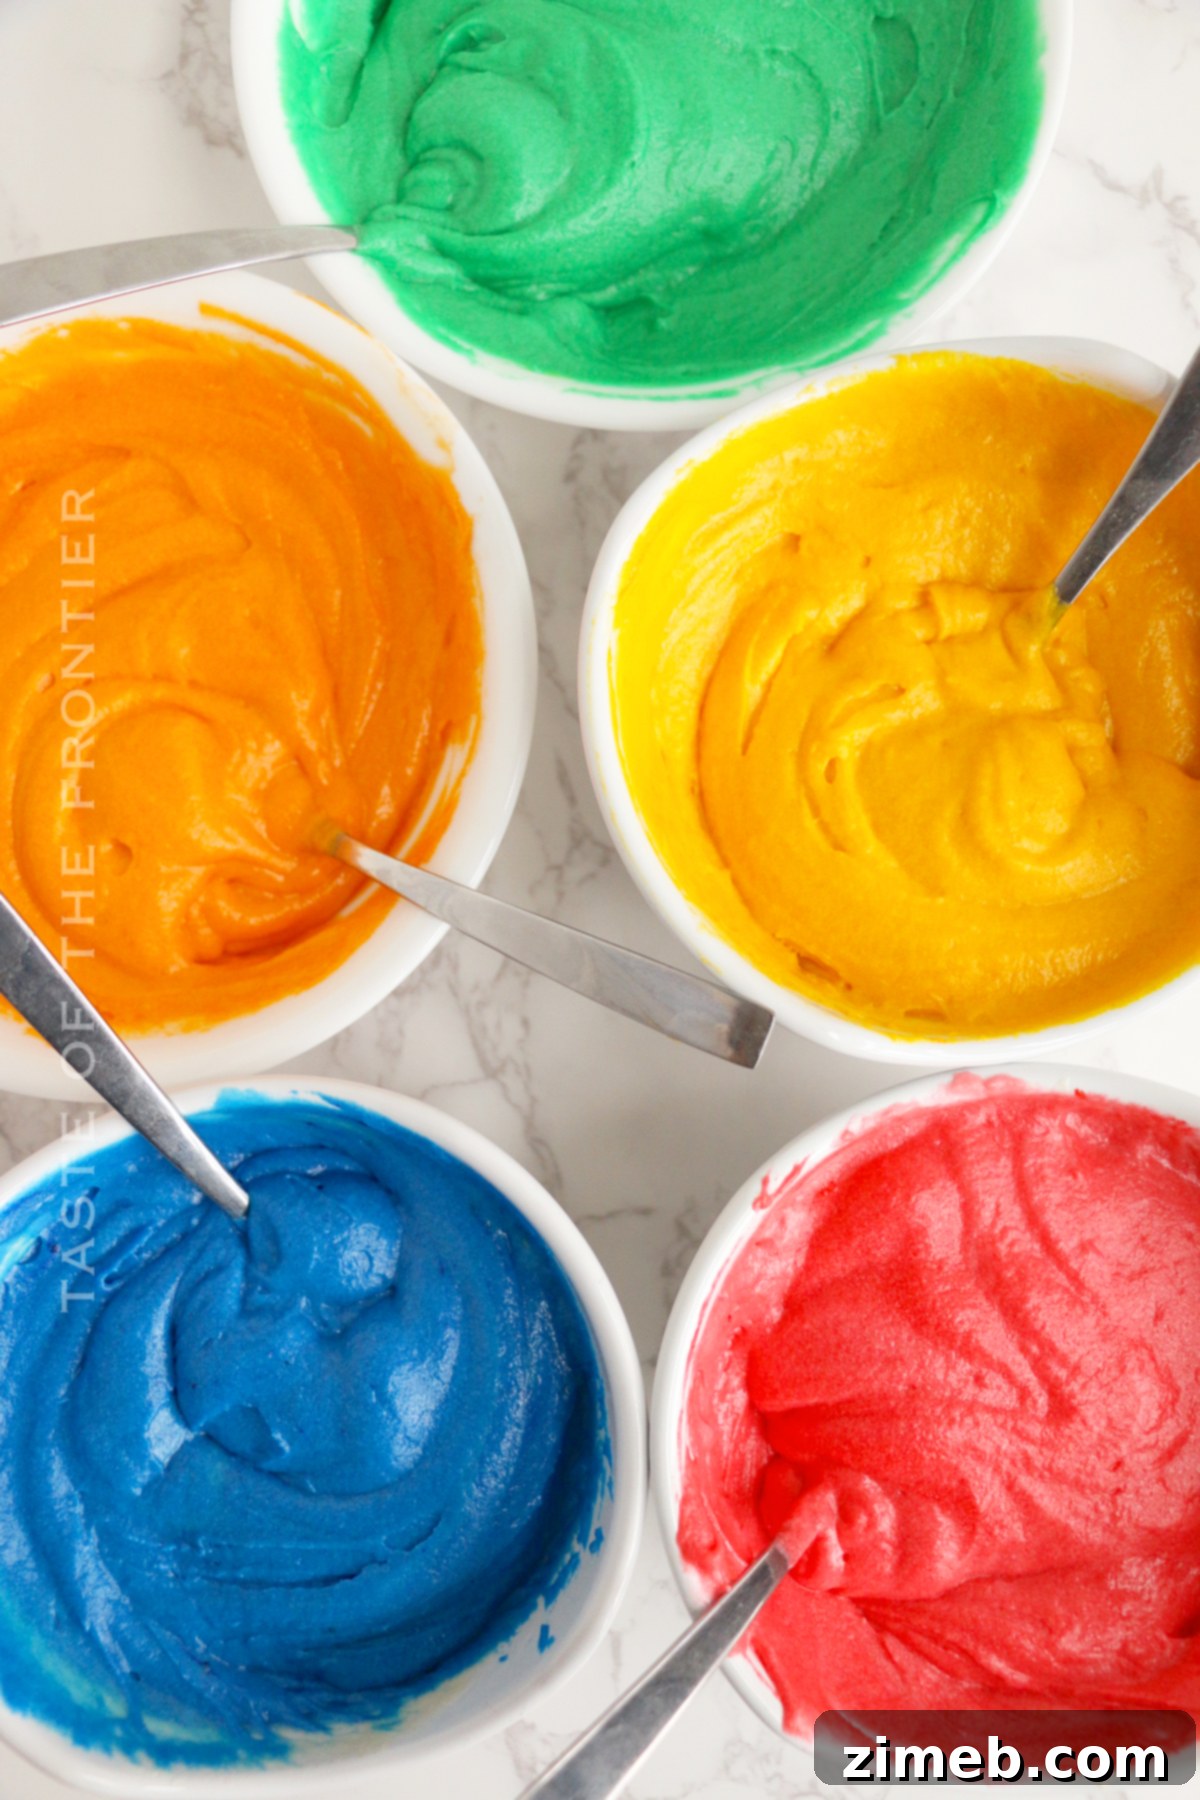
- Evenly divide the smooth cake batter into 5 separate medium-sized bowls. Precision here helps ensure uniform cake layers.
- Add one of the five desired food coloring colors (red, orange, yellow, green, blue) to each bowl. The amount of food coloring will depend on its type (gel is recommended for vibrancy) and how intense you want your colors to be. Start with a few drops or a small amount and mix thoroughly. Continue adding more until you’ve reached your desired shade for each color. Mix with a large spoon or whisk until the color is completely and evenly distributed.
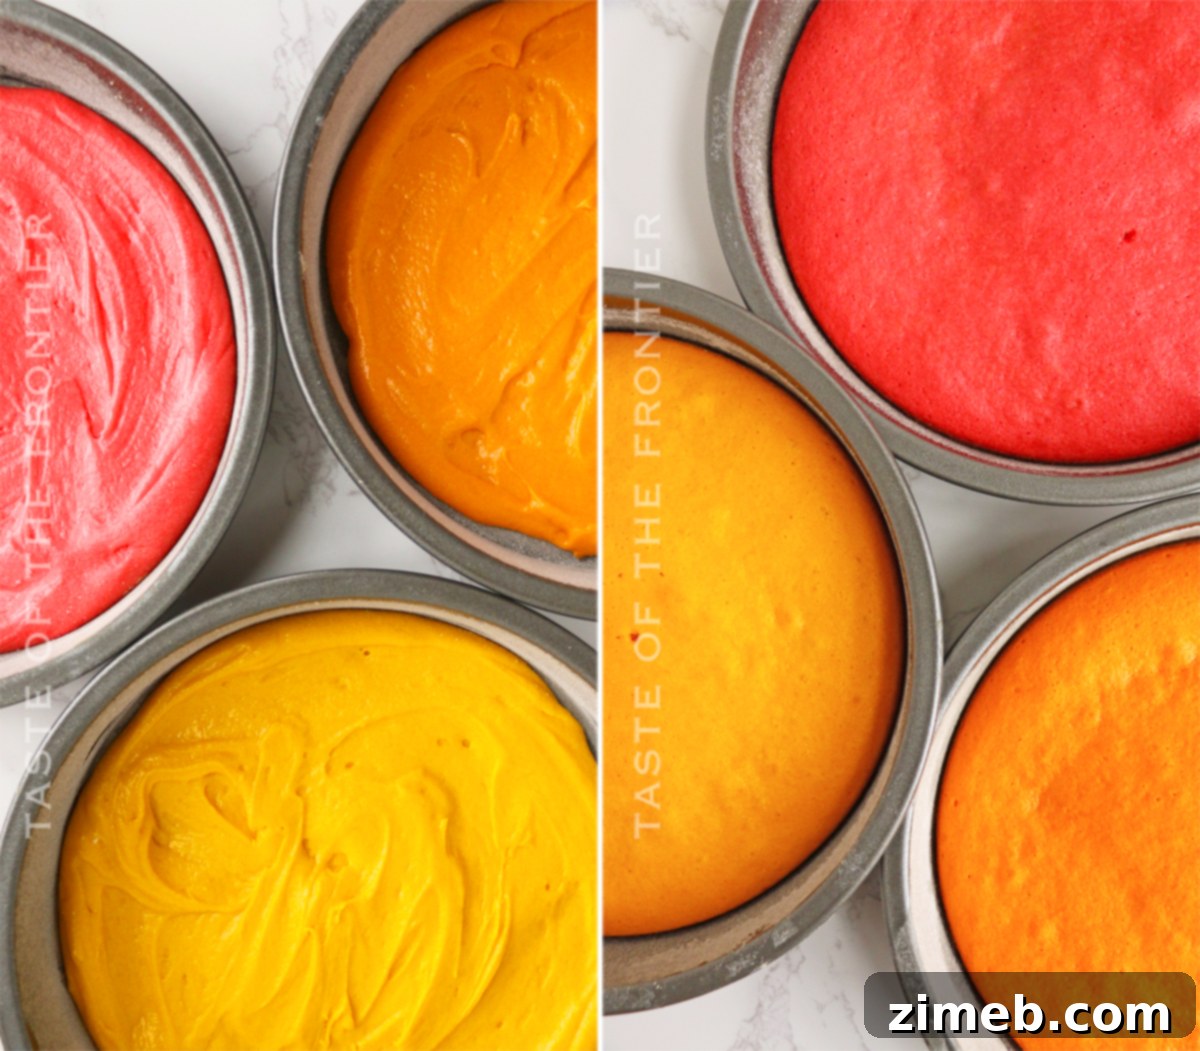
- Prepare 5 separate 8-inch round baking pans by generously coating them with cooking spray and a light dusting of flour, or by greasing and flouring them traditionally. This prevents sticking.
- Pour each colored batter into its separately prepared baking pan. Spread the batter evenly to the edges.
- Bake each colored layer for approximately 15 minutes, or until a toothpick inserted into the center comes out clean. Another indicator is when the center of the cake springs back gently when lightly pressed.
- Once baked, remove the cakes from the oven and allow them to cool in their pans for about 10-15 minutes. This allows them to firm up slightly. Then, carefully invert the pans and transfer the cake layers onto wire racks to cool completely to room temperature. You may need to run a knife around the edges of the pan to release the cakes. Do not attempt to frost warm cakes!
Creamy Vanilla Frosting
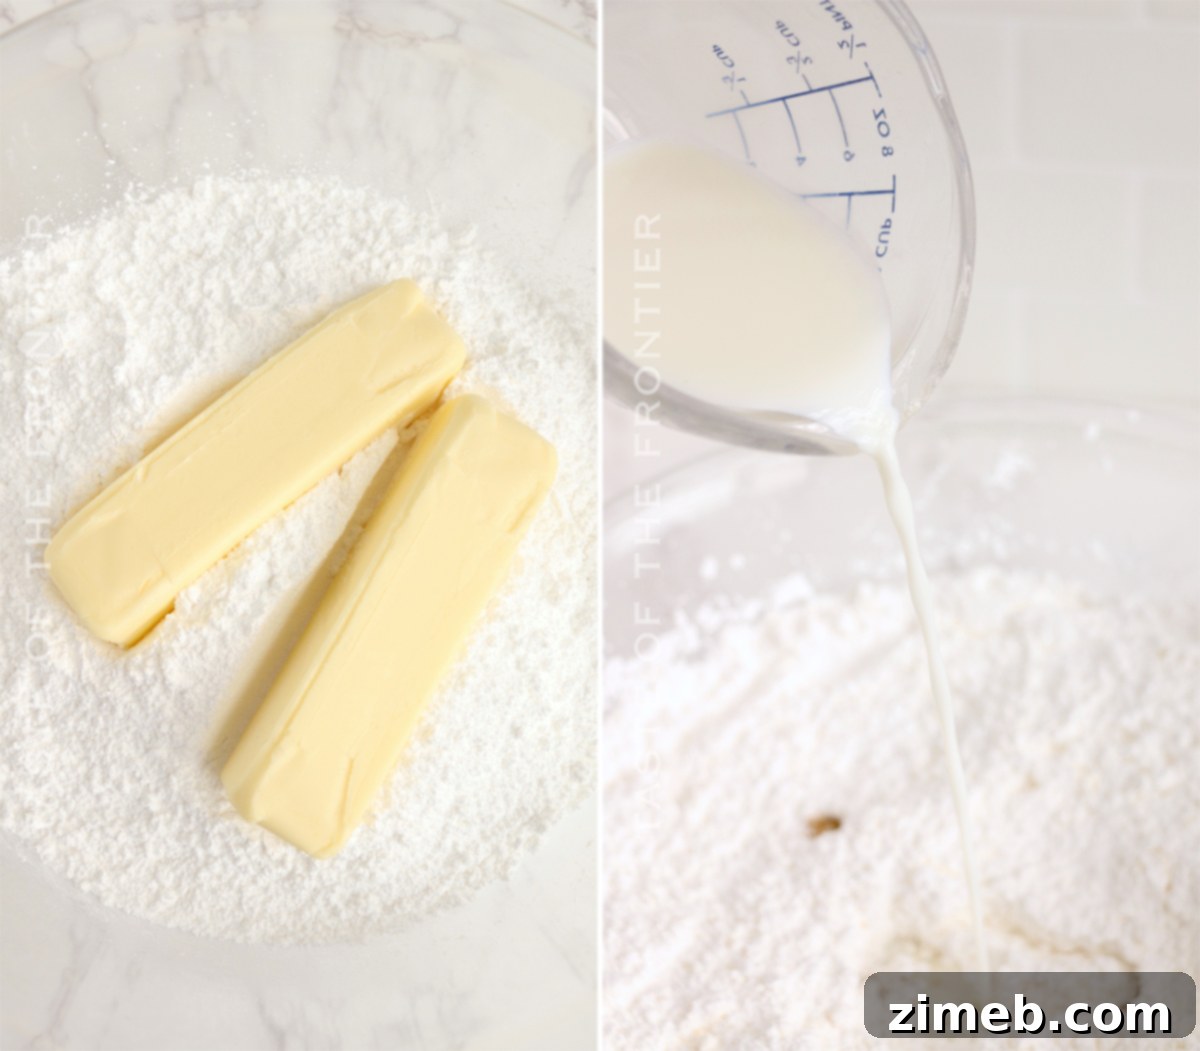
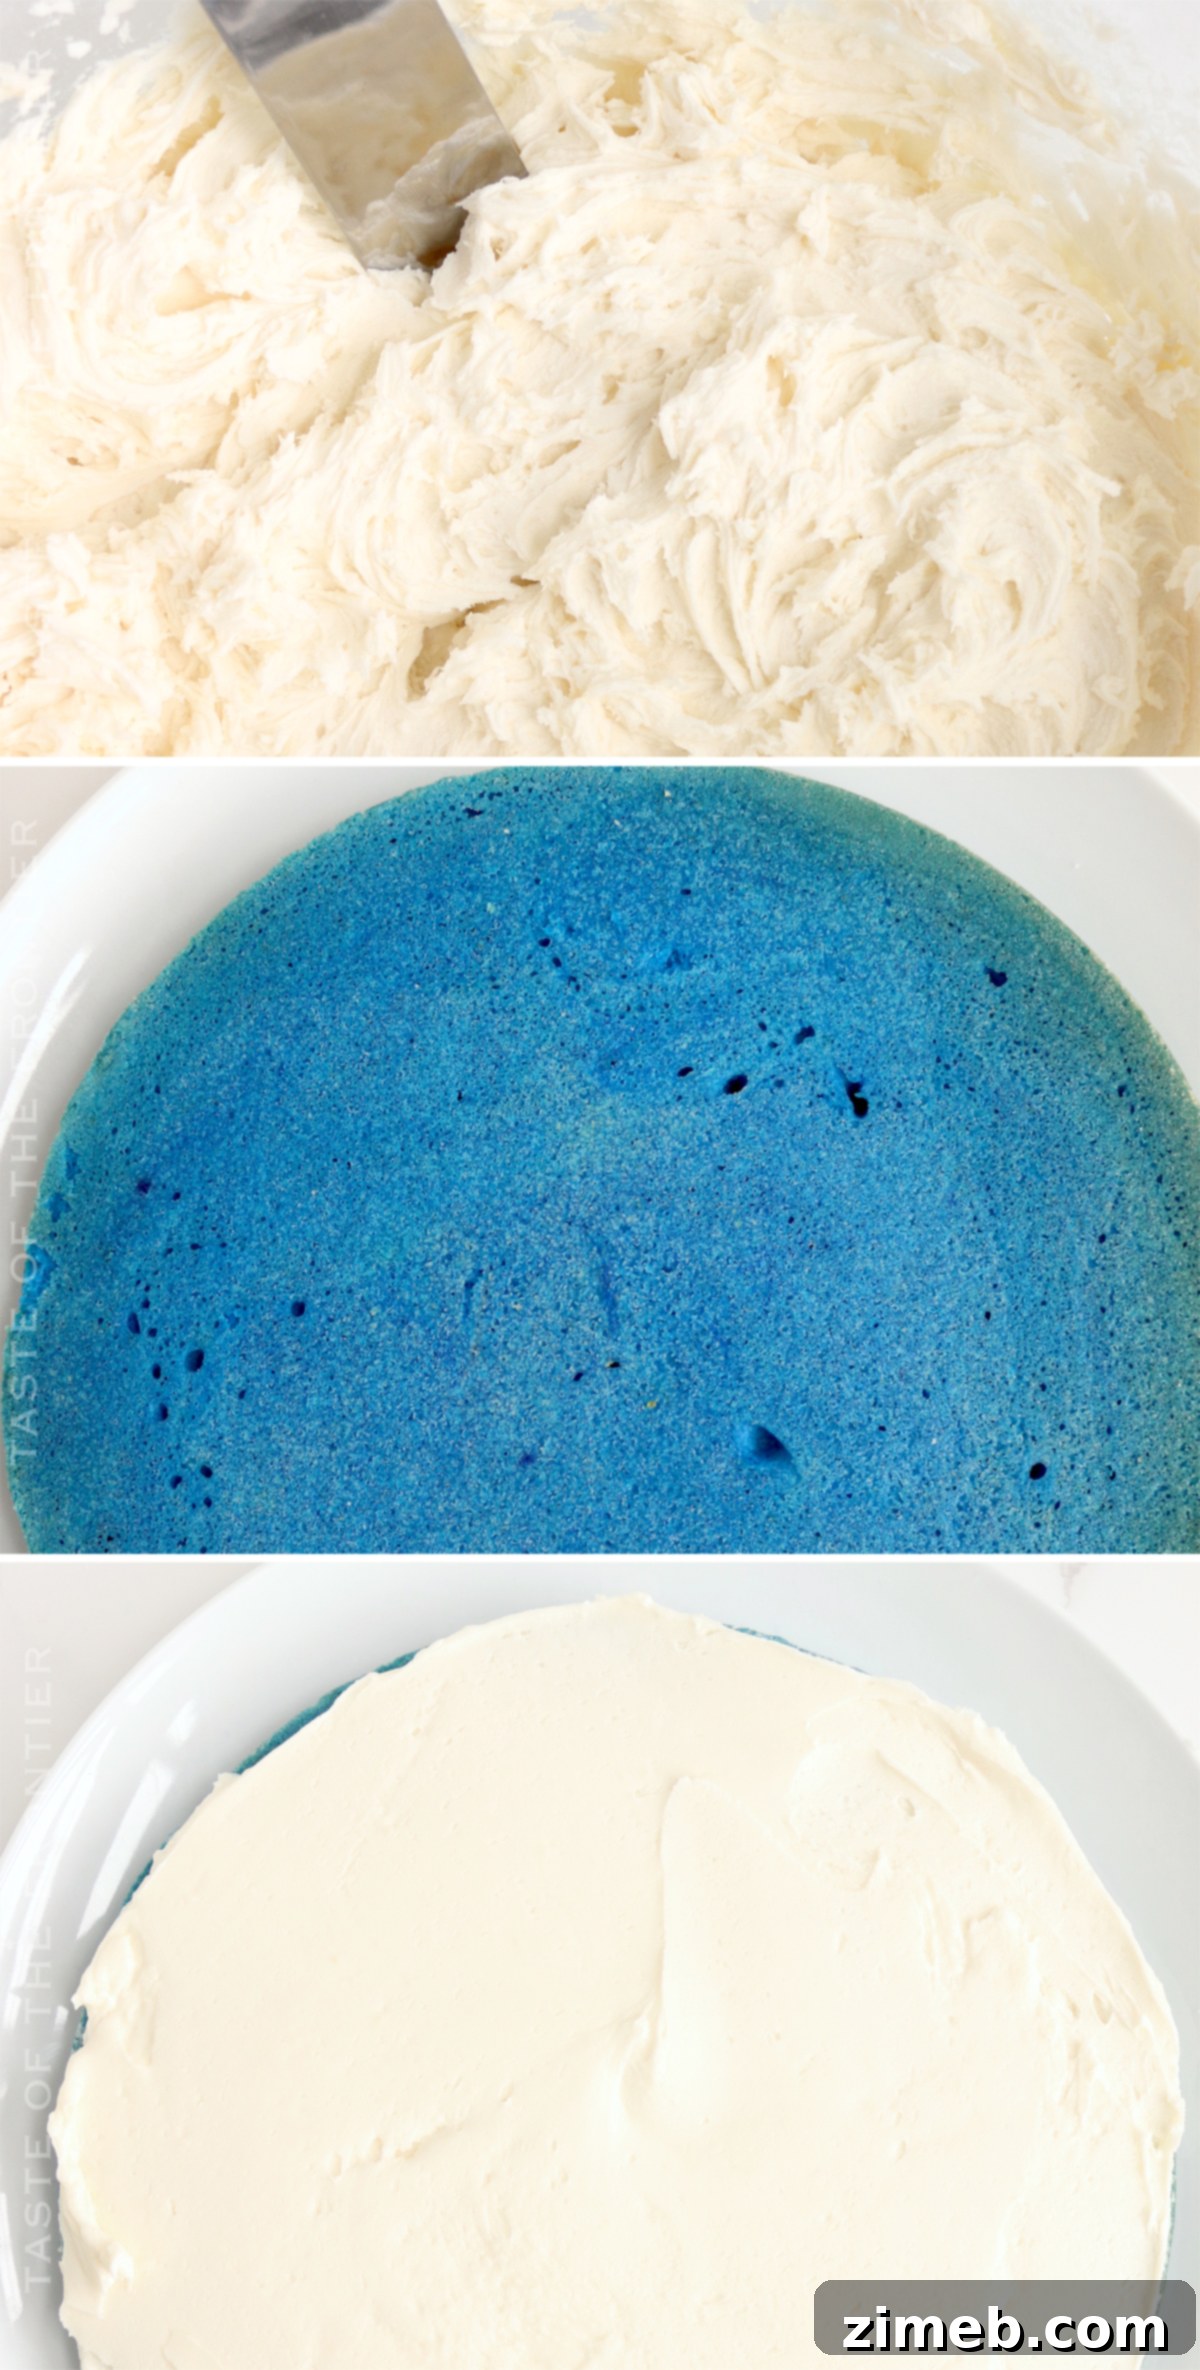
- In a medium mixing bowl, combine the confectioner’s sugar and softened butter. Beat them together until completely combined and creamy.
- Add 2 tablespoons of milk and the vanilla extract to the sugar mixture. Beat well until the frosting is smooth and fluffy. If the frosting is too thick, add a little more milk, one teaspoon at a time, until you reach a spreadable consistency. If it becomes too thin, gradually add more confectioner’s sugar until it thickens.
Assembling Your Rainbow Masterpiece
- Begin the assembly by placing the blue cake layer on your chosen serving plate or cake stand. A dab of frosting on the plate before placing the first layer can help secure the cake.
- Spread a thin, even layer of your vanilla frosting over the top of the blue cake. Remember you have five layers to frost, plus the exterior, so manage your frosting supply wisely.
- Carefully place the green cake layer on top of the frosted blue layer. Continue the pattern, adding a layer of frosting, then the yellow cake, then frosting, then the orange cake, and finally, the red cake layer at the very top. Ensure each layer is centered for a stable and beautiful cake.
- Once all layers are stacked, apply a thin crumb coat of frosting around the sides and top of the entire cake. Chill the cake in the refrigerator for about 15-20 minutes to set the crumb coat. This step is essential for a clean final frosting.
- After the crumb coat is firm, apply the remaining frosting to cover the top and sides of the cake, smoothing it out with an offset spatula or bench scraper for a polished finish.
- Generously shake your chosen sprinkles over the top of the cake, or decorate the sides as well.
- Refrigerate the assembled cake until it’s ready to be served. Allowing it to come to room temperature for about 30 minutes before cutting will yield the best flavor and texture.
- Store any leftovers in an airtight container or wrapped well with plastic wrap to maintain freshness.
What to Serve With Your Rainbow Cake
A slice of this delightful rainbow cake is a treat in itself, but pairing it with the right accompaniments can elevate the dessert experience even further. Think of options that complement its sweet vanilla flavor and rich frosting.
- Frozen Desserts: There’s nothing quite like the combination of a moist, sweet cake with a scoop of cool, creamy frozen dessert. Classic vanilla or rich chocolate ice cream are always excellent choices. For an extra pop of color and complementary flavor, consider serving rainbow sherbet, a berry sorbet, or even a sophisticated gelato.
- Hot Beverages: A perfectly brewed hot beverage can cut through the sweetness of the cake, offering a balanced taste. Coffee, whether it’s a strong espresso or a smooth latte, pairs exceptionally well. Black teas provide a robust counterpoint, while herbal teas like peppermint or chamomile offer a refreshing, calming finish.
- Fresh Fruit: The natural sweetness and slight tartness of fresh fruit provide a wonderful contrast to the cake. A simple bowl of mixed berries (strawberries, raspberries, blueberries) or sliced kiwi and mandarins would add a refreshing element and further enhance the vibrant colors of the dessert. A light fruit coulis drizzled on the plate could also be a beautiful addition.
Why You Should Make This Recipe
Beyond its absolutely gorgeous appearance, there are numerous compelling reasons why this rainbow cake recipe deserves a spot in your baking repertoire. It’s more than just a dessert; it’s a delightful project and a guaranteed crowd-pleaser.
- Pure Fun: From dividing the batter and coloring each bowl to stacking the vibrant layers and adding sprinkles, the entire process of making this cake is incredibly enjoyable. It’s a project that brings smiles even before the first bite, making it a fantastic activity for bakers of all ages, including baking with children. The anticipation of cutting into it to reveal the rainbow is part of the magic!
- Surprisingly Easy: Despite its complex and impressive finished look, this rainbow cake is remarkably simple to put together. It relies on fundamental baking techniques and readily available ingredients. The step-by-step instructions are clear and straightforward, ensuring that even novice bakers can achieve a stunning result without unnecessary stress. It’s the perfect recipe to impress without the fuss.
- Affordable Elegance: You don’t need expensive ingredients or specialty equipment to create this breathtaking cake. The components are standard pantry items, making it a budget-friendly option compared to purchasing a custom-made, multi-colored cake from a bakery. You get a show-stopping, custom-quality dessert for a fraction of the cost.
- Unforgettable Impression: This cake isn’t just eaten; it’s experienced. Its unique visual appeal guarantees a memorable impression on your guests. It’s a conversation starter, a photo opportunity, and a moment of pure joy, cementing its place as the highlight of any dessert table.
Variations and Creative Add-ins
While the classic vanilla rainbow cake is fantastic, this recipe offers a versatile canvas for your culinary creativity. Feel free to add your own unique flair to this whimsical cake and customize it to suit any preference or occasion.
- Decorator’s Sugar: For an extra touch of sparkle and glamour, sprinkle some coarse decorator’s sugar or edible glitter over the frosting. This adds texture and a dazzling finish.
- Chopped Nuts: Introduce a delightful crunch and nutty flavor by sprinkling finely crushed nuts (such as walnuts, pecans, or almonds) between the layers of frosting or over the top of the cake.
- Chocolate Chips: For the chocolate lovers, miniature chocolate chips can be pressed into the sides of the frosted cake, or sprinkled generously between layers, adding a rich chocolatey burst to the vanilla base.
- Alternative Sprinkles: Instead of traditional rainbow jimmies, explore different shapes and colors of sprinkles to match specific holidays or celebrations. Think heart-shaped sprinkles for Valentine’s Day, star sprinkles for patriotic events, or themed sprinkles for birthdays.
- Flavor Extracts: Experiment with different extracts in the cake batter or frosting. Lemon, almond, or even a hint of mint extract can transform the flavor profile. Be mindful that some extracts might slightly alter the color.
- Fruit Fillings: For a burst of freshness, spread a thin layer of fruit curd (lemon, raspberry, or passion fruit) or a fruit preserve between a couple of the cake layers, underneath the frosting.
- Different Frostings: While vanilla buttercream is a classic, consider cream cheese frosting for a tangy counterpoint, chocolate ganache for decadence, or even a meringue-based frosting for a lighter texture.
- Box Cake Mix Shortcut: For an even quicker preparation, you can absolutely substitute a good quality white or yellow box cake mix instead of making the cake batter from scratch. Simply follow the package instructions for preparing the batter, then divide and color as directed in this recipe.
If you love this easy Rainbow Cake recipe, you’re going to love these other rainbow treats too. Please click each link below to find the easy, printable recipe!
Rainbow Truffles Recipe
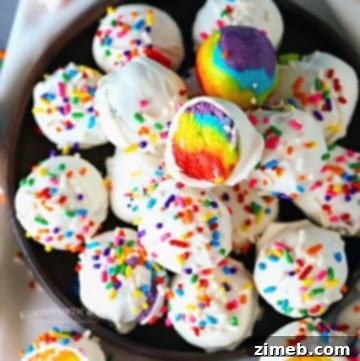
This Rainbow Truffles Recipe is the perfect no-bake treat for rainbow lovers! Made with cake mix & cream cheese, they’re easy & so tasty too! Make them for parties, St. Patrick’s Day & more.
Check out this recipe
Rainbow Sprinkle Cookies
Rainbow Sprinkle Cookies are a soft and chewy dropped sugar cookie recipe coated in rainbow nonpareils. They’re perfect for any celebration – including St. Patrick’s Day, Mother’s Day, and of course, BIRTHDAYS!
Check out this recipe
Rainbow Pinwheel Cookies
Rainbow Pinwheel Cookies are the perfect dessert for St. Patrick’s Day. Delicious green & white pinwheel cookies coated in rainbow sprinkles to bring you the luck of the Irish!
Check out this recipe
Rainbow St. Patrick’s Day Cake
Rainbow St. Patrick’s Day Cake is super easy to make & the perfect dessert for your St. Patrick’s Day celebrations! Plus it’s topped with MARSHMALLOWS!
Check out this recipe
Rainbow Mint Oreo Truffles : St. Patrick’s Day
Easy Oreo truffles decorated for St. Patrick’s Day.
Check out this recipe
Other Creative Cakes to Explore
If you enjoy the fun and creativity of baking, here are some other unique cake recipes to inspire your next kitchen adventure:
- Snickerdoodle Cake
- Confetti Cake
- Chocolate Ganache Drip Cake
- Homemade Funfetti Cake
- Comic Book Cake – Viral Cartoon Cake
If you love this recipe for this Easy Rainbow Cake as much as I do, please write a five-star review, and be sure to help me share on Facebook and Pinterest!
CONNECT WITH YUMMI HAUS!
Be sure to follow me on my social media, so you never miss a post!
Substack, FB, Pinterest, IG, Email Subscription
Rate this Recipe
Rainbow Cake
Course: Dessert
Servings: 12
Try this easy Naked Rainbow Cake recipe that’s so pretty that it’s perfect for any special occasion and will impress any guest. Make it for St. Patrick’s Day, birthdays and more!
Prep Time: 20 mins
Cook Time: 15 mins
Assembly Time: 30 mins
Total Time: 1 hr 5 mins
Ingredients
Cake
- 2 cups granulated sugar
- 1 cup butter softened
- 6 large egg whites
- 2 teaspoons vanilla extract
- 3 cups all-purpose flour
- 1 cup milk
- 4 teaspoons baking powder
- 1 teaspoon salt
Food coloring – rainbow colors – red, orange, yellow, green, and blue.
Frosting
- 4 cups confectioner’s sugar
- ½ cup butter softened
- 3 tbsp milk
- 1 tsp vanilla
Sprinkles of your choice
Instructions
Cake
- Preheat the oven to 350ºF.
- In a large mixing bowl, cream the sugar and butter together.
- Add the egg whites and the vanilla. Beat again until smooth.
- Add the flour, milk, baking powder, and salt. Beat again until the batter is smooth.
- Divide the batter into 5 separate bowls.
- Add one of the five food coloring colors to each bowl. The amount you add will depend on the type of food coloring you are using and how vibrant you want the colors to be. Stir well until colors are even.
- Prepare 5 separate 8-inch round baking pans by coating them with cooking spray and a thin layer of flour. Or grease and flour the pans.
- Bake each colored layer for 15 minutes or until a toothpick comes out clean. Or when the center of the cake springs back when gently pressed.
- When the cakes are done baking, allow them to cool for 15 minutes before flipping them out of the pans. You may need to use a knife to release the edges. Allow them to cool completely on a wire rack before frosting them.
Frosting
- In a medium mixing bowl, cream together the sugar and butter.
- Add 2 tablespoons of the milk and the vanilla. Beat well.(If it is too thick, add more milk. If it is too thin, add more confectioner’s sugar.)
Assembly
- Place the blue layer of cake on the serving plate.
- Cover it with a layer of frosting. You will need to spread five layers of frosting, so be sure to not go too thick with the frosting.
- Continue with the green, yellow, orange, and red layers. Adding each one and then a layer of frosting in between.
- Add sprinkles of your choice to the top.
- Refrigerate until ready to serve. Allow to come to room temperature before serving.
- Store in an airtight container or wrapped well with plastic wrap.
Nutrition
Serving: 1g | Calories: 632kcal | Carbohydrates: 99g | Protein: 6g | Fat: 24g | Saturated Fat: 5g | Cholesterol: 64mg | Sodium: 496mg | Potassium: 79mg | Fiber: 1g | Sugar: 73g | Calcium: 115mg | Iron: 2mg | Net Carbohydrates: 58g
Nutritional information for the recipe is provided as a courtesy and is approximate. Please double-check with your own dietary calculator for the best accuracy. We at Yummi Haus cannot guarantee the accuracy of the nutritional information given for any recipe on this site.
Love this recipe? Follow @KleinworthCo for even more tasty recipes!