
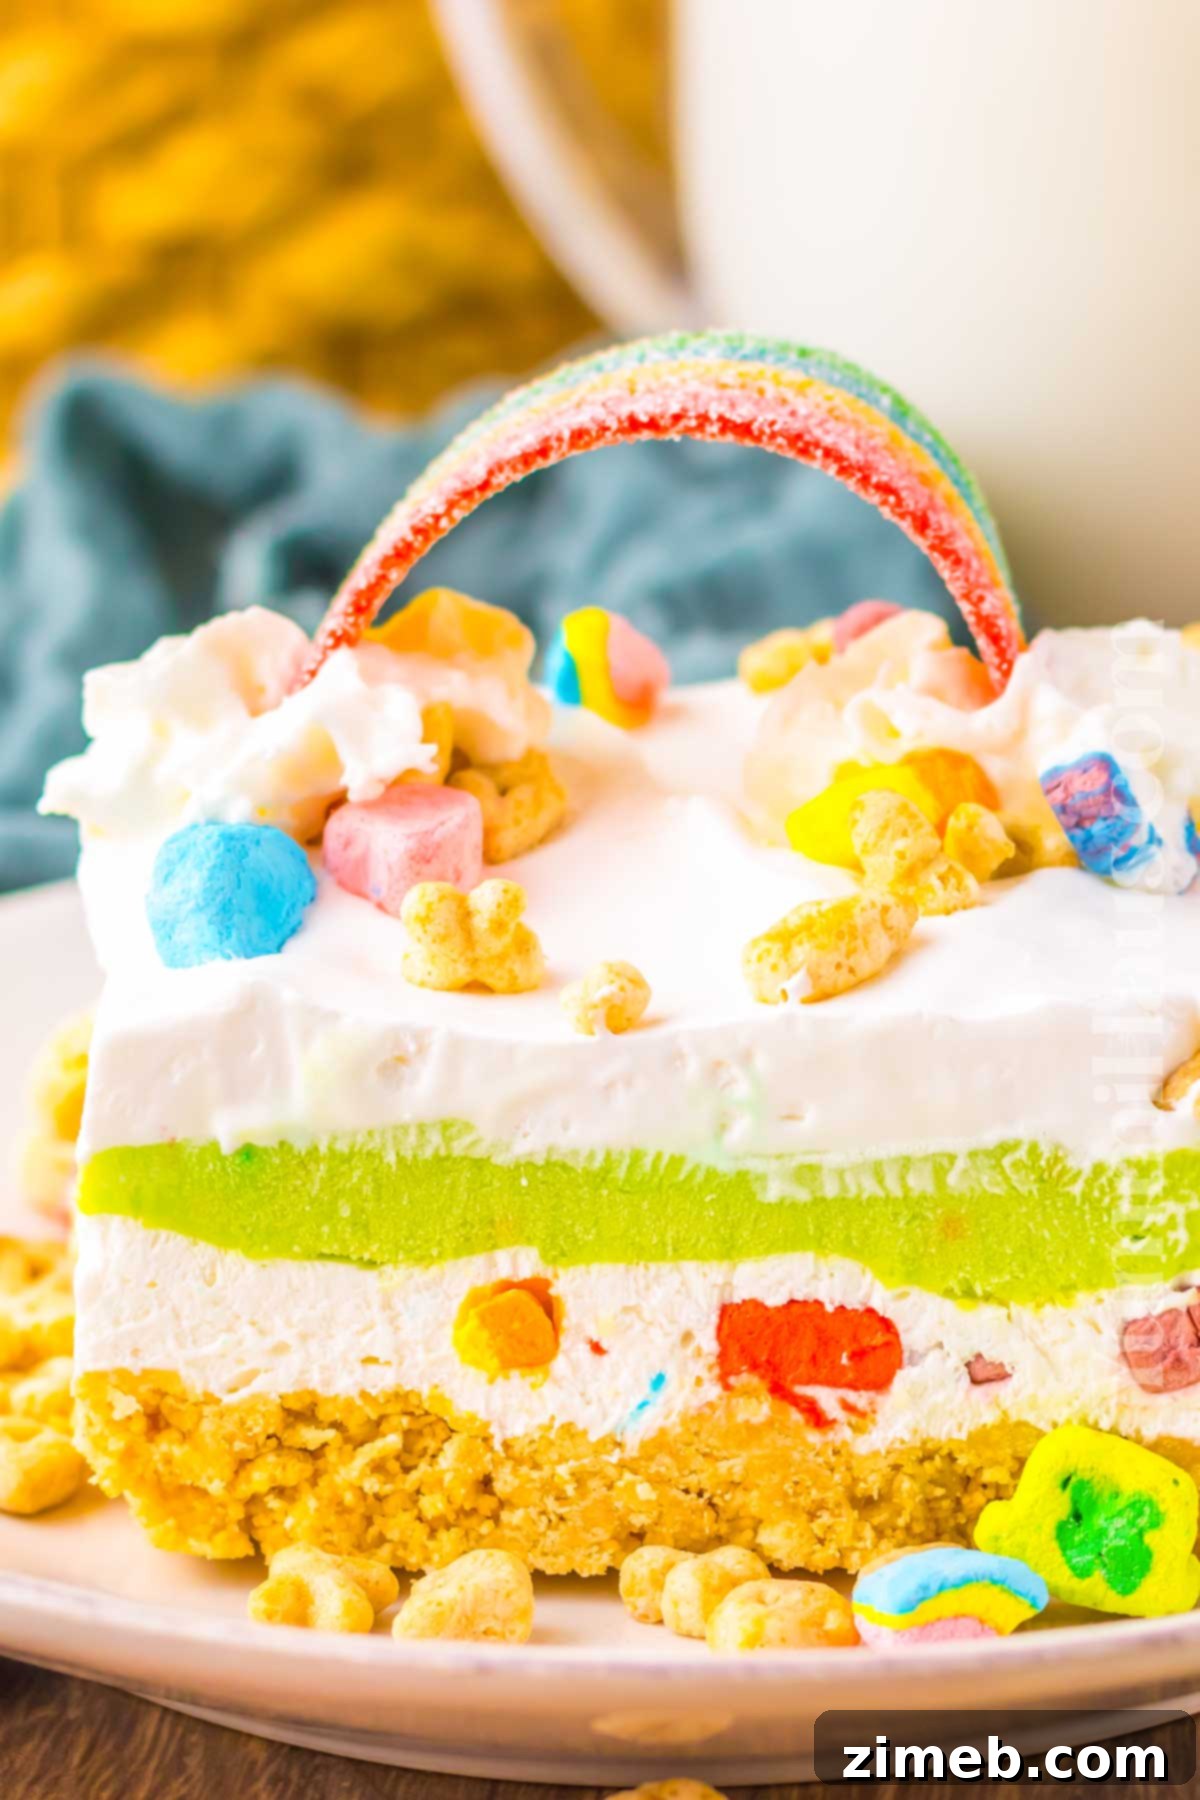
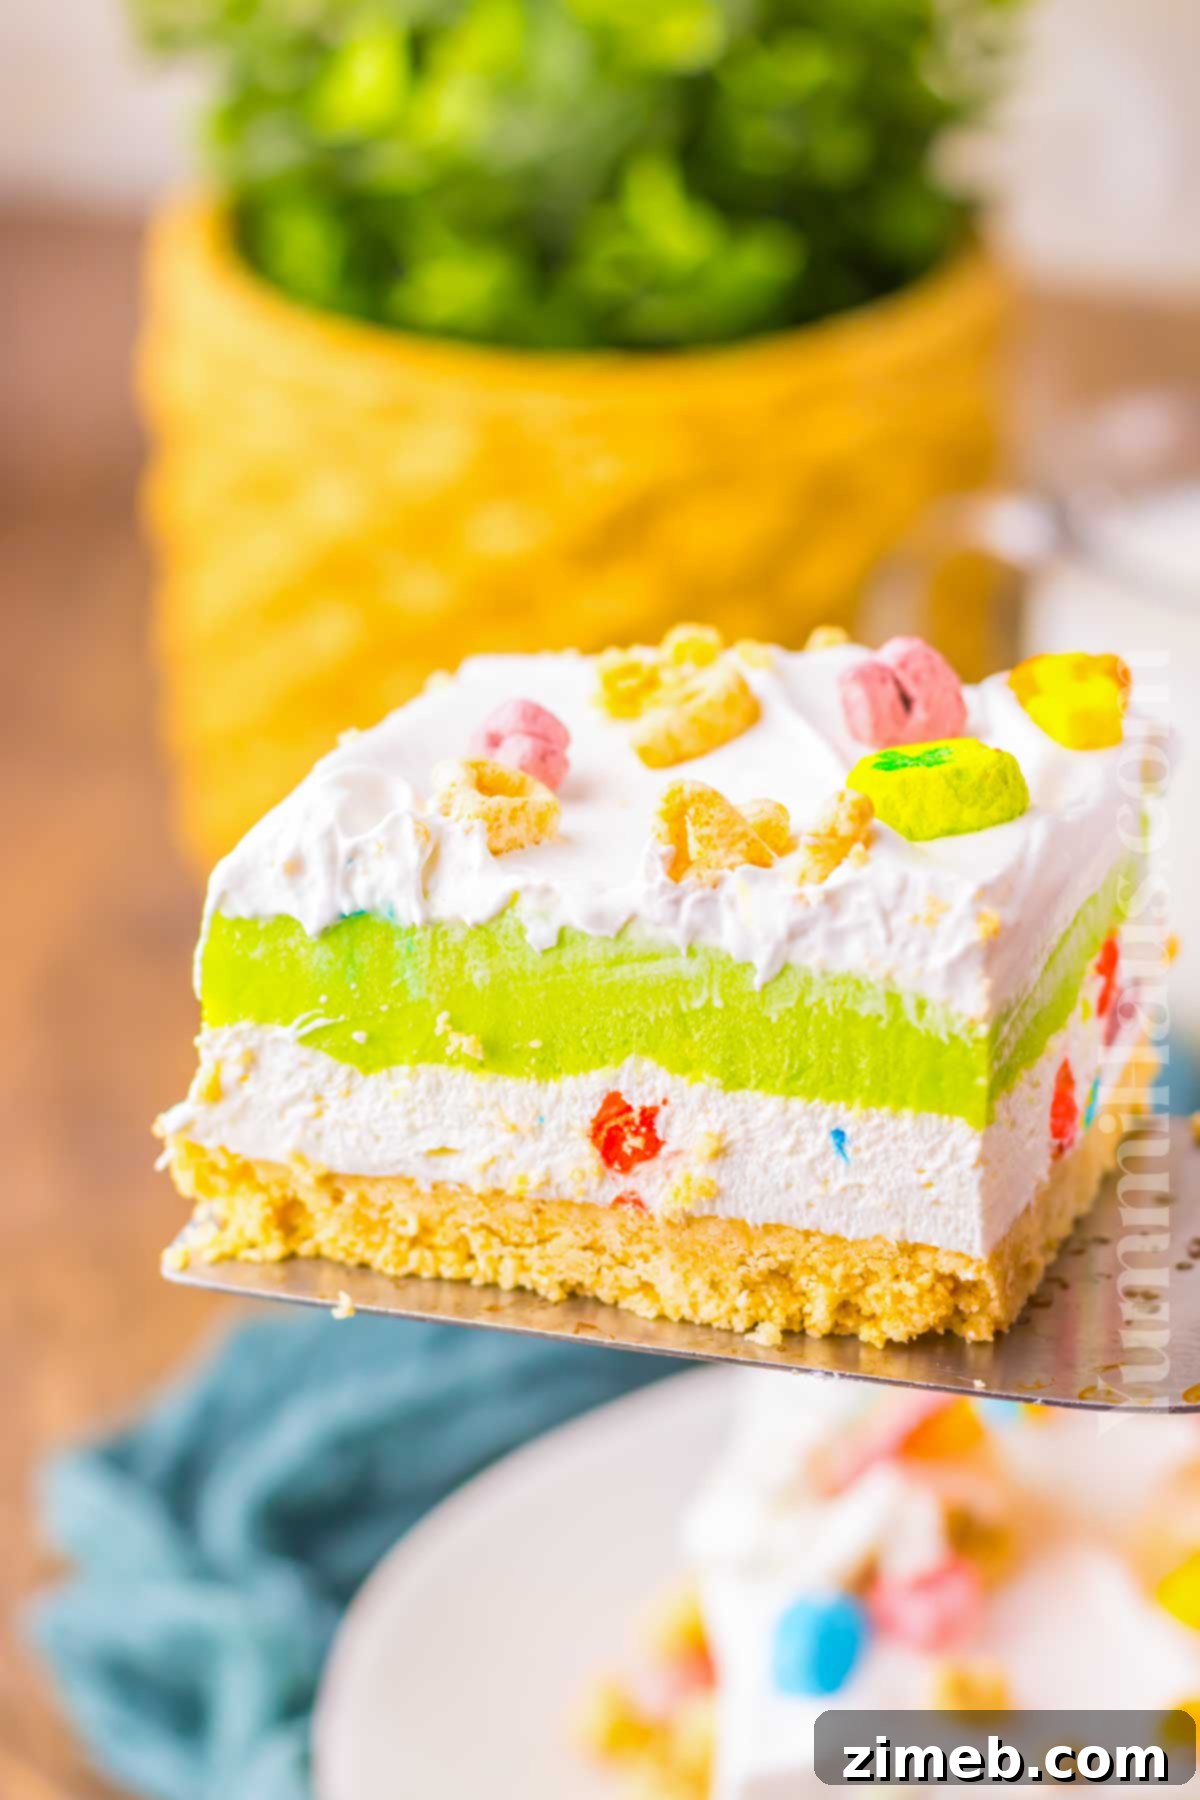
Get ready for a dessert that’s as enchanting as a pot of gold at the end of a rainbow! This incredible **Lucky Charms Lush** is the ultimate no-bake treat, perfect for celebrating St. Patrick’s Day or simply adding a touch of magic to any occasion. Combining the playful crunch of Lucky Charms cereal with a symphony of creamy, sweet layers, it’s a dessert that truly lives up to its “magically delicious” reputation. Forget spending hours in the kitchen – this sweet lasagna-style dessert comes together with minimal effort, promising maximum delight.
Whether you’re Irish by blood or just Irish at heart for a day, this vibrant green and marshmallow-packed creation will undoubtedly put a festive smile on everyone’s face. It’s an effortless crowd-pleaser that blends nostalgic cereal fun with sophisticated dessert layers, making it irresistible to both kids and adults alike. Prepare to be charmed!
Gina’s Recipe Rundown:
Texture: Imagine biting into a dreamy, cloud-like dessert with delightful contrasts. You’ll experience the satisfying crunch of the cereal crust, followed by the pillowy softness of whipped cream and gooey marshmallows. Each forkful is a perfect blend of fluffy and firm, with hints of chewiness.
Taste: A perfectly balanced sweet symphony awaits! This lush dessert marries the creamy richness of softened cream cheese and buttery Oreos with the delicate sweetness of vanilla pudding and fluffy marshmallows. It’s comforting, familiar, and undeniably indulgent, with a subtle vanilla undertone that ties all the flavors together beautifully.
Ease: Incredibly simple to prepare, making it an ideal project for budding young chefs or a stress-free dessert for busy hosts. With no baking required, you’ll spend less time in the kitchen and more time enjoying the festive spirit. Simply stir, layer, and allow it to chill to perfection.
Why I love it: I absolutely adore this unique Lucky Charms dessert because it’s a feast for the eyes and the palate. Its vibrant colors instantly bring a celebratory mood, it’s packed with flavor, and the straightforward recipe makes it accessible for anyone. It’s one of those special treats that makes people ask for the recipe!
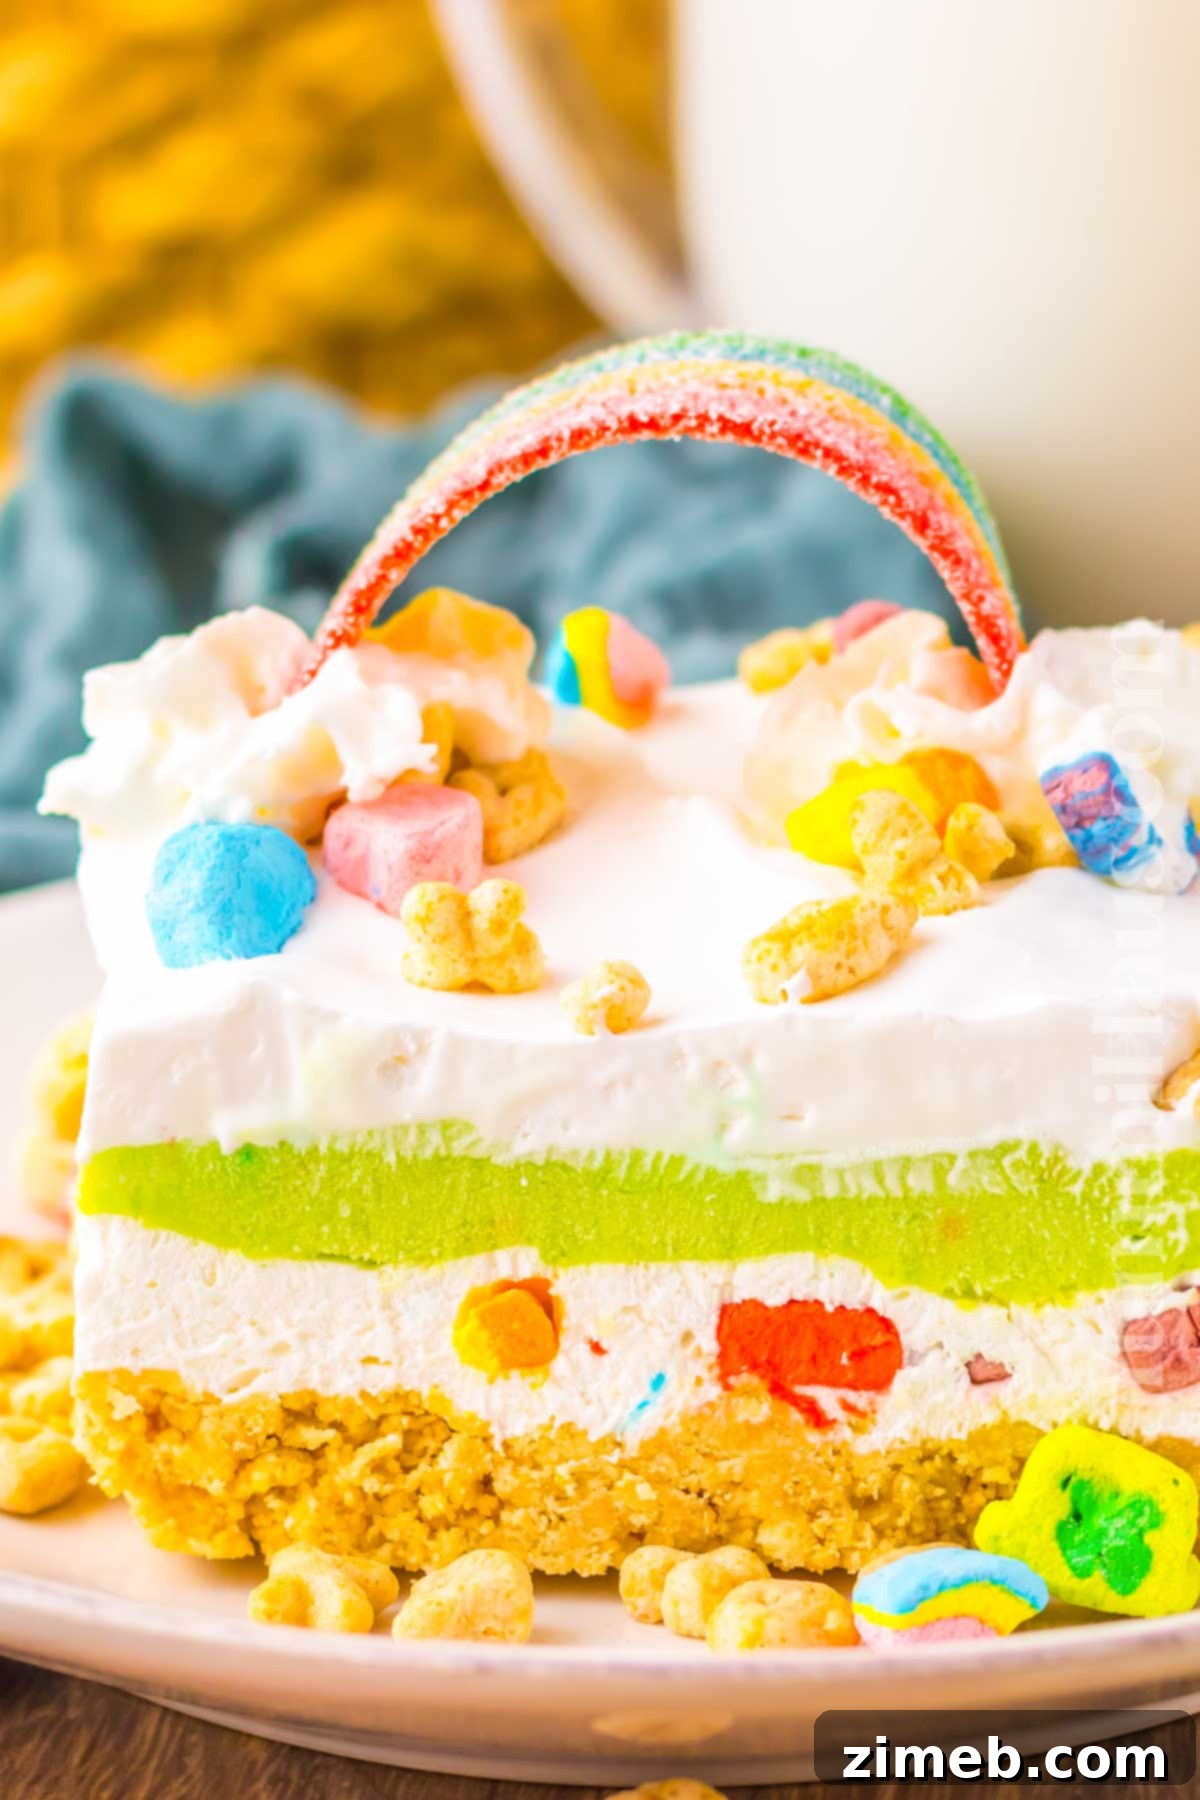
My secret to crafting the absolute best Lucky Charms dessert lies in maximizing its creaminess and visual appeal. I generously incorporate marshmallows, rich cream cheese, and an abundance of fluffy whipped cream to achieve that melt-in-your-mouth texture. Beyond taste, I never skimp on vibrant decorations – they truly make this dessert a showstopper and bring the St. Patrick’s Day magic to life!
For more festive St. Patrick’s Day dessert ideas, explore my blog. You’ll find delightful recipes like these Lucky Charms Treats, a whimsical rainbow cake, easy-to-make cake mix cookie bars, refreshing mint chocolate chip cookies, and fun shamrock M&M’s popcorn. There’s a treat for every leprechaun!
- Gina’s Recipe Rundown:
- Why You’ll Love This Recipe
- Essential Ingredients for Success
- Key Kitchen Equipment
- How To Make Lucky Charms Lush Dessert
- Storage Tips
- Substitutions & Variations
- Expert Tips For A Perfect Lush Dessert
- Serving Suggestions
- Frequently Asked Questions (FAQ)
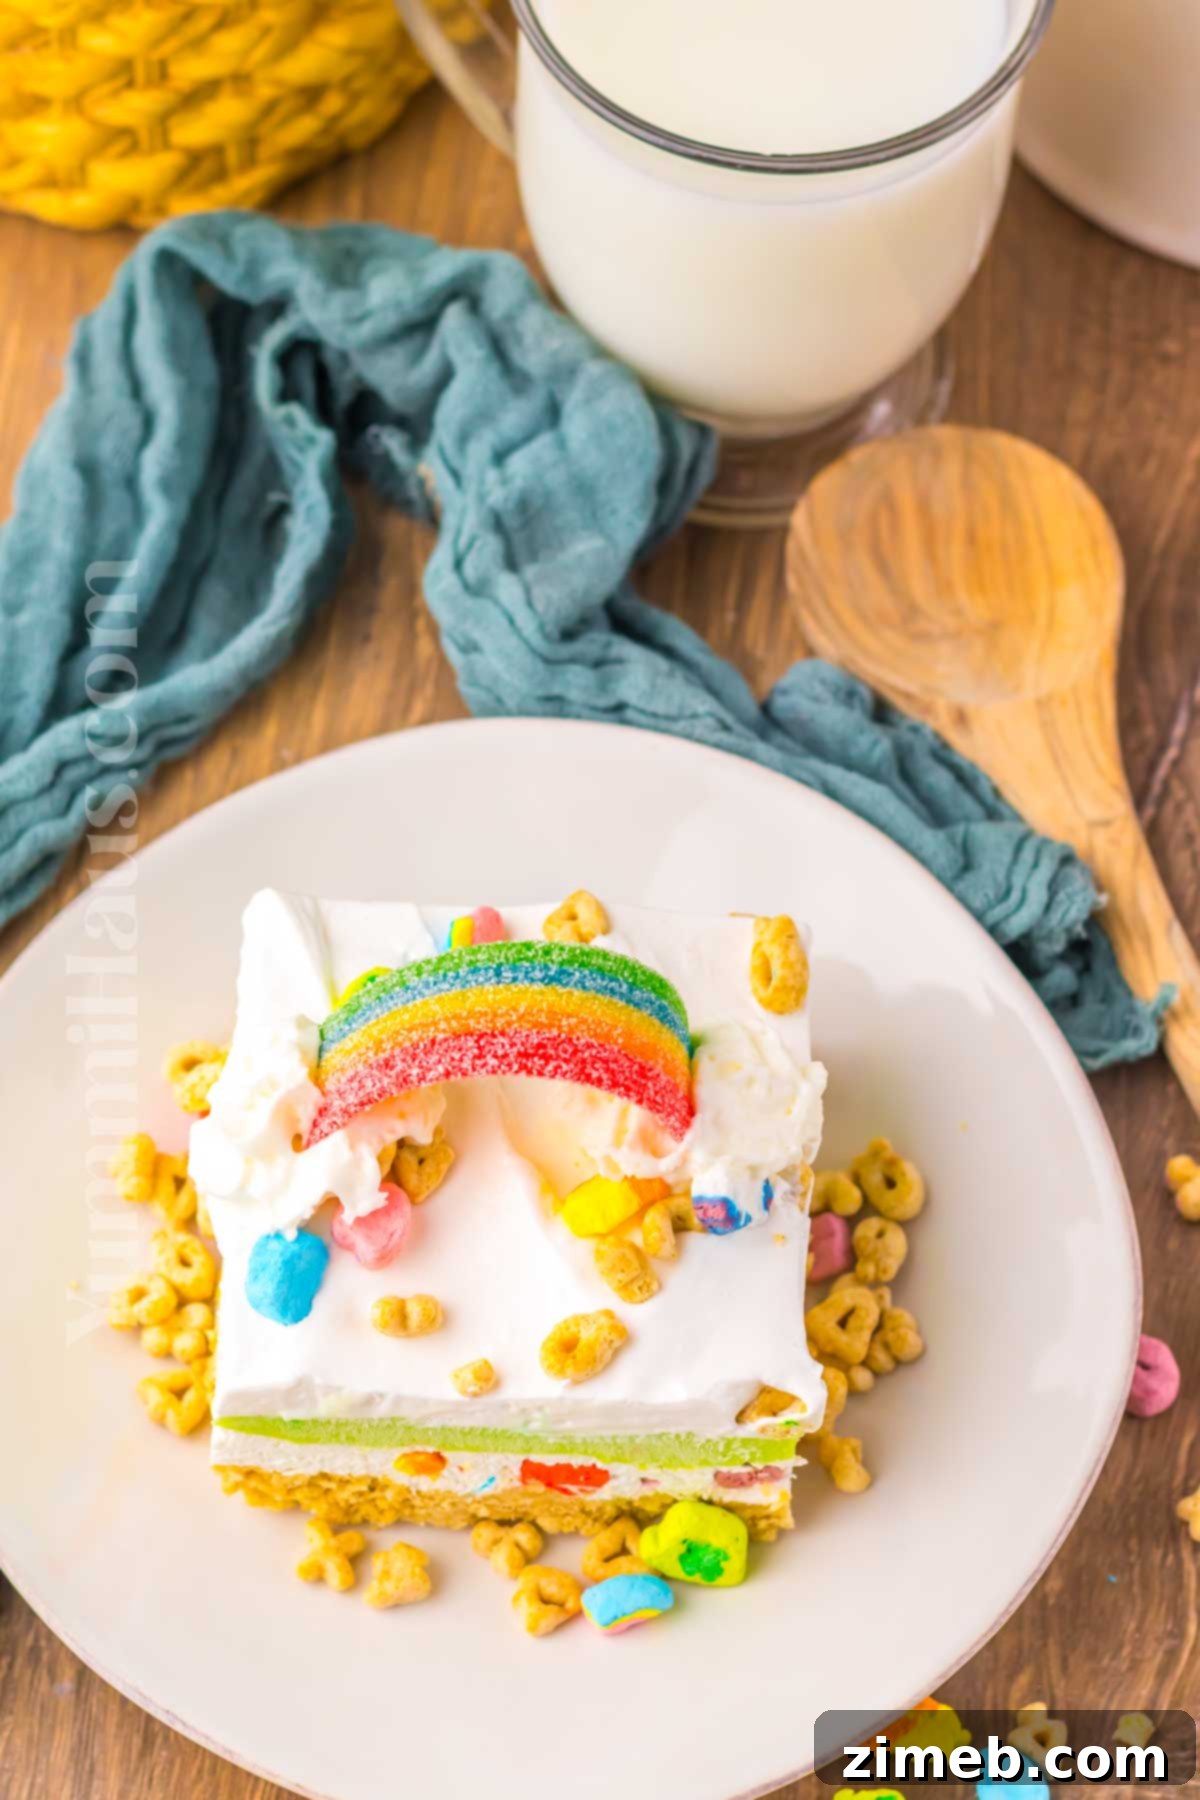
Why You’ll Love This Recipe
This Lucky Charms Lush is more than just a dessert; it’s a celebration in every bite. Here’s why it will quickly become your new favorite:
- Effortless Elegance: Achieve stunning results with minimal effort and prep time. This dessert looks incredibly impressive, yet it’s surprisingly simple to assemble, making you look like a seasoned pro without the stress.
- A Festive Favorite: This no-bake St. Patrick’s Day dessert is a fantastic potluck contribution or party centerpiece. Its vibrant green hue and charming Lucky Charms marshmallows instantly evoke the spirit of the holiday, promising good luck and deliciousness.
- Universal Appeal: Kids are absolutely ecstatic about this dessert, captivated by the colorful marshmallows and sweet flavors. Adults will feel a comforting wave of nostalgia, reliving childhood memories with every spoonful of this “old-school delight.” It’s a guaranteed crowd-pleaser for all ages!
- Perfect for Gifting: I love preparing this lush dessert and sharing it with neighbors and friends, often paired with a thoughtful greeting card. It makes for a fun, heartfelt holiday gift that brightens anyone’s day.
- No Oven Required: As a no-bake recipe, it’s perfect for warm weather, busy holidays when oven space is limited, or simply when you want a delicious treat without turning on the heat.
- Versatile & Customizable: Easily adapt this recipe to your taste preferences or dietary needs with various substitutions and garnishes, making it truly your own.
Essential Ingredients for Success
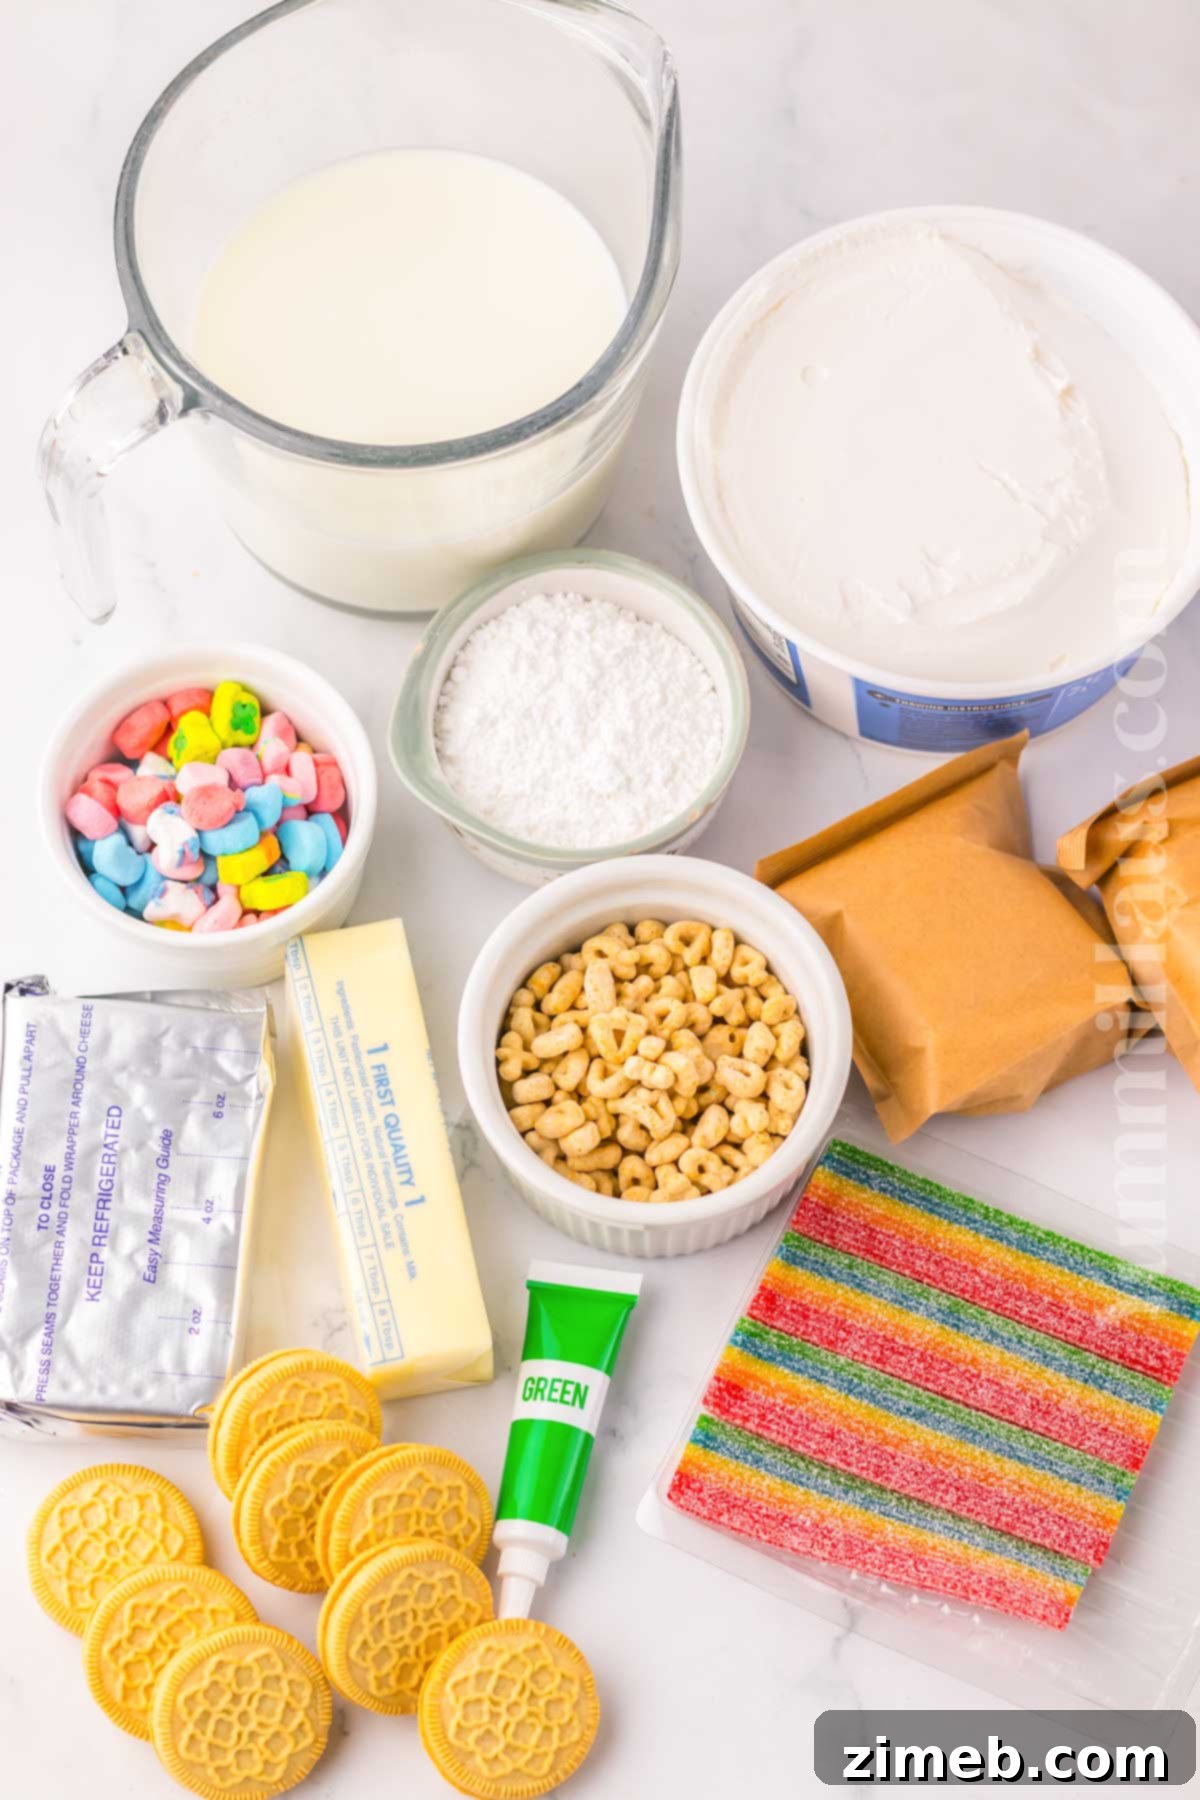
Crafting the perfect Lucky Charms Lush starts with the right ingredients. Below, you’ll find a detailed breakdown of what you need and why each component is crucial. You can find the exact quantities in the printable recipe card at the end of this post.
- Vanilla Oreo Cookies: These form the crunchy, buttery base of our lush. Vanilla Oreos offer a milder flavor that complements the Lucky Charms beautifully, but feel free to use the gluten-free variety if needed. The classic chocolate Oreos would also work for a different flavor profile.
- Lucky Charms Cereal (Just the Toasted Oats): We’ll use the crunchy oat-based cereal pieces for the crust, adding a unique texture and flavor that elevates this dessert beyond a simple cookie crust.
- Lucky Charms Marshmallows (Extra Gooey Goodness): These iconic, colorful marshmallows are not just for decoration; mixing them into the pudding layer enhances the gooey texture and reinforces the festive theme. While mini marshmallows are ideal for even distribution, regular-sized ones will also work. This is a fantastic task for kids – they’ll love picking them out (just make sure to have extra, as some are bound to disappear!).
- Melted Unsalted Butter: Essential for binding the cookie and cereal crumbs into a sturdy crust. Always use unsalted butter to control the overall saltiness of your dessert. Ensure it’s completely melted for proper incorporation; a microwave or stovetop will do the trick.
- Softened Cream Cheese: The backbone of our creamy, tangy layer. It’s crucial that your cream cheese is softened to room temperature (about 30 minutes to an hour) to ensure a smooth, lump-free mixture. Opt for brick-style cream cheese, like Philadelphia, rather than the spreadable kind from a tub, which has a different consistency.
- Confectioner’s Sugar (Powdered Sugar): This fine sugar dissolves easily into the cream cheese, creating a silky-smooth and sweet layer without any grittiness.
- Whipped Topping (Two Tubs!): I highly recommend using two full tubs of whipped topping (like Cool Whip) to achieve the most luscious, airy, and creamy texture for both the cream cheese layer and the final topping. It contributes significantly to the dessert’s delightful lightness.
- Vanilla Instant Pudding Mix (Two Boxes): Vanilla pudding is a classic component in lush desserts, providing a rich, smooth texture and an essential layer of goodness. Using two 3.4-ounce boxes ensures ample pudding for a substantial layer. You won’t need to add any extra vanilla extract here, as the pudding mix provides sufficient flavor.
- Cold Milk: Absolutely vital for setting the instant pudding correctly. Make sure your milk is cold, not room temperature, for the best results.
- Green Food Coloring: To truly capture the spirit of St. Patrick’s Day, a few drops of green food coloring transform the cream cheese layer into a vibrant, signature green. You control the intensity of the shade, but remember that colors can deepen as they sit.
Garnish: The Finishing Touch
Elevate your Lucky Charms Lush with these delightful garnishes, adding both visual appeal and extra flavor:
- Additional Lucky Charms Cereal Pieces: Sprinkle some extra toasted oats and marshmallows on top for a final flourish and added crunch.
- Fresh Whipped Cream: Light and airy, a dollop of fresh whipped cream provides a beautiful contrast and a delicate finish.
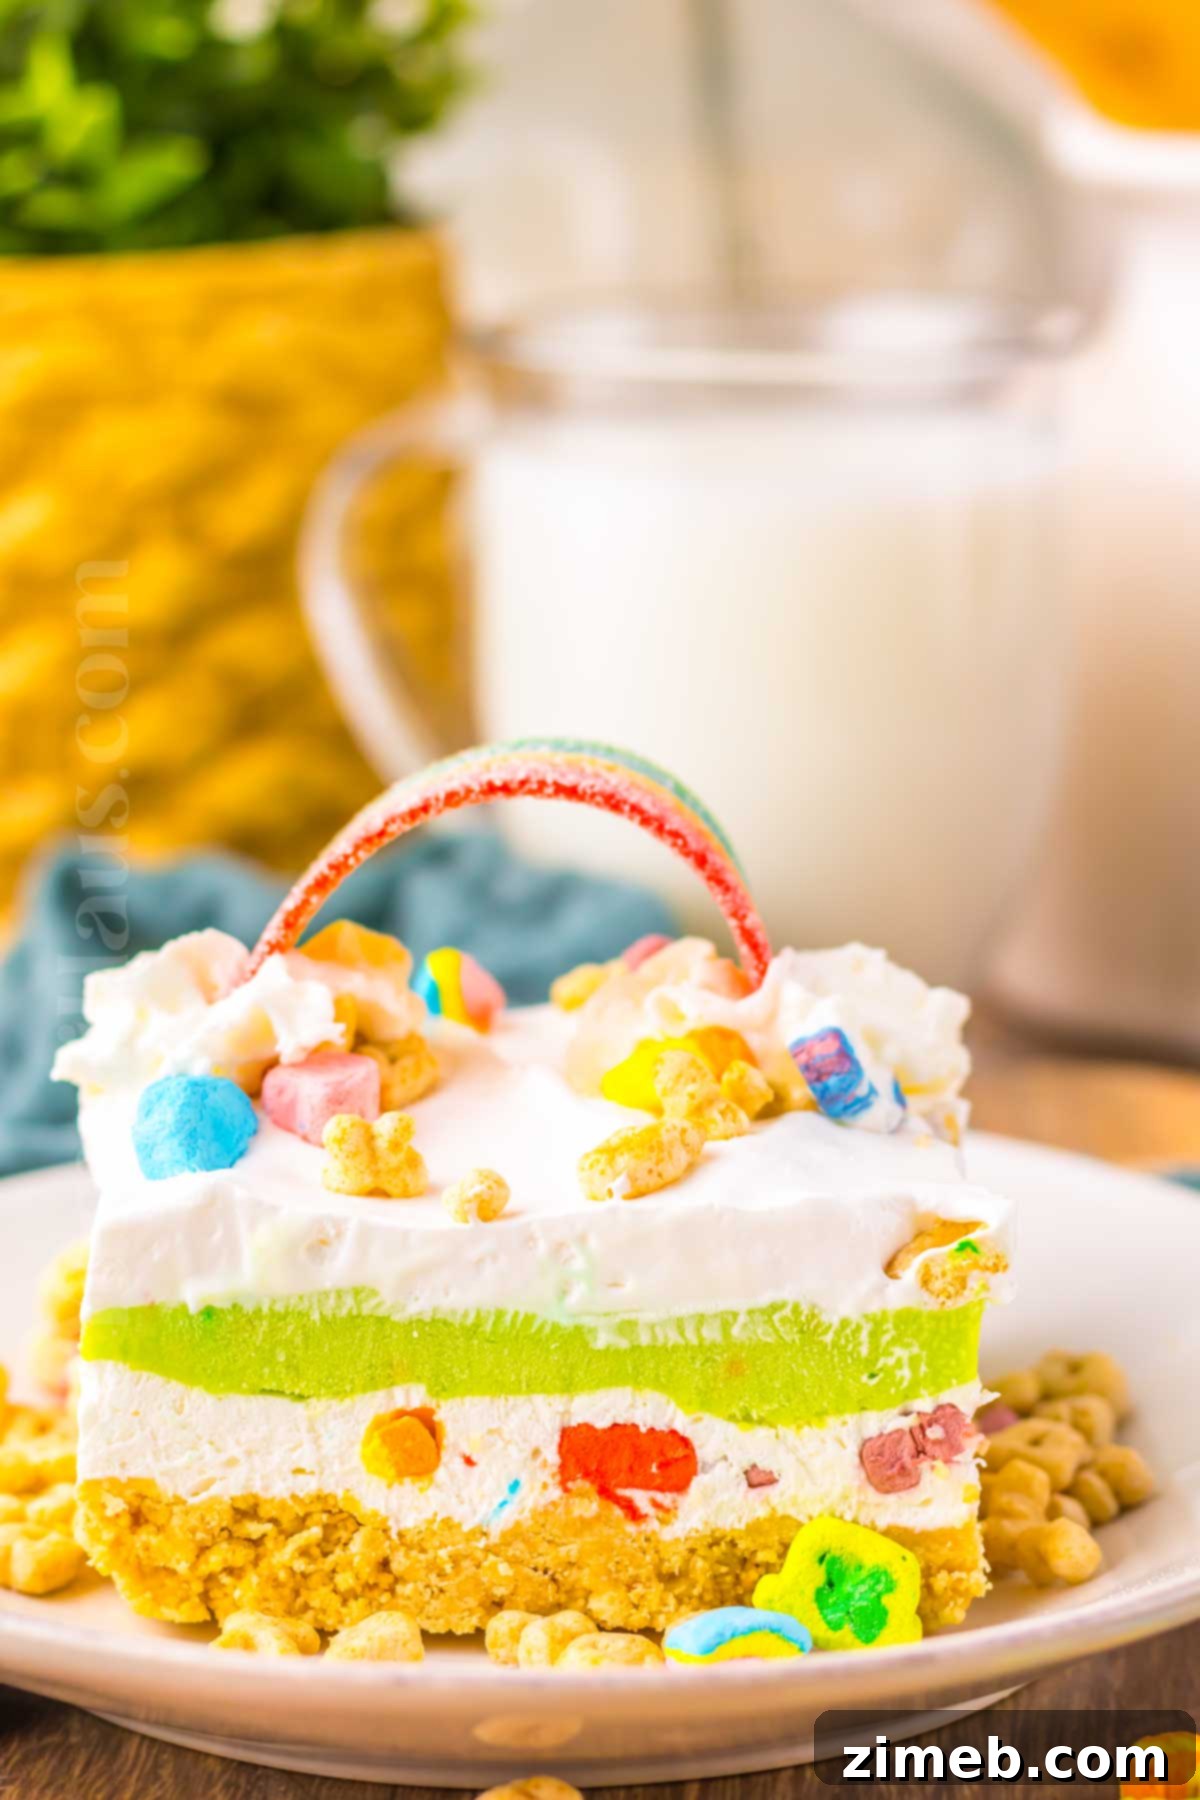
- Sour Ropes or Rainbow Candy: For an extra pop of color and whimsy, a vibrant sour rope can mimic a rainbow, tying into the magical theme perfectly.
Key Kitchen Equipment
To make this Lucky Charms Lush, you’ll need a few basic kitchen tools:
- 9×13 Baking Pan: This standard size is perfect for creating a beautiful, multi-layered dessert. Lining it with parchment paper is highly recommended for easy lifting and clean slicing.
- Food Processor: Essential for quickly crushing your Oreos and Lucky Charms cereal into fine crumbs for the crust. If you don’t have one, a sturdy Ziploc bag and a rolling pin will also work, though it requires a bit more elbow grease.
- Large Mixing Bowl: You’ll need this for preparing both the cream cheese layer and the pudding layer, ensuring ample space for mixing.
- Electric Mixer (Handheld or Stand): While not strictly listed, an electric mixer is incredibly helpful for beating the cream cheese and sugar until smooth, and for folding in the whipped topping evenly.
- Whisk: For combining the instant pudding mix and cold milk.
- Rubber Spatula: Great for scraping down the sides of bowls and gently folding in ingredients.
How To Make Lucky Charms Lush Dessert
Creating this “magically delicious” dessert is a straightforward process, broken down into four easy layers. Follow these steps to assemble your vibrant, no-bake treat:
1: Prepare The Crunchy Oreo & Lucky Charms Crust
- Begin by preparing your baking dish. Line a 9×13 inch baking dish with parchment paper, leaving an overhang on the sides to easily lift the dessert out later. Alternatively, you can lightly grease the dish with cooking spray. Set this aside.
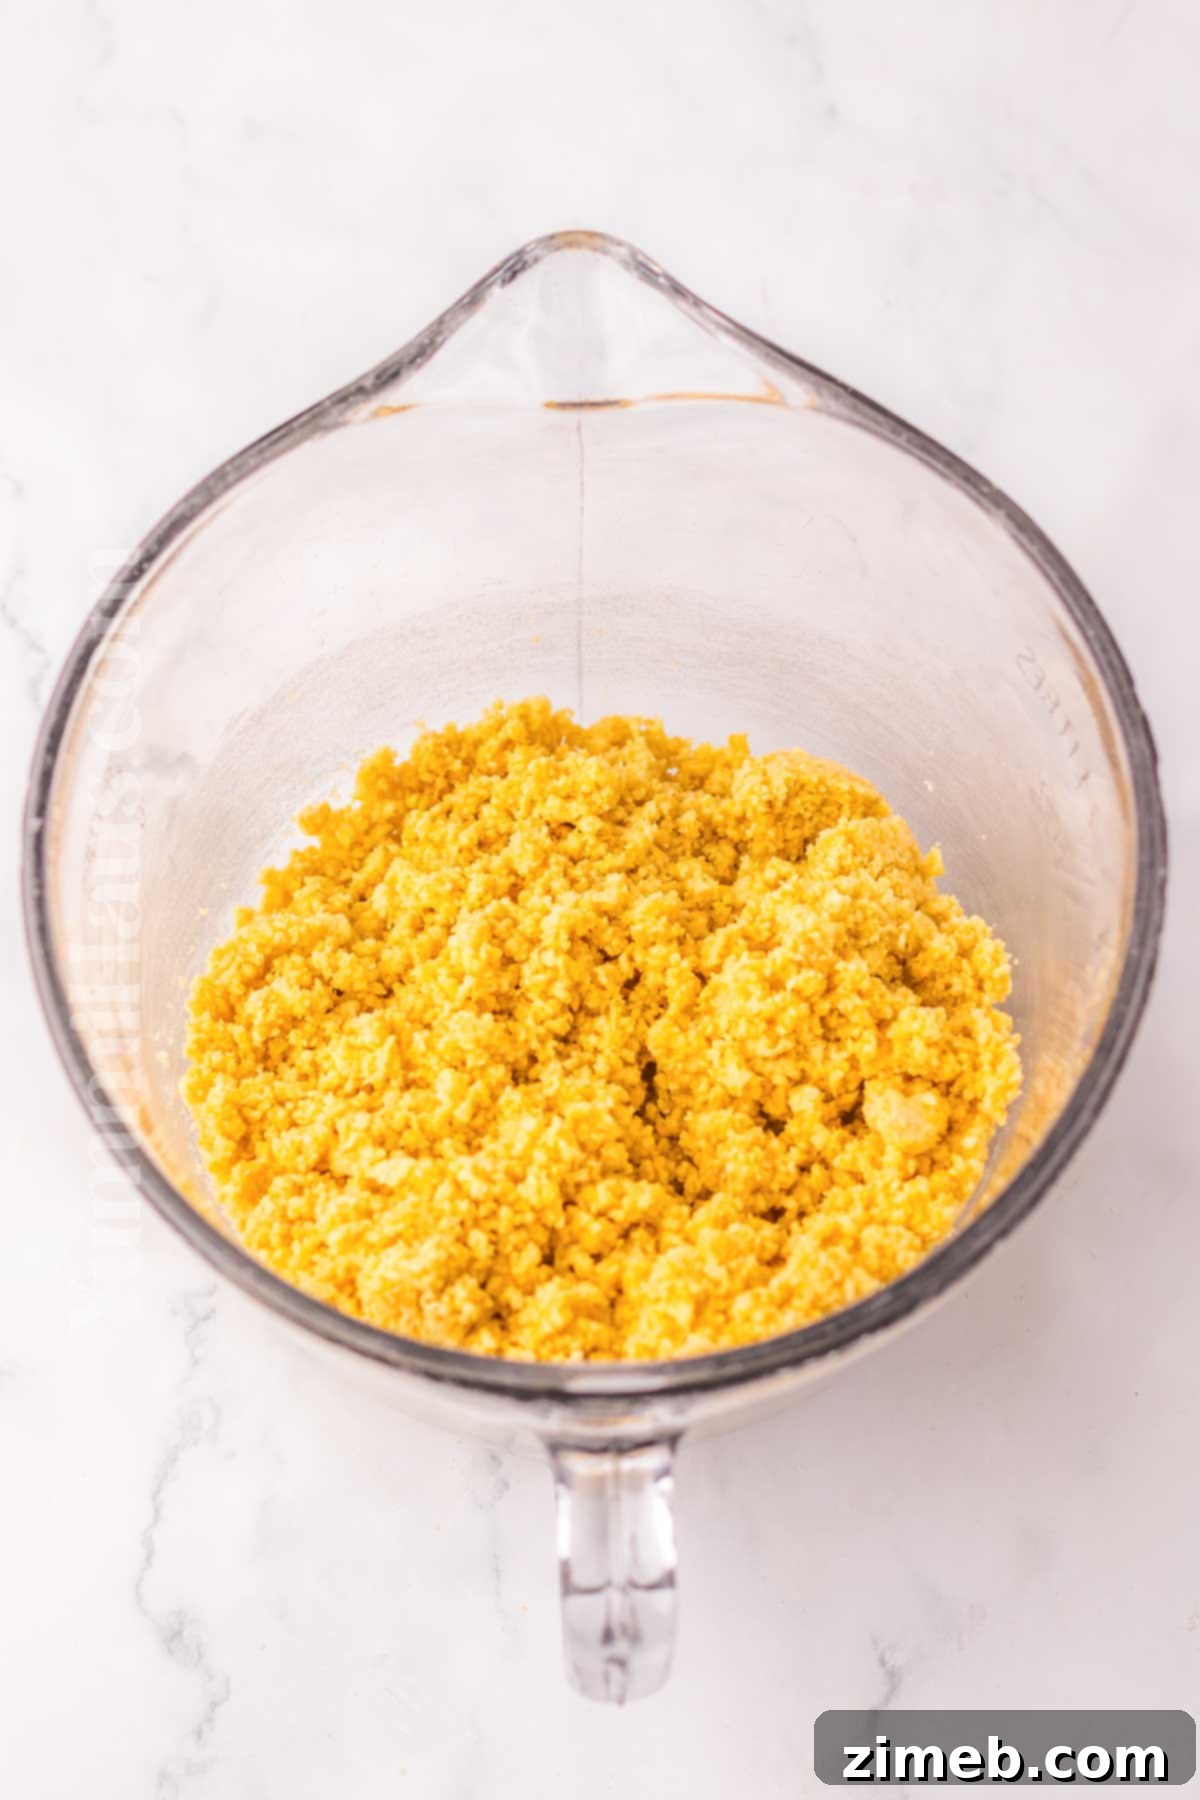
- In a food processor, combine the vanilla Oreo cookies and the Lucky Charms cereal (just the toasted oat pieces). Pulse until they are finely crushed into even crumbs.
- Add the melted unsalted butter to the food processor with the crumbs. Pulse a few more times until the crumbs are thoroughly moistened and resemble wet sand.
- Gently press this moistened crumb mixture into an even, firm layer across the bottom of your prepared baking dish. Ensure it’s packed down tightly to form a stable base.
2: Craft The Vibrant Green Cream Cheese Layer
- In a large mixing bowl, combine the softened cream cheese and confectioner’s sugar. Beat them together with an electric mixer until the mixture is completely smooth and creamy, with no lumps remaining.
- Gently fold in one full container of whipped topping until well combined, creating a light and airy texture.
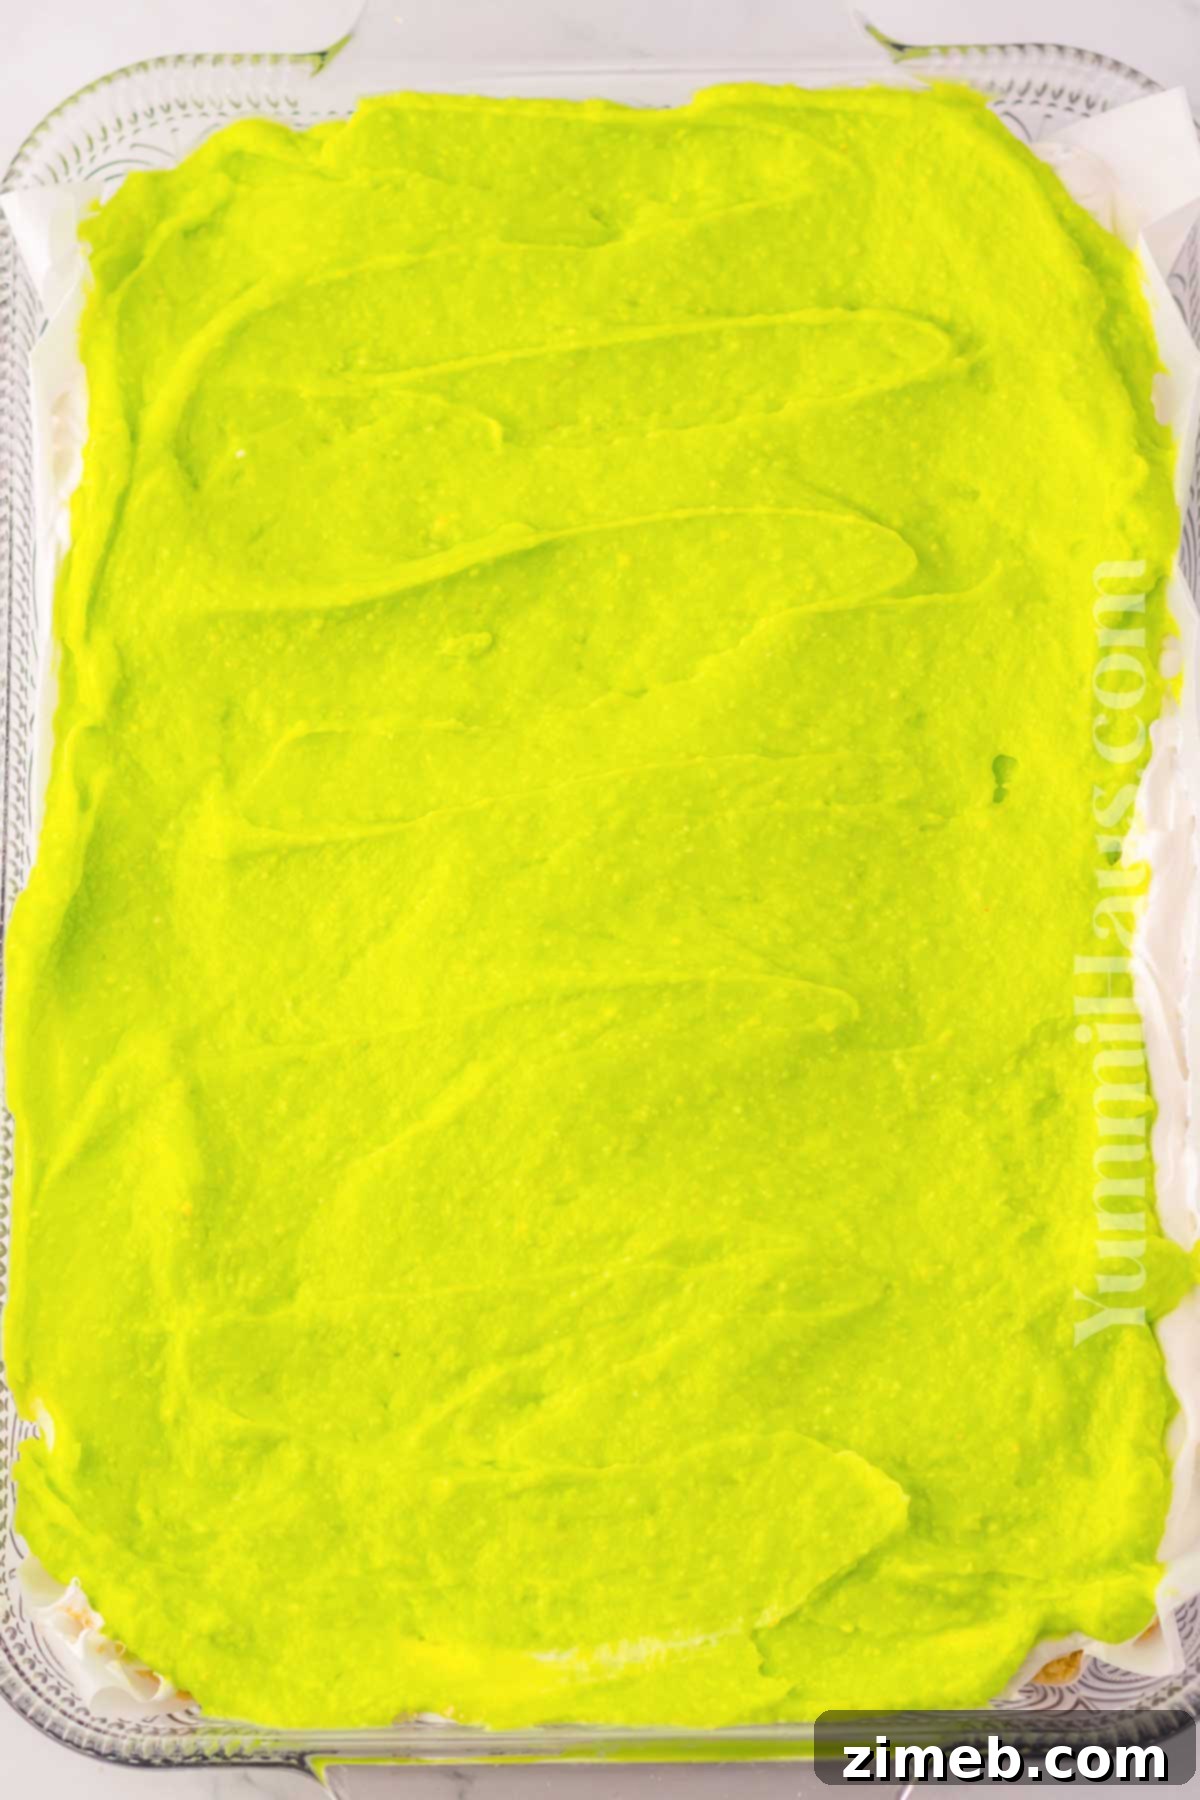
- Now for the festive touch! Add green food coloring to the cream cheese mixture, starting with a few drops and adding more gradually until you achieve your desired vivid shade of green. Remember, the color might intensify slightly as it sits.
- Carefully and evenly spread this green cream cheese mixture over the chilled cookie crust layer in the baking dish.
3: Create The Magically Delicious Marshmallow Pudding Layer
- In a separate large bowl, whisk together the dry vanilla instant pudding mixes and the cold milk until the mixture is smooth and begins to thicken. Continue whisking for about 2 minutes until it reaches a pudding consistency.
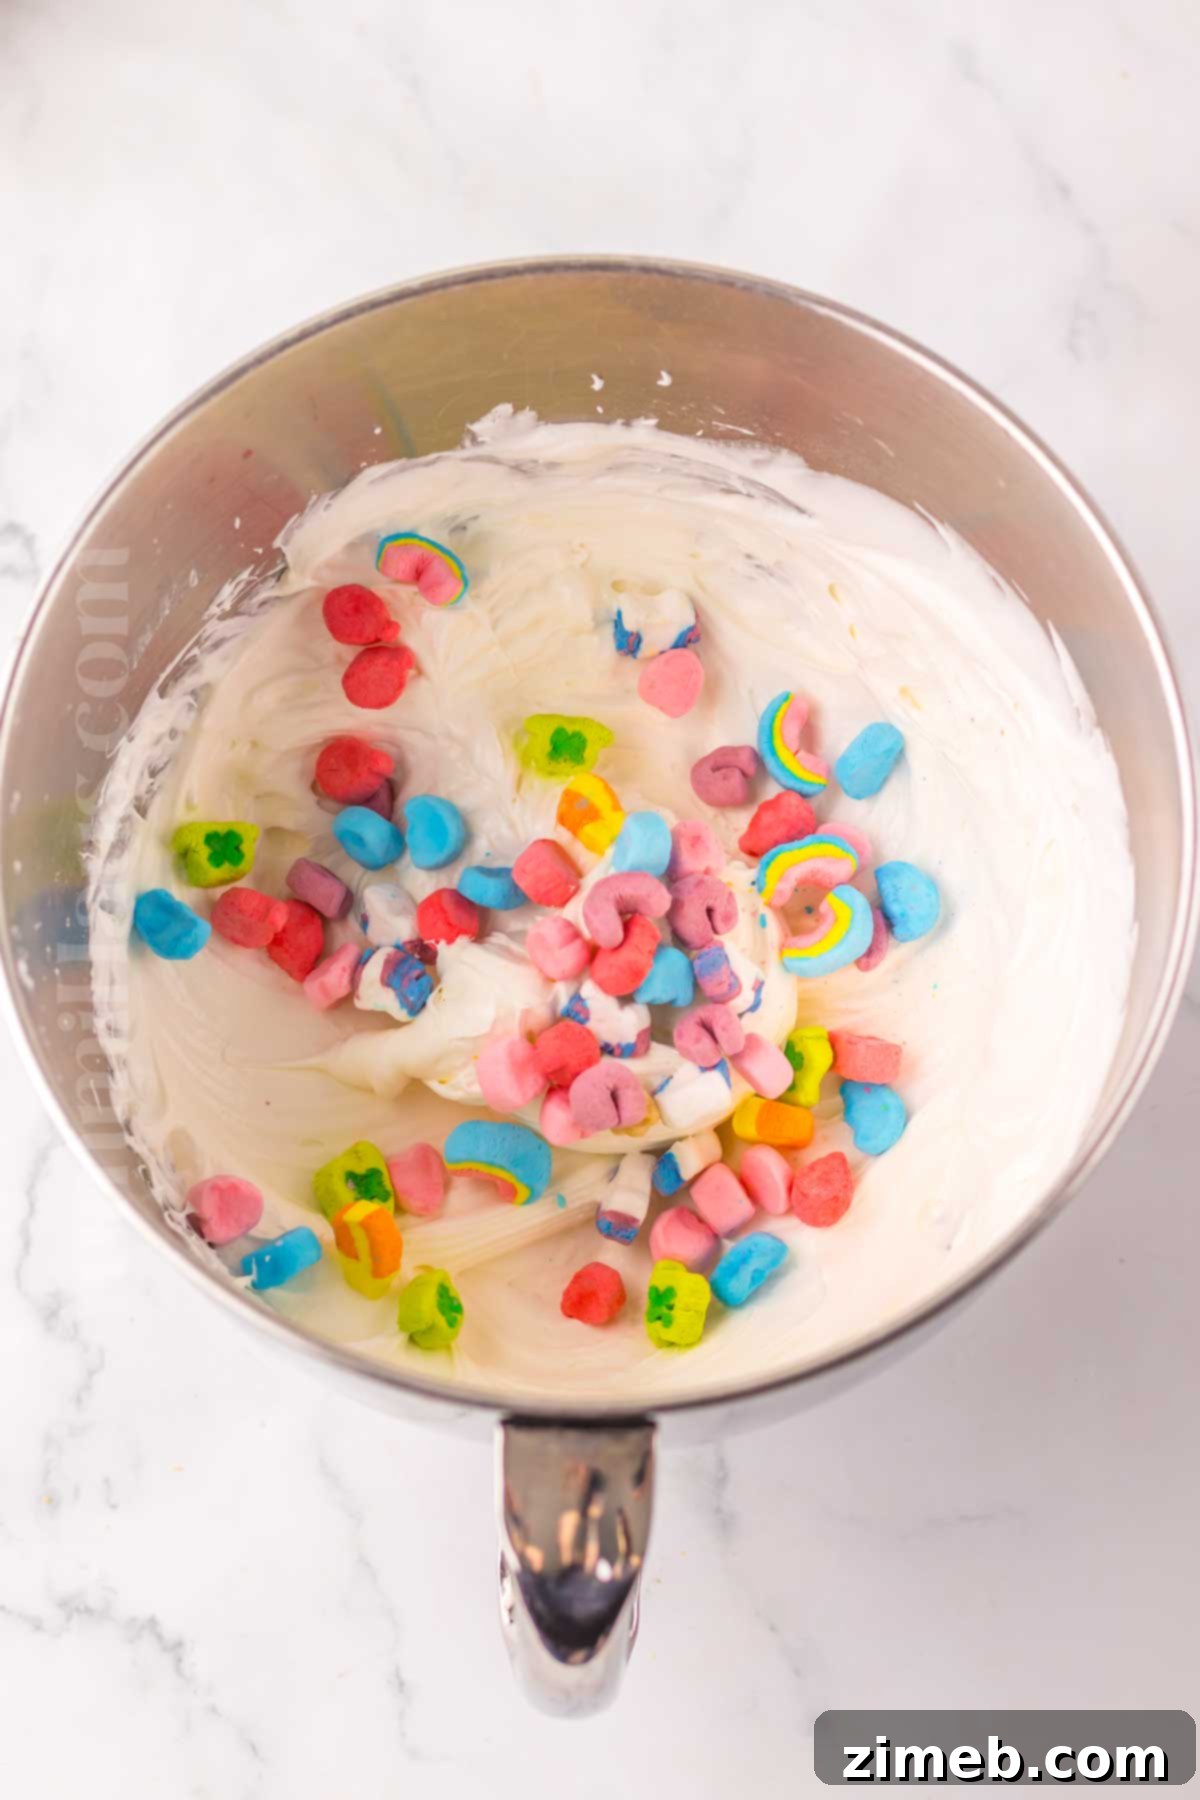
- Gently fold the separated Lucky Charms marshmallows into the prepared pudding mixture. These will add extra bursts of color and delightful chewiness.
- Carefully spread this marshmallow-pudding layer over the vibrant green cream cheese layer in the baking dish, ensuring an even distribution.
4: Decorate & Chill to Perfection
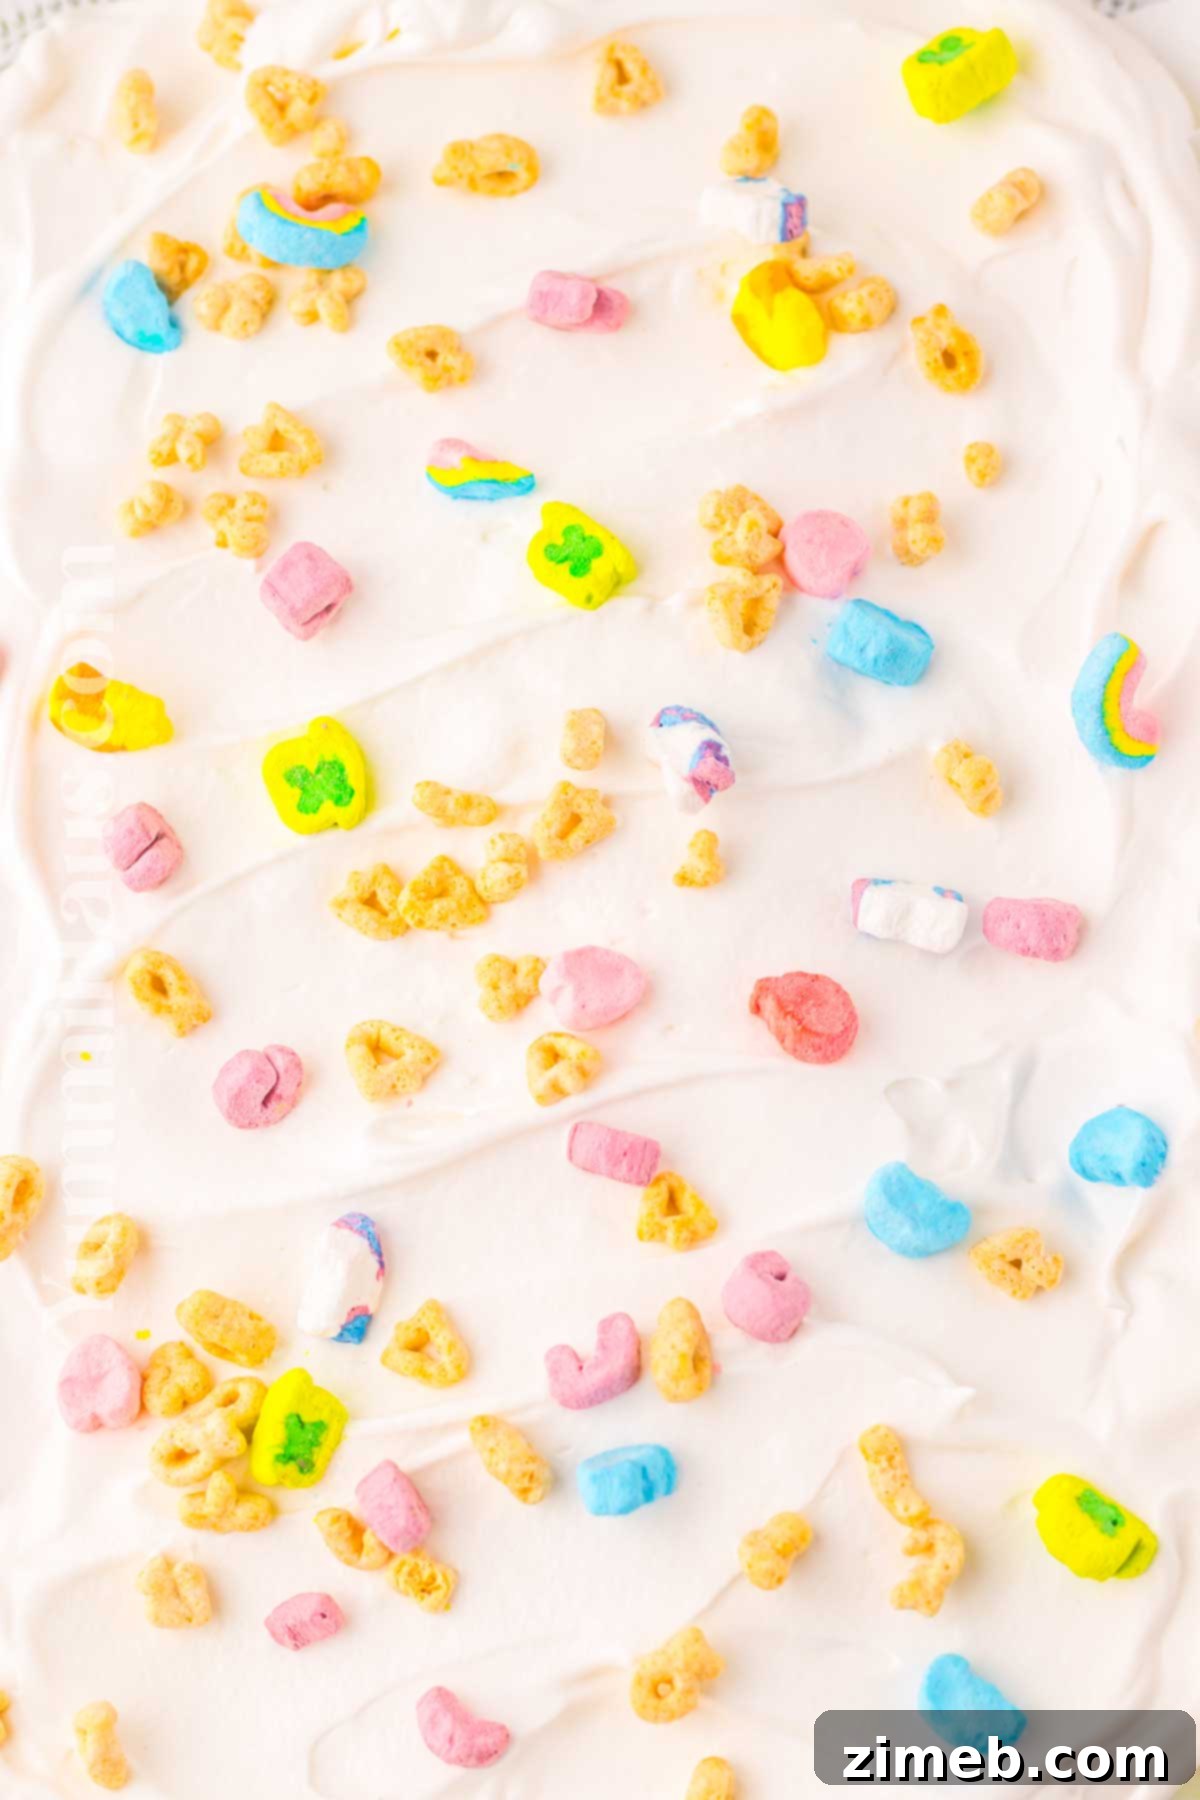
- Top the dessert with the remaining container of whipped topping, spreading it evenly across the pudding layer to create a smooth, cloud-like finish.
- Now for the fun part: decorate the top with additional Lucky Charms cereal pieces and other festive candy or sprinkles as desired. This is where you can unleash your creativity!
- This step is crucial for the dessert to set properly and for the flavors to meld. Refrigerate the Lucky Charms Lush for a minimum of 4 hours before serving. For best results and easiest slicing, chilling it overnight is highly recommended.
- Just before serving, enhance the presentation by garnishing with extra whipped cream (piped as fluffy clouds) and a colorful rainbow sour rope, creating a truly enchanting dessert.
Storage Tips
Proper storage ensures your delicious Lucky Charms Lush remains fresh and delightful for days:
Store any leftover Lucky Charms Lush in an airtight container in the refrigerator for up to 2-3 days. This helps maintain its creamy texture and prevents it from drying out or absorbing other food odors.
For longer storage, this Lucky Charms Lush dessert can be frozen for up to 2 months. To freeze, wrap the entire dish (or individual slices) tightly in plastic wrap, then a layer of aluminum foil. Thaw in the refrigerator overnight before serving. The texture might be slightly softer after thawing, but it will still be incredibly delicious!
Substitutions & Variations
This Lucky Charms Lush recipe is wonderfully adaptable, allowing you to customize it to your preferences or what you have on hand. Get creative with these delicious substitutions and variations:
- Add Chocolatey Goodness: Incorporate white chocolate Lucky Charms into the pudding layer for an extra sweet twist, or sprinkle in mini chocolate chips with the cereal for the crust or on top for garnish.
- Minty Fresh Flavor: For a refreshing kick, add a few drops of mint extract to the cream cheese layer. This not only enhances the flavor but also complements the green theme perfectly.
- Pudding Flavor Swap: While vanilla is classic, feel free to experiment with other instant pudding flavors. Pistachio pudding would add another layer of green and a nutty flavor, or a chocolate pudding could create a rich base. Choose your favorite!
- Custom St. Patrick’s Day Decorations: Beyond Lucky Charms marshmallows, use any St Patrick’s Day themed decorations, such as green and white sprinkles, edible glitter, or small shamrock candies, to adorn individual slices or the entire dessert.
- Oreo Options: Reserve some crushed Oreos for an additional topping, adding more texture. If you can find them, mint Oreos are a fantastic choice for the crust, enhancing both flavor and the vibrant green color.
- Simple Topping Alternative: If you’re short on time or prefer a less “fancy” look, simply pipe some extra whipped cream on top of each slice and finish with a bright red maraschino cherry.
- Healthier Crunch: For those looking for a slightly different texture and less sweetness, consider replacing some of the candy garnish with chopped nuts (like pistachios or pecans) or dried fruit. While they may look less festive, they add a delightful crunch and wholesome twist.
Expert Tips For A Perfect Lush Dessert
Achieving the best possible Lucky Charms Lush is simple with a few insider tricks. Follow these expert tips for a dessert that’s not only delicious but also perfectly set and easy to serve:
- Parchment Paper for Easy Slicing: While optional, lining your baking dish with parchment paper (with an overhang) before pressing in the crust makes slicing and serving incredibly easy. You can simply lift the entire dessert out of the pan and cut it on a flat surface.
- Don’t Rush the Chill Time: This is perhaps the most important tip for any no-bake dessert. Adequate chilling time (at least 4 hours, or preferably overnight) is essential for all the layers to fully set and firm up. This guarantees clean slices and a stable, non-messy treat. A fully set dessert is key for the best experience.
- Cream Cheese Temperature is Key: If your cream cheese isn’t blending smoothly and you’re getting lumps, it’s likely still too cold. Allow it more time to soften at room temperature before beating it with the confectioner’s sugar. This ensures a silky-smooth cream cheese layer.
- Chill Between Layers for Precision: If you find yourself struggling to spread the next layer without disturbing the one beneath it, try chilling each layer briefly (15-20 minutes) in the refrigerator before adding the next. This helps to firm them up, making assembly much cleaner and easier.
- Use Cold Milk for Pudding: Always use very cold milk when preparing instant pudding. This helps the pudding set quickly and properly, ensuring a firm, creamy texture.
- Crush Cereal Finely: For the crust, ensure the Oreos and cereal are crushed into very fine crumbs. Larger pieces can make the crust too crumbly and difficult to press into a cohesive layer.
Serving Suggestions
Once your Lucky Charms Lush has chilled to perfection, it’s time to slice and serve! Here are some ideas to make serving even more special:
- Clean Slices: For neat slices, use a sharp knife and wipe it clean with a warm, damp cloth between each cut. This prevents the layers from smudging.
- Individual Portions: This dessert is substantial, so serving it in generous squares is perfect. You can also prepare it in smaller ramekins or dessert glasses for individual portions.
- Extra Garnish: Offer an extra sprinkle of Lucky Charms marshmallows, a dollop of whipped cream, or a drizzle of green syrup alongside each slice for those who want an extra touch.
- Beverage Pairings: This sweet dessert pairs wonderfully with a glass of cold milk, a warm mug of hot cocoa, or a refreshing glass of mint tea, especially for St. Patrick’s Day.
- Holiday Platter: If serving for St. Patrick’s Day, arrange slices on a festive green platter with other themed treats for an eye-catching display.
Frequently Asked Questions (FAQ)
Got questions about making your Lucky Charms Lush? We’ve got answers!
- Can I make this dessert ahead of time? Absolutely! In fact, this dessert benefits greatly from being made ahead. Preparing it the day before ensures all the layers have ample time to set and allows the flavors to fully meld, resulting in a perfectly firm and delicious treat.
- What if my cream cheese mixture is lumpy? Lumps usually indicate that your cream cheese wasn’t soft enough when you started mixing. To avoid this, ensure your cream cheese sits at room temperature for at least 30-60 minutes before you begin. If it’s already lumpy, try beating it longer with an electric mixer, or gently warm it slightly in the microwave for a few seconds to help it soften further, then beat again.
- Can I use homemade whipped cream instead of whipped topping? Yes, you can! If using homemade whipped cream, ensure it is stabilized with a bit of powdered sugar and cream of tartar or gelatin to help it hold its shape, especially since it needs to support layers and chill for an extended period.
- How do I separate the Lucky Charms marshmallows from the cereal? The easiest way is to pour the cereal onto a baking sheet and pick out the marshmallows by hand. It can be a fun activity for kids! You can also find bags of just Lucky Charms marshmallows online or in some specialty stores if you want to skip the separation step.
- Is this dessert gluten-free? The original recipe is not, due to the Oreos and Lucky Charms cereal. However, you can easily make it gluten-free by using gluten-free vanilla Oreo cookies and a gluten-free version of the Lucky Charms cereal if available, or substitute the cereal with another gluten-free crunchy option.
If you love this easy St. Patrick’s Day dessert recipe, you’re going to love these other festive treats too. Please click each link below to find the easy, printable recipe!
Check out this recipe
Check out this recipe

Check out this recipe
Check out this recipe
Check out this recipe
Check out this recipe

More No-Bake Lush Recipes
If you’re a fan of easy, layered no-bake desserts, you’ll love these other lush recipes:
Lemon Lush Dessert
Chocolate Lush
Chocolate Mint Lush Dessert
Halloween Lush
CONNECT WITH YUMMI HAUS!
Be sure to follow me on my social media, so you never miss a post!
Substack, FB, Pinterest, IG, Email Subscription
Rate this Recipe
Lucky Charms Lush
Ingredients
- 36 vanilla oreo cookies
- ½ cup lucky charms cereal just the cereal part
- ½ cup lucky charms marshmallows the marshmallows from the cereal
- 6 tablespoons butter melted
- 8 ounces cream cheese – softened
- 1 cup confectioner’s sugar
- 16 ounces whipped topping TWO tubs
- 6.8 ounces vanilla instant pudding mix two boxes – 3.4 ounces each
- 2 ½ cups cold milk
- Green food coloring
Additional cereal for garnish
Whipped cream and sour ropes for garnish
Instructions
-
Prep a 9×13 baking dish with parchment paper or grease it. Set aside.
-
Process the cookies and the cereal, crushing them into crumbs using a food processor.
-
Add the melted butter, and pulse a few times to moisten the crumbs.
-
Press the moistened crumbs into an even layer in the bottom of the prepared baking dish.
-
Combine the cream cheese and confectioner’s sugar in a large mixing bowl – beat until smooth.
-
Fold in 1 container of the whipped topping.
-
Add the green food coloring – you decide how vivid you want the shade. But keep it mind that the color may intensify as the mixture sits.
-
Spread the green cream cheese mixture over the cookie layer.
-
Whisk the dry pudding mixes and milk until combined – creating the pudding.
-
Mix the marshmallows from the cereal into the pudding mixture. Spread this on top of the green layer.
-
Top with the remaining container of whipped topping.
-
Decorate with candy on top.
-
Refrigerate for 4 hours before serving.
-
Before serving, garnish with some whipped cream clouds and a rainbow sour rope.
Notes
This can be frozen for up to 2 months.
Nutrition
Nutritional information for the recipe is provided as a courtesy and is approximate. Please double-check with your own dietary calculator for the best accuracy. We at Yummi Haus cannot guarantee the accuracy of the nutritional information given for any recipe on this site.