
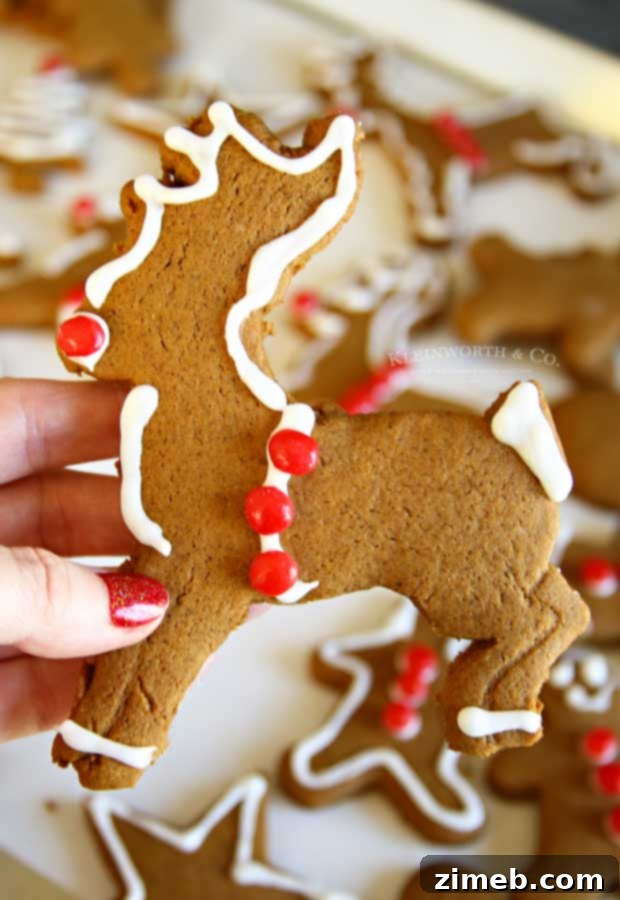
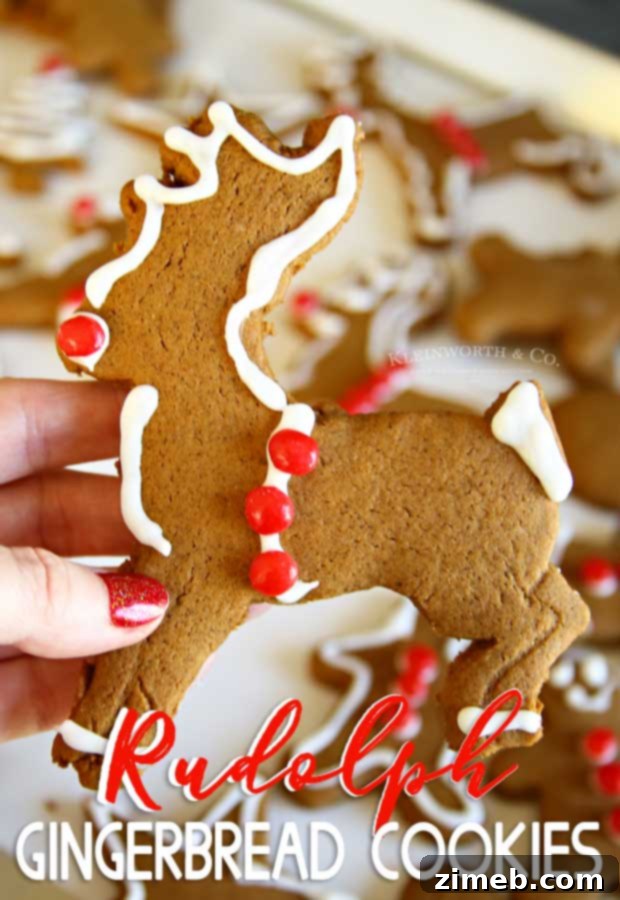
Delight your family and friends this holiday season with the ultimate festive treat: these incredibly super soft & chewy Rudolph Gingerbread Cookies! Perfect for adding a magical touch to any Christmas celebration, they’re guaranteed to bring BIG smiles and fill your home with the warm, inviting aroma of holiday cheer. Get ready to bake a batch of pure joy that everyone will adore!
The holiday season is synonymous with a handful of iconic flavors, and for many, gingerbread stands proudly at the top of that list. There’s something undeniably enchanting about the blend of warm spices that instantly transports you to a cozy, festive wonderland. While traditional gingerbread cookies are a beloved classic, I’m thrilled to share my special twist on this cherished recipe: adorable Rudolph Reindeer cookies! This recipe transforms a timeless favorite into a whimsical, charming delight that’s perfect for creating new cherished holiday memories.

Inspiration can strike at the most unexpected moments! I remember the idea for these Rudolph Reindeer Cookies popping into my head during a summer afternoon, a full season away from Christmas. I was thinking about my favorite gingerbread cookie recipe, and instead of the usual gingerbread people, a vision of cute little reindeer with bright red noses appeared. The thought of transforming them into festive Rudolph shapes seemed utterly irresistible, and I’m absolutely delighted with how adorable they turned out!
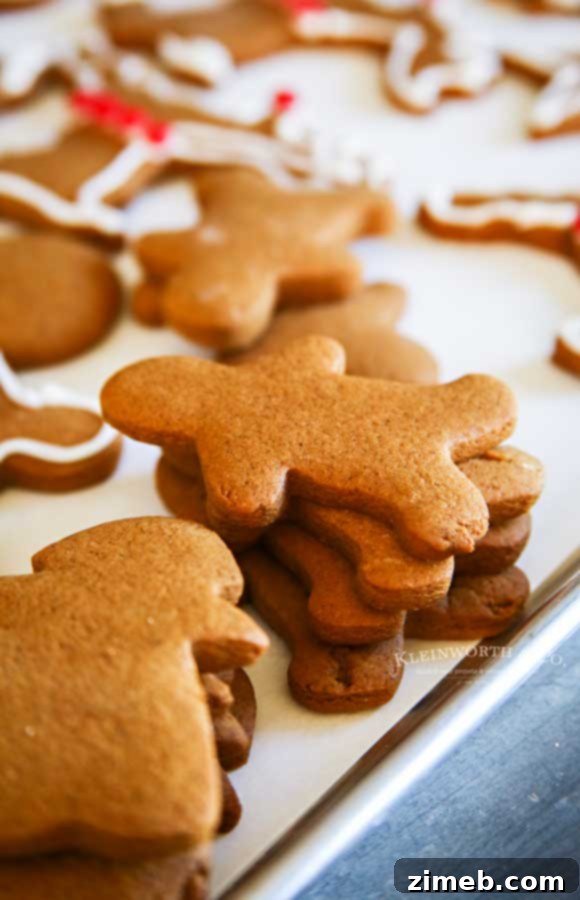
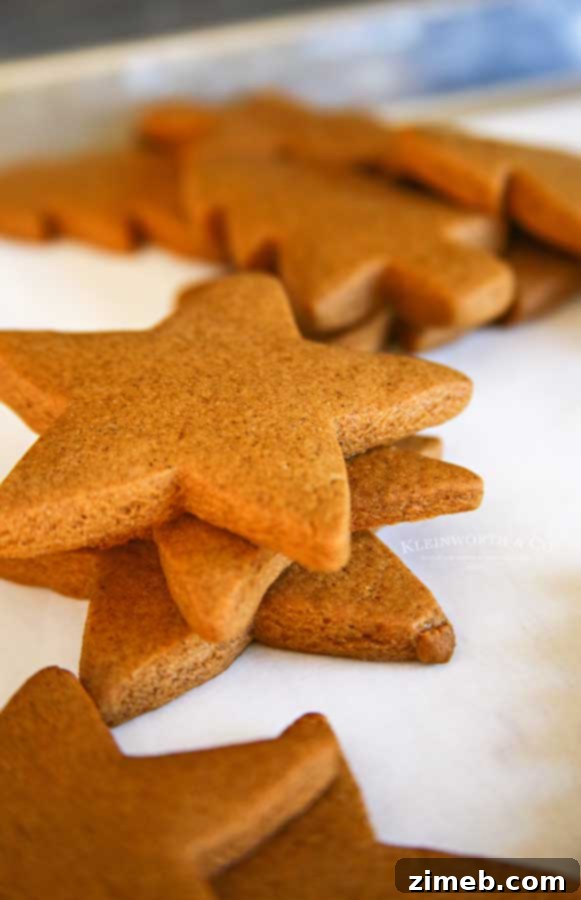
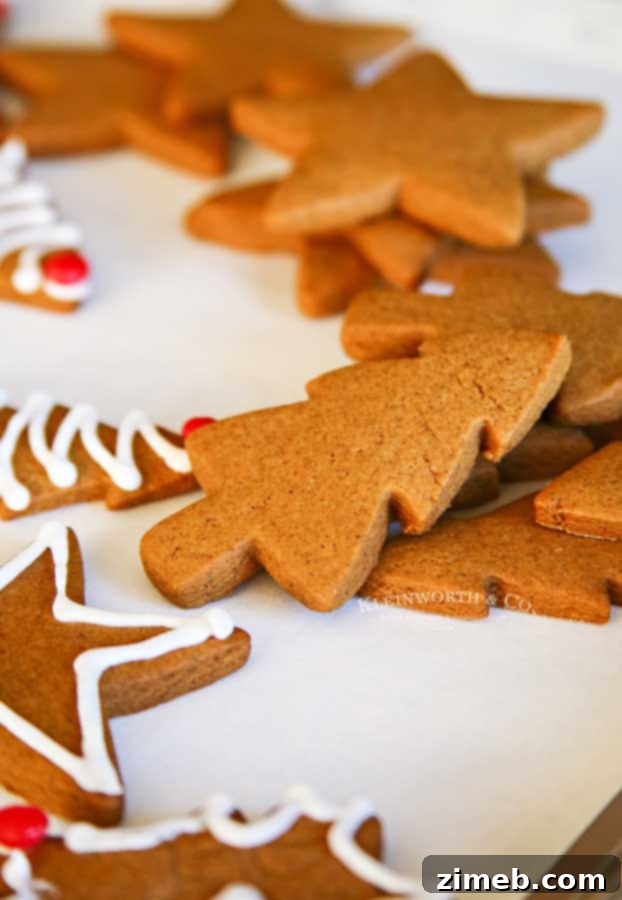
The beauty of this versatile gingerbread cookie recipe is its adaptability. While I absolutely adore the whimsical Rudolph reindeer, you’re not limited to this shape. This dough works beautifully with traditional gingerbread men and women, festive stars, charming Christmas trees, or any other holiday cookie cutter you have on hand. However, for that extra touch of holiday magic, using little red hot candies for Rudolph’s iconic nose truly takes these cookies to the next level, making them an instant favorite for kids and adults alike. Imagine a plate full of these cheerful reindeer, each with its own glistening red nose – pure holiday joy!
Classic & Creative Gingerbread Cookies for the Holidays
This post contains some affiliate links. Click here to read my full disclosure policy.

Baking gingerbread cookies has always been a significant part of my holiday tradition, a cherished ritual passed down through generations. Growing up, my mom would meticulously pull out this very recipe each year, signaling the unofficial start of the holiday season. The air would fill with the intoxicating scent of ginger, cinnamon, and molasses, instantly transforming our kitchen into a festive workshop. I hold countless fond memories of us together, flour dusting our hands and laughter echoing as we tirelessly whipped up batch after batch of these delightful cookies. It was more than just baking; it was an annual tradition that cemented the joy and warmth of Christmas in our home.
That sentimental journey truly captures the essence of what I love most about the holidays. My mom absolutely adored this time of year, and her passion revolved entirely around baking and crafting delicious goodies for every single person we knew. From neighbors to teachers, friends to family, her gingerbread cookies were a symbol of her love and generosity. Continuing this tradition allows me to connect with those precious memories, bringing the same warmth and happiness to my own home and loved ones. These soft and chewy gingerbread cookies aren’t just a recipe; they’re a legacy of love, a taste of Christmas past, and a delightful way to create new, lasting traditions for the future.

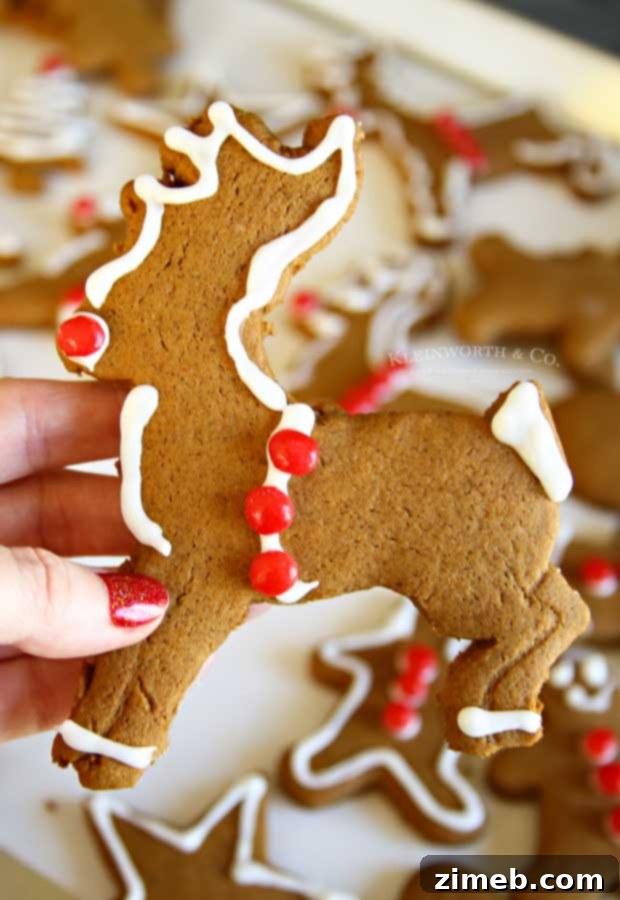
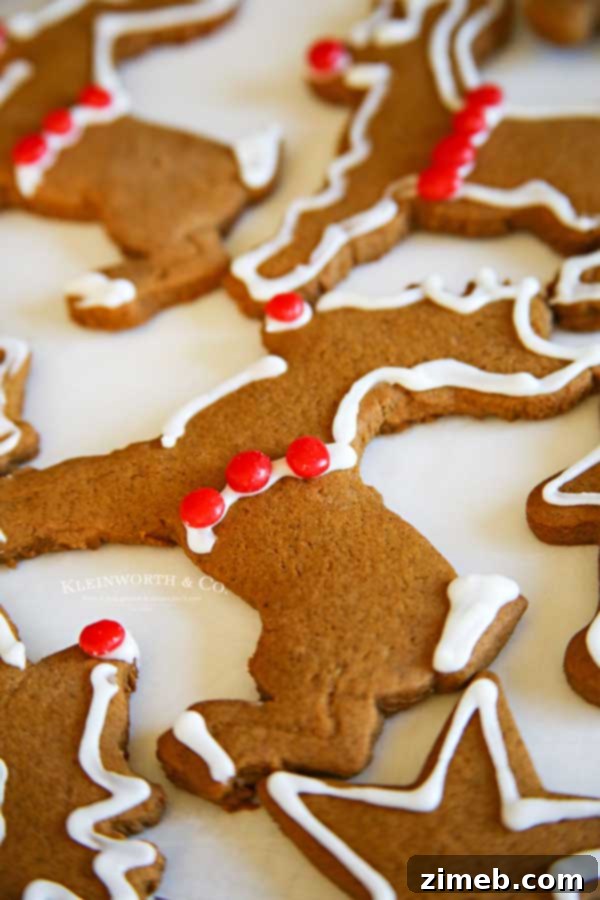
When it comes to decorating these irresistible gingerbread cookies, I often find beauty in simplicity. There’s something truly enchanting about the stark contrast of bright white icing against the rich, warm brown of the gingerbread. This classic combination is not only visually appealing but also allows the intricate details of the cookie shape, like our adorable Rudolph, to truly shine. The clean lines and elegant simplicity make my heart swoon – I simply can’t resist grabbing one (or two!) the moment they’re ready!
However, this recipe offers a fantastic canvas for your creativity, so feel free to express yourself with as much icing and embellishment as your heart desires! Beyond the simple outline, consider adding festive holiday sprinkles for a dazzling effect, edible glitter for a touch of sparkle, or even miniature chocolate chips to create playful eyes and buttons. You could experiment with different colored icings using food coloring, creating vibrant gingerbread masterpieces. Imagine transforming gingerbread men into Santas or elves, or turning your reindeer into a whole team with different colored noses!
For an extra dose of holiday fun, why not host a cookie decorating party? Gather your friends and family, prepare several batches of these delicious gingerbread cookies in advance, and set out an array of icing colors, sprinkles, and candies. It’s a wonderful way to bond and create joyful memories, much like my mom and I used to do. Everyone, regardless of age, will have a blast letting their imaginations run wild, and yes, plenty of “taste-testing” is absolutely encouraged throughout the process!

Frequently Asked Questions About Baking Gingerbread Cookies
Can I make this gingerbread cookie recipe without the orange zest?
Absolutely! The orange zest is my personal addition to my mom’s classic recipe, lending a bright, citrusy note that beautifully complements the warm spices. It’s truly a flavor preference, and the cookies will be delicious with or without it. If you enjoy that subtle citrus hint but don’t have a fresh orange on hand, you can easily substitute it with orange extract. Just a small amount goes a long way to replicate that delightful flavor.
What is the best way to store leftover gingerbread cookies?
To keep your Rudolph Gingerbread Cookies wonderfully soft and fresh, the easiest method is to store them in a large, airtight container at room temperature. A sturdy plastic bowl with a tight-fitting lid or a reliable zip-top bag works perfectly. A crucial tip for successful storage: ensure that any icing or decorations have completely set and dried before you stack the cookies. This prevents them from sticking together and smudging your beautiful designs. Stored properly, these cookies will maintain their chewiness and flavor for several days, making them perfect for enjoying throughout the holiday week.

How many cookies does this recipe yield?
This versatile gingerbread recipe typically yields approximately 45 regular-sized cookies. However, the exact number can vary significantly depending on the size of your cookie cutters and how thinly you roll your dough. I personally use a variety of cutters, from really large ones to tiny, intricate designs, which naturally affects the overall count. If you aim for a standard-sized cookie and roll your dough out consistently to about 1/8-inch thickness, you could comfortably get closer to 50 delightful gingerbread treats. It’s a generous batch, perfect for sharing, gifting, or simply enjoying with your loved ones!
Can this gingerbread cookie recipe be doubled?
Yes, absolutely! If you’re planning a big holiday baking session, hosting a large party, or simply want to ensure you have plenty of these delicious Rudolph Gingerbread Cookies to last, you can certainly double this recipe. However, it’s important to be mindful of your equipment. Doubling the dough will significantly fill your mixer bowl, so make sure you are using a very large, heavy-duty stand mixer bowl that can handle the increased volume and density of the dough. This will help prevent overflow and ensure proper mixing for consistent results.
Should I use salted or unsalted butter for these cookies?
When it comes to butter, I often use whatever I have readily available in my refrigerator. However, for baking, especially when you want precise control over the saltiness, unsalted butter is generally recommended. My original recipe was developed using unsalted butter, allowing the spices and molasses to truly shine without any added salt interference. That said, I’ve also experimented with salted butter and found the results to be equally delicious. If you are monitoring your sodium intake, or prefer to add salt separately to taste, sticking with unsalted butter is your best bet. Otherwise, feel free to use either, confident that your gingerbread cookies will be fantastic!
How to Make Delicious Rudolph Gingerbread Cookies: Step-by-Step Instructions
Creating these delightful gingerbread cookies is a rewarding process. Follow these simple steps for perfect, soft, and chewy results every time:
- **Prepare Dry Ingredients:** In a medium bowl, thoroughly whisk together the all-purpose flour, ground cinnamon, ground ginger, ground nutmeg, ground cloves, table salt, and baking soda. Whisking ensures all spices and leavening agents are evenly distributed throughout the flour. Set this dry mixture aside.
- **Cream Butter and Sugar:** In a large mixing bowl (preferably using a stand mixer with a paddle attachment), combine the softened butter and brown sugar. Beat on high speed until the mixture becomes light, fluffy, and pale in color. This creaming process incorporates air, which contributes to the cookies’ soft texture.
- **Incorporate Wet Ingredients:** Add the eggs, molasses, and vanilla extract to the creamed butter and sugar. Continue to beat until all ingredients are well combined, scraping down the sides of the bowl as needed to ensure everything is fully incorporated.
- **Combine Wet and Dry:** Lower your mixer speed to the lowest setting. Gradually add the reserved flour mixture to the wet ingredients, beating slowly until just combined. Be careful not to overmix the dough, as overworking the gluten can lead to tougher cookies. Stop as soon as no dry streaks of flour remain.
- **Divide and Flatten Dough:** Divide the gingerbread dough into two equal portions. Gently flatten each portion into a disk, approximately 1 inch thick. This shape makes it easier to roll out later.
- **Chill the Dough:** Wrap each dough disk tightly in plastic wrap. Refrigerate the dough for a minimum of 3 hours. For the best results, allowing the dough to chill overnight is highly recommended. Chilling is a crucial step that helps the flavors develop, prevents the cookies from spreading too much during baking, and makes the dough much easier to handle.
- **Preheat Oven and Prep Baking Sheets:** Once your dough is sufficiently chilled, preheat your oven to 350 degrees Fahrenheit (175 degrees Celsius). Line several baking sheets with parchment paper to prevent sticking and ensure even baking. Set these aside.
- **Roll Out Dough:** Unwrap one disk of chilled dough. On a clean, lightly floured surface, use a rolling pin to roll out the dough evenly until it is approximately 1/8 inch thick. Dust your rolling pin and surface lightly with flour as needed to prevent sticking.
- **Cut Out Shapes:** Use your favorite holiday cookie cutters to cut out your desired shapes. For Rudolph cookies, a reindeer cutter is perfect! Carefully transfer the cutouts to your prepared baking sheets, leaving a small space between each cookie. Gather and re-roll any dough scraps as needed to cut out more cookies until all the dough is used.
- **Bake Cookies:** Bake the gingerbread cookies in the preheated oven for 8-10 minutes. The baking time will vary slightly depending on the size and thickness of your cookies and your oven’s calibration. The cookies are done when they are just crisp around the edges and slightly firm on top. For softer cookies, lean towards the shorter baking time; for a crispier texture, bake for the full 10 minutes.
- **Cool on Baking Sheet:** Remove the baking sheets from the oven and allow the cookies to cool on the hot sheet for 5 minutes. This allows them to firm up slightly before handling.
- **Transfer to Wire Rack:** After 5 minutes, carefully transfer the cookies to a wire rack to cool completely to room temperature. This prevents the bottoms from becoming soggy and ensures a crispier finish.
- **Decorate:** Once the cookies are entirely cool, they are ready for decorating! Get creative with icing, sprinkles, and candies.
- **Prepare Icing Mixture:** In a small bowl, whisk together the confectioner’s sugar, milk (start with 2 tablespoons and add more drop by drop if needed), and vanilla extract until the mixture is completely smooth and reaches your desired piping consistency. It should be thick enough to hold its shape but fluid enough to flow.
- **Decorate Cookies:** Transfer the smooth icing mixture to a piping bag fitted with a small round tip, or use a plastic squeeze bottle. Pipe the icing onto your cooled gingerbread cookies as desired. For Rudolph, pipe outlines and details, then add a red hot candy for the nose while the icing is still wet. Allow the icing to fully set before stacking or storing the cookies.
**For the Icing:**
These detailed steps will guide you to perfect, festive Rudolph Gingerbread Cookies that are as fun to make as they are to eat!
Do I have to chill the gingerbread cookie dough?
Yes, chilling the dough is an absolutely critical step that you should never skip when making these gingerbread cookies! While it requires a bit of patience, this resting period in the refrigerator serves several important purposes that are vital for the cookies’ texture, shape, and overall success. Firstly, chilling the dough makes it significantly easier to handle and roll out. The butter solidifies, making the dough less sticky and more manageable, which is especially helpful for intricate cookie cutter shapes like our Rudolph reindeer.
Secondly, and perhaps most importantly, chilling helps the cookies maintain their beautifully cut shapes when transferred to the baking sheet and throughout the baking process. Cold dough spreads less in the oven, ensuring your Rudolphs (or gingerbread men, stars, trees) keep their distinct outlines and don’t turn into shapeless blobs. Furthermore, the chilling time allows the flavors of the spices and molasses to meld and deepen, resulting in a richer, more complex gingerbread taste. So, for perfectly shaped, flavorful, and delightfully soft gingerbread cookies, please do not skip this essential step!

Can I use a gluten-free flour blend for these Rudolph Gingerbread Cookies?
I haven’t personally tested this recipe with gluten-free flour yet, so I can’t give a definitive guarantee, but it’s an experiment I’m keen to try! If you’re looking to make these delightful Rudolph Gingerbread Cookies gluten-free, I would highly recommend using a 1:1 gluten-free all-purpose flour blend, specifically one that contains xanthan gum. These blends are formulated to behave very similarly to traditional wheat flour in baking, often eliminating the need for additional ingredients or complex adjustments that might be required with other gluten-free flours.
While I anticipate a 1:1 blend would yield good results, baking with gluten-free flours can sometimes alter the texture slightly. The cookies might be a touch more crumbly or have a slightly different chew. If you decide to give it a go, please come back and share your experience in the comments! Your feedback would be incredibly valuable for other bakers in the community looking for a gluten-free option for these holiday favorites. Happy baking, and good luck with your gluten-free gingerbread adventure!
How do I properly measure flour for perfect gingerbread cookies?
Properly measuring flour is absolutely crucial for achieving the perfect soft and chewy texture in your gingerbread cookies. The most accurate method, and the “official” way, is the spoon and level method. To do this, first, fluff your flour in its container with a spoon or whisk to aerate it. Then, gently spoon the flour into your dry measuring cup until it’s overflowing. Do not scoop the flour directly from the bag with the measuring cup, as this compacts it and can lead to using too much flour. Finally, use the flat edge of a knife or a straight kitchen utensil to level off the top of the measuring cup, scraping off any excess. This ensures you have just the right amount of flour. If your flour is packed down or measured too tightly, you’ll end up with a denser, drier dough, and consequently, cookies that are tough and crumbly instead of wonderfully soft and chewy. Precision here makes all the difference!
Achieving Soft Gingerbread Cookies: The Secret to a Perfect Bite
These Rudolph Gingerbread Cookies are specifically designed to be delightfully soft and wonderfully chewy, a texture that melts in your mouth and leaves you craving more. The secret lies in a few key elements of the recipe: the careful balance of ingredients, especially the generous amount of molasses which adds moisture and contributes to that signature chewiness, and the precise baking time. To ensure your cookies remain soft, avoid overbaking. Keep a close eye on them during the last few minutes in the oven; once the edges are just barely crisp and the centers still look slightly soft, they are perfectly done. They will continue to firm up as they cool, preserving that coveted soft and tender interior. The careful chilling of the dough also plays a vital role in preventing excessive spreading, which helps maintain a thicker, chewier cookie.
Essential Ingredients for Your Homemade Gingerbread Cookies:
Crafting these irresistible Rudolph Gingerbread Cookies is both straightforward and incredibly rewarding. You’ll likely find many of these ingredients already stocked in your pantry, making this a convenient and delightful recipe to prepare. Here’s a comprehensive list of what you’ll need to create these holiday favorites:
- all-purpose flour
- ground ginger
- cinnamon
- ground cloves
- ground nutmeg
- baking soda
- table salt
- butter – softened to room temperature
- packed brown sugar
- egg
- molasses
- vanilla extract
- orange zest or orange extract (optional, for a citrusy kick)
- OPTIONAL toppings – holiday sprinkles, red hots (for Rudolph’s nose!), various icing colors
- confectioner’s sugar (powdered sugar)
- milk
- vanilla extract
For the simple icing, you’ll need:
Recommended Baking Tools and Products for Gingerbread Cookies:
Making these Rudolph Gingerbread Cookies is not only easy but also incredibly rewarding. Even if you’re new to baking gingerbread, you’ll be amazed by how delicious and fun these are to create! To ensure your baking experience is as smooth and enjoyable as possible, I’ve compiled a list of my go-to tools and ingredients that I simply can’t bake without:
- all-purpose flour
- cinnamon
- ginger
- ground cloves
- baking soda
- nutmeg
- table salt
- light brown sugar
- molasses
- vanilla extract
- red hots (essential for Rudolph’s nose!)
- Christmas cookie cutters (especially a reindeer shape!)
- holiday sprinkles
- orange extract (if not using fresh orange zest)
- confectioners sugar
- parchment paper
- 3/4 sheet pans
- mixer
- mixing bowl
- spatulas
- measuring cups
- measuring spoons
These truly are the perfect holiday cookies to brighten any festive occasion!
Scroll to the bottom for the Printable Recipe Card
Easy Gingerbread Cookies: More Festive Cookie Recipes to Explore
If you’ve fallen in love with this Rudolph Gingerbread Cookies recipe, you’re in for a treat! The holiday season is all about delicious baking, and I’m excited to share some of my other favorite, easy-to-make cookie recipes that are perfect for festive gatherings, gifting, or simply enjoying with a warm cup of cocoa. Click each link below to discover these delightful, printable recipes:
Check out this recipe
Check out this recipe

Check out this recipe
Check out this recipe
Check out this recipe
Check out this recipe
Check out this recipe
Check out this recipe
Check out this recipe
Check out this recipe
Check out this recipe
The Best Gingerbread Cookies Recipe for Your Holiday Table!
These Rudolph Gingerbread Cookies are more than just a sweet treat; they’re a delicious embodiment of holiday joy, family traditions, and festive creativity. Whether you’re baking them for a cozy evening at home, a bustling holiday party, or as thoughtful homemade gifts, their soft, chewy texture and classic spiced flavor will undoubtedly be a highlight of your season. If you adore this recipe as much as I do, please take a moment to leave a five-star review below – your feedback means the world! And don’t forget to help spread the holiday cheer by sharing this recipe with your friends and family on Facebook and Pinterest!
CONNECT WITH KLEINWORTH & CO!
Stay updated with more delicious recipes, tips, and inspiration by following me on social media!
FB, Pinterest, IG, Email Subscription
Don’t miss these other fantastic holiday recipes from my blogging friends…
How the Grinch Stole Christmas Grinch Heart Pretzels | Two Sisters Crafting
Red Velvet Peanut Butter Blossoms | Kitchen Fun with My 3 Sons

Rate this Recipe
Rudolph Gingerbread Cookies
Ingredients
COOKIES
- 3-1/4 cups all-purpose flour
- 1 tbsp ground ginger
- 1 tbsp cinnamon
- 3/4 tsp ground cloves
- 3/4 tsp baking soda
- 1/2 tsp ground nutmeg
- 1/2 tsp table salt
- 3/4 cup butter – softened to room temperature
- 1/2 cup packed brown sugar
- 1 large egg
- 1/2 cup molasses
- 1-1/2 tsp vanilla extract
- orange zest – 1/2 of a small orange or 1/4 tsp orange extract
- OPT -toppings – holiday sprinkles,red hots, icing
ICING
- 2 cups confectioner’s sugar
- 2-3 tbsp milk
- 1/4 tsp vanilla extract
Instructions
-
Combine flour, cinnamon, ginger, nutmeg, cloves, salt & baking soda in a medium bowl. Set aside.
-
In a large mixing bowl, combine butter & sugar. Beat on high until light & fluffy.
-
Add in eggs, molasses & vanilla & beat until combined.
-
Lower the mixer to the lowest speed & slowly beat in the flour mixture until just combined.
-
Divide the dough into 2 equal balls, slightly flattening them into 1″ thick disks.
-
Wrap each disk in plastic wrap & refrigerate for a minimum of 3 hours, but it is best to chill overnight.
-
Once the dough is chilled, preheat the oven to 350 degrees.
-
Line baking sheets with parchment & set aside.
-
Unwrap one dough disk & use a rolling pin to roll out on a flat, lightly floured surface.
-
Once the dough is approximately 1/8″ thick, use your cookie cutter to cut your shapes. Reroll the dough as needed to continue cutting out more cookies.
-
Transfer cutouts to the prepared baking sheet.
-
Bake 8-10 minutes or until the cookies are just crisp around the edges & slightly on top. The longer you bake, the crispier they will be.
-
Remove from the oven & allow to cool on the baking sheet for 5 minutes before transferring to a wire rack to continue cooling.
-
Once the cookies have cooled to room temperature, they are ready for decorating.
For the icing
-
Whisk the confectioner’s sugar, milk & vanilla in a small bowl until smooth.
-
Transfer the mixture to a piping bag or plastic squeeze bottle & pipe onto the cookies as desired.
Nutritional information for the recipe is provided as a courtesy and is approximate. Please double-check with your own dietary calculator for the best accuracy. We at Yummi Haus cannot guarantee the accuracy of the nutritional information given for any recipe on this site.