
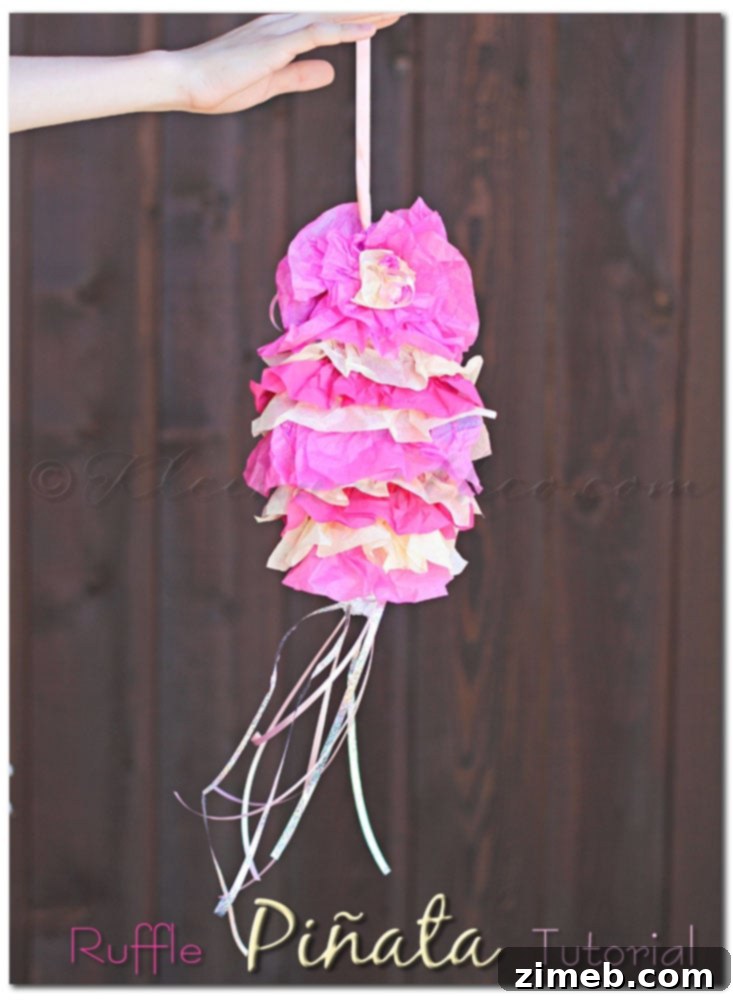
Craft Your Own Stunning Ruffle Piñata: A Detailed DIY Tutorial
There’s something truly magical about celebrating special moments, especially birthdays, with a touch of handmade charm. As I find myself in full “birthday mode,” my creative spirit is soaring, eager to tackle projects that have lingered on my crafting wish list for far too long. Just yesterday, I proudly showcased a delightful birthday banner, a versatile creation ready to adorn countless future celebrations for my girls. Today, I’m channeling that same enthusiasm into a project that promises even more whimsy and personal flair: a homemade piñata. But not just any piñata – I envisioned something uniquely feminine and enchanting, opting for an elegant ruffled design instead of the traditional fringe.
Why a DIY Ruffle Piñata?
The allure of a DIY piñata goes beyond just saving money; it’s about infusing a celebration with unparalleled personality and love. A handmade piñata becomes a centerpiece, a conversation starter, and a cherished memory. For this project, I was particularly excited by the idea of creating a “ruffle piñata” because it offered a softer, more sophisticated aesthetic. While traditional fringed piñatas are always fun, the ruffles provide a lush, textured look that perfectly complements a girly birthday theme.
Many crafters, myself included, can sometimes feel daunted by projects that appear overly complex or require numerous intricate steps. My crafting philosophy leans heavily towards instant gratification; if a project begins to demand too much time or becomes excessively complicated, my interest wanes rapidly. This is precisely why I was thrilled to discover that creating this beautiful ruffle piñata was far simpler than I initially anticipated. Its manageable steps and the ability to break the work into two relaxed afternoons made it an absolute joy to complete, proving that stunning DIY creations don’t have to be overwhelming.
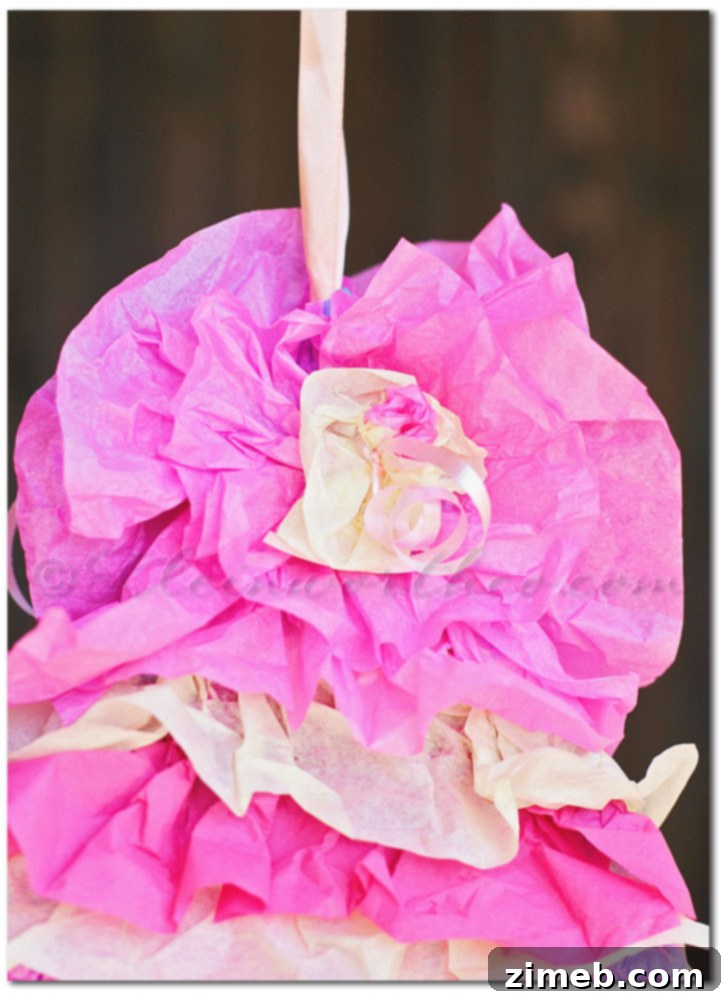
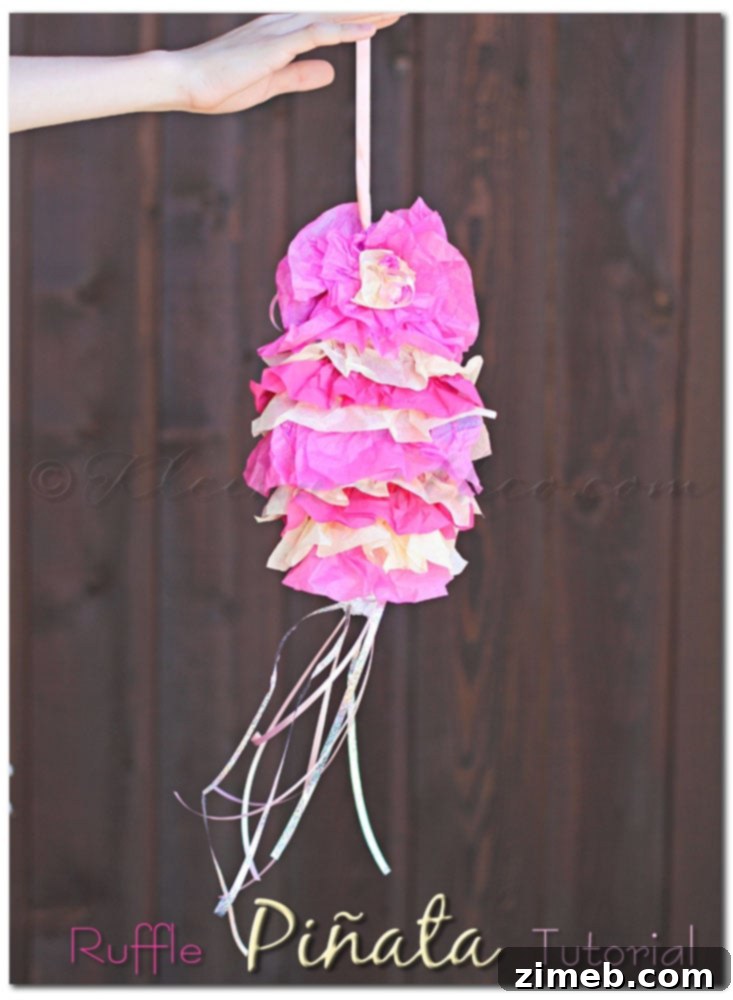
The finished piñata turned out so charming, my daughters were almost hesitant to break it open!
Gathering Your Materials: Crafting on a Budget
One of the most satisfying aspects of this project was its zero-dollar cost. I managed to craft this entire piñata using only supplies I already had on hand from previous birthday decorations and general craft stash. This not only made the project incredibly budget-friendly but also highlighted the beauty of resourcefulness. By utilizing existing materials, I could allocate more of my budget towards gifts, making the celebration even sweeter. Here’s a quick rundown of the essential supplies you’ll need:
- Cardboard: Repurpose old delivery boxes or any sturdy cardboard. This forms the foundational structure of your piñata.
- Scissors or Craft Knife: For precise cutting of cardboard and tissue paper.
- Painter’s Tape: Crucial for assembling the cardboard structure. Its lower adhesive strength ensures the piñata will break apart easily when hit, delivering maximum fun.
- Mod Podge (or White Glue/Water Mixture): The adhesive that transforms flat tissue paper into voluminous ruffles. Mod Podge offers excellent bonding and a nice finish.
- Tissue Paper: The star of the show for creating those beautiful ruffles. Choose colors that match your party theme.
- Curling Ribbon: For decorative accents and adding a festive flourish to the bottom of the piñata.
- Satin Ribbon: A sturdy ribbon is essential for creating the hanging loop.
Step-by-Step Guide to Your Ruffled Masterpiece
Part 1: Constructing the Cardboard Base (Approx. 30 Minutes)
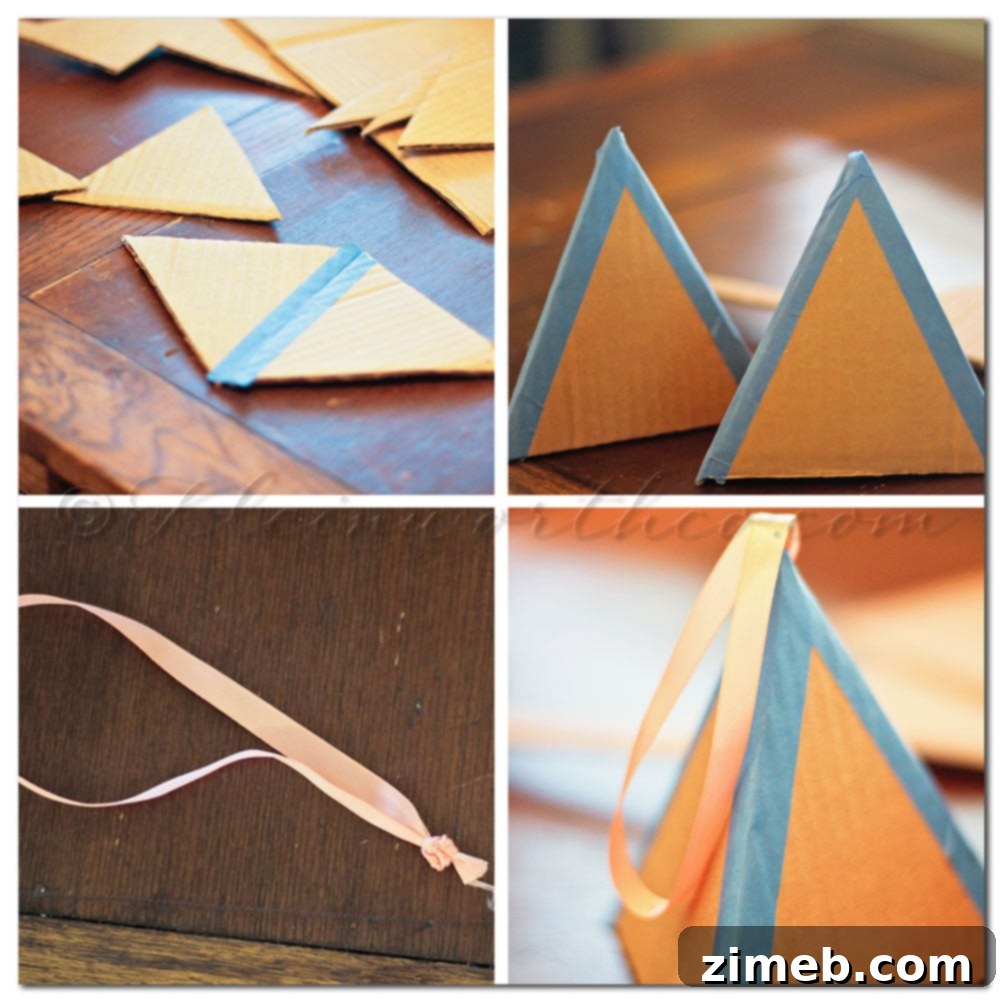
- Prepare Your Cardboard Triangles: Begin by cutting six identical cardboard triangles. These will form the two pyramid halves of your piñata, which will ultimately come together to create a diamond shape. While the ruffles will largely obscure the exact geometric shape, having uniform pieces ensures a balanced and stable structure. If you envision a future project with traditional fringe, you’ll want to be even more meticulous with your cuts to highlight the shape.
- Form the Pyramids: Take three of your cardboard triangles and carefully tape their edges together using painter’s tape to form one pyramid shape. Repeat this process with the remaining three triangles to create a second identical pyramid. The painter’s tape is key here; it holds the structure together securely enough for decorating, but its lighter adhesion allows the piñata to break open properly during the party.
- Create the Hanging Loop: Before fully assembling the piñata, select one of your pyramids to be the top. Take your sturdy satin ribbon, tie a secure knot at one end, leaving a generous loop. Carefully poke a hole at the very apex of this pyramid and thread the knotted end of the ribbon through the hole from the inside. The knot should be inside the pyramid, securing the loop on the outside, ready for hanging.
- Design the Candy Flap: On one of the flat sides of one pyramid, carefully cut a flap. This opening will be used to fill your piñata with candy and treats later. Make sure it’s large enough for easy filling but not so large that it compromises the structural integrity of the cardboard.
- Assemble the Diamond Shape: Once both pyramids are formed and your hanging loop and candy flap are in place, gently tape the two pyramids together at their bases using more painter’s tape. This joins them to create your final diamond-shaped piñata base. Ensure the taping is secure but remember the goal is for it to break when struck!
Part 2: Adding the Beautiful Ruffles (Approx. 1-2 Hours, Including Photos)
This is where the magic truly happens! The ruffling technique, while seemingly intricate, is surprisingly straightforward and incredibly rewarding.
- Prepare Your Tissue Paper: Cut your colored tissue paper into strips. The width of your strips will determine the size of your ruffles. For a fuller, more dramatic ruffle, opt for wider strips (e.g., 2-3 inches). For a finer, more delicate look, narrower strips are ideal. You’ll need a good quantity of tissue paper to cover the entire piñata.
- Begin Ruffling from the Bottom Up: Start at the very bottom point of your piñata. Apply a generous, even layer of Mod Podge (or your glue mixture) along a horizontal line on the cardboard.
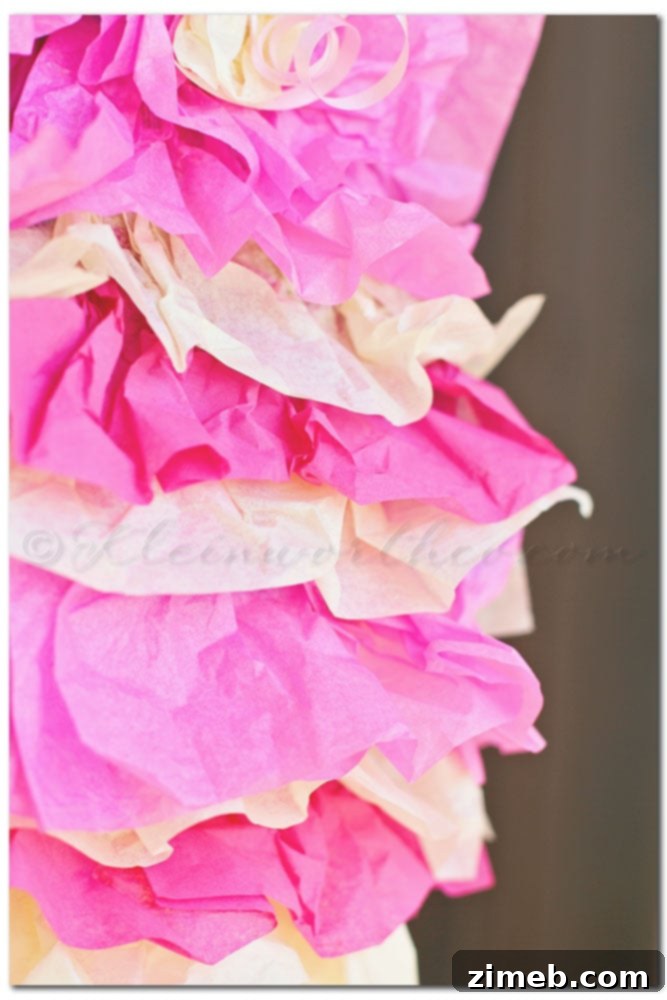
- Create the Ruffles: Immediately take one of your tissue paper strips. Lay one long edge of the strip onto the glued line. As you press the strip down, gently pull and pinch the tissue paper to create soft, undulating ruffles. Don’t worry about perfection; the organic nature of the ruffles adds to the charm. Work your way around the entire circumference of the piñata with this first strip.
- Layering for Volume: Once the first ruffled strip is complete, move upwards. Apply another line of Mod Podge just above the previous strip. Lay your next tissue paper strip, ensuring that the un-glued, ruffled part of the new strip slightly overlaps the previously glued strip. This layering technique is crucial for achieving a dense, voluminous ruffled effect. Continue this process, working your way up the entire piñata, row by row.
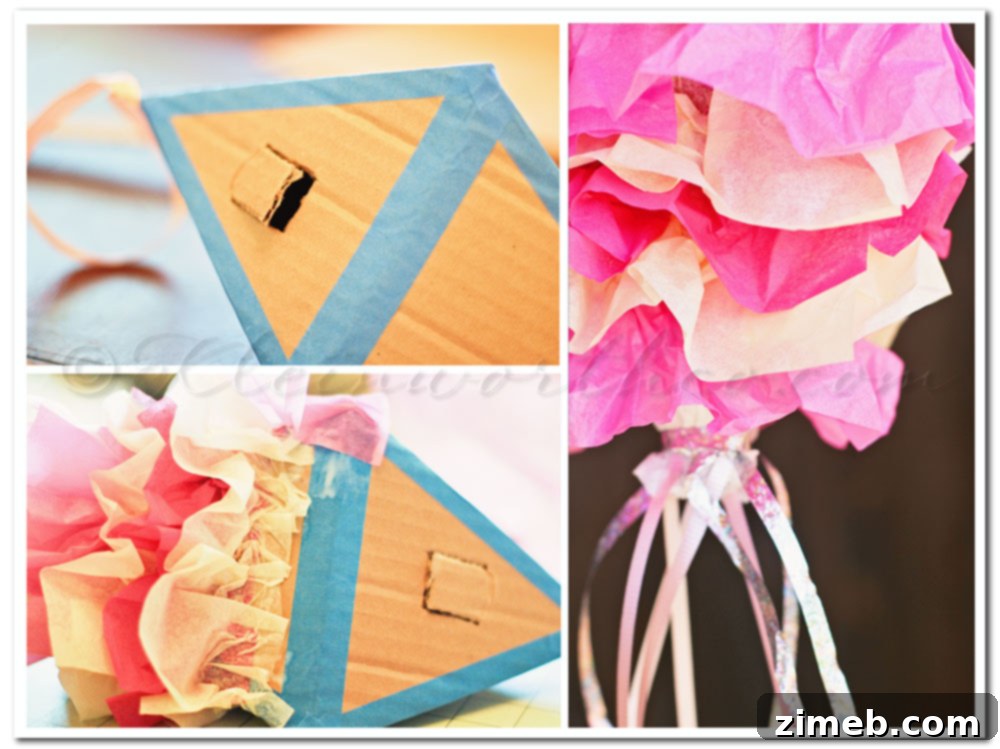
- Addressing the Candy Flap: As you apply ruffles over the area where you cut your candy flap, go ahead and glue the tissue paper right over it. Once the Mod Podge is completely dry, you can use a craft knife or sharp scissors to carefully slice through the tissue paper along the original cut lines of the flap, allowing it to open freely.
- Decorating the Top: When you reach the top of the piñata, consider adding some decorative tissue paper flowers. I simply crumpled small squares of coordinating tissue paper towards their centers and tied them with a piece of curling ribbon to hold their shape. Then, I glued one flower onto each side of the top point of the piñata, adding a lovely finishing touch.
- Adding Festive Ribbons: To enhance the celebratory feel, I decided to add more curling ribbon, selecting metallic and coordinating pink shades. I simply tied these ribbons around the bottom point of the piñata, letting them cascade downwards. This adds movement and an extra layer of visual interest.
Color Choices and Personal Touches
While the party decorations featured a delightful palette of yellow, pink, and orange sorbet, I didn’t have orange tissue paper readily available. Embracing the spirit of using what I had, I opted for two different shades of pink, which created a beautiful monochromatic effect that was still perfectly “girly.” This experience reinforces the idea that you don’t always need to adhere strictly to a plan; sometimes, improvisation leads to equally beautiful, if not more unique, results.
The entire project was a testament to efficient crafting. The initial construction of the cardboard base took a mere 30 minutes on the first afternoon. The following afternoon, I dedicated about 1-2 hours to applying the tissue paper and capturing photos, making it a perfectly paced weekend craft. The satisfaction of creating something so charming and impactful with zero additional cost was immense.
The Joy of Handmade Celebrations
Having now successfully completed this ruffle piñata, I can confidently say it won’t be my last. Its simplicity, combined with the stunning outcome, makes it an ideal project for future birthdays and celebrations. The joy of creating something with your own hands, especially for loved ones, is truly unparalleled. It adds a layer of warmth and personalization that store-bought items simply can’t replicate.
So, if you’re looking for a fun, creative, and budget-friendly way to elevate your next party, I highly recommend giving this ruffle piñata a try. It’s proof that impressive DIY projects don’t have to be complicated to be spectacular. Get ready to impress your guests and delight your little ones with this charming, handmade creation!
Remember to check back every Monday for more creative inspiration with Project 52, and discover where I’m linking today for even more craft ideas!