
*Disclosure: I have been compensated for this post either monetarily or with product through Blueprint Social & Plaid FolkArt. All opinions are truthful & my own.
Unlock Creativity: Crafting a Distressed Key Rack with FolkArt Multi-Surface Paint & Handmade Charlotte Stencils
There’s a unique satisfaction that comes from transforming forgotten items into something beautiful and functional. If you’ve been a regular visitor here, you know my passion for repurposing runs deep. My garage is a treasure trove of salvaged materials, each waiting for its moment to be reimagined into a new project. So, when the opportunity arose to experiment with the brand-new FolkArt Multi-Surface Paint and the exquisite Handmade Charlotte stencils, recently launched and now available at Michaels, I was beyond thrilled! This wasn’t just about trying out new products; it was an invitation to bring a fresh burst of creativity into our home.
The Art of Repurposing: Giving New Life to Old Treasures
Repurposing isn’t just a hobby for me; it’s a philosophy. It’s about seeing potential where others see waste, about sustainability, and about injecting personality into your living space without breaking the bank. From an old wooden pallet becoming a garden planter to vintage drawers transforming into wall shelves, the possibilities are endless. This project, a distressed key rack, perfectly embodies that spirit. It utilizes a simple piece of salvaged wood and an everyday soda can, turning them into a stylish and practical addition to our home. The beauty of repurposing lies in its ability to create pieces that tell a story, each imperfection adding to its unique charm.
A Functional Solution: Why Every Home Needs a Key Rack
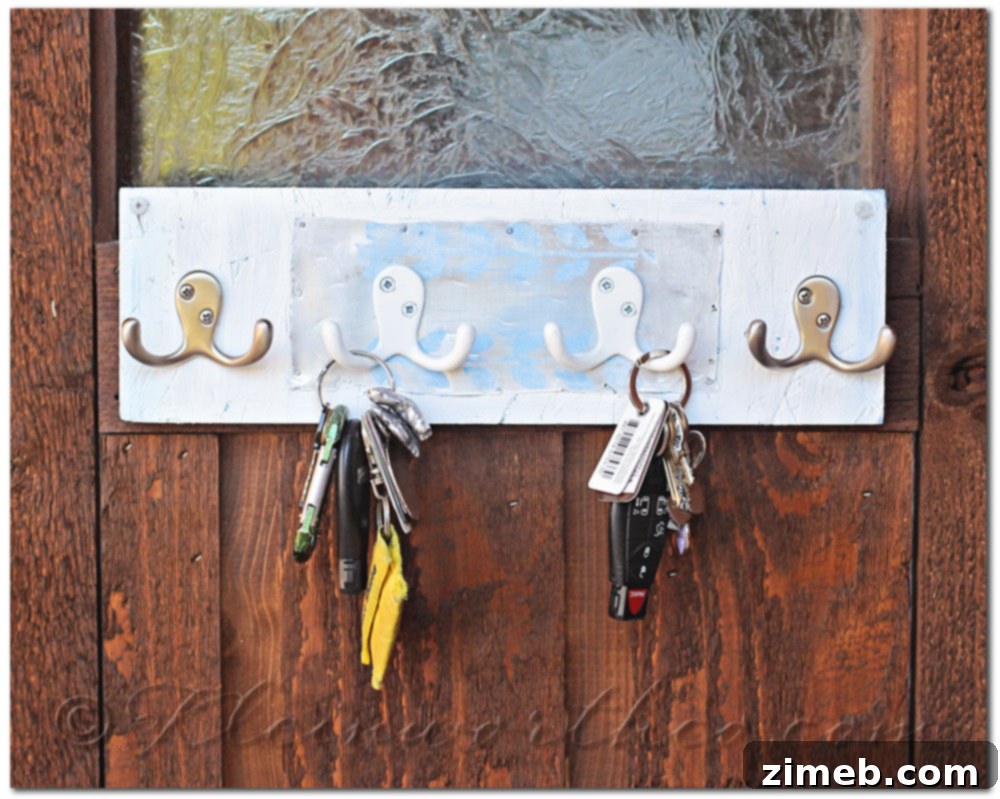
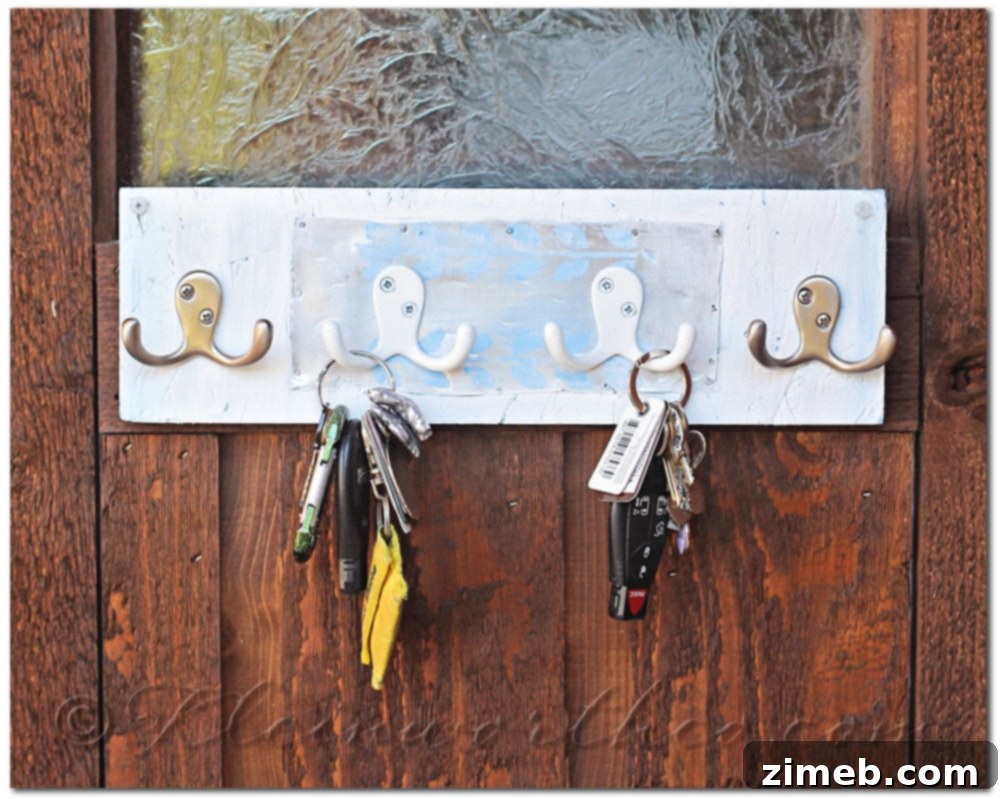
Despite my love for crafting, I’ve always struggled with keeping track of our keys. They’d invariably end up scattered across the kitchen counter, creating a messy eyesore. While I prefer not to have my keys conspicuously displayed, their current state of disarray clearly indicated a need for a dedicated organizational solution. This led me to the idea of creating a distressed key rack – something both practical and aesthetically pleasing. I envisioned a piece that would blend seamlessly with our existing rustic and weathered decor. Its intended home? Our laundry room. This space doubles as our “kid command center” and is the primary entry/exit point to the garage, making it the perfect, discreet location for a functional key organizer. (Though, a quick note: my laundry room is more “dungeon” than “rustic chic,” which is why I took these project photos on our porch, where the natural light truly highlights the craftsmanship!)
The Game-Changers: FolkArt Multi-Surface Paint & Handmade Charlotte Stencils
The true stars of this project are the new FolkArt Multi-Surface Paint and Handmade Charlotte Stencils. The multi-surface paint is a crafter’s dream come true, offering incredible versatility. It adheres beautifully to virtually any surface – wood, metal, glass, fabric, ceramics – you name it! Plus, its durable formula means it’s dishwasher safe for glass and ceramics, and machine washable for fabrics, making it ideal for a wide range of projects, from custom mugs to personalized apparel. For this distressed key rack, its ability to bond with both wood and metal was absolutely essential, allowing me to use the same paint throughout the entire piece for a cohesive look. The “COOL!!!” factor here is immense; no need to switch paints for different materials, streamlining the entire creative process.
Complementing this remarkable paint are the new Handmade Charlotte Stencils. These aren’t your average stencils; they feature a collection of fresh, intricate, and trendy patterns that instantly elevate any project. Their quality and design make them incredibly easy to use, ensuring crisp, professional-looking results every time. For my key rack, I chose a pattern that added an elegant, yet subtly rustic, touch to the recycled aluminum accent. Together, these Plaid FolkArt products open up a world of creative possibilities, empowering crafters to tackle diverse projects with confidence and style.
Gather Your Materials: What You’ll Need for Your Distressed Key Rack
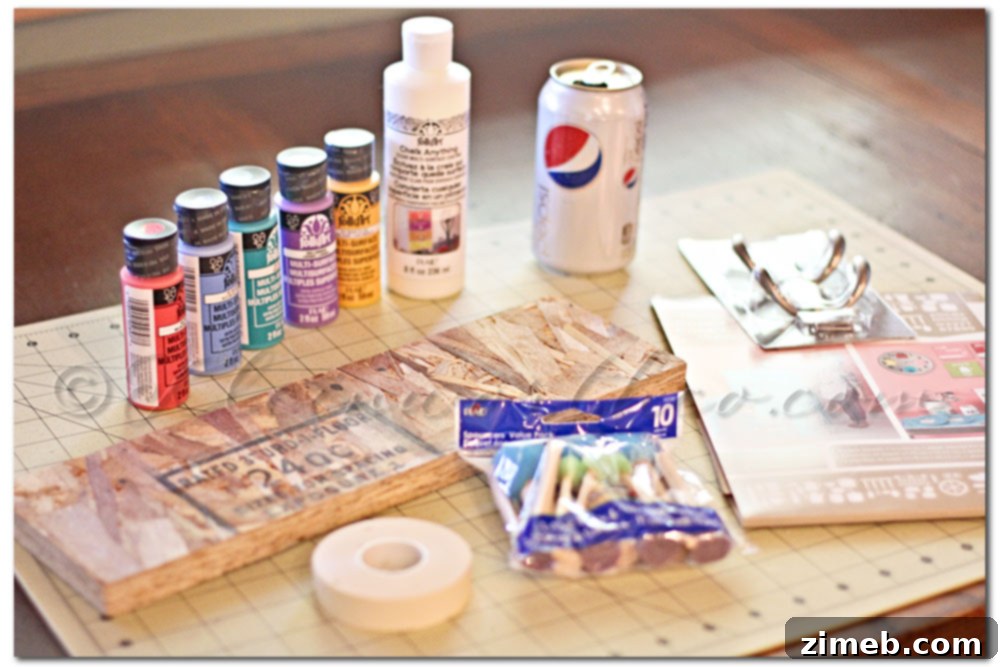
To embark on your own distressed key rack adventure, here’s a detailed list of the supplies I used. Feel free to adapt and personalize based on what you have on hand or your preferred aesthetic:
Supplies:
- Plaid FolkArt Multi-Surface Paint: Choose a palette of colors that complement your home decor. I selected a serene blue for the base and a crisp white for the stenciled details and accent areas. The multi-surface capability means flawless adhesion on both the wood and metal components.
- Stamper Sponges: These are ideal for stenciling, allowing for controlled paint application and preventing bleeding under the stencil edges. A small brush can also work for detail work.
- Handmade Charlotte Stencils: Pick a pattern that resonates with your personal style. Their unique designs add a sophisticated touch to any project.
- Piece of Salvaged Wood: The beauty of repurposing! Look for a piece of wood with character – an old fence post, a discarded shelf, or a section from an unused pallet. The dimensions will depend on how many keys you plan to hang and the space you have available. I found a lovely piece that already had a wonderfully aged patina.
- 1 Empty Soda Can: A standard aluminum soda can is perfect for creating a unique metallic accent. Any clean, empty aluminum can will do.
- Painter’s Tape: Essential for holding your stencils in place and for creating clean lines if you’re planning any painted borders or sections.
- Key Hooks: I used a mix of hooks I had previously purchased and some from an unopened package. Choose hooks that match the aesthetic you’re going for – rustic, antique brass, or simple silver. Ensure they are sturdy enough to hold your keys.
Essential Tools:
- Hammer: For attaching the aluminum and for distressing the wood and metal.
- Drill with Bits: Necessary for pre-drilling holes for your hooks and for mounting the rack to the wall.
- Finishing Nails: Small nails to secure the flattened aluminum to the wood.
- Scissors or Utility Knife: For safely cutting and preparing the soda can.
- Nail File or Sandpaper: For roughing up painted surfaces and aluminum to achieve that perfect distressed look.
- Cloth or Paper Towels: For cleanup and wiping excess paint.
- Pencil: For marking hook placement and drill holes.
Step-by-Step Guide: Crafting Your Rustic and Distressed Key Rack
Follow these detailed steps to create your very own repurposed and distressed key organizer. Remember, the beauty of DIY is in embracing imperfections and personalizing each stage.
Step 1: Prepare Your Wooden Base
Begin by painting your entire salvaged wood piece with your chosen base color. I opted for a rich blue shade from the FolkArt Multi-Surface Paint collection to give it an immediate rustic feel. Apply one or two even coats, allowing sufficient drying time between each. Since this paint is designed for durability and excellent coverage, you’ll find it goes on smoothly and dries to a beautiful finish.
Step 2: Transform the Soda Can into Unique Metal Accents
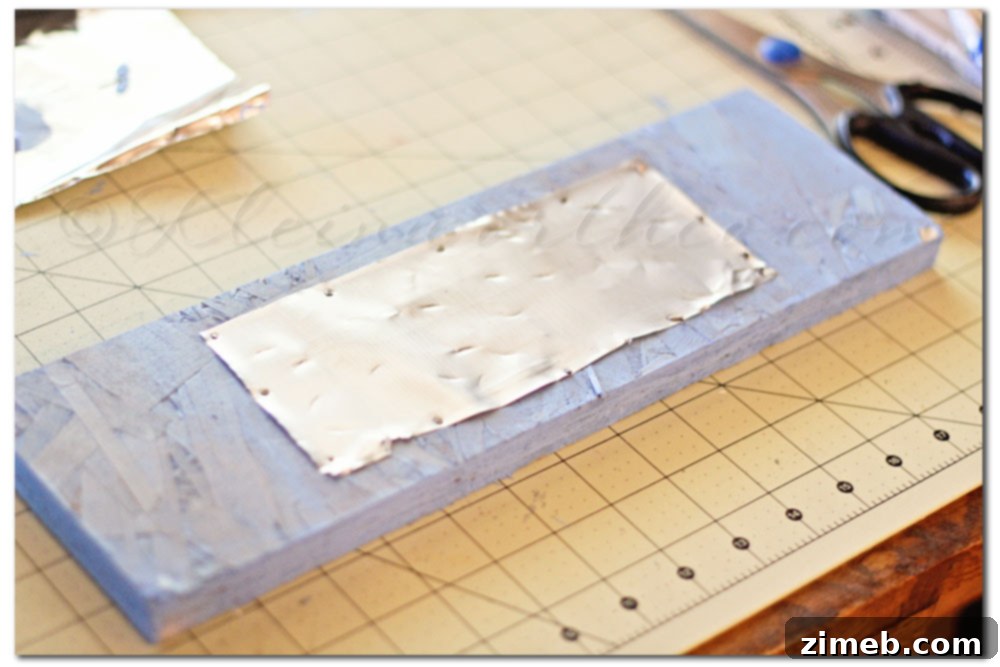
This is where the creative repurposing truly shines! Carefully cut off the top and bottom of your empty soda can using strong scissors or a utility knife. Then, cut down the side of the can to flatten it into a sheet of aluminum. Be cautious, as the edges can be sharp. Once flattened, position the aluminum sheet on your painted wood board. Using small finishing nails, tack the aluminum securely onto the board. Don’t be afraid to embrace the “distressed” look here – I intentionally beat the aluminum a little with my hammer to create dents and imperfections, adding to its weathered charm.
Step 3: Stenciling and Initial Distressing
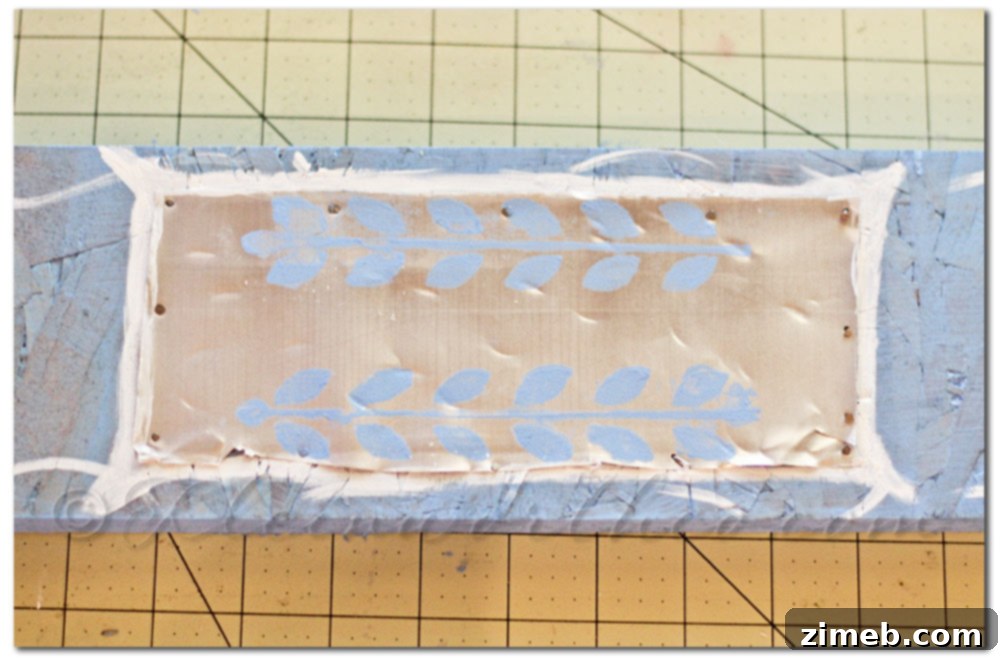
Now for the artistic flair! Place your chosen Handmade Charlotte Stencil over the aluminum section. Secure it with painter’s tape to prevent shifting. Using a stamper sponge, gently dab your contrasting paint color (I used white) over the stencil to create your desired design. Once the paint is dry, carefully remove the stencil. To further enhance the distressed effect, take a nail file or a piece of fine-grit sandpaper and lightly rough up both the painted design and the aluminum surface. This step subtly reveals the underlying metal and softens the new paint, making it look aged and worn.
Step 4: Refining the Distressed Look and Color Scheme
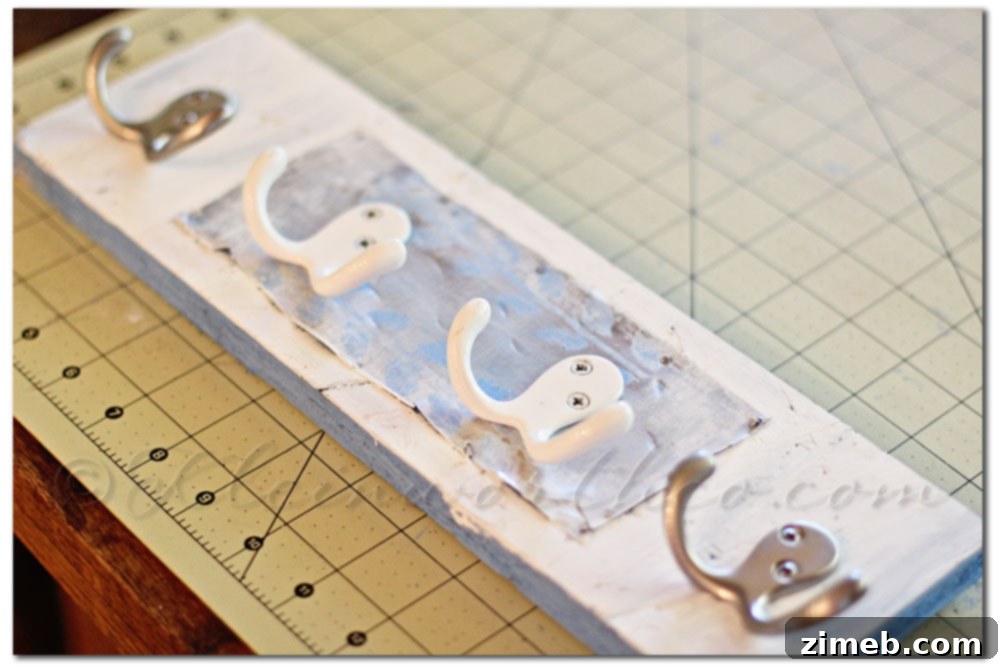
Initially, I tried adding white designs around the aluminum, but candidly, I wasn’t pleased with the outcome. This is a common part of the creative process – sometimes you need to pivot! I decided to repaint the non-aluminum sections. I repainted the entire board with the blue base, then carefully added white to create a distinct border around the aluminum, giving it a cleaner, yet still rustic, look. To achieve a more subdued, matte effect on the aluminum itself, I lightly brushed a very thin coat of my chosen paint over the entire metallic area. This mutes the metallic sheen and integrates it more seamlessly with the distressed wood.
Step 5: Attaching the Hooks and Preparing for Installation
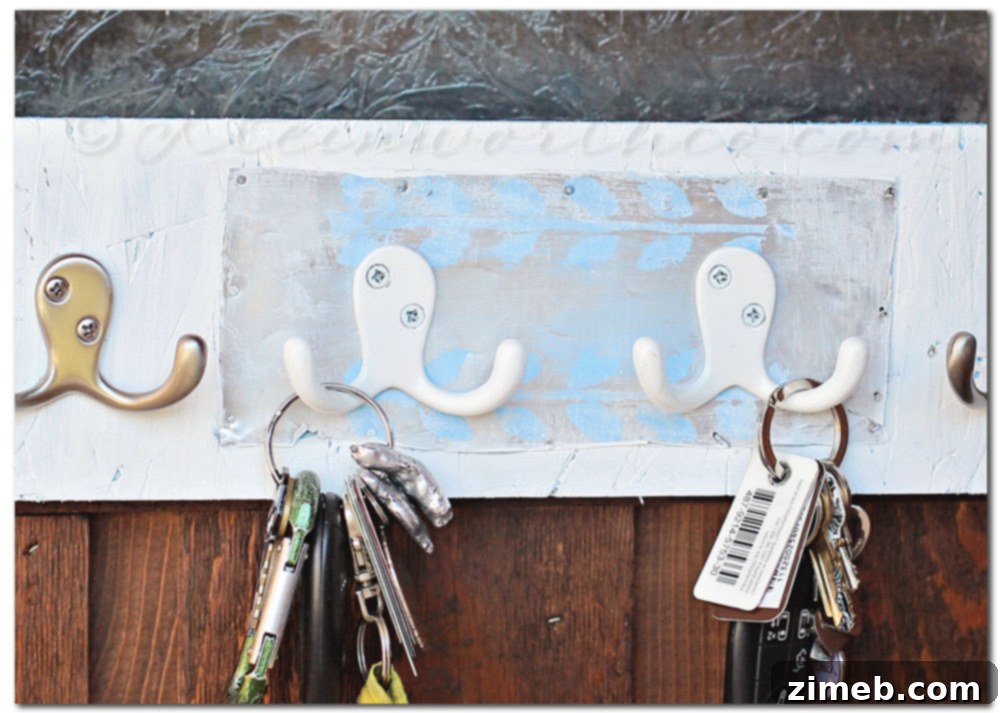
With the decorative elements complete, it’s time for functionality. Lay out your key hooks on the board, marking precisely where you want each hook to be. Using a small nail, create starter holes to guide your drill. Then, with a drill, screw in each hook securely. Next, mark the top corners of your key rack where it will attach to the wall. Drill pilot holes through the wood in these spots. Finally, for a truly finished and cohesive look, I applied a small dab of paint over the heads of the screws that will be used for wall mounting. This subtle detail helps them blend in, ensuring they don’t detract from the rustic aesthetic of the rack.
Your Rustic Key Rack is Complete! Embrace the Charm of Repurposed Decor
Once all the paint edges were cleaned up and the final touches were applied, my distressed key rack was ready! The end result is a charming, functional piece that perfectly complements our home’s existing collection of old, rustic, and weathered items. It’s more than just a place to hang keys; it’s a testament to the power of repurposing and the creative potential of materials that might otherwise be discarded. I encourage you to unleash your own creativity with these fantastic Plaid FolkArt products and see what unique pieces you can bring to life!
Discover More from Plaid Crafts!
Eager to explore more incredible products and project ideas from Plaid FolkArt? Don’t miss out on their inspiring content and latest releases. Be sure to connect with them across their social media channels and blog:
Facebook: https://www.facebook.com/InspiredByPlaid
Twitter: https://twitter.com/plaidcrafts
Pinterest: https://pinterest.com/plaidcrafts/
Blog: https://paintmeplaid.com/
Win Big: FolkArt Multi-Surface Prize Pack & Michaels Gift Card!
Do you want to WIN a fantastic FolkArt Multi-Surface prize pack and a $100 Michaels gift card? I know you do! Don’t miss your chance – enter now for an opportunity to kickstart your next crafting adventure!
a Rafflecopter giveaway
Explore More Creative Projects
Ready for even more inspiration? Check out a host of other amazing projects created by talented bloggers using these very same FolkArt products. Discover new techniques and ideas to spark your next DIY masterpiece!
Don’t forget to come back & join me on Mondays for Project 52, where we explore a new creative challenge each week!
To see where I am linking today- visit HERE