
Sparkle & Shine: The Ultimate Guide to Crafting Beautiful DIY Glitter Jars
There’s a special joy in transforming the ordinary into something extraordinary, especially when it involves a bit of shimmer! For years, I’ve harbored a secret (or not-so-secret) obsession with saving used glass jars. They pile up in my craft closet, waiting for their moment to shine – a testament to my belief in upcycling and repurposing. My mind is a constant whirl of craft projects and recipe ideas, often keeping me awake with their creative possibilities. While there aren’t enough hours in the day or blog posts in a year to share every single one, some projects simply demand attention. This time, I finally pulled out a selection of those patiently waiting jars and embarked on a delightful glitter jar decorating adventure – a project I’ve envisioned since the holidays!
The allure of glitter is undeniable. It’s a touch of magic, a sprinkle of joy that can elevate any space. These glitter jars, while deceptively simple to make, deliver a powerful aesthetic punch. Yes, the crafting process can be a tad messy – my husband often finds stray glitter in unexpected corners of the house – but I assure you, it’s a small price to pay for the radiant beauty they bring. In our home, with its cozy, rustic cabin decor, I craved something a little “fussy” and “girly” to introduce an element of whimsical charm and sparkle. These jars were the perfect answer, adding just enough gleam to make my heart sing. As I often remind myself, life is too short to fret over minor inconveniences. While I love a clean home, I’m learning to embrace the ebb and flow of daily life, finding joy in the creative process and letting go of the need for constant perfection. These glitter jars are a beautiful reminder of that philosophy.
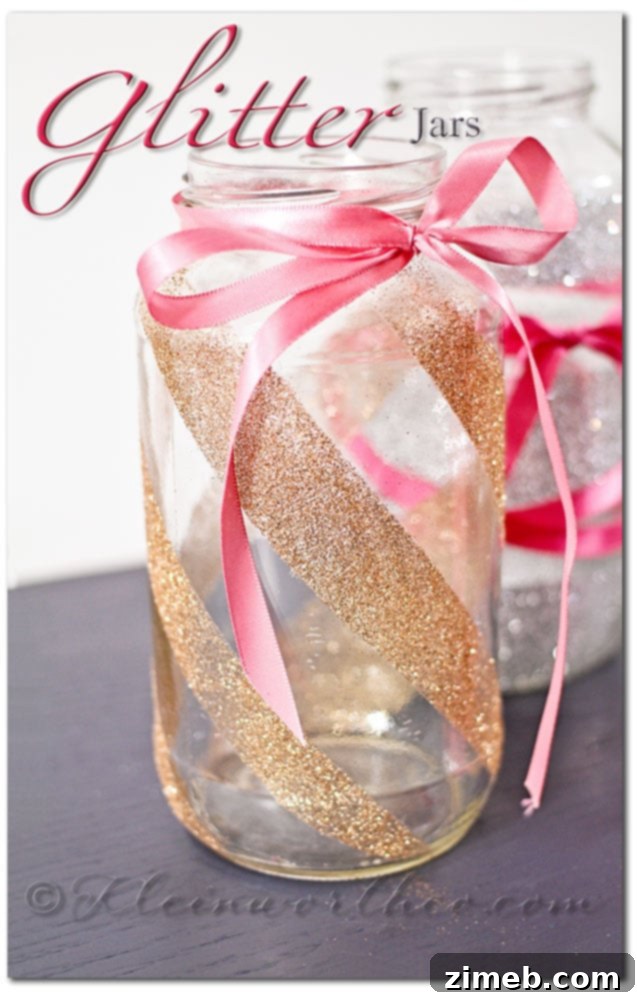
Why Upcycle Jars into Dazzling Decor?
Upcycling glass jars isn’t just a fun craft; it’s a sustainable practice that benefits both your home and the environment. Instead of discarding these versatile containers, we give them a new life, reducing waste and fostering creativity. From pickle jars to jam jars, each one holds potential. Beyond their eco-friendly appeal, glitter jars offer an incredible opportunity for personalization. You can choose colors, patterns, and themes that perfectly match your existing home decor, a specific season, or an upcoming celebration. They are remarkably cost-effective, allowing you to create high-impact decor on a budget. Plus, the satisfaction of making something beautiful with your own hands is truly priceless.
Gather Your Supplies: What You’ll Need
Before diving into the glittery goodness, ensure you have all your materials ready. A little preparation goes a long way in making the crafting process smooth and enjoyable (and minimizing glitter migration!).
- Clean Glass Jars: Any size or shape will do. Wide-mouthed jars are often easier to work with.
- Dish Soap & Hot Water: For thorough cleaning.
- Scraping Tool: A spackle tool, old credit card, or even a butter knife works well for label removal.
- Rubbing Alcohol or Goo Gone: For stubborn adhesive residue.
- Painter’s Tape or Masking Tape: To create your desired patterns. Washi tape can also work for delicate designs.
- Spray Adhesive: A strong, quick-drying craft adhesive is ideal. Look for one that explicitly states it’s suitable for glitter.
- Fine Glitter: Your choice of colors! Craft glitter comes in various finishes – iridescent, holographic, metallic – experiment to find your favorite.
- Large Tray or Newspaper: To catch excess glitter and contain the mess.
- Clear Acrylic Sealer (Optional but Recommended): A clear spray sealant will help minimize glitter shedding once your jars are complete.
- Gloves (Optional): To keep your hands clean during the spray adhesive and glitter application.
- Cardboard Box (Optional): To create a “spray booth” for applying adhesive in a well-ventilated area.
Step-by-Step Guide to Dazzling Glitter Jars
This project is truly as easy as 1-2-3, but a few insider tips can make all the difference in achieving a professional-looking finish.
Step 1: The Foundation – Preparing Your Jars
The first and most crucial step is ensuring your jars are impeccably clean. Any residual glue or grease will prevent the adhesive from sticking properly. I find the best method is to soak the jars in hot, soapy water for an hour or so. This softens most labels, making them easier to scrape off with a spackle tool or similar utensil. For any stubborn adhesive, a dab of rubbing alcohol or a product like Goo Gone, followed by a good wash, will usually do the trick. Once the labels are completely removed, wash the jars again with soap and water, rinse thoroughly, and let them air dry completely. Moisture is the enemy of spray adhesive and glitter, so ensure they are bone dry before proceeding.
Step 2: Designing Your Sparkle – Taping Off Patterns
Now comes the fun part – defining your design! Use painter’s tape or masking tape to create your desired patterns. The possibilities are endless: horizontal stripes, vertical lines, geometric shapes, or even freehand curves. For crisp lines, press the tape down firmly, ensuring there are no gaps or air bubbles. You can experiment with different widths of tape for varied effects. Perhaps you want to glitter just the bottom half, the top rim, or create a window for viewing contents. This step allows for immense creative expression, so take your time and plan your design thoughtfully. Remember, any area covered by tape will remain clear glass, while the exposed areas will get the glitter treatment.
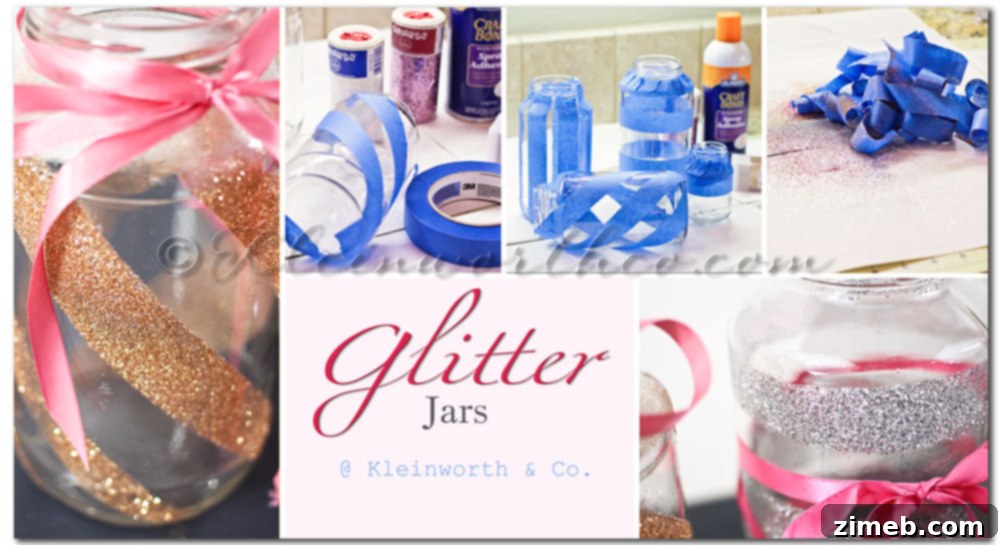
Step 3: The Magic Layer – Spray Adhesive Application
Head to a well-ventilated area, preferably outdoors or in a garage with open doors. Lay down a large sheet of newspaper or an old drop cloth to protect your work surface. If you have a cardboard box, you can turn it on its side to create a makeshift spray booth, which helps contain the spray and direct it onto your jar. Holding the spray adhesive can about 6-8 inches from the jar, apply an even, thin coat over all the exposed glass areas. Work quickly and in short, sweeping motions to avoid drips or uneven patches. You want good, tacky coverage, but not so much that it becomes gloopy. Immediately move to the next step while the adhesive is still very sticky.
Step 4: The Glitter Bomb – Adding the Sparkle
Working over your catch tray or newspaper, generously sprinkle glitter over the adhesive-covered areas of your jar. Don’t be shy! Ensure every sticky spot is thoroughly coated. You can rotate the jar as you sprinkle to ensure even coverage from all angles. For best results, use a different color glitter for each jar if you’re creating a set, or experiment with blending shades on a single jar. Once you’re satisfied with the coverage, gently tap the jar to shake off any excess glitter. This excess can be collected and returned to its container (if it’s clean enough) for future projects, minimizing waste.
Step 5: The Reveal & Seal – Finishing Touches
Carefully peel off the painter’s tape while the adhesive is still slightly tacky but not wet. This helps ensure clean, crisp lines. If you wait until the adhesive is fully dry, the glitter might lift with the tape, or the edges might not be as sharp. Once the tape is removed, let the jars dry completely for several hours, or even overnight, to ensure the adhesive is fully cured. For an extra layer of durability and to significantly reduce glitter shedding, apply a thin, even coat of clear acrylic sealer spray over the glittered areas. Again, do this in a well-ventilated area. Allow the sealer to dry fully according to the product instructions. This final step is crucial for making your glitter jars truly functional and less messy in the long run.
Creative Ways to Use Your Dazzling Glitter Jars
Now that your glitter jars are complete, it’s time to put them to good use! Their versatility is part of their charm.
- Vases: Perfect for displaying fresh flowers or faux botanicals, adding a touch of elegance to any table.
- Candle Holders: Place LED flameless candles inside for a safe and enchanting glow, especially lovely for outdoor evenings or cozy corners.
- Desk Organizers: Keep pens, pencils, brushes, or craft supplies neatly organized and sparkling.
- Bathroom Storage: Ideal for cotton balls, Q-tips, makeup brushes, or hair ties, adding a glamorous touch to your vanity.
- Party & Event Decor: Use them as centerpieces, party favors, or decorative accents for weddings, birthdays, or festive gatherings.
- Gift Jars: Fill them with homemade treats, small gifts, or a collection of notes for a personalized and thoughtful present.
- Fairy Lights Holders: Stuff them with battery-operated fairy lights for a magical, twinkling display.
Taming the Glitter Monster: Tips for a Less Messy Craft
Let’s be honest, glitter is notorious for getting everywhere. But with a few precautions, you can keep the sparkle contained:
- Work Area: Always work over a large tray, newspaper, or a disposable tablecloth.
- Static Control: A dryer sheet wiped over your workspace can help reduce static cling, which often makes glitter fly.
- Sticky Roller: Keep a lint roller handy for quick clean-up of stray glitter on surfaces or clothing.
- Vacuum Attachment: For larger spills, a small vacuum attachment is your best friend.
- Sealant: Don’t skip the clear acrylic sealer! It significantly reduces shedding once the project is done.
Embrace the Sparkle, Embrace the Joy
These glitter jars are more than just a craft; they’re a miniature celebration of creativity and joy. In a world that often demands perfection, there’s immense beauty in the handmade, in the slight imperfections that make each piece unique. They remind me to infuse a little sparkle into everyday life, to embrace moments of simple pleasure, and to not sweat the small stuff – like a bit of rogue glitter. So go ahead, gather those forgotten jars, unleash your inner artist, and let your home shine with a touch of DIY magic.
Don’t forget to connect with us for more creative inspiration! Join us on Mondays for Project 52 and on Wednesdays for Your Best Weekly to discover new ideas and share your own crafting journeys.