
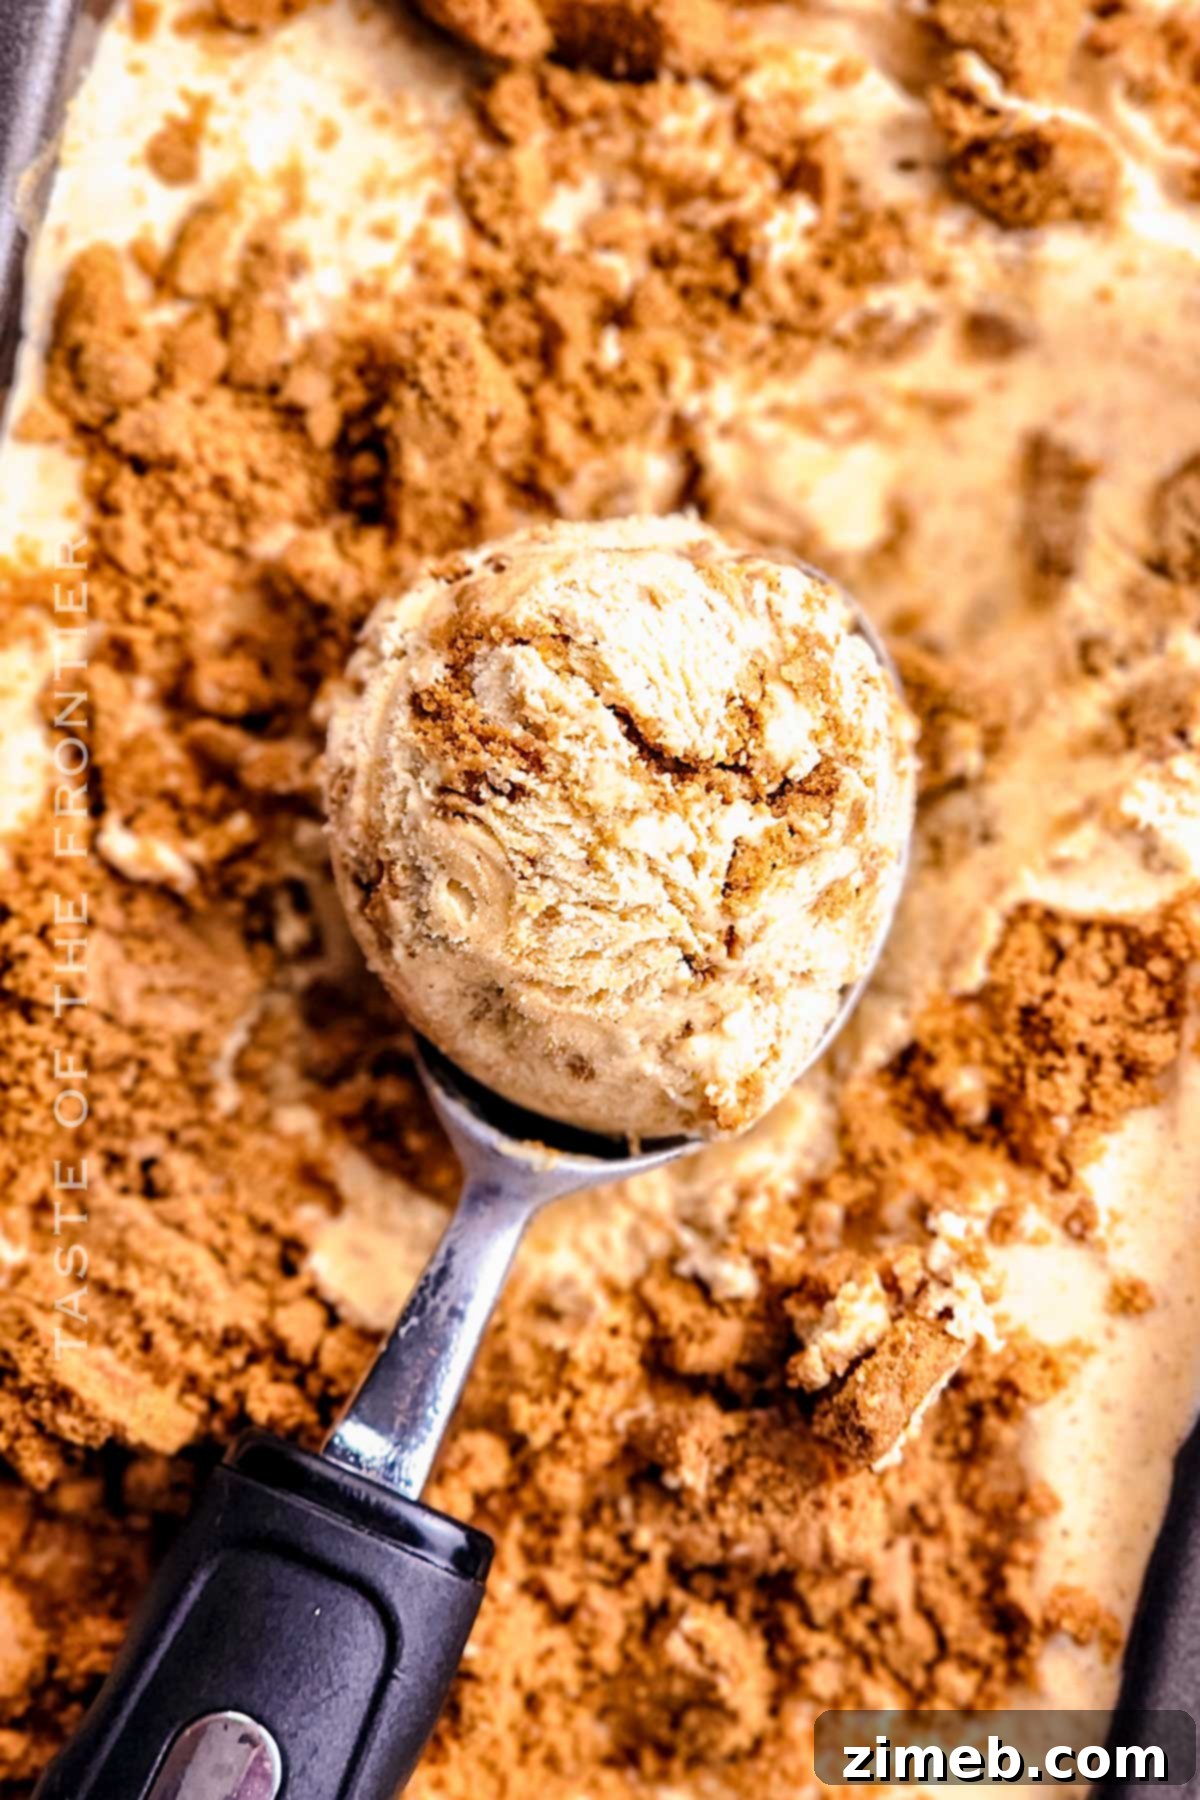
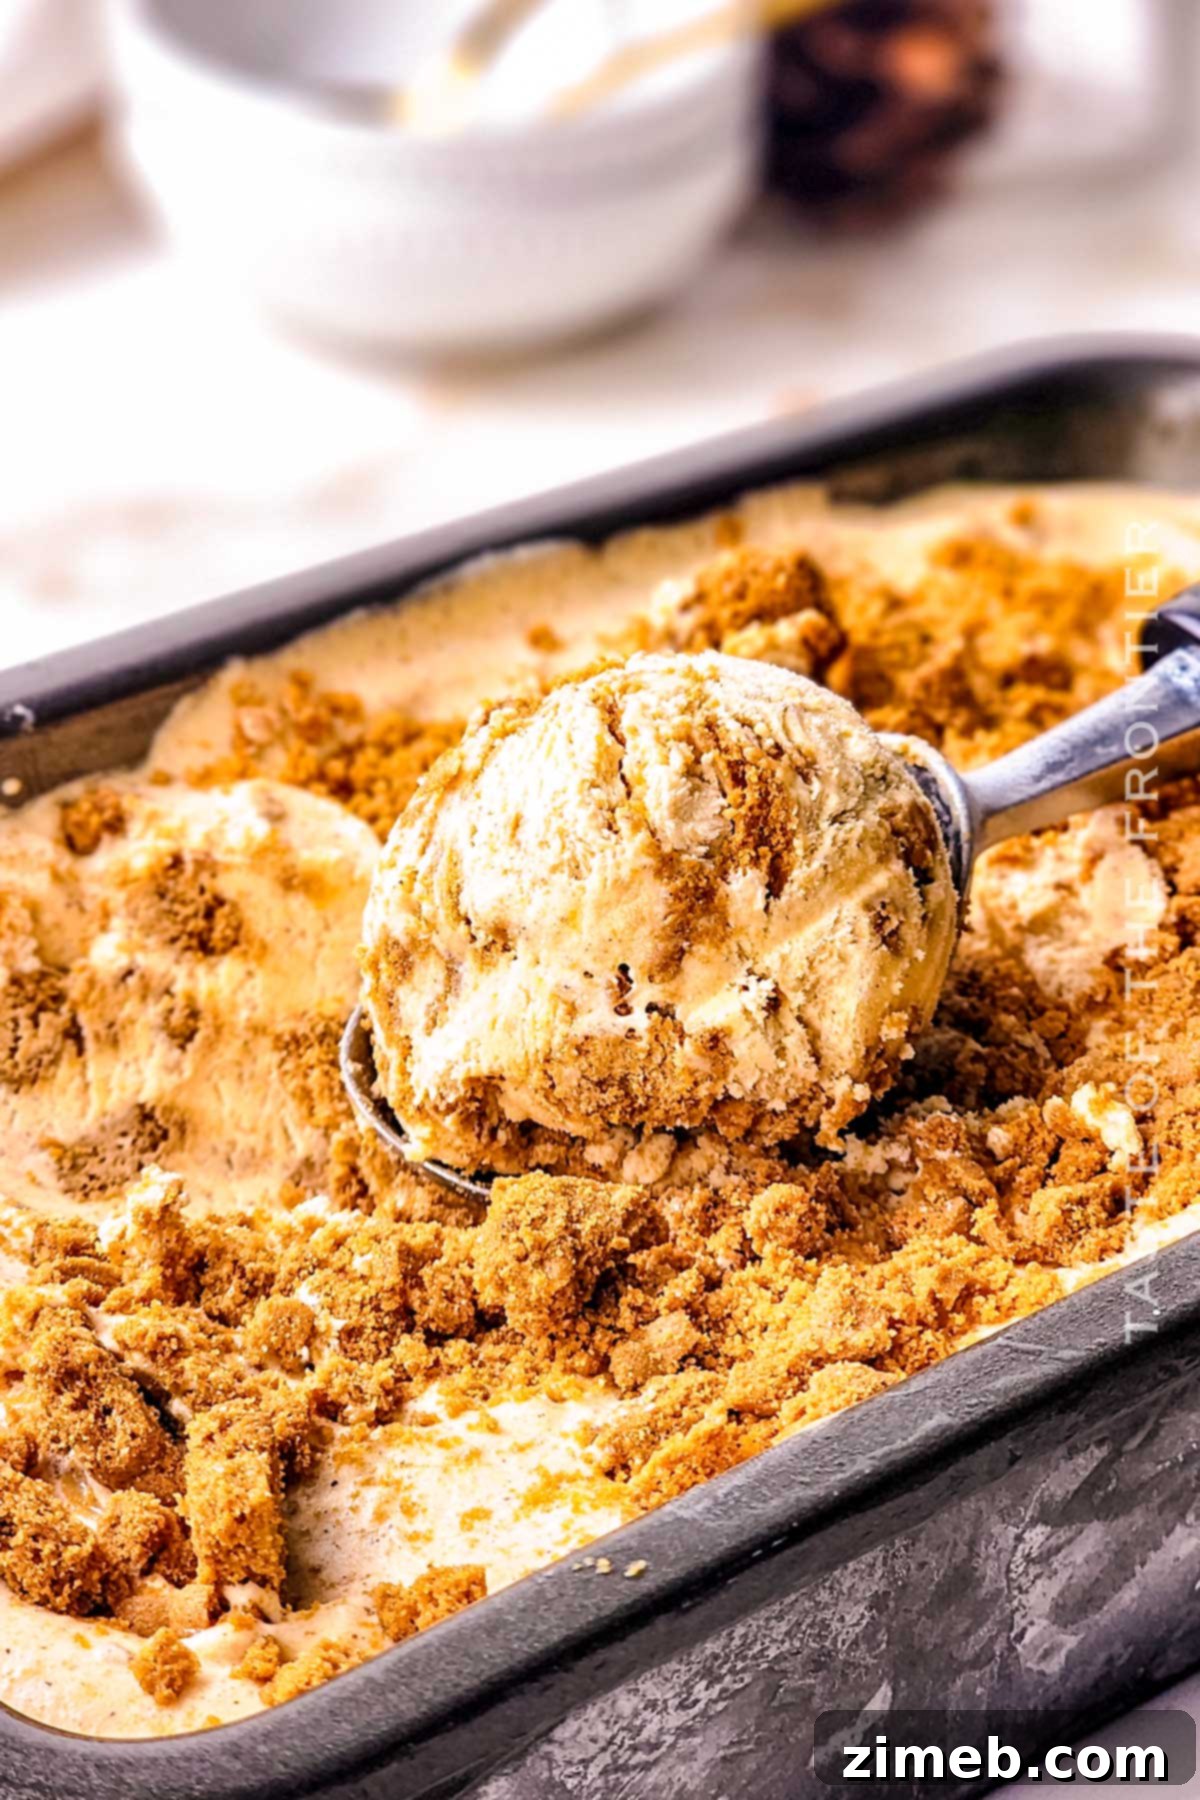
Indulge in the ultimate taste of autumn with this incredibly simple, 5-ingredient homemade pumpkin pie ice cream. You don’t need a fancy ice cream maker to create this creamy, dreamy frozen treat. Combining the rich flavors of condensed milk, pure pumpkin, and aromatic pumpkin spice, this recipe transforms all your favorite fall dessert notes into a delightful, scoopable experience. Prepare to savor the essence of pumpkin pie, perfectly chilled and ready to enjoy whenever a craving strikes.
In just five essential ingredients and six straightforward steps, you’ll have a generous container of smooth, luscious pumpkin ice cream. It boasts a flavor profile reminiscent of both classic pumpkin pie and the beloved Biscoff cookies, creating a truly unique and irresistible dessert. Honestly, for the vibrant and cozy autumn season, I can’t envision a more fitting or delightful frozen indulgence.
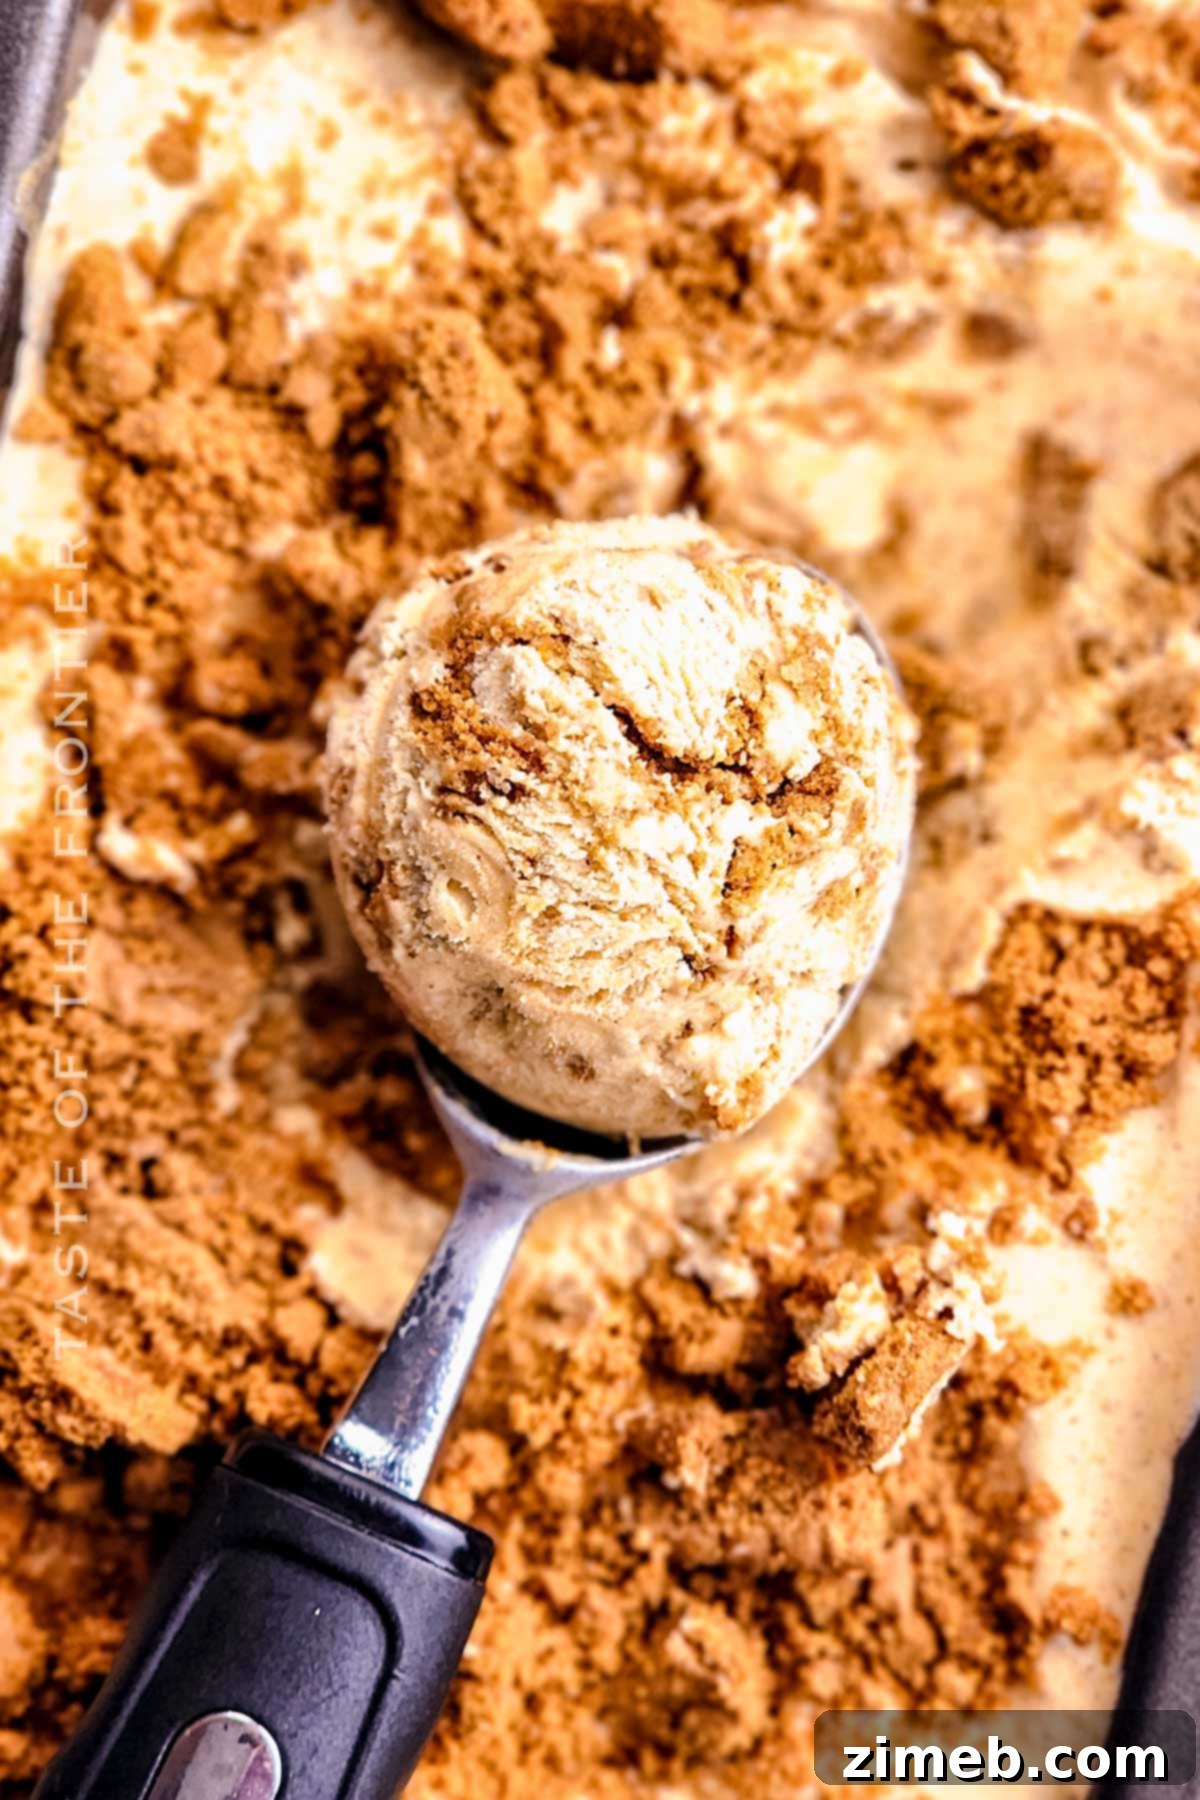
The sheer simplicity and speed of preparing this no-churn pumpkin ice cream are truly astonishing. It takes a mere 15 minutes of active preparation to combine all the ingredients, making it an ideal choice for busy individuals or spontaneous dessert cravings. Once assembled, it just needs proper freezing, ideally overnight, to develop its perfect texture and flavor. The result is pure, unadulterated joy in a loaf pan, completely free from artificial preservatives, colorings, or enhancers. This means you get a wholesome, delicious dessert that you can feel good about sharing with family and friends.
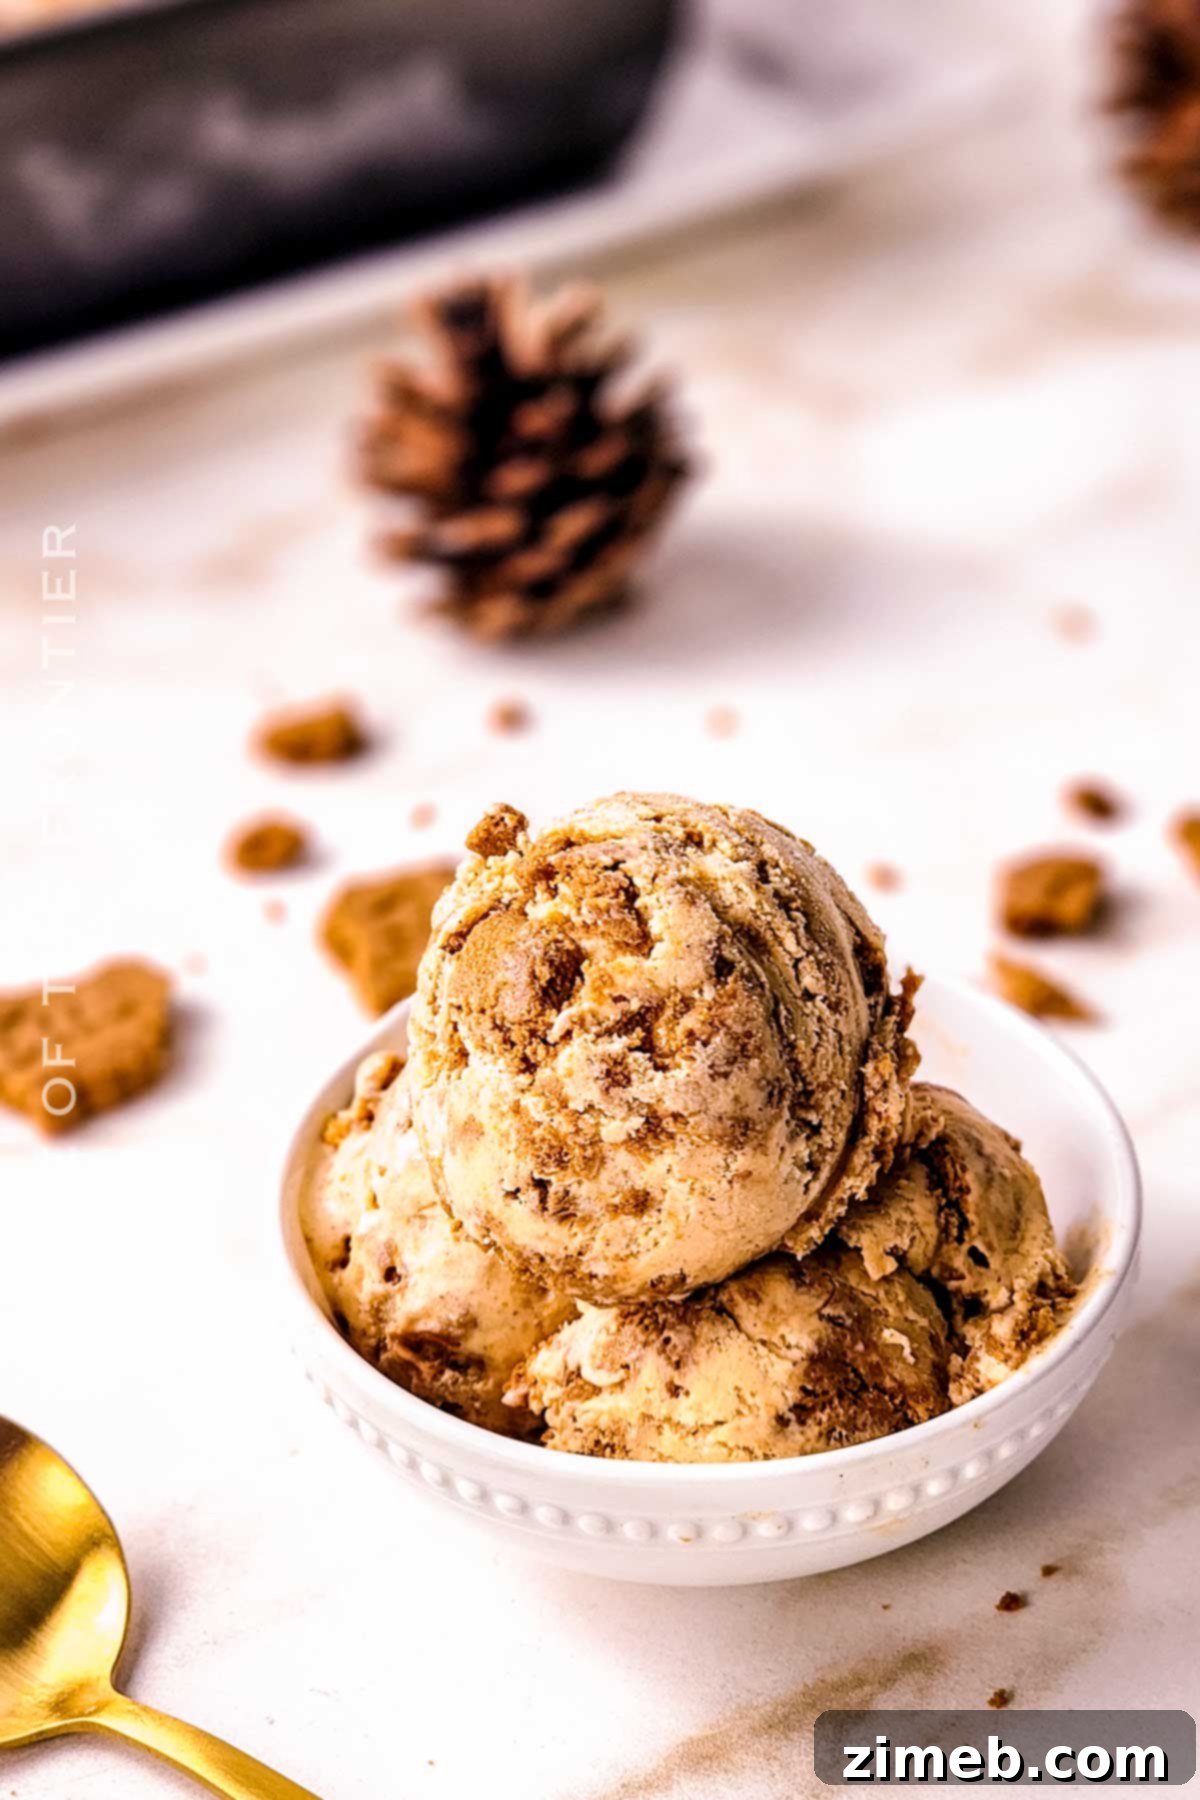
Forget waiting until Thanksgiving to satisfy your deep pumpkin cravings! This incredible pumpkin ice cream recipe is versatile enough to be enjoyed year-round, making it a fantastic summer dessert as well. Its refreshing coolness combined with warm spice notes creates a balanced treat for any season. Beyond just serving it in a bowl, I’m also excited to share two more fun and delicious variations to elevate this dessert: how to transform it into a homemade pumpkin ice cream pie and delightful ice cream sandwiches. Get ready to explore new ways to enjoy your favorite fall flavors!
Essential Ingredients: Notes & Smart Substitutions for Perfect No-Churn Ice Cream
This remarkable recipe sets itself apart by requiring no eggs, no egg yolks, no additional granulated sugar (beyond what’s in the condensed milk), and no regular milk. These ingredients are typically essential for traditional churned ice cream recipes that involve cooking a custard base. Our no-churn approach simplifies the process without compromising on flavor or creamy texture.
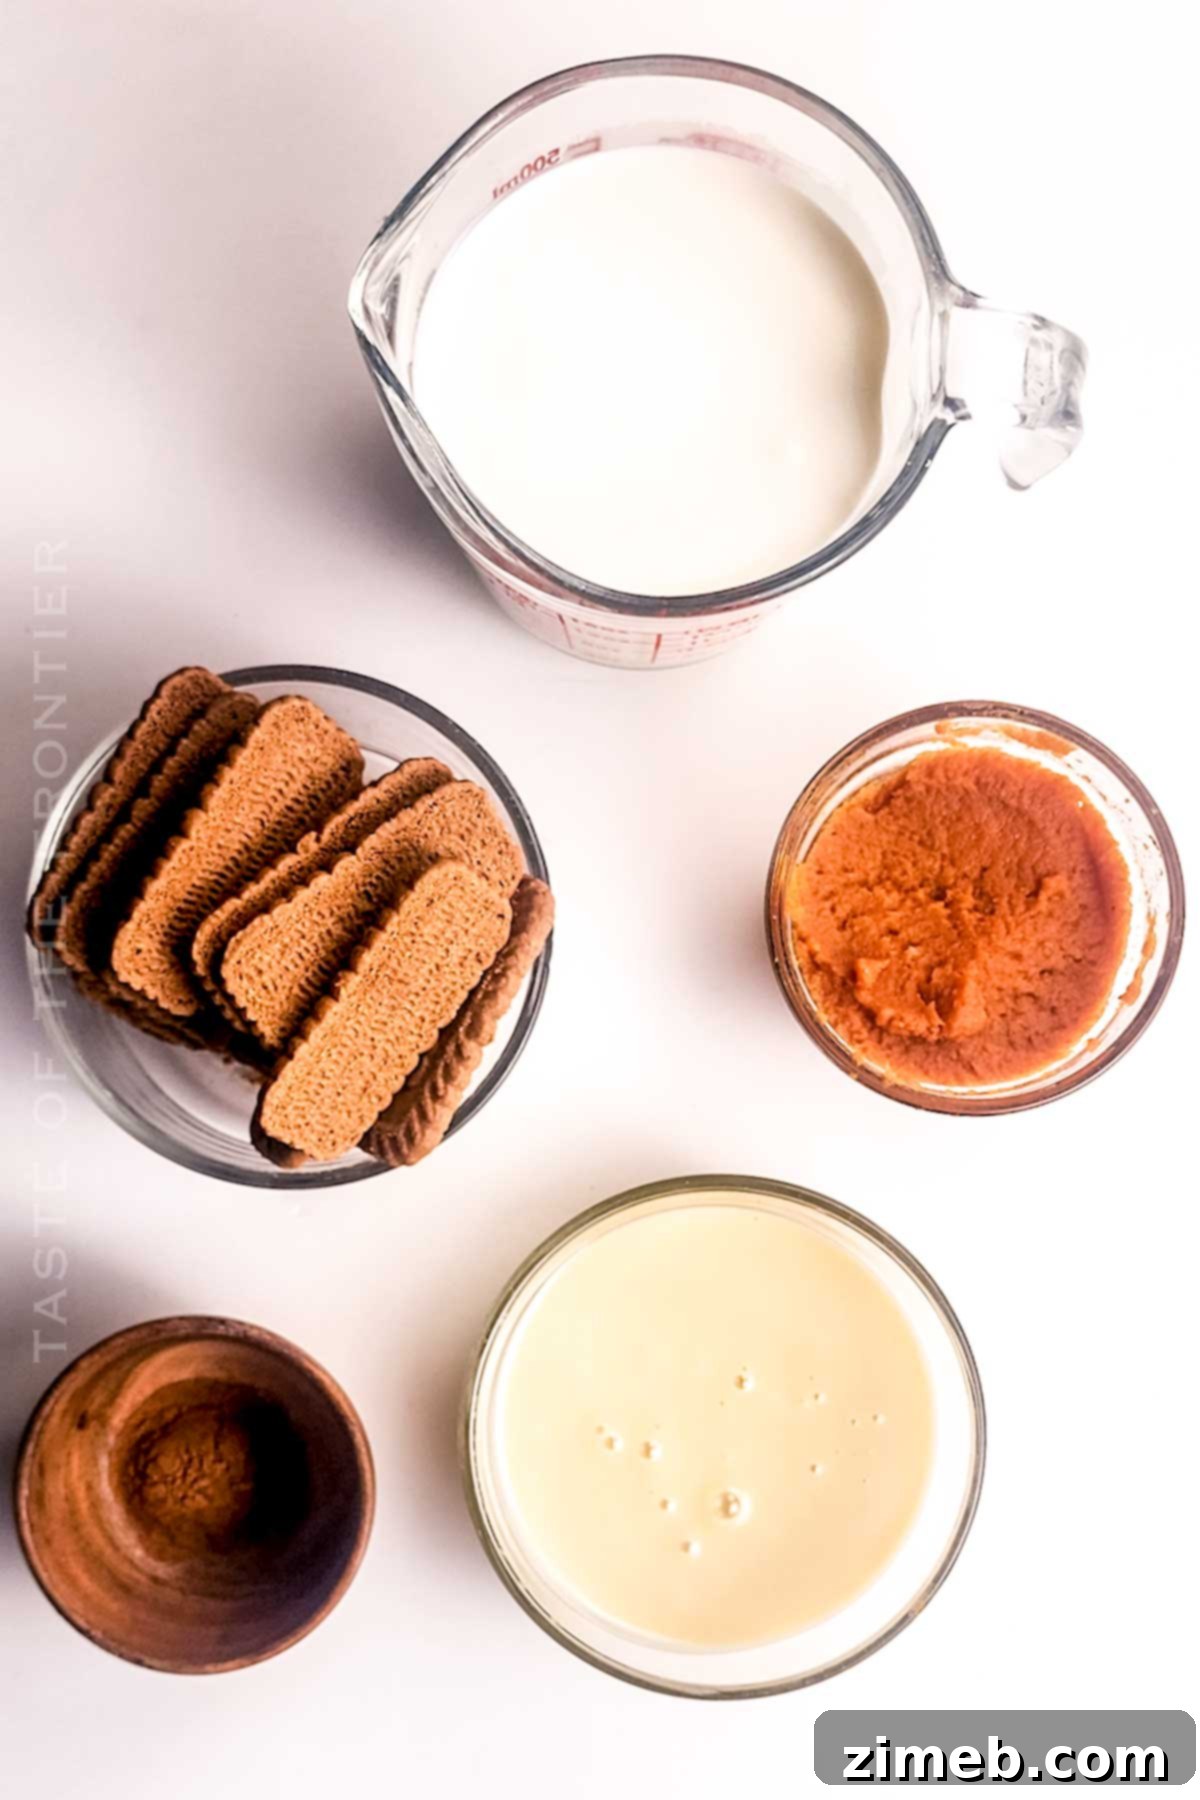
At its heart, this homemade pumpkin pie ice cream is crafted from just four core components: rich heavy cream, luscious sweetened condensed milk, authentic pumpkin puree, fragrant pumpkin pie spice, and a delightful textural element: crushed Biscoff cookies. Each ingredient plays a vital role in achieving that perfect, scoopable consistency and iconic flavor.
The Foundation: Base Ingredients for Creamy No-Churn Ice Cream
- Heavy Cream: This is the cornerstone of our no-churn ice cream. When whipped, heavy cream transforms into a light, airy foam, which, when folded into the mixture, makes the ice cream incredibly creamy, milky, and rich. The aeration from whipping also adds significant volume and a wonderfully light texture, preventing the ice cream from becoming too dense. The high fat content in heavy cream, combined with that of the condensed milk, is crucial. It acts as a natural emulsifier, preventing the formation of large, icy crystals that can ruin the smooth texture and delicious flavor of homemade ice cream. Always ensure your heavy cream is very cold before whipping for optimal results.
- Sweetened Condensed Milk: Without a doubt, sweetened condensed milk is the single most important ingredient for creating a successful no-churn ice cream base. Its unique properties replace the need for an ice cream machine entirely. This thick, sweet milk provides both the necessary sweetness and a dense, creamy body that prevents ice crystals from forming during freezing. While my recipe calls for sweetened condensed milk, which eliminates the need for any additional sugar, unsweetened condensed milk can also be used if you prefer to control the sugar content yourself. However, it’s critical to understand that you cannot replace condensed milk with regular milk, half-and-half, or any other liquid dairy product in this recipe. Its specific viscosity and sugar content are what make the no-churn method possible, ensuring a smooth, delightful frozen dessert.
Capturing Autumn: Fall Flavor Ingredients
- Canned Pumpkin Puree: For authentic pumpkin flavor, always opt for pure canned pumpkin puree. It’s essential to distinguish this from pumpkin pie filling, which often contains added sugars, spices, and other flavorings that can alter the balance of this recipe. Look for cans explicitly labeled “100% pure pumpkin.” Alternatively, for an even fresher taste, you can easily make your own homemade pumpkin puree from fresh pumpkin. If you’re using unsweetened homemade puree, you might consider adding a small amount of light brown sugar. This addition is entirely optional but can introduce subtle molasses and toffee-like notes that beautifully complement the pumpkin and spice, enriching the overall flavor profile.
- Pumpkin Pie Spice: This spice blend is the heart of the “pumpkin pie” experience, enhancing all the traditional warm, inviting spices you instantly associate with pumpkin pie and the cozy ambiance of fall. A typical pumpkin pie spice mix usually includes ground cinnamon, ground ginger, nutmeg, allspice, and cloves. If you don’t have a pre-made blend, you can easily create your own by combining these individual ground spices in desired proportions. This allows for customization, letting you adjust the intensity of each spice to your preference.
- Biscoff Cookies: Coarsely crushed Biscoff cookies are incorporated both into the ice cream mixture and used as a delightful topping. Their unique caramelized, gingerbread-like flavor pairs exceptionally well with pumpkin and spice. However, if Biscoff isn’t available or you prefer an alternative, there are many delicious substitutes. You can easily swap them for classic graham cracker crumbs, crunchy oatmeal cookies, gingersnaps, or any other crispy cookie you enjoy. Even leftover pie crust, baked and crumbled, can work magically here, offering a more authentic pie-like texture. For an incredibly easy topping idea, consider a simple brown sugar crumble: mix brown sugar with a touch of melted butter, then sprinkle it over the ice cream before freezing or serving for an extra layer of sweetness and crunch.
- Optional: Sugar Cones: For a classic serving experience, keep some sugar cones on hand to present your delicious homemade pumpkin pie ice cream.
To further refine the flavor profile, you might consider adding a tiny pinch of salt. This small addition works wonders in balancing the sweetness of the condensed milk and the richness of the pumpkin, enhancing all the flavors without making the ice cream taste salty. A splash of pure vanilla extract can also deepen the complexity of the dessert, adding a subtle warmth that harmonizes beautifully with the pumpkin and spices.
Essential Equipment for Your No-Churn Adventure
- Loaf Pan: A standard 9×5 inch loaf pan is perfect for freezing your ice cream. Its shape makes scooping easy, and it fits conveniently in most freezers.
- Hand Electric Mixer: An electric hand mixer is ideal for quickly and efficiently whipping the heavy cream to stiff peaks. If you have one, a stand mixer with a whisk attachment works equally well and requires less manual effort. Ensure you have a large mixing bowl to prevent splattering when whipping the cream.
- Optional: Ice Cream Scoop: While not strictly necessary, a sturdy ice cream scoop makes serving much easier and creates those perfectly rounded portions.
Crafting Your Own: Step-by-Step Homemade Pumpkin Pie Ice Cream
This beginner-friendly recipe masterfully incorporates all the beloved components of a classic pumpkin pie into a frozen delight. You get the crisp “crust” from the crushed Biscoff cookies, the rich, spiced “pumpkin pie filling” from the pumpkin puree and spices, and the luxurious creamy texture characteristic of premium ice cream. The best part? There’s no complex tempering of egg yolks, no cooking of custard on the stovetop, and absolutely no need for an expensive ice cream maker. This is truly a 100% hassle-free, accessible ice cream recipe for everyone. Still not convinced? Let’s dive into the simple steps.
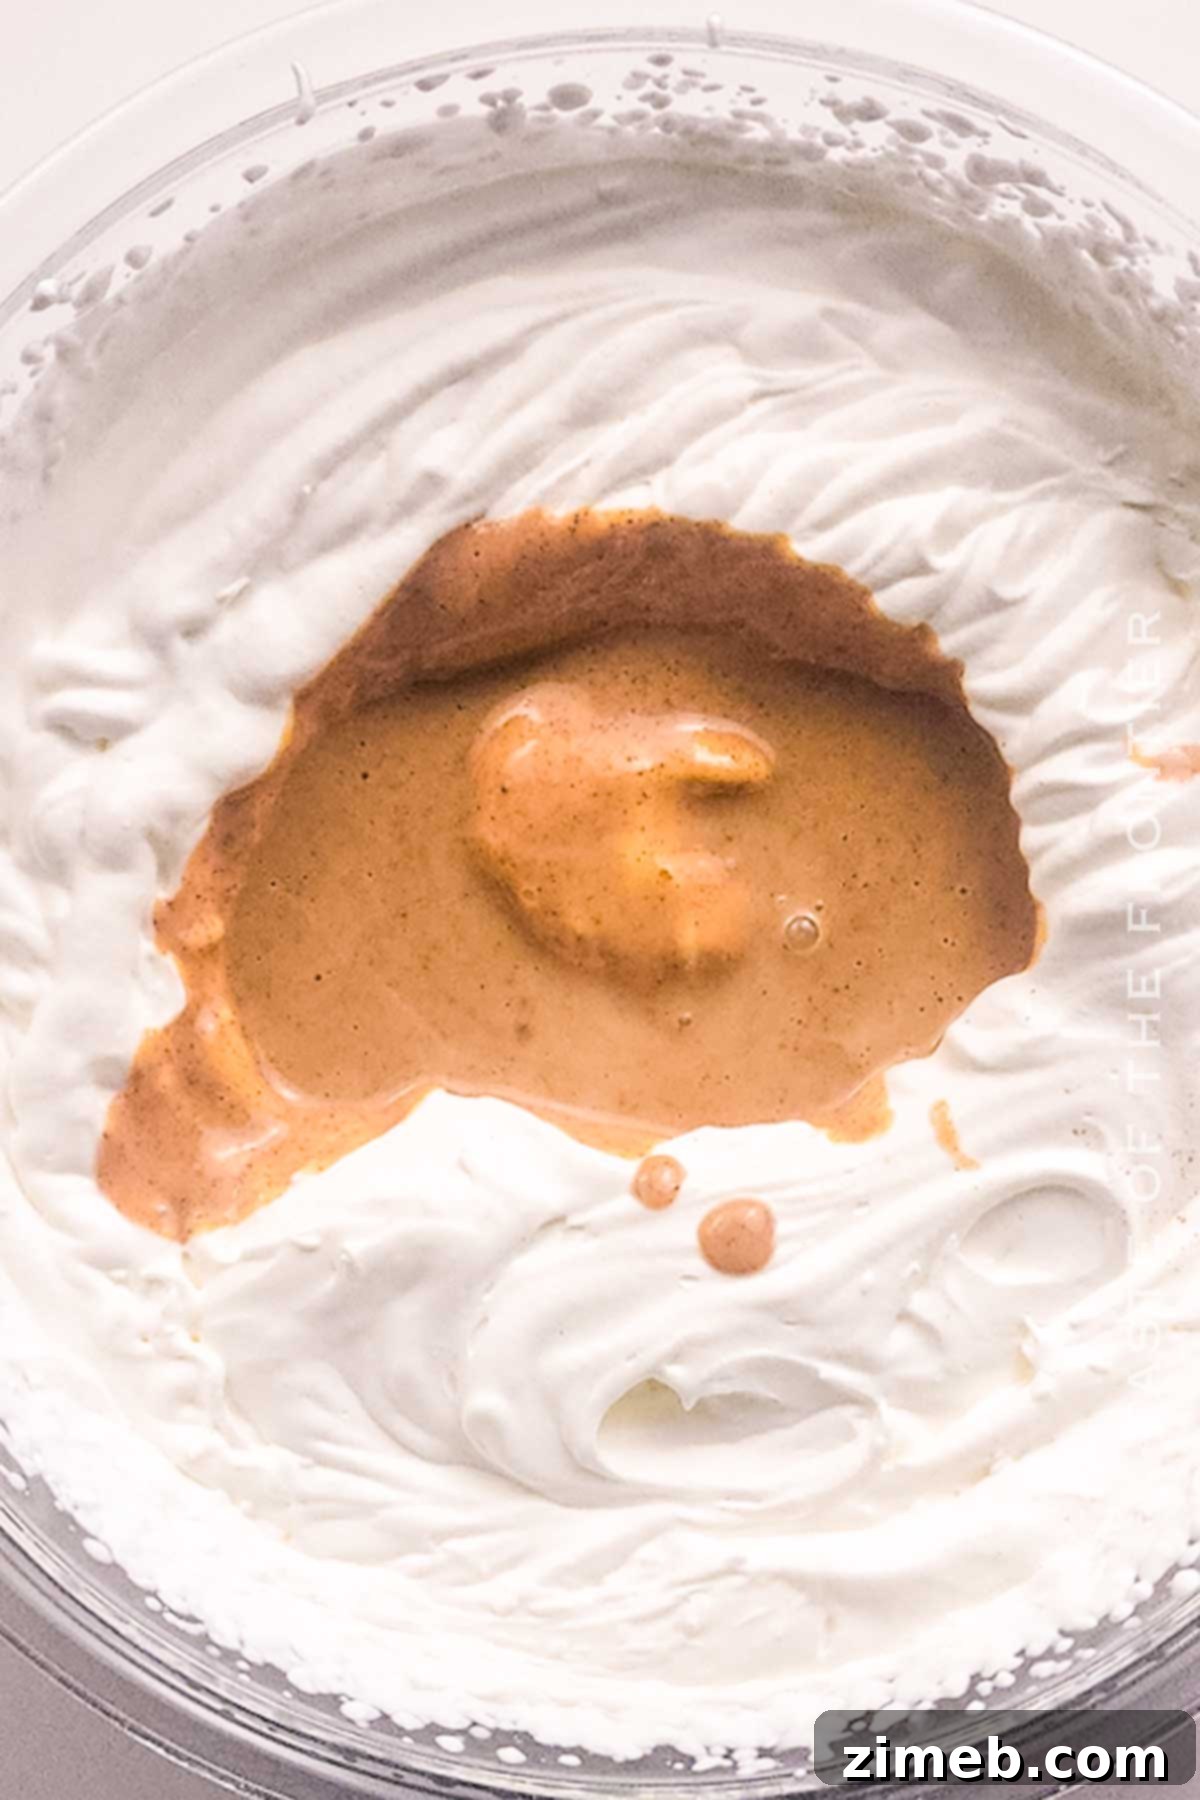
- Whip the Heavy Cream: Begin by pouring the very cold heavy cream into a large mixing bowl. Using your electric hand mixer (or stand mixer), beat the cream at high speed. Continue mixing for approximately 2 to 5 minutes, or until distinct stiff peaks form. This means when you lift the beaters, the whipped cream should hold its shape firmly. This step is crucial for incorporating air and creating a light, airy base for your ice cream.
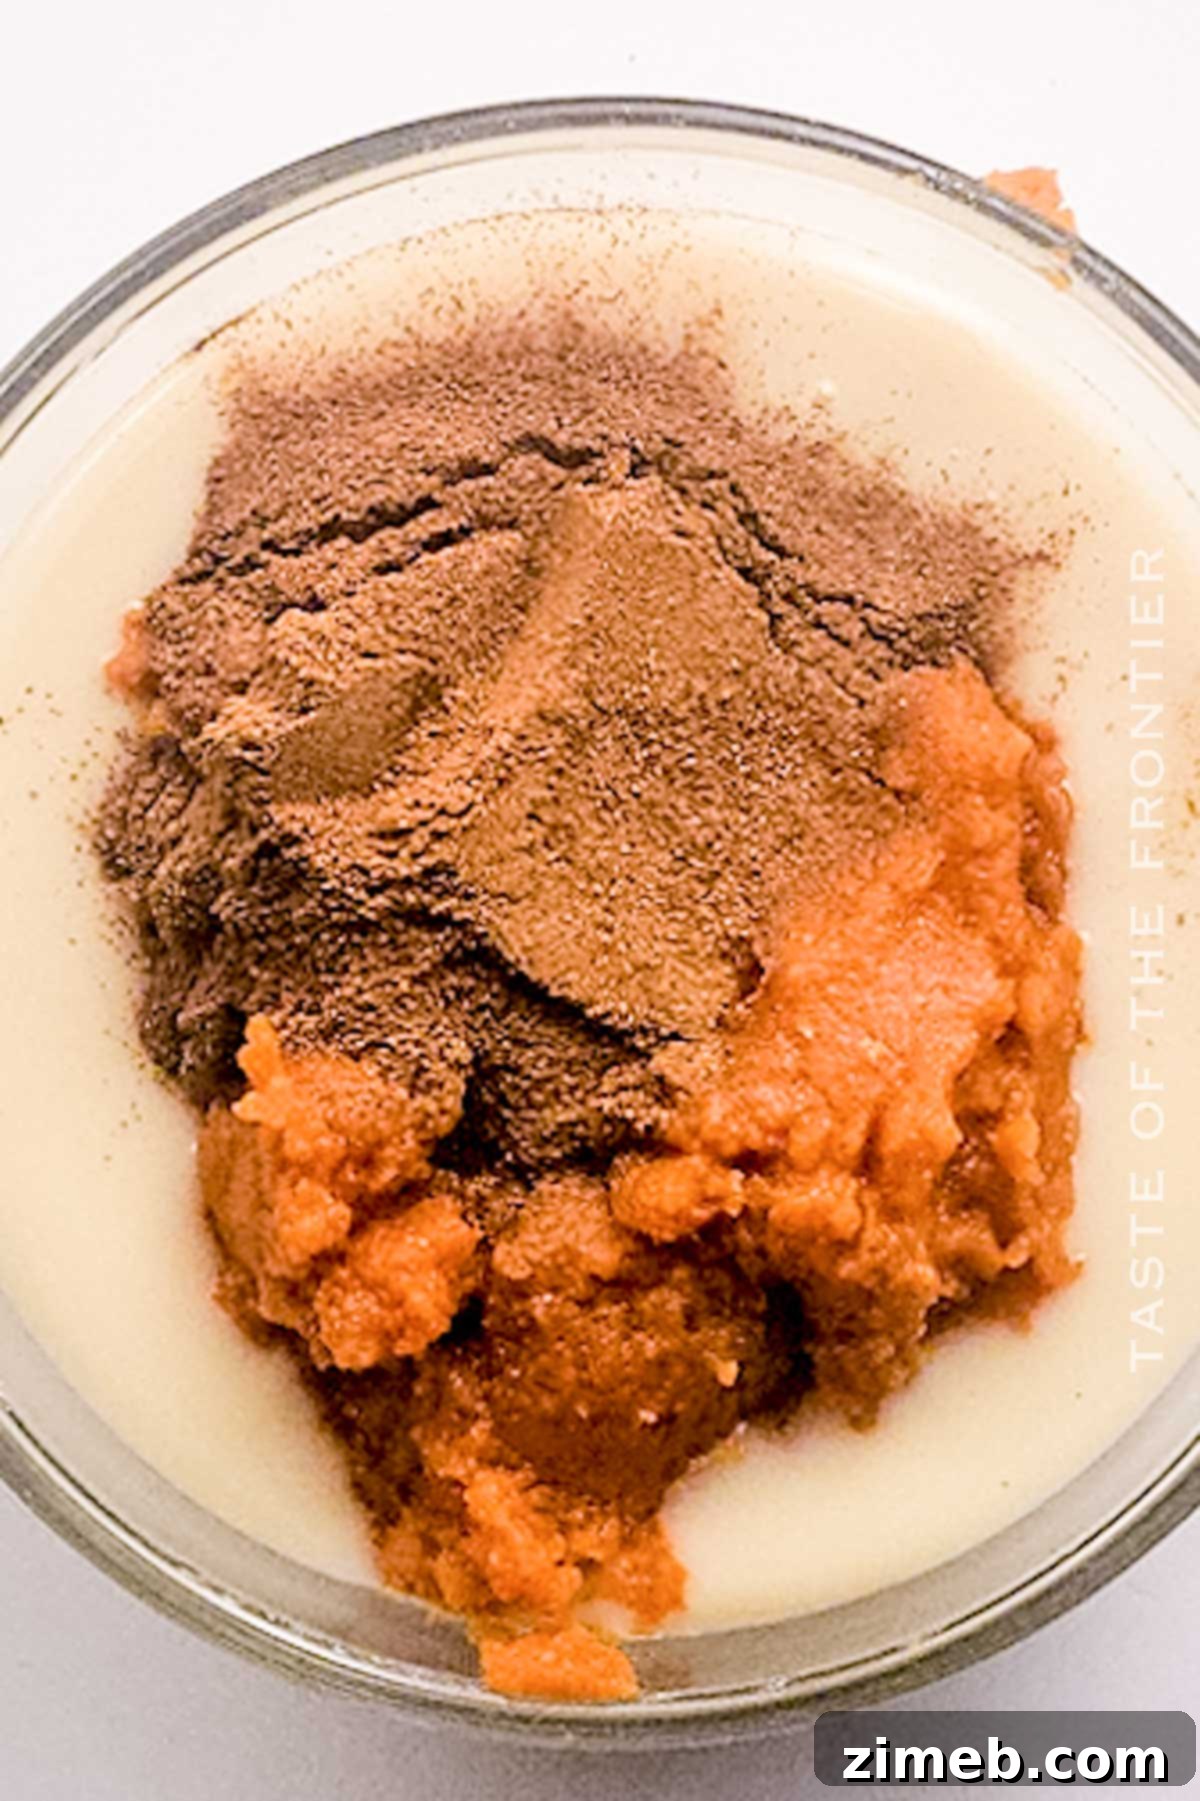
- Prepare the Pumpkin Mixture: In a separate, medium-sized bowl, combine the sweetened condensed milk, pure pumpkin puree, and fragrant pumpkin pie spice. Whisk these ingredients together thoroughly until the mixture is smooth, well-combined, and uniform in color. Ensure there are no lumps of pumpkin puree.
- Gently Fold Them Together: Now, carefully and gently fold the prepared pumpkin mixture into the whipped cream. Use a spatula to combine the two mixtures with a light, lifting motion. Be gentle to avoid deflating the air you’ve whipped into the cream. Continue folding until the mixture is uniformly blended and smooth, without any streaks of plain whipped cream.
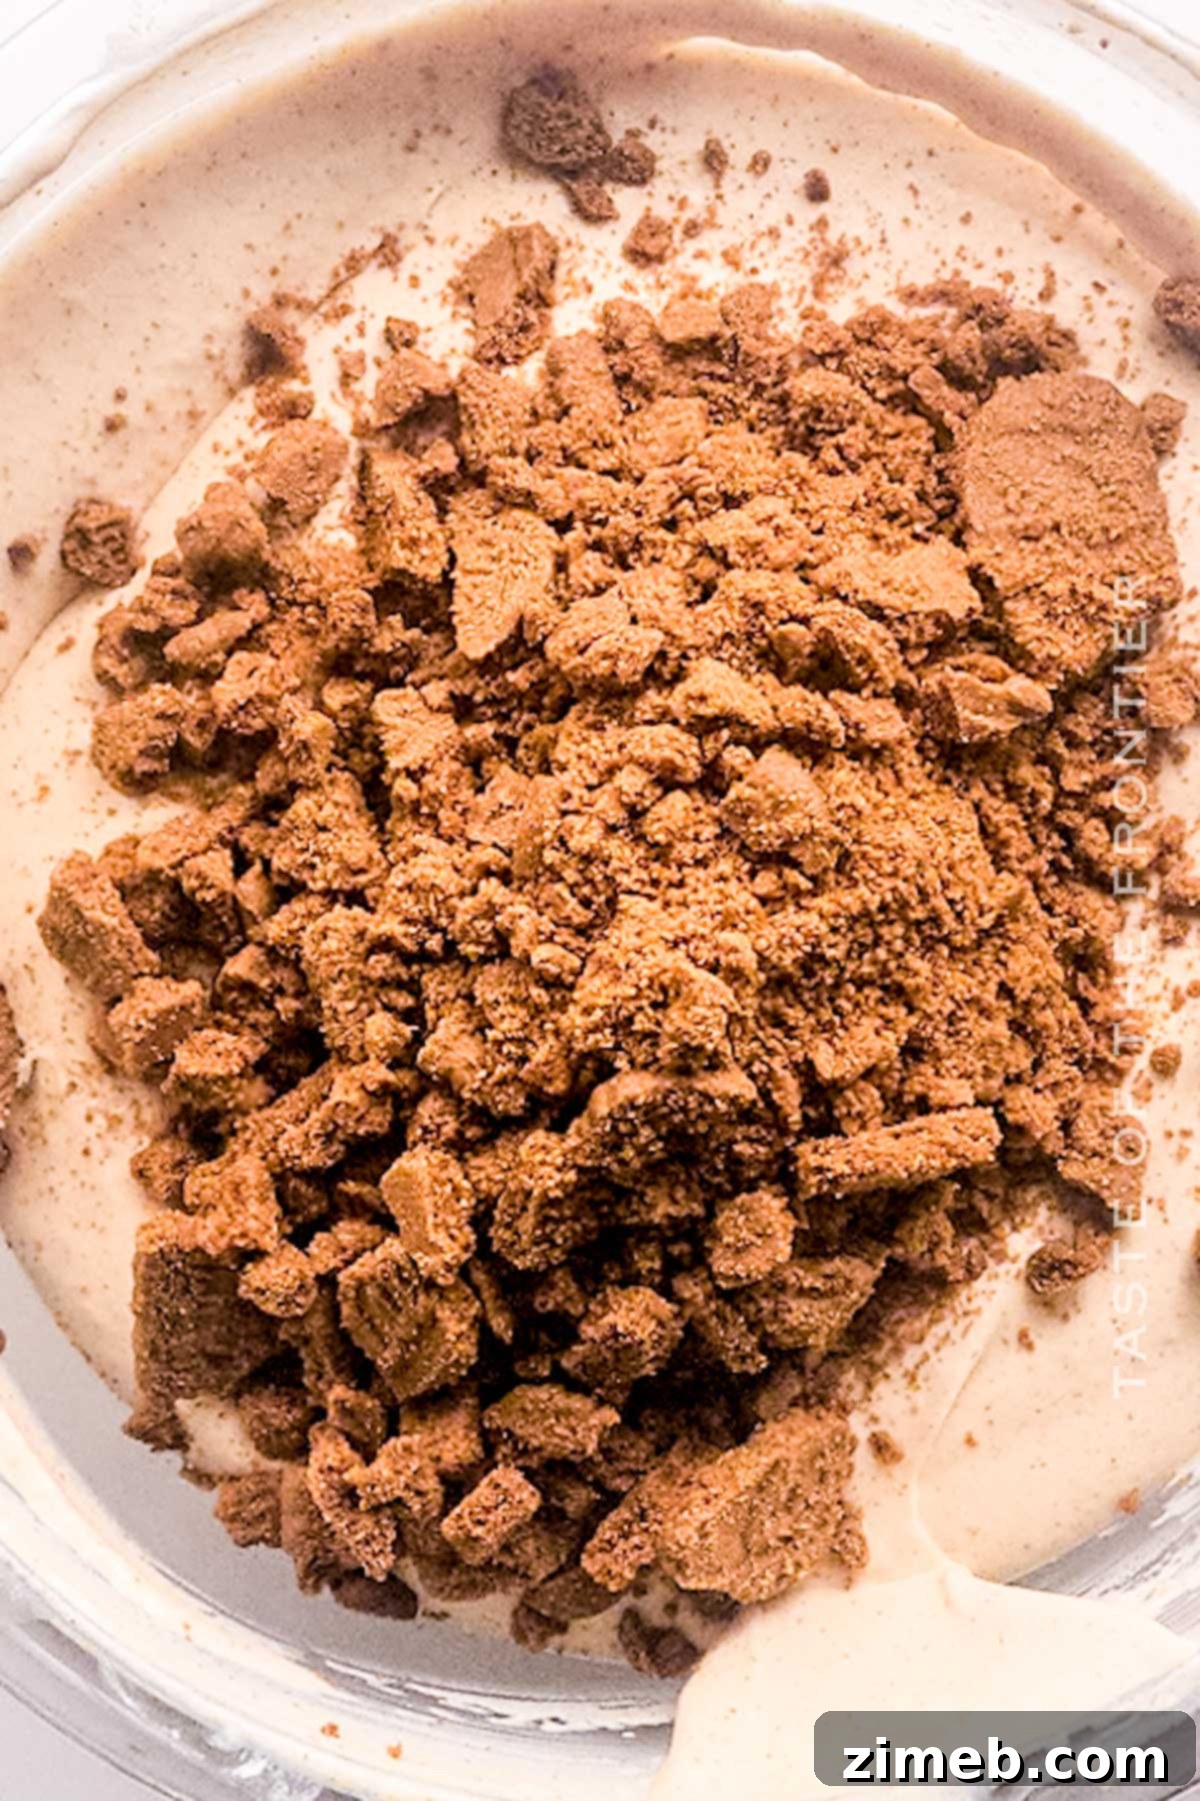
- Incorporate the Cookies: Add the coarsely crushed Biscoff cookies to the ice cream base. Gently fold them in, distributing them evenly throughout the mixture. Remember to reserve a small handful of extra cookie pieces for an attractive garnish later.
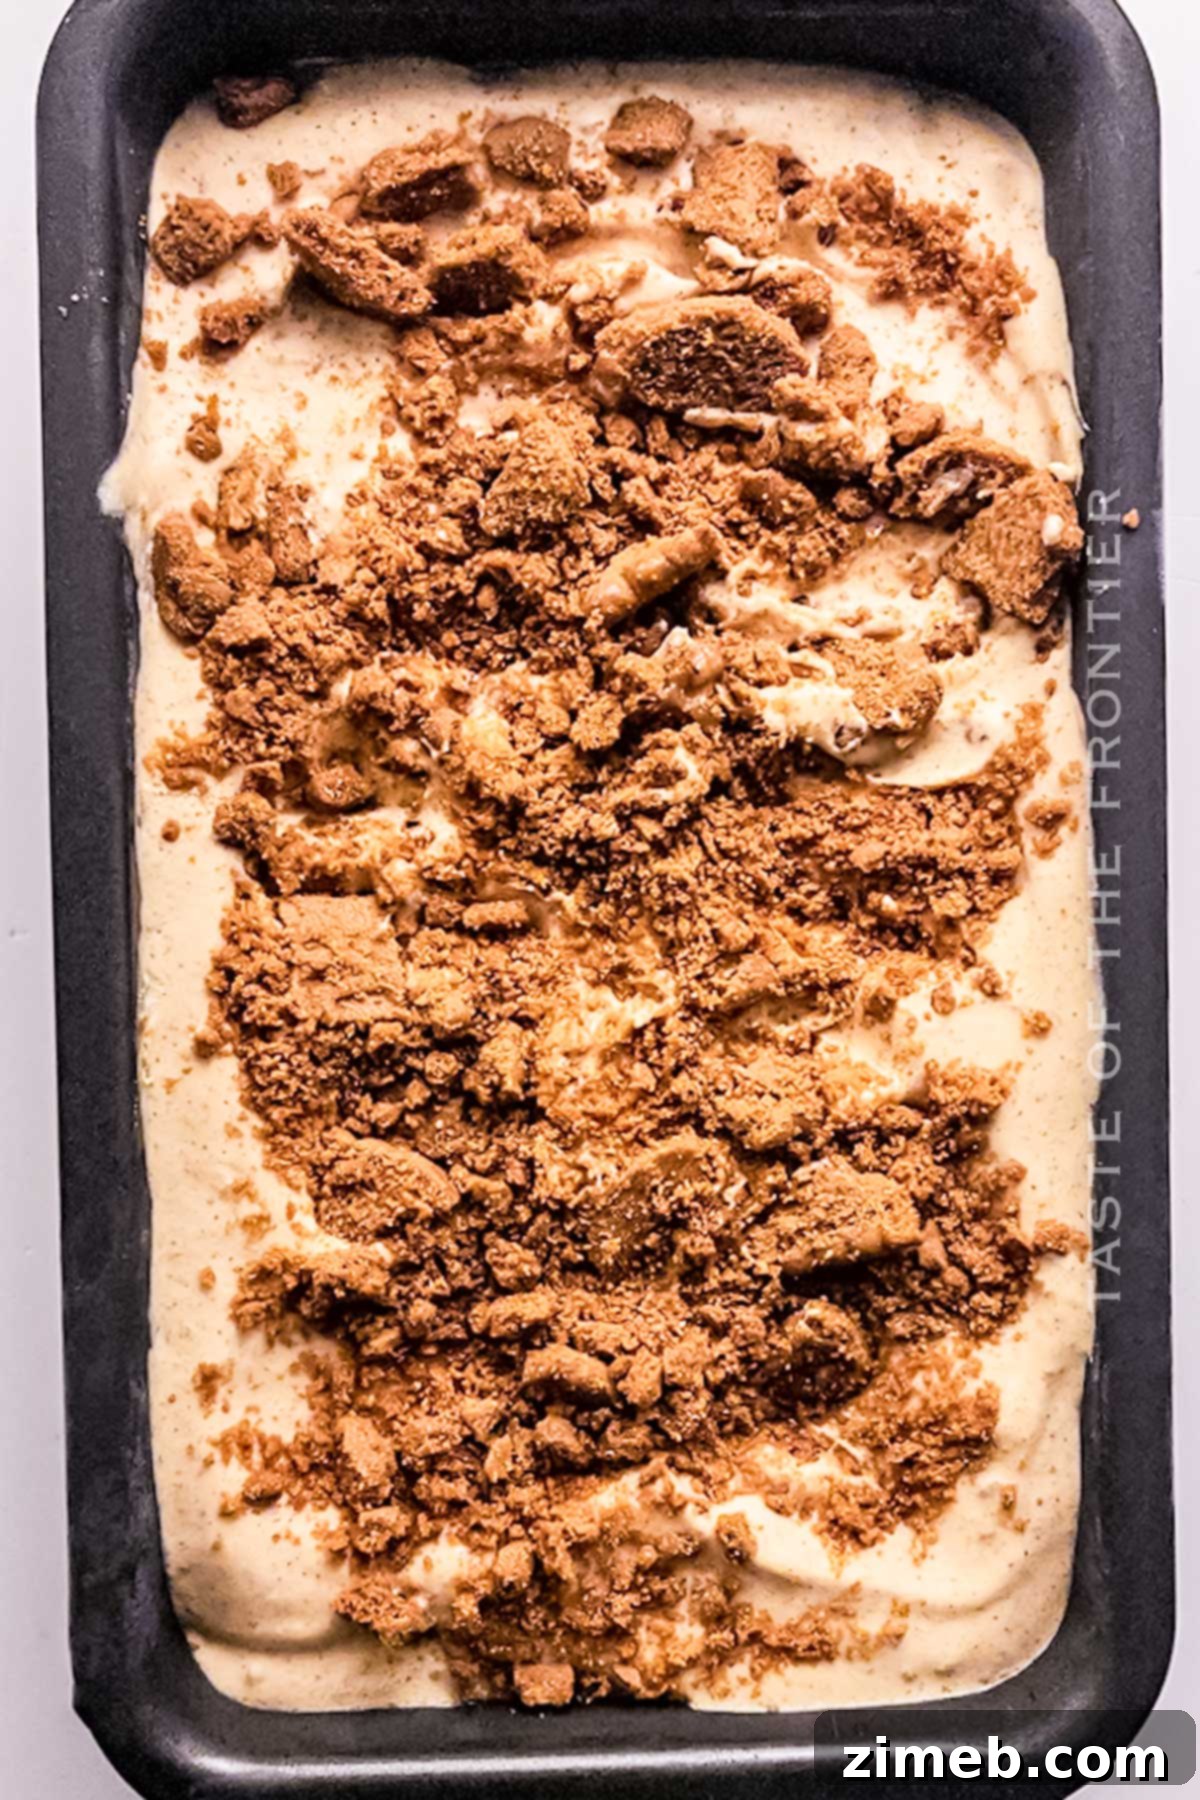
- Transfer and Cover: Carefully transfer the entire ice cream mixture into your loaf pan. Use your spatula to smooth the top. Sprinkle the reserved extra cookie pieces over the surface for a lovely visual and textural finish. Cover the loaf pan tightly with plastic wrap, pressing the wrap directly onto the surface of the ice cream to prevent ice crystal formation.
- Freeze to Perfection: Place the covered loaf pan in the freezer. Allow it to freeze for a minimum of 8 hours, or ideally, overnight. Freezing overnight ensures the ice cream achieves its optimal firm, scoopable consistency.
When you’re ready to serve this delightful treat, simply remove it from the freezer. For easier scooping, allow the ice cream to sit at room temperature for 5-10 minutes. Use a warm, dry scoop to portion out generous servings. Enhance your creation with a drizzle of rich caramel or decadent chocolate sauce, or add a festive touch with a elegant cinnamon stick as a garnish. Each spoonful promises a burst of autumnal flavor!
Storing Your Homemade Pumpkin Ice Cream for Lasting Freshness
Proper storage is key to maintaining the creamy texture and delicious flavor of your homemade pumpkin pie ice cream. To store leftovers, simply keep them in the same loaf pan, ensuring it’s tightly covered with at least two layers of plastic wrap, or transfer the ice cream to a dedicated freezer-safe, airtight container. This helps to prevent freezer burn and keeps unwanted ice crystals at bay. When stored correctly, your pumpkin ice cream will maintain its quality for up to 4 weeks in the freezer, although it’s often at its best within the first two weeks for peak freshness.
When you’re ready for another scoop, allow the ice cream to thaw at room temperature for about 8-10 minutes. This brief period softens it just enough to make scooping effortless, yielding perfectly smooth portions without having to wrestle with a rock-hard block.
A crucial tip for preserving texture: avoid letting the ice cream melt completely if you intend to refreeze it. Repeated thawing and refreezing can lead to the formation of large ice crystals, which will compromise the smooth, creamy consistency you worked so hard to achieve. Always ensure it remains partially frozen during any brief softening period.
Exciting Pumpkin Pie Ice Cream Variations
This versatile no-churn pumpkin pie ice cream recipe serves as an excellent foundation for a myriad of delicious and creative dessert ideas. From adding intriguing textures to transforming it into a full-fledged pie or delightful sandwiches, the possibilities are endless. Let’s explore how you can customize this seasonal favorite.
Elevate Your Ice Cream: Creative Texture Add-ins
Beyond the delightful crunch of Biscoff cookies, there are countless ways to introduce exciting textures and flavors into your pumpkin ice cream. Consider stirring in colorful Reese’s Pieces for a peanut butter-chocolate twist, or more traditional crushed graham crackers for a classic pie crust feel. Nilla wafers offer a delicate vanilla sweetness and crunch. For nut lovers, finely chopped pecans, walnuts, or candied ginger can provide a wonderful contrast. Mini chocolate chips (milk, dark, or white) are always a crowd-pleaser, adding pockets of melty goodness. Toffee bits bring a buttery, caramelized chew, while even small peanut butter bits can deepen the richness. Don’t be afraid to experiment with your favorite crunchy or chewy additions to personalize each batch.
Beyond the Bowl: Pumpkin Ice Cream Cake (Pumpkin Ice Cream Pie)
Transforming your pumpkin pie ice cream into a show-stopping ice cream pie or cake is surprisingly simple. The only additional element needed is a delicious crust. You have two main options for the crust:
- No-Bake Crust: This is the quickest and easiest method. Combine finely crushed graham crackers (or your preferred cookie crumbs like gingersnaps or even more Biscoff) with melted butter and a touch of granulated sugar. Press this mixture firmly into the bottom and up the sides of a pie dish or springform pan. Chill it in the refrigerator for at least 30 minutes, or freeze for 15 minutes, to set.
- Baked Pie Shell: For a more traditional pie experience, you can use a pre-made frozen pie shell. Simply bake it according to package directions until golden brown, then let it cool completely before filling.
Once your chosen crust is ready and chilled, simply layer your prepared pumpkin pie ice cream mixture evenly over the crust. You can add another layer of crushed cookies or a drizzle of caramel between layers if desired. Then, freeze the entire pie following the same instructions as for the regular ice cream (at least 8 hours or overnight). This creates a stunning dessert that combines the best of pumpkin pie with the refreshing chill of ice cream.
The Perfect Handheld Treat: Pumpkin Ice Cream Sandwiches
Creating homemade pumpkin ice cream sandwiches is a fun and customizable way to enjoy this delicious frozen dessert. Here’s how you can make them:
- Prepare Your Ice Cream: First, make your pumpkin pie ice cream following the base recipe provided above.
- Partial Freeze: Once the ice cream has been setting in the freezer for approximately 3 hours, it should still be a bit soft and “jiggly” but firm enough to hold its shape. This is the ideal consistency for forming sandwiches.
- Assemble the Sandwiches: Take your favorite sandwich cookies (chocolate wafers, graham crackers, or even large shortbread cookies work wonderfully) and place a generous scoop of the partially frozen ice cream onto one cookie. Gently top it with another cookie, pressing down slightly to form a sandwich.
- Add a Roll-On Coating (Optional): For an extra layer of flavor and texture, you can roll the sides of your newly assembled ice cream sandwiches in additional crushed graham crackers, mini chocolate chips, sprinkles, or finely chopped nuts. This also helps to seal the ice cream within the cookies.
- Store for Firmness: To store your homemade ice cream sandwiches, wrap each one individually in plastic wrap or parchment paper, then place them in an airtight freezer-safe container. Store them in the freezer until fully firm, which usually takes another 2-3 hours.
- Alternative Sandwich Method with Crusts: Instead of using store-bought cookies, you can create two no-bake Biscoff (or graham cracker) crusts, similar to the pie method. Prepare these crusts in two separate rectangular dishes. Lay out the first crust, then spread the pumpkin ice cream evenly over it, and finally, top with the second crust. Freeze this layered creation, then cut it into individual sandwich bars for serving. This method yields a larger batch and a slightly different texture.
Embrace Plant-Based: Vegan Pumpkin Ice Cream
Crafting a delicious vegan version of pumpkin pie ice cream is entirely possible and equally delightful! To achieve a creamy, plant-based alternative, you’ll need to make a few key substitutions for the dairy components. Begin by whipping a can of full-fat unsweetened coconut cream (ensure it’s chilled overnight and you only use the thick cream, discarding the liquid). For added richness and body, you can pulse some pre-soaked raw cashews or dates into a paste with a little water before combining. Then, mix in pure pumpkin puree, your favorite pumpkin spice blend, and an optional pinch of salt to balance the flavors. You might also want to add a touch of maple syrup or agave nectar for sweetness if your coconut cream or pumpkin puree is completely unsweetened.
The overall steps remain remarkably similar to the original recipe. You’ll combine your vegan ice cream base (whipped coconut cream and/or cashew/date mixture) with the pumpkin ingredients in two separate bowls. Gently fold them together until smooth and uniform. Finally, transfer the mixture to a loaf pan, cover it tightly, and freeze until firm. This yields a wonderfully creamy, spiced vegan pumpkin ice cream that captures all the comforting flavors of fall.
Traditional Method: Pumpkin Pie Ice Cream with an Ice Cream Maker
While this recipe champions the no-churn method, for those who own an ice cream maker and prefer the traditional approach, you can certainly adapt this pumpkin pie ice cream to be churned. The key difference lies in the dairy base.
- Adjust Ingredients: You will use almost all the same flavorful ingredients, but instead of sweetened condensed milk, you’ll swap it for a 50/50 mix of whole milk and half-and-half. This provides the liquid and fat content suitable for churning. You may also need to add granulated sugar to taste, as the condensed milk typically provides the sweetness.
- Churn the Mixture: Combine all the dairy ingredients (whole milk, half-and-half, and granulated sugar if using) in your ice cream machine’s bowl. Then, add the pumpkin puree and pumpkin pie spice. Churn the mixture according to your specific machine’s instructions. This usually involves churning for 20-30 minutes until the mixture reaches a soft-serve consistency.
- Final Freeze: Once churned, transfer the soft ice cream to an airtight freezer-safe container. Freeze for at least 3-4 hours to achieve a delicious, more soft serve consistency. For a firmer, denser, and more scoopable texture, freeze for a full 8 hours or overnight.
Popular and reliable ice cream machines like those from Cuisinart and KitchenAid are excellent choices for achieving perfect results with this traditional churning method.
Expert Tips for Crafting the Best No-Churn Pumpkin Ice Cream
- Chill Your Equipment: For optimal results when whipping heavy cream, place your mixing bowl and even the beaters of your electric mixer in the freezer for at least 15-20 minutes, or even overnight, before you begin. This significantly helps the cream whip up faster and achieve stiffer, more stable peaks, which is essential for a light, airy ice cream.
- Monitor Freezing Time: While 8 hours or overnight is recommended for a firm, scoopable texture, you can check your ice cream after about 4-6 hours. If you prefer a softer, almost soft-serve consistency, it might be ready sooner. Personal preference dictates the ideal freezing time.
- Freshness is Key: Homemade ice cream, unlike commercial varieties, doesn’t contain preservatives. While it will technically last for a month in the freezer, it truly tastes its best and freshest within the first two weeks. For the most vibrant flavor and creamiest texture, aim to enjoy it within this timeframe.
- Avoid Overmixing the Cream: When whipping the heavy cream, stop as soon as stiff peaks form. Overmixing can lead to a grainy texture, which will negatively impact the final smoothness of your ice cream.
- Airtight Storage: Always ensure your ice cream is stored in an airtight container or covered very tightly with plastic wrap pressed directly against the surface. This minimizes exposure to air, which is the main culprit behind ice crystal formation and freezer burn.
- Quality Ingredients Matter: Since this recipe uses only a few ingredients, the quality of each really shines through. Use good quality heavy cream and pure pumpkin puree for the best flavor.
Popular Questions & Troubleshooting for No-Churn Ice Cream
Here are answers to some common questions and solutions to potential issues you might encounter when making homemade no-churn ice cream.
Is No-Churn Ice Cream Truly Better?
While “better” is subjective, no-churn ice cream offers significant advantages, especially for home cooks. It can taste remarkably similar to traditional churned ice cream, often achieving the same creamy and rich texture. The key benefits are its incredible ease of preparation and cost-effectiveness – you don’t need to cook a custard base, nor do you have to invest in a special, often expensive, ice cream machine. When executed correctly, with the right balance of ingredients and proper folding technique, no-churn ice cream is virtually indistinguishable from churned varieties in terms of taste and texture, making it a fantastic, accessible option for everyone.
What Can I Use If I Don’t Have an Ice Cream Churn?
The beauty of no-churn ice cream is that you don’t need an ice cream maker at all! The entire recipe is designed to bypass the churning process. Instead of regular milk, we utilize sweetened condensed milk. This ingredient’s thick consistency and sugar content are what prevent the formation of large ice crystals during freezing, creating that smooth, dense texture. Simply mix your ingredients by hand with a whisk or use a hand mixer to whip the heavy cream before folding in the pumpkin puree and any desired mix-ins like crushed cookies. The freezer does the rest of the work!
How Do You Achieve Thickness in No-Churn Ice Cream?
The thickness and rich, creamy texture of no-churn ice cream come primarily from two key ingredients: sweetened condensed milk and properly whipped heavy cream. The high sugar content and viscosity of sweetened condensed milk prevent the formation of large ice crystals, while its thickness contributes to the overall density. When heavy cream is whipped to stiff peaks, it incorporates a significant amount of air, which, when folded into the condensed milk mixture, creates a stable, airy emulsion that freezes into a wonderfully thick and smooth ice cream texture. Ensuring both ingredients are very cold before combining helps maximize this effect.
Why Is My No-Churn Ice Cream Not Freezing Properly?
If your no-churn ice cream isn’t freezing to a firm consistency, there are a few common culprits. The most frequent reason is the addition of too much liquid or ingredients with a high alcohol content (like bourbon or certain extracts in large quantities). Alcohol has a much lower freezing point than water, and excessive amounts can prevent the ice cream from solidifying properly. Another reason could be insufficient whipping of the heavy cream; if it’s not whipped to stiff peaks, the mixture won’t have enough air or stability to freeze correctly. Ensure your freezer is set to a sufficiently cold temperature, ideally 0°F (-18°C) or colder, and that your container is tightly sealed to prevent freezer burn and encourage proper freezing.
What Does Pumpkin Pie Ice Cream Taste Like?
Imagine your favorite slice of classic pumpkin pie, but transformed into a delightfully creamy, smooth, and frozen dessert. That’s precisely what pumpkin pie ice cream tastes like! It captures the comforting, earthy sweetness of pumpkin puree, beautifully complemented by the warm, aromatic medley of traditional pumpkin pie spices – cinnamon, ginger, nutmeg, allspice, and cloves. It’s a harmonious blend of sweet and spice, with a luscious texture that melts in your mouth, offering a refreshing yet cozy indulgence. If you love pumpkin pie, you will adore this frozen rendition.
How to Transform Vanilla Ice Cream into Pumpkin Ice Cream
If you have plain vanilla ice cream on hand and want to quickly infuse it with the flavors of fall, you can easily turn it into pumpkin ice cream. Allow your store-bought or homemade vanilla ice cream to soften slightly at room temperature until it’s pliable enough to stir but not completely melted. Then, gently fold in a mixture of pure pumpkin puree and a generous amount of pumpkin spice. For an added layer of depth and a hint of molasses, you can also mix in a little bit of light brown sugar. Once thoroughly combined, return the ice cream to the freezer until it firms up again. This quick hack allows you to enjoy pumpkin ice cream without starting from scratch.
If you’re enchanted by this easy holiday dessert recipe and want to explore more delightful frozen treats, you’ll undoubtedly love these other homemade ice cream ideas. Each link below leads to a simple, printable recipe waiting to inspire your next sweet creation!

Butterscotch Ice Cream
You’ll love the nostalgic flavor of this easy-to-make, no-churn Butterscotch Ice Cream. Smooth and creamy, it’s the perfect fall dessert!
Check out this recipe

Cookie Monster Ice Cream
This bright blue homemade Cookie Monster Ice Cream is loaded with crushed Oreos and chocolate chip cookies. Fun for any occasion!
Check out this recipe
Turtle Ice Cream
Homemade Turtle Ice Cream is a sweet and creamy treat. It’s loaded with Turtle Bites candy, fudge sauce, caramel syrup, and toasted pecans.
Check out this recipe
Black Forest Ice Cream
Homemade Black Forest Ice Cream packed full of sweet cherries and hot fudge. This decadent favorite is an easy-to-make summer treat.
Check out this recipe
Biscoff Ice Cream
Biscoff Ice Cream is an easy, no-churn, homemade ice cream recipe that is perfect for Biscoff cookie lovers and loaded with Biscoff flavor.
Check out this recipe
More Delicious Pumpkin Dessert Ideas
If your love for pumpkin extends beyond ice cream, be sure to explore these other fantastic pumpkin-inspired dessert recipes:
- 50+ Irresistible Pumpkin Recipes
- Cozy Pumpkin Spice Cake
- Effortless Pumpkin Dump Cake
- The Famous Costco Pumpkin Pie Copycat
CONNECT WITH YUMMI HAUS!
Be sure to follow me on my social media, so you never miss a post!
Substack, Facebook, Pinterest, Instagram, Email Subscription
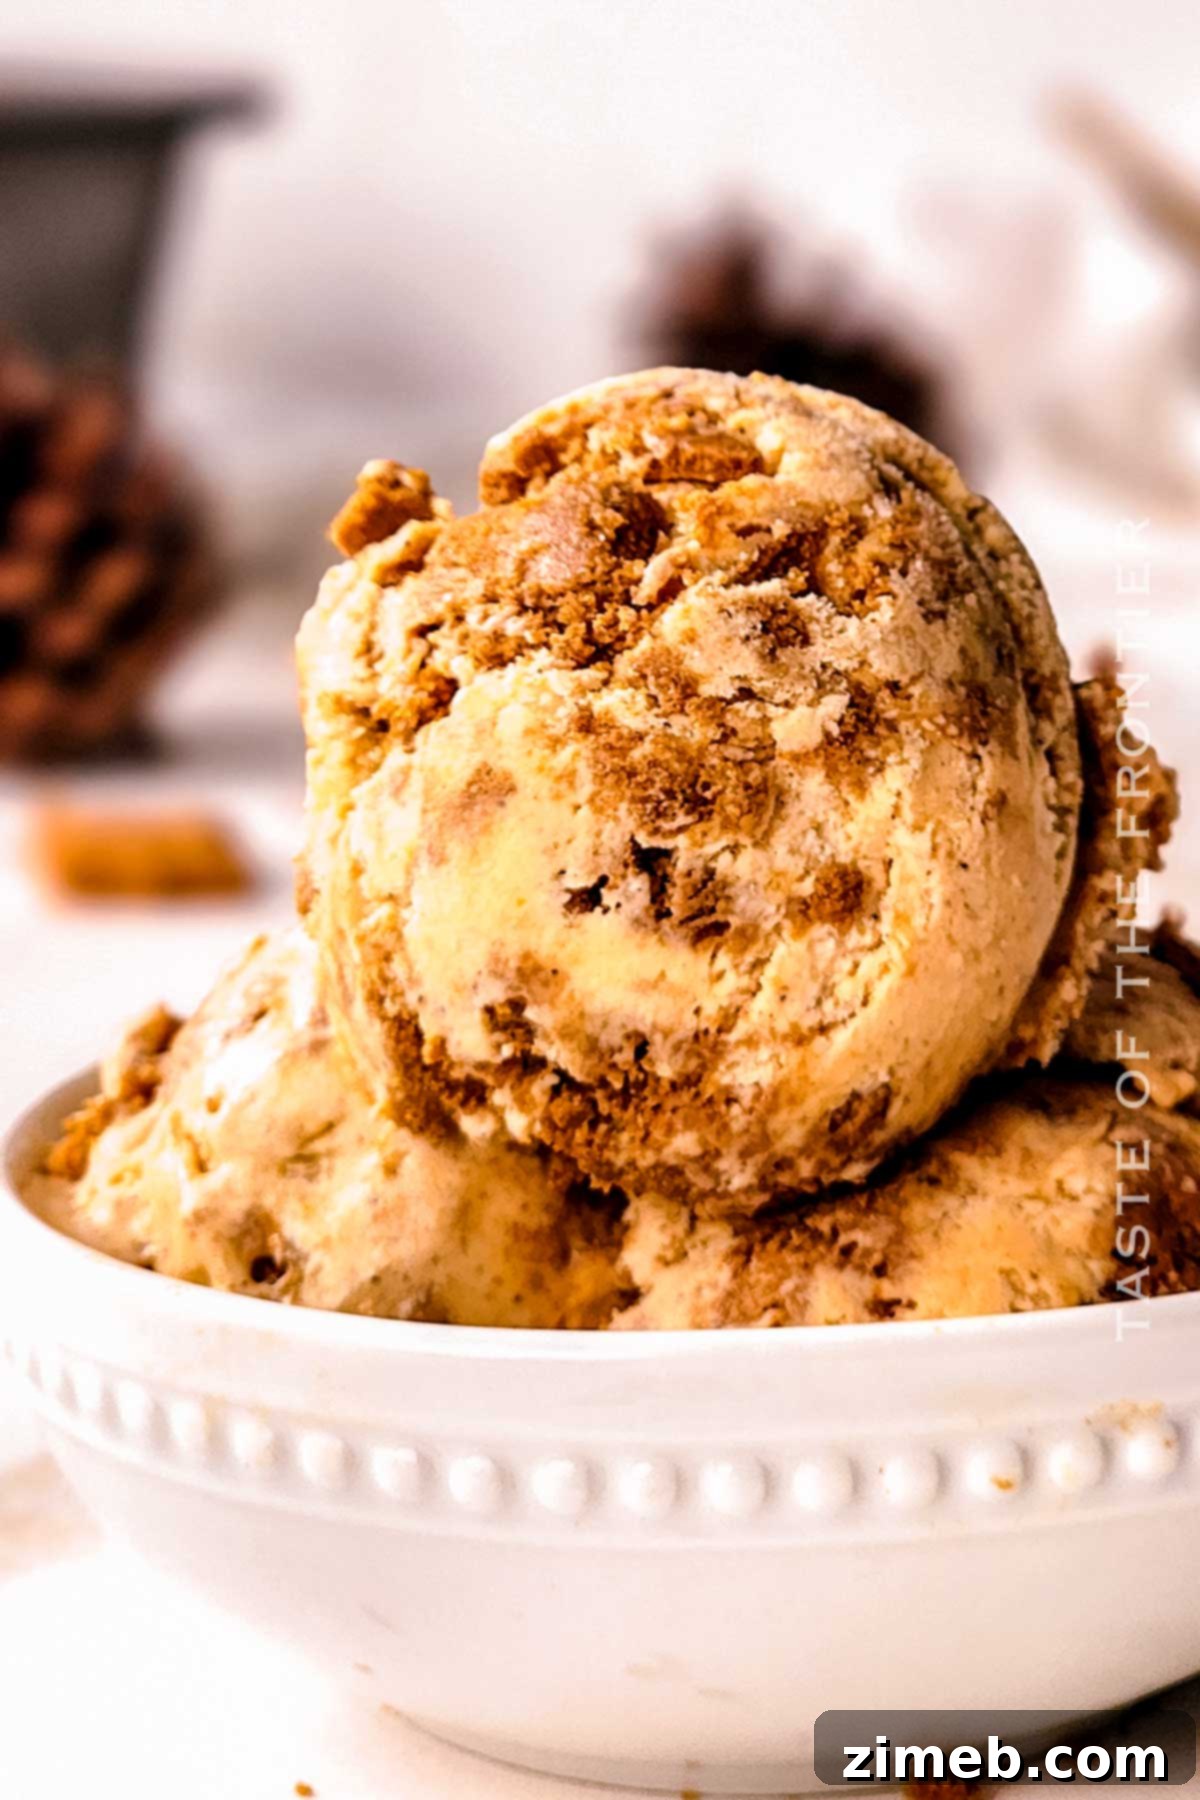

Pumpkin Pie Ice Cream
With this easy no-churn Pumpkin Pie Ice Cream, you don’t have to wait until Thanksgiving to fix your pumpkin cravings! No ice cream maker is required!
Course: Dessert
Servings: 4 servings
Prep Time: 15 mins
Chill Time: 8 hrs
Total Time: 8 hrs 15 mins
Pin Recipe
Rate this Recipe
Ingredients
- 1 ½ cups heavy cream (very cold)
- 14 ounces sweetened condensed milk
- ⅔ cup pumpkin puree (canned – pure pumpkin, not pie filling)
- 1 ½ teaspoons pumpkin pie spice
- 25 Biscoff cookies (coarsely crushed, with some reserved for garnish)
Instructions
- Beat the heavy cream in a large mixing bowl at high speed until stiff peaks form (about 2-5 minutes).
- Whisk the sweetened condensed milk, pumpkin puree, and pumpkin pie spice together in a separate medium bowl until smooth.
- Gently fold the pumpkin mixture into the whipped cream until thoroughly combined and smooth.
- Fold in most of the crushed Biscoff cookies, reserving a few extra pieces for garnish.
- Transfer the mixture to a loaf pan, top with the reserved cookie pieces, and cover tightly with plastic wrap pressed directly onto the surface.
- Freeze for at least 8 hours or, ideally, overnight before serving to achieve optimal firmness.
Equipment
- Loaf Pan
- Hand mixer (or stand mixer)
Nutrition
Nutritional information is approximate per serving:
- Calories: 906 kcal
- Carbohydrates: 101 g
- Protein: 14 g
- Fat: 52 g
- Saturated Fat: 26 g
- Cholesterol: 135 mg
- Sodium: 358 mg
- Potassium: 542 mg
- Fiber: 1 g
- Sugar: 79 g
- Vitamin C: 5 mg
- Calcium: 356 mg
- Iron: 1 mg
- Net Carbohydrates: 59 g
Nutritional information for the recipe is provided as a courtesy and is approximate. Please double-check with your own dietary calculator for the best accuracy. We at Yummi Haus cannot guarantee the accuracy of the nutritional information given for any recipe on this site.
Love this recipe?
Follow @KleinworthCo for even more tasty recipes!