
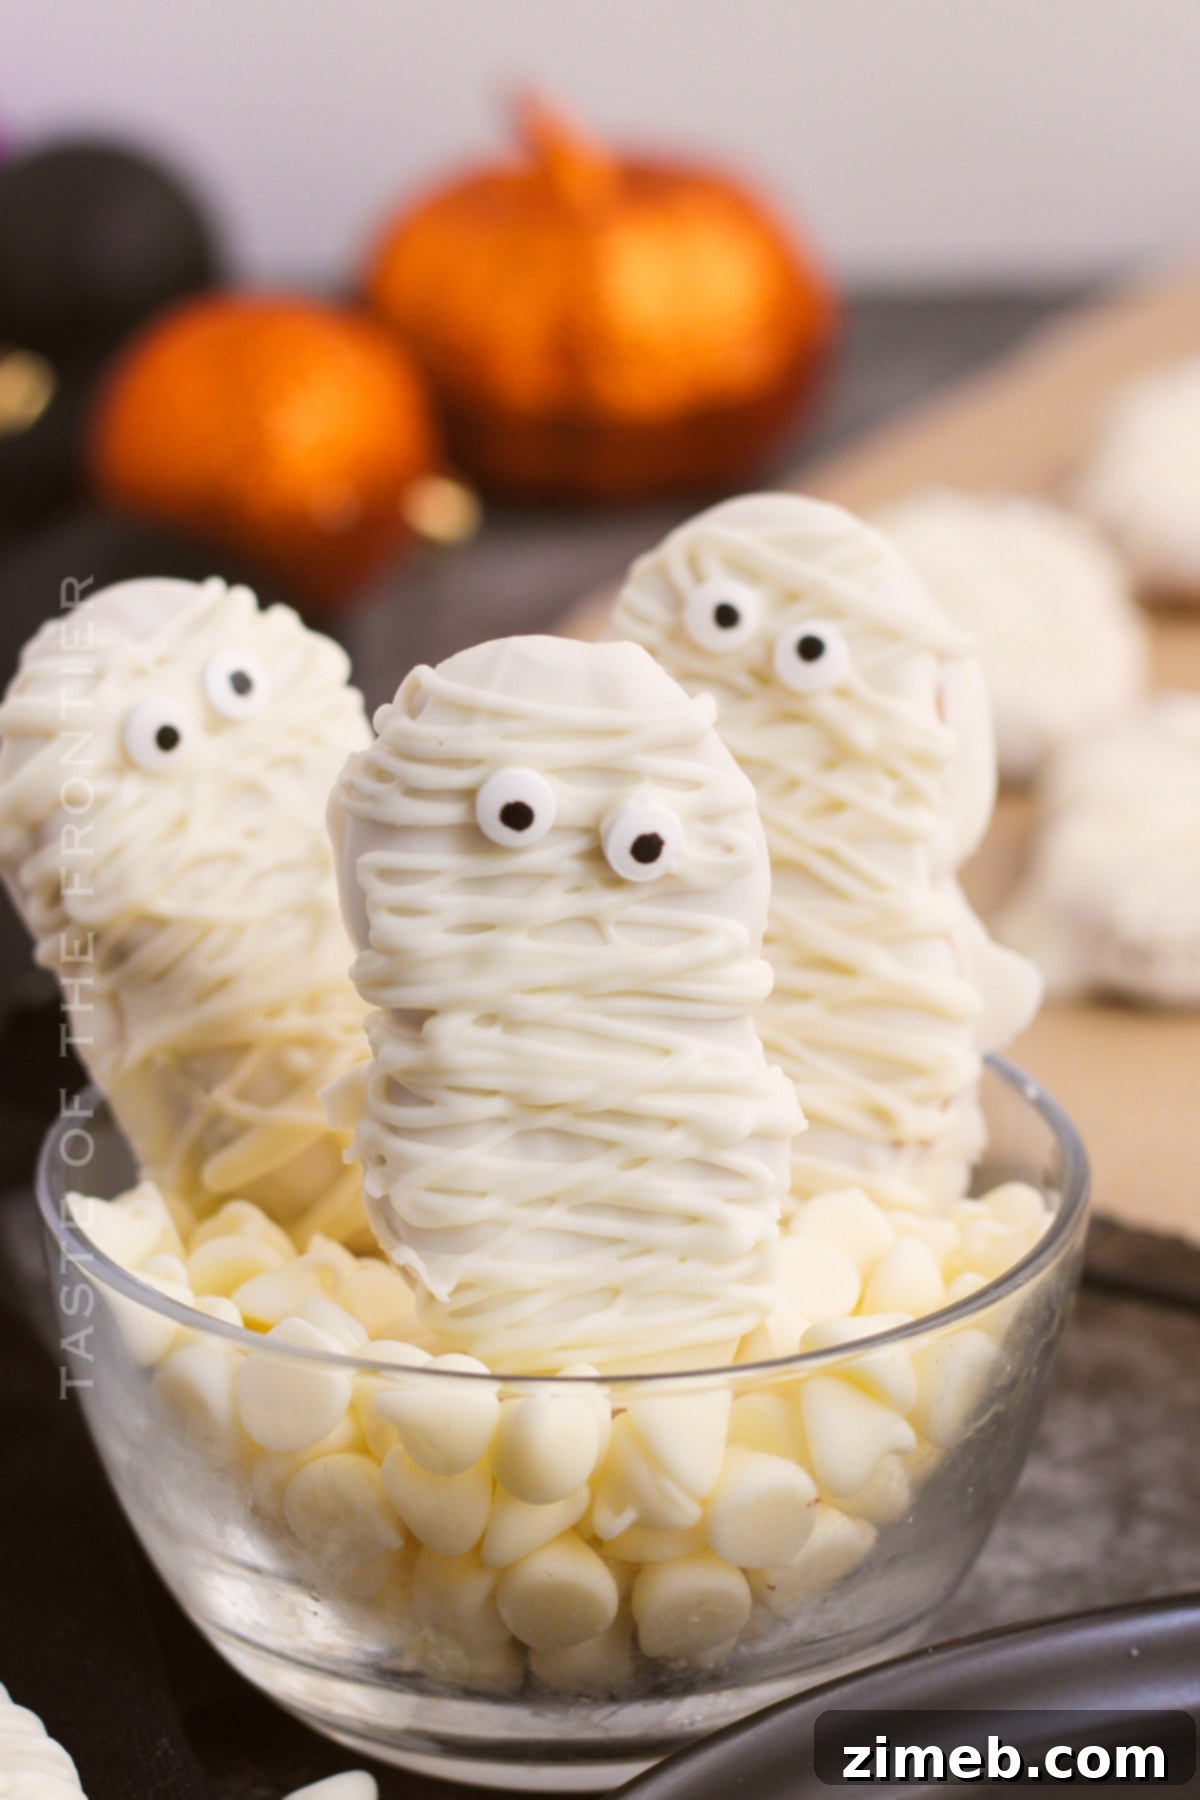
Easy & Spooky Mummy Cookies: Your Ultimate Halloween Treat Guide
Searching for the perfect spooky, yet incredibly fun, treat to craft with your children this Halloween season? Look no further than these delightful Mummy Cookies! They are a fantastic activity for kids and adults alike, promising delicious results and memorable holiday moments.
Every child adores cookies, and what could possibly be more exciting than baking and decorating cookies that transform into charming little mummies? These Halloween Mummy Cookies are designed to be effortlessly simple, guaranteeing a resounding hit with your little monsters and ghouls. Beyond their irresistible taste, the process of bringing these mummies to life is a super enjoyable hands-on activity, making them an ideal project for a Halloween party or a cozy autumn afternoon. Dive into the fun and give them a try today!
PIN THIS RECIPE TO SAVE FOR LATER
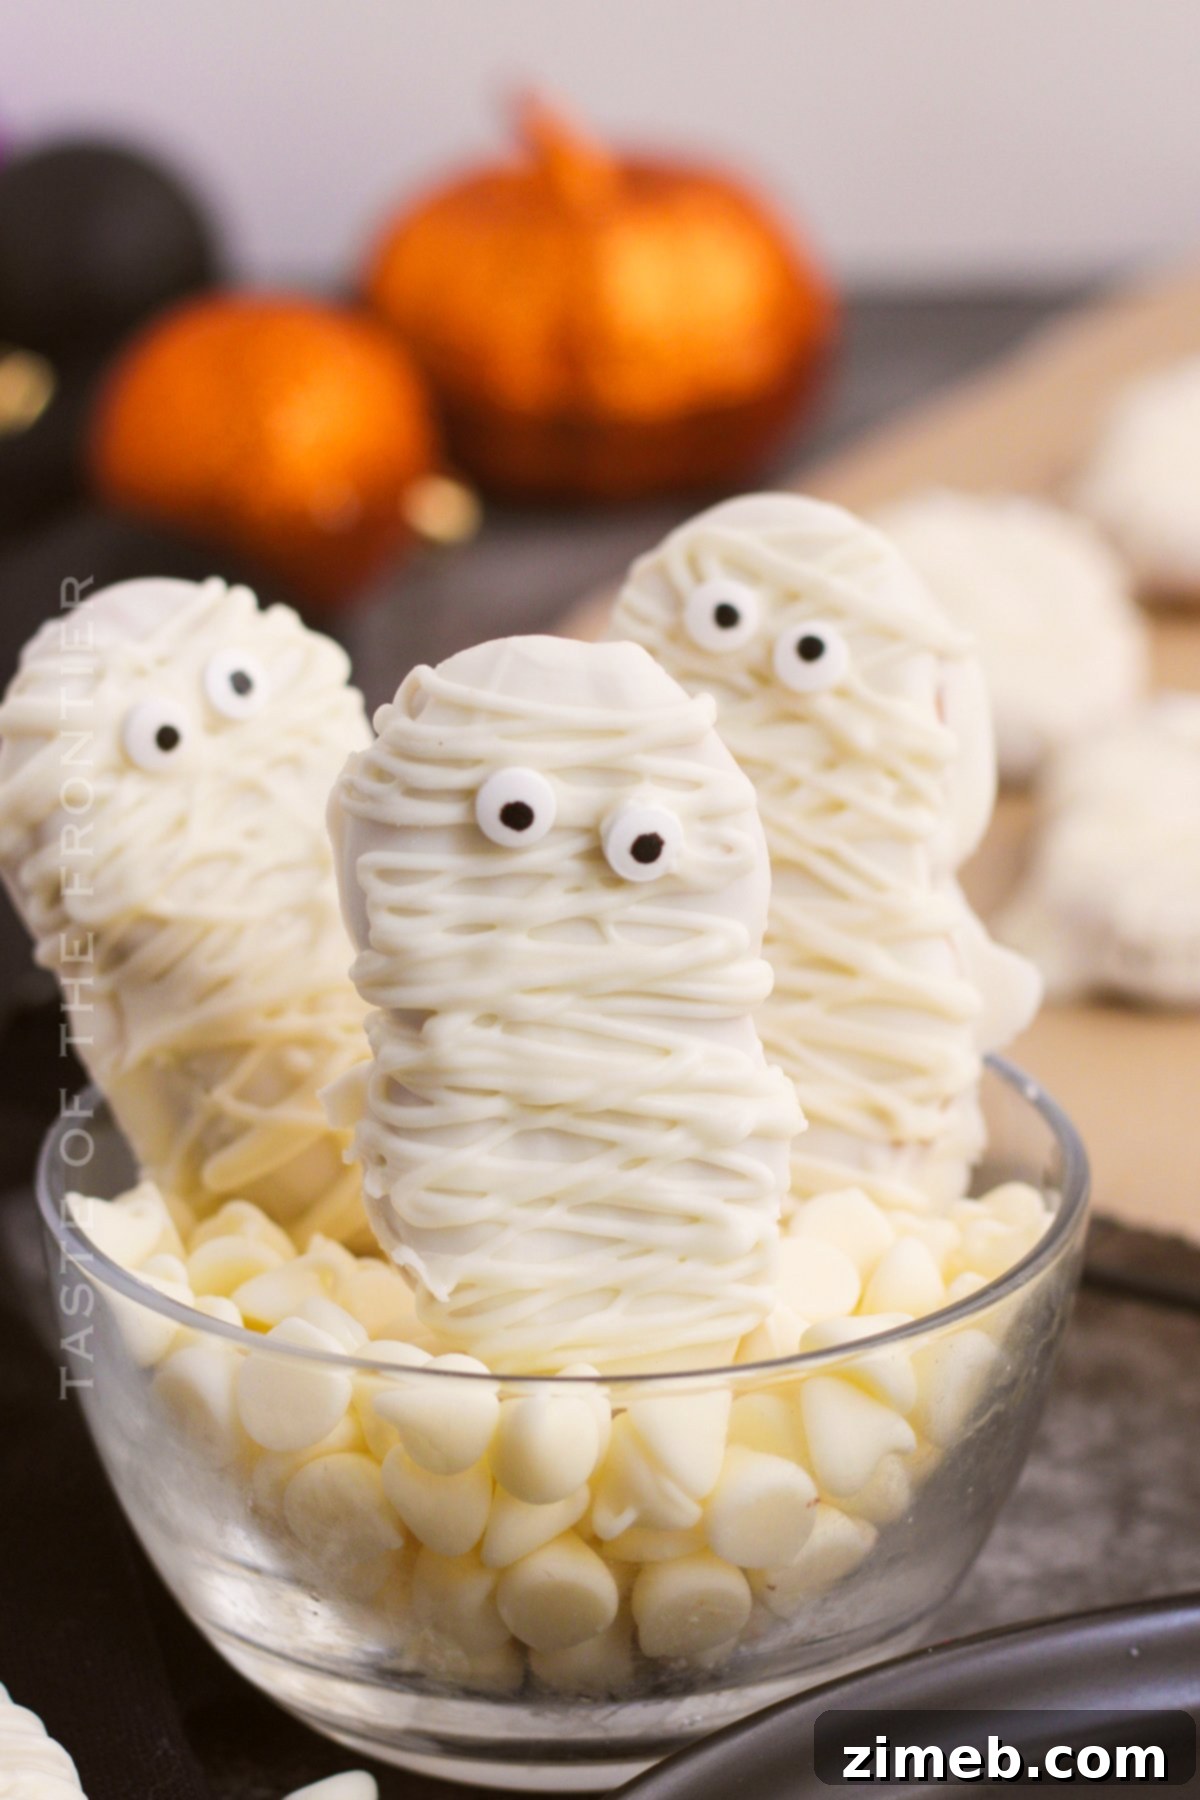
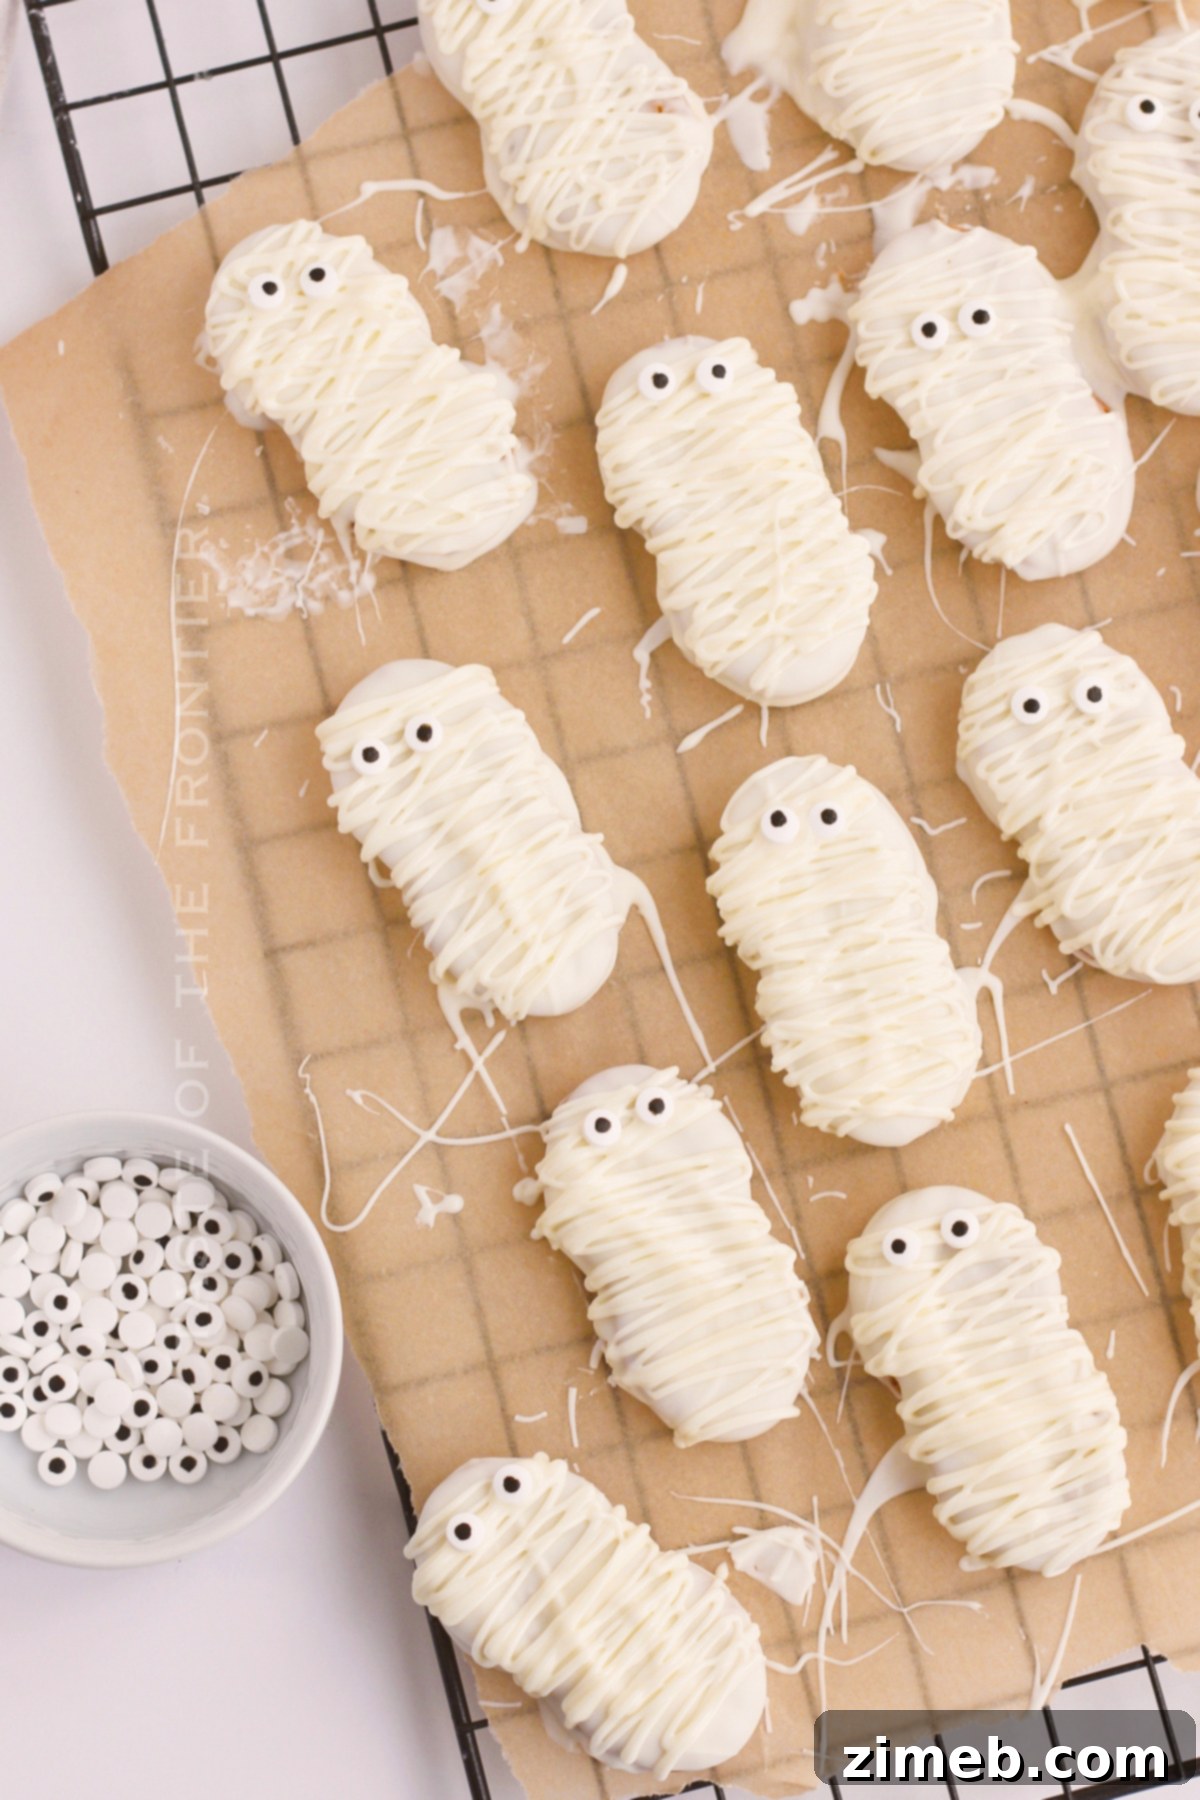
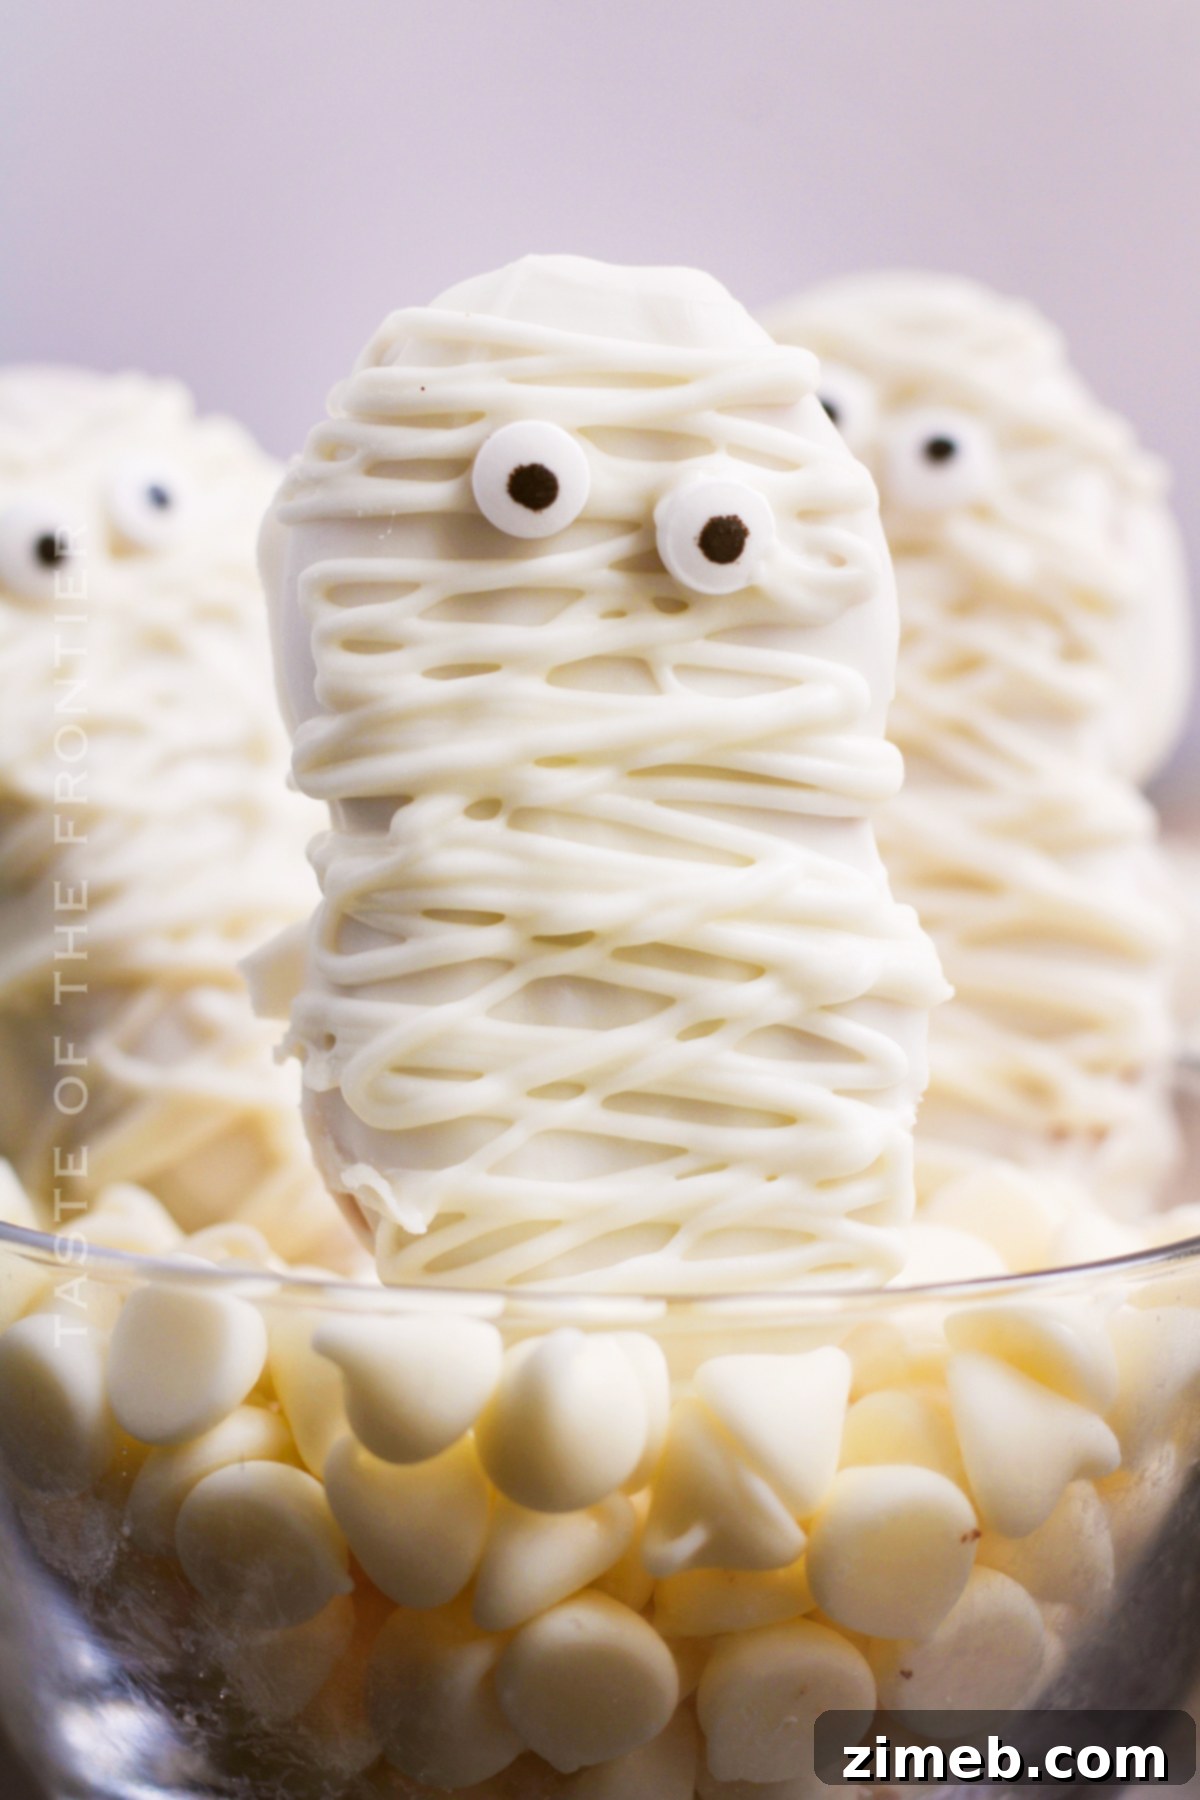
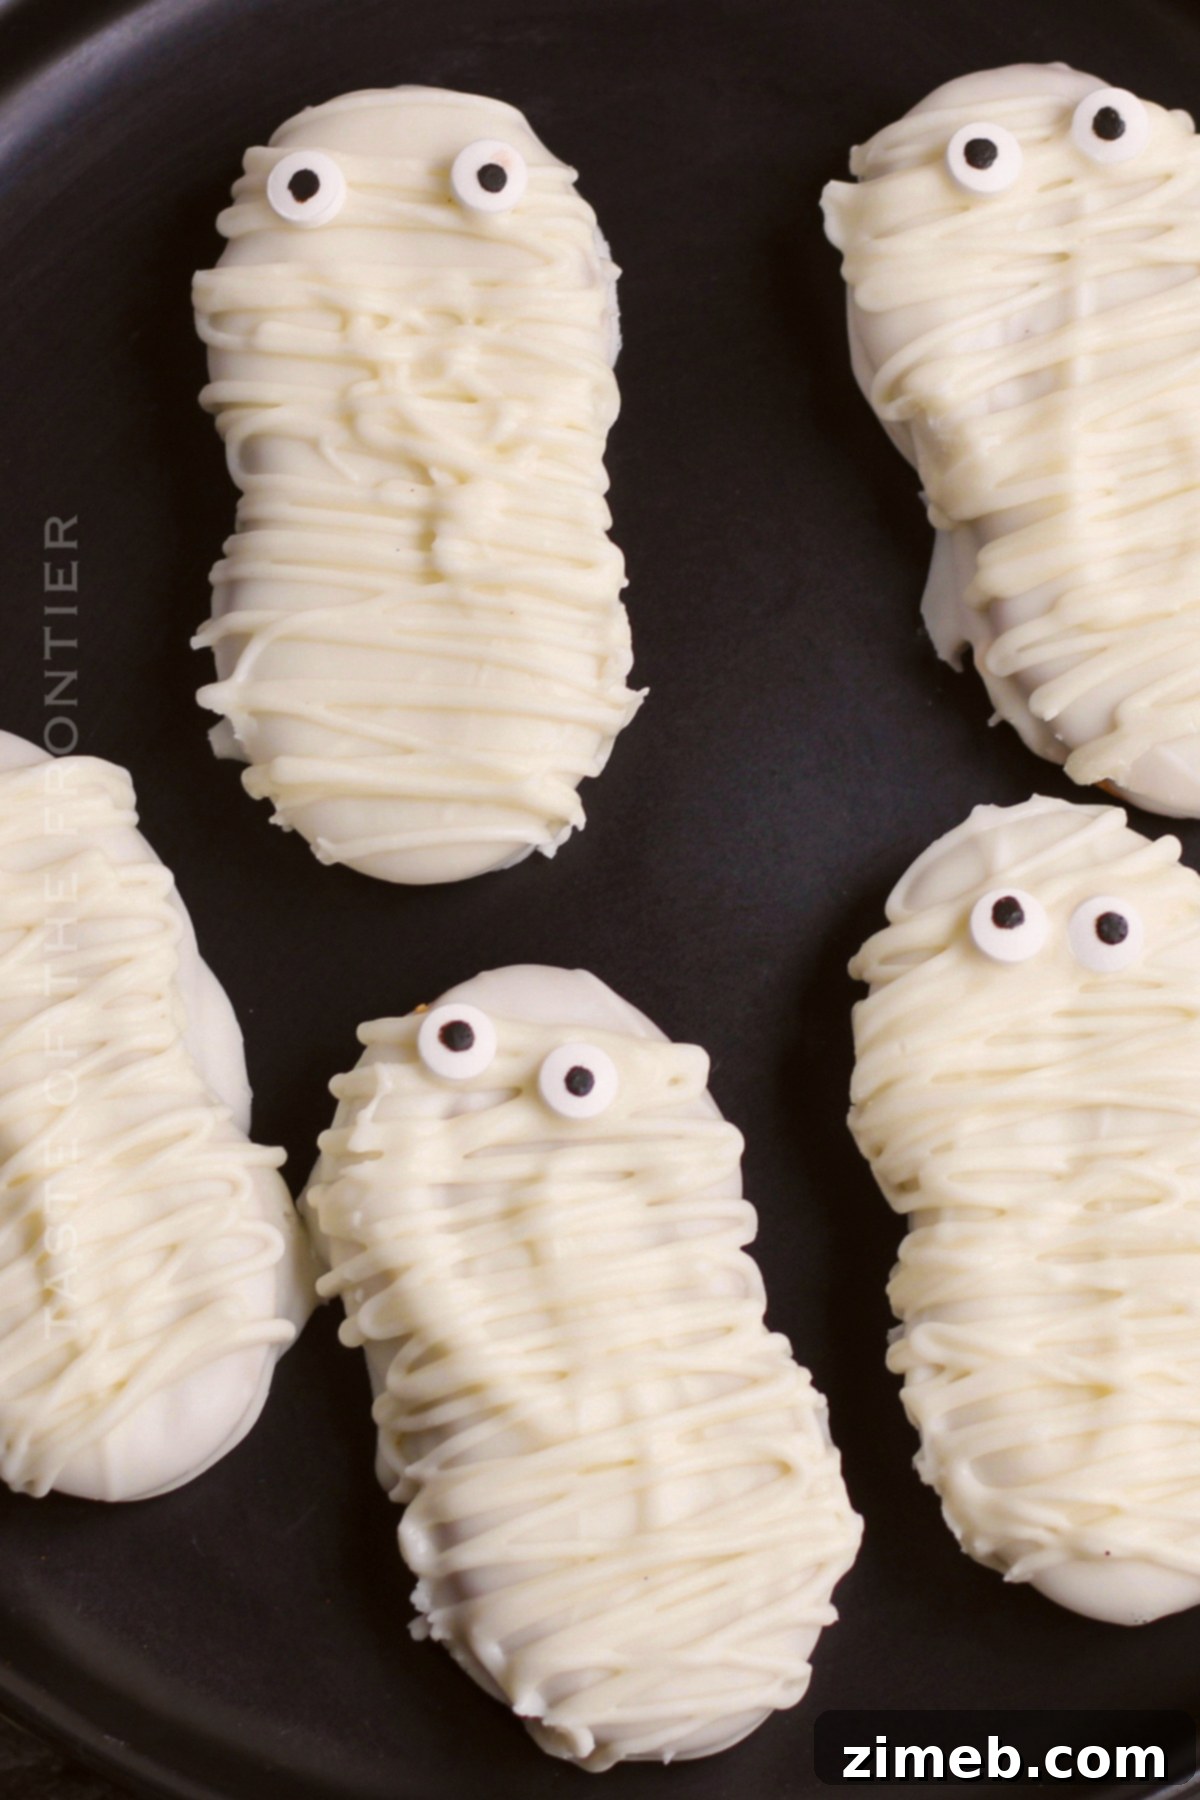
If your goal this Halloween is to create a treat that’s both enchantingly spooky and utterly delectable, these mummy cookies are your answer. You’ll be genuinely surprised by how straightforward they are to assemble, yet they possess a charm that will undoubtedly impress everyone from your friends to your most discerning family members. The secret? They’re not just cute; they’re incredibly tasty too! It’s hard to go wrong with the classic combination of Nutter Butter Cookies enveloped in a rich, smooth white chocolate coating. The result is pure bliss – SO GOOD and exceptionally cute, making them a festive centerpiece for any Halloween gathering.
So, don’t hesitate! Gather your ingredients and embark on this sweet adventure. Your taste buds, and those of your loved ones, will most certainly thank you!
Crafting the Perfect Mummy Nutter Butter: A Halloween Delight
The beauty of these Mummy Cookies lies in their simplicity, making them accessible to even novice bakers. They leverage the beloved Nutter Butter cookie as their base, transforming a classic peanut butter sandwich cookie into a ghoulishly delightful mummy with just a few simple steps. The contrast between the salty peanut butter and the sweet white chocolate creates a flavor profile that is truly addictive, ensuring these cookies disappear quickly from any party platter. Imagine the joy of seeing these adorable, edible mummies lined up, ready to be devoured!
Frequently Asked Questions About Mummy Cookies
Here are some commonly asked questions to ensure your Mummy Cookie making experience is as smooth and successful as possible:
How to Store Leftover Mummy Cookies?
To keep your Mummy Cookies fresh and delicious, store them in an airtight container at room temperature. They will maintain their quality for up to one week. It’s generally not recommended to refrigerate these cookies. The damp, humid environment of a refrigerator can cause the delicate candy eyes to “bleed” or “weep,” spoiling their appearance and potentially their texture. The sugar in the candy eyes tends to absorb moisture, leading to discoloration and a less appealing look. For optimal presentation and taste, stick to room temperature storage.
Can I Freeze Mummy Cookies for Future Enjoyment?
Yes, these spooky treats can indeed be frozen! To do so, place them in a freezer-safe bag or container, ensuring they are well-sealed to prevent freezer burn. They will keep beautifully for up to 3 months. When you’re ready to enjoy them, simply let them thaw at room temperature.
However, as previously mentioned regarding refrigeration, the candy eyes are quite sensitive to damp conditions. For this reason, if you plan to freeze a batch, a valuable tip is to store the cookies without their candy eyes. Once the cookies have thawed and you’re ready to serve, you can then attach fresh candy eyes. This ensures their vibrant and spooky appearance is preserved, making them perfect for any last-minute Halloween party or spontaneous treat craving.
Mummy Cookies for Halloween: Simple Ingredients, Maximum Impact
These adorable Mummy Cookies are not only a feast for the eyes but also incredibly simple to prepare, requiring just a few key ingredients. The magic lies in the combination of crunchy, creamy Nutter Butter cookies and smooth, melt-in-your-mouth chocolate. Each ingredient plays a crucial role in bringing these spooky characters to life, making them a go-to for any Halloween celebration. Get ready to gather these essentials and prepare for some frightfully fun baking!
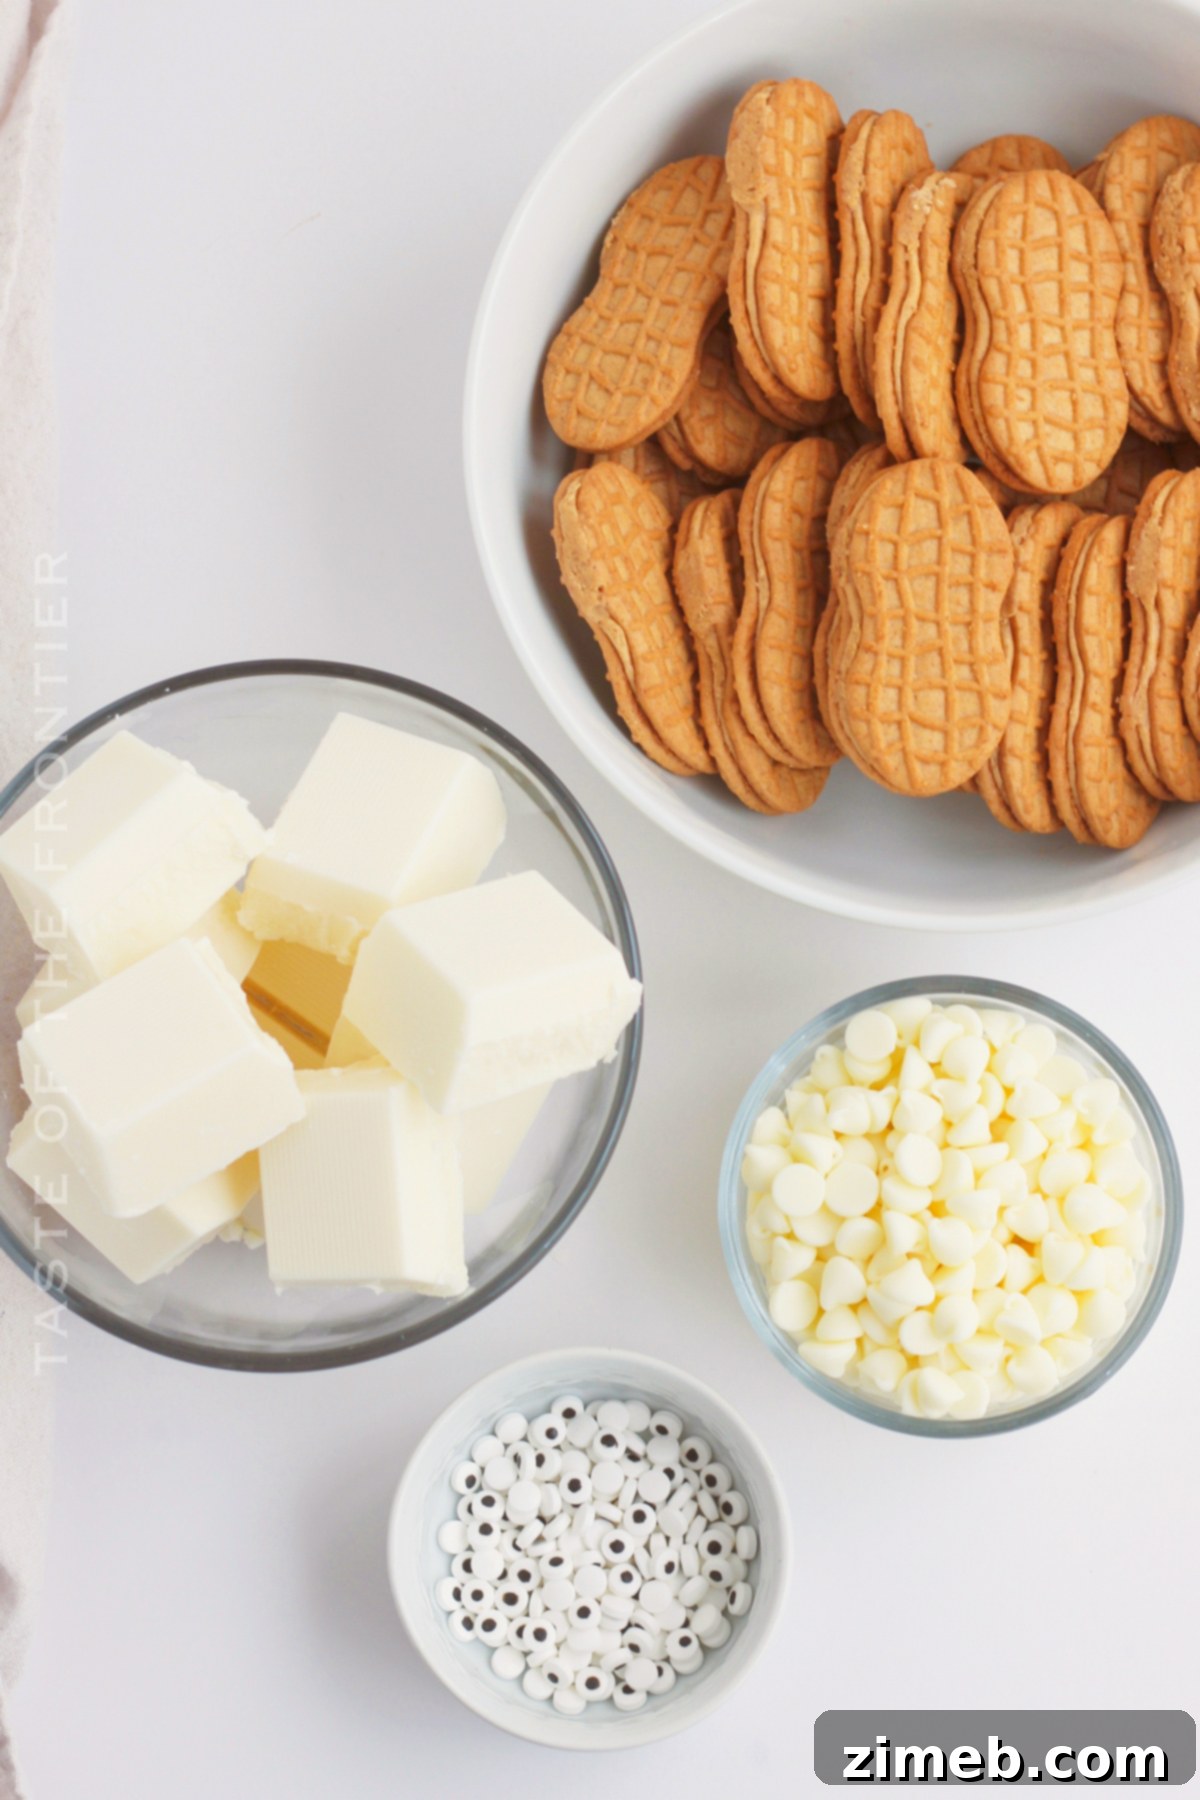
Ingredients for Your Mummy Cookies:
- Nutter Butter cookies: The perfect peanut butter-filled base for your mummies. Their oval shape is ideal for the mummy wrapping effect.
- Almond bark: This forms the base white coating. It melts smoothly and sets quickly, providing a solid foundation for your mummy wraps.
- White chocolate chips: Used for creating the distinctive mummy “bandages.” Choose a good quality brand for best melting and piping results.
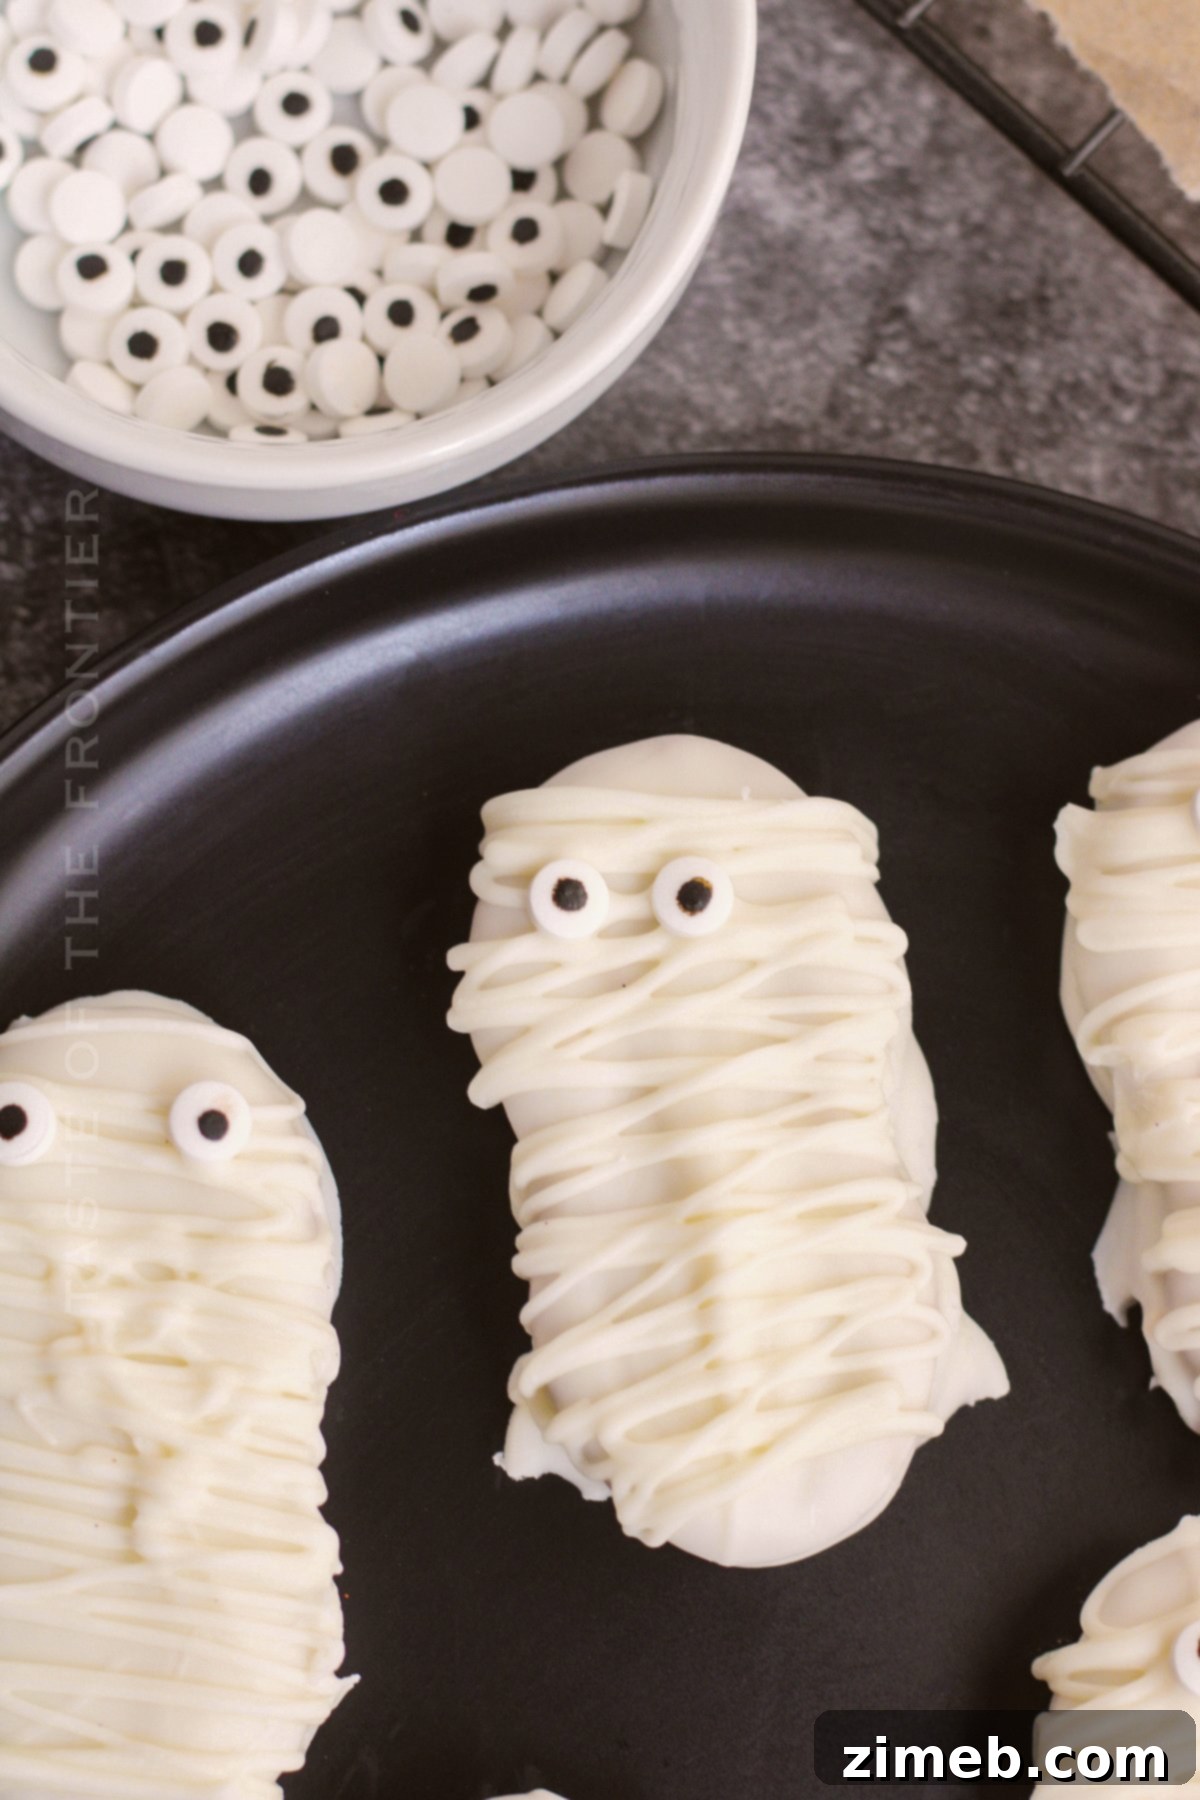
- Candy eyeballs: These are essential for giving your mummies their characteristic spooky gaze, bringing them to life with a playful touch.
Choosing the Best Chocolate for Dipping Cookies
When it comes to dipping cookies, the type of chocolate you choose can significantly impact the ease of preparation and the final appearance of your Mummy Cookies. While chocolate chips are a common pantry staple and can be used in a pinch, achieving the perfect smooth, dippable consistency often requires a little extra help, such as adding a touch of coconut oil or shortening. This helps to thin out the melted chocolate, making it easier to coat your cookies evenly.
For a truly effortless and professional finish, many prefer to use candy melts. These specialized confectionery coatings are formulated to melt into an ideal, flowing consistency without any added ingredients. They come in an incredible array of colors, varieties, and even flavors, offering endless creative possibilities for all your chocolate-coated treats. Whether you envision traditional white mummies or colorful, fantastical versions, candy melts provide the versatility you need.
In this specific recipe, we utilize almond bark for the initial full coating because it’s readily available in larger quantities, which is perfect for dipping a significant number of cookies at once. Following this, white chocolate chips are used to create the detailed mummy “bandages.” If you’re looking to streamline the process even further, you can absolutely substitute both the almond bark and the white chocolate chips with white candy melts. This can make the melting and dipping stages even simpler and more consistent, ensuring beautifully wrapped mummies every time.
How to Make Easy Mummy Cookies: Step-by-Step Guide
Creating these charming Mummy Cookies is a straightforward and rewarding process. Follow these simple steps to bring your spooky treats to life, perfect for any Halloween celebration!
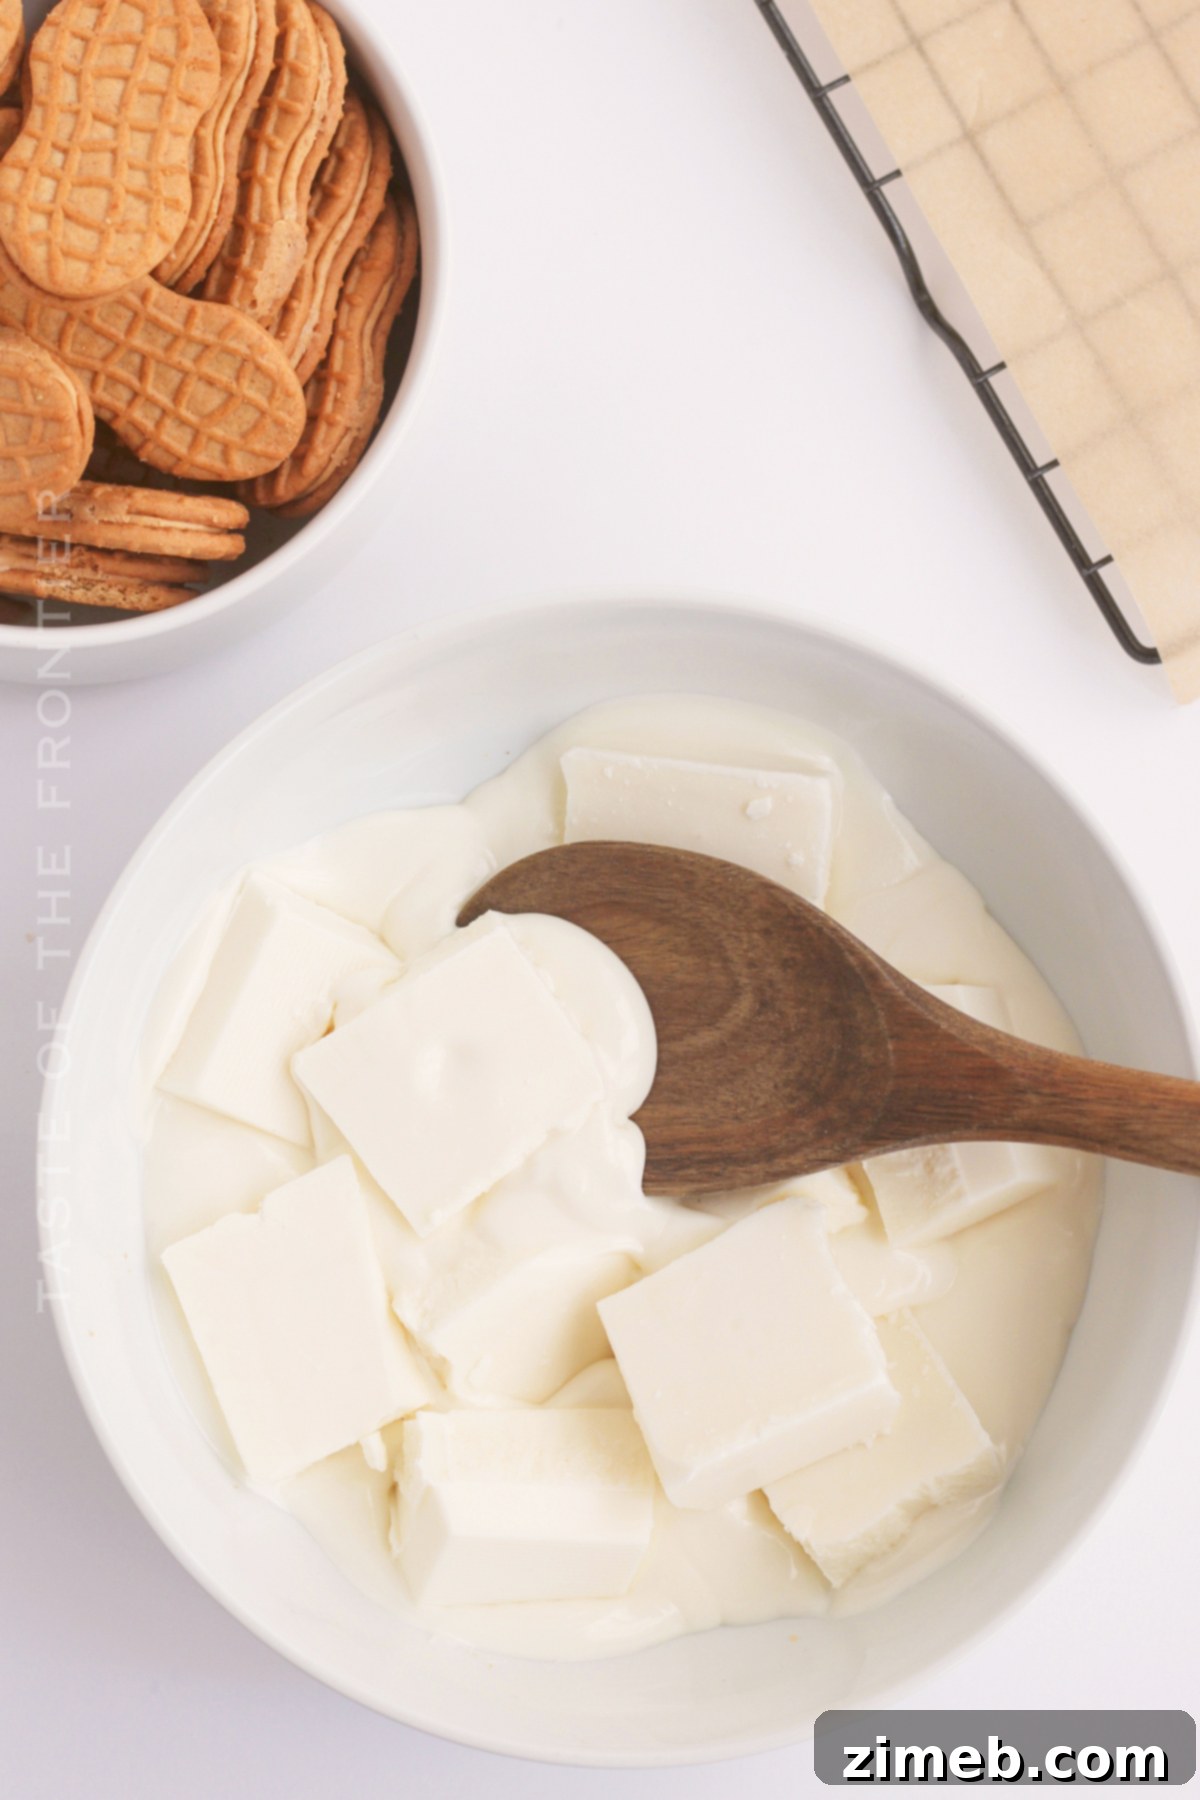
- Melt the Almond Bark: Begin by placing the almond bark in a microwave-safe dish. Microwave it for 20-second intervals, stirring thoroughly after each interval. Continue this process until the almond bark is completely melted and smooth. This gradual approach prevents overheating and ensures a creamy consistency.
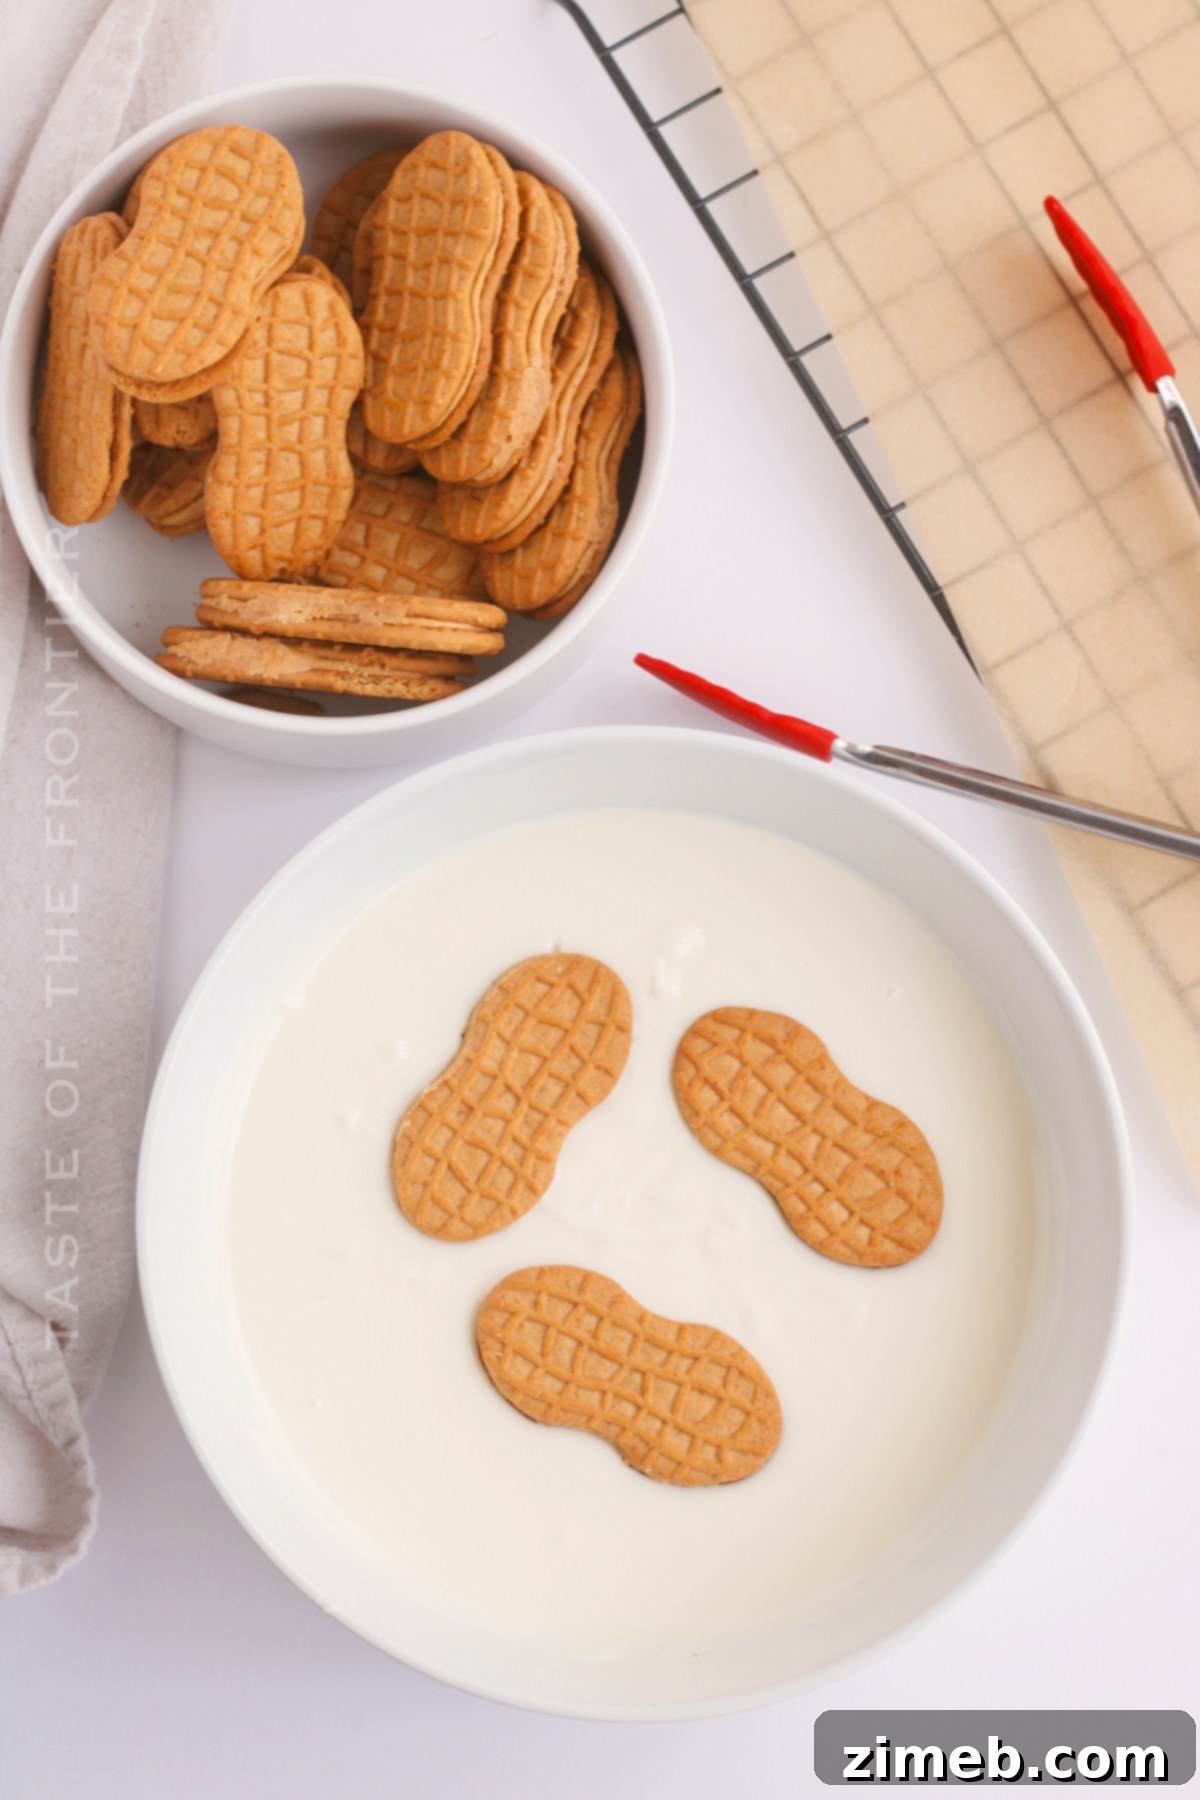
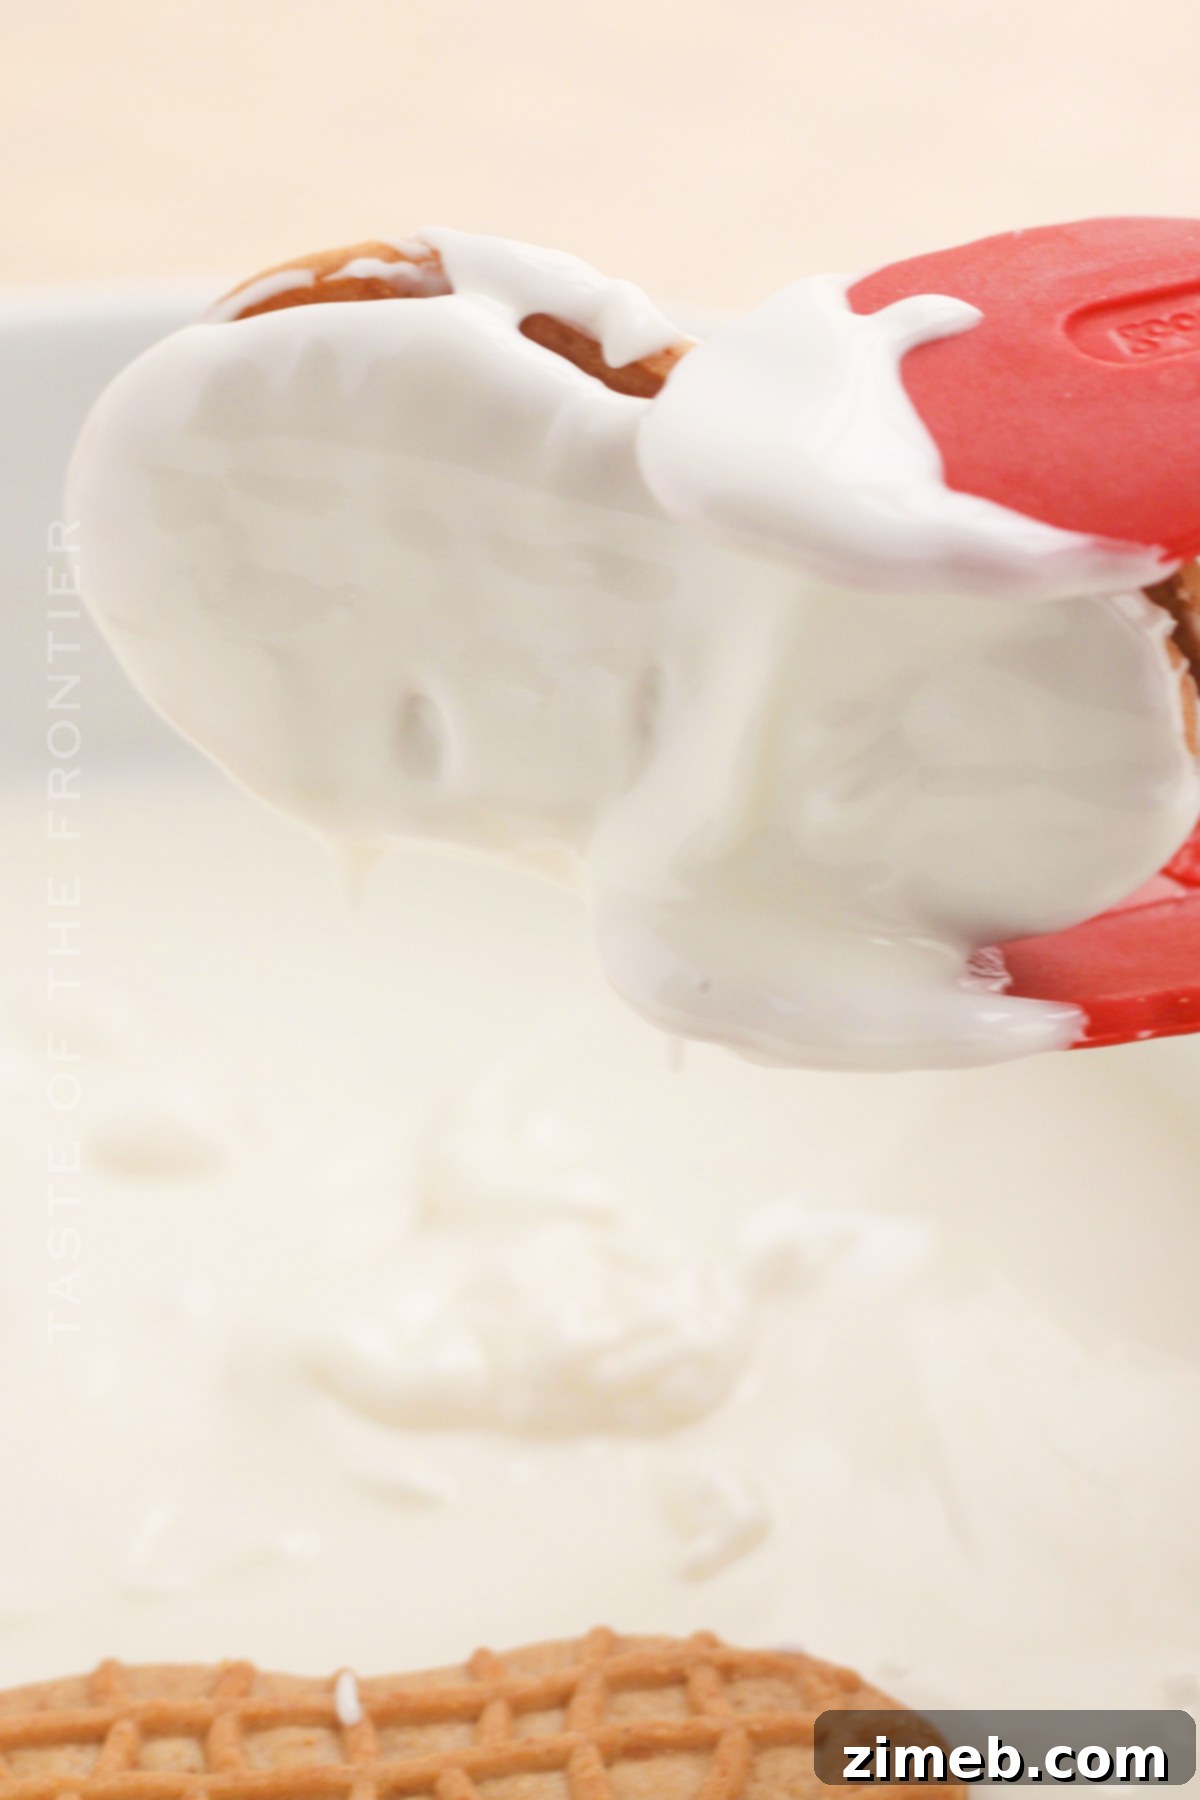
- Coat the Nutter Butter Cookies: Using tongs, carefully immerse each Nutter Butter cookie into the melted almond bark, ensuring it’s fully coated. Gently shake off any excess chocolate before transferring the coated cookies onto a sheet of parchment paper. This allows for easy removal once set.
- Allow First Coating to Set: Let the chocolate-coated cookies cool completely for approximately 10 minutes. This step is crucial for the white chocolate “bandages” to adhere properly and create a defined mummy effect.
- Melt the White Chocolate Chips: Once the first layer of almond bark has fully set, melt the white chocolate chips. Place them in a clean microwave-safe dish and microwave in 20-second bursts, stirring diligently after each. Repeat until the chocolate chips are fully melted and smooth. For best results, avoid high heat to prevent scorching.
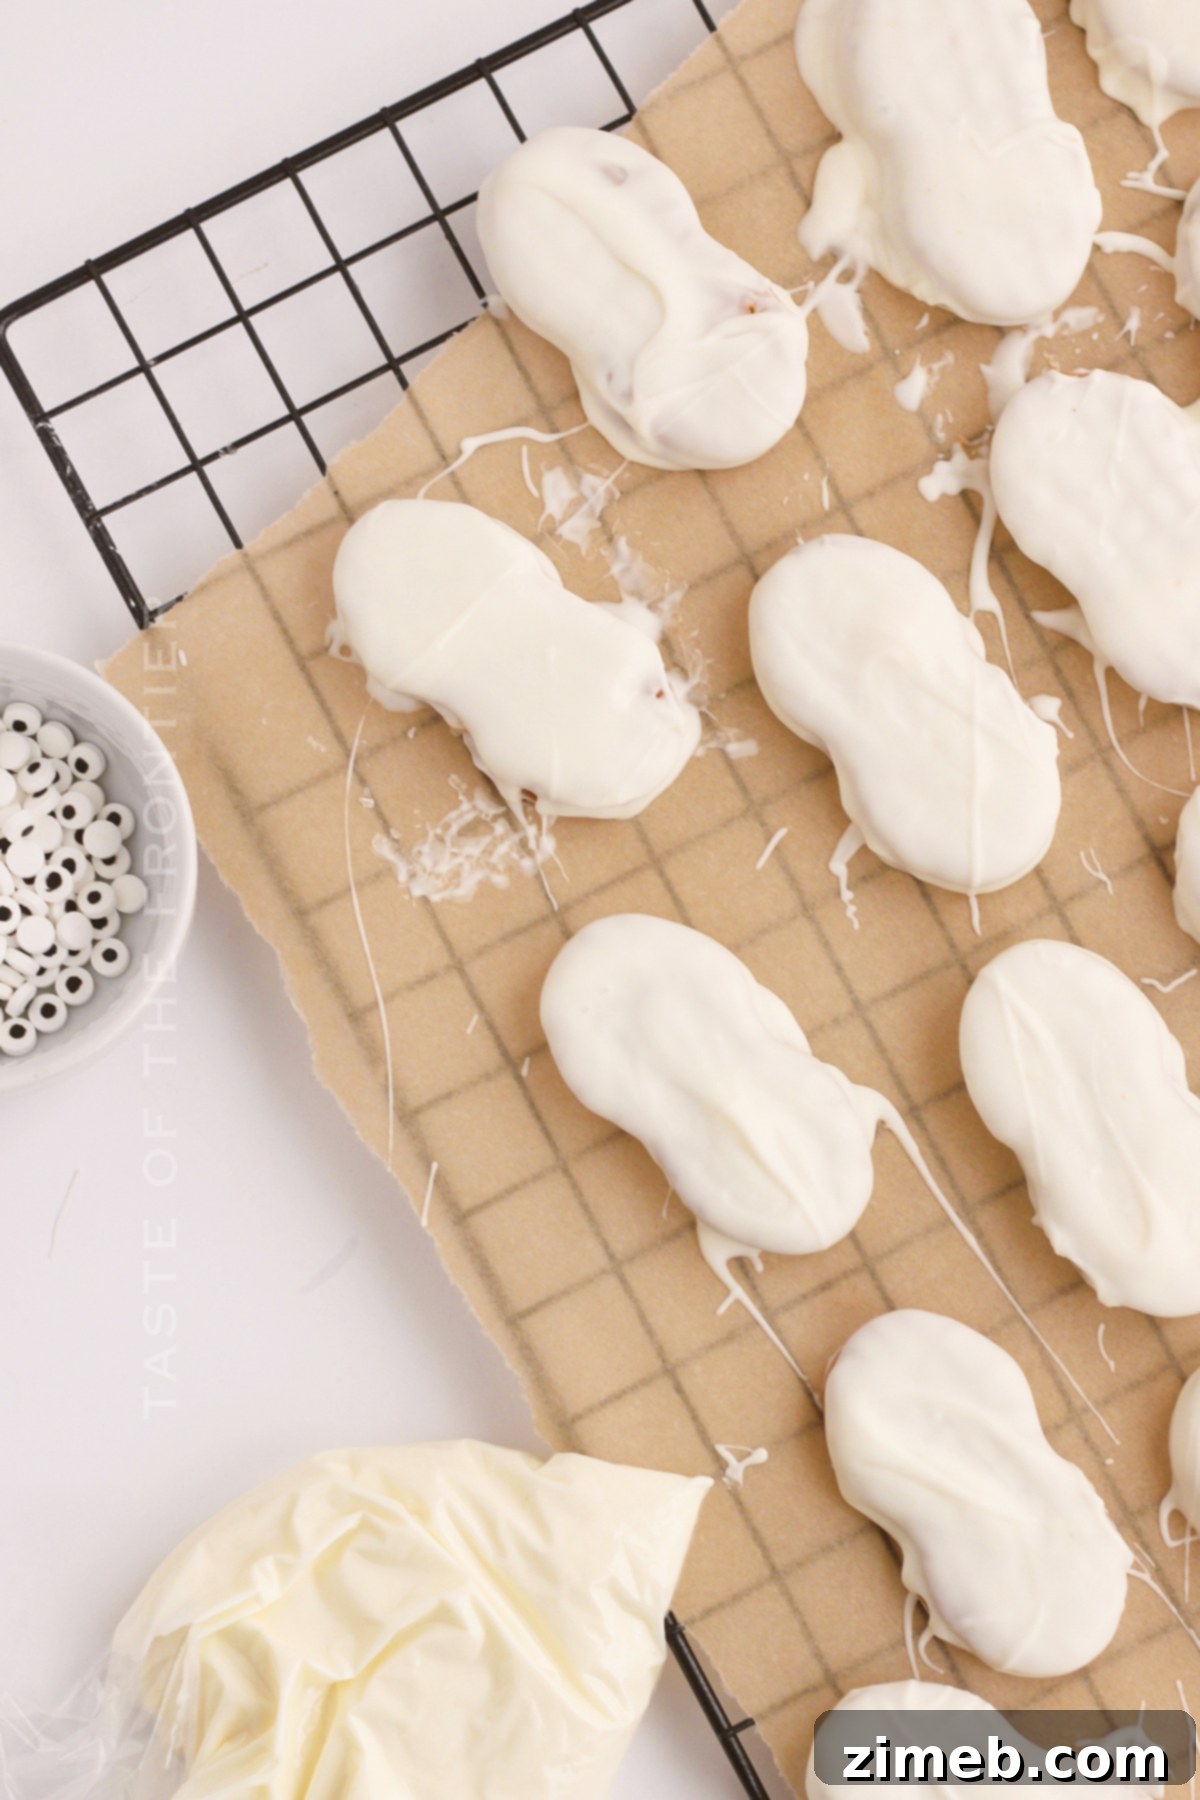
- Prepare for Piping: Carefully spoon the melted white chocolate into a piping bag. For those without a piping bag, a sturdy Ziploc bag with a tiny corner snipped off works just as well. The size of the snip will determine the thickness of your mummy stripes, so start small and enlarge if needed.
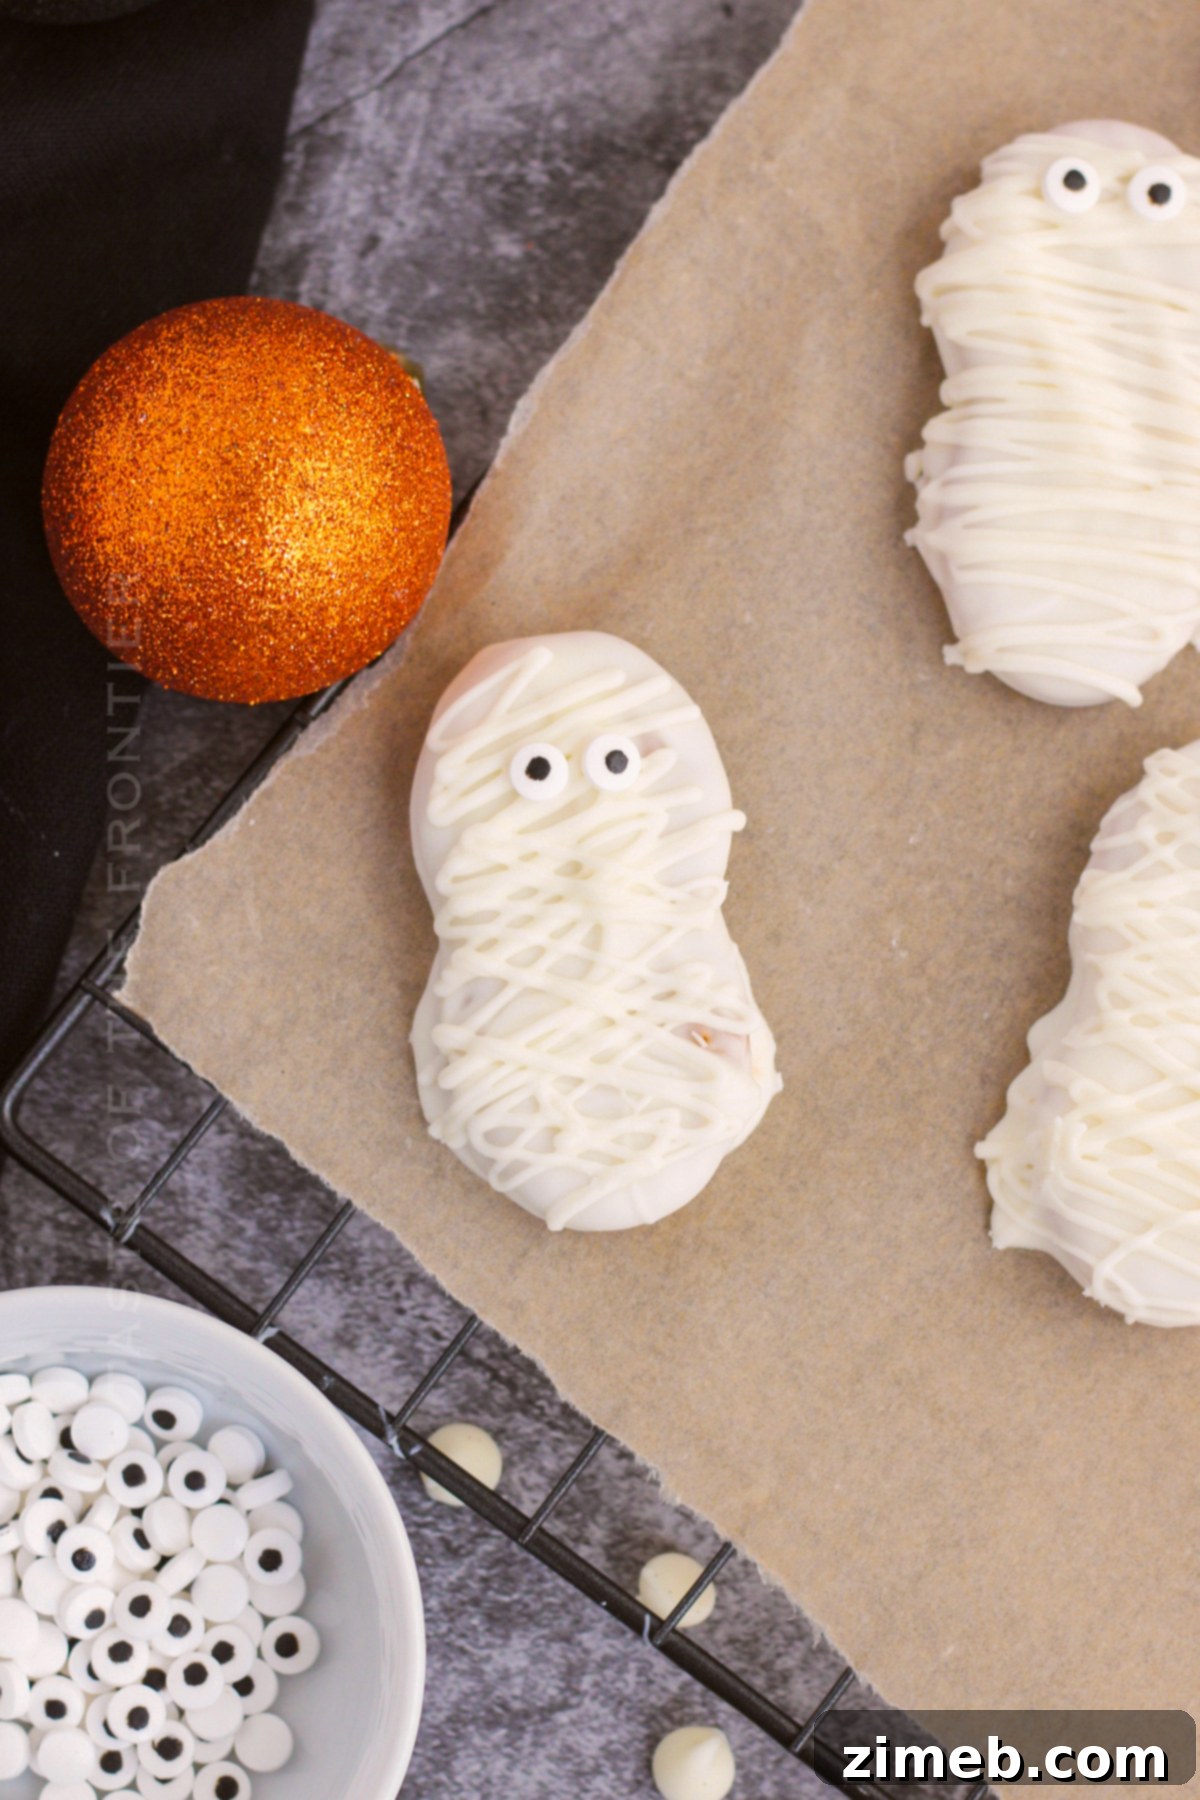
- Create the Mummy Bandages: Gently pipe the white chocolate over the coated cookies in a back-and-forth zigzag pattern. This creates the illusion of overlapping bandages, giving your cookies their characteristic mummy appearance. Don’t worry about perfection; uneven lines add to the authentic mummy look!
- Add the Candy Eyes: While the white chocolate “bandages” are still wet, carefully place two candy eyeballs on each mummy cookie. Position them to peer out from between the chocolate strips, giving each mummy a unique and playful expression. Allow the cookies to set completely before handling or storing.
Troubleshooting: Why Didn’t My Chocolate Melt Correctly?
One common frustration when working with chocolate for dipping is when it becomes chunky and stiff instead of smooth and creamy. This phenomenon is known as “seizing.” Chocolate typically seizes for one of two main reasons: overheating or contact with water or steam.
In the first scenario, if the chocolate is subjected to excessive heat, it can burn. This causes the cocoa solids to separate from the cocoa butter, leading to a grainy, unworkable texture. To prevent this, always melt chocolate slowly and gently, preferably in short bursts in the microwave or over a double boiler.
The second, and more frequent, cause of seizing is the introduction of even a tiny amount of water or steam. Chocolate is rich in waxy compounds and various oils that are inherently hydrophobic, meaning they “fear” water. When water comes into contact with melted chocolate, these components react negatively, causing the chocolate to clump and separate. This is why it’s crucial to ensure your bowls, spatulas, and any other equipment are completely dry when melting chocolate, and to be careful not to let steam from a double boiler get into the chocolate itself.
To avoid these issues, always refer to the specific melting directions on your chocolate or candy melt packaging. They often provide precise temperatures or microwave timings that are tailored to their product. Following these guidelines carefully will help ensure your chocolate melts to a beautifully smooth and dippable consistency, perfect for your Mummy Cookies.
Can I Use Sugar-Free Chocolate for Mummy Cookies?
While this recipe hasn’t been tested with sugar-free chocolate personally, it is likely that sugar-free chocolate would work just fine as a substitute for dipping. The melting properties of many sugar-free chocolate brands are comparable to their regular counterparts, so you should be able to achieve a similar smooth coating.
That being said, if your aim is to create a truly low-carb or carb-friendly version of these Mummy Cookies, simply swapping the chocolate might not be enough. You would also need to find a suitable low-carb cookie base with a similar shape and texture to the Nutter Butter cookies. There are various recipes for keto or sugar-free peanut butter cookies that could potentially be adapted. This would ensure the entire treat aligns with a low-carb dietary preference, creating a delightful and guilt-free Halloween indulgence.
Are Mummy Cookies Easy to Make for Everyone?
Absolutely! If the thought of making elaborate treats like cake pops, intricate chocolate truffles, or other complex chocolate-dipped delights has ever seemed intimidating, then these chocolate-covered Nutter Butter mummy cookies are here to prove you wrong. They are significantly quicker and easier to prepare, making them a fantastic entry point into the world of festive baking. The beauty of this recipe is its incredible versatility; you can customize them in countless ways, from varying chocolate colors to different types of candy decorations.
These adorable little cookies, transformed into playful mummies, require very little time from start to finish. This makes them perfect for busy individuals or families looking for a high-impact, low-effort Halloween project. They are also ideally suited for packaging into Halloween treat bags, delighting all the little ones who come trick-or-treating or attend your spooky celebrations. Their ease and charm ensure they’ll be a beloved part of your holiday traditions for years to come.
More Spooky & Sweet Mummy-Themed Treats to Explore!
If you’ve fallen in love with the charm and simplicity of these Mummy Cookies, you’ll be thrilled to discover there’s a whole world of other mummy-themed treats waiting to be explored! These recipes offer creative ways to incorporate the fun, wrapped aesthetic into various desserts, perfect for expanding your Halloween menu. Don’t miss out on these other super cute mummy ideas:
- Mummy Rice Krispie Treats
- Easy Mummy Shortbread Cookies
- Mummy French Macarons
- Mummy Brownies
- Chocolate Mummy Candy Apples
Can Kids Help Make Mummy Cookies?
Absolutely, this is an ideal activity to involve children of all ages! Making Mummy Cookies offers a fantastic opportunity for kids to get creative in the kitchen, fostering a love for baking and helping them develop fine motor skills. They will undoubtedly have a blast helping with various stages of decorating the cookies. Supervised tasks such as dipping the Nutter Butters into the melted almond bark, carefully adding the white chocolate drizzle to create the mummy bandages, and, of course, placing the adorable candy eyes are all perfect for little hands.
However, for safety, it’s crucial that an adult handles the melting of the chocolate and almond bark. The dishes used for melting can become quite hot, posing a burn risk. With a grown-up overseeing the hot parts, children can safely and joyfully participate in the fun, hands-on decorative aspects, making these Mummy Cookies a truly memorable family project for Halloween!
DON’T MISS THESE HOLIDAY E-BOOKS!


Essential Products for Making Mummy Cookies
This adorable Halloween recipe is incredibly straightforward and utterly delicious. If you’re like me during this time of year, you might already have most of these items on hand. Or, perhaps you’re new to making cookies like this and feel a little nervous – but trust me, you’re going to absolutely love the process and the results! To make your cookie-making journey even smoother, I’ve compiled a list below of the things I simply can’t do without when crafting this fun treat. (You can also SHOP MY FAVORITES in my online store for more baking essentials).
- Baking Sheet: Essential for setting your chocolate-dipped cookies.
- Parchment Paper: Prevents sticking and makes cleanup a breeze.
- Medium Microwave-Safe Bowl: Perfect for melting your almond bark and white chocolate chips.
- Rubber Spatula: Ideal for stirring melted chocolate and scraping the bowl clean.
- Frosting Bag: For precise piping of the mummy bandages.
- Scissors: For cutting the tip of your piping bag.
- Candy Melts: An excellent alternative to almond bark and chocolate chips for easy melting, available in various colors.
If you adore this easy Mummy Cookie recipe as much as I do, you’re going to absolutely love these other Halloween treats too! Each recipe offers a unique blend of spooky fun and deliciousness, perfect for expanding your festive baking repertoire. Please click each link below to discover the easy, printable recipe and add more frightful flavors to your holiday celebrations!
Check out this recipe
Check out this recipe
Check out this recipe
Check out this recipe
Check out this recipe
Check out this recipe
Check out this recipe
Check out this recipe
Check out this recipe
If you love this fantastic recipe for Mummy Cookies as much as I do, please take a moment to write a five-star review below. Your feedback helps other home bakers discover and enjoy these delightful treats! Also, be sure to help me spread the Halloween cheer by sharing this recipe on Facebook and Pinterest! Happy baking!
CONNECT WITH YUMMI HAUS!
Be sure to follow me on my social media, so you never miss a post!
Substack, FB, Pinterest, IG, Email Subscription
Rate this Recipe
Mummy Cookies
Dessert
32
cookies
Ingredients
- 32 Nutter Butter Cookies
- 24 ounces almond bark
- 1 cup white chocolate chips
- 64 candy eyeballs
Instructions
-
Melt the almond bark in a microwave-safe dish for 20 seconds and mix. Repeat until all the bark is melted.
-
Place the Nutter Butter cookies into the melted bark. Use tongs to press the cookies into the melted chocolate and fully coat the cookies. Remove the cookies and place them onto the parchment paper.
-
Allow the chocolate coating to completely cool for 10 minutes.
-
Once the bark is completely cooled, melt the white chocolate chips in a microwave-safe dish for 20 seconds and mix. Repeat until all the chocolate chips are melted. (See notes in post above for more melting tips).
-
Carefully spoon the melted chocolate into a piping bag. Cut the tip or the corner of the bag, adjusting the size based on how thick you want your mummy stripes to be.
-
Pipe the white chocolate over the cookies in a back-and-forth zigzag pattern to beautifully create the look of a mummy.
-
Complete your charming mummies by adding two candy eyes to each cookie, pressing gently to secure them onto the wet chocolate.
Nutrition
Calories: 220kcal |
Carbohydrates: 29g |
Protein: 0.3g |
Fat: 10g |
Saturated Fat: 8g |
Cholesterol: 1mg |
Sodium: 61mg |
Potassium: 16mg |
Fiber: 0.01g |
Sugar: 23g |
Vitamin C: 0.03mg |
Calcium: 11mg |
Iron: 0.01mg |
Net Carbohydrates: 28g
Nutritional information for the recipe is provided as a courtesy and is approximate. Please double-check with your own dietary calculator for the best accuracy. We at Yummi Haus cannot guarantee the accuracy of the nutritional information given for any recipe on this site.
Love this recipe?
Follow @KleinworthCo for even more tasty recipes!