
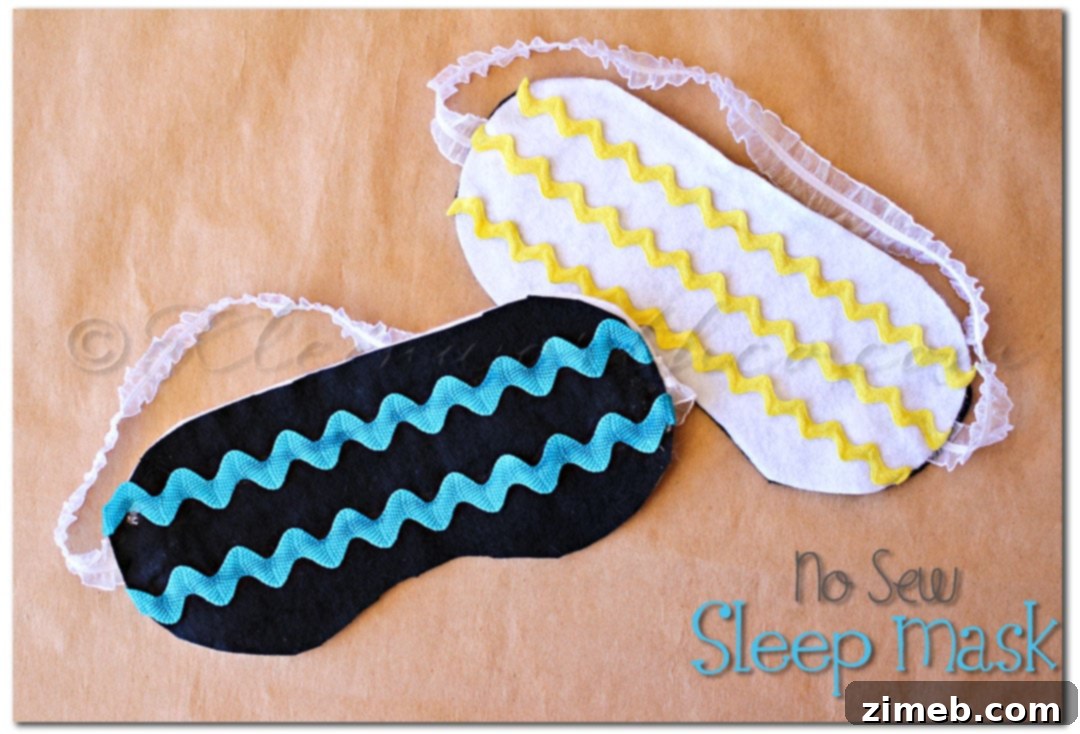
Craft Your Comfort: The Ultimate No-Sew Sleep Mask DIY for Restful Nights
Have you ever experienced those endless summer evenings where the sun seems to linger in the sky until an astonishing 10 PM, only to peek over the horizon again by 3:50 AM? This natural phenomenon, while beautiful, can wreak havoc on our sleep patterns, especially for those sensitive to light. For many families, ensuring a good night’s rest becomes a significant challenge when daylight hours stretch so extensively. We certainly faced this dilemma in our household, especially living in areas with such pronounced seasonal light variations! That’s why sleep masks quickly transitioned from a luxury to an absolute necessity, particularly for us girls.
While purchasing a sleep mask is always an option, there’s something uniquely satisfying about creating your own. This led me to embark on a fun, simple project: making no-sew sleep masks for the kids. And when I say simple, I mean *incredibly* simple! This project requires no sewing skills whatsoever and can be completed in less than 30 minutes, not including any necessary drying time for adhesives. It’s the perfect way to bring a little darkness and a lot of restful sleep back into your home, ensuring everyone gets the deep, uninterrupted sleep they deserve, regardless of the time on the clock or the brightness outside.
Unlock Deeper Sleep with a DIY No-Sew Sleep Mask
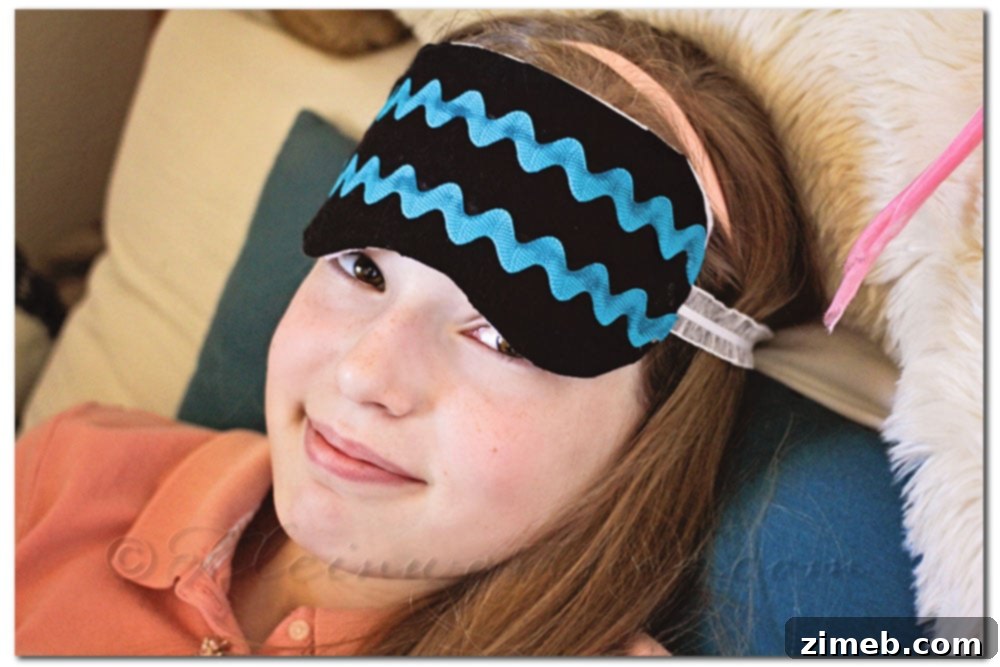
Our little one was absolutely delighted to finally have some darkness, allowing her to get back to the restful sleep she needed, even with the morning light approaching early.
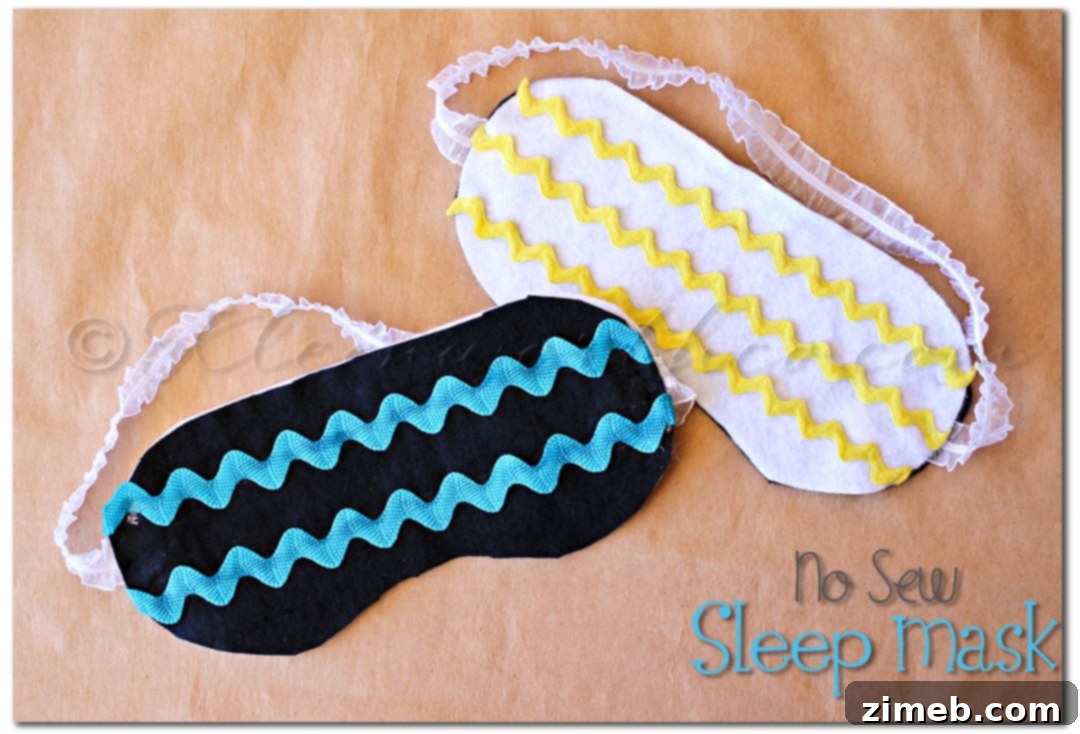
The Silent Saboteur: How Light Impacts Your Sleep Quality
Our bodies are intrinsically linked to natural light cycles. This internal clock, known as the circadian rhythm, dictates our sleep-wake cycle, largely influenced by the presence or absence of light. When light hits our eyes, it signals our brain to suppress the production of melatonin, the hormone responsible for making us feel sleepy. Conversely, as darkness falls, melatonin production increases, preparing our bodies for rest and deep sleep.
However, in our modern world, and especially during phenomena like extended summer daylight, early sunrises, or in urban environments filled with artificial light, this natural process can be significantly disrupted. Even subtle amounts of light filtering through windows, glowing from electronic devices, or emanating from streetlights can be enough to interfere with melatonin synthesis, leading to fragmented sleep, difficulty falling asleep, or waking up feeling unrested. For travelers crossing time zones, shift workers needing to sleep during the day, or anyone who simply needs to nap, creating a pitch-black environment is paramount for deep, restorative sleep. This is where a simple yet effective tool like a sleep mask proves invaluable, effectively blocking out unwanted light and allowing your body to naturally unwind and achieve optimal rest.
Why Choose a No-Sew Sleep Mask? Benefits of This Easy DIY Craft
When it comes to crafting, especially for practical items like a sleep mask, the “no-sew” approach offers a plethora of advantages that make it an ideal project for individuals and families alike. Firstly, it champions accessibility. Not everyone owns a sewing machine or possesses the skills to operate one. This no-sew method opens up the world of DIY to absolute beginners, ensuring anyone can create a functional and stylish sleep mask without intimidation or the need for specialized equipment.
Secondly, speed is a major selling point. In a world where time is a precious commodity, completing a project in under 30 minutes (excluding drying time) is incredibly appealing. This means instant gratification – you can envision, create, and use your sleep mask almost immediately. It’s perfect for last-minute needs or a spontaneous crafting session. Moreover, this project is wonderfully kid-friendly. It allows children to engage in a fun, creative activity that results in a useful item they can enjoy nightly. It encourages fine motor skills, decision-making (choosing fabrics and decorations), and a strong sense of accomplishment, all without the need for sharp needles or complex machinery. Parents will appreciate that it’s a safe and engaging way to spend an afternoon together.
Beyond the practical benefits of the craft itself, a homemade sleep mask is also remarkably cost-effective. You can often repurpose fabric scraps, old t-shirts, or inexpensive felt sheets, turning what might have been waste into a comfortable sleep aid. This not only saves money but also promotes sustainability. The ability to fully customize your sleep mask means you can choose colors, patterns, and embellishments that perfectly suit your personal style or that of your child, making each mask unique and truly personal. This level of personalization is often unavailable with store-bought options, allowing for a truly bespoke item that enhances comfort and sleep.
Gather Your Supplies: What You’ll Need for Your DIY Sleep Mask
The beauty of this project lies in its simplicity, both in technique and materials. You likely have many of these items already at home, making it an excellent budget-friendly craft. Here’s a comprehensive list of what you’ll need to create your very own comfortable, light-blocking no-sew sleep mask:
- Fabric: Choose soft, opaque fabrics that are comfortable against the skin and effective at blocking light. Good options include:
- Felt: Easy to cut, doesn’t fray, and offers good light-blocking capabilities. It’s a fantastic choice for beginners.
- Fleece: Soft, warm, and comfortable, but might be a bit thick for some preferences.
- Cotton (two layers): Lightweight and breathable, but ensure it’s dense enough or use two layers for opacity to effectively block light.
- Silk or Satin: Offers a luxurious feel, gentle on skin and hair, and excellent for preventing creases. However, these can be a bit more challenging to work with due to fraying (consider using fabric glue specifically for edge sealing or a fray-stop liquid).
You’ll need at least two pieces of fabric for the main mask (front and back), plus an optional third inner layer for extra thickness and superior light-blocking capability.
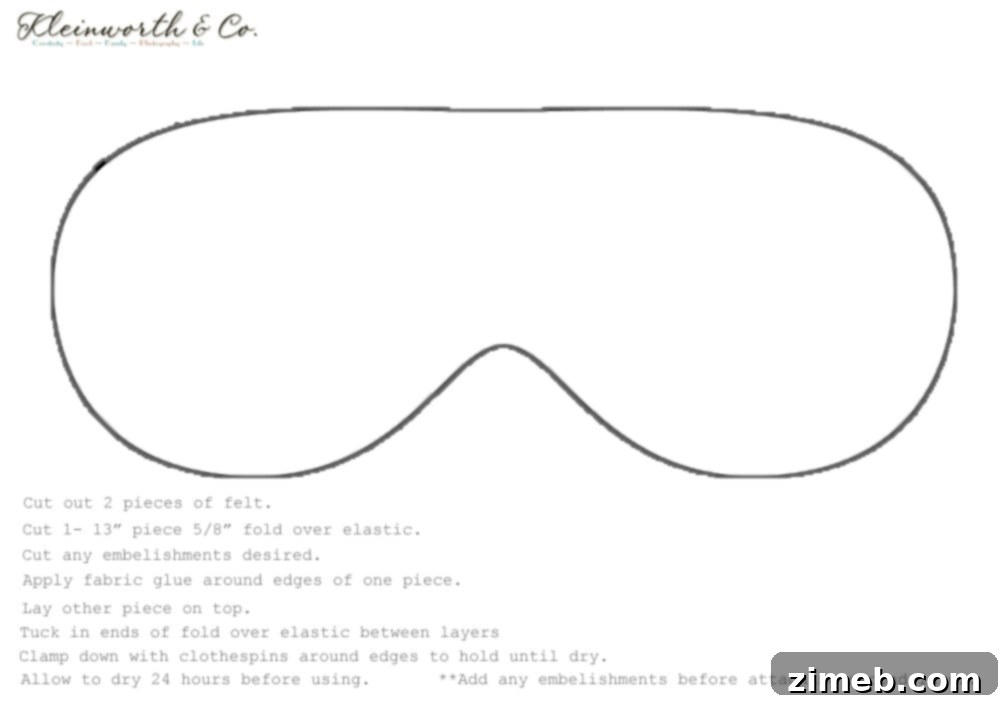
- Sleep Mask Template: This is crucial for achieving a perfectly shaped and symmetrical mask. We provide a free printable sleep mask template, which makes the cutting process incredibly straightforward and ensures a professional finish.
- Fabric Adhesive: The star of our “no-sew” show!
- Strong Fabric Glue: Look for a permanent, washable fabric glue that dries clear and flexible. Popular and effective examples include Liquid Stitch, Fabri-Tac, or E6000 Craft Adhesive. Ensure it’s suitable for the type of fabric you’re using.
- Iron-On Adhesive Sheets: Brands like HeatnBond UltraHold or Pellon EZ-Steam are excellent alternatives. These create a strong, permanent bond when ironed between two fabric layers, often resulting in a very flat and smooth finish.
Choose the method you prefer; both work beautifully for this project.
- Elastic Band: A soft, comfortable elastic band is essential for securing the mask around the head. Choose an elastic that is about 1/2 to 3/4 inch wide to prevent digging into the skin. The length will vary depending on the head size, but generally, about 12-15 inches is a good starting point for adults, adjusted for children.
- Sharp Scissors: High-quality fabric scissors will make clean, precise cuts, which are vital for a neat-looking finished product.
- Pencil or Fabric Marker: For accurately tracing your template onto the fabric. A disappearing fabric marker is ideal if you want to avoid any visible lines.
- Optional Embellishments: Get creative and personalize your mask!
- Fabric paint or markers for drawing custom designs or patterns.
- Glitter glue for some sparkle and fun.
- Iron-on patches or appliqués for adding favorite characters or motifs.
- Small fabric scraps for creating decorative elements like flowers or shapes.
When selecting your materials, prioritize comfort and light-blocking ability. Remember, the ultimate goal is a mask that feels good against the skin, allows for breathability, and effectively creates total darkness for optimal, uninterrupted sleep. With the right materials, your DIY sleep mask will be both functional and a joy to wear.
Step-by-Step Guide: Crafting Your Perfect No-Sew Sleep Mask
Now that you have all your materials ready, let’s dive into creating your very own customized no-sew sleep mask. Follow these simple, clear steps for a fun and rewarding crafting experience that results in a practical item for better sleep:
Step 1: Prepare Your Template and Fabric
- Download and Print: Start by downloading our free printable sleep mask template. Print it out on standard paper at 100% scale to ensure the correct size.
- Cut the Template: Carefully cut out the paper template along its outer edges. Precision here will lead to a better-shaped mask.
- Choose and Prepare Fabric: Select your chosen fabrics. If using two different fabrics (e.g., a decorative front and a soft back), decide which side will face outwards and which will be against your skin. Smooth out any wrinkles or creases in your fabric using an iron, as this will help with accurate tracing and cutting.
Step 2: Trace and Cut Your Mask Pieces
- Trace the Shape: Lay your fabric flat and smooth. Place the paper template on top and trace around its perimeter using a pencil or fabric marker. You’ll need at least two identical mask shapes (one for the front, one for the back). For extra light blocking and thickness, you can optionally cut a third inner layer from a slightly stiffer or darker fabric like felt.
- Cut Fabric Pieces: Carefully cut out each traced fabric piece using your sharp fabric scissors. Take your time to ensure clean, smooth edges. The neatness of your cuts will significantly contribute to the finished, professional look of your sleep mask.
Step 3: Secure the Elastic Band
- Measure Elastic: Hold the elastic band around your head, positioning it comfortably where the sleep mask would sit (typically across the middle of the back of your head). Ensure it’s snug but not too tight. Cut the elastic to this measured length, adding about half an inch to each end for securing.
- Attach Elastic (Before Adhesion): This is a crucial step for a strong, hidden attachment.
- Take one of your main mask fabric pieces (this will be the inner lining of your mask).
- Position the ends of the elastic band on the wrong side of this fabric piece, approximately where the mask would sit on your temples (on the curved side of the mask). Aim to center the elastic vertically on the side edges.
- Apply a small dot or thin line of strong fabric glue to secure each end of the elastic to the fabric. Make sure the elastic is positioned inwards, extending towards the center of the mask, so it won’t be visible once the mask is assembled. Press firmly and allow to set for a few minutes until slightly tacky.
Step 4: Assemble the Mask Layers
- Apply Adhesive:
- Using Fabric Glue: Apply a thin, even layer of permanent fabric glue along the perimeter of the wrong side of one of your main mask pieces (the one *without* the elastic attached yet). If you’re using an inner layer for extra light blocking, you can apply glue to both sides of that as well, layering it between your two main fabric pieces.
- Using Iron-On Adhesive: If you’re using an iron-on sheet, follow the manufacturer’s instructions carefully. Typically, you’d iron the adhesive sheet to the wrong side of one fabric piece, let it cool slightly, peel off the backing, and then position the second fabric piece on top.
- Layer and Press: Carefully align the second main mask fabric piece (the one with the elastic already attached and partially secured) on top of the first, ensuring all edges match up perfectly. Press down firmly all around the perimeter and over the elastic attachment points. If you have an inner layer, ensure it is neatly sandwiched between the two main pieces.
- Cure/Dry: If using fabric glue, allow ample drying time. This is critical for a strong, lasting bond. Follow the glue manufacturer’s recommendations, which might be several hours or even overnight, and avoid using the mask before it’s completely dry. If using iron-on adhesive, press firmly with a hot iron according to instructions, applying even pressure to ensure a secure bond across the entire mask.
Step 5: Add Finishing Touches and Decorate
- Trim Excess: Once completely dry, inspect the edges of your assembled sleep mask. If there are any uneven spots, carefully trim them with your sharp scissors for a clean and professional finish. This step helps refine the shape.
- Decorate (Optional): This is where you can truly personalize your mask and let your creativity shine!
- Use fabric markers or paint to draw patterns, names, or fun designs on the front of the mask.
- Apply glitter glue for some sparkle and an eye-catching effect.
- Affix small iron-on patches, fabric appliqués, or use fabric glue to attach decorative fabric cut-outs like stars, hearts, or flowers.
If you decorate, ensure all added embellishments are dry and securely attached before using the mask.
And there you have it! A beautiful, functional, and custom-made no-sew sleep mask, ready to provide a tranquil and dark sleep environment. This simple project is not just about crafting; it’s about reclaiming peaceful, restorative nights for yourself and your family, allowing everyone to wake up feeling refreshed and energized.
Customization Beyond the Basics: Making Your Sleep Mask Uniquely Yours
One of the most exciting aspects of DIY projects is the freedom to customize, and the no-sew sleep mask is no exception. While the basic steps provide a functional mask, there are endless ways to infuse personality and specific needs into your creation. For instance, consider varying the shape slightly; perhaps adding more curvature around the nose for a better fit, or a less pronounced nose bridge based on personal comfort. You can experiment with different fabric combinations – a luxurious silk or satin on the inside for skin and hair benefits and a durable, fun cotton print or cozy flannel on the outside.
Beyond visual aesthetics, think about functionality. For those seeking extra darkness, a thin layer of blackout fabric or even a piece of flannel or extra felt sandwiched between the two main fabric layers can significantly enhance light-blocking capabilities. If you want to make a more “manly” solution for the guys in the house, opt for darker, neutral tones like charcoal grey, navy blue, deep forest green, or classic black. Patterns like subtle plaids, understated stripes, or even a simple solid color with a textured fabric can appeal more to a masculine aesthetic. Avoid overly bright colors or glitter, and instead focus on understated elegance, comfort, and functionality. Remember, the goal is not just a mask, but a personal statement of comfort and commitment to good sleep hygiene.
The Wider Benefits: Why Crafting This Sleep Mask Matters
Beyond the immediate satisfaction of creating something with your own hands, embarking on a project like the no-sew sleep mask offers several broader benefits that extend far beyond the craft itself. For children, it’s an excellent way to develop crucial fine motor skills, learn to follow instructions, and unleash their creativity, all while contributing directly to their own well-being. The sense of accomplishment they feel wearing a mask they personally made is invaluable, fostering independence and self-esteem. For adults, it’s a mindful and relaxing activity that provides a welcome break from daily stresses, allowing for a moment of focused creativity and self-care.
Most importantly, this project actively promotes better sleep hygiene for everyone in the household. In an increasingly illuminated world, where artificial light sources from screens, streetlights, and even home decor can disrupt natural sleep cycles, actively creating a dark sleep environment is a proactive and essential step towards improved health. Quality sleep impacts everything from mood, concentration, and cognitive function to physical health, energy levels, and immunity. By making these masks, you’re not just engaging in a fun craft; you’re investing in your family’s overall well-being in a fun, accessible, and economical way. It’s a testament to how simple DIY solutions can effectively address significant modern challenges, bringing much-needed peace and restful nights to your home.
Ready to Craft Your Way to Better Sleep?
We hope this detailed guide empowers you to create your own effective and personalized no-sew sleep masks. It’s an incredibly rewarding project that promises to deliver peaceful, light-free sleep, even during the brightest summer nights or the busiest travel days. Don’t let unwanted light disrupt your rest any longer; take control of your sleep environment with this simple DIY solution!
Download the free printable template, gather your materials, and embark on this simple yet impactful DIY journey. We’d absolutely love to see your creations and hear about your experience!